
Microsoft Word is the programming par excellence for the creation and edition of texts. This offers you very versatile functions. One of them is to place images in the document. However, these move when the writing is modified. To avoid this, it is possible to freeze or lock the position of an image in Word .
The possibility of inserting images to the document is one of the most used tools of this program. Despite this, not everyone knows how to get the most out of it. What can be frustrating when making use of it.
Today it is possible to download and install Microsoft Office in Google Chrome for free and enjoy Word. Even compressing a Word document with images so that it weighs less , similar to the function that will be studied next.
Freeze or lock the position of a picture in Word
As mentioned previously, a recurring problem that many users complain about is that, when inserting an image into a Word document, unlike creating a macro document in Word , it changes as the text changes.
Repositioning the image every time there is a change can be cumbersome. For this there is a solution. Freezing or locking the position of an image in Word will stop the image from moving, even though the text is constantly changing.
Steps to follow to freeze or lock an image in Word 2007 and 2010
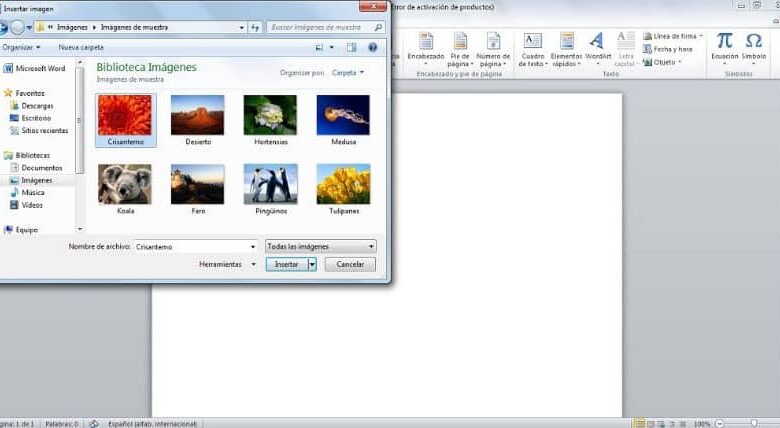
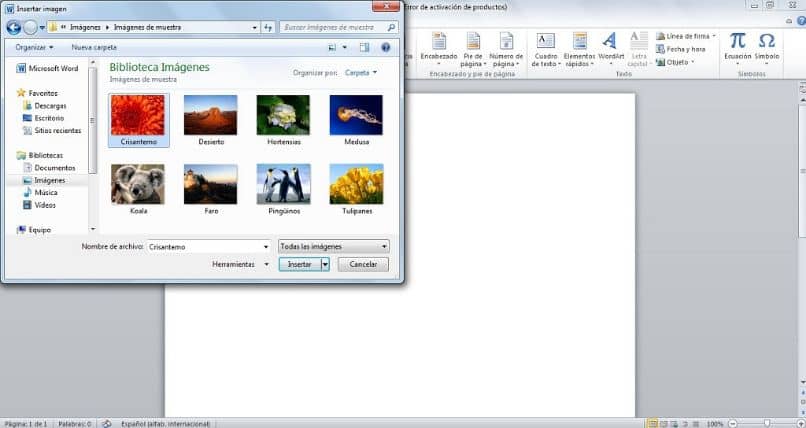
The first thing you should do to benefit from this tool is go to the “Insert” tab located in the top menu of the screen. There select the option ” Image “. After having carried out this action, a file search window will open. There, look for the image you want to use in your document.
Once you have finished doing this action. With the image selected, go to the ” Format ” section of the top menu. There, locate and click the option “Adjust text”.
In this drop-down menu you can choose between different text settings. You can make use of all of them except “In line with the text”, since selecting this option would hinder all the work.
To freeze or block the position of an image in Word you must, in the ” Format ” section, click on the ” Position ” option . Another series of options will appear, choose the one that says “More design options.”
After having done this, it will open the conceptual menu. Go to the ” Position ” section. There you must configure where you want to place the image with respect to the margins of the document.
Keep in mind that for this procedure to work you must click on the “Block delimiter” box that is located in the lower left part of the conceptual menu. To finish, click on ” OK ” and that’s it. Now you can only move the image by dragging it with the mouse.
It must be emphasized that this procedure only works in the 2007 and 2010 versions of the Office program, so if you want to freeze or block an image in Word 2003 you must follow the following steps.
Steps to follow to freeze an image in Word 2003
As explained above, you must add the image you want to work with from the ” Insert ” menu and define the position you want it to have according to the “text adjustment” section . Remember not to select the option “In line with the text”.
To continue with the procedure, you must go to the image toolbar and select the “Image format” option , in the conceptual menu that will appear click on ” Design ” and then on the ” Advanced ” option .
As before, you must configure the position you want the image to have according to the margins of the document. You will do this from the “Image position” section found within the advanced design settings.
When you have the necessary settings, select the ” Block delimiter ” box and press ” OK “. Ready, that’s how easy it is to freeze or lock the position of an image in Word.
Microsoft Word is the programming par excellence for the creation and editing of texts. This offers you very versatile functions. One of them is to place images in the document. However, these move when the writing is modified. To avoid this You can freeze or lock the position of an image in Word.
The possibility of inserting images to the document is one of the most used tools of this program. Despite this, not everyone knows how to get the most out of it. What can be frustrating when making use of it.
Today it is possible to download and install Microsoft Office in Google Chrome for free and enjoy Word. Even compressing a Word document with images so that it weighs less, similar to the function that will be studied next.
Freeze or lock the position of a picture in Word
As mentioned above, a recurring problem that many users complain about is that, when inserting an image into a Word document, unlike creating a macro document in Word, it changes as the text changes.
You may also be interested in:
Repositioning the image every time there is a change can be cumbersome. For this there is a solution. Freezing or locking the position of an image in Word will stop the image from moving, even though the text is constantly changing.
Steps to follow to freeze or lock an image in Word 2007 and 2010
The first thing you should do to benefit from this tool is go to the «Insert» tab located in the top menu of the screen. There select the option «Picture”. After having carried out this action, a file search window will open. There, look for the image you want to use in your document.
 1")
Once you have finished doing this action. With the image selected go to the section “Format”From the top menu. There locate and click the option «Adjust text».
In this drop-down menu you can choose between different text settings. You can use all of them except for «In line with the text», since, selecting this option would hinder all the work.
To immobilize or block the position of an image in Word you must, in the section «Format«, Click on the option»Position”. Another series of options will appear, choose the one that says «More design options.»
After having done this, it will open the conceptual menu. Go to the section «Position”. There you must configure where you want to place the image with respect to the margins of the document.
Keep in mind that for this procedure to work you must click on the box «Lock delimiter» which is located in the lower left part of the concept menu. To finish click on «To accept» and ready. Now you can only move the image by dragging it with the mouse.
It should be emphasized that this procedure only works in the 2007 and 2010 versions of the Office program, so if you want to freeze or block an image in Word 2003 you must follow the following steps.
Steps to follow to freeze an image in Word 2003
As in what was explained above, you must add the image you want to work with from the menu «Insert”And define the position you want it to have according to the section «text wrap». Remember not to select the option «In line with the text.»
 2")
To continue with the procedure, you must go to the image toolbar and select the option «Image format», in the conceptual menu that will appear, click on «Design«And then on the option»Advanced”.
As before, you must configure the position you want the image to have according to the margins of the document. You will do this from the section «Image position» found within the advanced layout settings.
When you have the necessary settings, select the box «Lock delimiter«And press»To accept”. Ready, that’s how easy it is to freeze or lock the position of an image in Word.
Source by
You may also be interested in:
Microsoft Word is the programming par excellence for creating and editing texts. This gives you very versatile functions. One of them is to place images in the document. However, these move when the writing is changed. To avoid this, he is possible to freeze or lock the position of an image in Word .
The ability to insert images into the document is one of the most used tools of this program. Despite this, not everyone knows how to get the most out of it. Which can be frustrating when using it.
Today it is possible to download and install for free Microsoft Office in Google Chrome and enjoy Word. Even compress Word document with pictures so that it weighs less , similar to the function which will be studied next.
As mentioned above, a recurring problem that many users complain about is that while inserting a picture into a Word document, unlike the creating a macro document in Word , it changes as the text changes.
Repositioning the image every time there is a change can be tedious. There is a solution for this. Freezing or locking the position of a picture in Word will prevent the picture from moving, even if the text is constantly changing.
Steps to Freeze or Lock a Picture in Word 2007 and 2010
The first thing to do to benefit from this tool is to go to the «Insert» tab located in the menu at the top of the screen. There, select the option » Image «. After performing this action, a file search window opens. There, find the image you want to use in your document.
Once you have completed this action. With the image selected, go to the section » Format From the top menu. There, find and click on the option «Adjust text».
In this drop-down menu, you can choose between different text settings. You can use them all except «In line with the text», because selecting this option would interfere with all work.
To freeze or block the position of a picture in Word, you must, in the section » Format «, Click on the option» Position «. Another set of options will appear, choose the one that says “More design options”.
After doing that, it will open the concept menu. Go to the section » Position «. There you need to configure where you want to place the image in relation to the document margins.
Keep in mind that for this procedure to work, you must click on the box «Block delimiter» which is in the lower left part of the conceptual menu. To finish, click on » Accept » and that’s all. Now you can only move the image by dragging it with the mouse.
It should be noted that this procedure only works in the 2007 and 2010 versions of the Office program, so if you want to freeze or freeze a picture in Word 2003, you need to take the following steps.
Steps to Freeze a Picture in Word 2003
As explained above, you need to add the image you want to work with from the menu » Insertion »And define the position you want it to have according to the section «Text setting» . Remember not to select the option «In line with the text».
To continue the procedure, go to the image toolbar and select the option «Image format» , in the conceptual menu that will appear, click on » Design »Then on the option» Advanced «.
As before, you need to configure the position you want the image to have according to the document margins. You will do this from the section «Image position» who is found in advanced design settings.
When you have the necessary parameters, select the case » Block delimiter «And press» OK «. Ready, it’s as easy as freezing or locking the position of a picture in Word.

Q. I often add several graphics to Word
documents and Excel spreadsheets to enhance their visual impact. But
what drives me bananas is that just as I’m about finished the graphics
sometimes move on the page—so now they no longer are lined up
correctly. Is there some way to get them to stay still?
A. You’re right; graphics have a way of unexpectedly
shifting around. But it’s not hard to get them to sit still. Both Word
and Excel have a feature called Group in their
graphics tools that can freeze the relative positions of graphics.
After you’ve placed your graphics in a document or spreadsheet,
engage Group by opening the Drawing
tool ( View , Toolbar ,
Draw ). Then select all the graphics you want
frozen by holding down the Shift key while clicking on each image.
Then click on Draw , which appears in the lower
left-hand corner of your screen, and then on Group .
If the word Group is dimmed out, that means you have
failed to properly select the graphics you want to freeze.
You still can move the grouped graphics, but now they all will move
together, maintaining their relative positions to each other. Later,
if you want to ungroup them, click on them and select Ungroup
from the Draw menu.
FIND COMMENTS IN A SPREADSHEET
Q.
I usually add many comments to cells in my spreadsheets. It’s an
effective way to document what’s going on in a complex file. I run into
problems, however, when I try to find some specific comment because
there are so many. Is there some facility that makes finding them more
effective?

A. It’s not well-known, but the Find
tool can handle the job quite well. All you have to do is dig
a little deeper than Find’s opening screen. To launch
Find , press Ctrl+F, which displays the
Find and Replace dialog box. You may have to click
on the Options button to evoke more of the searching
options. Then, in the Find what box, enter the words
you’re searching for and click on the arrow next to Look in
until the Comments choice appears and click
on Find Next .
Once you locate the target cell or cells, you must close the dialog
box before you can display the comment.
SHORTCUTS
![]()
Browser navigation:
Although you can surf Web pages with your mouse by clicking on the
Forward
and Back
buttons, you also can give your mouse a rest and accomplish the same
actions on the keyboard. To move back, hold down the Alt key and press
the left arrow key; to go forward, press the right arrow key.
![]() Excel: Once you’ve worked hard to create
Excel: Once you’ve worked hard to create
a formula in Excel, wouldn’t it be nice if you could save it in a
convenient workbook? Unfortunately, Excel lacks that ability. But you
can copy formulas into a text file and then store the file on your
desktop for instant reference.
![]() Internet Explorer: Instead of using your
Internet Explorer: Instead of using your
mouse to move your cursor to the address bar to enter a URL, press
Alt+D.
![]() Windows: To quickly minimize several
Windows: To quickly minimize several
open files, click on the Show Desktop on the desktop
toolbar or press the Windows key+D. Likewise, the fastest and easiest
way to get to your desktop is to click on the Desktop
icon, which looks like this: ![]()
If the icon is not in your taskbar, you can put it there by
right-clicking on an empty space in the taskbar and then clicking on
Toolbars and placing a check next to Quick
Launch .
![]() Word: To return immediately to the place
Word: To return immediately to the place
in your text where you ended up during your last editing session,
press Shift+F5 after you open the document.
STANLEY ZAROWIN, a former JofA senior editor, is now a
contributing editor to the magazine. His e-mail address is zarowin@mindspring.com .
questions for this column? Or, after reading an answer, do you
have a better solution? Send them to contributing editor
Stanley Zarowin via e-mail at zarowin@mindspring.com
or regular mail at the Journal of Accountancy,
201 Plaza Three, Harborside Financial Center, Jersey
City, NJ 07311-3881.
Because of the volume of mail, we
regret we cannot individually answer submitted questions.
However, if a reader’s question has broad interest, we will
answer it in a forthcoming Technology Q&A column.
On occasion you may find you cannot implement a function
I describe in this column. More often than not it’s because
not all functions work in every operating system or
application. I try to test everything in the 2000 and XP
editions of Windows and Office. It’s virtually impossible to
test them in all editions and it’s equally difficult to find
out which editions are incompatible with a function. I
apologize for the inconvenience.
 Please Note:
This article is written for users of the following Microsoft Word versions: 97, 2000, 2002, and 2003. If you are using a later version (Word 2007 or later), this tip may not work for you. For a version of this tip written specifically for later versions of Word, click here: Freezing Cell Size when Inserting Pictures.
![]()
Written by Allen Wyatt (last updated June 1, 2018)
This tip applies to Word 97, 2000, 2002, and 2003
Al wrote about a problem he was having with inserting graphics into a table. He created a table that had four rows and four columns, and then merged the center four cells. He ended up with one large cell surrounded by twelve smaller cells. When he tried to place a picture into the center cell, his table was thrown all out of whack as the table rows and columns would adjust to accommodate the inserted picture.
This is normal behavior for Word. According to Word’s online help system, if you insert a graphic into a table cell, the cell is adjusted to fit the dimensional needs of the graphic. If you don’t want Word to do that, then you must format the table so that it won’t. This requires two passes through the Table Properties dialog box. Follow these steps:
- Right-click on the table and choose Table Properties from the Context menu. Word displays the Table Properties dialog box.
- Make sure the Table tab is displayed. (See Figure 1.)
- Clear the Automatically Resize to Fit Contents check box. (In Word 2003 you need to click the Options button to display the Automatically Resize to Fit Contents check box.)
- Click OK.
- Select the row or rows that will contain pictures.
- Right-click on the selected rows and choose Table Properties from the Context menu. Word again displays the Table Properties dialog box.
- Make sure the Row tab is displayed. (See Figure 2.)
- Select the Specify Height check box, and indicate right next to it the height you want used for the rows that will contain graphics.
- Using the Row Height Is drop-down list, choose Exactly.
- Clear the Allow Row to Break Across Pages check box.
- Click OK.
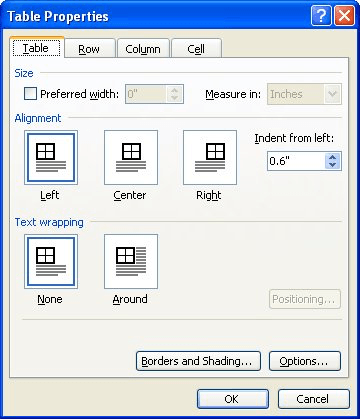
Figure 1. The Table tab of the Table Properties dialog box.
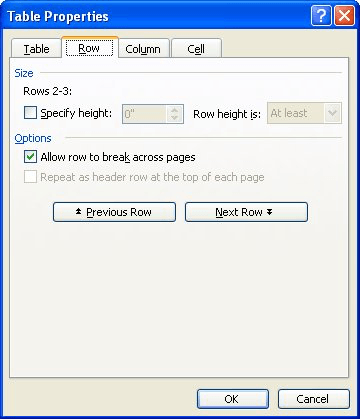
Figure 2. The Row tab of the Table Properties dialog box.
Now, insert your picture as you normally would. The table will not resize. If the graphic is larger than the available space in the cell, then it is cropped to fit within the cell.
WordTips is your source for cost-effective Microsoft Word training.
(Microsoft Word is the most popular word processing software in the world.)
This tip (3839) applies to Microsoft Word 97, 2000, 2002, and 2003. You can find a version of this tip for the ribbon interface of Word (Word 2007 and later) here: Freezing Cell Size when Inserting Pictures.
Author Bio
With more than 50 non-fiction books and numerous magazine articles to his credit, Allen Wyatt is an internationally recognized author. He is president of Sharon Parq Associates, a computer and publishing services company. Learn more about Allen…
MORE FROM ALLEN
Centering Across Columns
Have a heading you need centered across a few columns? It’s easy to do using the tool described in this tip.
Discover More
Dynamic Path and Filename in a Footer
You can easily place a path and filename in the footer of your document. What do you do if it appears that these elements …
Discover More
Bookmark Error when Printing
Bookmarks are commonly used in Word documents as a way to cross-reference information. If the bookmark referenced by the …
Discover More
More WordTips (menu)
Formatting an ASCII Table with Spaces
When you get a text file from a program other than Word, tabular information may be formatted with nothing but spaces in …
Discover More
Finding a Cell Reference
Want to know what the reference address is for a particular cell in a table? Word won’t tell you, but you can use a macro …
Discover More
Table Won’t Flow to Second Page
Have you ever created a table that never seems to flow to a second page, even when it should? This could be caused by any …
Discover More

By default, you can’t freely move pictures (by drag-and-drop) to any position in a Microsoft Word document without also placing them somewhere in the text. But with a small change, you can drag images anywhere. Here’s how.
Make a Picture Freely Move in a Word Document
Using the method below, you can move a picture anywhere you want in your Word document—outside of the normal flow of text. You can even place the picture on top of an existing block of text if you want.
We’ll use a blank document to do this. Start by opening Microsoft Word on your Windows or Mac computer. On Word’s first screen, select “Blank Document” to create a new document.

In Word’s editing window that opens, click the “Insert” tab at the top.
In the “Insert” tab under the “Illustrations” section, click Pictures > This Device. This lets you add a picture from your computer.
Use the “File Explorer” window that opens to navigate to the folder containing your picture. Double-click the picture to add it to your Word document.
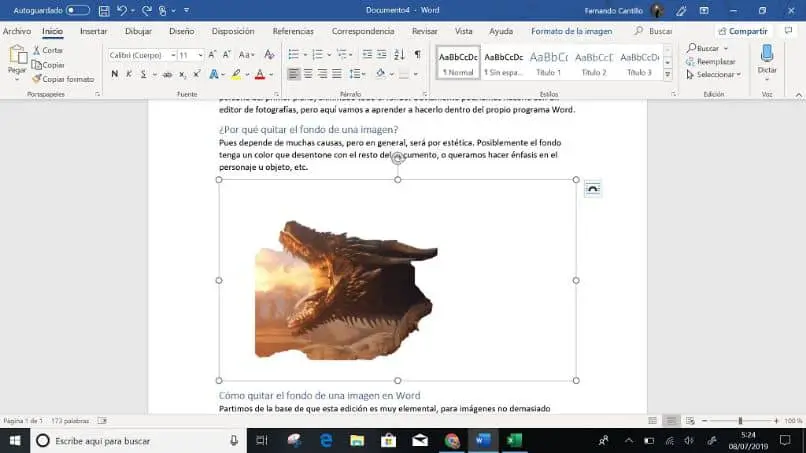
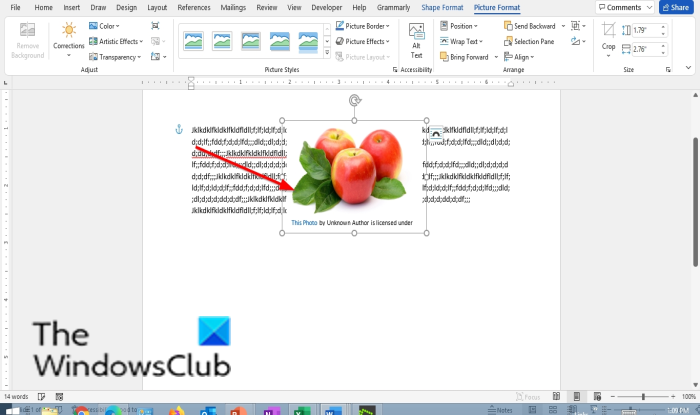
Back on Word’s editing screen, right-click the image that you just added and select Wrap Text > In Front of Text from the menu.
Your picture is now freely movable. Drag and drop it anywhere you want in your document.
Make All Future Pictures Freely Move in a Word Document
If you’d like to make all of your future pictures freely move in your Word documents, you can modify an option in Word’s settings menu. To do so, first, open Microsoft Word on your Windows or Mac computer.
On Word’s main screen in the lower-left corner, click “Options.”
Note: If you’re on Word’s document editing screen instead, click “File” at the top to see the “Options” option.
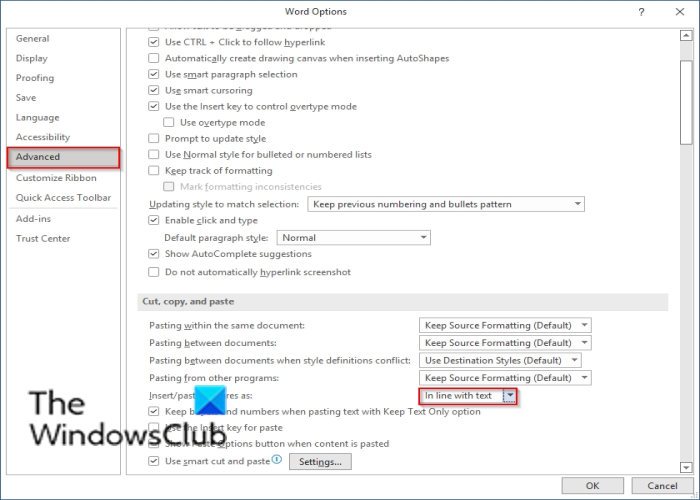
In the “Word Options” window, select “Advanced” in the sidebar on the left.
Scroll down the right pane to the “Cut, Copy, and Paste” section. In this section, find the “Insert/Paste Pictures As” option and click the drop-down menu next to it.
Select “In Front of Text” in the drop-down menu.
Click “OK” at the bottom of the “Word Options” window to close the window.
And that’s it. From now on, Word will allow you to freely move pictures on top of text in your documents.
If you ever need to remove many images from your Word document, it’s easy to remove all of them at once. This handy tip can save you a lot of time in the future. Good luck!
RELATED: How to Quickly Remove All Images from a Word Document
READ NEXT
- › How to Move a Table in Microsoft Word
- › How to Perfectly Align Objects and Images in Microsoft Word
- › How to Move Images in Google Docs
- › 8 Microsoft Word Tips for Professional Looking Documents
- › How to Prevent Accidentally Dragging and Dropping Text in Microsoft Word
- › How to Overlay Images in Microsoft Word
- › BLUETTI Slashed Hundreds off Its Best Power Stations for Easter Sale
- › This New Google TV Streaming Device Costs Just $20
How-To Geek is where you turn when you want experts to explain technology. Since we launched in 2006, our articles have been read billions of times. Want to know more?

6 Ways to Lock an Image in MS Word
- Lock an Image Using Picture Anchor Tool
- Lock an Image Using Picture Content Tool
- Lock an Image Using Restrict Editing Option
- Lock an Image Using Watermark Tool
- Lock an Image Using Fill Effects
- Lock an Image Using Header and Footer
Method 1: Lock an Image Using Picture Anchor Tool
This method is the simplest way to lock an image into position. However, it is not as permanent a fix compared to the other methods. It simply allows you to edit your text while retaining the current arrangement of the image.
Step 1: Open an MS Word document.

Step 2: Insert an image.
Go to the Insert tab. Under the Illustrations group, click on Pictures.
Upon doing so, an Insert Picture dialog box will launch in the middle of your screen.
Locate the image you want to use from your drive and click Insert to proceed.

Step 3: Select the text wrapping style.
Right Click on the picture and select Wrap Text. Select the text wrapping style you want to use among the options that show except for In Line with Text. This style will make your image sit on the text line then automatically adjust once you type in or edit the main text.
For this example, we’ll be using the Behind Text style.

Step 4: Fix the position of the image.
Repeat the step to display the Wrap Text menus once more and select Fix Position on Page. Upon doing so, you will notice that an anchor with a lock icon will appear near the image. Now you can edit your text without being worried about moving the images around it.

Method 2: Lock an Image Using Picture Content Control
This method won’t just enable you to protect your image from being accidentally moved but also prevent it from being deleted by mistake.
Step 1: Open a Word file.

Step 2. Enable the Developer tab.
By default, the Developer tab is not visible. So, go to the File menu and click Options.


This will display the Word Options dialogue box. You should see a list of options on the left side of the window.
Click Customize Ribbon. Once you’ve done that, the dialogue box will display two sets of lists.
In the list on the right, under the Main Tabs, tick the checkbox next to Developer.
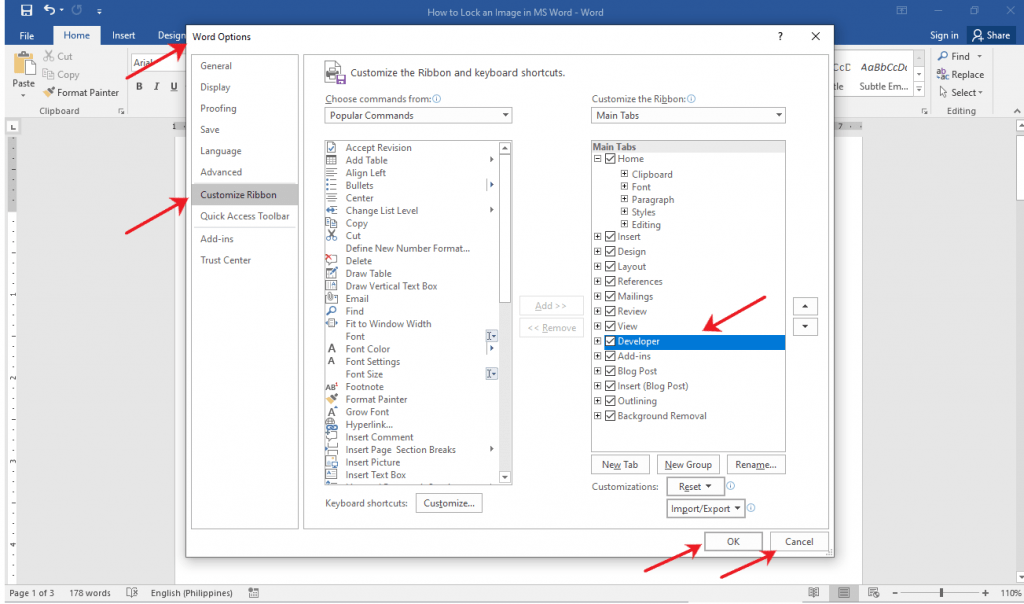
Click on the OK button to save the changes.
Step 3: Insert Picture Content Control.
Under the Developer tab on the Ribbon, select the Picture Content Control under Controls group.
This will insert a Picture Content Control on whichever location your cursor is located.
Make sure that you place your cursor to where you want the image to be placed.

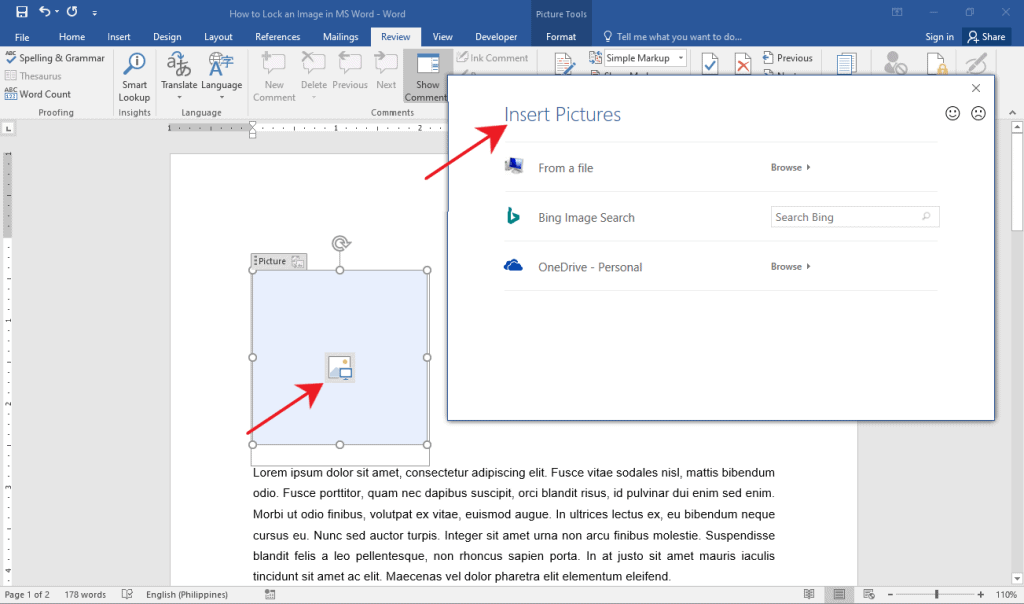
Step 4: Insert an Image.
Now that you have a Picture Content Control on your document, proceed to insert the image that you want to use. T
o do this, simply click on the picture icon right in the middle of the Picture Content Control.
Doing so will launch the Insert Picture dialog box. This will let you select which location your images will be coming from.
Choose the images you want to use, then click Insert to proceed.
Method 3: Lock an Image Using Restrict Editing Option
The third method will require you to protect your image with a password.
Take note, however, that enabling the Restrict Editing option will lock the document as a whole.
Step 1: Open a Word document.

Step 2: Insert an image.
If you already have a picture loaded on your document, you can skip this step. But if you don’t have one yet, simply follow the steps on how to insert an image in Method 1.
Step 3: Enable Restrict Editing.
Now that you have a picture ready, go to the Review tab and select Restrict Editing.
This will launch the Restrict Editing side panel on the right side of your screen.

Now, click on the Yes, Start Enforcing Protection button found at the bottom of the menu.
This will prompt a dialog box that will require you to set a password for the file.
Type in the password that you prefer, then click OK.

Remember the password that you used so you’ll be able to edit or delete the image later on.
Also, note that enabling Restrict Editing tool will prohibit you to edit the entire document.
Method 4: Lock an Image Using Watermark Tool
If you want to edit your document without the hassle of accidentally dragging your background, then this method is perfect for you.
Here’s how you can do that.
Step 1: Open a Word file.

Step 2: Insert your image as a Watermark
Go to the Design tab and click the Watermark button under the Page Background group.
From the list of options below, select Custom Watermark. This will launch a dialog box.

From there, select Picture Watermark.
Click on the Select Picture button. Doing so will prompt an Insert Picture dialog box.
Locate and import the picture you want to use.

Method 5: Lock an Image Using Fill Effects
This method is another option to stop your image from constantly getting selected while you’re editing text.
Step 1: Open up a Word document.

Step 2: Select fill effects on the page color option.
Go to the Design tab.
Click the Page Color drop-down menu and select Fill Effects. This will prompt a dialog box in the middle of the screen.

On the dialog box, go to the Picture tab and click the Select Picture button.
Locate the image you want to use and then click the OK button.

Method 6: Lock an Image Using Header and Footer
Finally, in this last method, we’ll guide you on how to lock an image using the Header and Footer section. This is especially useful if the image that you want to lock in place are logos for corporate documents.
Here’s how to do just that.
Step 1: Open an MS Word document.

Step 2: Insert your image in the header or footer.
Double-click on the Header or Footer section of your document. The header is the topmost area of the file where the header or title is usually placed.
Meanwhile, the footer section is found at the bottom part of the document, where we usually see page numbers.

Once the Header or Footer section is enabled, the Design tab will be visible on the Ribbon. From there, select the Picture button under the Insert group.
Then, locate and insert the image that you want to use.

Finally, double-click on the gray part of your MS Word window to close the Header and Footer section.

Deleting a Locked Image in MS Word
For the first and second methods, you can simply click on the image and hit the Delete key on your keyboard to delete the image.
Deleting the image you locked using Method 3 won’t be complicated as long as you know the password. You just have to click on the Protect button under the Review tab and select Restrict Editing. It will launch a menu on the side of the screen. From there, just click on Stop Protection and then enter the password you used to enforce protection to the document. After removing the document’s protection, just delete the image by selecting it and pressing the Delete key..
Meanwhile, to delete a watermarked image, simply click on the Watermark button under the Design tab. Then, select the Remove Watermark option. If you used the Fill Effects tool, simply go back to the Page Color option on the Design tab, then select No Color.
Lastly, to remove a locked image in the Header and Footer section, access the Header and Footer section, click the image and press the Delete key on your keyboard.
Conclusion
We hope you found this article helpful!
Download PC Repair Tool to quickly find & fix Windows errors automatically
Microsoft Word is a great Word processing software developed by Microsoft. You can create and edit documents in Microsoft Word. It has many options to create a document, like adding images, formatting the text, etc. Sometimes, we need to adjust the position of an inserted image in Microsoft Word by moving it. By default, Word does not let users move an image. In this article, we will see how to move a picture freely in Microsoft Word.
Which option is used to move a picture?
In Microsoft Word, you can move a picture by using the Wrap Text feature. Right-click on an image and select Wrap Text. After that, you will see a number of options. The In Line with Text option does not let you move an image. Therefore, you have to select other options in the Wrap Text to move an image.
What is the Wrap Text feature in MS Word?
The Wrap Text feature in Microsoft Word enables text to wrap around the image so that the image does not interfere with line spacing. The feature lets Microsoft Word users choose how to wrap the text wraps around the selected object.
Why can’t I move pictures in Word?
When inserting an image into a document with text, you cannot move it around the text easily due to it being in line with text by default. To freely move a picture in your Microsoft Word, you should use the Wrap Text feature.
Follow the methods below to move pictures freely in Microsoft Word:
Enable a picture to move freely in a Word document
Open a Word document file.
Insert a picture into it.

Right-click the picture, hover the cursor over Wrap Text and select In Front of Text.
Now, you can move your picture freely around the text in your document.
Enable all pictures to move freely overall in a Word document
You can allow your future images to move freely in your document by customizing the Word settings.
Click the File tab on the menu bar.
Click Options in the backstage view.
A Word Options dialog box will open.
Click Advanced on the left pane.
In the section Cut, copy and paste, click the list button for Insert/paste picture as.
Then select In front of text from the list box.
Click OK.
Try to insert a photo into the Word document and try to move the image freely around the text.
Read: How to add Templates and insert Videos in Microsoft Word.
We hope this tutorial helps you understand how to move a picture freely in Microsoft Word.
Shantel has studied Data Operations, Records Management, and Computer Information Systems. She is quite proficient in using Office software. Her goal is to become a Database Administrator or a System Administrator.