
You can perform calculations and logical comparisons in a table by using formulas. The Formula command is found on the Table Tools, Layout tab, in the Data group.
A formula in Word automatically updates when you open the document that contains the formula. You can also update a formula result manually. For more information, see the section Update formula results.
Note: Formulas in Word or Outlook tables are a type of field code. For more information about field codes, see the See Also section.
In this article
-
Insert a formula in a table cell
-
Update formula results
-
Update the result of specific formulas
-
Update all the formula results in a table
-
Update all the formulas in a document
-
-
Examples: Sum numbers in a table by using positional arguments
-
Available functions
-
Use bookmarknames or cell references in a formula
-
RnCn references
-
A1 references
-
Insert a formula in a table cell
-
Select the table cell where you want your result. If the cell is not empty, delete its contents.
-
On the Table Tools, Layout tab, in the Data group, click Formula.
-
Use the Formula dialog box to create your formula. You can type in the Formula box, select a number format from the Number Format list, and paste in functions and bookmarks using the Paste Function and Paste Bookmark lists.
Update formula results
In Word, the result of a formula is calculated when it is inserted, and when the document containing the formula opens. In Outlook, the result of a formula is only calculated when it is inserted and won’t be available for the recipient of the email to edit.
You can also manually update:
-
The result of one or more specific formulas
-
The results of all formulas in a specific table
-
All the field codes in a document, including formulas
Update the result of specific formulas
-
Select the formulas that you want to update. You can select multiple formulas by holding down the CTRL key while you make selections.
-
Do one of the following:
-
Right-click the formula, then click Update field.
-
Press F9.
-
Update all the formula results in a table
-
Select the table that contains formula results that you want to update, and then press F9.
Update all the formulas in a document
Important: This procedure updates all the field codes in a document, not just formulas.
-
Press CTRL+A.
-
Press F9.
Examples: Sum numbers in a table by using positional arguments
You can use positional arguments (LEFT, RIGHT, ABOVE, BELOW) with these functions:
-
AVERAGE
-
COUNT
-
MAX
-
MIN
-
PRODUCT
-
SUM
As an example, consider the following procedure for adding numbers by using the SUM function and positional arguments.
Important: To avoid an error while summing in a table by using positional arguments, type a zero (0) in any empty cell that will be included in the calculation.
-
Select the table cell where you want your result. If the cell is not empty, delete its contents.
-
On the Table Tools, Layout tab, in the Data group, click Formula.
-
In the Formula dialog box, do one of the following:
|
To add the numbers… |
Type this in the Formula box |
|---|---|
|
Above the cell |
=SUM(ABOVE) |
|
Below the cell |
=SUM(BELOW) |
|
Above and below the cell |
=SUM(ABOVE,BELOW) |
|
Left of the cell |
=SUM(LEFT) |
|
Right of the cell |
=SUM(RIGHT) |
|
Left and right of the cell |
=SUM(LEFT,RIGHT) |
|
Left of and above the cell |
=SUM(LEFT,ABOVE) |
|
Right of and above the cell |
=SUM(RIGHT,ABOVE) |
|
Left of and below the cell |
=SUM(LEFT,BELOW) |
|
Right of and below the cell |
=SUM(RIGHT,BELOW) |
-
Click OK.
Available functions
Note: Formulas that use positional arguments (e.g., LEFT) do not include values in header rows.
The following functions are available for use in Word and Outlook table formulas:
|
Function |
What it does |
Example |
Returns |
|---|---|---|---|
|
ABS() |
Calculates the absolute value of the value inside the parentheses |
=ABS(-22) |
22 |
|
AND() |
Evaluates whether the arguments inside the parentheses are all TRUE. |
=AND(SUM(LEFT)<10,SUM(ABOVE)>=5) |
1, if the sum of the values to the left of the formula (in the same row) is less than 10 and the sum of the values above the formula (in the same column, excluding any header cell) is greater than or equal to 5; 0 otherwise. |
|
AVERAGE() |
Calculates the average of items identified inside the parentheses. |
=AVERAGE(RIGHT) |
The average of all values to the right of the formula cell, in the same row. |
|
COUNT() |
Calculates the count of items identified inside the parentheses. |
=COUNT(LEFT) |
The number of values to the left of the formula cell, in the same row. |
|
DEFINED() |
Evaluates whether the argument inside the parentheses is defined. Returns 1 if the argument has been defined and evaluates without error, 0 if the argument has not been defined or returns an error. |
=DEFINED(gross_income) |
1, if gross_income has been defined and evaluates without error; 0 otherwise. |
|
FALSE |
Takes no arguments. Always returns 0. |
=FALSE |
0 |
|
IF() |
Evaluates the first argument. Returns the second argument if the first argument is true; returns the third argument if the first argument is false. Note: Requires exactly three arguments. |
=IF(SUM(LEFT)>=10,10,0) |
10, if the sum of values to the left of the formula is at least 10; 0 otherwise. |
|
INT() |
Rounds the value inside the parentheses down to the nearest integer. |
=INT(5.67) |
5 |
|
MAX() |
Returns the maximum value of the items identified inside the parentheses. |
=MAX(ABOVE) |
The maximum value found in the cells above the formula (excluding any header rows). |
|
MIN() |
Returns the minimum value of the items identified inside the parentheses. |
=MIN(ABOVE) |
The minimum value found in the cells above the formula (excluding any header rows). |
|
MOD() |
Takes two arguments (must be numbers or evaluate to numbers). Returns the remainder after the second argument is divided by the first. If the remainder is 0 (zero), returns 0.0 |
=MOD(4,2) |
0.0 |
|
NOT() |
Takes one argument. Evaluates whether the argument is true. Returns 0 if the argument is true, 1 if the argument is false. Mostly used inside an IF formula. |
=NOT(1=1) |
0 |
|
OR() |
Takes two arguments. If either is true, returns 1. If both are false, returns 0. Mostly used inside an IF formula. |
=OR(1=1,1=5) |
1 |
|
PRODUCT() |
Calculates the product of items identified inside the parentheses. |
=PRODUCT(LEFT) |
The product of multiplying all the values found in the cells to the left of the formula. |
|
ROUND() |
Takes two arguments (first argument must be a number or evaluate to a number; second argument must be an integer or evaluate to an integer). Rounds the first argument to the number of digits specified by the second argument. If the second argument is greater than zero (0), first argument is rounded down to the specified number of digits. If second argument is zero (0), first argument is rounded down to the nearest integer. If second argument is negative, first argument is rounded down to the left of the decimal. |
=ROUND(123.456, 2) =ROUND(123.456, 0) =ROUND(123.456, -2) |
123.46 123 100 |
|
SIGN() |
Takes one argument that must either be a number or evaluate to a number. Evaluates whether the item identified inside the parentheses if greater than, equal to, or less than zero (0). Returns 1 if greater than zero, 0 if zero, -1 if less than zero. |
=SIGN(-11) |
-1 |
|
SUM() |
Calculates the sum of items identified inside the parentheses. |
=SUM(RIGHT) |
The sum of the values of the cells to the right of the formula. |
|
TRUE() |
Takes one argument. Evaluates whether the argument is true. Returns 1 if the argument is true, 0 if the argument is false. Mostly used inside an IF formula. |
=TRUE(1=0) |
0 |
Use bookmarknames or cell references in a formula
You can refer to a bookmarked cell by using its bookmarkname in a formula. For example, if you have bookmarked a cell that contains or evaluates to a number with the bookmarkname gross_income, the formula =ROUND(gross_income,0) rounds the value of that cell down to the nearest integer.
You can also use column and row references in a formula. There are two reference styles: RnCn and A1.
Note: The cell that contains the formula is not included in a calculation that uses a reference. If the cell is part of the reference, it is ignored.
RnCn references
You can refer to a table row, column, or cell in a formula by using the RnCn reference convention. In this convention, Rn refers to the nth row, and Cn refers to the nth column. For example, R1C2 refers to the cell that is in first row and the second column. The following table contains examples of this reference style.
|
To refer to… |
…use this reference style |
|---|---|
|
An entire column |
Cn |
|
An entire row |
Rn |
|
A specific cell |
RnCn |
|
The row that contains the formula |
R |
|
The column that contains the formula |
C |
|
All the cells between two specified cells |
RnCn:RnCn |
|
A cell in a bookmarked table |
Bookmarkname RnCn |
|
A range of cells in a bookmarked table |
Bookmarkname RnCn:RnCn |
A1 references
You can refer to a cell, a set of cells, or a range of cells by using the A1 reference convention. In this convention, the letter refers to the cell’s column and the number refers to the cell’s row. The first column in a table is column A; the first row is row 1. The following table contains examples of this reference style.
|
To refer to… |
…use this reference |
|---|---|
|
The cell in the first column and the second row |
A2 |
|
The first two cells in the first row |
A1,B1 |
|
All the cells in the first column and the first two cells in the second column |
A1:B2 |
Last updated 2015-8-29
See Also
Field codes in Word and Outlook
In some Word documents you need to use formulas, such as summing, subtracting, multiplying, or
dividing certain values:

In this example was used a simple formula to calculate a discount rate:

See
How to turn on or turn off highlighting off fields in a Word document
and
Show blue hyperlink instead of { HYPERLINK link }.
To create a formula like the one above, it is necessary to make two steps:
1. Create a bookmark (variable) for every parameter.
2. Create a formula.
To perform these steps, do the following:
1. Create a field with the volume of a parameter:
1.1. Position the cursor in the document.
It doesn’t important, where: where this variable should be shown in the first time or anywhere in
the text (see both examples below).
1.2. On the Insert tab, in the Text group,
select the Quick Parts drop-down list and the click on Field…:

1.3. In the Field dialog box:
1.3.1. In the Field names list, select the
command Set and click the Field Codes button:

1.3.2. In the Field codes textbox, after
proposed SET type the name of this bookmark (variable) and the value.
For example:

1.3.3. Click OK to insert the current field in
you document:
![]()
Note: Instead of making steps 1.1-1.3, you can press Ctrl+F9 to insert a
field in your document and type:
SET <name> <value>
To create the bookmark (variable) as you type, just update a field: right-click on the field and
choose Update field in the popup menu:

2. Repeat the step 1 for every bookmark (variable)
that you want to define.
In this example, the discount with volume 5.
3. To insert the bookmark (variable) in the text, do
the following:
3.1. Position the cursor where you want to insert the
value of some bookmark (variable).
3.2. On the Insert tab, in the Text group,
select the Quick Parts drop-down list and the click on Field….
3.3. In the Field dialog box, click the
Formula… button:

3.4. In the Formula dialog box, in the
Paste bookmarks drop-down list, if you made all correctly on the previous steps, you will
see all variables that you have created:

Choose one and click OK. For example, price:

Note: Instead of making steps 3.1 – 3.4, if you can press Ctrl+F9 to insert
a field in you document and type:
= <bookmark name>
4. To insert a formula, do the following:
4.1. Position the cursor where you want to insert
the formula.
4.2. On the Insert tab, in the Text group,
select the Quick Parts drop-down list and the click on Field….
4.3. In the Field dialog box, click the
Formula… button.
4.4. In the Formula dialog box type the
formula:
The first variant where each of the variables defined before their values in the text:

The second variant where the variables defined before the text:

See
Functions and formulas in a Word document
for more details.
Note: The field { SET *** } doesn’t shown in the document by default. So,
this field can be easily removed by mistake with any other text or paragraph. To avoid missing
this field, we recommend use a field { Quote *** } to keep the definition and the first
using of the parameter:
![]()
See also this tip in French:
Comment calculer des formules dans un document Word.
Create Calculations in Word Tables Using Formulas
by Avantix Learning Team | Updated October 9, 2021
Applies to: Microsoft® Word® 2013, 2016, 2019 or 365 (Windows)
You can insert formulas in Word tables to perform calculations. These formulas can include functions such as SUM or AVERAGE or basic operators. When you insert formulas in Word tables, you are really inserting fields so the fields will need to be updated if the data in the table changes. For more complex calculations, it’s usually best to create formulas in Excel where they will update automatically.
Formulas and functions in Word tables only work with numbers. You can’t perform text calculations or output text.
Recommended article: 3 Simple Ways to Copy or Import Excel Data into Word (Linked or Unlinked)
Note: Buttons and Ribbon tabs may display in a different way (with or without text) depending on your version of Word, the size of your screen and your Control Panel settings. For Word 365 users, Ribbon tabs may appear with different names. For example, the Table Tools Design tab may appear as Table Design.
To insert a formula in a cell in a Word table, you’ll need to use the Function command on the Table Tools Layout or Table Layout tab in the Ribbon:
Do you want to learn more about Microsoft Word? Check out our virtual classroom or live classroom Word courses >
Understanding formula syntax
When you insert a table in Word, each column and row are identified like cells in Excel worksheets and each cell is assigned a cell reference. In a Word table, the first column would be column A and the first row would be row 1 so the first cell would be identified as A1. Therefore, you can create calculations that refer to cells (such as =A1+A2).
In Word and Excel, you can use the same basic operators:
- addition (+)
- subtraction (-)
- multiplication (*)
- division (/)
Typically, formulas in Word tables are created using common functions such as SUM, AVERAGE, MIN, MAX or COUNT and refer to a range. They must start with an equal sign (=).
You can refer to ranges of cells using ABOVE, LEFT, RIGHT or BELOW as the arguments for functions. If you’re trying to sum the cells at the bottom of a column, the formula would be =SUM(ABOVE). You can also combine these arguments. For example, you could enter a formula =SUM(ABOVE,LEFT) and it would sum all cells that are above and to the left of that cell. Functions can also refer to cell references such as =SUM(C1:C10). You can also refer to individual cells such =SUM(B1,C1,D5).
Word tables can also perform more complex calculations using the IF function with the syntax =IF(test,true,false). For example, =IF(A5>=1000,0,50) could be used to calculate a shipping cost of 50 if orders are less than 1000. You can also use the AND and OR functions with the IF function.
Inserting a formula in a table
To insert a formula in a table:
- Click in the cell where you want to enter a formula.
- Click the Table Tools Layout or Table Layout tab in the Ribbon.
- Select Function (fx) in the Data group. A dialog box appears. Word will typically insert a function and arguments in the Formula box.
- If you want to accept the suggested formula, click OK. If you want to change the formula, click in the Formula box and enter a formula (starting with =). You can also choose other functions from the Paste Function drop-down menu.
- If necessary, select a format from the Format drop-down menu.
- Click OK. Word inserts the formula as a field and displays the results.
The Function dialog box appears as follows with a formula and a format selected:
Updating a formula
If the original data changes, you can right-click the Formula field and select Update from the drop-down menu or press F9. If you want to update all formulas in a table, select all of the cells in the table and press F9. To select the entire table, click the four arrows on the top left of the table.
Changing a formula
To change a formula in a table:
- Right-click the formula or error. A drop-down menu appears.
- Select Edit field.
- Make the desired changes.
- Click OK.
Updating all fields
To update all fields in all tables:
- Press Ctrl + A to select all.
- Press F9.
Formula fields are just one type of field you can use in Word. There are many other fields that can insert variable information in Word documents.
Subscribe to get more articles like this one
Did you find this article helpful? If you would like to receive new articles, join our email list.
More resources
4 Ways to Create a Table in Word
How to Insert Fields in Word (Built-in or Custom)
5 Ways to Insert the Division Symbol in Word (Type or Insert ÷)
How to Insert Reusable Text Snippets in Word with Quick Parts
10 Microsoft Word Tips, Tricks and Shortcuts for Selecting in Tables
Related courses
Microsoft Word: Intermediate / Advanced
Microsoft Excel: Intermediate / Advanced
Microsoft PowerPoint: Intermediate / Advanced
Microsoft Word: Long Documents Master Class
Microsoft Word: Styles, Templates and Tables of Contents
Microsoft Word: Designing Dynamic Word Documents Using Fields
VIEW MORE COURSES >
Our instructor-led courses are delivered in virtual classroom format or at our downtown Toronto location at 18 King Street East, Suite 1400, Toronto, Ontario, Canada (some in-person classroom courses may also be delivered at an alternate downtown Toronto location). Contact us at info@avantixlearning.ca if you’d like to arrange custom instructor-led virtual classroom or onsite training on a date that’s convenient for you.
Copyright 2023 Avantix® Learning
Microsoft, the Microsoft logo, Microsoft Office and related Microsoft applications and logos are registered trademarks of Microsoft Corporation in Canada, US and other countries. All other trademarks are the property of the registered owners.
Avantix Learning |18 King Street East, Suite 1400, Toronto, Ontario, Canada M5C 1C4 | Contact us at info@avantixlearning.ca
Microsoft Office Word 2003
=
Formula [Bookmark ] [#
Numeric Picture ] }
Calculates a number by using a mathematical formula. You can use the Formula command (Table menu) or press CTRL+F9 to insert a field in a table or in regular text.
If you have a spreadsheet application, such as Microsoft Excel, embedding all or part of a worksheet in a document is often easier than using the = (Formula) field in a table.
Instructions
Formula
An expression that can contain any combination of numbers, bookmarks that refer to numbers, fields resulting in numbers, and the available operators and functions. The expression can refer to values in a table and values returned by functions.
Learn about:
Operators
In an = (Formula) field, you can use any combination of values and the following mathematical and relational operators.
- +
- Addition
- –
- Subtraction
- *
- Multiplication
- /
- Division
- %
- Percentage
- ^
- Powers and roots
- =
- Equal to
- <
- Less than
- < =
- Less than or equal to
- >
- Greater than
- > =
- Greater than or equal to
- < >
- Not equal to
Functions
The = (Formula) field can use values returned by the following functions. Functions with empty parentheses can accept any number of arguments separated by commas (,) or semicolons (;), as long as you use the list separator defined as part of the regional settings in Microsoft Windows Control Panel. Arguments can be numbers, formulas, or bookmark names. The functions AVERAGE(), COUNT(), MAX(), MIN(), PRODUCT(), and SUM() can also accept references to table cells as arguments.
- ABS(x)
- Returns the positive value of a number or formula, regardless of its actual positive or negative value.
- AND(x,y)
- Returns the value 1 if the logical expressions x and y are both true, or the value 0 (zero) if either expression is false.
- AVERAGE( )
- Returns the average of a list of values.
- COUNT( )
- Returns the number of items in a list.
- DEFINED(x)
- Returns the value 1 (true) if the expression x is valid, or the value 0 (false) if the expression cannot be computed.
- FALSE
- Returns 0 (zero).
- INT(x)
- Returns the numbers to the left of the decimal place in the value or formula x.
- MIN( )
- Returns the smallest value in a list.
- MAX( )
- Returns the largest value in a list.
- MOD(x,y)
- Returns the remainder that results from dividing the value x by the value y a whole number of times.
- NOT(x)
- Returns the value 0 (zero) (false) if the logical expression x is true, or the value 1 (true) if the expression is false.
- OR(x,y)
- Returns the value 1 (true) if either or both logical expressions x and y are true, or the value 0 (zero) (false) if both expressions are false.
- PRODUCT( )
- Returns the result of multiplying a list of values. For example, the function { = PRODUCT (1,3,7,9) } returns the value 189.
- ROUND(x,y)
- Returns the value of x rounded to the specified number of decimal places y; x can be either a number or the result of a formula.
- SIGN(x)
- Returns the value 1 if x is a positive value, or the value –1 if x is a negative value.
- SUM( )
- Returns the sum of a list of values or formulas.
- TRUE
- Returns the value 1.
Table references
When you perform calculations in a table, you reference table
cells as A1, A2, B1, B2, and so on, with the letter representing a column and the number representing a row. Cell references in Microsoft Word, unlike those in Microsoft Excel, are always absolute references and are not shown with dollar signs. For example, referring to a cell as A1 in Word is the same as referring to a cell as $A$1 in Excel.

Reference an entire row or column
You can reference an entire row or column in a calculation in the following ways:
- Use a range that includes only the letter or number that represents it— for example, 1:1 to reference the first row in the table. This designation allows the calculation to automatically include all the cells in the row if you decide to add other cells later.
- Use a range that includes the specific cells— for example, a1:a3 to reference a column with three rows. This designation allows the calculation to include only those particular cells. If you add other cells later and you want the calculation to include them, you need to edit the calculation.
Reference cells in another table
To reference cells in another table, or to reference a cell from outside a table, identify the table with a bookmark. For example, the field { =average(Table2 b:b) } averages column B in the table marked by the bookmark Table2.
Bookmark
The name of a bookmark that refers to one or more values.
# Numeric picture
Specifies the display of a numeric result. This switch is called a «picture» switch because you use symbols to represent the format of the field result.
For example, the switch # $#,##0.00 in { = SUM(ABOVE) # $#,##0.00 } displays a result such as «$4,455.70.» If the result of a field is not a number, this switch has no effect.
Note Quotation marks are not required around simple numeric pictures that do not include spaces— for example, { MarchSales # $#,##0.00 }. For more complex numeric pictures and those that include text or spaces, enclose the numeric picture in quotation marks, as shown in the following picture item examples. Microsoft Word adds quotation marks to numeric picture switches if you insert a field by using the Field command (Insert menu) or the Formula command (Table menu).
Combine the following picture items to build a numeric picture switch.
Picture items
- 0 (zero)
- Specifies the requisite numeric places to display in the result. If the result does not include a digit in that place, Word displays a 0 (zero). For example, { = 4 + 5 # 00.00 } displays «09.00».
- #
- Specifies the requisite numeric places to display in the result. If the result does not include a digit in that place, Word displays a space. For example, { = 9 + 6 # $### } displays «$ 15».
- x
- Drops digits to the left of the «x» placeholder. If the placeholder is to the right of the decimal point, Word rounds the result to that place. For example:
{ = 111053 + 111439 # x## } displays «492».
{ = 1/8 # 0.00x } displays «0.125».
{ = 3/4 # .x } displays «.8». - . (decimal point)
- Determines the decimal point position. For example, { = SUM(ABOVE) # $###.00 } displays «$495.47».
Note Use the decimal symbol specified as part of the regional settings in Microsoft Windows Control Panel.
- , (digit grouping symbol)
- Separates a series of three digits. For example, { = NetProfit # $#,###,### } displays «$2,456,800».
Note Use the digit grouping symbol specified as part of the regional settings in Windows Control Panel.
- — (minus sign)
- Adds a minus sign to a negative result, or adds a space if the result is positive or 0 (zero). For example, { = 10 — 90 # -## } displays «-80».
- + (plus sign)
- Adds a plus sign to a positive result, a minus sign to a negative result, or a space if the result is 0 (zero). For example, { = 100 — 90 # +## } displays «+10», and { = 90 — 100 # +## } displays «-10».
- %, $, *, and so on
- Includes the specified character in the result. For example, { = netprofit # «##%» } displays «33%».
- «positive; negative«
- Specifies different number formats for positive and negative results. For example, if the bookmark Sales95 is a positive value, the field { Sales95 # «$#,##0.00;-$#,##0.00» } displays the value with regular formatting— for example, «$1,245.65». A negative value is displayed with bold formatting and a minus sign— for example, «-$ 345.56«.
- «positive; negative; zero«
- Specifies different number formats for a positive result, a negative result, and a 0 (zero) result. For example, depending on the value of the Sales95 bookmark, { Sales95 # «$#,##0.00;($#,##0.00);$0» } displays positive, negative, and 0 (zero) values as follows: $1,245.65, ($ 345.56), $0
- ‘text‘
- Adds text to the result. Enclose the text in single quotation marks. For example, { = { Price } *8.1% # «$##0.00 ‘is sales tax’ » } displays «$347.44 is sales tax».
- `numbereditem`
- Displays the number of the preceding item that you numbered by using the Caption command (Insert menu, Reference submenu) or by inserting a SEQ field. Enclose the item identifier, such as «table» or «figure,» in grave accents (`). The sequential number is displayed in Arabic numerals. For example, { = SUM(A1:D4) # «##0.00 ‘is the total of Table’ `table`» } displays «456.34 is the total of Table 2».
Examples
Example 1
The following field subtracts from a value represented by the bookmark GrossSales. The numeric picture switch displays the results with a currency sign— for example, $14,786.17:
{ = GrossSales-29,897.62 # «$#,##0.00» }
Example 2
The following = (Formula) field computes the total number of pages in a document whose page numbering starts at 47; it displays a result such as «Page 51 of 92»:
Page { PAGE } of { = (47 — 1) + { NUMPAGES } }
Example 3
The following examples refer to values in a table. The cell references in the examples refer to cells in the table containing the = (Formula) field. If the field isn’t in the referenced table, mark the table with a bookmark and specify the bookmark, followed by the cell references.
- { = SUM(ABOVE) } (inserted in a table cell)
-
The sum of cells, from the cell above the field to the top of the column or to the first blank cell or illegal value.
- { = SUM(Table3 C3) }
-
The contents of the cell in the third column of the third row of the table marked by the bookmark «Table3.»
- { = MIN(Table3 A3:D3) }
-
Smallest value in the first four cells in the third row of the table marked by the bookmark «Table3.»
Содержание
- Добавление формулы в Ворде
- Способ 1: Выбор шаблонных и часто используемых примеров
- Способ 2: Самостоятельное создание уравнений
- Способ 3: Рукописный ввод уравнений
- Сохранение собственных формул в качестве шаблона
- Вставка формулы в ячейку таблицы
- Работа с формулами в Microsoft Word 2003
- Заключение
- Вопросы и ответы

Функциональные возможности текстового редактора Microsoft Word на деле не ограничиваются одной только работой с текстом. Так, это офисное приложение позволяет создавать таблицы, диаграммы и графики, добавлять и изменять изображения и много чего другого. Одной из наиболее интересных, хотя и не самых очевидных функций является вставка формул и уравнений, а также их создание с нуля. О том, как это делается, расскажем в данной статье.
Читайте также:
Вставка изображений в Microsoft Word
Создание диаграмм в программе MS Word
Добавление формулы в Ворде
Как и в случае с большинством объектов, работа с которыми поддерживается Word, добавление и создание формул в текстовом документе осуществляется во вкладке «Вставка». На выбор пользователю предоставляется четыре различных варианта — от использования готовых шаблонов до самостоятельного создания записи и даже ее ручного ввода. Все это, а также некоторые дополнительные возможности и нюансы, подробнее рассмотрим далее, но прежде всего расскажем и покажем, как перейти к интересующему нас разделу программы.
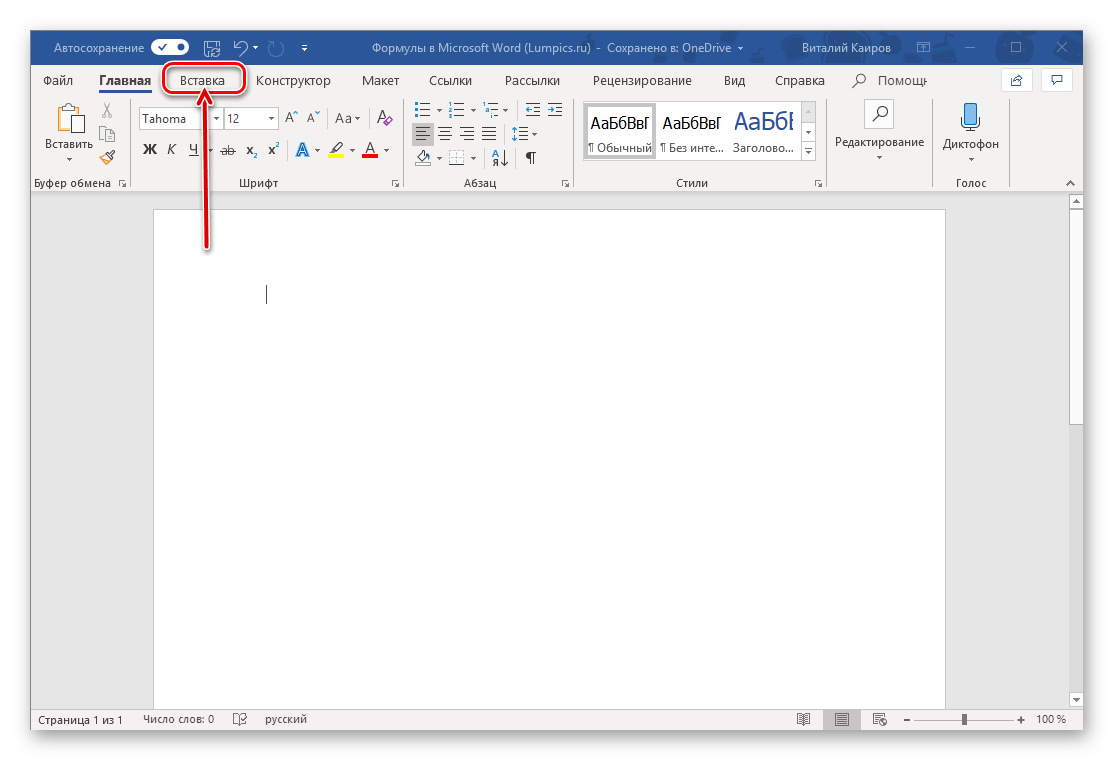
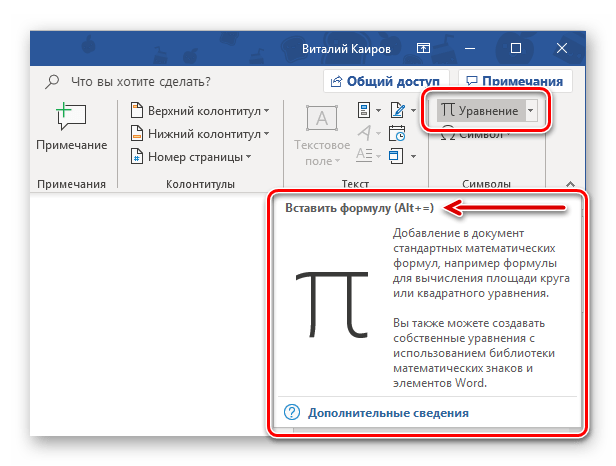
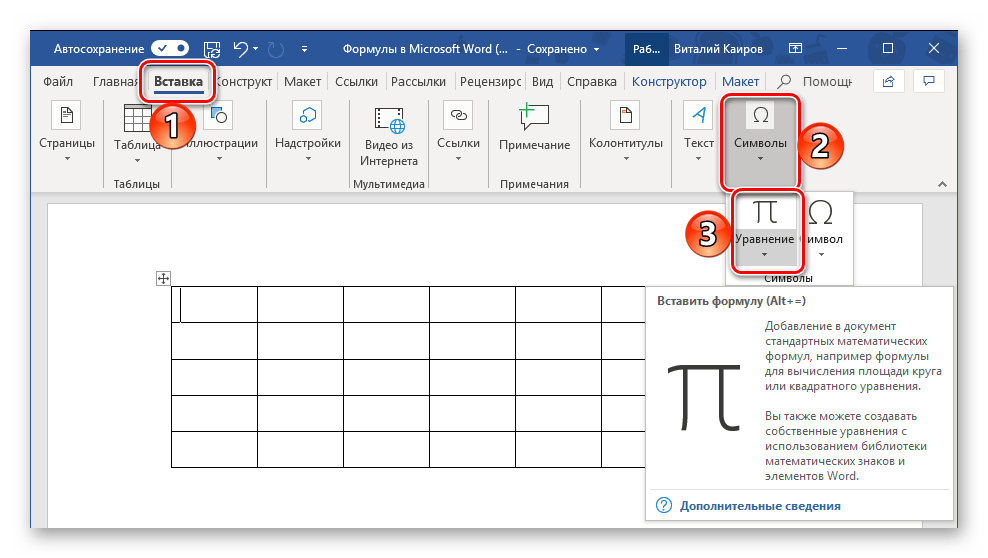
- Из главного окна Майкрософт Ворд перейдите во вкладку «Вставка».
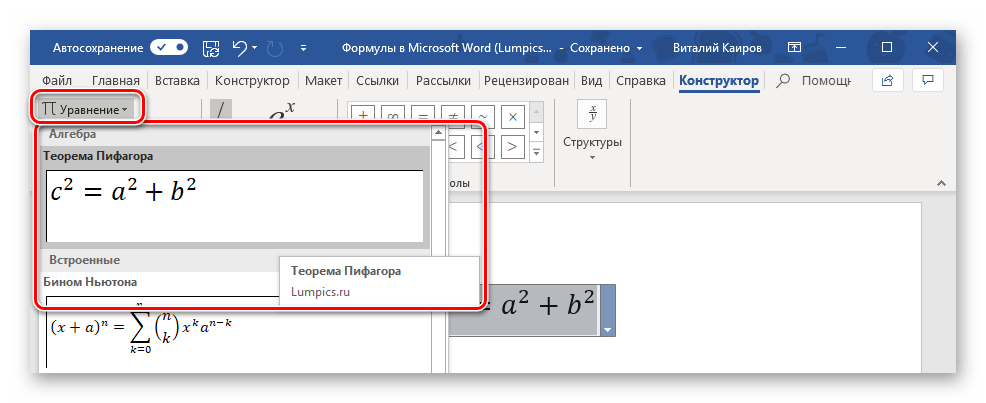
- В группе инструментов «Символы» (крайняя справа) разверните меню пункта «Уравнение», нажав левой кнопкой мышки (ЛКМ) по указывающей вниз стрелке справа от наименования.
- Выберите подходящий вариант вставки формулы, а точнее, уравнения, ведь в программе этот раздел называется именно так.

Примечание: В Microsoft Word 2003 встроенные средства для создания уравнений и работы с ними отсутствуют. Если вы до сих пор пользуетесь этой версией программы, ознакомьтесь с последней частью данной статьи.
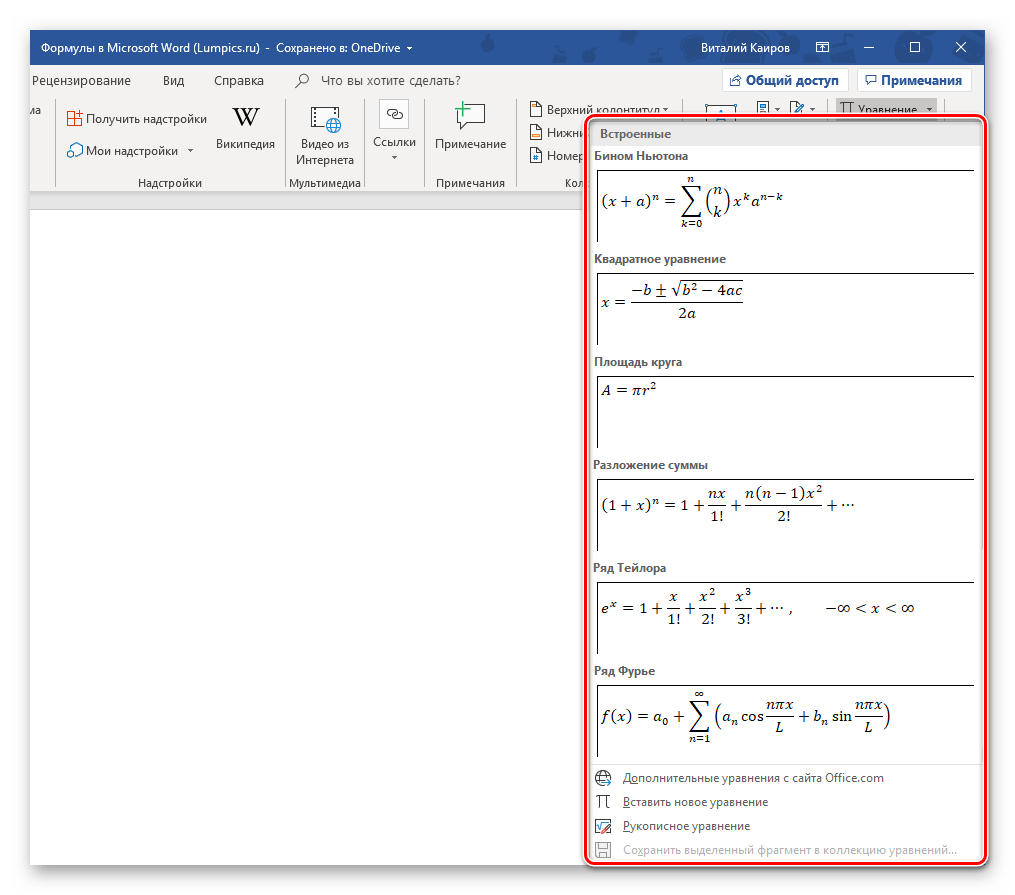
Способ 1: Выбор шаблонных и часто используемых примеров
В меню создания уравнений Microsoft Word есть несколько готовых шаблонов, для добавления любого из которых в документ достаточно просто нажать по нему ЛКМ. В числе таковых следующие:
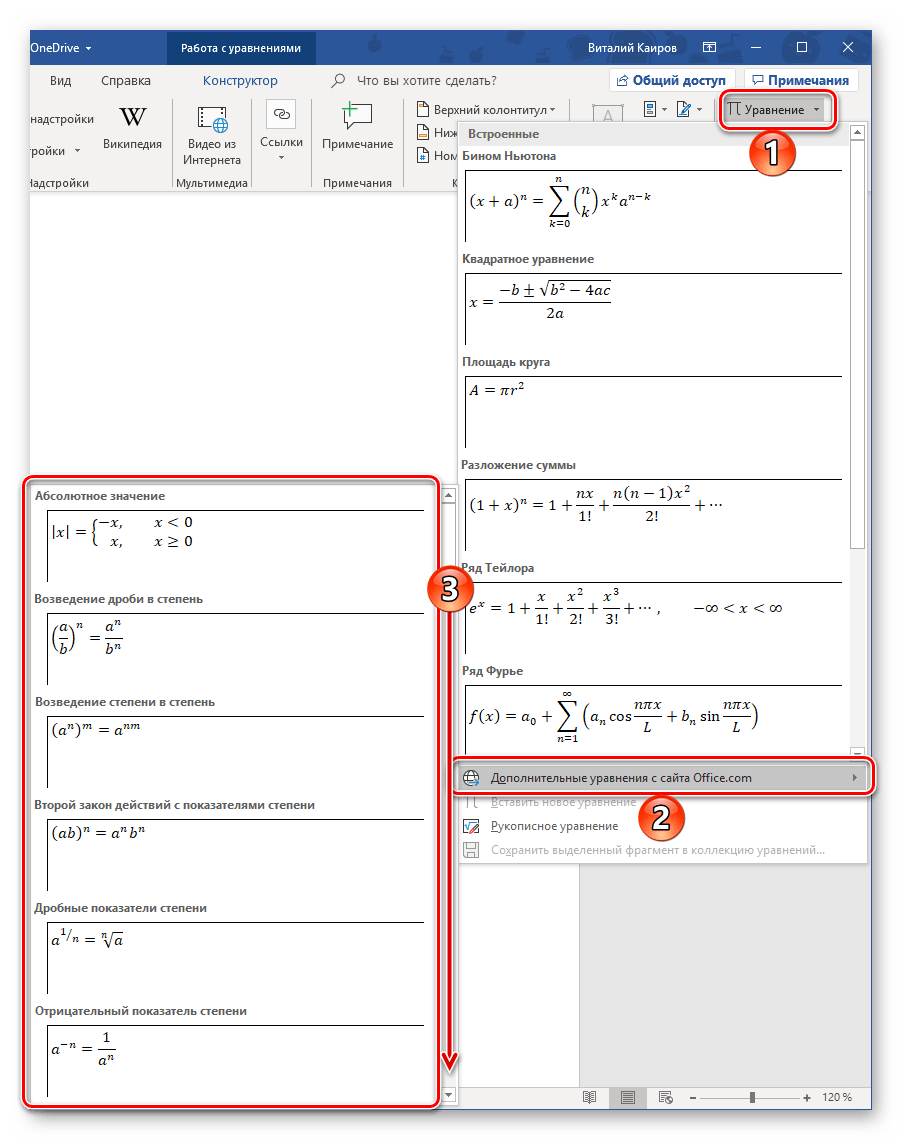
Конечно же, большинству пользователей этого будет недостаточно, а потому неудивительно, что столь скромный список можно пополнить как собственными формулами, так и дополнительными уравнениями на сайте Office.com, которые на самом деле доступны прямо в программе. Для их выбора и последующей вставки просто наведите указатель курсора на соответствующий пункт меню добавления новой записи.
Далее кратко расскажем о том, каким образом осуществляется работа с изначально отформатированными, шаблонными математическими записями в Ворде.
Примечание: Для всех формул и уравнений, как шаблонных, так и записанных вручную, применяется шрифт Cambria Math, и изменить его невозможно. Все остальные параметры (изменение типа начертания, размера, цвета и т. д.) при этом остаются доступными.
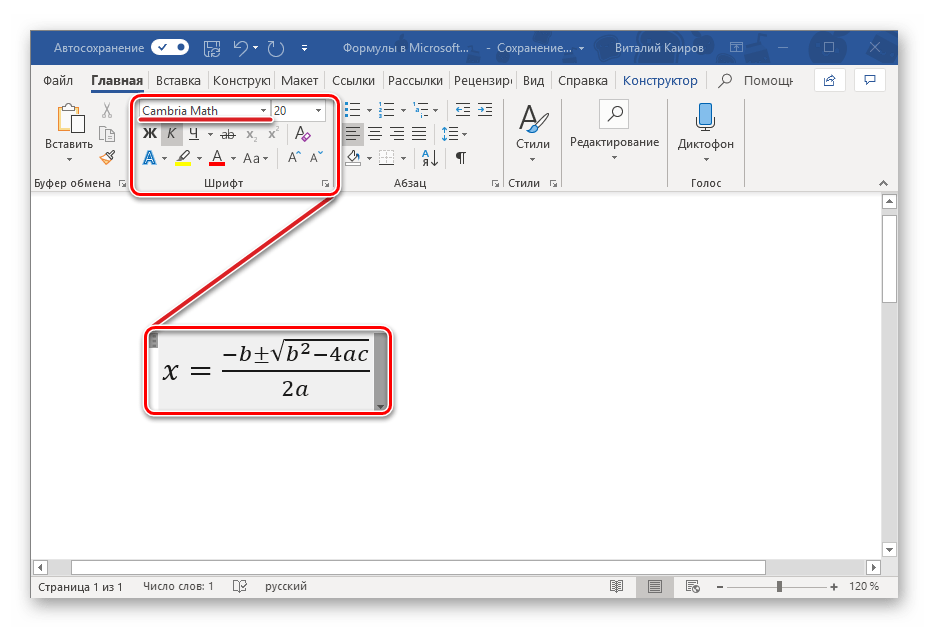
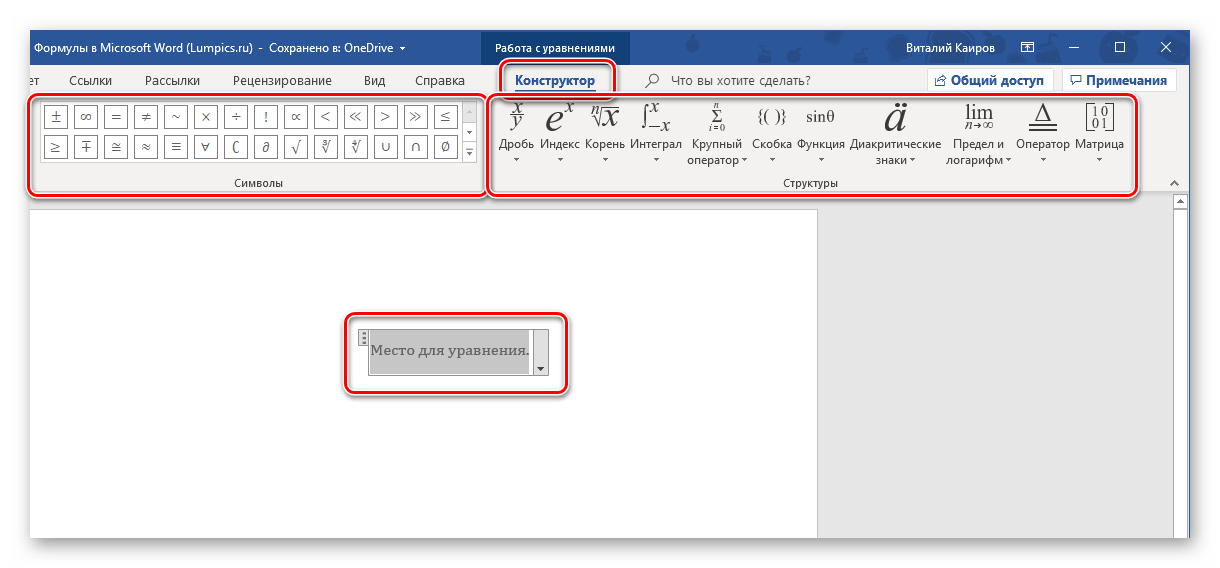
Сразу же после добавления шаблонного уравнения (как и любого другого) вы будете перенаправлены на вкладку «Конструктор» (не путайте с той, что изначально присутствует не панели инструментов Microsoft Word и расположена между вкладками «Вставка» и «Макет», ранее она называлась «Дизайн»).

Примечание: Вкладка «Конструктор», посредством которой осуществляется вся работа с формулами, активна и открыта исключительно в то время, когда выделено поле вставки нового уравнения и/или вы с ним взаимодействуете.

Здесь представлены три основных категории инструментов, а именно:
- Преобразования;
- Символы;
- Структуры.
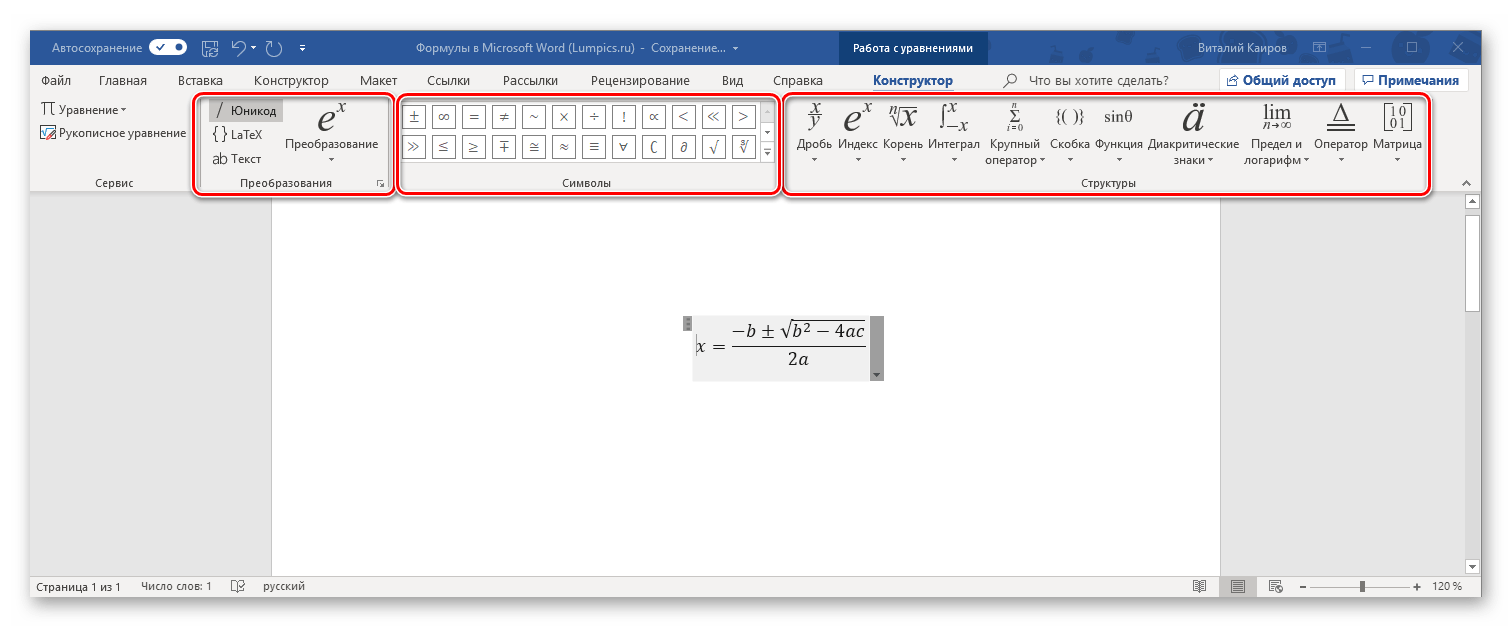
Получить доступ к возможностям «Преобразования» можно и через меню с блоком добавленной формулы – просто нажмите ЛКМ на указывающий вниз треугольник. Помимо прочего, отсюда же можно сохранить уравнение в виде шаблона, о чем мы еще расскажем, и определить тип его выравнивания на странице документа.
Если в добавленную запись потребуется внести изменения, используйте инструментарий разделов «Символы» и «Структуры».
Закончив работу с уравнением, просто кликните по пустой области страницы. Если нажать после этого на пробел, запись, изначально вставленная посередине, будет выровнена по левому краю (или по тому, который задан в качестве параметров выравнивания по умолчанию для текущего документа).

Способ 2: Самостоятельное создание уравнений
Куда более часто требуется добавить в текстовый документ не шаблонную запись, а произвольное или просто отсутствующее в списке «Встроенные» уравнение. Делается это следующим образом:
- В выпадающем списке меню «Уравнение» выберите пункт «Вставить новое уравнение», после чего на страницу будет добавлено поле для записи.

Примечание: Для вставки поля для ввода формулы, которое называется «Место для уравнения», можно воспользоваться горячими клавишами, а именно, комбинацией «ALT+=».

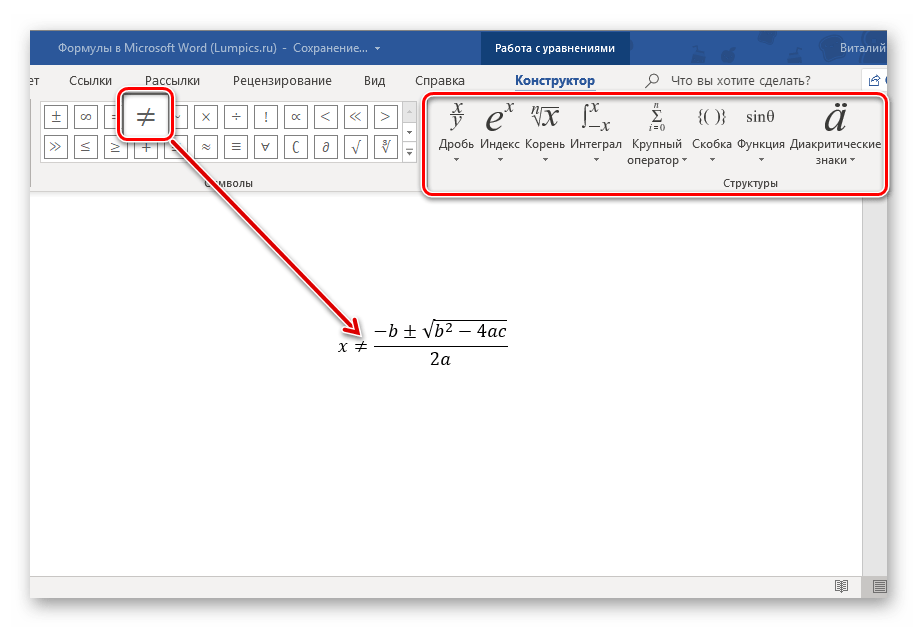
- Для рукописного ввода уравнения воспользуйтесь элементами, представленными во второй и третьей группе инструментов вкладки «Конструктор» — «Символы» и «Структуры».

В число последних входят следующие:- Дробь;
- Индекс;
- Корень;
- Интеграл;
- Крупный оператор;
- Скобка;
- Функция;
- Диакритические знаки;
- Предел и логарифм;
- Оператор;
- Матрица.

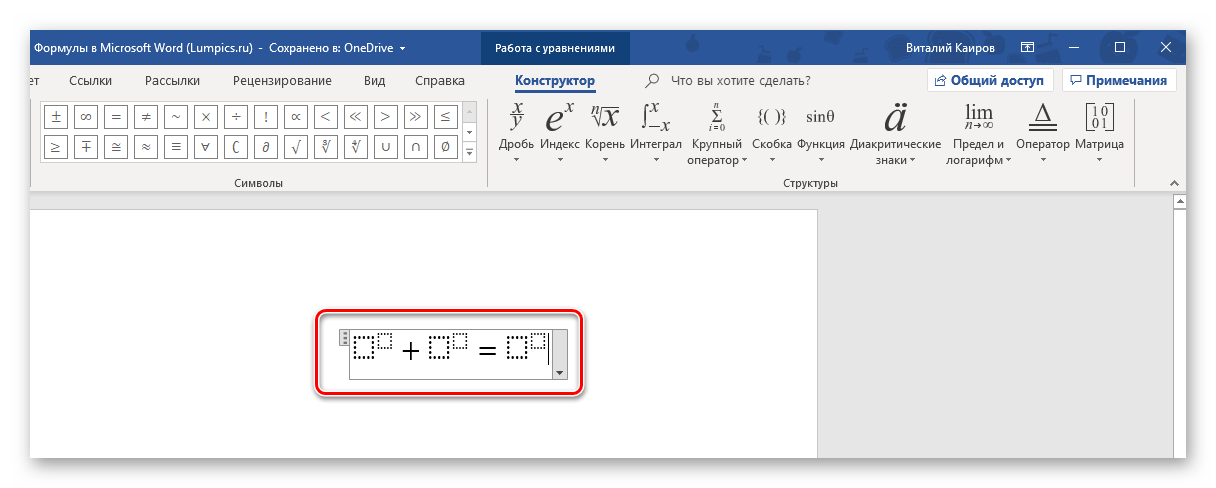
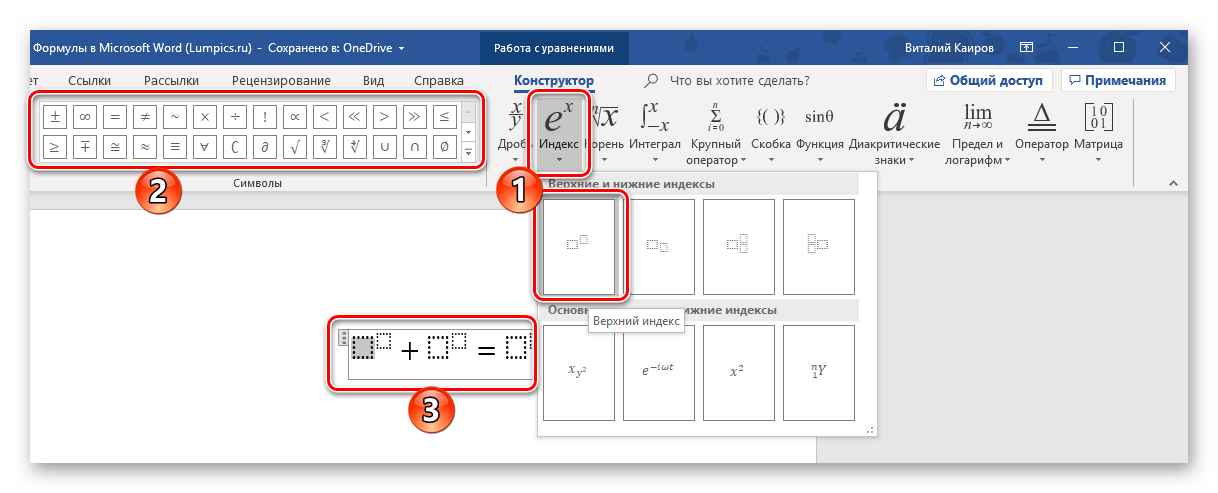
Вот пример того, как можно записать простое уравнение:- Для начала выбираем подходящую структуру (в нашем примере это «Верхний индекс»).
- Затем ставим символ (такие как плюс, минус, равно, умножить можно ввести и с клавиатуры, остальные же выбираются на панели «Символы»).
- Аналогичным образом записываем остальные элементы примера.

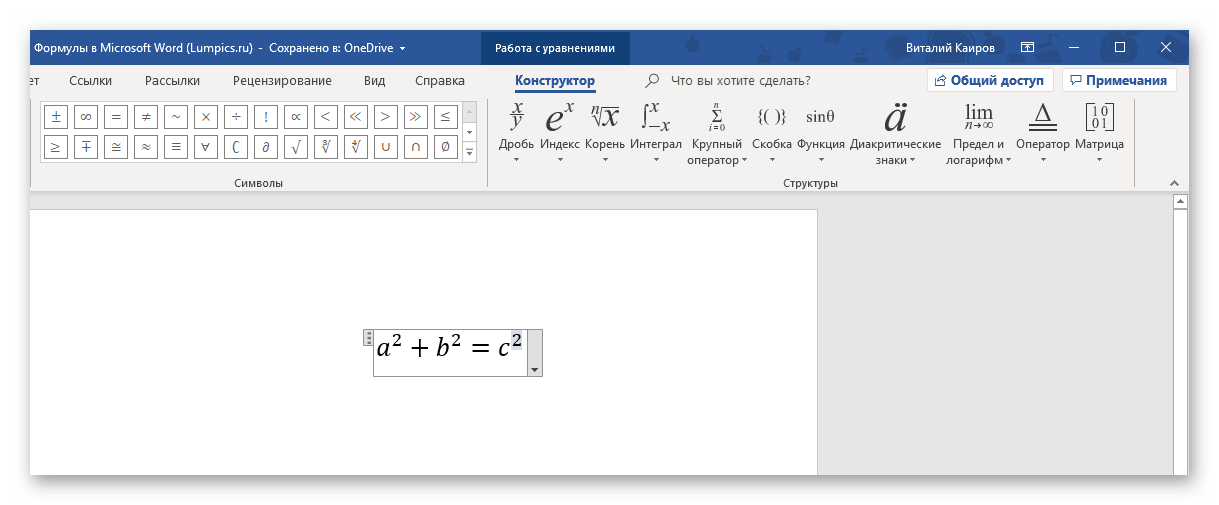
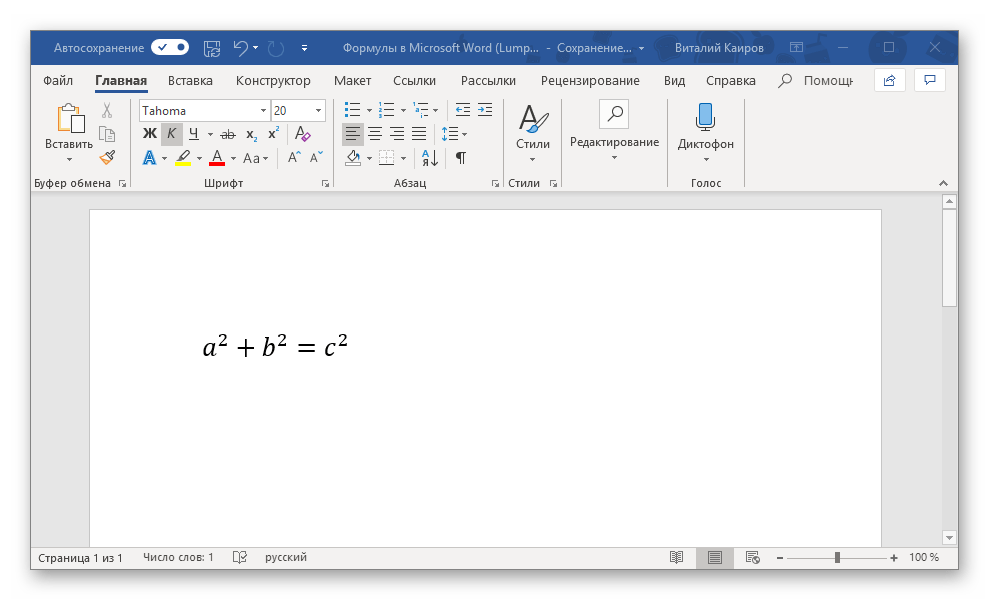
- После того как вы введете формулу, кликните ЛКМ по пустой области страницы.

Если потребуется, выровняйте расположение записи по левому краю, нажав пробел или обратившись к меню дополнительных действий (выпадающий список блока с уравнением).

В сравнении с рассмотренным нами выше способом вставки шаблонных формул, их самостоятельное создание предоставляет куда более широкие возможности. Именно таким образом можно добавить в текстовый документ запись любой сложности и структуры, хотя и выполняется данная процедура не всегда удобно.
Способ 3: Рукописный ввод уравнений
Если набор математических символов и структур, представленных во вкладке «Конструктор» и предназначенных для самостоятельного создания записей, вас по каким-то причинам вас не устраивает, формулу или уравнение можно добавить и старым-добрым способом – написав его от руки, а точнее, с помощью мышки (или стилуса на устройствах с сенсорным экраном). Делается это следующим образом:
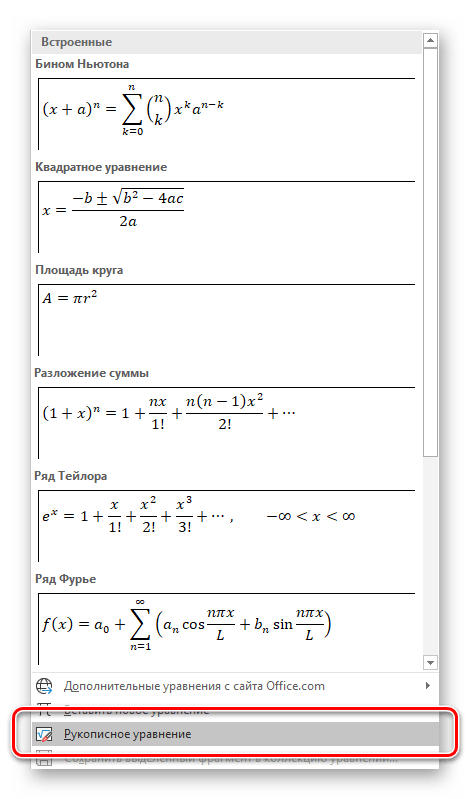
- В меню вставки нового уравнения выберите предпоследний пункт «Рукописное уравнение».
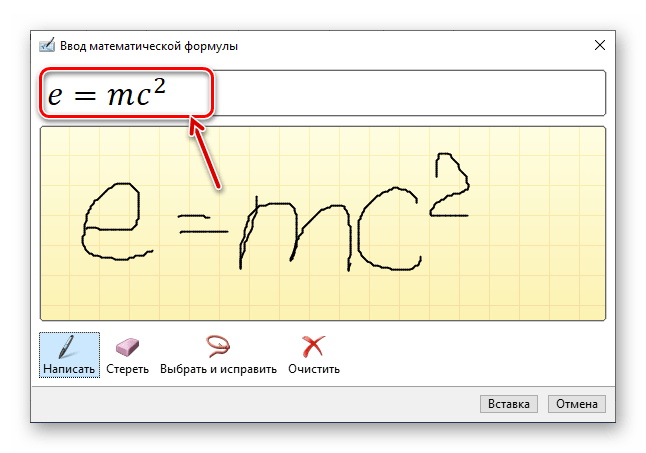
- Будет открыто окно «Ввод математической формулы», верхняя часть которого является областью предварительного просмотра, нижняя – панелью инструментов, а наибольшую часть занимает расположенная посредине область для ввода.

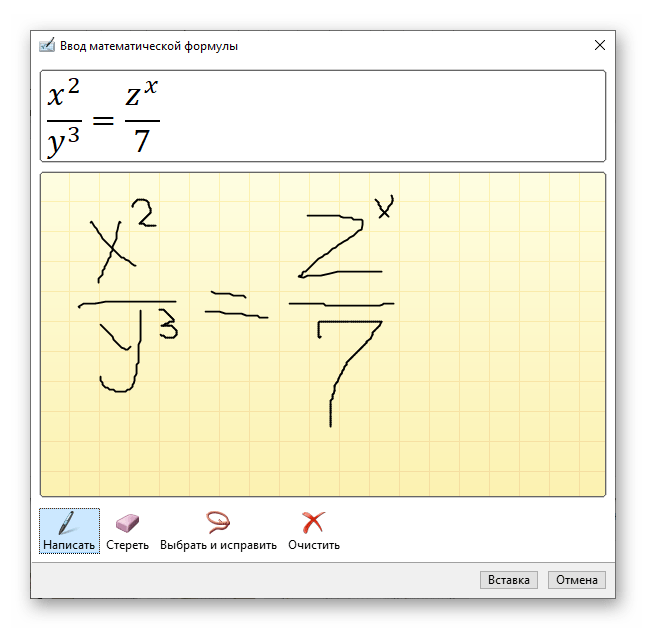
Как раз в ней с помощью мышки (или стилуса, если таковой поддерживается экраном) и инструмента «Написать» и следует писать формулу от руки. Старайтесь делать это аккуратно, так как алгоритм распознавания рукописного текста отнюдь не совершенен.

Примечание: По ходу написания формулы поле для ее ввода будет автоматически расширяться.

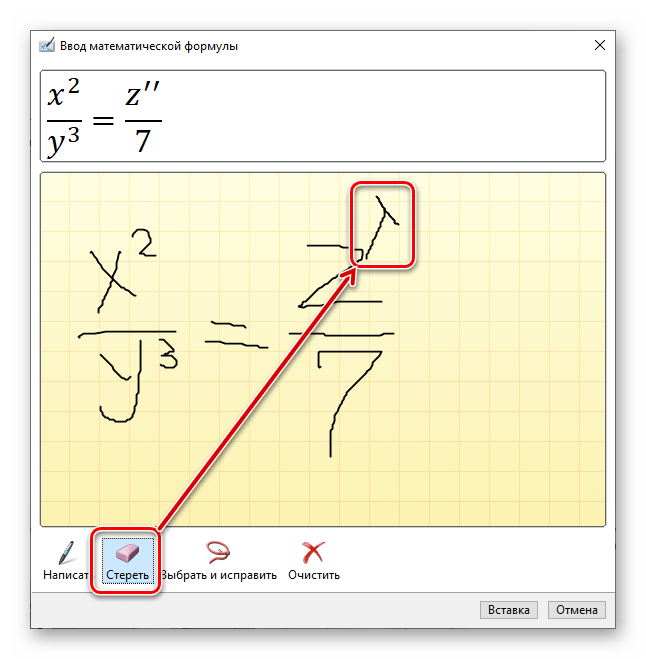
Если вы допустили ошибку, воспользуйтесь инструментом «Стереть», который удаляет сразу весь выбранный символ.

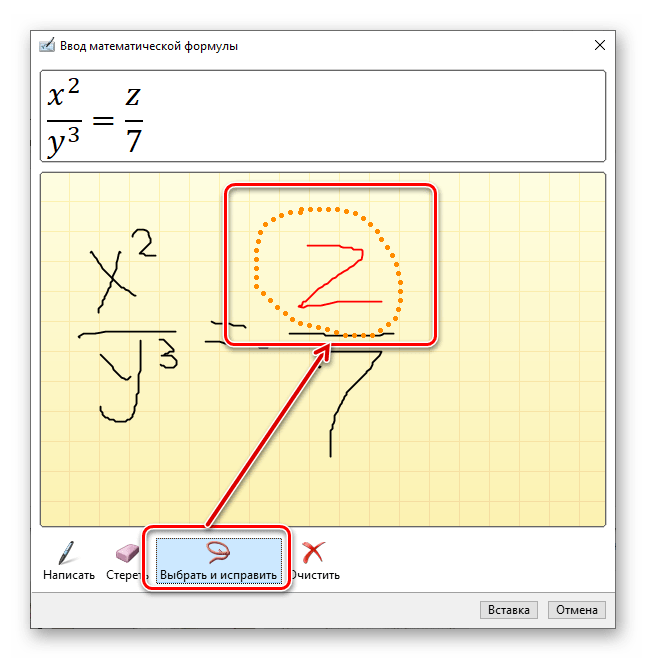
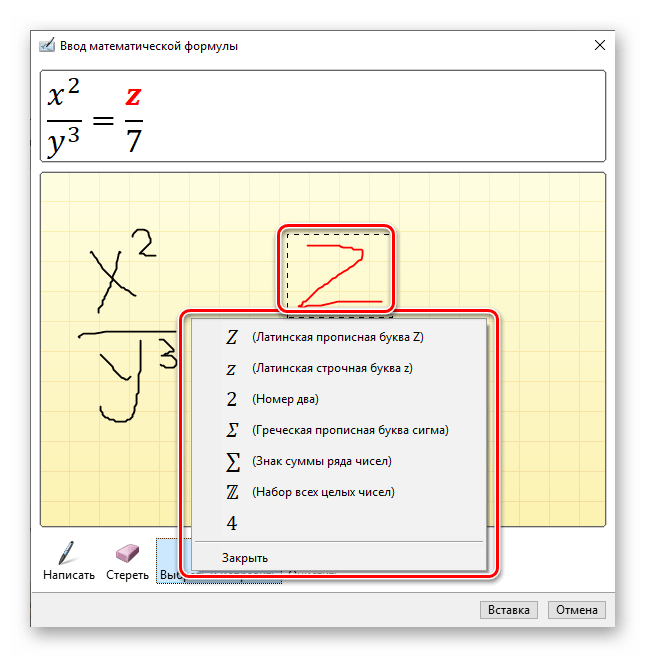
Помимо удаления, доступно и исправление ошибок, что делается инструментом «Выбрать и исправить». С его помощью выделяете символ, обводя его по кругу, а затем из выпадающего меню выбираете то, на что вы хотите его заменить.
Выделять можно и более одного символа, к примеру, букву и степень, и в таком случае будет доступно еще больше вариантов исправления. Все это явно пригодиться в тех случаях, когда алгоритм программы спутает один символ с другим, например, цифру «2» и латинскую букву «Z», или просто некорректно его распознает.

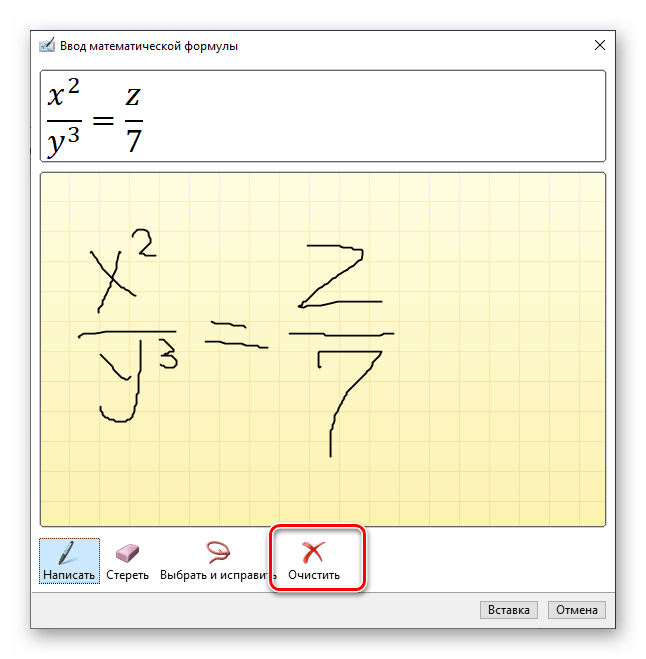
При необходимости вы также можете очистить поле для рукописного ввода и начать писать формулу заново. - Для добавления созданной вручную записи на страницу нажмите по кнопке «Вставка», расположенной в нижней области окна «Ввод математической формулы».

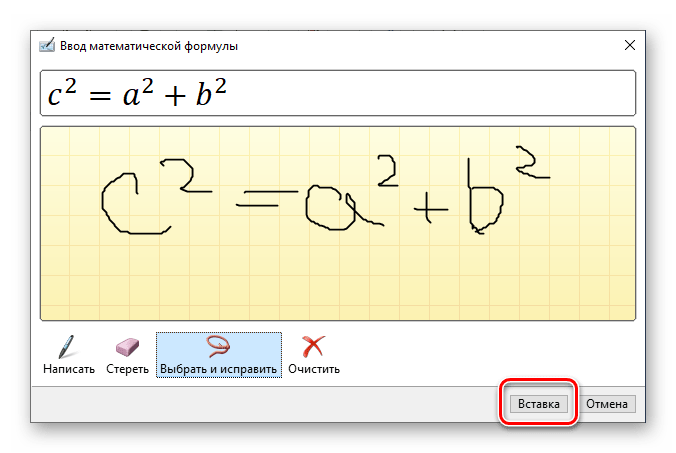
Дальнейшее взаимодействие с формулой ничем не отличается от шаблонных и тех, что созданы посредством встроенных в Ворд символов и структур.

Сохранение собственных формул в качестве шаблона
Если в процессе работы с документами вам часто требуется записывать одни и те же формулы, разумно будет добавить их в список часто используемых. Таким образом вы создадите готовый шаблон, который будет доступен из меню вставки буквально в пару кликов мышкой.
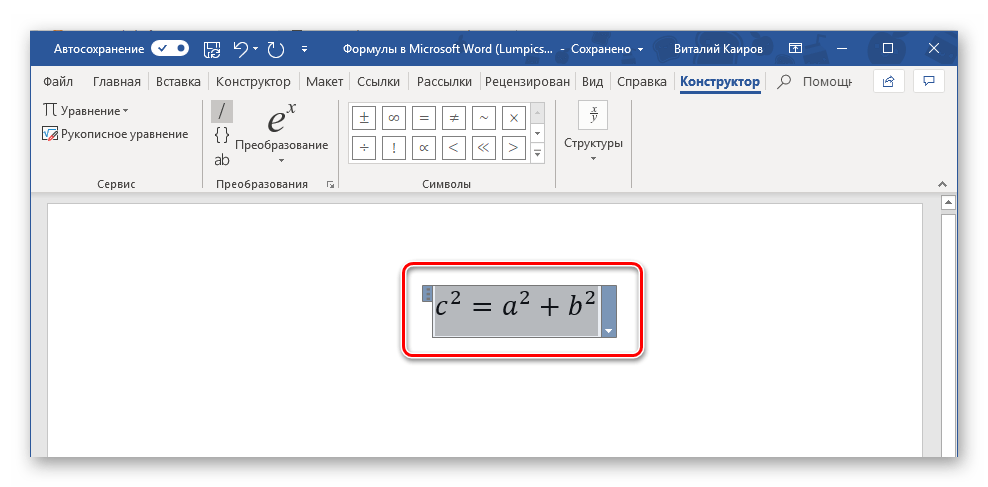
- Создайте формулу, которую хотите добавить в список шаблонов, а затем выделите ее нажатием ЛКМ по «рамке».
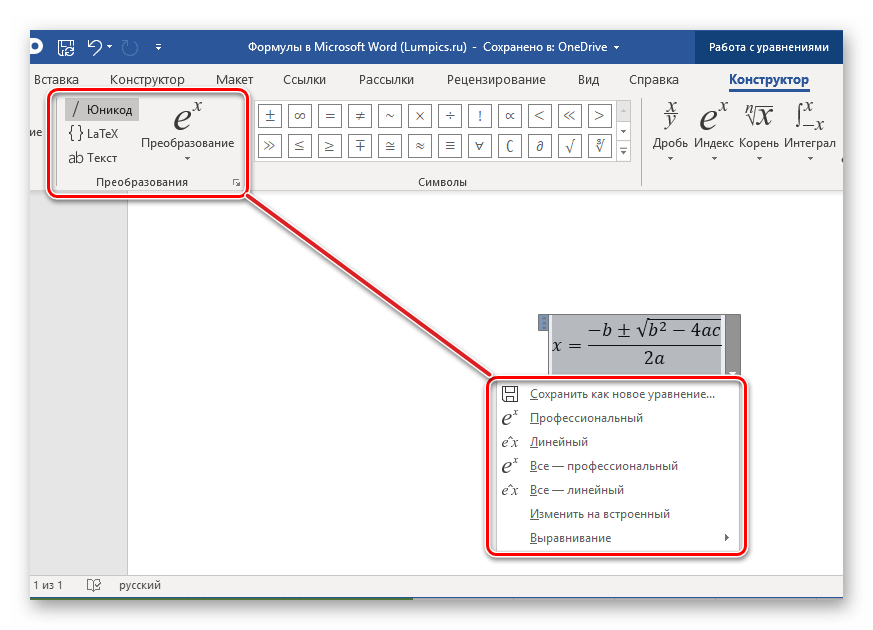
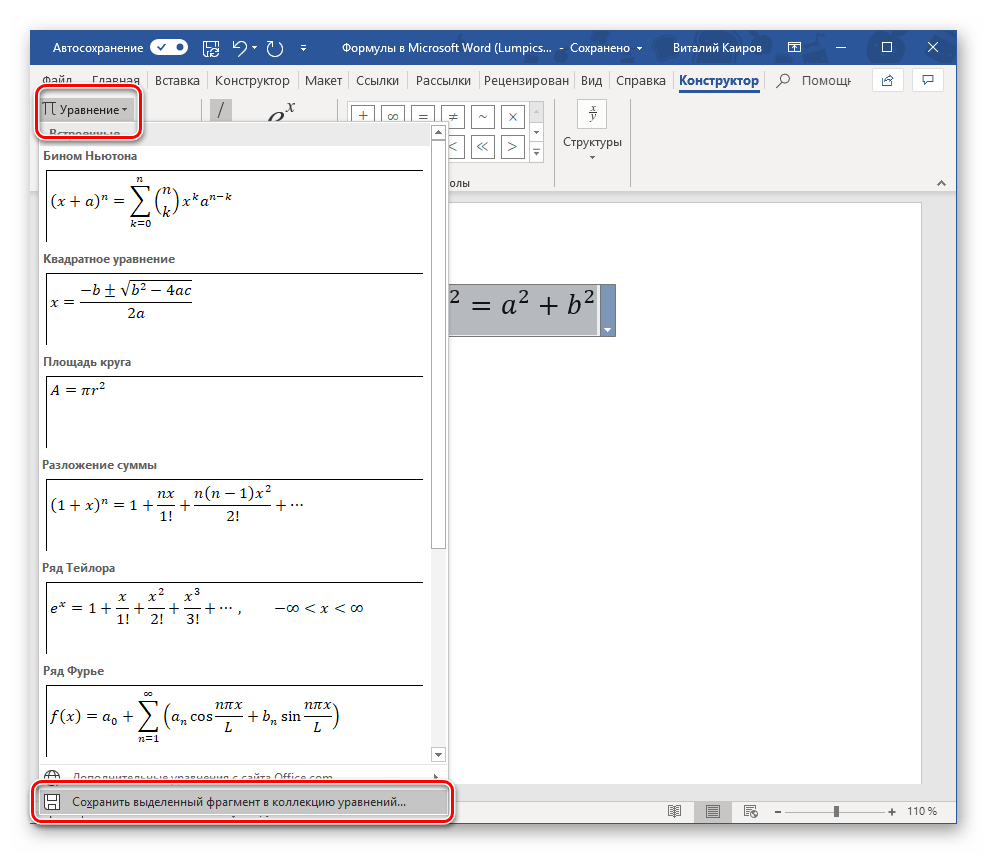
- Нажмите на кнопку «Уравнение», расположенную в группе «Сервис» (вкладка «Конструктор») и в появившемся меню выберите пункт «Сохранить выделенный фрагмент в коллекцию уравнений…».
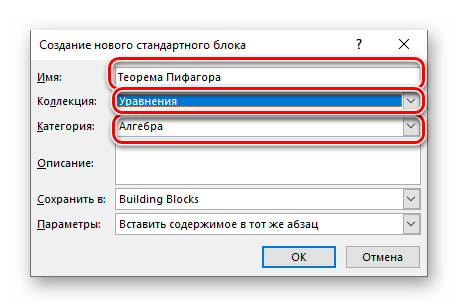
- В появившемся диалоговом окне придумайте имя для сохраняемой формулы. В выпадающем списке «Коллекция» выберите пункт «Уравнения» и, при желании, определите категорию или оставьте ту, которую автоматически «подберет» программа.
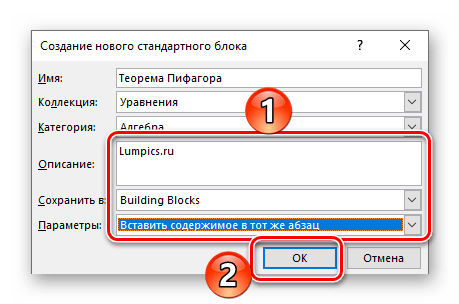
- В случае необходимости определите другие параметры (добавьте описание и выберите то, куда сохраняемое уравнение будет добавляться), после чего нажмите «ОК».
- Сохраненная в качестве шаблона формула появится в списке быстрого доступа Ворд, который открывается сразу после нажатия на кнопку «Уравнение» («Формула») в группе «Сервис».
Вставка формулы в ячейку таблицы
Несмотря на то что в пакете Microsoft Office за работу с таблицами отвечает Excel, Word тоже позволяет создавать и обрабатывать элементы данного типа. Да, возможности текстового редактора в этом плане куда более скромные, чем у его собрата, но для решения базовых задач встроенной функциональности будет достаточно.
Вставка непосредственно уравнений, шаблонных или самостоятельно созданных, в таблицу осуществляется ровно по тому же алгоритму, что и во всех рассмотренных нами случаях, что можно понять из представленного выше скриншота. Однако помимо этого в программе имеется возможность добавления именно формулы в любую ячейку таблицы Ворд, по типу того, как это делается в Экселе. Об этом далее и расскажем.
Читайте также:
Создание таблиц в Word
Работа с таблицами в MS Word
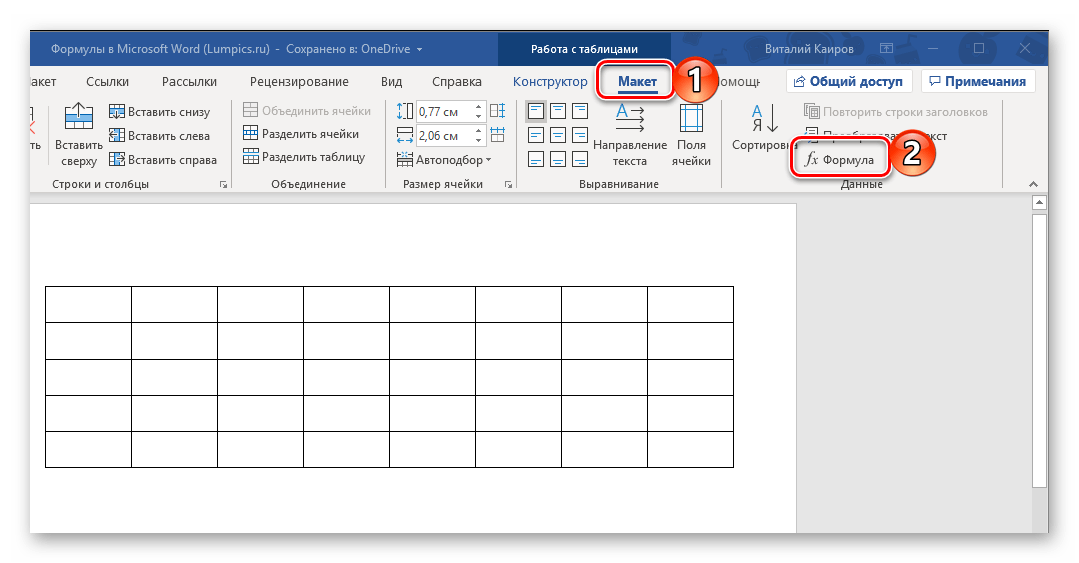
- Создайте таблицу, если не сделали это заранее, а затем выделите кликом ЛКМ ту ее ячейку, в которую будет добавлена формула.
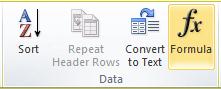
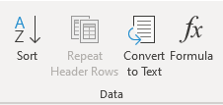
- Перейдите во вкладку «Макет», но не ту, что в основной группе вкладок, а ту, которая располагается в категории «Работа с таблицами», и нажмите там по кнопке «Формула» (группа инструментов «Данные»).

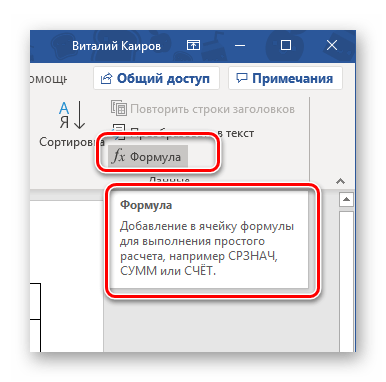
Примечание: Если просто навести указатель курсора на кнопку «Формула», можно увидеть краткое описание того, что данная функция позволяет. С ее помощью можно добавить в ячейку таблицы формулу для выполнения простого расчета, например, среднего значения или суммы.
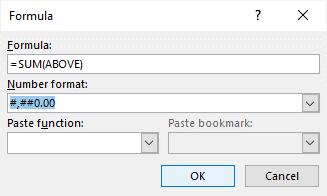
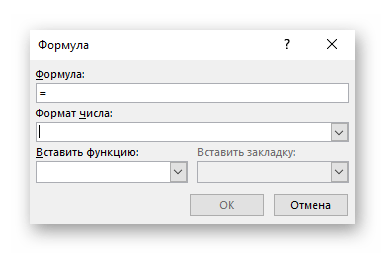
- В небольшом диалоговом окошке, которое будет открыто, впишите в первую строку формулу, во второй определите формат числа, а в третьей, если это потребуется, выберите функцию, которую требуется вставить в формулу. Сделав все это, нажмите «ОК» для закрытия окна и добавления созданной записи в ячейку таблицы.
У вас может возникнуть вполне логический вопрос – как правильно записывать такие формулы, какой у них должен быть синтаксис? Общий алгоритм в данном случае мало чем отличается от такового в MS Excel, с той лишь разницей, что переменными в записи выступают не адреса ячеек, а их расположение – над ячейкой (ABOVE) или под ней (BELOW), справа (RIGHT) или слева от нее (LEFT). Например, вот так будет выглядеть формула суммы значений:
=SUM(ABOVE)
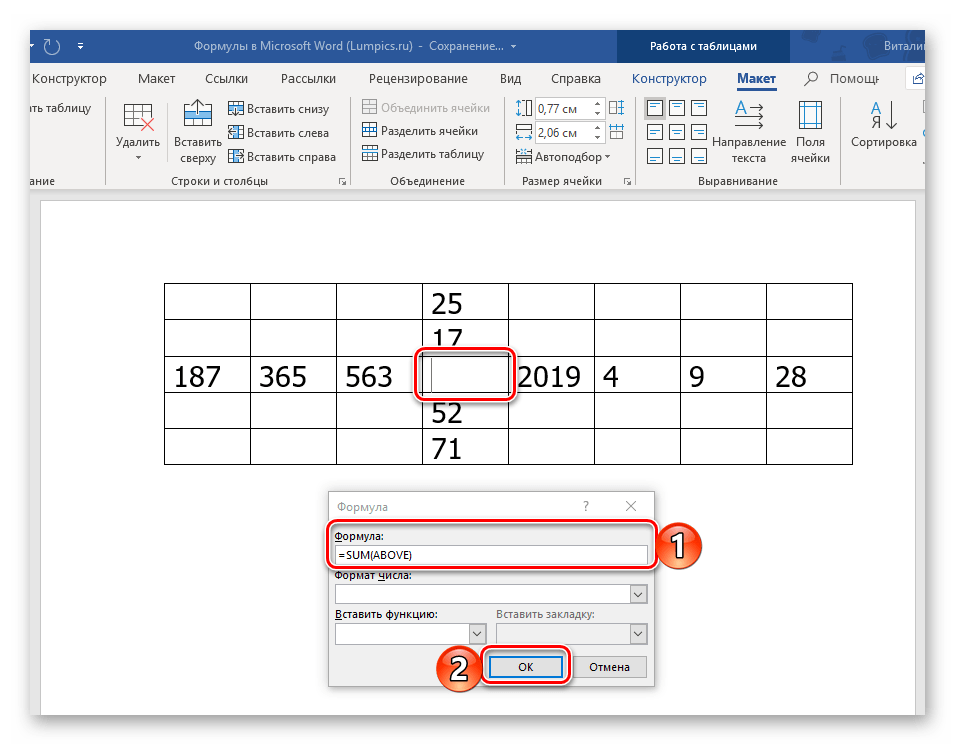
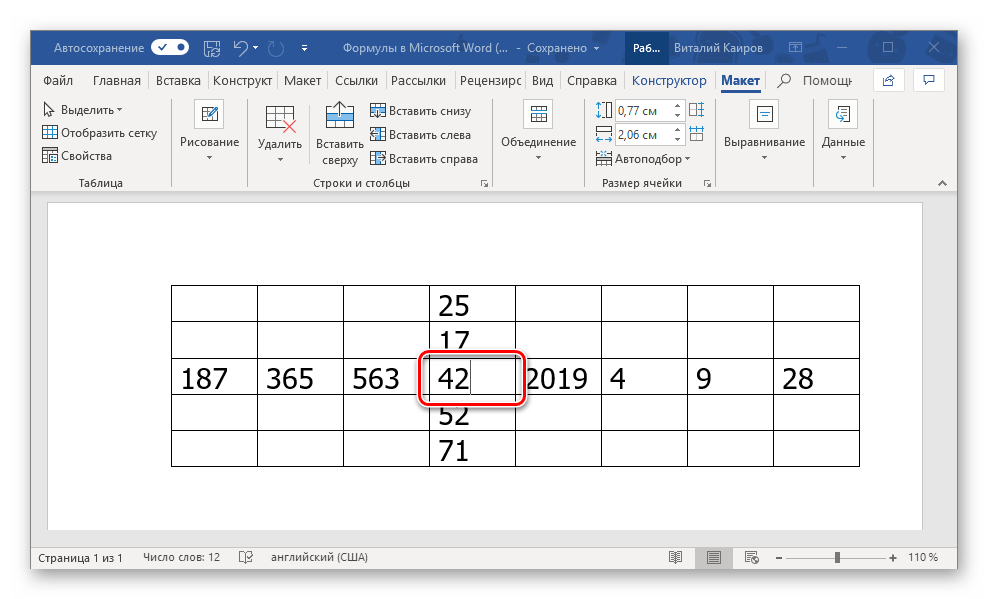
В нашем примере она записана в в четвертую ячейку третьей строки таблицы, а значит, будет суммировать указанные над ней значения: 25+17, что равно 42.
Остальные примеры различных вариантов записи формулы суммы для таблиц в Ворде показаны на следующем изображении, а под ним есть ссылка на официальную страницу поддержки на сайте Microsoft, посвященную данной теме — на ней можно найти синтаксис всех поддерживаемых программой формул и подробное описание их использования.
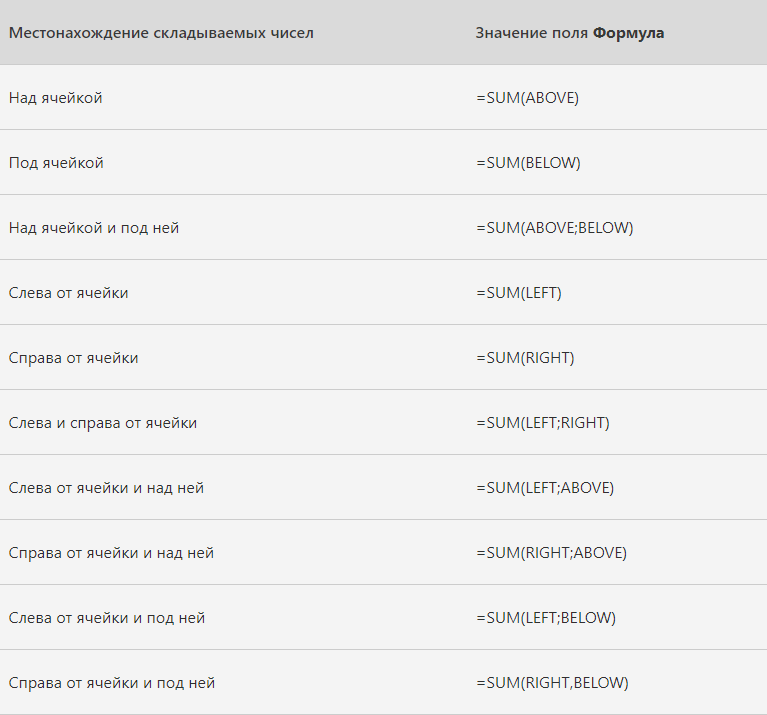
Работа с формулами в таблицах MS Word
Работа с формулами в Microsoft Word 2003
Как было сказано во вступлении, в Ворд 2003 нет собственных средств для добавления, изменения и создания уравнений и формул. Но решение нашей сегодняшней задачи, хоть и весьма ограниченное, доступно и в этой версии программы. Используются для этих целей специальные надстройки — Microsoft Equation и Math Type, об использовании которых мы кратко расскажем далее.
- Откройте вкладку «Вставка» и выберите пункт «Объект».
- В открывшемся диалоговом окне выберите «Microsoft Equation 3.0» и нажмите на кнопку «ОК».
- Сразу же после этого будет открыто небольшое окно под названием «Формула», в котором можно выбирать математические символы и структуры, аналогичные таковым в более новых версиях Microsoft Word, и использовать их для создания формул и уравнений любой сложности.
Для того чтобы выйти из режима работы с формулами, просто кликните левой кнопкой мышки по пустому месту на листе. К сожалению, помимо самостоятельного, причем весьма ограниченного в функциональном плане, создания математических выражений, для решения нашей сегодняшней задачи Ворд 2003 не предоставляет более никаких возможностей.
Заключение
Несмотря на то что Microsoft Word предназначен в первую очередь для работы с текстом, в нем возможно в том числе и выполнение таких отнюдь не рутинных задач, как вставка шаблонных уравнений и формул, их изменение или создание с нуля, и даже рукописный ввод.