|
evgmaz Пользователь Сообщений: 37 |
Есть числовое значение в TextBox (оно может быть как целым (Long), так и с плавающей запятой). |
|
ikki Пользователь Сообщений: 9709 |
функция Format() фрилансер Excel, VBA — контакты в профиле |
|
evgmaz Пользователь Сообщений: 37 |
В нем использовал предопределенный формат Standard, но он дает только 2 цифры после запятой, а мне нужны все! |
|
Юрий М Модератор Сообщений: 60570 Контакты см. в профиле |
Запишите рекордером нужно е форматирование ячейки и посмотрите получившийся код. Используйте аналогичный для ТекстБокса. |
|
ikki Пользователь Сообщений: 9709 |
#5 28.04.2013 03:03:45 был один вопрос
где здесь сказано про количество знаков после запятой? так что надо-то на самом деле? фрилансер Excel, VBA — контакты в профиле |
||
|
evgmaz Пользователь Сообщений: 37 |
#6 28.04.2013 05:06:02
Спасибо за совет! Попробуем! |
||
|
evgmaz Пользователь Сообщений: 37 |
воспользовался советом от Юрия М, но вот такой код в процедуре TextBox1_KeyPress: If KeyAscii >= 48 And KeyAscii <= 57 Then дает в итоге неправильный формат, типа 1 234 5678 (т.е. делит не по 3 разряда, а в конце оставляет 4). Не пойму то ли ошибка в использовании ф-ии Format, то ли не корректность ее использования в процедуре KeyPress (и надо поискать другую процедуру)?! |
|
ikki Пользователь Сообщений: 9709 |
#8 28.04.2013 14:27:38 в окне immediate:
а что там у вас в переменной st — нам, извините, не видно фрилансер Excel, VBA — контакты в профиле |
||
|
evgmaz Пользователь Сообщений: 37 |
#9 28.04.2013 14:41:06
Подозрение у вас правильное, в процедуре KeyPress в переменную st попадает число до нажатия клавиши, а не после, поэтому форматирование неверное. Если сделал процедуру Change, типа то все заработало верно…..Но какой-то осадок остался, кажется все можно достойно решить в рамках одной процедуры KeyPress, просто я увы не до конца понимаю «график» ее работы. |
||
|
ikki Пользователь Сообщений: 9709 |
имхо, правильнее именно разделить эти две задачи — недопущение нажатия неправильной клавиши и форматирование. не стоит пихать всё в один обработчик, создавая себе трудности и запутывая код. фрилансер Excel, VBA — контакты в профиле |
|
evgmaz Пользователь Сообщений: 37 |
Спасибо, всегда приятно, что свои мысли (подходы) одобряются профессионалами |
|
evgmaz Пользователь Сообщений: 37 |
И все таки продолжу: Проблема с плавающей запятой. Ввожу: 12345.6789 Запись «#,##0.##» проверял с NumberFormat применительно к ячейкам, то все работает ок! |
|
Юрий М Модератор Сообщений: 60570 Контакты см. в профиле |
#13 28.04.2013 19:52:13
Неправильно полагаете — должно получиться 12 345,68.
Наверное, Вы забываете, что событие Change возникает после ввода КАЖДОГО символа.
|
||||||
|
evgmaz Пользователь Сообщений: 37 |
#14 29.04.2013 00:17:08
st можно не вводить (это не принципиально!). Согласен. С Exit конечно все работает, то хочется чтобы форматировалось во время набора, а не после выхода из TextBox….. Продолжаю осмысливать идеи….но пока нет результата! Изменено: evgmaz — 10.05.2013 00:07:08 |
||
|
ikki Пользователь Сообщений: 9709 |
предлагаю попробовать так: Изменено: ikki — 29.04.2013 00:46:42 фрилансер Excel, VBA — контакты в профиле |
|
Юрий М Модератор Сообщений: 60570 Контакты см. в профиле |
#16 29.04.2013 00:41:57
В TextBox ВСЕГДА текст, вне зависимости от того, вводите Вы точку или запятую. |
||
|
evgmaz Пользователь Сообщений: 37 |
Совершенно верно, в TextBox всегда текст (это хорошо известно), но вот когда данные из TextBox я копирую в ячейку Листа, то Exel воспринимает текст с точкой как число, а текст с запятой как текст. |
|
Юрий М Модератор Сообщений: 60570 Контакты см. в профиле |
Так и передавайте его в ЯЧЕЙКУ числом: [A1] = CDbl(Me.TextBox1) |
|
Юрий М Модератор Сообщений: 60570 Контакты см. в профиле |
#19 29.04.2013 02:32:05
Не согласен: это VBA воспринимает точку, как разделитель. А вот Excel как раз наоборот. Попробуйте ввести в ячейку 12345.6789 |
||
|
evgmaz Пользователь Сообщений: 37 |
#20 29.04.2013 02:34:51
Попробую ваш вариант, но вот что настораживает: А ДЛЯ ДЕЙСТВИТЕЛЬНОГО ЧИСЛА (когда запятая есть) вариант с процедурой Change и кодом |
||
|
evgmaz Пользователь Сообщений: 37 |
Юрий М, ну, Вы только подтверждаете сказанное….Это 12345.6789 — Exel воспринимает как текст, а если 12345.6789 находится в TextBox, то Cells(1,1) =TextBox.value получится нормальное хорошее число 12345,6789 Короче ни с запятой ни с точкой пока нет результата! Изменено: evgmaz — 10.05.2013 00:08:25 |
|
Юрий М Модератор Сообщений: 60570 Контакты см. в профиле |
#22 29.04.2013 02:52:43
Правильно — «вмешивается» VBA. И вообще не пойму — зачем форматировать именно в TextBox? Что Вам даст там наличие пробела между разрядами? Форматируйте уже при присвоении значения ячейке. Не вижу вообще проблемы: как писал выше — cdbl нормально справляется. А вот менять точку на запятую можно и при вводе. |
||
|
evgmaz Пользователь Сообщений: 37 |
#23 29.04.2013 03:29:27
Ответы: |
||
Содержание
- Свойство TextBox.Format (Access)
- Синтаксис
- Замечания
- Пример
- Поддержка и обратная связь
- VBA Excel. Элемент управления TextBox (текстовое поле)
- Элемент управления TextBox
- Свойства текстового поля
- Привязка текстового поля к ячейке
- Formatting textbox vba excel
- What’s on this page
- Formatting a text box
- Insert a text box
- Position, size and align a text box
- Link a text box to a cell
- Insert a text box programmatically
- Font and font size
- Add or edit text
- Position a text box
- Resize a text box
- Assign a macro to a text box
- Change text box color
- Link text box to cell
- Hide/Show text box
- Delete text box
- Where to copy the code?
- Get the Excel file
- Recommended articles
- ADDTEXTBOX examples
- SHAPES examples
- TEXTFRAME examples
Свойство TextBox.Format (Access)
Используйте свойство Формат , чтобы настроить способ отображения и печати чисел, дат, времени и текста. Для чтения и записи, String.
Синтаксис
expression. Формат
Выражение Переменная, представляющая объект TextBox .
Замечания
Используйте один из стандартных форматов или можно создать пользовательский формат с помощью символов форматирования.
Свойство Format использует разные параметры для разных типов данных. Сведения о параметрах для определенного типа данных см. в одном из следующих разделов:
В Visual Basic введите строковое выражение, соответствующее одному из предопределенных форматов, или введите пользовательский формат.
Свойство Format влияет только на то, как отображаются данные. Это не влияет на способ хранения данных.
Microsoft Access предоставляет стандартные форматы для типов данных «Дата/время», «Число» и «Валюта», «Текст» и «Memo» и «Да/Нет». Стандартные форматы зависят от страны или региона, указанного при двойном щелчке Параметра региона в панель управления Windows. Для доступа отображаются форматы, соответствующие выбранной стране или региону. Например, если на вкладке Общие выбран английский (США), значение 1234,56 в формате валюты отображается как 1 234,56 долл. США, а если на вкладке Общие выбран английский (британский), число отображается как 1 234,56.
Если задать свойство Format поля в представлении конструктора таблицы, Access использует этот формат для отображения данных в таблицах. Он также применяет свойство Format поля к новым элементам управления в формах и отчетах.
Используйте следующие символы в пользовательских форматах для любого типа данных.
| Символ | Смысл |
|---|---|
| (пробел) | Отображать пробелы в виде литеральных символов. |
| «ABC» | Отображение всех элементов в кавычках в виде литеральных символов. |
| ! | Принудительное выравнивание по левому краю вместо выравнивания по правому краю. |
| * | Заполните доступное пространство следующим символом. |
| Отображение следующего символа в виде символа литерала. Вы также можете отобразить литеральные символы, поместив вокруг них кавычки. | |
| [ цвет ] | Отображение отформатированных данных в цвете, указанном между квадратными скобками. Доступные цвета: черный, синий, зеленый, голубой, красный, пурпурный, желтый, белый. |
Вы не можете смешивать настраиваемые символы форматирования для типов данных Number и Currency с символами даты и времени, да/нет или текста и memo форматирования.
Если вы определили маску ввода и задали свойство Format для одних и того же данных, свойство Format имеет приоритет при отображении данных, а маска ввода игнорируется. Например, если создать маску ввода пароля в представлении конструктора таблицы, а также задать свойство Format для того же поля в таблице или в элементе управления в форме, маска ввода пароля игнорируется, а данные отображаются в соответствии со свойством Format .
Пример
В следующих трех примерах свойство Format задается с помощью предопределенного формата.
В следующем примере задается свойство Format с помощью пользовательского формата. В этом формате дата отображается как январь 2018 г.
В следующем примере показана функция Visual Basic, которая форматирует числовые данные с помощью формата Currency и форматирует текстовые данные полностью прописными буквами. Функция вызывается из события OnLostFocus несвязанного элемента управления TaxRefund.
Поддержка и обратная связь
Есть вопросы или отзывы, касающиеся Office VBA или этой статьи? Руководство по другим способам получения поддержки и отправки отзывов см. в статье Поддержка Office VBA и обратная связь.
Источник
VBA Excel. Элемент управления TextBox (текстовое поле)
Элемент управления пользовательской формы TextBox в VBA Excel. Использование текстового поля для ввода и вывода информации, основные свойства, примеры. Привязка текстового поля к ячейке.
Элемент управления TextBox
Текстовое поле незаменимо, когда необходимо заполнить пользовательскую форму новой информацией. Например, это может быть ФИО нового сотрудника и его паспортные данные, сумма выручки за день, новый электронный адрес и многое-многое другое.
Вводить информацию в TextBox на открытой форме можно не только с помощью клавиатуры, но и вставкой текста из буфера обмена. Когда текстовое поле применяется для ввода пароля, есть возможность отобразить все его знаки замещающим символом, например, звездочкой.
Свойства текстового поля
| Свойство | Описание |
|---|---|
| AutoSize* | Автоподбор размера текстового поля. True – размер автоматически подстраивается под длину размещаемой строки. False – размер элемента управления определяется свойствами Width и Height. |
| AutoTab | Включение автоматической табуляции – передачи фокуса следующему элементу управления при достижении максимального числа символов при значениях свойства MaxLenght > 0. True – автоматическая табуляция включена, False – выключена. |
| ControlSource | Ссылка на источник данных для поля TextBox. |
| ControlTipText | Текст всплывающей подсказки при наведении курсора на TextBox. |
| Enabled | Возможность ввода, редактирования, копирования, вставки, удаления текста. True – все перечисленные опции включены, False – выключены (цвет текста в поле становится серым). |
| Font | Шрифт, начертание и размер текста в поле. |
| Height | Высота текстового поля. |
| Left | Расстояние от левого края внутренней границы пользовательской формы до левого края текстового поля. |
| Locked | Запрет ввода, редактирования, удаления текста. True – перечисленные опции запрещены (разрешено выделение и копирование текста), False – перечисленные опции разрешены. |
| MaxLenght | Максимальная длина строки. По умолчанию – 0, что означает – ограничений нет. |
| Multiline | Устанавливает многострочный (True) или однострочный (False) режим ввода-вывода текста. |
| PasswordChar | Задает символ, который будет отображаться при вводе знаков пароля. |
| TabIndex | Определяет позицию элемента управления в очереди на получение фокуса при табуляции, вызываемой свойством AutoTab или нажатием клавиш «Tab», «Enter». Отсчет начинается с 0. |
| Text** | Текстовое содержимое (значение) поля (=Value). |
| TextAlign | Выравнивание текста: 1 (fmTextAlignLeft) – по левому краю, 2 (fmTextAlignCenter) – по центру, 3 (fmTextAlignRight) – по правому краю. |
| Top | Расстояние от верхнего края внутренней границы пользовательской формы до верхнего края текстового поля. |
| Value** | Текстовое содержимое (значение) поля (=Text). |
| Visible | Видимость текстового поля. True – TextBox отображается на пользовательской форме, False – TextBox скрыт. |
| Width | Ширина текстового поля. |
| WordWrap | Актуально при Multiline = True. Переход на новую строку при достижении границы текстового поля. True – переход включен, False – переход выключен. |
* При использовании свойства AutoSize в значении True следует учитывать, что автоматическое изменение размеров поля при вводе текста может нарушить дизайн пользовательской формы.
** Text и Value — это два обозначения одного и того же свойства. Если в окне Properties элемента управления TextBox в поле свойства Text начать ввод строки, в поле Value ввод будет дублироваться. И наоборот, при вводе текста в поле свойства Value, дублирование произойдет в поле Text.
В таблице перечислены только основные, часто используемые свойства текстового поля. Все доступные свойства отображены в окне Properties элемента управления TextBox.
Свойства BackColor, BackStyle, BorderColor, BorderStyle отвечают за внешнее оформление текстового поля и его границ. Попробуйте выбирать доступные значения этих свойств в окне Properties, наблюдая за изменениями внешнего вида элемента управления TextBox на проекте пользовательской формы.
Привязка текстового поля к ячейке
Привязать элемент управления TextBox к ячейке на рабочем листе можно двумя способами.
1. В окне Properties элемента управления TextBox в поле свойства ControlSource необходимо указать адрес ячейки:
2. Присвоить свойству ControlSource адрес ячейки в коде VBA Excel:
Источник
Formatting textbox vba excel
There are two different kinds of text boxes, Form controls and ActiveX Controls. Form controls can only be used on worksheets whereas ActiveX Controls are far more advanced, offers a lot more customization, can be manipulated in more ways using VBA, and can also be used on userforms.
The examples in this post are text boxes from the group Form Controls. A text box is an empty field that can be used to submit data from the user or show data to the user. The image above shows a textbox containing text TextBox.
What’s on this page
There are more VBA articles in the VBA knowledge base. Text boxes are great for dynamic worksheets, dashboards, or interactive charts. They allow you to build amazing workbooks with minimal effort.
Formatting a text box
A textbox can be formatted in many different ways.
- Opacity
- background color
- border width
- border color
- font size
- font color
- font
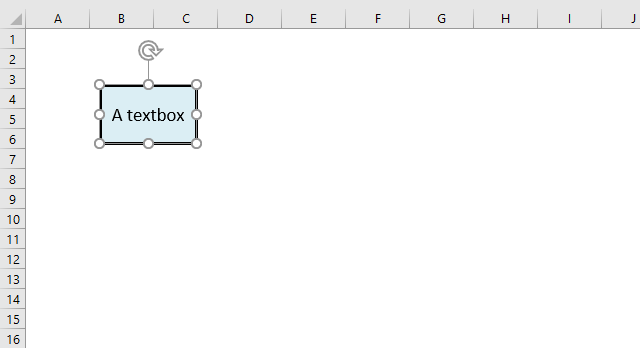
The image above shows a textbox containing text «A textbox», a black border and a blue background. Select the text box you want to format.
To select a textbox press with left mouse button on it with the left mouse button. A selected textbox has white circles around it called sizing handles.
I will explain how to use the sizing handles later in this article. Go to tab «Shape Format» on the ribbon. This allows you to change the background color, border size, border color, etc.
The «Shape Format» tab is only visible on the ribbon if a textbox is selected.
Insert a text box
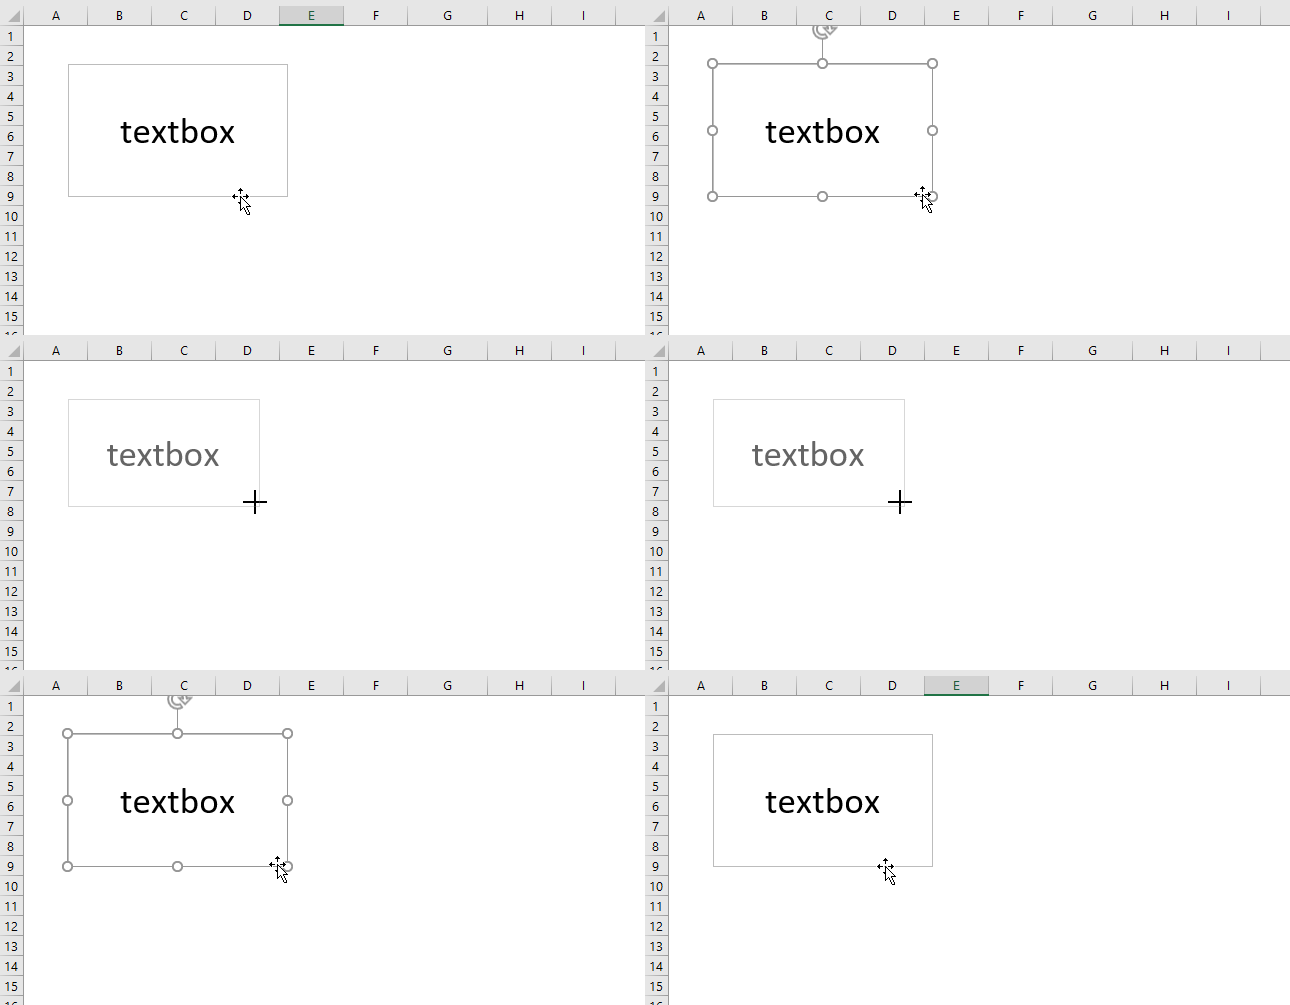
To create a text box simply go to tab «Insert» on the ribbon and press with left mouse button on the «Text box» button.
Now press and hold with the left mouse button where you want to place the text box on the worksheet.
Drag with mouse to size the button. Release left mouse button to create the text box.
Position, size and align a text box
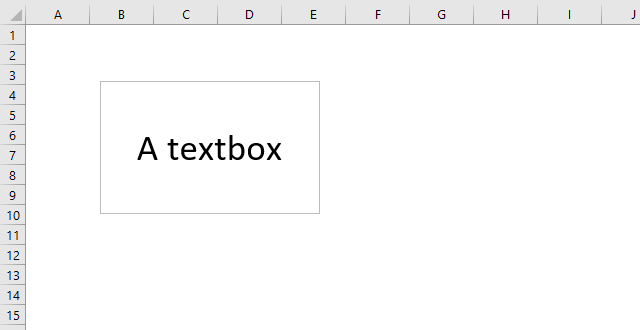
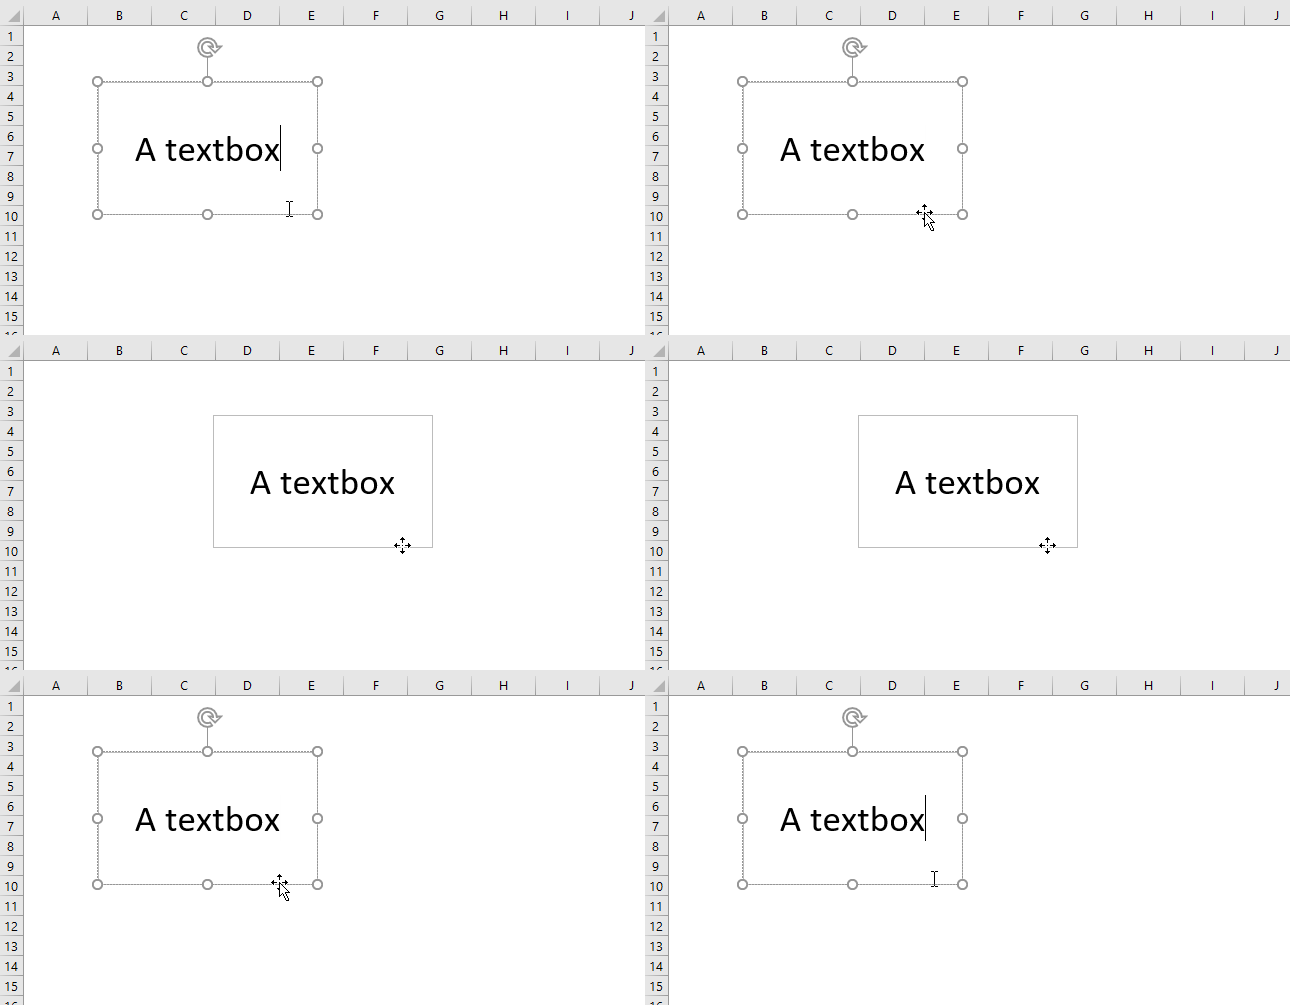
Press with left mouse button on with left mouse button to select the text box. Move the mouse cursor to the edge of the text box, the cursor changes.
Press and hold with left mouse button on the border of the text box. Drag with mouse to its new location. Release the mouse button to release the text box.
To resize a textbox you first select the textbox so the sizing handles appear, they are white circles surrounding the textbox.
Press and hold with left mouse button on a sizing handle, then drag with mouse to resize the textbox.
To align a text box to the cell grid, select the text box in order to see the sizing handles. Press and hold the Alt key, press and hold with left mouse button on a sizing handle.
Drag with mouse to align the sizing handle with the cell grid. Release the left mouse button and the Alt key.
Link a text box to a cell
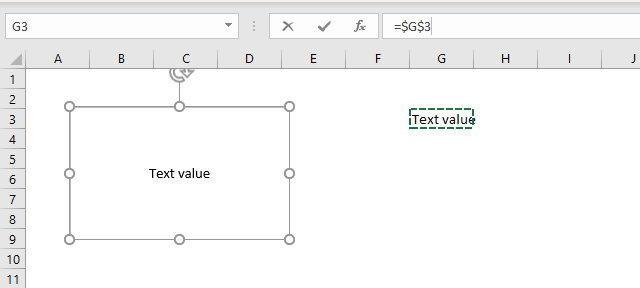
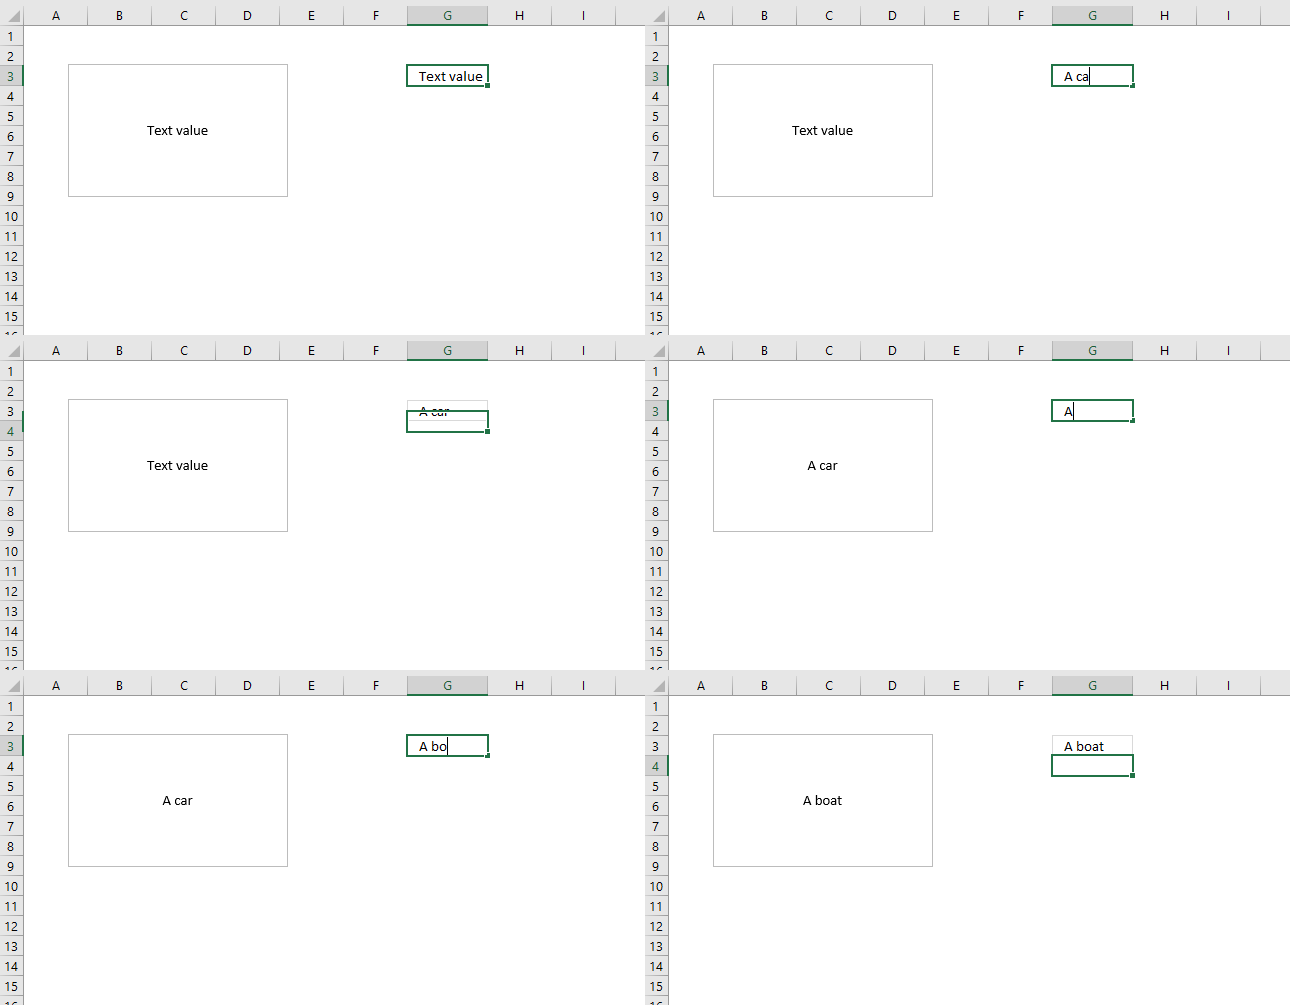
These steps show how to link a text box to a cell value. The image above shows a text box linked to cell G3, cell G3 has value «Text value». The text box shows the exact same value as in cell G3.
- Press with left mouse button on the text box to select it.
- Press with left mouse button on in the formula bar, a prompt appears.
- Type the cell reference to a cell you want to link. See the image above.
This makes the text box dynamic meaning if the linked cell value changes the text box cell value changes accordingly. This technique is useful in an interactive dashboard, chart or worksheet.
Insert a text box programmatically
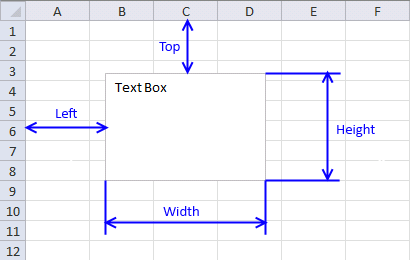
The AddTextBox method allows you to specify the distance from the cell grids top and left border, see picture above.
It also lets you specify the width and height of the textbox you want to create. The macro below inserts a text box on worksheet Sheet1 60 points from the top border and 40 points from the left border. The text box width is 120 points and height is 80 points.
I will explain where to put this macro later in this article.
Font and font size
The following code changes the font to Arial and font size to 20 of text box «Textbox 1» located on worksheet Sheet1.
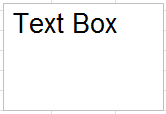
Add or edit text
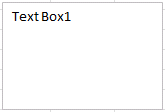
Position a text box
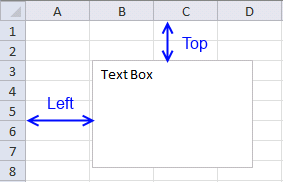
50 points from the left border and 30 points from the top border.
Resize a text box
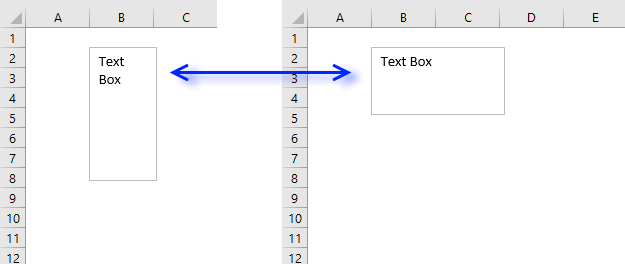
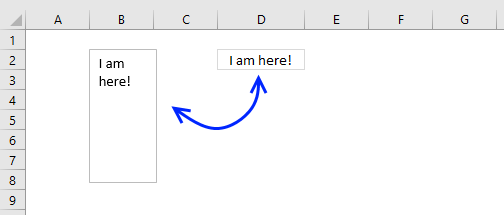
The picture above demonstrates a text box that resizes from height 100 points and width 50 points (left text box) to height 50 points and width 100 points (right text box).
Assign a macro to a text box
The text box allows you to link a macro to a text box, what happens is that when a user press with left mouse button ons on a text box the assigned macro runs.
To assign a macro to a specific text box using VBA see following code.
The macro above assigns Macro1 to «TextBox 1» on worksheet Sheet1.
Change text box color
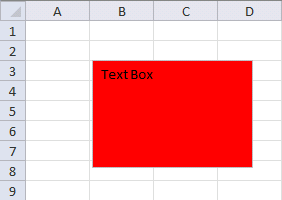
The macro below changes the color of «TextBox 1» using RGB values.
Link text box to cell
This macro links text box «TextBox 1» to cell D2, the text box will now show the value in cell D2 making it dynamic meaning you can easily change what is shown in the text box by changing the value, for example, with a formula in cell D2.
Hide/Show text box
The visible property allows you to hide the text box.
This macro hides «TextBox 1» on worksheet Sheet1.
Delete text box
This macro deletes «TextBox 2» on worksheet Sheet1.
Where to copy the code?
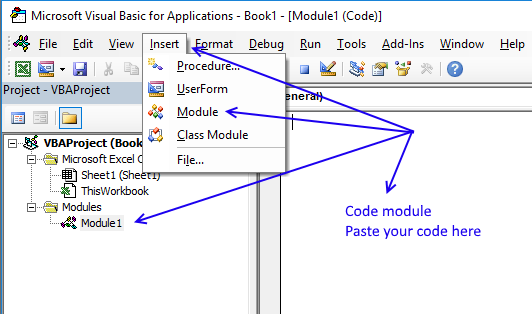
Follow these steps to insert macro to your workbook.
- Copy macro.
- Go to VB Editor (Alt+F11).
- Press with mouse on «Insert» on the top menu.
- Press with left mouse button on «Module» to insert a module to the workbook.
- Paste macro to the code module.
- Exit VB Editor.
- Save the workbook as a macro-enabled workbook (*.xlsm).
If you don’t the macro will be gone the next time you open the workbook.
Get the Excel file
Recommended articles
ADDTEXTBOX examples
SHAPES examples
TEXTFRAME examples
This extensive vba reference list provides detailed information including syntax, arguments, return values, and examples for Visual Basic for Applications.
Источник
-
#1
Hi, all,
I have a userform with 5 input fields, four of which are textboxes (the other is a combobox). Two of the fields ask the user to input a date in the format dd/mm/yy, and one of them asks for a number.
Currently, these values are added to the worksheet as text values, even though the cells are formatted as dates/numbers. (Thus it also flags that the input data doesn’t correspond to the cell formatting).
I would like the dates to retain the day, month, and year data, but to only show dd/mm in the cell.
I would like the number to display as a number (allowing for decimals and zero).
Here’s the code that adds the form data to the worksheet:
VBA Code:
Private Sub Add_Eval_Add_Click()
Dim iCol As Long
Dim ws As Worksheet
Set ws = Worksheets("Gradebook")

'find first empty column in database
iCol = ws.Cells.Find(What:="*", SearchOrder:=xlColumns, _
    SearchDirection:=xlPrevious, LookIn:=xlValues).Column + 1

'check for an evaluation title
If Trim(Me.Eval_Title.Value) = "" Then
  Me.Eval_Title.SetFocus
  MsgBox "Please enter an evaluation title."
  Exit Sub
End If

'check for a category
If Trim(Me.Eval_Cat.Value) = "" Then
  Me.Eval_Cat.SetFocus
  MsgBox "Please choose a category."
  Exit Sub
End If

'check for an assigned date
If Trim(Me.Eval_Date.Value) = "" Then
  Me.Eval_Date.SetFocus
  MsgBox "Please enter the date the evaluation was assigned."
  Exit Sub
End If

'check for a due date
If Trim(Me.Eval_Due_Date.Value) = "" Then
  Me.Eval_Due_Date.SetFocus
  MsgBox "Please enter the due date."
  Exit Sub
End If

'check for a points value
If Trim(Me.Eval_Points.Value) = "" Then
  Me.Eval_Points.SetFocus
  MsgBox "Please enter the available points."
  Exit Sub
End If

'copy the data to the database
'use protect and unprotect lines,
'     with your password
'     if worksheet is protected
With ws
'  .Unprotect Password:="password"
  .Cells(1, iCol).Value = Me.Eval_Title.Value
  .Cells(2, iCol).Value = Me.Eval_Cat.Value
  .Cells(3, iCol).Value = Me.Eval_Date.Value
  .Cells(4, iCol).Value = Me.Eval_Due_Date.Value
  .Cells(5, iCol).Value = Me.Eval_Points.Value
'  .Protect Password:="password"
End With

'clear the data
Me.Eval_Title.Value = ""
Me.Eval_Cat.Value = ""
Me.Eval_Date.Value = ""
Me.Eval_Due_Date.Value = ""
Me.Eval_Points.Value = ""
Me.Eval_Title.SetFocus
End Sub
P.S. If you have any suggestions to optimise the code, I’m all ears!
P.P.S. Do I understand the code correctly that, if I have the worksheet protected, I can uncomment the lines
VBA Code:
.Unprotect Password:="password"and
VBA Code:
.Protect Password:="password"and replace «password» with the worksheet password?
How to total the visible cells?
From the first blank cell below a filtered data set, press Alt+=. Instead of SUM, you will get SUBTOTAL(9,)
-
#2
hi ]tjdickinson,
In VBA textbox values (excluding numbers only) are considered as TEXT and when we populate cells with textbox values, they are transferred as text as well. Same goes for dates, thus formatting cells as Date does not have any effect. have a look at below examples:
VBA Code:
Sheets("sheet1").Range("a1") = TextBox1.Value                           'textbox value will be transferred as text
Sheets("sheet1").Range("a1").NumberFormat = "mmm/yyyy"                  'there will be no effect on cell value, since it is text

Sheets("sheet1").Range("a3") = Format(TextBox1.Value, "dd/mm/yyyy")     'textbox value will be transferred as text but formatted as date, the value will remain TEXT

Sheets("sheet1").Range("a2") = CDate(TextBox1.Value)                    'textbox value will be transferred as date
Sheets("sheet1").Range("a2").NumberFormat = "mmm/yyyy"                  'cell format will be changed to mmm and year, the value will remain DATE
Textbox1.value will place your value as text and as a result number format will not have any effect on such value.
format(textbox1.value, «mm/yyyy») will place your value as text but formatted in shape of month and year, but excel will read the cell value as text.
CDate(textbox1.value) will place your value as date and numberformat will change the date format, but the value will remain date.
hth…..
-
#3
hi ]tjdickinson,
In VBA textbox values (excluding numbers only) are considered as TEXT and when we populate cells with textbox values, they are transferred as text as well. Same goes for dates, thus formatting cells as Date does not have any effect. have a look at below examples:
VBA Code:
Sheets("sheet1").Range("a1") = TextBox1.Value                           'textbox value will be transferred as text
Sheets("sheet1").Range("a1").NumberFormat = "mmm/yyyy"                  'there will be no effect on cell value, since it is text

Sheets("sheet1").Range("a3") = Format(TextBox1.Value, "dd/mm/yyyy")     'textbox value will be transferred as text but formatted as date, the value will remain TEXT

Sheets("sheet1").Range("a2") = CDate(TextBox1.Value)                    'textbox value will be transferred as date
Sheets("sheet1").Range("a2").NumberFormat = "mmm/yyyy"                  'cell format will be changed to mmm and year, the value will remain DATE
Textbox1.value will place your value as text and as a result number format will not have any effect on such value.
format(textbox1.value, «mm/yyyy») will place your value as text but formatted in shape of month and year, but excel will read the cell value as text.
CDate(textbox1.value) will place your value as date and numberformat will change the date format, but the value will remain date.View attachment 41652
hth…..
Hi, Fahad, thanks for your reply!
Okay, so I changed the code to include the CDate() function:
VBA Code:
  .Cells(3, iCol).Value = CDate(Me.Eval_Date.Value)
  .Cells(4, iCol).Value = CDate(Me.Eval_Due_Date.Value)
When I run the form and fill it in, I put (for example) 26/06 in the first date box and 27/06 in the second date box.
After I click ‘Add’, the cells receive the values
26/06/2021
27/06/2021
even though I didn’t put the year in the form. I would like the year not to display in order to minimise column width.
The Cell Number Format now says ‘Text’ instead of ‘Date’ (it was set to ‘Date’ with custom formatting dd/mm before I added the data). However, the flag in the corner of the cell has gone away, which had been indicating that the cell contents didn’t fit the intended format. So I’m not quite sure what’s going on there.
I don’t quite understand how to use the NumberFormat parameter. I can’t call a specific cell, because each instance of the userform adds a new column of data (so the reference is constantly changing). Is there something similar to CDate() for numbers?
-
#4
hi ]tjdickinson,
In VBA textbox values (excluding numbers only) are considered as TEXT and when we populate cells with textbox values, they are transferred as text as well. Same goes for dates, thus formatting cells as Date does not have any effect. have a look at below examples:
VBA Code:
Sheets("sheet1").Range("a1") = TextBox1.Value                           'textbox value will be transferred as text
Sheets("sheet1").Range("a1").NumberFormat = "mmm/yyyy"                  'there will be no effect on cell value, since it is text

Sheets("sheet1").Range("a3") = Format(TextBox1.Value, "dd/mm/yyyy")     'textbox value will be transferred as text but formatted as date, the value will remain TEXT

Sheets("sheet1").Range("a2") = CDate(TextBox1.Value)                    'textbox value will be transferred as date
Sheets("sheet1").Range("a2").NumberFormat = "mmm/yyyy"                  'cell format will be changed to mmm and year, the value will remain DATE
Textbox1.value will place your value as text and as a result number format will not have any effect on such value.
format(textbox1.value, «mm/yyyy») will place your value as text but formatted in shape of month and year, but excel will read the cell value as text.
CDate(textbox1.value) will place your value as date and numberformat will change the date format, but the value will remain date.View attachment 41652
hth…..
Update:
Guided and informed by your suggestions, I found a near solution, but there’s still one glitch:
I added an Exit event to each textbox setting the format of the textbox contents
VBA Code:
Private Sub Eval_Date_Exit(ByVal Cancel As MSForms.ReturnBoolean)

Eval_Date.Text = Format$(Eval_Date.Text, "dd/mm")

End Sub
and
VBA Code:
Private Sub Eval_Points_Exit(ByVal Cancel As MSForms.ReturnBoolean)

Eval_Points.Text = Format$(Eval_Points.Text, "##0.0")

End Sub
Then, in the Click event adding the data to the worksheet, I added the .NumberFormat function after each value is added to the worksheet:
VBA Code:
With ws
'  .Unprotect Password:="password"
  .Cells(1, iCol).Value = Me.Eval_Title.Value
  .Cells(2, iCol).Value = Me.Eval_Cat.Value
  .Cells(3, iCol).Value = Me.Eval_Date.Value
  .Cells(3, iCol).NumberFormat = "dd/mm"
  .Cells(4, iCol).Value = Me.Eval_Due_Date.Value
  .Cells(4, iCol).NumberFormat = "dd/mm"
  .Cells(5, iCol).Value = Me.Eval_Points.Value
  .Cells(5, iCol).NumberFormat = "##0.0"
'  .Protect Password:="password"
End With
Now the dates show up correctly in the sheet.
The number (Eval_Points) displays correctly, and the number format in the worksheet shows ‘Custom’ (rather than ‘Text’), which is good, but I still get a flag that says ‘Number stored as text’.
-
#5
this will disable the error, but it works across the whole workbook
VBA Code:
Application.ErrorCheckingOptions.NumberAsText = False
-
#6
this will disable the error, but it works across the whole workbook
VBA Code:
Application.ErrorCheckingOptions.NumberAsText = False
Thanks, diddi! My only concern is whether calling these values in other functions will result in errors, if the values are stored here as text.
Is it possible to apply your code only to the current worksheet (and not the whole workbook)?
If I use this code, where do I put it? In the ‘ThisWorkbook’ object? or in the current sheet object?
-
#7
use the Val( ) function in VBA code
errorcheckingoptions is an application level value, so it cannot be applied to individual sheets or ranges. sorry
you would be best to place it in WorkBook_Open sub. dont forget to set to true again before exiting the workbook
-
#8
Or try the following
VBA Code:
.Cells(5, iCol).Value = Me.Eval_Points.Value
  .Cells(5, iCol).NumberFormat = "General"
hth….


