
- Free Courses
- Microsoft Word
- How to Insert Icons in Word

How to Insert and Format Icons in Word
![]()
If you need to add a little emphasis to parts of a document, you can add icons from the Office icon library.
Insert an Icon
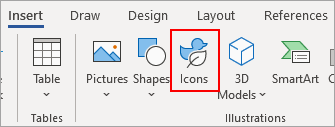
- Click where you want to insert an icon.
- Click the Insert tab.
- Expand the Illustrations group, if necessary.
- Click the Icons button.

- Click an icon category (optional).
- Select an icon (or icons).
- Click Insert.
The Icons library opens, displaying a variety of basic icon shapes you can use.
The icon is inserted.
Format an Icon
Icons can also be formatted just like other shapes.
- With an icon selected, click the Format tab.
- Use the commands in the Graphic Styles group to change the icon’s appearance.
You can use the Styles gallery to select a style, or use the options in the Graphic Styles group to change the color, outline, or effect.

FREE Quick Reference
Click to Download
Free to distribute with our compliments; we hope you will consider our paid training.
Insert icons in Microsoft Word
You can insert icons into Microsoft Office documents, workbooks, email messages, and presentations. You can rotate, color, and resize them with no loss of image quality. These icons are free to use; there’s no royalty or copyright.

Choose from a library of icons that you can resize, move, and format—just like other ready-made shapes in Word.
-
Select Insert > Icons.

-
Select as many icons as you want, and then choose Insert at the lower right.
-
Select the icon then you can rotate, color, and resize them by using the options on the Graphic Format tab.
Need more help?
Want more options?
Explore subscription benefits, browse training courses, learn how to secure your device, and more.
Communities help you ask and answer questions, give feedback, and hear from experts with rich knowledge.
![]()
Не хватает иконки? Мы ее нарисуем
Опишите, какая иконка вам нужна, и мы нарисуем её бесплатно в любом из наших стилей.
Скачать 238117 бесплатных иконок «Форматированиетекста» в стиле All.
Скачивайте бесплатные иконки на тему Форматированиетекста в iOS, Material, Windows и других стилях для сайтов, презентаций и мобильных приложений. Все наши иконки созданы pixel perfect, чтобы идеально вписываться в любой дизайн. Вы можете скачать их в PNG или векторном формате. Перед скачиванием иконки можно редактировать.
Не забудьте взглянуть на Новые иконки и познакомиться с самой Популярной категорией.
Q
Sometimes I see special symbols are showing up at the end of each paragraph
in my Microsoft Word document. What are they?
A
![]()
If you see special symbols showing up at the end of each paragraph,
they are called formatting symbols (also called formatting marks).
Formatting symbols are hidden by default.
You can display them by pressing Ctrl-* or clicking the formatting
symbol icon in the «Paragraph» group of the Home tab.
Displaying formatting symbols helps you to understand how each part
is being formatted.
Here is a list of those formatting symbols or marks and their meanings:
 ➝   U+279D, TRIANGLE-HEADED RIGHTWARDS ARROW, representing a tab
 ·   U+00B7, MIDDLE DOT, representing a space character
 ¬   U+00AC, NOT SIGN, representing an optional hyphen
 ■   U+25A0, BLACK SQUARE, representing the start of a styled paragraph
 ¶   U+00B6, PILCROW SIGN, representing the end of a styled paragraph
 ❡   U+2761, CURVED STEM PARAGRAPH SIGN ORNAMENT,
       representing the end of a normal paragraph
 ↵   U+21B5, DOWNWARDS ARROW WITH CORNER LEFTWARDS,
       representing a line break, also called soft return
   Circle on X, representing the end of a cell or row of a table
 ⚓   U+2693, ANCHOR', representing the location of an object
 ạ    U+0323, Combining Dot Below, representing hidden text
   Column break mark
   Page break mark
   Section break mark
 Circle on X, representing the end of a cell or row of a table
⚓ U+2693, ANCHOR', representing the location of an object
ạ U+0323, Combining Dot Below, representing hidden text
Circle on X, representing the end of a cell or row of a table
⚓ U+2693, ANCHOR', representing the location of an object
ạ U+0323, Combining Dot Below, representing hidden text
 Column break mark
 Page break mark
 Section break mark

⇒ List of Control Codes in Microsoft Word
⇐ Open Microsoft Word Template File as Template
⇑ General Questions on Microsoft Word
⇑⇑ MS Word — Frequently Asked Questions
Once you have written your basic document you can spruce it up with a just few clicks.
The process for formatting text is:
1. Select the text you want to format.
2. Apply the formatting.
Most of the tools that you need to make your document look professional are on the Home ribbon. They are collected together into the Font group.
Here’s a quick breakdown and each of these will be covered in this post.

2. Changing the font
The font is the name given to the text style — what the text looks like. Many newspapers and magazines use a font like Times New Roman for a formal look but there are other simpler fonts available like Calibri.
To change the font:
1. Select the text you want to apply the font to.
2. Single-left-click the Home tab.
3. Single-left-click the Font drop-down list then single-left-click the font you want to use.

A sample of some popular fonts are provided below.
![]()
![]()
![]()
![]()
3. Changing the font size
To change the size of your selected text:
1. Single-left-click the Home tab
2. Click the Font Size drop-down list on the Font group.
3. Choose a font size.

You can also click one of the two ‘A‘ icons, situated next to the font size drop down list.
![]()
The first A increases the text size by one standard size.
The second A decreases the text size by one standard size.
4. Adding bold, italic or underline for emphasis
To apply emphasis to a word or phrase, bold and italic are the quickest techniques to use. Here is a comparison:
- Regular text
- Bold text
- Italic text
- Underlined text
- Bold italic underlined text
There are 3 standard icons that you will find in every Microsoft Office program.
![]()
- To bold a selection of text, click the B icon, or press Ctrl B on the keyboard..
- To italicise a selection of text, click the I icon, or press Ctrl I on the keyboard..
- To underline a selection of text, click the U icon, or press Ctrl U on the keyboard..
To change the underline style:
1. Click the drop-down arrow next to the U icon.
2. Select the underline type that you want – single, double, thick, dotted, dashed etc.

To change the underline colour:
3. Click Underline Color (at the bottom of the menu).
4. Choose a colour from the palette.
5. Changing the font colour
To change the colour of your text
1. First, select the text that you want to change the colour for.
2. Single-left-click the Home tab.
3. Single-left-click the Font drop-down list in the Font group.
4. Single-left-click a colour from the palette.

Paragraph formatting tools in Microsoft Word
6. Striking through the text
Strikethrough puts a line through your text like this.
This is an example of text that has been struck through.
You can use this when you need to keep the text for historical reasons but clearly mark it as out of date, obsolete, no longer stocked of one of many other reasons.
To apply strikethrough to your text:
1. Select the text.
2. Single-left-click the Home tab.
3. Single-left-click the Strikethrough icon in the Font group.
![]()
7. Superscripting or subscripting text
Superscripted text is little text that sits above the baseline, e.g. 360o, 42 or 16th.
Subscripted text is little text that sits below the baseline, e.g. H2O, CO2, H2SO4.
![]()
To apply superscript:
1. Select the text.
2. Single-left-click the Home tab.
3. Single-left-click the Superscript icon in the Font group.
4. The keyboard short cut is Ctrl Shift +.
To apply subscript:
1. Select the text.
2. Single-left-click the Home tab.
3. Single-left-click the Subscript icon in the Font group.
4. The keyboard short cut is Ctrl Shift =.
8. Changing the case
UPPER CASE WORDS stand out on a page. Some people describe it as SHOUTING. To change the case of your text:
1. Single-left-click the Home tab.
2. Click the Aa icon in the Font group.
3. Choose from Sentence case, lower case, UPPER CASE, Capitalise Each Word and tOGGLE cASE

Pressing Shift F3 cycles through the UPPERCASE, lowercase and Capitalise Each Word options. The other two options are not included in the cycle.
Here are what the different case options mean:
Sentence Case
Capitalise the first letter of the first word in the sentence.
lowercase
Make all the selected text lower case (i.e. un-capitalise everything).
UPPERCASE
CAPITALISE all selected text.
Capitalise Each Word
Capitalise the first letter of EVERY word.
tOGGLE cASE
Convert UPPER CASE letters to lower case and convert lower case letters to UPPER CASE.
The Toggle Case feature seems like an odd one and under normal circumstances you would never use it.
However, back in the day (gee, I sound old) guys like me who look at their keyboard as they type and only look up once every 30 minutes used to curse loudly when we found our CAPS LOCK had been on the whole time!
You may still stumble across an old legacy document where the case is all screwed up. If you do, you canquickly fix it with Toggle Case.
Fast forward to today.
Microsoft Word detects when the CAPS LOCK is on. After typing something in reverse case, as soon as you press space or ENTER, Word corrects the incorrect case and turns the CAPS LOCK off. Whatever you type next is in correct case.
10. Highlighting text
Just as you would take a highlighter pen to highlight certain portions of text in a book or report, you can add highlight to any section of text in Microsoft Word. Highlighting attracts attention.
Perhaps you have prepared a document for somebody and need to point out the important sections.
Perhaps you are reviewing somebody else’s work (or even your own) and want to mark sections to revisit later.
There are 2 ways to use the highlighter tool.
Method 1 (for a one-off highlight):
1. Select the text you want to highlight.
2. Single-left-click the Home tab.
3. Click the ab Highlight icon in the Font group (to use default yellow).
4. If you want to choose your own highlight colour, click the drop-down arrow on the icon, then choose one of the highlight colours in the palette. Stick with the lighter colours.

Method 2 (for multiple highlights)
1. Single-left-click the Home tab.
2. Double-left-click the ab Highlight icon in the Font group.
3. The regular mouse pointer will change to a highlighter icon.
4. Select the first portion of text that you wish to highlight. The highlight is added but the highlighter tool is still active.
5. Select as many other portions of text as you want.
6. When you are done, press Escape or single-left-click the the ab Highlight icon again

Reset highlighted text
1. Select the highlighted text.
2. Single-left-click the Home tab.
3. Click the drop-down arrow on the ab Highlight icon in the Font group and choose No Color.
11. Creating a pretty title or heading
WordArt is a feature that has been around for many years. The conventional way to create WordArt is to choose the tools from the Insert ribbon, choose a style, type some text and then play with the settings.
In Word, there is a second tool that lets you select some existing text and apply WordArt Styling to it.
Here’s the process:
- Select your text (normally a title or heading).
- Click the blue A icon (called Text Effects and Typography).
- Select one of the thumbnail images from the gallery to apply the effect to your text.
- You can switch the style at any time.
 tool in Word")
- Using the options underneath, you can also change the outline (colour, thickness and style), shadows, reflection and glow settings. You don’t have to stick with the default settings in the main gallery.
 settings in Word")
Here are some samples of text effects and typography:
 in Word")
12. Key Takeaways
- The most commonly used text formatting tools in Word are found on the Home ribbon in the Font group.
- To access even more text formatting tools in Word, click the launcher icon in the bottom-right corner of the Font group (on the Home ribbon). This displays the Font dialog which not only displays the tools found on the ribbon but also additional tools.
- Common text formatting includes the font, font size, font colour, empasis tools like bold, italic and underline, strikethrough, superscript, subscript, WordArt and the highlighter tool.
13. what next?
I hope you found plenty of value in this post. I’d love to hear your biggest takeaway in the comments below together with any questions you may have.
Have a fantastic day.


About the author
Jason Morrell
Jason loves to simplify the hard stuff, cut the fluff and share what actually works. Things that make a difference. Things that slash hours from your daily work tasks. He runs a software training business in Queensland, Australia, lives on the Gold Coast with his wife and 4 kids and often talks about himself in the third person!
SHARE