
In this Article
- Format Dates in VBA
- NumberFormat – Dates
- Short Date
- Long Date
- Custom dates
- VBA Format Function
- VBA Custom Format Builder
- VBA Format Date in Access
This tutorial will demonstrate how to format dates using VBA.
Format Dates in VBA
There are two methods to format dates using VBA.
- The NumberFormat property of Cells / Ranges – To format dates stored in cells
- The VBA Format function – To format dates in VBA (ex. variables)
NumberFormat – Dates
The default number format of a cell in Excel is General. You can display values as numbers, text, dates, percentages or currencies by changing the number format. The NumberFormat property can be used in VBA to set the number format of dates in a cell or range.
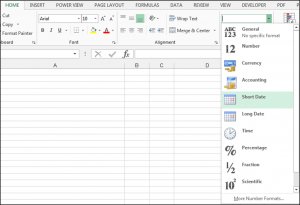
Note: In order to see the different standard date formats available in Excel go to Home>Number and you’ll see options such as Short Date, Long Date and Time.

Short Date
The Short date number formatting option displays the date in a short, numerical format.
The following code will set the .NumberFormat property of cell A1 to Short date:
Range("A1").NumberFormat = "mm/dd/yyyy"Long Date
Long date number formatting displays the date in a longer, written format. The following code will set the .NumberFormat property of cell A1 to Long date:
Range("A1").NumberFormat = "dddd, mmmm dd, yyyy"Custom dates
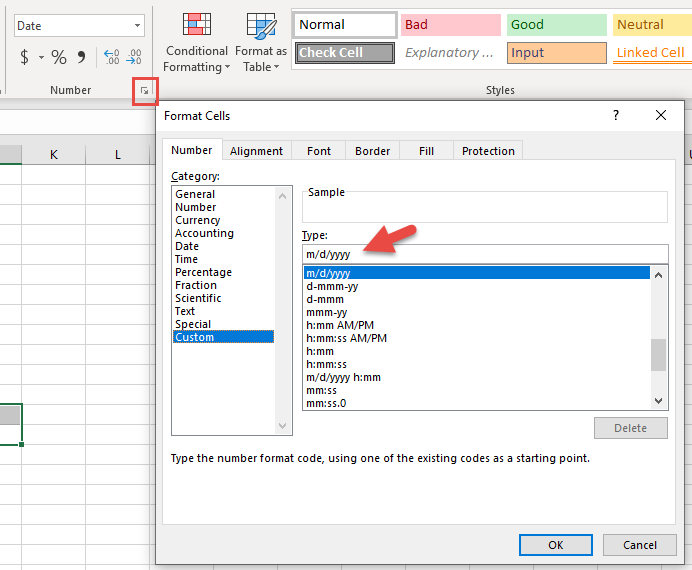
In order to see the custom number format codes that you can use in VBA to format dates, go to Home>Number and click the Dialog Box Launcher. Select the Number tab and choose Custom.
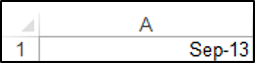
You can either select the custom built-in formats for your date or create your own user-defined date formats. The following code will set the .NumberFormat property of cell A1 to a built-in custom date format:
Range("A1").NumberFormat = "mmm-yy"The result is:
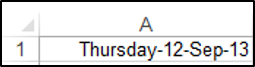
The following code will set the .NumberFormat property of cell A1, to a user-defined custom date format:
Range("A1").NumberFormat = "dddd-dd-mmm-yy"The result is:
By reviewing Excel’s pre-built examples you can learn how NumberFormats should be entered. For more information, read Microsoft’s documentation on number formats for dates.
VBA Format Function
As mentioned above, the NumberFormat method is appropriate for setting the Numberformat of dates stored in Excel cells. In VBA, you can use the Format Function to convert dates to strings with certain date formatting.
You would use the following syntax to format dates:
Format(String_Representation, NumberFormatCode) where:
String_Representation – the text string representing the date.
NumberFormatCode – the number format code specifying the way the date should be displayed.
The following code shows how to format a text string representation of a date as long date format:

MsgBox Format("1/1/2010", "dddd, mmmm dd, yyyy")The result is:

Notice that the Format Function uses the same date formatting syntax as the NumberFormat above.
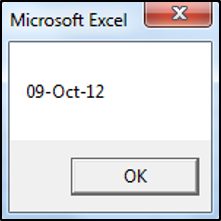
The following code shows how to format a text string representation of a date as medium date format:
MsgBox Format("09 October 2012", "Medium Date")The result is:
The following code shows how to format a text string representation of a date as a user-defined format:
MsgBox Format("09 October 2012", "dddd: dd/mm/yy")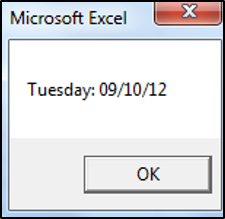
VBA Coding Made Easy
Stop searching for VBA code online. Learn more about AutoMacro — A VBA Code Builder that allows beginners to code procedures from scratch with minimal coding knowledge and with many time-saving features for all users!

Learn More
VBA Custom Format Builder
Our VBA Add-in: AutoMacro contains a Custom Format Builder for the VBA Editor. This allows you to set custom formats and immediately preview the output for your desired value:
The VBA Add-in contains numerous other “Code Generators”, an extensive code library, and an assortment of other coding tools. It’s the ultimate add-in for anyone serious about VBA programming!
VBA Format Date in Access
The VBA Format Date function work exactly the same in Access VBA as in Excel VBA.
Function GetDateFilter() As String
'create a string to get information from 2 date fields on a form in Access
   Dim strDateField As String
   If IsNull(Me.txtSDate) = False Then
      If IsNull(Me.txtEDate) = True Then Me.txtEDate = Me.txtSDate
      If strDateField2 = "" Then
        GetDateFilter = strDateField & " Between #" & Format(Me.txtSDate, "mm/dd/yyyy") & "# And # " & Format(Me.txtEDate, "mm/dd/yyyy") & "#"
      End If
   End If
End Function Excel provides you several options for formatting dates. In addition to the several built-in date formats that exist, you can create custom date formats.
Even though the process of manually applying a date format isn’t very complicated, there are some circumstances in which you may want to create macros that format dates. This may the case if, for example:
- You use a particular date format constantly and want to be able to apply such a format without having to do everything manually; or
- You frequently format cells or cell ranges in a particular way, and the formatting rules you apply include date formats.
Regardless of your situation, if you’re interested in understanding how you can use Visual Basic for Applications for purposes of formatting dates, you’ve found the right place.
When working in Visual Basic for Applications, there are a few different properties and functions you can use for purposes of formatting a date. The following 3 are commonly used:
- The Format VBA function.
- The Range.NumberFormatLocal property.
- The Range.NumberFormat property.
This particular Excel tutorial focuses on the last item of the list above (the Range.NumberFormat property). I may cover the Format function and Range.NumberFormatLocal property in future blog posts. If you want to be informed whenever I publish new content in Power Spreadsheets, please make sure to register for our Newsletter by entering your email address below.
In addition to explaining the Range.NumberFormat property, I explain the different date format codes you can use and present 25 date formatting examples using VBA.
You can use the following detailed table of contents to navigate to the section of this tutorial that interests you the most.
Before I introduce the NumberFormat property in more detail, let’s start by taking a look at the sample file that accompanies this Excel tutorial:
Format Dates Using Excel VBA: Example
For purpose of this Excel tutorial, I use an Excel workbook that contains the full match schedule of the 2014 Brazil World Cup.

This Excel VBA Date Format Tutorial is accompanied by an Excel workbook containing the data and some versions of the macros I explain below. You can get immediate free access to this example workbook by subscribing to the Power Spreadsheets Newsletter.
Notice how the first column of the table contains dates:

These are the dates that I format throughout this tutorial.
However, since the focus of this macro is in formatting dates using VBA, we need a Sub procedure. The following image shows the basic structure of the macro (called “Format_Dates”) that I use to format these dates.

The macro has a single statement:
Selection.NumberFormat = “m/d/yy;@”
Therefore, before I start showing examples of how you can format dates using VBA, let’s analyze this statement. For these purposes, you simply need to understand…
The Range.NumberFormat Property And How To Format An Excel Date Using VBA
As mentioned at the beginning of this Excel tutorial, you can generally use the Range.NumberFormat property to format dates.
The Range.NumberFormat property sets a Variant value. This value represents the number format code of the relevant Range object. For these purposes, the Range object is generally a single cell or a range of cells.
Strictly speaking, in addition to setting the NumberFormat property value, you can also return the property’s current setting. As explained by Excel authority John Walkenbach in Excel VBA Programming for Dummies, the NumberFormat property is a read-write property.
However, if you’re reading this Excel tutorial, you likely want to modify the property, not read it. Therefore, this guide focuses on how to change the NumberFormat property, not how to read it.
You can, however, easily examine the number format of a cell or range of cells. I explain how you can read a property value in this tutorial. In such cases, if (i) you select a range of cells and (ii) all the cells don’t share the same format, the Range.NumberFormat property returns Null.
NumberFormat is just one of the many (almost 100 by my count) properties of the Range object. As explained in Excel Macros for Dummies, once you’ve selected a range of cells (as the sample Format_Dates macro does), “you can use any of the Range properties to manipulate the cells”.
This Excel tutorial is quite specific. The only property of the Range object that I cover in this blog post is NumberFormat. In fact, I only explain (in high detail) one of the applications of the NumberFormat property: to format dates with VBA.
I may cover other properties of the Range object, or other applications of the NumberFormat property, in future tutorials. If you want to receive an email whenever I publish new material in Power Spreadsheets, please make sure to subscribe to our Newsletter by entering your email address below:
Syntax Of The Range.NumberFormat Property
The syntax of the Range.NumberFormat property is relatively simple:
expression.NumberFormat
In this case, “expression” stands for the Range object, or a variable that represents this object.
The sample Format_Dates macro shown above uses the Application.Selection property, which returns whichever object is selected. Generally, you can use the sample Format_Dates macro framework whenever the selection is a range of cells. Therefore, the sample macro uses the following version of the syntax above:
Selection.NumberFormat
You can use another expression instead of Selection. What matters, as I mention above, is that the expression stands for a Range object.
Whenever you want to modify the value of a property, you must do the following:
- #1: Determine whether the property you’re working with uses arguments and, if that’s the case, determine what is the argument you want to use. These arguments are the ones that specify the value that the property takes.
- #2: Use an equal sign to separate the property name from the property value.
As shown in the examples throughout this tutorial, if you’re implementing the NumberFormat property using the framework structure of the sample Format_Dates macro, argument values are generally surrounded by double quotes (” “).
Therefore, if you’re setting the NumberFormat property value, you can use the following syntax:
expression.NumberFormat = “argument_value”
In other words, in order to change the current setting of the NumberFormat property, you use a statement including the following 3 items:
- Item #1: A reference to the NumberFormat property.
- Item #2: The equal sign (=).
- Item #3: The new value of the NumberFormat property, surrounded by double quotes (” “).
As I explain above, the Range.NumberFormat property determines the number format code of a Range object. Therefore, in order to be able to format a date using VBA, you must understand…
Date Format Codes: The Arguments Of The Range.NumberFormat Property
As explained at the Microsoft Dev Center:
The format code is the same string as the Format Codes option in the Format Cells dialog box.
This is quite a mouthful, so let’s break down the statement and process into different parts to understand how you can know which format code you want to apply. More precisely, you can find the string that represents a particular format code in the Format Cells dialog box in the following 5 easy steps.
This process is, mostly, useful if you don’t know the format code you want to apply. Generally, as you become more familiar with number format codes, you’ll be able to create macros that format dates without having to go through this every time. For these purposes, refer to the introduction to date format codes below.
Step #1: Go To The Number Tab Of The Format Cells Dialog Box
You can get to the Format Cells dialog box using any of the following methods:
- Method #1: Click on the dialog box launcher at the bottom-right corner of the Number command group of the Home Ribbon tab.

- Method #2: Go to the Home tab of the Ribbon, expand the Number Format drop-down list and select More Number Formats.

- Method #3: Use the “Ctrl + 1” keyboard shortcut.


Regardless of which of the methods above you use, Excel displays the Format Cells dialog box.

If you use method #1 or #2 above, Excel displays the Number tab, as in the image above. This is the one you need in order to find the date format codes.
However, if you use method #3 (keyboard shortcut), Excel may show you a tab other than the Number tab (as shown above). In such a case, simply go to the Number tab.

Step #2: Select The Date Category
Since you’re interested in date format codes, choose “Date” in the Category list box on the left side of the Format Cells dialog box.

Step #3: Choose The Date Format Type Whose Format Code You Want
Once you’ve selected the Date category, Excel displays the built-in date format types inside the Type box on the right side of the Format Cells dialog box. This allows you to select from several different date format types.
For example, in the image above, I select the option “14-Mar-12”:

Step #4: Select The Custom Category
Once you’ve selected the date format type you’re interested in, click on “Custom” within the Category list box on the right side of the Format Cells dialog.

Step #5: Get The Date Format Code
Once you’ve completed the 4 steps above, Excel displays the date format code that corresponds to the date format type you selected in step #3 above. This format code is shown in the Type box that appears on the upper-right section of the Format Cells dialog box.

The date format code shown in the example above, is “[$-en-US]d-mmm-yy;@”. This format code corresponds to the option “14-Mar-12” with the English (United States) locale that I selected in step #3.
Once you have this date format code, you can go back to you VBA code and use this as the argument for the Range.NumberFormat property.
To see how this works in practice, let’s go back to the World Cup calendar that I introduce above. If you want to apply the format shown above, the VBA code looks as follows:

As I show below, you can achieve the same date formatting effect without the first part of the date format code which makes reference to the locale settings. That means you can delete “[$-en-US]”. However, for the moment, I leave it in.
For purposes of this example, I modify the format of the dates that appear in the sample table. Let’s assume that, before applying this new version of the Format_Dates macro, all of the dates have the long date format, as shown in the following screenshot:

Before executing the Format_Dates macro, I select the cell that I want to format. In this case, I choose the date in the first row of the table. This corresponds to June 12 of 2014, which is the date of the match between Brazil and Croatia.

Once I execute the version above of the Format_Dates macro, the date format changes to the following:

The 5-step method to find date format codes described above can be useful in some situations.
However, Excel date format codes follow some general rules. If you know them, you don’t have to go through the whole process described above every single time you want to create a macro that formats dates.
Let’s take a look at these general rules and some additional examples:
Date Format Codes In Excel And VBA: General Guidelines
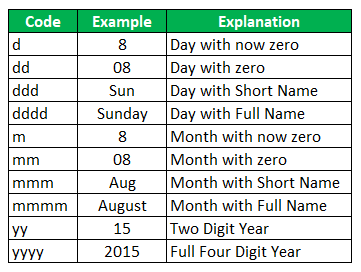
The date format codes that you can use to format a date using VBA appear in the table below. As shown in the following sections, you can use these codes to create different types of date formats to use in your VBA code.
| Format Code Applies To | Format Code | Description | How It Looks In Practice |
|---|---|---|---|
| Month | m | Month is displayed as number.
It doesn’t include a leading 0. |
1, 2, 3, 4, 5, 6, 7, 8, 9, 10, 11, 12 |
| Month | mm | Displays month as a number.
If the month is between January (month 1) and September (month 9), it includes a leading 0. |
01, 02, 03, 04, 05, 06, 07, 08, 09, 10, 11, 12 |
| Month | mmm | Month name is abbreviated. | Jan, Feb, Mar, Apr, May, Jun, Jul, Aug, Sep, Oct, Nov, Dec |
| Month | mmmm | Full name of month is displayed | January, February, March, April, May, June, July, August, September, October, November, December |
| Month | mmmmm | Only the first letter of the month name is displayed | J, F, M, A, M, J, J, A, S, O, N, D |
| Day (Number) | d | The day number is displayed without a leading 0. | 1, 2, 3, 4, 5, 6, 7, 8, 9, 10, 11, 12, 13, 14, 15, 16, 17, 18, 19, 20, 21, 22, 23, 24, 25, 26, 27, 28, 29, 30, 31 |
| Day (Number) | dd | The day number is displayed.
For days between 1 and 9, a leading 0 is displayed. |
01, 02, 03, 04, 05, 06, 07, 08, 09, 10, 11, 12, 13, 14, 15, 16, 17, 18, 19, 20, 21, 22, 23, 24, 25, 26, 27, 28, 29, 30, 31 |
| Day (Weekday) | ddd | The weekday is abbreviated | Mon, Tue, Wed, Thu, Fri, Sat, Sun |
| Day (Weekday) | dddd | The full weekday name is displayed | Monday, Tuesday, Wednesday, Thursday, Friday, Saturday, Sunday |
| Year | yy | The last 2 digits of the year are displayed | 00 to 99 |
| Year | yyyy | All of the four digits of the year are displayed | 1900 to 9999 |
Note, however, that the Format function (which I mention at the beginning of this Excel tutorial) supports slightly different date format codes from those appear in this table.
The following sections show examples of how all of these different options can be applied to format dates using VBA. For each situation, I show both of the following:
- The VBA code of the sample Format_Dates macro.
- The resulting format in one of the dates within the sample table that contains the 2014 Brazil World Cup schedule.
Let’s start taking a look at each of these:
Format Date Using VBA: Display A Single Item Of The Date
You can have Excel display just one of the items of a date, regardless of whether it’s the month, the day or the year. To do this, the argument of the Range.NumberFormat property must only include the format code of the relevant item.
Let’s take a look at the different date formats you can obtain by including a single item, and how does the corresponding VBA code looks like:
Format A Date To Display Only The Month Using VBA
You can display a month using any of the following 5 options:
Option #1: Display The Month As A Number (Without Leading 0)
You can format a date in a way that:
- Only the month is displayed; and
- The month is displayed as a number without a leading 0.
In this case, the format code that you use as argument for the NumberFormat property is “m”. The image shows the version of the sample Format_Dates macro that does this:

Let’s go back to the sample table with the schedule of the 2014 World Cup. I select the second date, which is June 13 of 2014 and corresponds to the match between Mexico and Cameroon.

The following image shows the results after the date is formatted by the Format_Dates macro. Notice how only the month number (6, corresponding to June) appears. Notice, also, that the value in the Formula Bar continues to be the same. The only thing that changes is the format of the date displayed in the cell itself.

Option #2: Display The Month As A Number (With Leading 0)
This option is similar to the one above. More particularly:
- Only the month is displayed; and
- The month is displayed as a number.
However, in this particular case, the month is displayed with a leading 0. In other words, if the relevant month is between January (month 01) and September (month 09), a leading 0 is added.
For these purposes, the VBA code behind the Format_Dates macro looks as follows:

This particular macro is applied to the third date in the 2014 World Cup schedule. The date is June 13 of 2014. The teams playing are Spain and Netherlands.

Once the Format_Dates macro is applied, the date looks as follows in the cell (where the format changes) and the Formula Bar (where the value remains the same):

Option #3: Display The Month As A 3-Letter Abbreviation
If you choose to implement this option, the month name is displayed as a 3-letter abbreviation. In order to achieve this, the VBA code of the Format_Dates macro is as follows:

Let’s continue with the same process of applying the new date formats to the match dates of the 2014 Brazil World Cup. In this case, the relevant date is June 13 of 2014. The match played is between Chile and Australia.

The following image shows how the cell looks like after the new format is applied. As in the previous cases, the value of the date itself (as shown in the Formula Bar), doesn’t change.

Option #4: Display The Full Name Of The Month
If you want to display the full name of the month that corresponds to a date (not just its abbreviation), the following version of the Format_Dates macro is of help:

In order to apply this format to a date in the sample 2014 Brazil World Cup schedule, I select the corresponding cell. In this case, the date is June 14 of 2014 and corresponds to the match between Colombia and Greece.

The results of applying the new version of the Format_Dates macro are shown in the following screenshot:

Option #5: Display The First Letter Of The Month
The fifth way in which you can display just the month when formatting a date using VBA is to display (only) the first letter of the relevant month. In this case, the Format_Dates macro looks as follows:

This macro is applied to the date June 14 of 2014. This date corresponds to the match between Uruguay and Costa Rica.

The results of executing the new macro are shown in the following image:

Format A Date To Display Only The Day Number Using VBA
Just as you can use VBA to format a date in a way that only the month is displayed, you can do the same for the day. In other words, you can use Visual Basic for Applications to format a date and have Excel display only the day.
The following 2 sections show how you can modify the sample Format_Dates macro so that only the day (number) is displayed when the date is formatted.
Option #1: Display The Day Number Without Leading 0
If you want Excel to display the day number without a leading 0 while using VBA, you can use the following version of the sample Format_Dates macro:

The date to which this macro is applied in the sample workbook is June 14 of 2014. In this case, the relevant match is that between England and Italy.

The results of applying the Format_Dates macro are shown in the following image:

Option #2: Display The Day Number With Leading 0
You can format dates in such a way that Excel adds a leading 0 whenever the day is only 1 digit long (1 to 9). The following version of the Format_Dates macro achieves this:

If I continue going down the 2014 Brazil World Cup match schedule (as until now), this version of the Format_Dates macro would be applied to the date June 14 of 2014. This date corresponds to the match between Ivory Coast and Japan.

However, since this the day (14) doesn’t require a leading 0, the result of applying the new version of the Format_Dates macro would be the same as that obtained above for the date of the match between England and Italy.

To see how this date format works like whenever the corresponding day is only one digit long, I go further down the sample table to one of the matches played at the beginning of July of 2014. More precisely, I apply the current version of the Format_Dates macro to the date July 1 of 2014. The match to which this date corresponds to is that played between Argentina and Switzerland.

The following image shows the results of applying the Format_Dates macro to this date. Notice how, now, Excel adds a leading 0 to the day number in the cell.

Format A Date To Display Only The Weekday Using VBA
The previous section shows how you can use VBA to format a date in such a way that only the day number is displayed. You can also format a date in such a way that only the weekday is displayed.
The following 2 sections show 2 ways in which you can implement this date format by using VBA.
Option #1: Display The Weekday As A 3-Letter Abbreviation
The first way in which you can format a date to display the weekday allows you to have that weekday shown as a 3-letter abbreviation. The following version of the Format_Dates macro achieves this:

Let’s go back to the match between Ivory Coast and Japan to which I make reference above and apply this new date format. The date of this match is June 14 of 2014.

After executing the Format_Dates macro, the date looks as follows:

Option #2: Display The Full Weekday
The second way in which you can format a date to display the weekday using VBA makes Excel show the full name of the weekday. The following version of the sample Format_Dates macro formats a date in such a way:

Let’s execute this macro for purposes of formatting the date of the match between Switzerland and Ecuador in the 2014 Brazil World Cup match schedule. This date, as shown in the image below, is June 15 of 2014.

Running the Format_Dates macro while this particular cell is active causes the following change in the date format:

Format A Date To Display Only The Year Using VBA
So far, you have seen how you can format a date using VBA for purposes of displaying only the (i) month, (ii) day number or (iii) weekday. In this section, I show you how to format a date using VBA to display only the year.
Let’s take a look at the 2 options you have for these purposes:
Option #1: Display The Last 2 Digits Of The Year
The first way in which you can format a date to display only the year results in Excel displaying only the last 2 digits of the relevant year. To achieve this date format, you can use the following version of the Format_Dates macro:

This date format is to applied to the date June 15 of 2014. This corresponds to the World Cup match between France and Honduras.

The following image shows the results of executing the sample Format_Dates macro while this cell is active:

Option #2: Display The Full Year
The second way in which you can format a date to display only the year results in Excel showing the full year. If you want to format a date in such a way using VBA, the following version of the Format_Dates macro achieves this result:

I apply this date format to the date of the match between Argentina and Bosnia and Herzegovina. This is June 15 of 2014.

Once the Format_Dates macro is executed, the results are as shown in the following screenshot:

Format Date Using VBA: Display Several Items Of The Date
The examples in the section above explain different ways in which you can format a date using VBA to display a single item (month, day or year) of that particular date.
Having the ability to format a date in such a way that only a single item is displayed is helpful in certain scenarios. Additionally, once you know the format codes that apply to each of the individual items of a date, you can easily start combining them for purposes of creating more complex and advanced date formats.
In any case, in a lot of cases, you’ll need to format dates in such a way that more than 1 element is displayed. In the following sections, I go through some date formats that result in Excel displaying more than 1 item of the relevant date.
Even though I don’t cover every single date format that you can possibly implement, these examples give you an idea of the possibilities you have at your disposal and how you can implement them in your VBA code.
All of the sections below follow the same form and show 2 things:
- The version of the Format_Dates macro that is applied.
- The result of executing that macro for purposes of formatting 1 of the dates of a match in the sample workbook that accompanies this blog post.
Format Date Using VBA: Display m/d/yyyy
The following version of the Format_Dates macro formats a date in the form m/d/yyyy.

The following image shows the result of applying this format to the date June 16 of 2014. This date corresponds to the match between Germany and Portugal.

Format Date Using VBA: Display m/d
To display a date in the form m/d, you can use the following macro:

When this macro is executed and the cell with the date of the match between Iran and Nigeria (June 16 of 2014) is selected, the formatted date looks as follows:

Format Date Using VBA: Display m/d/yy
The following macro formats a date so that it’s displayed in the form m/d/yy:

The result of applying this format, using the version of the Format_Dates macro above, to the date of June 16 of 2014 (for the match between Ghana and the USA) is shown below:

Format Date Using VBA: Display mm/dd/yy
You can format a date so that it’s displayed in the form mm/dd/yy by using the following version of the Format_Dates macro:

When this date format applied to the date of the World Cup match between Belgium and Algeria (June 17 of 2014), the result is as shown in the following image:

Format Date Using VBA: Display d-mmm
The following version of the Format_Dates macro makes Excel display the date in the form d-mmm:

The results of executing this macro while the date of the World Cup match between Brazil and Mexico is selected (June 17 of 2014) are shown in the next image:

Format Date Using VBA: Display d-mmm-yy
The next version of the Format_Dates macro makes Excel display dates using the form d-mmm-yy:

If I choose the cell that shows the date of the match between Russia and Korea (June 17 of 2014) prior to executing this version of the Format_Dates macro, the resulting date format is as follows:

Format Date Using VBA: Display dd-mmm-yy
To apply the format dd-mmm-yy to a particular date, you can use the following version of the sample Format_Dates macro:

The following screenshot shows the results of applying this version of the Format_Dates macro to the date in which Australia played against the Netherlands in the 2014 Brazil World Cup (June 18 of 2014):

Notice that, in this particular case, the resulting date format is exactly the same as that of the date of the match between Russia and Korea which is immediately above (and is used as an example in the previous section). To understand why this is the case, let’s take a look at the date format codes used in each case:
- Russia vs. Korea (June 17 of 2014) uses the date format code d-mmm-yy.
- Australia vs. Netherlands (June 18 of 2014) has the date format code dd-mmm-yy.
Notice that the only difference between both format codes is in the way the day is represented. In the first case, the format code uses “d”, which displays the day number without a leading 0. In the second case, the format code is “dd”, which adds a leading 0 whenever the day number has a single digit (between 1 and 9).
In this particular situation, the day numbers of both dates (17 and 18) have 2 digits. Therefore, the format code “dd” doesn’t add a leading 0 to the day number. The result is that shown above:
Both format codes (d-mmm-yy and dd-mmm-yy) result in the same date format when the number of digits of the day is 2 (between 10 and 31).
Let’s go further down the match schedule of the 2014 Brazil World Cup to see how the format code “dd-mmm-yy” adds a leading 0 when applied to a date in which the day number has a single digit:
The image below shows this. In this particular case, the Format_Dates macro is applied to the date July 1 of 2014, when Belgium played against the USA. Notice, especially, the leading 0 in the day number (01 instead of 1).

Format Date Using VBA: mmm-yy
The following version of the Format_Dates macro allows you to format a date using the form mmm-yy:

The resulting date format when this version of the Format_Date macro is executed is as shown in the image below. The formatted date is June 18 of 2014, corresponding to the match between Spain and Chile.

Format Date Using VBA: mmmm-yy
Continuing with date formats that only display the month and year, the following version of the Format_Dates macro applies the format code mmmm-yy:

The results of executing the macro on the date June 18 of 2014 are shown in the image below. In this case, the date corresponds to the World Cup match between Cameroon and Croatia.

Format Date Using VBA: mmmm d, yyyy
The following version of the sample Format_Dates macro formats dates so that they’re displayed using the form mmmm d, yyyy.

The next image shows the results of executing this macro while a cell with the date June 19 of 2014 is active. This date corresponds to the world cup match between Colombia and Ivory Coast.

Format Date Using VBA: mmmmm-yy
The following version of the sample Format_Dates macro makes Excel display dates using the format mmmmm-yy.

To see how a date looks like when formatted by this version of the Format_Dates macro, let’s go back to the 2014 Brazil World Cup match schedule. The following screenshot shows how the date June 19 of 2014 (for the match between Uruguay and England) looks like after this macro is executed:

Format Date Using VBA: d-mmm-yyyy
Further above, I show versions of the Format_Dates macro that use the format codes d-mmm-yy and dd-mmm-yy. The version of this macro displayed in the image below results in a similar date format. The main difference between this version and those displayed above is that the version below displays the 4 digits of the year.

I execute this macro while the cell with the date of the World Cup match between Japan and Greece (June 19 of 2014) is selected. The resulting date format is displayed in the image below:

Format Date Using VBA: dddd, mmmm dd, yyyy
The following version of the sample Format_Dates macro makes Excel display dates using the default long date format under the English (United States) locale settings.

To see how this looks in practice, check out the following image. This screenshot shows the date of the match between Italy and Costa Rica (June 20 of 2014) after the Format_Dates macro has been executed:

So far, this Excel tutorial includes 24 different examples of how you can use Visual Basic for Applications to format dates. The date formats introduced in the previous sections are relatively straightforward.
These basic date formats include several of the most commonly used date formats in American English. You can also use them as a basis to create other date formatting macros for less common date formats.
These basic date formats are, however, not the only ones you can apply. More precisely, once you have a good knowledge of how to apply date formats using VBA, you can start creating more complex constructions.
To finish this blog post, I introduce one such date formatting macro:
Format Date Using VBA: Add A Carriage Return To Dates
You can add a carriage return in custom date formats. This allows you to display different items of a date in different lines within a single cell.
Let’s see how this looks in practice:
The following screenshot shows an example of a date format with carriage returns. The formatted date is June 20 of 2014, corresponding to the World Cup match between Switzerland and France.

This example works with a date format that only includes month (using the format code mmmm) and year (using the format code yyyy). You can tweak the macro that I introduce below in order to adjust it to your needs and use any other date items or formats.
You can use Visual Basic for Applications for these purposes. The following macro (called “Format_Dates_Carriage_Return”) is the one that I’ve used to achieve the date format shown in the image above.

Some of the elements in this piece of VBA code probably look familiar. The following screenshot shows the elements that I introduce in the previous sections of this Excel tutorial:

There are, however, a few other elements that I don’t introduce in the previous sections of this blog post. These are the following 5:
Element #1: With Statement
You can generally identify a With statement because of its basic syntax. This syntax is roughly as follows:
- Begins with a statement of the form “With object”.
In the case of the Format_Dates_Carriage_Return macro, this opening statement is “With Selection”. As explained above, the Application.Selection property returns the object that is currently selected. When formatting dates using the sample macro above (Format_Dates_Carriage_Return), the selected object is a range of cells.

- Has 1 or more statements in its body.
You can easily identify these 2 statements within the Format_Dates_Carriage_Return macro due to the fact that they’re indented.
- Closes with an End With statement.


The effect of using a With statement is that all of the statements within it refer to the same object or structure. In this case:
- The object to which all of the statements refer to is that returned by the Selection property.
- The statements that refer to the object returned by Selection are:
Statement #1: .NumberFormat = “mmmm” & Chr(10) & “yyyy”.
Statement #2: .RowHeight = .RowHeight * 2.
Statement #3: .WrapText = True.
I explain each of these statements below.
Using the With statement allows you to, among other, simplify the syntax of the macro. I use this statement in other sample macros throughout Power Spreadsheets, including macros that delete blank rows.
Element #2: The Ampersand (&) Operator
The first statement within the With…End With block is:
.NumberFormat = “mmmm” & Chr(10) & “yyyy”
Since, as explained above, this statement works with the object returned by the Application.Selection property, it’s the equivalent of:
Selection.NumberFormat = “mmmm” & Chr(10) & “yyyy”
Most of this statement follows exactly the same structure of (pretty much) all of the other macro examples I include in the previous sections. There are, however, a couple of new elements.
One of those new elements is the ampersand (&) operator. Notice how there are 2 ampersands (&) within this statement:

Within the Visual Basic for Applications environment, the ampersand (&) operator works in a very similar way to how it works in Excel itself.
This means that, within VBA, ampersand (&) is a concatenation operator. In other words, within the Format_Dates_Carriage_Return macro, ampersand (&) concatenates the 3 following expressions:
- Expression #1: “mmmm”.
- Expression #2: Chr(10).
- Expression #3: “yyyy”.
Expression #2 above leads me to the next and last element you need to be aware of in order to understand the first statement within the With…End With block of the sample macro:
Element #3: The Chr Function
The Chr Function returns a string. The string that is returned is determined by the particular character code that you feed as an argument.
In the sample Format_Dates_Carriage_Return macro, the character code is the number 10. This corresponds to a linefeed character. In other words:
“Chr(10)” is what actually adds the carriage return between the date’s month and year.
The second statement within the With…End With block is also new. Let’s take a look at the new element it introduces:
Element #4: Range.RowHeight Property
The Range.RowHeight property allows you to set the height for a row.
In the Format_Dates_Carriage_Return sample macro, this property is used for purposes of doubling the height of the row for which you’re changing the date format. This is done by the statement:
.RowHeight = .RowHeight * 2
The expression to the right side of the equal sign (=) takes the current row height and, using the asterisk (*) operator, multiplies it by 2. The result of applying this property change to the sample chart with the 2014 Brazil World Cup Match Schedule is that a row can now fit the 2 date elements that are separated by the carriage return.
Compare the following 2 screenshots to see the difference this statement makes in the date format. The first image shows what happens when the Format_Dates_Carriage_Return macro is executed without having the statement under analysis. The formatted date, which corresponds to the match between Honduras and Ecuador, is June 20 of 2014.

The image below shows the result of including the Range.RowHeight property for purposes of doubling the row height. The formatted date corresponds to that of the match between Argentina and Iran (June 21 of 2014).

Notice that this format isn’t yet what we want. More precisely, the month and year that correspond to the formatted date are displayed on the same line. Element #5, which I explain below, fixes this.
If the height of the cells whose date format you’re modifying is enough to fit all of the elements/lines, you may not need to include this particular statement in your date-formatting macro. In other cases, you may need to change the factor by which you multiply the current row height. In other words, instead of using the number 2 at the end of the statement (as I do in the sample macro), you may need to use a different number.
The use of the Range.RowHeight property is optional and doesn’t affect the date format of the selected cells. You may choose to omit it from your macros, or work with a different property.
The reason why I use RowHeight in the sample Format_Dates_Carriage_Return is for illustration purposes only. In particular, it ensures that the cell that I format using this macro shows the complete date.
Let’s take a look at the fifth and last of the new elements introduced in the sample Format_Dates_Carriage_Return macro:
Element #5: Range.WrapText Property
The Range.WrapText Property allows you to determine whether Excel wraps the text within the relevant range object. In the sample Format_Dates_Carriage_Return macro, that relevant range object is the range of cells returned by the Application.Selection property.
Within the Format_Dates_Carriage_Return macro, the WrapText property is used for purposes of wrapping the text within its own cell. More precisely, the following statement sets the property to True for all the cells within the range returned by the Selection property:
.WrapText = True
The last image I show when explaining the Range.RowHeight property above displays both the month and the year on the same line. The following image allows you to compare the results obtained when I execute: (i) the macro version that doesn’t include the WrapText property (for the date of the match between Argentina and Iran) and (ii) the macro version that uses the WrapText property (for the match between Germany and Ghana):

Conclusion
This Excel tutorial explains the Range.NumberFormat property in great detail and shows how you can use it for purposes of formatting dates using VBA.
As you’ve probably realized, successfully applying date formats using VBA generally boils down to knowing and understanding the following 2 topics:
- Item #1: The Range.NumberFormat property.
- Item #2: Date format codes.
In addition to reading about these 2 items, you’ve seen 25 different date formatting examples using VBA. Such a long list of examples may seem a little excessive, and there are several similarities between some of the date formats I applied.
However, these 25 examples are evidence of the flexibility you have when formatting dates using VBA. At the same time, they provide a base for you to create your own macros to apply different date formats.
This Excel VBA Date Format Tutorial is accompanied by an Excel workbook containing the data and some versions of the macros I explain above. You can get immediate free access to this example workbook by subscribing to the Power Spreadsheets Newsletter.
Books Referenced In This Excel Tutorial
- Alexander, Michael (2015). Excel Macros for Dummies. Hoboken, NJ: John Wiley & Sons Inc.
- Walkenbach, John (2013). Excel VBA Programming for Dummies. Hoboken, NJ: John Wiley & Sons Inc.
Excel VBA Format Date
In general, we have different types of Date formats that are used in all around the world but we mostly use the data in the DDMMYYYY format. For this, in VBA we have Format function which is quite popular for converting Format Date. The date or number which we feed in using the Format function converts that into the required format which we choose. Below we have the syntax of the FORMAT Function in VBA.
Syntax of FORMAT Function:
![]()
Where, Format = It is the type by which we want to see the format of a date.
We know and probably have used many types of Date formats in our life and most of the formats are so commonly used such as DDMMYYYY and MMDDYYYY. Where we have seen DDMMYYYY used mostly in India and MMDDYYYY is used globally. Also, there are different separators that are used in creating a date format such as hyphen, slash, dot, brackets, etc. In this article, we will see the ways to use format the date in upcoming examples.
How to Change Date Format in VBA Excel?
Below are the examples of the excel VBA date format:
You can download this VBA Format Date Excel Template here – VBA Format Date Excel Template
Example #1
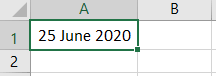
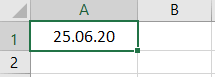
In this example, we will see a simple VBA code to format the date. We have a date in cell A1 as 25-Jun-20 as shown below.
Now we will be using the Format Date function to change the format of date in cell A1.
Step 1: Insert a new module inside Visual Basic Editor (VBE). Click on Insert tab > select Module.

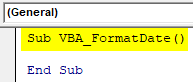
Step 2: Write the subprocedure for VBA Format Date or choose anything to define the module.
Code:
Sub VBA_FormatDate()

End Sub
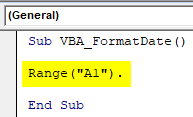
Step 3: Choose the range cell first as A1.
Code:
Sub VBA_FormatDate()

Range("A1").

End Sub
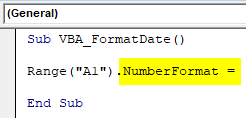
Step 4: Then use the Number Format function as shown below.
Code:
Sub VBA_FormatDate()

Range("A1").NumberFormat =

End Sub
Step 5: As per the syntax of the Format function, choose the format by which we want to change the Date of the selected cell.
Code:
Sub VBA_FormatDate()

Range("A1").NumberFormat = "dd.mm.yy"

End Sub
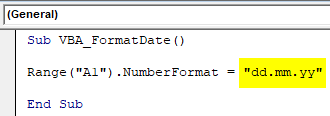
Step 6: Run the code by pressing F5 or Play Button is mentioned below the menu bar. We will see the Date at cell A1 is now changed to DD.MM.YY and visible as 25.06.20.
Example #2
There is another way to change the Format of Date in VBA.
Step 1: For this again we would need a module and in that write the subprocedure for VBA Format Date.
Code:
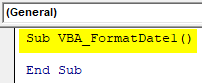
Sub VBA_FormatDate1()

End Sub
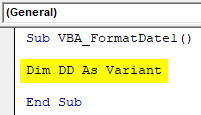
Step 2: Now using DIM declare a variable choosing the data type as a Variant. We have chosen Variant as it would allow most of the characters in it.
Code:
Sub VBA_FormatDate1()

Dim DD As Variant

End Sub
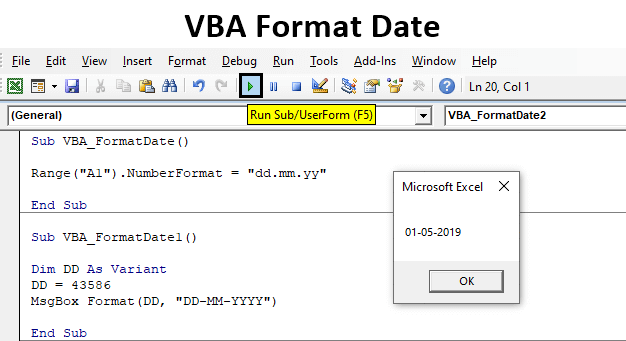
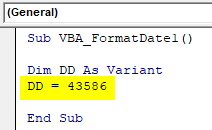
Step 3: Put any number which we would like to see that converting into a date. Here we have chosen 43586 as shown below.
Code:
Sub VBA_FormatDate1()

Dim DD As Variant
DD = 43586

End Sub
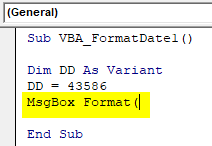
Step 4: To see the output, here we will use the message box as shown below with the FORMAT function.
Code:
Sub VBA_FormatDate1()

Dim DD As Variant
DD = 43586
MsgBox Format(

End Sub
Step 5: As per the syntax of the Format function, we will now use the DD variable and the format in which we want to convert the mentioned number into a date as shown below.
Code:
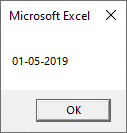
Sub VBA_FormatDate1()

Dim DD As Variant
DD = 43586
MsgBox Format(DD, "DD-MM-YYYY")

End Sub

Step 6: We will see in the message box, the Format function has converted it into 01-05-2019 as shown below.
Example #3
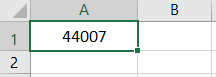
There is another way to convert a date’s format into another format as needed. For this, we will be using the same number which we have seen in the above example-1 as 44007 in cell A1.
Step 1: Open a module and in that write the subprocedure of VBA Format Date.
Code:
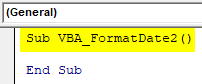
Sub VBA_FormatDate2()

End Sub
Step 2: Define a variable using DIM as Worksheet as shown below.
Code:
Sub VBA_FormatDate2()

Dim DD As Worksheet

End Sub

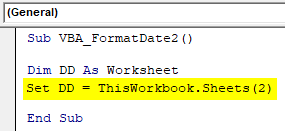
Step 3: Now using SET, choose the worksheet which we want to assign in the defined variable DD. Here, that worksheet is Sheet2.
Code:
Sub VBA_FormatDate2()

Dim DD As Worksheet
Set DD = ThisWorkbook.Sheets(2)

End Sub
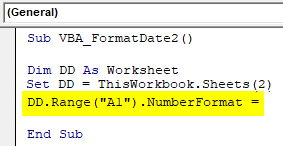
Step 4: In a similar way as shown in example-1, we will Range cell A1 with defined variable DD and then insert the Number Format function as shown below.
Code:
Sub VBA_FormatDate2()

Dim DD As Worksheet
Set DD = ThisWorkbook.Sheets(2)
DD.Range("A1").NumberFormat =

End Sub
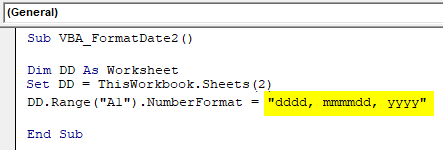
Step 5: Now as needed, we will choose the Date format we want to see in the number at cell A1 as shown below.
Code:
Sub VBA_FormatDate2()

Dim DD As Worksheet
Set DD = ThisWorkbook.Sheets(2)
DD.Range("A1").NumberFormat = "dddd, mmmmdd, yyyy"

End Sub
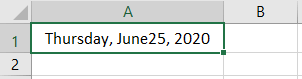
Step 6: Once done, run the code to see the output in cell A1. We will see, as per chosen date format, cell A1 has the date as Thursday, June25, 2020.
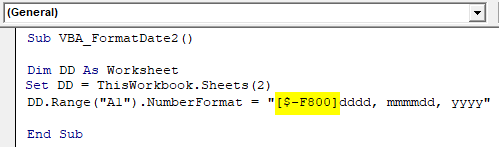
Step 7: We are seeing the weekday name because as per the format we need to exclude that manually. We would insert the value as $-F800 to skip weekday.
Code:
Sub VBA_FormatDate2()

Dim DD As Worksheet
Set DD = ThisWorkbook.Sheets(2)
DD.Range("A1").NumberFormat = "[$-F800]dddd, mmmmdd, yyyy"

End Sub
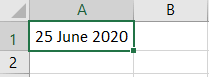
Step 8: Now again run the code to see the required Date format. The new date format is now shown as 25 June 2020.
Pros of VBA Format Date
- VBA Format Date is quite useful which helps us to see any kind of date format.
- We can test and choose a variety of separators in VBA Format Date without any limit.
Things to Remember
- We try to enter a date using any number, then we would get the default format which is there as per Operating System setting.
- To see the number hidden in any date, we can first convert the date into number format and then try to use that number into the Format Date function.
- We can only change the date format using the FORMAT function in any format we want.
- We need to save the excel file after writing up the VBA Code in macro-enabled excel format to avoid losing the VBA code in the future.
Recommended Articles
This is a guide to the VBA Format Date. Here we discuss how to change the Date Format in VBA Excel along with practical examples and a downloadable excel template. You can also go through our other suggested articles –
- How to Use VBA Login?
- VBA Month | Examples With Excel Template
- How to Use Create Object Function in VBA Excel?
- How to Use VBA IsError Function?
Преобразование чисел, дат и строк в настраиваемый текстовый формат из кода VBA Excel с помощью функции Format. Синтаксис, параметры, символы, примеры.
Format – это функция, которая преобразует число, дату или строку в текст, отформатированный в соответствии с именованным выражением формата или инструкциями, составленными из специальных символов.
Синтаксис и параметры
Format(Expression, [FormatExpression], [FirstDayOfWeek], [FirstWeekOfYear])
- Expression – любое допустимое выражение (переменная), возвращающее числовое значение или строку (обязательный параметр).
- FormatExpression – выражение формата, именованное или содержащее инструкции из специальных символов (необязательный параметр).
- FirstDayOfWeek – константа, задающая первый день недели (необязательный параметр).
- FirstWeekOfYear – константа, задающая первую неделю года (необязательный параметр).
Именованные выражения форматов
Именные форматы даты и времени
| Имя формата | Описание |
|---|---|
| General Date | Стандартное отображение даты и времени в соответствии с параметрами системы. |
| Long Date | Длинный формат даты. |
| Medium Date | Средний формат даты. |
| Short Date | Краткий формат даты. |
| Long Time | Длинный формат времени. |
| Medium Time | Средний формат времени. |
| Short Time | Краткий формат времени. |
Проверьте отображение даты и времени с использованием именованных форматов на вашем компьютере при помощи следующего кода VBA Excel:
|
Sub FormatDateTime() MsgBox «General Date: « & Format(Now, «General Date») & vbNewLine _ & vbNewLine & «Long Date: « & Format(Now, «Long Date») & vbNewLine _ & vbNewLine & «Medium Date: « & Format(Now, «Medium Date») & vbNewLine _ & vbNewLine & «Short Date: « & Format(Now, «Short Date») & vbNewLine _ & vbNewLine & «Long Time: « & Format(Now, «Long Time») & vbNewLine _ & vbNewLine & «Medium Time: « & Format(Now, «Medium Time») & vbNewLine _ & vbNewLine & «Short Time: « & Format(Now, «Short Time») End Sub |
Скорее всего, результат будет таким:

Именованные форматы чисел
| Имя формата | Описание |
|---|---|
| General Number | Стандартное отображение числа без знака разделителя групп разрядов. |
| Currency | Денежный формат. |
| Fixed | Отображение числа без знака разделителя групп разрядов с двумя цифрами после разделителя целой и дробной части. |
| Standard | Отображение числа со знаком разделителя групп разрядов и с двумя цифрами после разделителя целой и дробной части. |
| Percent | Процентный формат: отображение числа, умноженного на 100, со знаком процента (%), добавленного справа. |
| Scientific | Отображение числа в экспоненциальном виде. |
| Yes/No | Возвращается «Нет», если число равно 0, иначе отображается «Да». |
| True/False | Возвращается «Ложь», если число равно 0, иначе отображается «Истина». |
| On/Off | Возвращается «Выкл», если число равно 0, иначе отображается «Вкл». |
Проверяем работу именованных форматов на числах 2641387.7381962 и 0 с помощью кода VBA Excel:
|
Sub FormatNumber() Dim n As Double n = 2641387.7381962 ‘n = 0 MsgBox «Форматируемое число = « & n & vbNewLine _ & vbNewLine & «General Number: « & Format(n, «General Number») & vbNewLine _ & vbNewLine & «Currency: « & Format(n, «Currency») & vbNewLine _ & vbNewLine & «Fixed: « & Format(n, «Fixed») & vbNewLine _ & vbNewLine & «Standard: « & Format(n, «Standard») & vbNewLine _ & vbNewLine & «Percent: « & Format(n, «Percent») & vbNewLine _ & vbNewLine & «Scientific: « & Format(n, «Scientific») & vbNewLine _ & vbNewLine & «Yes/No: « & Format(n, «Yes/No») & vbNewLine _ & vbNewLine & «True/False: « & Format(n, «True/False») & vbNewLine _ & vbNewLine & «On/Off: « & Format(n, «On/Off») End Sub |
Получаем следующий результат:


Вместо вопросительного знака в отображении числа в формате Currency, по идее, должен быть знак валюты (₽ или руб.).
Специальные символы для выражений форматов
Символы для форматов даты и времени
| Символ | Описание |
|---|---|
| Точка (.) | Разделитель компонентов даты (день, месяц, год). Используется при отображении месяца в виде числа. |
| Пробел | Разделитель компонентов даты (день, месяц, год). Используется при отображении месяца прописью. |
| Двоеточие (:) | Разделитель компонентов времени (часы, минуты, секунды). |
| d | День в виде числа без нуля в начале (1–31). |
| dd | День в виде числа с нулем в начале (01–31). |
| m | Месяц в виде числа без нуля в начале (1–12). Если (m) следует после (h) или (hh), отображаются минуты (0–59). |
| mm | Месяц в виде числа с нулем в начале (01–12). Если (mm) следует после (h) или (hh), отображаются минуты (00–59). |
| mmm | Месяц прописью в сокращенном виде (янв–дек). |
| mmmm | Полное название месяца (январь–декабрь). |
| y | День года в виде числа (1–366). |
| yy | Год в виде 2-значного числа (00–99). |
| yyyy | Год в виде 4-значного числа (1900–9999). |
| h | Часы в виде числа без нуля в начале (0–23). |
| hh | Часы в виде числа с нулем в начале (00–23). |
| n (m) | Минуты в виде числа без нуля в начале (0–59). |
| nn (mm) | Минуты в виде числа с нулем в начале (00–59). |
| s | Секунды в виде числа без нуля в начале (0–59). |
| ss | Секунды в виде числа с нулем в начале (00–59). |
В этой таблице перечислены далеко не все символы для выражений форматов даты и времени. Вы можете ознакомиться со всеми символами, в том числе и для форматирования чисел, на сайте разработчика.
Примеры отображения даты с помощью разных по количеству наборов символа d:
|
Sub DataIsD() MsgBox «d: « & Format(Now, «d») & vbNewLine _ & vbNewLine & «dd: « & Format(Now, «dd») & vbNewLine _ & vbNewLine & «ddd: « & Format(Now, «ddd») & vbNewLine _ & vbNewLine & «dddd: « & Format(Now, «dddd») & vbNewLine _ & vbNewLine & «ddddd: « & Format(Now, «ddddd») & vbNewLine _ & vbNewLine & «dddddd: « & Format(Now, «dddddd») End Sub |

Символы для числовых форматов
| Символ | Описание |
|---|---|
| Точка (.) | Десятичный разделитель. |
| Запятая (,) | Разделитель групп разрядов. В отображаемых числах заполняется пробелом. |
| (0) | Заполнитель, который отображает цифру или ноль. Используется, когда нужны ведущие нули или нули в конце числа. |
| (#) | Заполнитель, который отображает цифру или ничего не отображает. Используется, когда не нужны ведущие нули или нули в конце числа. |
| (%) | Заполнитель процента. Выражение умножается на 100, а знак процента (%) вставляется на той позиции, где он указан в строке формата. |
| (E- E+ e- e+) | Экспоненциальный формат. |
Примеры использования символов в выражениях числовых форматов VBA Excel:
|
Sub FormatNumber2() Dim n As Double n = 2641387.7381962 ‘n = 0.2397842 MsgBox «Форматируемое число = « & n & vbNewLine _ & vbNewLine & «0.##: « & Format(n, «0.##») & vbNewLine _ & vbNewLine & «000.###: « & Format(n, «000.###») & vbNewLine _ & vbNewLine & «#,###.###: « & Format(n, «#,###.###») & vbNewLine _ & vbNewLine & «0 %: « & Format(n, «0 %») & vbNewLine _ & vbNewLine & «0.### E-: « & Format(n, «0.### E-«) & vbNewLine _ & vbNewLine & «0.### E+: « & Format(n, «0.### E+») End Sub |


Символы для текстовых форматов
| Символ | Описание |
|---|---|
| At-символ (@) | Заполнитель для символов, отображающий знак или пробел. |
| Амперсанд (&) | Заполнитель для символов, отображающий знак или ничего (пустая строка). |
| Меньше (<) | Принудительный перевод всех буквенных символов в нижний регистр. |
| Больше (>) | Принудительный перевод всех буквенных символов в верхний регистр. |
Примеры использования символов в выражениях строковых форматов VBA Excel:
|
Sub FormatString() MsgBox «Номер телефона: « & Format(«1234567890», «+7 (@@@) @@@-@@-@@») & vbNewLine _ & vbNewLine & «Серия и номер паспорта: « & Format(«1234567890», «&& && &&&&») & vbNewLine _ & vbNewLine & «Нижний регистр: « & Format(«Нижний регистр», «<«) & vbNewLine _ & vbNewLine & «Верхний регистр: « & Format(«Верхний регистр», «>») End Sub |

Форматы для различных значений одного выражения
Различные форматы для разных числовых значений
В выражении формата для чисел предусмотрено от одного до четырех разделов, отделяемых друг от друга точкой с запятой. Отображаемая строка зависит от значения, возвращенного параметром Expression функции Format.
| Количество разделов | Результат форматирования |
|---|---|
| Один раздел | Выражение формата применяется ко всем значениям. |
| Два раздела | Первый раздел применяется к положительным значениям и нулям, второй – к отрицательным значениям. |
| Три раздела | Первый раздел применяется к положительным значениям, второй – к отрицательным значениям, третий – к нулям. |
| Четыре раздела | Первый раздел применяется к положительным значениям, второй – к отрицательным значениям, третий – к нулям, четвертый – к значениям Null. |
Пример использования четырех разделов в выражении формата числовых значений:
|
Sub FormatDifferentValues() MsgBox «Число 1234,5678: « & _ Format(1234.5678, «#,##0.00 руб.;Отрицательное число;Ноль рублей;Значение Null») _ & vbNewLine & vbNewLine & «Число -25: « & _ Format(—25, «#,##0.00 руб.;Отрицательное число;Ноль рублей;Значение Null») _ & vbNewLine & vbNewLine & «Число 0: « & _ Format(0, «#,##0.00 руб.;Отрицательное число;Ноль рублей;Значение Null») _ & vbNewLine & vbNewLine & «Null: « & _ Format(Null, «#,##0.00 руб.;Отрицательное число;Ноль рублей;Значение Null») End Sub |

Различные форматы для разных строковых значений
В выражении формата для строк предусмотрено до двух разделов, отделяемых друг от друга точкой с запятой. Отображаемая строка зависит от текста, возвращенного параметром Expression функции Format.
| Количество разделов | Результат форматирования |
|---|---|
| Один раздел | Выражение формата применяется ко всем строковым данным. |
| Два раздела | Первый раздел применяется к строковым данным, второй – к значениям Null и пустым строкам («»). |
Пример использования двух разделов в выражении формата строк:
|
Sub FormatString2() MsgBox «Строка «Белка»: « & _ Format(«Белка», «@;Пустая строка или Null») _ & vbNewLine & vbNewLine & «Пустая строка: « & _ Format(«», «@;Пустая строка или Null») _ & vbNewLine & vbNewLine & «Строка «Null»: « & _ Format(«Null», «@;Пустая строка или Null») _ & vbNewLine & vbNewLine & «Значение Null: « & _ Format(Null, «@;Пустая строка или Null») End Sub |

To format a date in VBA, we use the inbuilt FORMAT function itself. It takes input as the date format and returns the desired format required. The arguments required for this function are the expression and the format type.
Formatting date and time are sensitive things in Excel, and the same applies to VBA. The default date and time are based on the system date we are working, which may vary from system to system. This article will show you different techniques for formatting dates with VBA codes.
To change the date format with VBA coding, we need to know the date formats and their impact on the date.
The below table shows the different date formatting and their codes.
Table of contents
- Excel VBA Format Date
- How to Change Date Format in VBA?
- Example #1
- Example #2
- Change Date Format by Using FORMAT Function
- Things to Remember
- Recommended Articles
- How to Change Date Format in VBA?
So, remember that the above chart formatting the date through VBA codingVBA code refers to a set of instructions written by the user in the Visual Basic Applications programming language on a Visual Basic Editor (VBE) to perform a specific task.read more is not a tough task.
How to Change Date Format in VBA?
Below are examples of Excel VBA date format.
You can download this VBA Format Date Excel Template here – VBA Format Date Excel Template
Example #1
We have the same date in multiple cells of the worksheet, as shown below.

Now, we will apply different date formats for the same date to see the impact at different date format codes.
First, copy the same data to the next column to see the impact.

For the first date, cell A1 we will apply the “DD-MM-YYYY” format.

We first must select the cell in the code using the RANGE object.
Code:
Sub Date_Format_Example1()

   Range ("A1")

End Sub

Since we are changing the date format of the cell, we need to access the “Number Format” property of the RANGE object.
Code:
Sub Date_Format_Example1()

  Range("A1").NumberFormat

End Sub

After accessing “Number Format,” we need to set the number format by putting the equal sign and applying the format code in double quotes.
Code:
Sub Date_Format_Example1()

   Range("A1").NumberFormat = "dd-mm-yyy"
   'This will chnage the date to "23-10-2019"

End Sub

When we execute this code, it will apply the number format to cell A1 as “DD-MM-YYYY.”
Output:

Example #2
Similarly, we have also applied different formatting codes for other cells. Below is the VBA code for you.
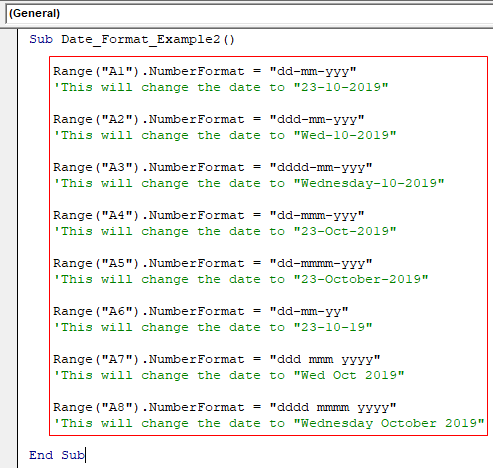
Code:
Sub Date_Format_Example2()

   Range("A1").NumberFormat = "dd-mm-yyy"
   'This will change the date to "23-10-2019"

   Range("A2").NumberFormat = "ddd-mm-yyy"
   'This will change the date to "Wed-10-2019"

   Range("A3").NumberFormat = "dddd-mm-yyy"
   'This will change the date to "Wednesday-10-2019"

   Range("A4").NumberFormat = "dd-mmm-yyy"
   'This will change the date to "23-Oct-2019"

   Range("A5").NumberFormat = "dd-mmmm-yyy"
   'This will change the date to "23-October-2019"

   Range("A6").NumberFormat = "dd-mm-yy"
   'This will change the date to "23-10-19"

   Range("A7").NumberFormat = "ddd mmm yyyy"
   'This will change the date to "Wed Oct 2019"

   Range("A8").NumberFormat = "dddd mmmm yyyy"
   'This will change the date to "Wednesday October 2019"

End Sub
The result of this code will be as follows.
Output:

Change Date Format by Using FORMAT Function
In VBA, we have a function called FORMAT, which we can use to apply the desired format to the cell.
![]()
We need to specify the value for “Expression” and apply the “Format” accordingly.
Look at the below code for an example.
Code:
Sub Date_Format_Example3()

  Dim MyVal As Variant

  MyVal = 43586

  MsgBox Format(MyVal, "DD-MM-YYYY")

End Sub

In the above code, we have defined the variable as a variant (which can hold any value).
Code:
Dim MyVal As Variant
Next, for this variable, we have assigned the value 43586.
Code:
MyVal = 43586
Next, in the message box, we have shown the result of the variable, but before we show the result, we have used the “FORMAT” function to format the variable’s value “MyVal,” and the given format. “DD-MM-YYYY.”
Code:
MsgBox Format(MyVal, "DD-MM-YYY")
Let us run the code and see the result in the message box in VBAVBA MsgBox function is an output function which displays the generalized message provided by the developer. This statement has no arguments and the personalized messages in this function are written under the double quotes while for the values the variable reference is provided.read more.
Output:

As you can see above, the result shows as “01-05-2019.”
You must wonder if we have supplied the serial number, but the result shows the date. Because Excel stores the date as serial numbers, the value 43586 is equal to the date “01-05-2019,” and if you increase the number by 1, i.e., 43587, the date will be “02-05-2019.”
Code:
Sub Date_Format_Example3()

  Dim MyVal As Variant

  MyVal = 43586

  MsgBox Format(MyVal, "DD-MM-YYY")

End Sub

Things to Remember
- It will also apply your system’s default date to your Excel.
- We can use the Number Format property to change the date format in VBA.
- Using the FORMAT function, we can change the date format.
- Excel stores date as serial numbers. If you apply the date format, it will show accordingly.
Recommended Articles
This article has been a guide to VBA Format Date. Here, we discuss how to change the date format in Excel VBA using different formatting codes and Format functions, examples, and a downloadable Excel template. Below are some useful Excel articles related to VBA: –
- Copy Formatting in Excel
- Subtract Date In Excel
- CDATE Function in VBA
- Range Variable in VBA
- VBA RGB

This Excel tutorial explains how to use the Excel FORMAT function (as it applies to date values) with syntax and examples.
Description
The Microsoft Excel FORMAT function takes a date expression and returns it as a formatted string.
The FORMAT function is a built-in function in Excel that is categorized as a Date/Time Function. It can be used as a VBA function (VBA) in Excel. As a VBA function, you can use this function in macro code that is entered through the Microsoft Visual Basic Editor.
Syntax
The syntax for the FORMAT function in Microsoft Excel is:
Format ( expression, [ format, [ firstdayofweek, [firstweekofyear] ] ] )
Parameters or Arguments
- expression
- The date value to format.
- format
-
Optional. It is the format to apply to the expression. You can either define your own format or use one of the named formats that Excel has predefined such as:
Format Explanation General Date Displays date based on your system settings Long Date Displays date based on your system’s long date setting Medium Date Displays date based on your system’s medium date setting Short Date Displays date based on your system’s short date setting Long Time Displays time based on your system’s long time setting Medium Time Displays time based on your system’s medium time setting Short Time Displays time based on your system’s short time setting - firstdayofweek
-
Optional. It is a value that specifies the first day of the week. If this parameter is omitted, it assumes that Sunday is the first day of the week. This parameter can be one of the following values:
Constant Value Explanation vbUseSystem 0 Uses the NLS API setting VbSunday 1 Sunday (default, if parameter is omitted) vbMonday 2 Monday vbTuesday 3 Tuesday vbWednesday 4 Wednesday vbThursday 5 Thursday vbFriday 6 Friday vbSaturday 7 Saturday - firstweekofyear
-
Optional. It is a value that specifies the first week of the year. If this parameter is omitted, it assumes that the week that contains January 1 is the first week of the year. This parameter can be one of the following values:
Constant Value Explanation vbUseSystem 0 Uses the NLS API setting vbFirstJan1 1 The week that contains January 1 vbFirstFourDays 2 The first week that has at least 4 days in the year vbFirstFullWeek 3 The first full week of the year
Returns
The FORMAT function returns a string value.
Applies To
- Excel for Office 365, Excel 2019, Excel 2016, Excel 2013, Excel 2011 for Mac, Excel 2010, Excel 2007, Excel 2003, Excel XP, Excel 2000
Type of Function
- VBA function (VBA)
Example (as VBA Function)
The FORMAT function can only be used in VBA code in Microsoft Excel.
Let’s look at some Excel FORMAT function examples and explore how to use the FORMAT function in Excel VBA code:
Format(#17/04/2004#, "Short Date")
Result: '17/04/2004'

Format(#17/04/2004#, "Long Date")
Result: 'April 17, 2004'

Format(#17/04/2004#, "yyyy/mm/dd")
Result: '2004/04/17'
For example:
Dim LValue As String

LValue = Format(Date, "yyyy/mm/dd")
In this example, the variable called LValue would now contain the date formatted as yyyy/mm/dd.
Excel VBA Dates & Time, Format Function, User Defined Date, Number & String Formats
—————————————————————————————————————
Contents:
Excel VBA Dates & Time
Format Function in VBA
Named Date/Time Formats
Named Numeric Formats
Characters used to create User-Defined Number Formats with the VBA Format Function
Characters used to create User-Defined Date & Time Formats with the VBA Format Function
Characters used to create User-Defined String Formats with the VBA Format Function
—————————————————————————————————————
Excel VBA Dates & Time
Excel Dates Equate to Serial Numbers — Excel stores all dates as integers and all times as decimal fractions. Your System’s Locale settings determines display format for Numbers, Currency, Date & Time. With the VBA Format function you can create User-Defined Date & Time Formats, Number Formats & String Formats, besides using predefined Named Date/Time & Numeric Formats. The Format function formats and returns an expression (String value) as per the specified format. Your system-defined formats include the Short Date Format, Long Date Format, Short Time Format, Long Time Format, and the Number & Currency Formats, which are specified in your computer’s regional settings, which determine your default display formats.
Date Data Type in VBA: Date equates to a numeric value which is the count of number of days elapsed from a certain referenced date. Dates are stored as 64-bit (8-byte) Double Precision floating-point numbers.
| Variable Data Type | Storage Size | Range or Type of Values it Stores |
| Date | 8-bytes | Holds either the date or the time, or both. Values can range from January 1, 100 to December 31, 9999. After declaring the variable, you can assign a value to it. A date value must be entered between two # signs, viz. DateOfBirth = #2/15/1961# TimeOfBirth = #10:05 AM# MarriageDate = #2/19/94 17:30# |
Enclosing a date within number signs (#) ensures that the date literal will actually remain the date value which you actually mean to refer or use in your code. Generally the locale in which your application might be running (ie. Code Locale), determines the actual meaning of date value you enter, for ex. if you mean July 02, 2010 in a locale using mm/dd/yyyy, entering 07/02/2010 will compile your code correctly but entering 07/02/2010 in a locale using dd/mm/yyyy format will erroneously interpret as February 07, 2010 in your code. Using number signs (#) ensures that the date literal remains independent of your computer’s date and time format settings. Date literal is the date format specified by the locale settings for your code (ie. Code Locale). #7/2/2010# is the date literal that represents July 02, 2010, where English-U.S. is the locale setting for your application.
System’s Locale settings vs. Code Locale: The System’s Locale settings is the locale of the user who runs your program — the User Locale determines which default settings a user wants for formatting Numbers, Currency, Time & Date (used as a reference for user output) and uses Control Panel settings provided by the operating system. System-defined Format is dependent on your System’s Locale settings. The code locale is always English/U.S. in Visual Basic, irrespective of the international version being used. Short Time format and Short Date format of the Code Locale are used to Display Date and Time in the development environment ie. VBE in Excel.
To ensure that the date is correctly interpreted in any System Locale, enter dates within number signs (#), in code, in the format #month/day/year#. Because only English/U.S. is allowed in Visual Basic as a programming locale, the date will be the same to a user wherever your application is run. See below example.
Example: System-defined format (format specified in your computer’s regional settings) — Short Date Format is «dd-mm-yy» (English/U.K.) — refer Image 1a

Sub DateLiteral_1()
‘system-defined format (format specified in your computer’s regional settings) — Short Date Format is «dd-mm-yy» (English/U.K.) — refer Image 1a
Dim MyDate As Variant, MyDate1 As Variant
‘short date format of your Code Locale is always English/U.S. in Visual Basic, which determines display of Date in VBE
MyDate = #7/5/2014#
‘below format will assume your system-defined format:
‘returns «Saturday, July 5, 2014«
ActiveCell.Offset(1, 0) = Format(MyDate, «dddd, mmmm d, yyyy«)
ActiveCell.Offset(1, 1) = «date within number signs (# #)«
‘returns «Wednesday, May 7, 2014«
ActiveCell.Offset(2, 0) = Format(MyDate1, «dddd, mmmm d, yyyy«)
ActiveCell.Offset(2, 1) = «date within double quotes«
End Sub
Example: System-defined format (format specified in your computer’s regional settings) — Short Date Format is «m/d/yyyy» (English/U.S.) — refer Image 1b

Sub DateLiteral_2()
‘system-defined format (format specified in your computer’s regional settings) — Short Date Format is «m/d/yyyy» (English/U.S.) — refer Image 1b
Dim MyDate As Variant, MyDate1 As Variant
‘short date format of your Code Locale is always English/U.S. in Visual Basic, which determines display of Date in VBE
MyDate = #7/5/2014#
‘below format will assume your system-defined format:
MyDate1 = «7/5/2014«
‘returns «Saturday, July 5, 2014«
ActiveCell.Offset(1, 0) = Format(MyDate, «dddd, mmmm d, yyyy«)
ActiveCell.Offset(1, 1) = «date within number signs (# #)«
‘returns «Saturday, July 5, 2014«
ActiveCell.Offset(2, 0) = Format(MyDate1, «dddd, mmmm d, yyyy«)
ActiveCell.Offset(2, 1) = «date within double quotes«
End Sub
Format specified in your computer’s regional settings — Short Date / Long Date Format can be set or changed by the individual user manually from the Formats tab of the Region item in Control Panel in Windows 8. Refer Image 2.

Excel Dates Equate to Serial Numbers:
Excel stores all dates as integers and all times as decimal fractions. With this system, Excel can add, subtract, or compare dates and times just like any other numbers, and all dates are manipulated by using this system. In this system, the serial number 1 represents 1/1/1900 12:00:00 AM, the first supported day from when the Excel calendar starts. Bug in Excel: Excel erroneously treats 1900 as a leap year, which has presumably been done knowingly by Microsoft to provide compatibility with Lotus 1-2-3, and so actually the bug would have been in Lotus 123 (Excel’s predecessor).
In Excel, Dates equate to a «serial number» (which is a numeric value) that is the count of number of days elapsed from a certain referenced date. Dates are stored as 64-bit (8-byte) Double Precision floating-point numbers. The integer part (values to the left of decimal) is the number of days elapsed since January 1, 1900. For example, January 1, 1900 is stored as 1; January 2, 1900 is stored as 2; March 15, 2001 is stored as 36,965. The fractional part (values to the right of decimal) holds time information, and represents the time as a fraction of a whole day. For example, 12.00AM (midnight) is stored as 0; 6:00AM is stored as 0.25; 12.00PM (noon) is stored as 0.5; 6:00PM is stored as 0.75; 6:00:30PM is stored as 0.750347222. To check the «serial number» of a date and time simply format the cell as «General» or format to number — conversely type a number in Excel and formatting the cell to date format will display the equivalent date. The Date and Time of «10/3/1954 6:00:00 AM» has a serial number of 20000.25.
Note that where the 1900 date system is used by Excel for Windows, but Excel for Mac uses the 1904 date system so that typing the number 1 in Excel and formatting it in date format will display 1/2/1904 12:00:00 AM in Excel for Mac while Excel for Windows displays it as 1/1/1900 12:00:00 AM. In Mac, you can change to the 1900 date system by clearing the 1904 date system in the Calculation tab (in Preferences) whereas in Excel for Windows you can change to the 1904 date system — in Excel 2007 click the Microsoft Office Button image, click Excel Options, and then click the Advanced category and in the ‘When calculating this workbook’ options select the ‘Use 1904 date system‘.
Format Function in VBA
The vba Format function formats and returns an expression (String value) as per the specified format. Syntax: Format(expression, format, firstdayofweek, firstweekofyear). It is necessary to specify the expression argument, which is any expression you wish to format. The other 3 arguments are optional to specify. The format argument specifies a named or user-defined format expression — (i) to format numbers (or dates/times), you will use predefined named numeric (or date/time) formats or create user-defined numeric (or date/time) formats; (ii) to format date and time serial numbers, you will use date/time formats or numeric formats; (iii) to format strings you will create user-defined string formats. You can also use constants to specify the first day of the week or the first week of the year in the arguments of firstdayofweek and firstweekofyear respectively.
Formatting a number by omitting the format argument will return a String representation of the number, similar to using the Str vba function, but a positive number thus formatted will not include a leading space for the sign of number in the returned string like when using the Str function.
While using the Format Function for Date formatting, you must specify the expression argument appropriately in Gregorian or Hijri depending if your Calendar property setting is Gregorian or Hijri.
Constants to be used for the argument firstdayofweek: vbUseSystem (value 0) — use NLS API setting; vbSunday (this is the default) (value 1) — Sunday; vbMonday (value 2) — Monday; vbTuesday (value 3) — Tuesday; vbWednesday (value 4) — Wednesday; vbThursday (value 5) — Thursday; vbFriday (value 6) — Friday; vbSaturday ( value 7) — Saturday.
Constants to be used for the argument firstweekofyear: vbUseSystem (value 0) — use NLS API setting; vbFirstJan1 (this is the default) (value 1) — start with week in which January 1 occurs; vbFirstFourDays (value 2) — start with the first week which has at least four days in the year; vbFirstFullWeek (value 3) — start with the first full week of the year which has all 7 days.
Named Date/Time Formats
Listed below are predefined named Date and Time formats. Your system setting determines the Date display.
| Format Name | Description |
| General Date | Displays a date and/or time, ex. 8/14/12 6:28 PM. The integer part (values to the left of decimal) displays a date, ex. 8/14/12, the fractional part (values to the right of decimal) displays time, ex. 6:28 PM. Your system setting determines the Date display — you can display only a Date or only a Time or both Date & Time. |
| Long Date | Long Date Format refers to your system-defined long date format ie. the long date format specified in your computer’s regional settings, for example, Thursday, July 31, 2014. |
| Medium Date | Medium Date Format displays a date using the medium date format appropriate for the language version of your Excel application (host application). |
| Short Date | Short Date Format refers to your system-defined short date format ie. the short date format specified in your computer’s regional settings, for example, 7/31/2014. |
| Long Time | Long Time Format refers to your system-defined long time format ie. the long time format specified in your computer’s regional settings, and typically includes hours, minutes, seconds, for example, 19:35:40. |
| Medium Time | Medium Time Format displays time in 12-hour format showing hours and minutes and the AM/PM designator viz. 7:48 AM. |
| Short Time | Short Time Format displays a time using the 24-hour format, and typically uses hours & minutes, for example, 19:35. |
System-defined Format is dependent on your System’s Locale settings:
System Locale controls the language used when displaying text in programs that do not support Unicode. Applications affected by this setting are only those that do not use Unicode as their default character-encoding mechanism and hence this setting is not applicable to applications that are already Unicode-encoded. The system locale is a unique setting for each system and the administrator has to change it manually wherein the computer is required to be restarted for the changes to take effect. System locale can be set from the Administrative tab of the Region item in Control Panel in Windows 8.
The User Locale determines which default settings a user wants for formatting Numbers, Currency, Time & Date. The user locale can be set or changed by the individual user manually from the Formats tab of the Region item in Control Panel in Windows 8. Locale-aware applications use this value to display formatted data.
Your System’s Locale settings (User Locale) determines display format for Numbers, Currency, Time & Date by running your code whereas the short time format and short date format of your Code Locale (which is always English/U.S. in Visual Basic) determines display of Time & Date in the development environment.
Example: Using Predefined Named Date and Time formats — System Settings — English (United States)
Sub PredefinedNamedDateAndTimeFormats_1()
‘Using Predefined Named Date and Time formats.
‘Your system setting determines the Date and Time display for General Date, Long Date, Short Date & Long Time;
‘Medium Date format is per the language version of your host Excel application;
‘Short Time Format uses a 24-hour format, displays hours & minutes;
‘SYSTEM SETTINGS SPECIFIED IN THE COMPUTER’S REGIONAL SETTINGS — English (United States):
‘Long Time Format = h:mm:ss tt
‘Long Date Format = dddd, MMMM d, yyyy
‘Short Time Format = h:mm tt
‘Short Date Format = M/d/yyyy
‘M = month; m = minute
‘AM & PM Symbol = AM & PM
Dim MyDate As Variant, MyTime As Variant, SerialNo As Variant, str As Variant
SerialNo = «41851.87«
MyDate = #7/31/2014#
MyTime = #7:16:32 PM#
‘returns «7/31/2014 8:52:48 PM»
str = Format(SerialNo, «General Date«)
MsgBox str
‘returns «Thursday, July 31, 2014»
str = Format(MyDate, «Long Date«)
MsgBox str
‘returns «31-July-14»
str = Format(MyDate, «Medium Date«)
MsgBox str
‘returns «7/31/2014»
str = Format(MyDate, «Short Date«)
MsgBox str
‘returns «7:16:32 PM»
str = Format(MyTime, «Long Time«)
MsgBox str
‘returns «07:16 PM»
str = Format(MyTime, «Medium Time«)
MsgBox str
‘returns «19:16»
str = Format(MyTime, «Short Time«)
MsgBox str
End Sub
Example: Using Predefined Named Date and Time formats — System Settings — English (United Kingdom)
Sub PredefinedNamedDateAndTimeFormats_2()
‘Using Predefined Named Date and Time formats.
‘Your system setting determines the Date and Time display for General Date, Long Date, Short Date & Long Time;
‘Medium Date format is per the language version of your host Excel application;
‘Short Time Format uses a 24-hour format, displays hours & minutes;
‘SYSTEM SETTINGS SPECIFIED IN THE COMPUTER’S REGIONAL SETTINGS — English (United Kingdom):
‘Long Time Format = HH:mm:ss
‘Long Date Format = dd MMMM yyyy
‘Short Time Format = HH:mm
‘Short Date Format = dd/MM/yyyy
‘h/H = 12/24 hour
‘M = month; m = minute
Dim MyDate As Variant, MyTime As Variant, SerialNo As Variant, str As Variant
SerialNo = «41851.87«
MyDate = #7/31/2014#
MyTime = #7:16:32 PM#
‘returns «31/07/2014 20:52:48»
str = Format(SerialNo, «General Date«)
MsgBox str
‘returns «31 July 2014»
str = Format(MyDate, «Long Date«)
MsgBox str
‘returns «31-July-14»
str = Format(MyDate, «Medium Date«)
MsgBox str
‘returns «31/07/2014»
str = Format(MyDate, «Short Date«)
MsgBox str
‘returns «19:16:32»
str = Format(MyTime, «Long Time«)
MsgBox str
‘returns «07:16 PM»
str = Format(MyTime, «Medium Time«)
MsgBox str
‘returns «19:16»
str = Format(MyTime, «Short Time«)
MsgBox str
End Sub
Named Numeric Formats
Listed below are predefined numeric format names.
| Format Name | Description |
| General Number | General format cells have no specific number format and do not display the thousand separator. |
| Currency | Currency format is used for general monetary values and displays number with the thousand separator. It typically displays two digits to the right of the decimal point and the currency symbol, final display being based on your system’s locale settings. |
| Fixed | Fixed format displays a minimum of one digit to the left and two digits to the right of the decimal point. |
| Standard | Standard format displays the thousand separator and a minimum of one digit to the left and two digits to the right of the decimal point. |
| Percent | Percent format multiplies the number by 100 and displays the result with a percent symbol (%) to its right, with two digits to the right of the decimal point. |
| Scientific | Scientific format uses standard scientific notation (exponential format), providing two significant digits. |
| Yes/No | If number is 0 this format displays No, otherwise it displays Yes. |
| True/False | If number is 0 this format displays False, otherwise it displays True. |
| On/Off | If number is 0 this format displays Off, otherwise it displays On. |
Example: Using Predefined Named Numeric formats.
Sub NamedNumericFormats()
‘Using Predefined Named Numeric formats.
Dim str As Variant
‘returns «5678.9523»
str = Format(5678.9523, «General Number«)
MsgBox str
‘returns «$5,678.95»
str = Format(5678.9523, «Currency«)
MsgBox str
‘returns «5678.90»
str = Format(5678.9, «Fixed«)
MsgBox str
‘returns «5,678.95»
str = Format(5678.9523, «Standard«)
MsgBox str
‘returns «595.23%»
str = Format(5.9523, «Percent«)
MsgBox str
‘returns «5.68E+03»
str = Format(5678.9523, «Scientific«)
MsgBox str
‘returns «Yes»
str = Format(-5.95, «Yes/No«)
MsgBox str
‘returns «True»
str = Format(5.95, «True/False«)
MsgBox str
‘returns «Off»
str = Format(0, «On/Off«)
MsgBox str
End Sub
Characters used to create User-Defined Number Formats with the VBA Format Function
| Syntax for VBA Format Function: Format(expression,format) | ||||
| Character | Description | Format Argument | Expression Argument | Formatted Display |
| 0 (zero) | Digit placeholder. If the number has lesser number of digits than zeros in the format code, the insignificant zeros are displayed. This means that the minimum number of digits are determined by the position of zero at the extreme left before decimal and position of zero at extreme right after decimal, in the format code. | 0.00 | 5.6 | 5.60 |
| If the number has more digits than zeros to the left of the decimal point in the format code, the extra digits are displayed. | 00.00 | 5.6 | 05.60 | |
| The number of zeros to the right of the decimal point in the format code, determine the round off digits. The «00» format code rounds off to the nearest digit preceding the decimal point. | 0.0 | 5.6 | 5.6 | |
| 0 | 0.6 | 1 | ||
| 00.00 | 456.789 | 456.79 | ||
| 00 | 45.445 | 45 | ||
| # (number character) | Digit placeholder. This follows the same rules as 0 (zero), except that, if the number has lesser number of digits than «#» characters in the format code, the insignificant zeros are NOT displayed, even though it may be the only digit. | ###.## | 456.6 | 456.6 |
| If the number has more digits than # characters to the left of the decimal point in the format code, the extra digits are displayed. | # | 456.68 | 457 | |
| The number of # to the right of the decimal point in the format code, determine the round off digits. The «##» format code rounds off to the nearest digit preceding the decimal point. | (###) ### — #### | 4567891234 | (456) 789 — 1234 | |
| ##.# | 456.689 | 456.7 | ||
| ## | 45.678 | 46 | ||
| . (period) | Decimal placeholder. The decimal point (ie. the «.» character) in the format code determines the decimal place. Some locales use comma as the decimal separator instead of period. | 00.000 | 456.123456 | 456.123 |
| The number of Digit Placeholders to the right of the decimal point in the format code, determine the round off digits. For the first digit placeholder to the left of the decimal separator use 0 to display a leading zero with fractional numbers. | 00.00 | 456.789567 | 456.79 | |
| The «00» or «##» format codes round off to the nearest digit preceding the decimal point. | ##.# | 456.789567 | 456.8 | |
| ##.# | 0.65 | 7 | ||
| % (percent sign) | Percentage indicator. Numbers are displayed as a percentage of 100 with this. The percent sign in the format code multiplies the number by 100, before it is formatted. The symbol «%» is displayed at the same position at which it is inserted in the format code. | #.0% | 0.00625 | .6% |
| 0.000% | 0.00625 | 0.625% | ||
| #.##% | 0.00625 | .63% | ||
| %# | 0.5625 | %1 | ||
| #% | 0.5625 | 56% | ||
| , (comma) | Thousand separator and Number scaling. Some locales use period (.) as a thousand separator. | # | 123456 | 123456 |
| Thousand separator: In the format code, placing comma between two digit placeholders and to the left of decimal, will act as a thousand separator. | #,### | 123456 | 123,456 | |
| Number Scaling: If comma is placed to the immediate left of the decimal point (in the format code), the number is divided by 1,000, n number of times wherein n is the number of characters «,». The format string «0,,» will scale down the number 100 million to 100 (divides 100 million by 1,000 * 1,000); and the format code «0,,,» will divide the number by 1,000 * 1,000 * 1,000. Note that this number scaling will not apply the thousand separator, which will have to be done separately after the number scaling. A comma in any position other than to the immediate left of the decimal point will only act as a thousand separator. | #,#00 | 123456 | 123,456 | |
| #,###.## | 4567.234 | 4,567.23 | ||
| 0, | 10000 | 10 | ||
| #,##0,, | 1000000 | 1 | ||
| #,###.#, | 12345.678 | 12,345.7 | ||
| #,###.# | 12345.678 | 12,345.7 | ||
| : | Time separator. This separates hours, minutes & seconds while formatting time values. | hh:mm:ss AMPM | 0.251 | 06:01:26 AM |
| / (forward slash) | Date separator. This separates the day, month & year while formatting date values. | dd/mm/yyyy | 7/24/2014 | 24/07/2014 |
| mm/dd/yyyy | 41476 | 07/21/2013 | ||
| E+ E- e+ e- | Scientific notation (exponential format). «E+» and «E-» followed by atleast one digit placeholder (0 or #), displays the number in scientific notation, with the character «E» mentioned between the number and the exponent. The number of «0» characters determine the minimum number of exponent digits. «E+» indicates that the sign character (plus or minus) will always precede the exponent, whereas «E-» indicates that the sign character (minus) precedes only negative exponents. | 0.00E+0 | 4560000 | 4.56E+6 |
| The E stands for exponent. To avoid writing extremely long numbers, use scientific notation (SN), ie. a numeric value containing the letter E followed by a number. To convert a SN number say 5.0E+3 to the actual number, move the decimal position 3 positions to the right OR multiply the number to the left of E by 10 raised to the powerof 3 viz. the actual number is 5000. If the exponent is negative, like in 5.25E-3, move the decimal position 3 positions to the left OR multiply the number to the left of E by 10 raised to the power of -3 viz. the actual number is 0.00525. | #0.0E+00 | 4560000 | 45.6E+05 | |
| 0.###E+0 | 123.456 | 1.235E+2 | ||
| ##E+# | 0.0001234 | 12E-5 | ||
| ##E-0 | 123456 | 12E4 | ||
| ##E+0 | 123456 | 12E+4 | ||
| ##E-0 | 0.0001234 | 12E-5 | ||
| 0.##E+0 | 0.00525 | 5.25E-3 | ||
| $ + — ( ) space | Literal characters. These are displayed as literals (exactly as typed) as per their position in the format code. Use these to display currency, to differentiate positive and negative numbers and for a more user-friendly display. | $ +#,###.00 | 1456.7 | $ +1,456.70 |
| (backslash) | Backslash. Any character appearing after backslash () will display as a literal, even though it may be reserved as an operator (say, %). Backlash itself will not be displayed. The number 0.75 with the format code #.00% will format to 75.00%, but with the format code #.00% it will format to .75%, ie. format code will not use % as operator but as a literal. To display several characters as literals enclose these in double quotation marks (» «) or in case of a single character, precede it with a backslash (). | #.00% | 0.75 | .75% |
| Many Characters do not display as literal, except when preceded with a backlash — some examples are: date/ time-formatting characters (c, d, h, m, n, q, s, w, y, / and :), the numeric-formatting characters (#, 0, and period), and string-formatting characters (@, &, <, >, and !). | #.00% | 0.75 | 75.00% | |
| Precede String with «Hello « | Hello @ | Tracy | Hello Tracy | |
| character c does not display as literal, unless preceded with a backlash | c @ | Tracy | Tracy | |
| character c does not display as literal, unless preceded with a backlash | c @ | Tracy | c Tracy | |
| character b displays as literal, without being preceded with a backlash | b @ | Tracy | b Tracy | |
| » kg” will be added to the end of the number | 0 kg | 75 | 75 kg | |
| (» «) double quotation marks | The string between the double quotation marks («») is displayed. | |||
| The vba Chr function returns a character (string data type) identified to the specified character code — use Chr(34) in your code for a quotation mark («) ex. MsgBox Chr(34) & ActiveCell.Value & Chr(34) returns the ActiveCell value within double quotation marks. |
Example: Using User-defined Number formats with the VBA Format Function.
Sub UserDefinedNumberFormats()
‘Using User-defined Number formats with the VBA Format Function.
Dim str As Variant
‘returns «5678.95»
str = Format(5678.9523, «0.00«)
MsgBox str
‘returns «05.90»
str = Format(5.9, «00.00«)
MsgBox str
‘returns «5.9»
str = Format(5.9, «##.##«)
MsgBox str
‘returns «5.95»
str = Format(5.9523, «##.00«)
MsgBox str
‘returns «5679»
str = Format(5678.9523, «#«)
MsgBox str
‘returns «$5672.5»
str = Format(5672.4523, «##.#«)
MsgBox str
‘returns «5,678.95»
str = Format(5678.9523, «#,###.##«)
MsgBox str
‘returns «(456) 789 — 1234»
str = Format(4567891234#, «(###) ### — ####«)
MsgBox str
‘returns «.63%»
str = Format(0.00625, «#.##%«)
MsgBox str
‘returns «%1»
str = Format(0.625, «%#«)
MsgBox str
‘returns «4.56E+6»
str = Format(4560000, «0.00E+0«)
MsgBox str
‘returns «45.6E+05»
str = Format(4560000, «#0.0E+00«)
MsgBox str
‘returns «12E4»
str = Format(123456, «##E-0«)
MsgBox str
‘returns «12E+4»
str = Format(123456, «##E+0«)
MsgBox str
‘returns «$ +1,456.70»
str = Format(1456.7, «$ +#,###.00«)
MsgBox str
‘returns «Hello Tracy»
str = Format(«Tracy«, «Hello @«)
MsgBox str
‘returns «75 kg»
str = Format(«75«, «0 kg»)
MsgBox str
End Sub
VBA Format Function can have upto Four Sections for User-defined Formats, for different Formats for different Numeric Values
While creating User-Defined Number Formats with the VBA Format Function, you can have upto 4 sections, each section being separated by semicolons(;), wherein you can create different formats for different Numeric values. Creating multiple sections is not possible wherein the format argument contains any Predefined Named Numeric format.
There can be upto four sections of format argument, wherein each section is separated by a semicolon. These sections determine the display of positive values, negative values, zeros and Null values, in that order. If only one section is specified, it applies to all values; if two sections are specified, the first applies to positive and zero values and the second section applies to negative values. When you use 3 sections for format argument, the first section applies to positive values, the second section applies to negative values, and the third section applies to zeros.
Example: Using multiple sections for user-defined Number formats with the VBA Format Function.
Sub MultipleSectionsUserDefinedNumberFormats()
‘Using multiple sections for user-defined Number formats with the VBA Format Function.
Dim str As Variant
‘returns «5,678.952»
str = Format(5678.9523, «#,###.000;($ #,##0);0.00;Null«)
MsgBox str
‘returns «($ 5,679)»
str = Format(-5678.9523, «#,###.000;($ #,##0);0.00;Null«)
MsgBox str
‘returns «0.00»
str = Format(0, «#,###.000;($ #,##0);0.00;Null«)
MsgBox str
End Sub
Missing a Section:
You can also skip a section and specify format argument for the following or preceding section, but then you must enter the ending semicolon for the skipped section. The skipped section is printed using the format of the positive value, and in the absence of a format for a positive value, skipping a section will result in a blank display for that section. See below example.
Example: Missing sections for user-defined Number formats with the VBA Format Function.
Sub MissingSectionsUserDefinedNumberFormats()
‘missing sections for user-defined Number formats with the VBA Format Function.
Dim str As Variant
‘returns «» ie. blank (positive expression, but no format argument for positive value)
str = Format(5678.9523, «;($ #,##0);Zero;«)
MsgBox str
‘returns «-5,678.952» (for negative expression, using the format of the positive value when no format argument for negative value)
str = Format(-5678.9523, «#,###.000;;Zero«)
MsgBox str
‘returns «» ie. blank (negative expression, no format argument for positive or negative values)
str = Format(-5678.9523, «;;«)
MsgBox str
‘returns «($ 5,679)» (for negative expression, using format argument for negative values)
str = Format(-5678.9523, «;($ #,##0);«)
MsgBox str
‘returns «zero» (for zero expression, using format argument for zero values)
str = Format(0, «;;zero«)
MsgBox str
‘returns «.000» (for zero expression, using the format of the positive value)
str = Format(0, «#,###.000;;«)
MsgBox str
End Sub
Characters used to create User-Defined Date & Time Formats with the VBA Format Function
| Character | Description | Format Argument | Expression Argument | Formatted Display |
| / (forward slash) | Date separator. Separates the day, month & year while formatting date values. | mm/dd/yyyy | 41463 | 07/08/2013 |
| c | Date is displayed as ddddd and time is displayed as ttttt, in that order. Only date is displayed if date serial number does not have a fractional part and only time information is displayed if no integer portion. | c | 41463.251 | 7/8/2013 6:01:26 AM |
| c | 0.251 | 6:01:26 AM | ||
| c | 41463 | 7/8/2013 | ||
| d | Day is displayed as a number, as one digit or as two digit, without a leading zero. (1-31) | mm/d/yyyy | 41463 | 07/8/2013 |
| dd | Day is displayed as a number, as two digit, with a leading zero where applicable. (01-31) | mm/dd/yyyy | 41463 | 07/08/2013 |
| ddd | Day is abbreviated to three letters, viz. Sunday is displayed as Sun. (Sun-Sat) | ddd, mmm d, yyyy | 41463 | Mon, Jul 8, 2013 |
| dddd | Day is displayed in its full format, viz. Sunday is displayed as Sunday. (Sunday-Saturday) | dddd, mmm d, yyyy | 41463 | Monday, Jul 8, 2013 |
| ddddd | Display a date serial number as a complete date (including day, month, and year) formatted according to the short date setting recognized by your system. The default short date format is m/d/yy. | ddddd | 41463 | 7/8/2013 (Short Date Format in the system showing the display is: dddd, m/d/yyyy) |
| dddddd | Display a date serial number as a complete date (including day, month, and year) formatted according to the long date setting recognized by your system. The default long date format is mmmm dd, yyyy. | dddddd | 41463 | Monday, July 8, 2013 (Long Date Format in the system showing the display is: dddd, MMMM d, yyyy) |
| aaaa | Displays the full, localized name of the day in its full format (same as dddd, except that its localized version). | |||
| w | Day of the week is displayed as a number (1-7 for Sunday-Saturday). | w, mmm d, yyyy | 41463 | 2, Jul 8, 2013 |
| ww | Week of the year is displayed as a number. (1 to 54) | ww | #7/8/2013# | 28 |
| m | Month is displayed as a number, as one digit or as two digit, without a leading zero — (1-12). To use m as minute(s), it should appear immediately after the h or hh code, such as «h:m». | m/d/yyyy | 41463 | 7/8/2013 |
| mm | Month is displayed as a number, as two digit, with a leading zero where applicable — (01-12). To use mm as minute(s), it should appear immediately after the h or hh code, such as «h:mm». | mm/d/yyyy | 41463 | 07/8/2013 |
| mmm | Month name is abbreviated to three letters, viz. January is displayed as Jan. (Jan-Dec) | mmm d, yyyy | 41463 | Jul 8, 2013 |
| mmmm | Month is displayed in its full name, viz. January is displayed as January. (January-December) | mmmm d, yyyy | 41463 | July 8, 2013 |
| oooo | Displays the full localized name of the month (same as mmmm, except that its localized version). | |||
| q | Quarter of the year is displayed as a number. (1 to 4) | q | #7/8/2013# | 3 |
| y | Day of the year is displayed as a number. (1 to 366) | y | #7/8/2013# | 189 |
| yy | Year is displayed as a number in two digits, viz. last 2 digits of the year are displayed. (00-99) | m/d/yy | 41463 | 7/8/13 |
| yyyy | Year is displayed as a number in four digits, viz. all digits of the year are displayed. (1900-9999) | m/d/yyyy | 41463 | 7/8/2013 |
| : | Time separator. This separates hours, minutes & seconds while formatting time values. | h:n:ss AMPM | 0.251 | 6:1:26 AM |
| h | Hour is displayed as a number, as one digit or as two digit, without leading zeros. (0-23) | h:nn:ss AMPM | 0.251 | 6:01:26 AM |
| Hh | Hour is displayed as a number, as two digit, with a leading zero where applicable. (00-23) | Hh:n:ss AMPM | 0.251 | 06:1:26 AM |
| N | Minute is displayed as a number, as one digit or as two digit, without leading zeros — (0 to 59). You can also use m code as minute (m is used for displaying month), for which it should appear immediately after the h or hh code, such as «h:m». | n:ss | 0.251 | 1:26 |
| Nn | Minute is displayed as a number, as two digit, with a leading zero where applicable — (00 to 59). You can also use m code as minute (m is used for displaying month), for which it should appear immediately after the h or hh code, such as «h:m». | Nn:s | 0.251 | 01:26 |
| S | Second is displayed as a number, as one digit or as two digit, without leading zeros. (0 — 59) | h:n:S | 0.2591 | 6:13:6 |
| Ss | Second is displayed as a number, as two digit, with a leading zero where applicable. (00 — 59) | h:n:Ss | 0.2591 | 6:13:06 |
| t t t t t | Complete time is displayed (including hour, minute, and second) wherein the time separator, as defined by the time format recognized by your system, is used. If the leading zero option is selected and the time is before 10:00 AM / PM, a leading zero will be displayed. h:mm:ss is the default format. | ttttt | 0.25631 | 6:09:05 AM |
| AM/PM, am/pm, A/P, a/p or AMPM | If these codes are included in the format, the hour is displayed using a 12-hour clock, else the hour is based on the 24-hour format. Display will include AM, am, A or a for a time before noon, and PM, pm, P or p for a time ‘from’ and ‘after’ noon till 11:59 PM. While using AMPM, the case can be UPPER or lower, matching the string as defined by your system settings. AM/PM is the Default format. | Hh:n:ss A/P | 0.251 | 06:1:26 A |
Example: Using User-defined Date & Time formats with the VBA Format Function.
Sub UserDefinedDateTimeFormats()
‘returns the Date and Time per user defined format
Dim MyDate As Variant, MyTime As Variant, str As Variant
MyDate = #7/1/2014#
MyTime = #7:09:32 PM#
‘returns «07/01/2014»
str = Format(MyDate, «mm/dd/yyyy«)
MsgBox str
‘returns «07/08/2013»
str = Format(41463, «mm/dd/yyyy«)
MsgBox str
‘returns «7/8/13»
str = Format(41463, «m/d/yy«)
MsgBox str
‘returns «7/8/2013 6:01:26 AM» — Date is displayed as ddddd and time is displayed as ttttt, in that order.
str = Format(41463.251, «c»)
MsgBox str
‘returns «6:01:26 AM» — only time information is displayed if no integer portion.
str = Format(0.251, «c«)
MsgBox str
‘returns «2» — Day of the week is displayed as a number (1-7 for Sunday-Saturday).
str = Format(41463, «w«)
MsgBox str
‘returns «28» — Week of the year is displayed as a number (1 to 54).
str = Format(#7/8/2013#, «ww«)
MsgBox str
‘returns «3» — Quarter of the year is displayed as a number (1 to 4)
str = Format(#7/8/2013#, «q«)
MsgBox str
‘returns «189» — Day of the year is displayed as a number (1 to 366)
str = Format(#7/8/2013#, «y«)
MsgBox str
‘returns «7/1/14»
str = Format(MyDate, «m/d/yy«)
MsgBox str
‘returns «Tue, Jul 1, 2014»
str = Format(MyDate, «ddd, mmm d, yyyy«)
MsgBox str
‘returns «19:9:32»
str = Format(MyTime, «h:n:s«)
MsgBox str
‘returns «07:09:32 pm»
str = Format(MyTime, «hh:mm:ss am/pm«)
MsgBox str
‘returns «07:09:32 PM»
str = Format(MyTime, «hh:mm:ss AMPM«)
MsgBox str
‘returns «06:1:26 A»
str = Format(0.251, «Hh:n:ss A/P«)
MsgBox str
‘returns «6:09:05 AM» — Complete time is displayed (including hour, minute, and second)
str = Format(0.25631, «ttttt«)
MsgBox str
‘omitting the format argument will return a String representation of the number — «245»
str = Format(245)
MsgBox str
End Sub
Characters used to create User-Defined String Formats with the VBA Format Function
| Character | Description | Format Argument | Expression Argument | Formatted Display |
| @ (at character) | Character placeholder. Display actual character or space. If character appears in the position where @ apepars in the format string, the character is displayed, else a space is displayed at that position. Placeholders will be filled from right to left, unless exclamation (!) character is used in the format string as explained below. | @@@@@@@ | Excel | Excel (2 leading spaces appear on the left of «Excel») |
| Precede String with «Mr « | «Mr «@ | James | Mr James | |
| Precede String with «Hello « | Hello @ | Tracy | Hello Tracy | |
| & | Character placeholder. Display actual character or nothing. If character appears in the position where & (ampersand) appears in the format string, the character is displayed, else a nothing is displayed at that position. Placeholders will be filled from right to left, unless exclamation (!) character is used in the format string as explained below. | &&&&&&&&& | Excel VBA | Excel VBA (Displays «Excel VBA» as in the String) |
| > | Displays all characters as uppercase. | > | Excel | EXCEL |
| < | Displays all characters as lowercase. | < | Excel | excel |
| ! | Placeholders will be filled from left to right — Default is right to left. | !@@@@@@@ | Excel | Excel (2 spaces appear on the right of «Excel») |
Example: Using User-defined String formats with the VBA Format Function.
Sub UserDefinedStringFormats()
‘Using User-defined String formats with the VBA Format Function.
Dim str As Variant
‘returns » Excel» & 7 — (2 leading spaces appear on the left of «Excel»)
str = Format(«Excel«, «@@@@@@@«)
MsgBox str
MsgBox Len(str)
‘returns «Excel » & 7 — (2 leading spaces appear on the right of «Excel»)
str = Format(«Excel«, «!@@@@@@@«)
MsgBox str
MsgBox Len(str)
‘returns «Mr James» — Precede String with «Mr «
str = Format(«James«, «««Mr ««@«)
MsgBox str
‘returns «Hello Tracy» — Precede String with «Hello «
str = Format(«Tracy«, «Hello @«)
MsgBox str
‘returns «EXCEL» — Displays all characters as uppercase.
str = Format(«Excel«, «>«)
MsgBox str
‘returns «excel» — Displays all characters as lowercase.
str = Format(«Excel«, «<«)
MsgBox str
End Sub
VBA Format Function can have One or Two Sections for User-defined Formats, for different Formats for different String Values
While creating User-Defined String Formats with the VBA Format Function, you can have One or Two sections, each section being separated by semicolons(;), wherein you can create different formats for different String values. If only one section is specified, it applies to all string data; if two sections are specified, the first applies applies to string data, and the second section applies to Null values and zero-length strings («»).