
Letters are still an important part of the world’s ecosystem. Even though letters have become an endangered form of communication, they are still important in formal settings and people still need to write letters for a multitude of different reasons. That being the case, even the computers of today are capable of allowing users to easily write letters using them. If you want to type a letter on a Windows computer, however, you have a few different options – you can either simply open up a fresh instance of WordPad and manually type and format your letter like a caveman, or you can opt for the fancier option and type your letter using Microsoft Word.
One might wonder how using typing a letter using Microsoft Word is the ‘fancier’ option – won’t you have to manually type and format your letter if you create it using Microsoft Word? Well, you’ll only have to type most of your letter if you type it using Microsoft Word, and if you do it right, your letter’s formatting will be taken care of for you. How is that possible? Well, Microsoft Word comes with a wide array of different document templates pre-installed on it – these templates also include templates for letters.
A letter template in Microsoft Word has an entire outline of what a letter should look like – from the greeting to the body and from the closing message to the signature area – and all you have to do is fill in the blanks and replace the placeholder text with the actual matter for your letter. Some letter templates even have visual elements meant to improve the appearance of your letter and make it more appealing and engaging. There are templates for all kinds of different letters, and if you don’t find a letter template that fits your requirements among the templates that came pre-installed on Word, you can simply download a template that is more your pace or get one from Microsoft Office Online.
Typing a letter on Microsoft Word using a letter template is actually pretty easy. To use a letter template to type a letter on Microsoft Word, you need to:
- Launch Microsoft Word.
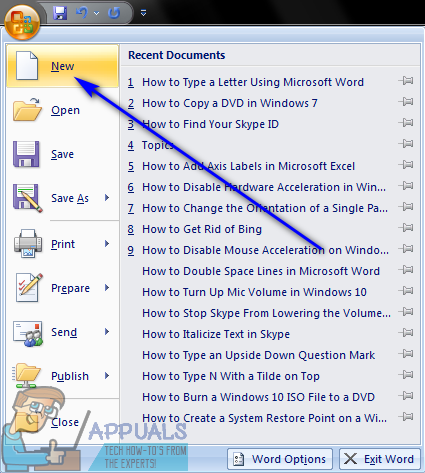
- Depending on what version of Microsoft Word you are using, click on File in the toolbar or on the Microsoft Office logo.
- Click on New.

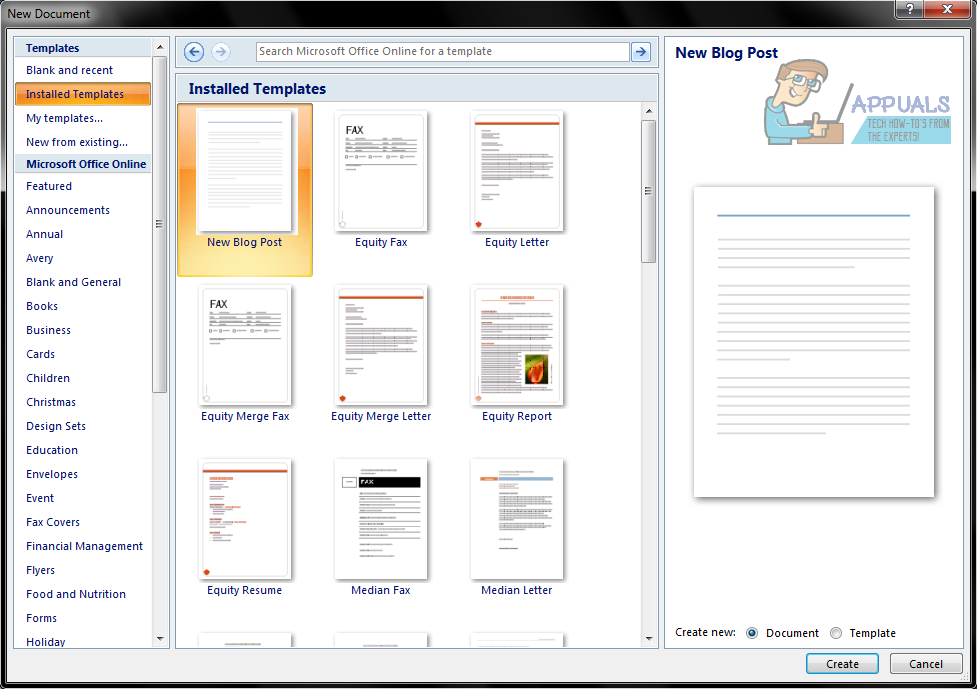
- In the left pane, click on Installed Templates under the Templates section.
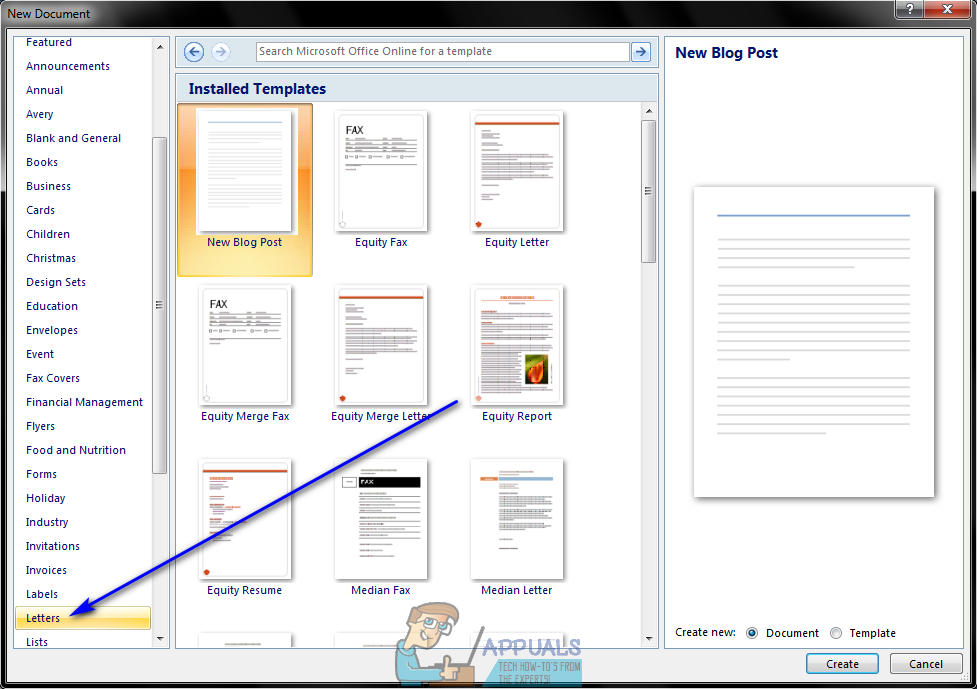
- Look through the templates pre-installed on Word, look for a letter template that meets your requirements and click on it to select it. If you do not find a template that fits the bill in the templates installed on Microsoft Word, simply download one that is more what you’re looking for from the internet, or click on Letters in the left pane, locate a template that is exactly what you need and click on Download to download and use it.

- Click on Create. When you do so, Microsoft Word will create a new document based on the template you selected.
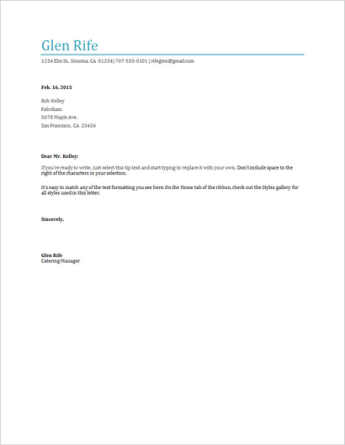
- Type in the corresponding information in the prompted spaces (your name, your address and the recipient’s name, for example), type in the body of the letter as you normally would, and sign the letter with your name in the space designated for your signature.

- Make sure the letter looks exactly how you wanted it to, and save it.

Once you’re done, you can go ahead and get the letter to whoever it is addressed to. You can email the letter to the recipient or print the letter out and have it sent to them. If you opt to have the letter printed out, it is recommended that you sign the letter with a pen instead of just your name in typing for a more professional and formal touch.

Kevin Arrows
Kevin Arrows is a highly experienced and knowledgeable technology specialist with over a decade of industry experience. He holds a Microsoft Certified Technology Specialist (MCTS) certification and has a deep passion for staying up-to-date on the latest tech developments. Kevin has written extensively on a wide range of tech-related topics, showcasing his expertise and knowledge in areas such as software development, cybersecurity, and cloud computing. His contributions to the tech field have been widely recognized and respected by his peers, and he is highly regarded for his ability to explain complex technical concepts in a clear and concise manner.
Back to top button
Writing a letter like this while you’re online is quick and easy.
Choose one of our letter templates, and open it in Word for the web to make it yours.
Tip: If you’re already in Word for the web, get to the letter templates by going to File > New, and then below the template images click More on Office.com.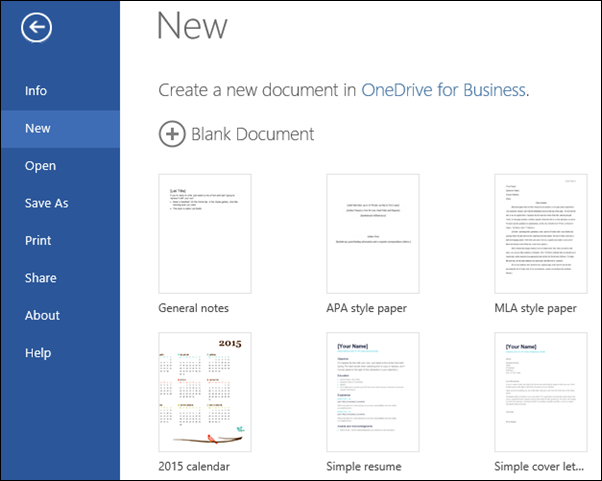
You’ll be on the Templates for Word page. In the list of categories, click Letters.
As you work on the letter, you’ll probably want to rename it.
Send your letter
When you’re finished, print it or send it out electronically. You can do this with the letter still open in Word for the web. No need to save it first (that’s already done for you).
Print it
To print it, press Ctrl+P, and wait for the Print dialog.
Note: If you don’t see a Print dialog box, click the link for opening a PDF version of your letter. From there, use the PDF program’s Print command.
Send a link to your letter
For an electronic version of your letter, send out a link:
-
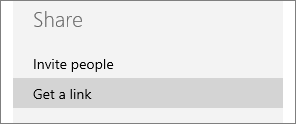
Near the top of the screen, click Share.
-
Under Share, click Get a Link.

-
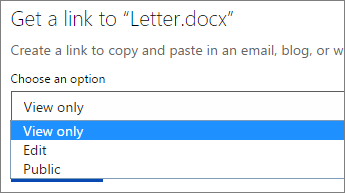
Under Choose an option, click View only.
-
Click Create Link.
-
Click on the web address to select it, and then copy and paste it into an email, message, or post.
Need more help?
A teacher in a high school or college careers class might ask you to write a business letter in Microsoft Word. To do so, you will need to use proper style and format. Word 2019 is the current version, but if you use an earlier version, such as Word 2007, the major difference is the layout of the Microsoft Word ribbon. Regardless of the version, follow the standard business letter format.
Sender and Recipient Addresses
If you are the sender, type your address one line above the date. Include your street address, city and ZIP code. Don’t include your name. The recipient’s address is the location of the person you’re sending the letter to. Include the name and title such as Mr., Miss or Mrs. If a woman prefers Miss or Ms., use what she prefers. If you don’t know her preference, use Ms. Include professional titles such as Dr. For an address in the United States, use the standard U.S. postal format. For an international address, complete the street address and city as you normally would, but type the country name in all caps. The recipient address is one line below your address. Format the recipient address left justified.
Date and Greeting
Unless you’re sending the letter a few days after you’ve typed it, send the letter the day you type it. Use the standard date format of month, day, year — such as June 1, 2015. Type the month, day and year 2 inches from the top of the page.
Include the name of the person you’re writing to and a personal or professional title. If you’re writing to someone you know — and you usually address that person by his first name — use his first name. The salutation in a business letter always uses a colon, not a comma. If you’re not on a first-name basis, type his title and last name. After the greeting, leave a blank line before the body paragraphs.
Body Paragraphs
For standard block and modified block formats, use single space and left justify each paragraph. Leave a blank line between each paragraph. Make your opening courteous and professional. State why you are writing the letter — such as you are replying to a job posting. Show how your qualifications match the job requirements. Provide examples of your best work. Provide evidence of recognition or awards. Mention recommendations from teachers or previous employers. For example, if you are applying for a position in a veterinarian’s office, include any recommendations plus experience you have as a pet sitter to support your interest and qualifications.
Closing and Enclosures
Format the closing at the same vertical point as your date and one line down after the last body paragraph. Only capitalize the first word of your closing and include a comma after the last word. In the example of «Sincerely yours,» the word «yours» has a comma after it. Leave four lines between the closing and the sender’s name.
Enclosures indicate that you have included other documents in the envelope. Type the word «Enclosures» one line below the closing. You can list the name of each document, if you wish, but it’s not mandatory.
If you typed the letter for someone else, indicate this with your initials. The format is uppercase for the initials of the person who requests the letter and lowercase for the typist’s initials. For example, if Jane Smith requests that Mike Jones type a letter for her, Mike Jones would format the typist initials like so: JS:mj.
Style and Font
The most common style for business letters is standard block format. For this format, align everything flush left. For modified block format, place the return address, date, closing and signature to the right of the page center. Alternatively, you can format these to be flush with the right margin. In the modified block style, all body paragraphs are left-justified. For semi-block format, indent the first line of each paragraph. Though you might be able to use Ariel, most companies, prefer Times New Roman 12.
Letters
49+ Letter Format Templates
The format of the letter that you are writing is very essential as it provides the organization of the letter content and the items that are expected to be placed in specific parts of the letter. There are different formatting that may be used in letter writing, and it all depends on the kind of letter that you are making or the specific purpose on why a letter has to be written.

We can provide you with different letter format templates so you can be aware of the different kinds of formats that are used in various letters. Again, formats depend on the usage of the letter as a specific format can only be properly applicable to particular writing instances. Make sure that you will follow the guidelines in creating the content and format that are usable for the purpose of the letter that you want to write.
Business Introduction Letter Template

Details
File Format
- Google Docs
- MS Word
- Pages
Size: A4, US
Download
Letter of Intent Template

Details
File Format
- Google Docs
- MS Word
- Pages
Size: A4, US
Download
Employee Recognition Letter Template

Details
File Format
- Google Docs
- MS Word
- Pages
- Editable PDF
Size: A4, US
Download
Letter of Resignation Template

Details
File Format
- Google Docs
- MS Word
- Pages
- Editable PDF
Size: A4, US
Download
Free Reference Letter Template

Free Appointment Letter Template

Free Fundraising Letter Template

Business Letters Format
Formal Business Letter Template

Standard Business Letter Format
 lexpublib.org
Details
File Format
Size: 46 kB
Download
Business Letter Format for Student
 claudiadalessioskare.weebly.com
Resignation Letters Format
Professional Resignation Letter Template

Simple Resignation Letter
 northeastern.edu
Details
File Format
Size: 168 kB
Download
Formal Resignation Letter Format
 yummydocs.com
Details
File Format
Size: 25 kB
Download
Resignation Acceptance Letter Format
 personnel.wv.gov
Details
File Format
Size: 139 kB
Download
Formal Letters Format
Formal Letter Format Sample

Formal Thank You Letter Format
 uis.edu
Details
File Format
Size: 45 kB
Download
Formal Application Letter
 uwgb.edu
Details
File Format
Size: 107 kB
Download
Formal Letter of Complaint
 legalombudsman.org.uk
Details
File Format
Size: 83 kB
Download
Application Letters Format
Simple Application Letter for Teacher Job

Job Application Letter Format
 owl.english.purdue.edu
Details
File Format
Size: 15 kB
Download
Leave Application Letter
 sampleletters4u.org
Details
File Format
- Doc
- Docx
Size: 6 kB
Download
Basic Letter Format
Most letters follow three common letter formats especially if they are used for business process and other formal transactions. These three letter formats are as follows:
- A Block Letter Format is used for strict business letter writing where all the items that are present in the letter should be placed in the left margin of the letter, and this creates a clean letter that is considered appropriate for corporate transactions because of its simple, neat and professional appeal.
- All the items that are in a block format are almost similar on those that can be found in semiblock format. The only difference that these formats have is that a semi-block format can be used in less formal transactions. As with the block format, all elements are left-aligned in the exception of the first line of each paragraph which is indented five spaces compared to the rest of the paragraph lines.
- Modified block formats usually place the items in different alignments. The date, the signature of the sender of the letter, and the sign-off details are usually placed at the center point of the page line. The body of the paragraph differs from that of a block format as the beginning of each paragraph in a modified block format is usually indented and not aligned with the other lines of the paragraph.
Inclusions of a Letter Format
Aside from the letter formats that are used to identify the text blocking of the information present in a letter, letter formats may also refer to the details that can be found in a particular business letter or Formal Letter structure. A letter format includes the following information:
- The date that the letter was written.
- The contact information of the person writing the letter.
- The contact information of the person or the organization for whom the letter is addressed.
- A formal salutation for the receiver of the letter.
- A greeting needed to provide warmth and a conversation starter.
- The body of the letter, which should include the following information:
- The first paragraph of the body should have the the purpose on why the letter has to be written.
- The second and the following paragraphs contain specific details and information about the transaction for which the letter was written.
- The last paragraph should be able to reiterate and further explain the inclusions of the letter.
- The letter sender’s closing remarks.
- The signature of the letter sender.
Request Letter Sample

Payment Request Letter Format
 cdn2.hubspot.net
Details
File Format
Size: 64 kB
Download
Transfer Request Letter
 mcleanfuneral.com
Details
File Format
Size: 102 kB
Download
Meeting Request Letter Format
 neoaonline.org
Details
File Format
Size: 36 kB
Download
Appointment Letters Format
Business Meeting Appointment Letter

Job Appointment Letter Format
 indiafilings.com
Details
File Format
Size: 74 kB
Download
Appointment Confirmation Letter
 old.northcarolina.edu
Details
File Format
Size: 321 kB
Download
Appointment Request Letter Format
 acpservices.org
Details
File Format
Size: 321 kB
Download
Relieving Letters Format
Employee Relieving Letter Format

Relieving Letter Format From Employee
 aoucbwb.com
Details
File Format
Size: 105 kB
Download
Relieving Letter Format from Manager
 placementpapers.net
Letters of Recommendation Format
Recommendation Letter Format

College Letter of Recommendation Format
 scribendi.com
Details
File Format
- Doc
- Docx
Size: 3 kB
Download
Professional Letter of Recommendation
 verimag.imag.fr
Details
File Format
Size: 82 kB
Download
Letter of Recommendation Format for Student
 owl.english.purdue.edu
Details
File Format
Size: 67 kB
Download
Letter of Recommendation Format for Internship
 livecareer.com
Details
File Format
- Doc
- Docx
Size: 3 kB
Download
Business Letters
There are a lot of Business Letters that are used in different transactions. A few of these business letters are as follows:
- Business cover letters are used to provide a preview of the content of a business document.
- Business letters can also be used by students who would like to involve themselves in professional transactions.
- Business letters are also used by people for job application in inquiry letters, application letters, or cover letters attached with the resume.
- Recommendation letters contain the relationship of the reference to the person who needs the letter, the purpose of the recommendation, the qualifications of the individual, and character reference of the individual.
- Business letters, in general, can be used by companies to transact with each other in many business deals.
Letters Used in the Workplace
A few of the letters that are used by the employer and the employees that also need to follow a particular format are as follows:
- Job appointment letters need to use a format that can identify the details regarding the offer of the company to an applicant. It should have the information regarding the job position, the job description or the functions that the applicant will be expected to do should they accept the offer, the starting date of the employment, the salary and benefits that the applicant will receive in exchange of their services, and other information that should be known to help the applicant decide on whether s/he will accept or reject the job appointment.
- Meeting Appointment Letters must also follow a professional letter format for it to relay information about the purpose of the meeting request, the people who are requested to be present in a particular meeting, the subject to be discussed, and the time and date of the meeting proposal. It is very essential for a person who will create a meeting request letter to assure that the content of the letter and the format being used is aligned with the job functions and positions of the employees who will receive it.
- Resignation Letters follow the letter format of stating the decision to resign first. Then, the reason for the resignation and the effective date of the resignation follows. The next paragraphs should be able to further discuss the reason of resignation, the willingness of the resigning employee to render service, and other information that is related to the procedures that are needed to be done for the resignation to smoothly be processed in reference to the company’s guidelines. Should all these items be present in a resignation letter format, the resigning employee may already expect the resignation acceptance letter coming from the management.
Letters of Request Format
Formal Letter of Request Format
 mp.gov.in
Details
File Format
Size: 22 kB
Download
Letter of Request for Permission
 untpress.unt.edu
Letters of Complaint Format
Business Letter of Complaint
 sse.gov.on.ca
Professional Letter of Complaint
 macmillaninspiration.com
Details
File Format
Size: 148 kB
Download
Letters of Appointment Format
Standard Letter of Appointment Format
 nevdgp.org.au
Details
File Format
- Doc
- Docx
Size: 7 kB
Download
Format of Appointment Letter for Teacher
 edb.gov.hk
Letter of Appointment Format for Employee
 hksmehr.org
Details
File Format
Size: 22 kB
Download
Free Business Proposal Letters
Free Business Proposal Letter
 media.metro.net
Details
File Format
Size: 25 kB
Download
New Business Proposal Letter
 howtowritealetter.net
Business Proposal Acceptance Letter Format
 sampleletterz.com
Details
File Format
- Doc
- Docx
Size: 3 kB
Download
Sample Cover Letters Format
Sample Cover Letter Format for Job Application
 collinsmcnicholas.ie
Details
File Format
Size: 182 kB
Download
Sample Cover Letter Format for Internship
 careerservices.uic.edu
Details
File Format
Size: 84 kB
Download
Sample Scholarship Cover Letter
 medcraveonline.com
Details
File Format
- Doc
- Docx
Size: 3 kB
Download
Formal Letters
Aside from the letters that are used in business transactions and other information exchanges within the bounds of the workplace, here are other letters that are used in formal written discussions:
- A thank-you letter for donation used for sending appreciation to the entity who extended help for a particular advocacy or program
- Invitation letters that are sent for people to know that they are requested to attend events, formal gatherings, occasions, and other forms of get-togethers.
- Letter of complaints that provide information about a transaction that made a customer or client dissatisfied with the services given to him or her by a company or business
- Leave application letters used by employees to request for the additional work offs that they are entitled to have
There are still a lot of letters that are used in various transactions, which is the reason why they need a particular format to further give emphasis on the reason and purpose of their creation. If you will write a letter to be given to an entity, make sure that you are aware of the format that you need to use and the arrangement of the inclusions of the letter which can help you to state all the items and information that you need to provide to the expected receiver of the letter.
More in Letters
| 31+ Acknowledgement Letter Templates – Free Samples, Examples … | 13+ Employee Resignation Letter Templates – Free Sample … |
| 30+ Personal Letter Templates – Free Sample, Example Format … | 39+ Transfer Letter Templates — Free Sample, Example, Format … |
| Resignation Letter Example – 10+ Free Word, Excel, PDF Format … | 389+ Letter Templates – Free Sample, Example, Format Download … |
| 25+ Appointment Letter Templates — Free Sample, Example Format … | 28+ Reference Letter Template – Free Sample, Example Format … |
![]()
Download Article
Learn the basics of formatting a Microsoft Word document
![]()
Download Article
- Formatting the Layout
- Formatting Text
- Adding Pictures, Graphs, & Tables
- Using a Formatted Template
- Saving in Other Formats
- Q&A
|
|
|
|
|
Microsoft Word is the world’s most popular word processing app. Depending on what kind of legal, formal, or personal paper you’re writing, each has its own formatting guidelines. Fortunately, Microsoft Word makes it easy to format the layout, text, and other objects in your document. If you’re new to using Microsoft Word, don’t worry. You can be formatting your document like a pro in no time. This wikiHow guide will teach you simple ways to format a Word document on your PC or Mac computer.
Things You Should Know
- You can find most of the formatting tools you’ll need in the Ribbon menu at the top of your document.
- If you don’t want to do all the formatting from scratch, try using one of Word’s premade templates.
- Save your document in different file formats using the Save a Copy or Save As menu.
-
1
Explore the Word user interface. You can access most of Word’s formatting tools from the Menu Bar or the Ribbon at the top of the window. You can modify which tools are visible using the View menu.
- The Menu Bar is the area at the top of the screen where you will find File, Edit, View, and other important menu commands.
- The Ribbon is at the top of your workspace and contains icons, menus, and shortcuts to common tasks.
-
2
Align your document. Different types of documents call for different text alignments. You can choose whether to align your entire document to the left, right, or at the center on the Home tab by clicking the Alignment buttons in the «Paragraph» section.
- These are the buttons that look like a small version of a document, with small black lines arranged according to their button’s alignment function.
- You can also adjust alignment by selecting the text and objects you want to align, right-clicking the selection, and choosing Paragraph. Select your preferred alignment from the Alignment menu under the General header.
- You can either set the alignment for the whole document or just a selected piece of text.
Advertisement
-
3
Set the line spacing of your document. Need to change your document to single or double-space? You can adjust the spacing of your entire document, or for selected text.
- If you haven’t begun typing or adding content to your Word document, click the Home tab, click the «Line and Paragraph Spacing» icon (a row of lines with vertical arrows to the left of the lines pointing up and down, and select an option.
- If your document already has text or other content, press Ctrl + A (PC) or Cmd + A (Mac) to select everything in the document, right-click the selection, and choose Paragraph. You can then choose your desired spacing from the «Line Spacing» menu.
- For a single-spaced document, choose 1.0. For double-spacing, choose 2.0.
- Many professional documents, like college essays and cover letters, should be double-spaced.
-
4
Adjust the page orientation. If you need to write the document in a different orientation, click the Layout tab at the top of Word, select Orientation, and choose either Portrait or Landscape.
-
5
Change the size of the paper. If you need to print the document on a specific paper size, click the Layout tab, click Size, and then select your desired size from the drop-down list.
- This will change the virtual size of the document you’re writing as well as the actual size of the printout.
-
6
Adjust the headers and footers. A header contains details that will appear on every page of the paper, such as page numbers, your name, or the document title.
- To set the header of your document, double-click on the topmost part of the page, and the header field will appear. You can also click the Insert tab and select Header.
- Footers are just like headers. All text in the footer will appear at the bottom of each page of your document. To set the footer, double-click on the bottommost part of the page, and the footer field will appear. You can also use the Footer button on the Insert tab.
- You can also format your headers and footers by selecting the View tab and clicking Header and Footer on the list. This action will open the headers and footers on your page and allow you to edit them.
-
7
Insert page or section breaks with the Breaks menu. Go to the Layout tab in the and click Breaks if you want to start a new page or section in your document. You can choose from a variety of types of breaks, including Page, Column, and Section. This is a very useful tool if you need to format different sections of your document in different ways.[1]
- For example, you can use section or page breaks to help you format your page numbers so that the numbering restarts with each new section.
-
8
Adjust the margin size with the Margins tool. Click the Margins button in the Layout tab and select a margin from the pre-defined margin settings listed on the drop-down list.
- If you want to use your own margin measurements, click Custom Margins at the very bottom of the drop-down list to set your own.
-
9
Add columns to split your text vertically on the page. If you need to create a newspaper-like document, you can do so by adjusting the format of the document to columns. Click the Layout tab, select the Columns option, and choose the number and alignment of columns from the drop-down list.
- The Columns button looks like a rectangle with two vertical columns of blue lines on it.
- If you want to create one, two, or three columns, you can do so from the preset options. If you’d like to create more, you’ll need to choose More Columns from the bottom of the dropdown menu.
- Note that this column option is different from the columns you get when you insert items like tables on your document.
-
10
Add bullets and numbers to make lists. Highlight the text that you would like to be numbered or bulleted and click the Numbering or Bullets button on the Home tab of the Ribbon.
- These buttons can be found side by side on the Ribbon, near the alignment buttons. The Numbering button displays three small lines with numbers to the left of the lines and the Bullets button displays three small lines with bullet points to the left of the lines.
- There’s also a third button that allows you to create more elaborate multi-level list styles, which is useful for formatting outlines.
-
11
Experiment with document styles. All documents have standard built-in styles (for example, Normal, Title, Heading 1). The default style for text is Normal. The template that a document is based on (for example, Normal.dotx) determines which styles appear on the Ribbon and on the Styles tab. You can see the current style presets for your document in the Home tab of the Ribbon.
- Before you apply a style, you can see all of the available styles and preview how they will appear when applied.
- On the Home tab, click a style to apply it to selected text.
- Click the Styles Pane button (the arrow pointing down and to the right) to view and select from advanced Style options.
- By default, Word applies a paragraph style (for example, Heading 1) to the entire paragraph. To apply a paragraph style to part of a paragraph, select only the specific part that you wish to modify.
-
12
Reveal hidden formatting symbols if you’re having trouble. Word documents often contain hidden code that can cause frustrating problems when you’re trying to modify your formatting. For instance, an invisible extra paragraph mark or section break can create unwanted spaces between paragraphs or lines of text. To see formatting symbols that are normally hidden so you can delete or modify them, you can click the ¶ button in the Home tab, or try one of the following:[2]
- On Windows, open File, select Options, and click Display. Tick the box next to Show all formatting marks.
- In Word for Mac, open the Word menu, then Preferences, then View. Check the box next to All in the Show Non-Printing Characters section of the View menu.
-
13
Use the View menu to change your view of the document. The View menu can let you change how your document looks in Word without actually making changes to the format. For example, Print Layout will show approximately what your document will look like when it’s printed out, while Web Layout will display the whole document in one long chunk without any page breaks.
- The View menu also lets you zoom in and out on your document.
- You can also change your view with the buttons and zoom slider at the bottom right side of the document pane, or with the View tab in the Ribbon.


Advertisement
-
1
Change the font face. On the Home tab, you will a drop-down menu containing a list of fonts to choose from. Use your mouse to select the text you want to change, then choose a font from the list.
-
2
Change font size and color. Also on the Home tab, you can change the size, color, and highlighting for your font. Select the text you want to format, then choose your options.
- By default, they will be set to the size and font associated with your document’s current Style settings. For example, if you’re using Word’s default template, the Normal style will use Calibri as the default font and 12 pt. as the default text size.
- Always consider the formatting guidelines of the document you are writing when choosing the font style and size.
- The standard font for most college and professional papers is Times New Roman font, text size 12.
-
3
Make text bold, underlined, or italicized. Besides setting the font style and size, you can also adjust the emphasis of words and lines in your document. Near the font and text size menus, you will see the Bold, Italics, and Underline buttons.
- Just click the buttons to make your text bold, underlined, or italicized.
- In this section, you can also find special text formatting options such as Strikethrough, Subscript, and Superscript.
-
4
Highlight text on the page. If you would like to change the background color behind selected text, similar to using a highlighter on a printed page, click the Text Highlight icon, which is a pen above a colored line.
- You can also add special text effects with the Text Effects button, which looks like a capital A with a glowing blue border.


Advertisement
-
1
Drag an image into your document. This is a quick way to add a picture to your Word document. Simply select an image on your desktop and drag and drop it into the document window. Make sure your image is placed exactly where you want it before you drop it.
- You can also insert an image by going to the Insert tab, then clicking Pictures. Select one of the options to browse for images on your computer, the web, or Word’s gallery of stock photos.
- You can also insert graphics or other media (such as video or audio clips) using the Shapes, Icons, or 3D Models, and Media buttons.
-
2
Enable text wrapping. Text wrapping changes the layout of your document, allowing the text to flow around the image no matter where it is placed. To turn on text wrapping:
- Right-click (or ctrl-click, on a Mac) on the image and hover over Wrap Text. Select the alignment that best suits your document. You will see a preview as you hover over each option.
- To change the location of the image in the document, select the image and then hold the Ctrl key. While holding the key, use the arrow keys to move the picture around the document.
- When you right-click or ctrl-click your image, you’ll also see an option in the context menu to add a caption under your image.
-
3
Edit your image in the Picture Format tab. Once you insert your image, you can select it to open a new Picture Format tab in the ribbon. From there, you can choose from a variety of tools, such as:
- Making corrections or adding artistic filters to the image
- Adding style effects, such as a drop shadow or frame, to the picture
- Entering alt text
- Tweaking the position of your image or changing the text-wrap settings
-
4
Add a graph or chart in the Insert tab. Click the Insert tab on the Ribbon, and then click the Chart option. Choose your preferred type of graph, such as a pie or bar chart, from the dropdown menu.
- Depending on the type of chart or graph you choose, Word may automatically launch Excel and create a new spreadsheet, where you can enter data for your chart.
-
5
Modify your graph. When you choose a graph type, a new tab will appear in the Ribbon menu called Chart Design. Navigate to that tab with the chart selected to make changes to the look of your graph or chart, or choose the Edit in Excel button to make changes to the data in your chart.
-
6
Use the Table tool to insert a table. If you want to add a table to your document, head over to the Insert tab and click the Table button. A menu will pop open where you can either scroll over a grid of squares to select your number of rows and columns, or select an option like Insert Table or Draw Table.
- Insert Table opens a pop-up menu where you can specify parameters like the number of rows and columns and whether or not the contents of the table autofit your document window.
- The Draw Table tool allows you to draw the table with your mouse directly in the document.
- Once you start creating a table, you’ll see several new table editing tools in the Layout tab.


Advertisement
-
1
Choose a template from the New Documents pane. Templates are a great way to create a nice-looking document without having to do all the formatting from scratch. To use one, open Word and select New from the side menu to create a new document, or select New from Template from the File menu. Click one of the templates on the screen to select it.[3]
- If you don’t see a template you like, use the Search bar at the top of the window to find one that fits your needs. For instance, use keywords like “flyer,” “resume,” or “research paper” to find different styles of templates.
-
2
Click Create to open the template. The template will open as a new document.
-
3
Select text within the template to modify it. Word templates are simply preformatted documents with text, graphics, and other elements already in place. To add your own text, select text anywhere on the document and type in your own. The new text will have the same format as whatever text you selected and replaced. You can also click on a blank area of the document and start typing to add new text.
- To select a single word, double-click it. You can select longer pieces of text by clicking and dragging your mouse, or positioning your cursor at the start of the selection and holding down Shift while pressing the Right Arrow key.
- You can also select and move, delete, or replace other elements in the template, such as images, graphs, or tables.
-
4
Modify your template with the Styles pane. Templates use styles to create their distinctive looks. If you want to change the look of the template, click the Styles button in the Home tab of the ribbon toolbar. Click the down arrow next to any of the style elements and select Modify Style… to make changes.
- You can also make any other types of changes you like using the rest of the tools in the ribbon menu or Format menu.
-
5
Save your modified template as a document. When you’ve made the changes you want to the template, save it the same way you would any other Microsoft Word document.


Advertisement
-
1
Click the file menu and select Save a Copy…. If you want to save a document as a file type other than .DOCX, you can do so with the Save a Copy function.
- If it’s a brand-new document that you haven’t already saved, select Save As… instead.
-
2
Open the File Format dropdown menu. You’ll see this menu at the bottom of the Save a Copy or Save As window.
-
3
Select the format you want from the menu. In addition to common formats like .DOC, .DOCX, .TXT and .RTF, you can also save your document as a PDF, an XML file, or a macro-enabled Word file.
- Check out the list of file formats that are supported in word here.


Advertisement
Add New Question
-
Question
What is Microsoft publishing?

UK_Gamer05
Community Answer
Publisher is a tool for making posters, leaflets, booklet,s etc. It’s for when you need to create something that isn’t a standard document.
-
Question
How do I move from page one to page two of a Word document?
UK_Gamer05
Community Answer
In Word 2016, on the insert tab, either select insert new page or page break.
Ask a Question
200 characters left
Include your email address to get a message when this question is answered.
Submit
Advertisement
Thanks for submitting a tip for review!
Tip
- Unless free-handedly writing your paper, consult the guidelines of your document first before adjusting its format.
- Besides the header, footer, and page layout formats (which affect the entire document), all the other formatting tools can be applied only on specific parts of the document.
About This Article
Thanks to all authors for creating a page that has been read 309,741 times.