
To create a form in Word that others can fill out, start with a template or document and add content controls. Content controls include things like check boxes, text boxes, date pickers, and drop-down lists. If you’re familiar with databases, these content controls can even be linked to data.
Show the Developer tab
If the developer tab isn’t displayed in the ribbon, see Show the Developer tab.
Open a template or a blank document on which to base the form
To save time, start with a form template or start from scratch with a blank template.
-
Go to File > New.
-
In Search online templates, type Forms or the type of form you want and press ENTER.
-
Choose a form template, and then select Create or Download.
-
Go to File > New.
-
Select Blank document.
Add content to the form
Go to Developer, and then choose the controls that you want to add to the document or form. To remove a content control, select the control and press Delete. You can set properties on controls once inserted.
Note: You can print a form that was created using content controls, but the boxes around the content controls will not print.
In a rich text content control, users can format text as bold or italic, and they can type multiple paragraphs. If you want to limit what users add, insert the plain text content control.
-
Click or tap where you want to insert the control.
-
Select Developer > Rich Text Content Control
 or Plain Text Content Control .
 or Plain Text Content Control
  .
.To set specific properties on the control, see Set or change properties for content controls.
A picture control is often used for templates, but you can also add a picture control to a form.
-
Click or tap where you want to insert the control.
-
Select Developer > Picture Content Control
.
 .
.To set specific properties on the control, see Set or change properties for content controls.
Use building block controls when you want people to choose a specific block of text. For example, building block controls are helpful when you need to add different boilerplate text depending on the contract’s specific requirements. You can create rich text content controls for each version of the boilerplate text, and then you can use a building block control as the container for the rich text content controls.
-
Click or tap where you want to insert the control.
-
Go to DeveloperBuilding Block Gallery Content Control
(or Building Block Content Control). -
Select Developer and content controls for the building block.
 (or Building Block Content Control).
-
Click or tap where you want to insert the control.
To set specific properties on the control, see Set or change properties for content controls.
In a combo box, users can select from a list of choices that you provide or they can type in their own information. In a drop-down list, users can only select from the list of choices.
-
Go to Developer > Combo Box Content Control
or Drop-Down List Content Control . -
Select the content control, and then select Properties.
-
To create a list of choices, select Add under Drop-Down List Properties.
-
Type a choice in Display Name, such as Yes, No, or Maybe.
Repeat this step until all of the choices are in the drop-down list.
-
Fill in any other properties that you want.
Note: If you select the Contents cannot be edited check box, users won’t be able to click a choice.
 or Drop-Down List Content Control
  .
.-
Click or tap where you want to insert the date picker control.
-
Select Developer > Date Picker Content Control
.
 .
.To set specific properties on the control, see Set or change properties for content controls.
-
Click or tap where you want to insert the check box control.
-
Select Developer > Check Box Content Control
.
 .
.To set specific properties on the control, see Set or change properties for content controls.
Legacy form controls are for compatibility with older versions of Word and consist of legacy form and Active X controls.
-
Click or tap where you want to insert a legacy control.
-
Go to Developer > Legacy Forms
drop-down. -
Select the Legacy Form control or Active X Control that you want to include.
 drop-down.
Set or change properties for content controls
Each content control has properties that you can set or change. For example, the Date Picker control offers options for the format you want to use to display the date.
-
Select the content control that you want to change.
-
Go to Developer > Properties.
-
Change the properties that you want.

Add protection to a form
If you want to limit how much others can edit or format a form, use the Restrict Editing command:
-
Open the form that you want to lock or protect.
-
Select Developer > Restrict Editing.
-
After selecting restrictions, select Yes, Start Enforcing Protection.


Advanced Tip:
If you want to protect only parts of the document, separate the document into sections and only protect the sections you want.
To do this, choose Select Sections in the Restrict Editing panel. For more info on sections, see Insert a section break.

Show the Developer tab
If the developer tab isn’t displayed in the ribbon, see Show the Developer tab.
Open a template or use a blank document
To create a form in Word that others can fill out, start with a template or document and add content controls. Content controls include things like check boxes, text boxes, and drop-down lists. If you’re familiar with databases, these content controls can even be linked to data.
-
Go to File > New from Template.
-
In Search, type form.
-
Double-click the template you want to use.
-
Select File > Save As, and pick a location to save the form.
-
In Save As, type a file name and then select Save.

-
Go to File > New Document.
-
Go to File > Save As.
-
In Save As, type a file name and then select Save.

Add content to the form
Go to Developer, and then choose the controls that you want to add to the document or form. To remove a content control, select the control and press Delete. You can set Options on controls once inserted. From Options, you can add entry and exit macros to run when users interact with the controls, as well as list items for combo boxes, .
-
In the document, click or tap where you want to add a content control.
-
On Developer, select Text Box, Check Box, or Combo Box.
-
To set specific properties for the control, select Options, and set .
-
Repeat steps 1 through 3 for each control that you want to add.

Options let you set common settings, as well as control specific settings. Select a control and then select Options to set up or make changes.
-
Set common properties.
-
Select Macro to Run on lets you choose a recorded or custom macro to run on Entry or Exit from the field.
-
Bookmark Set a unique name or bookmark for each control.
-
Calculate on exit This forces Word to run or refresh any calculations, such as total price when the user exits the field.
-
Add Help Text Give hints or instructions for each field.
-
OK Saves settings and exits the panel.
-
Cancel Forgets changes and exits the panel.
-
-
Set specific properties for a Text box
-
Type Select form Regular text, Number, Date, Current Date, Current Time, or Calculation.
-
Default text sets optional instructional text that’s displayed in the text box before the user types in the field. Set Text box enabled to allow the user to enter text into the field.
-
Maximum length sets the length of text that a user can enter. The default is Unlimited.
-
Text format can set whether text automatically formats to Uppercase, Lowercase, First capital, or Title case.
-
Text box enabled Lets the user enter text into a field. If there is default text, user text replaces it.
-
-
Set specific properties for a Check box.
-
Default Value Choose between Not checked or checked as default.
-
Checkbox size Set a size Exactly or Auto to change size as needed.
-
Check box enabled Lets the user check or clear the text box.
-
-
Set specific properties for a Combo box
-
Drop-down item Type in strings for the list box items. Press + or Enter to add an item to the list.
-
Items in drop-down list Shows your current list. Select an item and use the up or down arrows to change the order, Press — to remove a selected item.
-
Drop-down enabled Lets the user open the combo box and make selections.
-
-
Go to Developer > Protect Form.
Note: To unprotect the form and continue editing, select Protect Form again.
-
Save and close the form.

If you want, you can test the form before you distribute it.
-
Protect the form.
-
Reopen the form, fill it out as the user would, and then save a copy.
Show the Developer tab
-
On the right side of the ribbon, select
, and then select Ribbon Preferences. -
Under Customize, select Developer .
 , and then select Ribbon Preferences.
Open a template or a document on which to base the form
You can start with a blank document and create your own form. Or, to save time, you can start with a form template.
-
Go to File > New from Template.
-
In the left pane, expand Online Templates, and then select Forms.
-
Double-click the form template that you want to use.
Add content controls to the form
-
In the document, click where you want to add the control.
-
On the Developer tab, under Form Controls, select Text Box, Check Box, or Combo Box.
-
To set specific properties for the control, select Options, and then configure the properties that you want.
Note: To create a list of drop-down items in a combo box, select the combo box placeholder, click Options, and then add the items that you want to appear in the drop-down list.
-
Repeat steps 1 through 3 for each control that you want to add.
Add instructional text (optional)
Instructional text (for example, «Type First Name») in a text box can make your form easier to use. By default, no text appears in a text box, but you can add it.
-
Select the text box control that you want to add instructional text to.
-
On the Developer tab, under Form Controls, select Options.
-
In Default Text, type the instructional text.
-
Make sure that Fill-in enabled is selected, and then select OK.
Protect the form
-
On the Developer tab, under Form Controls, select Protect Form.
Note: To unprotect the form and continue editing, click Protect Form again.
-
Save and close the form.
Test the form (optional)
If you want, you can test the form before you distribute it.
-
Protect the form.
-
Reopen the form, fill it out as the user would, and then save a copy.
Creating fillable forms isn’t available in Word for the web.
You can create the form with the desktop version of Word with the instructions in Create a fillable form.
When you save the document and reopen it in Word for the web, you’ll see the changes you made.
Lucille, a work colleague, couldn’t figure out how to set up protected form fields in Word 2007. I haven’t dealt with these a lot (and not at all in Word 2007), but I was able to figure it out for her.
You’ll be working on the Developer tab, so make sure it’s visible before you start:
- Word 2007: https://cybertext.wordpress.com/2010/11/22/word-2007-show-the-developer-tab/
- Word 2010: https://cybertext.wordpress.com/2010/11/09/word-2010-developer-tab/
Now you can start setting up your form fields:
- Enter the text for the form field labels into your document.
- Position the cursor where you want the response to go (typically after the label).
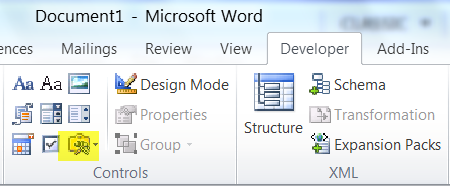
- Go to the Developer tab > Controls group.
- Click the icon for the type of form field you want to insert (e.g. text , date ). You can also click the Legacy Tools icon to insert the controls you were familiar with in Word 2003 and earlier.
- Repeat steps 2 to 4 for all other form fields you want to insert.
- Save your document.

 , date
  ). You can also click the Legacy Tools icon to insert the controls you were familiar with in Word 2003 and earlier.
Finally, protect the form fields:
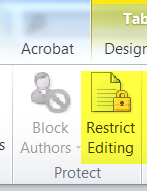
- Go to the Developer tab > Protect group and click the large Protect Document icon.
- Select Restrict Formatting and Editing from the drop-down list.
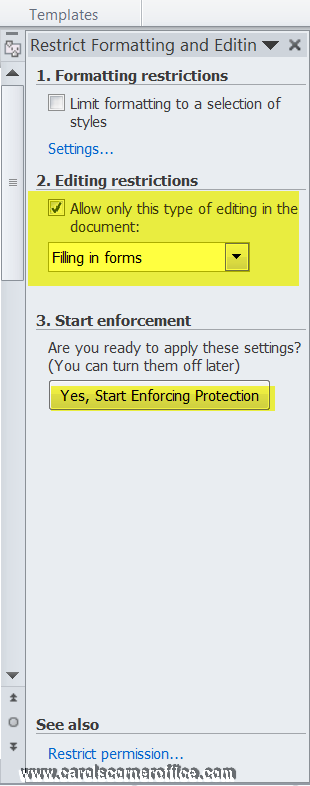
- On the Restrict Formatting and Editing task pane, select the Allow only this type of editing in the document check box, select Filling in forms from the drop-down list, then click the Yes, Start Enforcing Protection button. (Note: If this button is not active, click the Developer mode button in the Controls group as it may be turned on and you need to turn it off.)
- You are asked to set a password for this document. You can either set a password OR leave all these fields blank (i.e. no password), then click OK.
- Save your document. Anyone opening the document can now only fill in the form fields — they cannot edit the document.


For example, sometimes in sensitive documents such as contracts, sometimes they only need to be viewed by others, and not modified by others. At this time, you can use the form function:
1) In the options of the start menu, add developer tools:
2 
Then using the old form, you can use various text boxes, drop-down boxes, multi-select boxes, etc. The usage is relatively simple.
3 After use, perform the operations in the following figure to enable protection:

At this time, you can add a password. If it is actually a normal document, even if you don’t use the form, if you don’t modify the copied text for anyone, it may not be converted to PDF, because PDF has tools to do If you transfer it back, you can use the encryption method, then you can ensure that the document will not be copied or modified by the family!
After creating a fillable form in Microsoft Word, you may want to lock it down to prevent users from accidentally editing content outside the fillable areas. Microsoft Word provides a function called Restrict Editing that lets you either lock down the form in its entirety or allow users to access only the fillable areas within the form.
Lock Down Form
-
Open the form that you need to lock down, and press “Ctrl-A” to select all content within the form. Click the “Developer” tab, and then click “Restrict Editing” on the Protect group; if you cannot see the “Developer” tab, click “File | Options | Customize Ribbon | Developer | OK.”
On the Restrict Editing pane that shows up, check «Allow Only This Type of Editing,» then click the pull-down menu under Editing Restrictions. Select “Filling in Forms” to prevent users from editing the content outside the fillable areas, or select “No changes (Read Only)” to lock down the entire form, including the ability to fill in anything. Click “Yes, Start Enforcing Protection,” then enter a password into both the «New Password» and «Reenter Password» boxes. Click «OK.»
Disclaimer
-
Information in this article applies to Microsoft Word 2013. It may vary slightly or significantly with other versions.
You can protect cells in your Excel worksheet pretty easily, but protecting cells in an Microsoft Word Table – not so much, although it can be done.
How? Well you insert a Text Form field control into each cell where you want your users to input or modify values.
Then, you protect your document. Only those cells with the controls will allow changes. The process is a bit convoluted and I would not recommend using it with a complex document, but it works fairly well with a simple one.
Follow the steps below to learn how to protect and unprotect cells in a Word table:
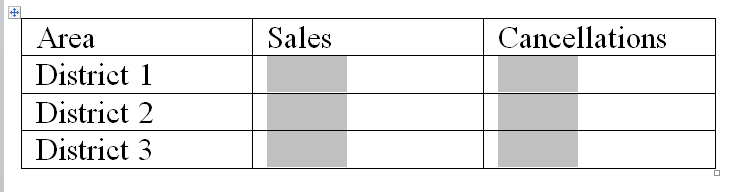
- Create your table and key in the labels or values you would like to protect as you normally would.
- Select a cell where you would like users to enter data.
- Click the Developer tab.
- In the Controls group, click the Legacy Tools option and select Text Form Field.
- Continue to select input cells and insert controls until you are finished.
- In the Protect group, click Restrict Editing.
- Click Allow only this type of edits in the document.
- In the resulting task pane, select Filling In Forms from 2. Editing Restrictions, and then click Yes, start Enforcing Protection.
- Enter a password and confirm it.
- Click OK.
After you have enabled protection, Word will not allow you to select normal text. You can only select and input data in the cells containing a Text Form Field control. If your document contains elements and text other than the table, Word will protect everything but the Text Form Field controls.
I would almost always use an Excel worksheet instead of protecting a Word table like this, but if you need it, this is a good trick to know!