
Document themes make it easy to coordinate colors, fonts, and graphic formatting effects across your Word, Excel, and PowerPoint documents and update them quickly. This video show you how-to change the entire theme, read below to just customize theme fonts, colors, or effects.

I want to
-
Choose a standard color theme
-
Create my own color theme
-
Change theme fonts
-
Change theme effects
-
Switch or remove a theme
-
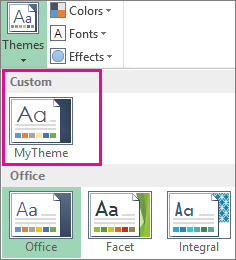
Save a custom theme for reuse
-
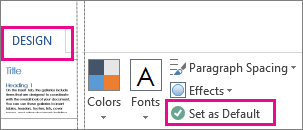
Make my changes the new default theme
-
Learn more about themes
Choose a standard color theme
-
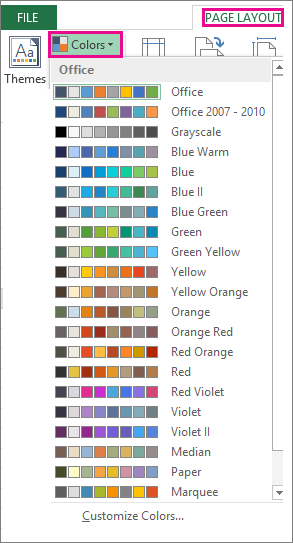
On the Page Layout tab in Excel or the Design tab in Word, click Colors, and pick the color set you want.
Excel

Word
Tip: The first group of colors are the colors in the current theme.
Create my own color theme
-
On the Page Layout tab in Excel or the Design tab in Word, click Colors, and then click Customize Colors.
-
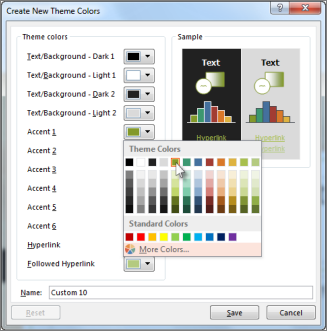
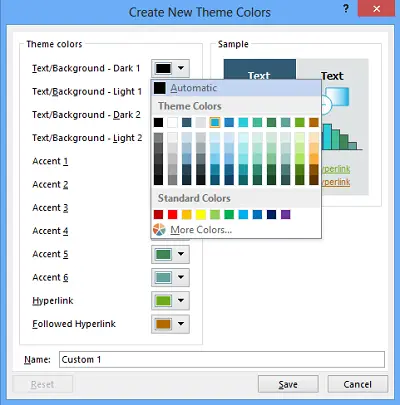
Click the button next to the theme color you want to change (for example, Accent 1 or Hyperlink), and then pick a color under Theme Colors.
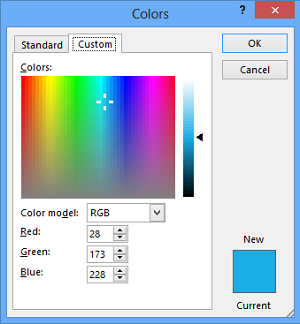
To create your own color, click More Colors, and then pick a color on the Standard tab, or enter numbers or select a color on the Custom tab.
-
In the Sample pane, preview the changes that you made.
-
Repeat this for all the colors you want to change.
-
In the Name box, type a name for the new theme colors, and click Save.
Tip: To return to the original theme colors, click Reset before you click Save.
Change theme fonts
-
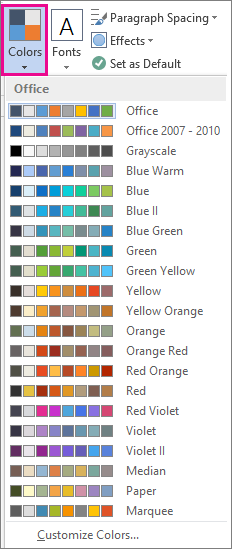
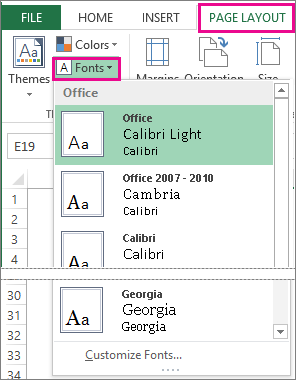
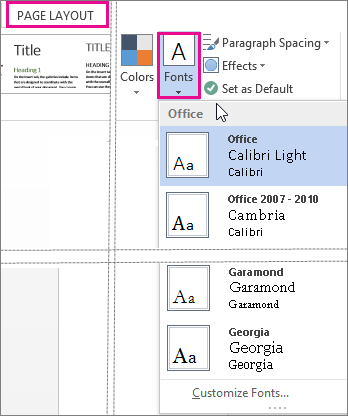
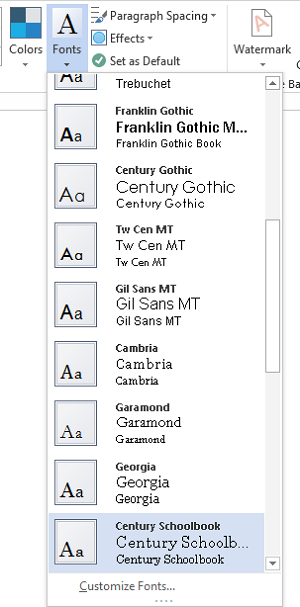
On the Page Layout tab in Excel or the Design tab in Word, click Fonts, and pick the font set you want.
Excel
Word
Tip: The top fonts are the fonts in the current theme.
-
To create your own set of fonts, click Customize Fonts.
-
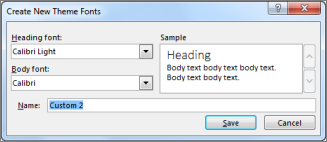
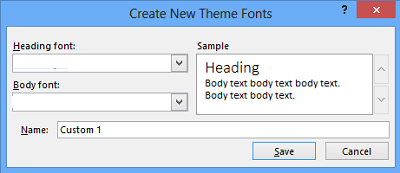
In the Create New Theme Fonts box, under the Heading font and Body font boxes, pick the fonts you want.
-
In the Name box, enter a name, and click Save.
Change theme effects
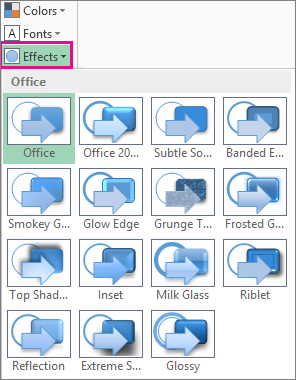
Theme effects include shadows, reflections, lines, fills, and more. While you cannot create your own set of theme effects, you can choose a set of effects that work for your document.
-
On the Page Layout tab in Excel or the Design tab in Word, click Effects.
. -
Select the set of effects that you want to use.
 .
.
Switch or remove a theme
-
To change themes, simply pick a different theme from the Themes menu. To return to the default theme, choose the Office theme.
-
To remove theme formatting from just a portion of your document, select the portion you want to change and change any formatting you like, such as font style, font size, color, etc.
Save a custom theme for reuse
Once you’ve made changes to your theme, you can save it to use again. Or you can make it the default for new documents.
-
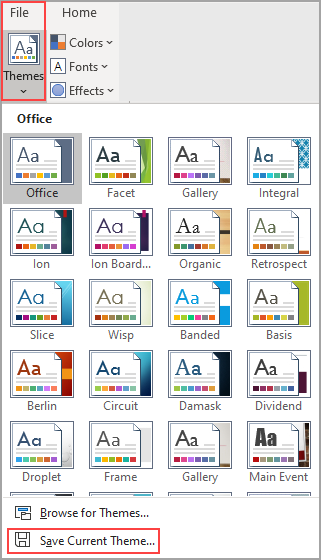
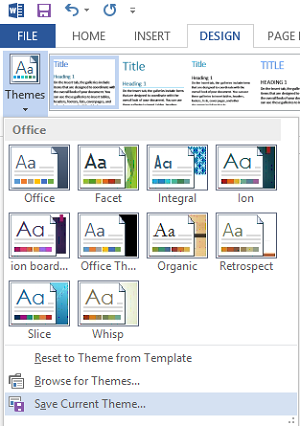
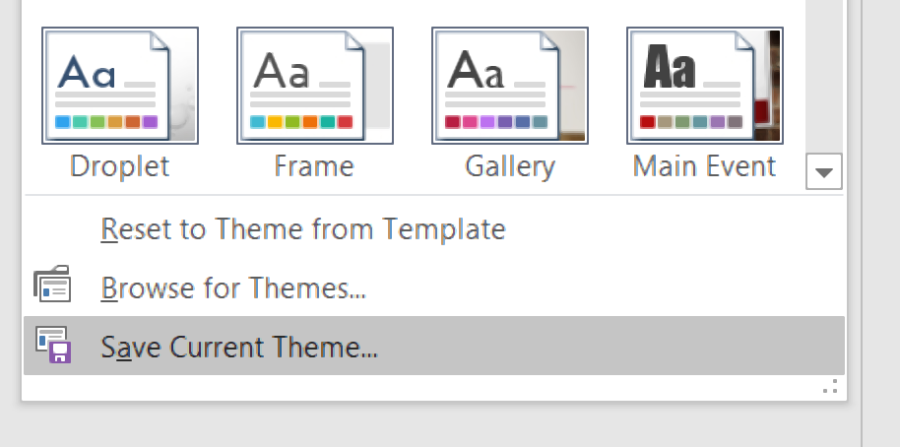
On the Page Layout tab in Excel or the Design tab in Word, click Themes > Save Current Theme.
-
In the File name box, enter a name for the theme, and click Save.
Note: The theme is saved as a .thmx file in the Document Themes folder on your local drive and is automatically added to the list of custom themes that appear when you click Themes.
Make my changes the new default theme
After saving your theme, you can set it so it’s used for all new documents.
Excel
Apply your custom theme to a blank workbook and then save it as a template named Book.xltx.
Word
-
On the Design tab, click Set as Default.
More about themes
A document theme is a unique set of colors, fonts, and effects. Themes are shared across Office programs so that all your Office documents can have the same, uniform look.
You can also change the Office theme. The Office theme is the color scheme for your entire Office program, while document themes are more specific (they show up in individual Word documents or Excel spreadsheets).

In addition, you can add a pattern to your Office program, by changing the Office Background.
See Also
-
Change the font size in Word, Excel or PowerPoint
-
Change the line spacing in Word
-
Insert subscript or superscript text in Word
-
Add or remove a sheet background in Excel
-
Create your own theme in PowerPoint
-
Customize and save a theme in Word 2016 for Mac
Change theme fonts
- On the Page Layout tab in Excel or the Design tab in Word, click Fonts, and pick the font set you want.
- To create your own set of fonts, click Customize Fonts.
- In the Create New Theme Fonts box, under the Heading font and Body font boxes, pick the fonts you want.
Contents
- 1 How do I change the theme style in Word?
- 2 How do you change the theme font in Word on a Mac?
- 3 How do I change font size and style in Word?
- 4 How do I change the theme in Word 2021?
- 5 How do I create a custom theme color in Word for Mac?
- 6 How do I change the default font in Word 2020?
- 7 What is 12pt?
- 8 Why can’t I change font in Word?
- 9 How do I change my text font?
- 10 How do you change the theme on Office 365?
- 11 How do I apply a theme in Word?
- 12 How do I change my Word theme to black?
- 13 How do I save a custom font color in Word?
- 14 What is the shortcut key for changing the font in Word?
- 15 Why does the same font look different in Word?
- 16 How do I change the default font in Windows 10?
- 17 Is font size 10 too small?
- 18 What size is 8pt font?
- 19 Why is font grayed out in Word?
- 20 Does Office 365 have themes?
How do I change the theme style in Word?
Apply a theme to quickly format an entire document and give it a modern, professional look.
- Select Design > Themes.
- Point to a theme to preview how it will look in your document.
- Select a theme.
How do you change the theme font in Word on a Mac?
Select the text that you want to change to a theme font. On the Home tab, under Font, click the arrow next to the font box. To change text to a theme font, click the Theme Headings font or the Theme Body font.
How do I change font size and style in Word?
Change the size of selected text
- Select the text or cells with text you want to change. To select all text in a Word document, press Ctrl + A.
- On the Home tab, click the font size in the Font Size box. You can also type in any size you want, within the following limits:
How do I change the theme in Word 2021?
How to use themes in Word
- Open the Word app.
- Click the Open option.
- Select the document you already styled to open it.
- Click the Design tab.
- Click the Themes button.
- Roll the mouse pointer over the themes to see a live preview of each available theme.
- Click the theme you want for the document.
How do I create a custom theme color in Word for Mac?
Click Word > Preferences
- Click General.
- Under Personalize, click the Office theme dropdown. Choose between Colorful or Classic.
- As I mentioned earlier, the options are very minimal when it comes to changing the Color Theme. It’s basically White or Blue. Being that the new Mac Office Suite was just released.
How do I change the default font in Word 2020?
To use your favorite font in Word all the time, set it as the default.
- Go to Format > Font > Font. You can also press and hold. + D to open the Font dialog box.
- Select the font and size you want to use.
- Select Default, and then select Yes.
- Select OK.
What is 12pt?
Font sizes are measured in points; 1 point (abbreviated pt) is equal to 1/72 of an inch. The point size refers to the height of a character. Thus, a 12-pt font is 1/6 inch in height.
Why can’t I change font in Word?
If you like to change the default font, you need to press Ctrl+D and then have to click on Set As Default after picking a font. Finally, you have to select All documents based on this Normal template option to make the changes available for new documents.
How do I change my text font?
To change the font, follow these steps:
- Click the Home tab and then select the text you want to change.
- Click the Font list box. A list of available fonts on your computer appears.
- Move the mouse pointer over each font.
- Click the font you want to use.
How do you change the theme on Office 365?
Change the Microsoft 365 theme
- On the Microsoft 365 navigation bar at the top of the screen, click the Settings icon .
- Click a theme in the gallery to see it previewed on your screen. Scroll down and click Save to set it as your theme.
How do I apply a theme in Word?
To apply a theme in Word to a document, click the “Design” tab in the Ribbon. Then click the “Themes” drop-down button in the “Document Formatting” button group to show a drop-down menu of theme choices. To preview a theme in your document, hold your mouse over a theme in this drop-down menu.
How do I change my Word theme to black?
1. To turn on Dark mode in the Word canvas, select File > Account > Office Theme > Black. 2. Once the black theme is set, you can toggle between the black and white page background colors by selecting View > Switch Modes from the ribbon.
How do I save a custom font color in Word?
1 Answer
- Go to the design tab.
- Select ‘Colors’
- Choose ‘Customize colors’
- Change one of the Accent colors to your desired color.
- Press save.
- Save document.
What is the shortcut key for changing the font in Word?
Change or re-size the font
- Open the Font dialog box to change the font. Ctrl+Shift+F.
- Increase the font size. Ctrl+Shift+>
- Decrease the font size. Ctrl+Shift+<
- Increase the font size by 1 point. Ctrl+]
- Decrease the font size by 1 point. Ctrl+[
Why does the same font look different in Word?
Another common difference is fonts, which are not the same across systems. If you create a document using one font that happens to be installed on your computer, and then view it on another system where the font is not present, things will look different. Word will substitute something “close” to the font you wanted.
How do I change the default font in Windows 10?
Open the “Start” menu, search for “Settings,” then click the first result. You can also press Windows+i to quickly open the Settings window. In Settings, click “Personalization,” then select “Fonts” in the left sidebar. On the right pane, find the font that you want to set as the default and click the font name.
Is font size 10 too small?
Most textbooks will use 10 to 12pt type. 10pt type is generally readable provided the font is well designed and line spacing is appropriate. (Personal opinion: That san serif text is horrible. Letter spacing is horrendous and it is not a very “readable” typeface to use at a small size.
What size is 8pt font?
Comparison table
| Point | Metric size | American system |
|---|---|---|
| American | ||
| 712 | ≈ 2.646 mm | |
| 8 | ≈ 2.822 mm | Brevier |
| 9 | ≈ 3.175 mm | Bourgeois |
Why is font grayed out in Word?
Word Isn’t Activated
Microsoft Word is a paid software program, but is sometimes available for free for a timed trial. If a valid registration code isn’t entered by the end of this trial, most features–including the font menu–will become unavailable.
Does Office 365 have themes?
Bring a Bit of Color to Some Office 365 Apps
The themes are called Rainbow (Figure 1), Ribbon (Figure 2), and Unicorn (Figure 3). To select one of the new themes, go to the Office 365 home page and select your preferred theme from the settings (cogwheel) menu.
Microsoft Word uses the default template whenever you open a new blank document. It is called normal.dotm and has predefined settings for font size, font family, themes, paragraph spacing, etc. The documents generally use Office theme with predefined set of styles. If you are not happy with these default settings in Word, you can customize the theme in Microsoft Word to make things as per your convenience.
Default Theme Settings in Word
A theme in Word document has three components:
- Fonts – size and family
- Styles – colors, spacing, etc., for each element like list, heading, paragraph, etc.
- Effects – bold, italic and other effects for elements
A theme can have custom values for all these components or use only few of them. For example, you will always see the document opens with white background in most of the Word themes though it is possible to have a different page color. In addition, you may also always see the font size of paragraph as 11 pixels and paragraph spacing as single. This may be annoying and you want to customize these settings as per your need.
Customizing Theme in Microsoft Word
The blank document in Word for Windows uses the font size as 11 pixels and family as Calibri. On Mac, you can see the default font size as 12 pixels. As mentioned, the blank Word document uses the Office theme as a default theme. There are two ways to change your default theme settings in Word:
- One is to choose from one of the predefined themes that come with your Word installation package. You can also create your own theme and use for future documents.
- Other is to customize each component of the default normal.dotm template so that you can use on all your documents. For example, you can manually change the default font size in the template to 14 px or 16 px instead of 11 px.
In both cases, the objective is to have a uniform setup for all your documents and keep things convenient for your working.
Choose Default Themes
This is an easy and recommended way without changing any other settings in Word.
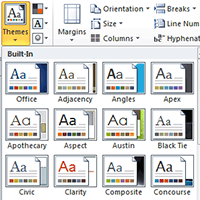
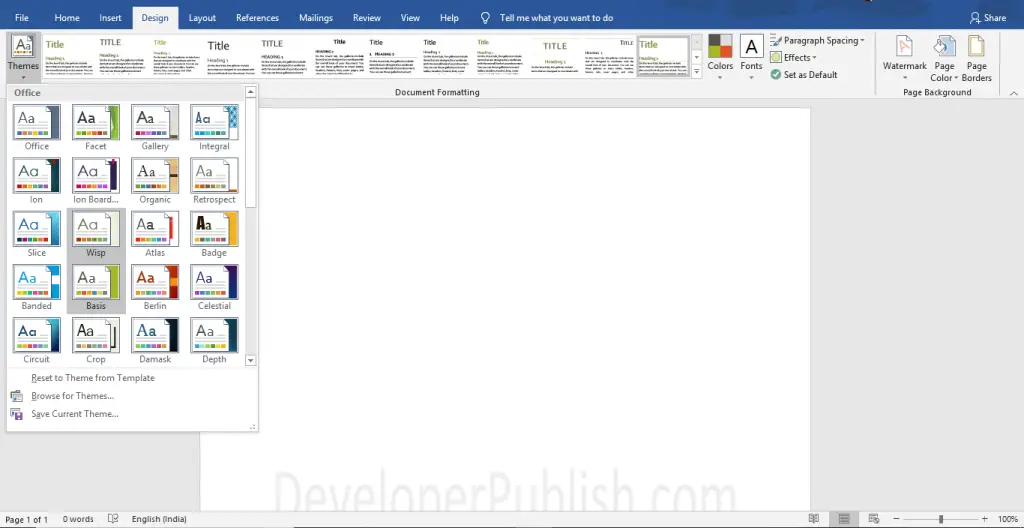
- Go to “Design” tab in the ribbon and click on “Themes” option.
- You will see a list of pre-defined themes and select the one you want to apply on your current document.
- You can hover over the theme to see the live preview before selecting a specific theme.
- You will notice the style in your document like heading color, font size, font family are changed as per the theme you have selected.

- Word will apply the selected theme only on the current document. If you want to use the theme for all your future documents as a base template, then click on “Set as Default” option.

- You will see a prompt informing you that Word will apply font, colors, effects and paragraph spacing of the current theme on all new blank documents. Click “OK” to confirm the prompt and apply the changes.

Customize Blank Template
If you do not like to use any of the existing themes, then it is possible to customize the appearance of the blank template and set as your default.
- Choose the style set for heading and text elements under “Design” tab’s “Document Formatting” group.
- Select base theme colors, fonts, effects and paragraph spacing by clicking on the respective dropdowns.
- It is also possible to apply page background color and borders for your document.
- If the existing colors and fonts are not enough, you can always upload third-party items.
- Additionally, you can go to “Home” tab and apply new “Styles” for your heading and body text. If required, you can change the font family and size from here and define new styles for each element using styles editor.
- When you are done, go back to “Design” tab and click on “Themes” dropdown.
- Select “Save Current Theme…” option.
- Provide a name for your theme and save it for future use. In this case, you need to manually select the theme every time when you want to use it in your document.
- If you want to use the customized theme as your template, then click on “Set as Default” and confirm the prompt to apply your changes.
Next time onwards, your blank document will always open with the customized theme. You do not need to increase the font size or change the font family every time when you open Word.
Change Office Theme
Themes are available across all Office apps like Excel and PowerPoint. It means, you can save a theme in Word and open in Excel or PowerPoint. However, styles are only applicable for Word or in your current document. For example, the custom theme we have saved in Word with the name as “WebNots” can be seen in PowerPoint as shown below.

It is also possible to change theme of your entire Office applications like Word, PowerPoint, Outlook and Excel in Windows version.
- Open any Office apps like Word or Excel.
- Go to “File > Options” menu and go to “General” tab.
- Select your preferred theme from “Office Theme” dropdown.

The selected theme will be applied to all Office applications like Word, Outlook, Excel, PowerPoint, etc. You can choose the black theme to apply dark mode in Office apps or force to use system settings. However, these Office themes will not have impact on font size, family and other paramters. It will only affect the appearnce of the app by using the selected color.
Download PC Repair Tool to quickly find & fix Windows errors automatically
I have been using the latest version of the Office for a few months now. It makes me share some tips, every time I discover something new with the productivity suite that I am not aware of. In this topic, we shall learn to change theme and font of Microsoft Office documents. Let’s get started!
If you intend to change your current theme, switch to a different one, or create a new theme, you may find the Design tab in Word or the Page Layout tab in Excel as the right place to start.
First off, open a new document, choose the ‘Designs’ tab, click the drop-down arrow of ‘Colors’ and pick the color of your choice.

Now, if you would like to create your own set of colors, choose ‘Customize Colors’ option.
Next, from the customize colors window that opens up, click the button adjacent to the theme color of your choice (for example, Accent 1 or Hyperlink), and then pick a color under ‘Theme Colors’.
For creating a customized or your own new color, click ‘More Colors’ and pick a color on the Standard tab or enter numbers on the Custom tab.
In the Name box, type a name for the new theme colors, and then click Save.

Change default Font in Office
For changing the default fonts, click on the Design tab, then ‘Fonts’ and pick the font set you want.
For creating your own set of fonts, select the ‘Customize Fonts’ option.
Then, if the ‘Create New Theme Fonts’ box is displayed, choose desired fonts under the Heading font and Body font boxes.
Next, as earlier, in the ‘Name’ box, enter a name, and click Save.
Save the Custom Theme for use in Microsoft Office
For this, click on the Design tab, click Themes > Save Current Theme.
In the File name box, enter a name for the theme, and click Save.
Set New Default Themes in Office
On the Design tab, click Set as Default.
You can follow the similar procedure using the Page Layout tab in Excel.
Hope you enjoy the change!

A post-graduate in Biotechnology, Hemant switched gears to writing about Microsoft technologies and has been a contributor to TheWindowsClub since then. When he is not working, you can usually find him out traveling to different places or indulging himself in binge-watching.
When it comes to creating a compelling and effective document, one of the most important tools at your disposal is the font (also known as «typeface»).
Fonts do much more than improve—or hamper—the legibility of your piece. They set a tone. They’ve got personalities. They evoke feelings. As such, fonts can either reinforce or undermine your brand.


Because fonts are so important, you may want to change the default fonts in Microsoft Word. In this article, you’ll see, step-by-step how to add fonts to Microsoft Word so you can change the default fonts in your document.
You’ll also learn tips on where to find the best Microsoft Word fonts and how to choose the best ones for your document.
(Note: In the tutorials below, I use Microsoft Word for macOS. If you’re on Windows or a different version of Word, then your interface will look different.)
Why Use Premium Fonts in Your Microsoft Word Document?
When it comes to creating documents that get and keep your readers’ attention, fonts are some of your most powerful tools. The right fonts:
- reinforce your branding
- express the right tone
- direct the reader’s attention
- improve readability
You might be tempted to use free fonts for Microsoft Word in your next document. But remember, those built-in MS Word fonts are exactly the same fonts that everyone else is using. Or, you might find a free Microsoft Word fonts download. But free fonts are often not as well-designed as premium fonts.
You can easily add fonts to Microsoft Word from outstanding sources like Envato Elements or GraphicRiver. To be able to download unlimited fonts, then look to Envato Elements. You get access to thousands of fonts. Download as many as you need for one small subscription price.


For one-off projects, GraphicRiver is a great source of the best Microsoft Word fonts on a pay-per-use basis.
And lastly, use the tips above to choose and use fonts effectively in your document. The misuse and overuse of fonts are sure signs of an amateur.
How to Change Microsoft Word Default Font
Word comes with default fonts, but you can change the font to match your branding or to change the tone and personality of the document.
You’ll find that dozens of fonts are already built into Word, and you can replace the default fonts with those. And you can also add new fonts. We’ll talk about how to add fonts to Microsoft Word later in this post.
To change the Microsoft Word default font, you’ve got three options:
1. How to Change the Microsoft Word Default Font for a Block of Text
This is a quick method that’s good to use if you want to change the default font only for one or a few bits of text. Here are the steps:
Step 1. Select the Text


Step 2. Open the Font Selection Tool


Click on the Font selection tool on the ribbon. You must be on the Home tab to see the buttons for formatting text. The Microsoft Word fonts list opens.
Step 3. Find the font you wish to use.
The Microsoft Word fonts list shows the Theme Fonts, Recent Fonts, and All Fonts. Scroll down farther to see all the fonts available on your computer. This includes fonts that are built-in as well as fonts you’ve added, listed in alphabetical order. The fonts list also gives you a preview of what each font looks like.
Click on the font you wish to use. A triangle next to the font means there are further selections you can make.


Step 4. Change the Font Size
Go to the font-size button to change the font size.


Or, click the Increase Font Size or Decrease Font Size buttons to change the font size by increments.
Step 5. Change Other Text and Paragraph Settings
Use the other buttons on the ribbon to add emphasis (bold, italics, underline), change the font color, and apply other effects.


We’ve now changed the default font in Microsoft Word.


2. How to Replace the Default Font Based on Paragraph Style
By changing the font used for a paragraph style, the change is applied globally in your document for all text with that paragraph style. Use this if you want to change the default font for large sections of text.
Follow the steps on how to change the Microsoft Word default font for a paragraph style:
Step 1. Select the Text
Highlight text that’s representative of the paragraph style you want to re-format. Make sure it’s got the paragraph style you want to change.


In this example, I’ll replace the default font for the Normal paragraph style.
Step 2. Apply the Font Settings You Wish to Use
Follow the steps in Method 1 to change the font, font size, font color, and apply other settings. You may also want to change the paragraph settings, such as alignment, line spacing, etc.


Step 3. Apply the New Formatting to the Paragraph Style
With the cursor in the paragraph you’ve formatted, click on the Styles button on the ribbon. This opens the paragraph Styles selection.


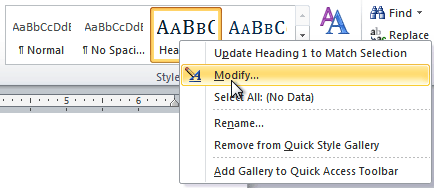
The current paragraph style will be highlighted. In this case, it’s the Normal style. Right-click on the Normal style, then click on Update Normal to Match Selection.


All other paragraphs with the Normal style are updated with the new font and settings you made.


3. How to Change the Font Based on Paragraph Styles Button
This method has the same end-result as Method 2. It changes the default font for a specific paragraph style. The steps are slightly different, as you’ll see:
Step 1. Open the Styles Settings
Click on the Styles button on the ribbon. This displays the paragraph styles.


Step 2. Modify the Paragraph Style
Right-click on the style you wish to change. Click Modify…


The Modify Style dialog opens.


Change the font, font size, and other settings. The box shows a preview of what the paragraph will look like when the settings you chose are applied. If you’re happy with the way it looks, click OK.


The new font (and other settings) will be applied to all paragraphs with that paragraph style.
How to Add Fonts to Microsoft Word
Right out of the box, Microsoft Word comes with dozens of fonts built in. But what if you want to use a font and you don’t see it on the Microsoft Word fonts list?
In that case, you add the font to Microsoft Word. I’ll walk you through how to do that in this section:
Step 1. Find New Fonts
The first step is to find the font you want to use. There are many sources of custom fonts. One to consider is Envato Elements, where you can download an unlimited number of fonts for one small subscription price.
To find a font you like, log into your Envato Elements account.


On the search bar, click on the downward arrow, then select Fonts.


Type a keyword into the search bar, depending on what kind of font you’re looking for. Click the search icon. The most relevant results appear.


Refine the results by Categories, Spacing, Optimum Size, and Properties. You can also sort the results by popularity (Popular) and newness (New).
Click on a font image or name to see its details.


When you find a font you like, click on any of the Download buttons on the page.


The Add this file to a project dialog box pops up.


Select a project to add the font file to. Or, click Create new project to add it to a new project. For this example, I’ll add the font to my existing tutorial project. Click the Add & Download button.
The file manager opens (Finder, if you’re on macOS; File Explorer, if you’re on Windows). Specify where you want to save the font file on your computer. Click Save.


The font files are now saved on your computer as a zip file.


Double-click on the zip file to unzip it.


Double-click on the font file itself to open it. It’ll usually have an extension like OTF or TTF. Click Install Font.


This adds the font to your computer’s fonts library.


The new font should now appear in the All Fonts list in Microsoft Word. To confirm, click on the Fonts button on the ribbon and scroll down the list until you see the new font. If you don’t see it, you may have to restart your computer.


Now, follow any of the methods above to change the default font with the new one.
2 Types of Fonts
Now that you know how to add fonts to Microsoft Word and replace the default fonts in your document, it would help for you to know more about fonts. This will help you choose the best fonts for your Word document.
There are two basic types of fonts you can use in your documents:
1. Serif Fonts
Serif fonts have little lines at the end of each stroke, like this:


Common examples of serif fonts include:


Various research studies have shown that, when it comes to printed matter, serif fonts are the easiest to read and result in the best comprehension.
2. Sans Serif Fonts
As the name implies, sans serif fonts don’t have little lines at the end of each stroke (“sans” means “without” in French):


These are some of the most common sans serif fonts:


Citing research by the Software Usability Research Laboratory, Drew E. Whitman in his book Ca$vertising, noted that sans serif fonts are the most legible fonts to use on a computer screen. Specifically, Arial, Courier, and Verdana were considered the best for online reading.
But these studies were conducted when the resolution of online screens was still very low (below 100 dpi) compared to printed materials (300 dpi). As computer screen resolutions get closer to 300 dpi, serif fonts may prove to be legible both online and offline.
In the meantime, you can use both serif and sans serif fonts in one document—if you know how. Read on for tips on how to use combine fonts.
5 Tips on Using Typography Effectively in Your Word Documents
It’s easy to get carried away with fonts! You may find that having so many kinds of fonts available at your fingertips unleashes your creativity. Yet, as with most things, fonts can either enhance or sabotage your document.
Follow these tips to harness the power of typography:
1. Keep It Simple
When it comes to choosing fonts, legibility is of utmost importance. Sure, it’s easier than ever now for you to find the most creative and outrageous fonts. But if nobody can read your text, then they defeat their purpose. If you must use an ornate font, restrict it to one letter or word.
2. Stick to Two Fonts
A document that’s dripping with many different fonts makes it look amateurish, confusing, and incoherent. For best results, stick to a maximum of two fonts: one serif and one sans serif. (More on this in tip #4).
Remember, use formatting like bold, italics, underlines, different font sizes and colors to add emphasis and variety.
3. Match the Tone and Goals for the Document
Fonts have personality, so pick the ones that match the tone and goals of the document. For example, the fonts for a 16th birthday party invitation will be different from the ones in a financial business report.
When in doubt, pre-test the document. Show it to other people, especially those who are like the intended audience. Make sure they can comprehend the document, first, and that they respond favorably.
4. Choose Fonts Appropriate for the Document’s Intended Use
Whether the document will be printed out or consumed on a computer screen will also affect your choice of fonts.
If you’re making a printed document, use the sans serif font for headings and the serif font for body text. For a web-based document, switch it: Use a serif font for headings and sans serif for body text.
5. Use Handwritten, Cursive, and Decorative Fonts Sparingly


There are other font types that may not fit easily in either serif or sans serif categories. These include handwritten, cursive, and decorative fonts. Handwritten fonts, as the name says, look like they were written by hand. These are extremely popular and useful for adding a warm, personal touch on materials. They can range from casual to glamorous.
Cursive fonts are a kind of handwritten font that look like they’re written in longhand. Beware of using cursive and handwritten fonts because they can be difficult to read. Use them for short bits of text you want to emphasize.
You can easily find handwritten fonts in marketplaces like Envato Elements or GraphicRiver.
Decorative fonts have special effects or treatments. They may be serif or sans serif. And some handwritten fonts can be considered decorative as well.
Here’s a sampling of the decorative fonts available in Envato Elements:
5 Best Font Styles for 2020
Designers come up with new fonts every day. Below are five of the best and freshest Microsoft Word font styles we’re seeing for 2020, along with two fresh examples of each style:
1. Vintage Fonts
Vintage fonts evoke the aesthetic of times past. If you’re working on a document that’s about a specific time, you’re bound to find a font to match.
Anthique — Vintage Typeface


Anthique is reminiscent of handmade Victorian hand lettering but with a modern flavor. It works best for materials that relate to the early 1800s. The font includes three variations in TTF and OTF formats. It also supports multilingual characters.
Middle Class Script


Middle Class is a script font that’s evocative of the bold style of the ’60s and ’70s. It’s got a hand-drawn and layered style, and includes punctuation, common ligatures, and extra swashes (lines).
2. Brush Script Fonts
Brush script fonts are handwritten fonts that look like they were written with a brush, such as a calligraphy or a paintbrush. These are increasingly popular as brands want to add a personal touch to their materials.
Eberthany Brush Script


Eberthany is a modern brush script signature font that works for:
- social media posts
- logos
- wedding invitations
- labels
- quotes
- and more
It works best with software that supports OpenType fonts like Adobe Illustrator CS, Adobe Photoshop CC, Adobe InDesign, and Corel Draw.
Mistrully Brush Script


Mistrully is a stylish brush script that looks like natural handwriting. It comes with special swashes or handwritten lines that you can use to add emphasis. Mistrully works well for logos, social media posts, advertisements, product designs and labels, stationery, among others.
3. Font Duos
Font Duos take the guesswork out of choosing fonts that work well together. These two-for-one font packages are designed to complement each other. You only need to pick the font duo that aligns with your branding and the tone of the material you’re designing. Examples of font duos include:
Chiladepia — Font Duo


The Chiladepia Font Duo is made up of two handwritten fonts. One’s a cursive font and the other’s a sans serif font. This font duo would work well on a computer screen. Use the cursive font for titles or headers and the sans serif font for the rest of the document.
Perkin | Duo Font Pack


The Perkin Duo Font combines a bold sans serif and a serif font. The sans serif font is best for titles and headings, while the serif font works great for body text. This duo is ideal for printed materials.
4. 3D Decorative Fonts
3D decorative fonts look like they’re popping off the pages. These fonts are incredibly eye-catching. For that reason, they’re great for titles. But, they’re not the most legible fonts, so use them sparingly for short bits of text.
Ultra — Modern Font


If you’re creating a futuristic document, then consider the Ultra — Modern Font. It’s got a modern and futuristic style. This pack is actually made up of four font styles: regular, bold, 3D, and bold 3D. It also comes in both OTF and TTF formats.
Under Construction 3D Color Font


Under Construction is a stunning 3D decorative font to use on materials related to industry, construction, technology, and the like. Each letter looks like it floats on top of the page. It’s a color or SVG OpenType font, which works only in Photoshop CC 2017+, Illustrator CC 2018, and some Mac apps.
5. Tech Sans Serif Fonts
Tech sans serif fonts have gone a long way since the pixelized arcade fonts of the ‘80s. Many are also much more legible and modern. Below are two examples:
Azuria — Technology Science Font


The Azuria — Technology Science Font evokes technology, science, and outer space. Its metallic, 3D look would work well in video games, movie titles, and tech-related branding. The font includes all Latin letters from A-Z, numbers, and punctuation marks.
Cyborg — Futuristic Technology Typeface


Cyborg is another futuristic tech font. Inspired by science fiction, it’s perfect for titles related to space, technology, and science. It comes in OTF, TTF, and WOFF formats.
Put Fonts to Work in Your Microsoft Word Document Today
As you’ve learned in this article, you don’t need to stick to the default fonts in Microsoft Word. Follow the steps outlined above to replace the default fonts with ones that are more appropriate to your document.
Now that you understand how to add fonts to Microsoft Word, you’re ready to start taking advantage of the unique look a professionally designed font can give your documents.
At Envato Elements and GraphicRiver we’ve got some of the best Microsoft Word fonts available. Take a look at our Microsoft Word fonts list today. Download your favorites for your next MS Word document.

Word’s document themes provide a consistent and professional look for your documents. Each document theme consists of three design elements:
- Theme Colors: A set of coordinated colors used in formatting text and objects in the document. These colors define what you see when you open the Color menu.
- Theme Fonts: A set of coordinated heading and body font types.
- Theme Effects: A set of coordinated formatting properties for shapes and objects.
Apply a Theme
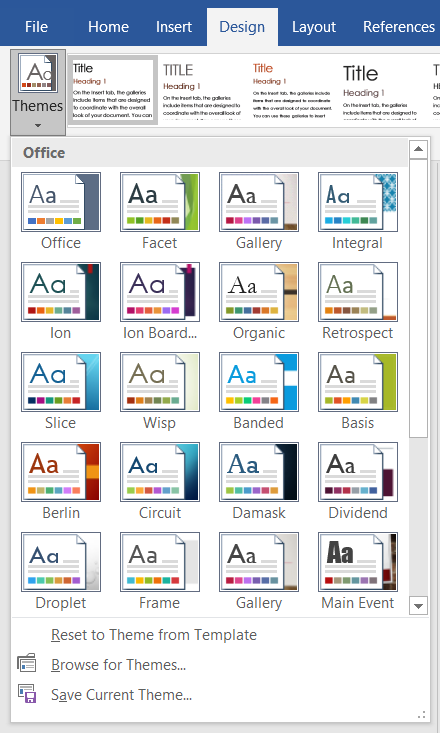
- Click the Design tab.
- Click the Themes button.
- Select a theme.

The Themes gallery opens. Each thumbnail previews the theme’s fonts and colors.
The theme is applied, and the colors, fonts, and effects of the document are changed.
If some text or graphics aren’t changing with the theme the way you expect, make sure the text is using Theme Fonts and the objects are using Theme Colors.
If a theme is saved elsewhere on your computer or network location, click Browse for Themes to locate the theme.
Customize a Theme
If you like most of a theme’s look, but still want to change something about it, you can change color and font sets as well.
- Click the Colors button on the Design tab.
- Select a color set.
- Click the Fonts button.
- Select a font set.
Each color set listed here shows a small preview of the text, background, and accent colors in that set. Any text and shapes that are using theme colors will be affected by a change here.
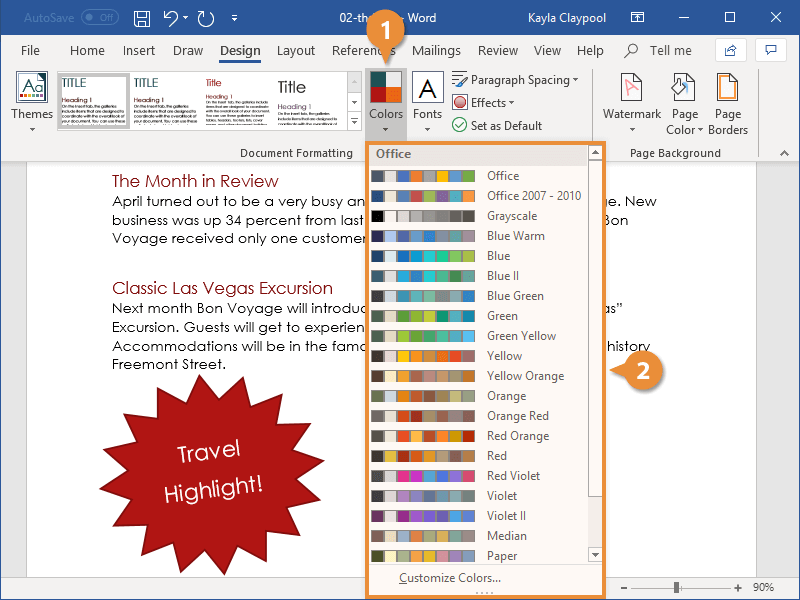
Anything set to use theme colors, such as heading text or shapes, will be updated.
Changing font sets works the same way.
Each font set shows the Heading and Body font it contains. Any text using theme heading and body fonts will be updated.
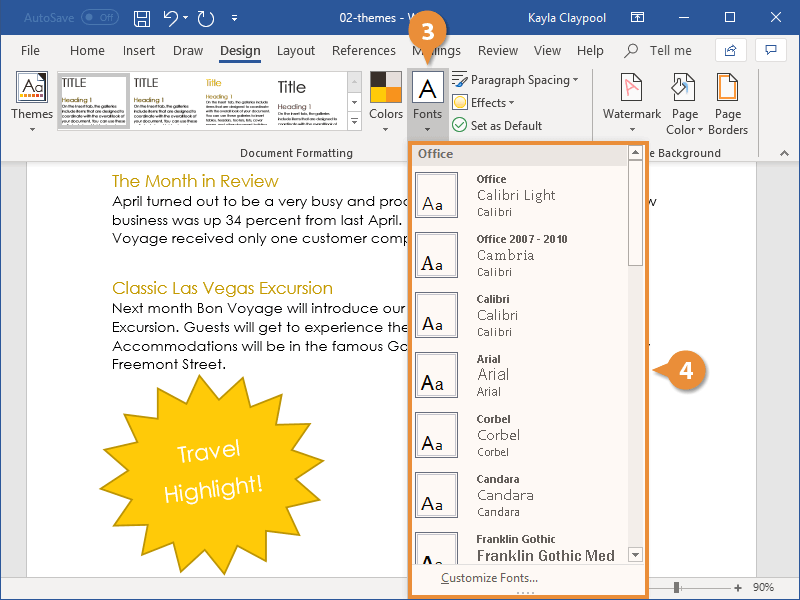
Both the body text and the headings are updated.

FREE Quick Reference
Click to Download
Free to distribute with our compliments; we hope you will consider our paid training.

You can use the themes in Microsoft Word to apply a consistent formatting style to your work. But how do these themes work? This post will explain the basics.
Applying Themes in Word
The themes in let you create professional-looking work by coordinating colors, styles, and other formatting within and between documents. This also saves time by eliminating to need to format each element of a document separately.
To apply a default theme to your document:
- Go to Design > Themes on the main ribbon.
- Click Themes to open the gallery.
- Hover over each option to preview it in your document.
- Click on your chosen design to apply.
This will apply the chosen theme to the entire document.
Adjusting Theme Colors and Fonts
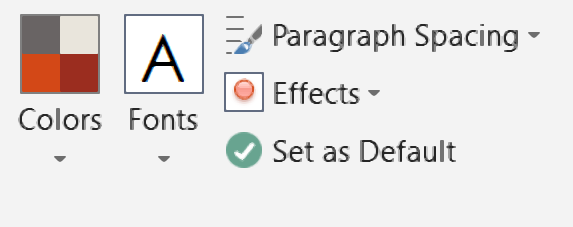
If the default themes in the gallery do not meet your needs, you can also customize them. The options for this are also available via the Design tab, including:
- Colors – A list of color schemes, with each color in a set applied to a different part of the document (e.g., text, headings, hyperlinks).
- Fonts – Sets of fonts for text and heading.
- Paragraph spacing – Pre-set options for line and paragraph spacing.
- Effects – Options for effects applied to graphical objects (e.g., drawn shapes).
Selecting an option from these menus will adjust the theme of your document. For the first three (but not “Effects”), you can also create a custom design for your theme (simply select the “Customize…” option at the bottom of the relevant menu).
You can also save a custom theme so that you can easily apply it to future work:
Find this useful?
Subscribe to our newsletter and get writing tips from our editors straight to your inbox.
- Make any changes and go to Design > Themes.
- Select Save Current Theme.
- In the dialog box that opens, enter a new theme name.
- Click Save to save your theme.
Your new theme will then be saved in the Themes gallery for quick access.
Alternatively, if you want to use a theme from an earlier piece of work that you didn’t save to the gallery, you can go to Themes > Browse for Themes and select the document with the theme you want to use. Microsoft Word will then apply the theme from that document to the current one.
And if you want to use a selected theme for all new documents (either a custom theme or one from the gallery), simply click Set as Default on the Design tab.
Expert Microsoft Word Formatting
Using the themes in Microsoft Word helps you to create professional documents with a consistent design. If you’d like any further help with polishing your work, though, we offer a tailored formatting service at Proofed.
Lesson 18: Styles and Themes
/en/word2010/formatting-pictures/content/
Introduction
Styles and themes are powerful tools in Word that can help you easily create professional-looking documents. A style is a predefined combination of font style, color, and size of text that can be applied to selected text. A theme is a set of formatting choices that can be applied to an entire document and includes theme colors, fonts, and effects.
In this lesson, you will learn how to apply, modify, and create a style; use style sets; apply a document theme; and create a custom theme.
Using styles and themes
Word’s large selection of styles and themes allows you to quickly improve the appearance of your document. Styles can give your document a more sophisticated look, while themes are a great way to change the tone of your entire document quickly and easily. To use styles and themes effectively, you’ll need to know how to apply, modify, and create a style; use style sets; apply a document theme; and create a custom theme.
Optional: You can download this example for extra practice.
To select a style:
- Select the text you want to format.
Selecting text
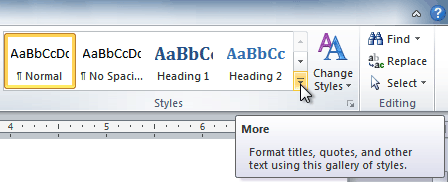
- In the Style group on the Home tab, hover over each style to see a live preview in the document. Click the More drop-down arrow to see additional styles.
Viewing the Text Styles
- Select the style you want. The selected text appears formatted in the style.
Selecting a Style

You can also use styles to create a table of contents for your document. To learn how, review our article on How to Create a Table of Contents in Microsoft Word.
To apply a style set:
Style sets include a combination of title, heading, and paragraph styles. Style sets allow you to format all of the elements of your document at once, rather than formatting your title and headings separately.
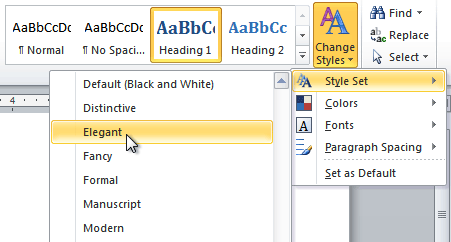
- Click the Change Styles command on the Ribbon. A drop-down menu will appear.
- From the drop-down menu, select Style Set.
Selecting a Style Set
- Select the Style Set you want, and the change will be reflected in the entire document.
Elegant Style Set Formal Style Set


To modify a style:
- Locate the style you want to change in the Styles group.
- Right-click the style. A drop-down menu will appear.
- Click Modify, and the Modify Style dialog box appears.
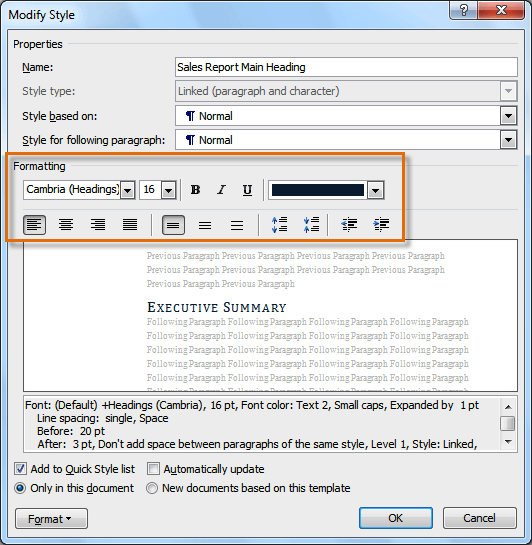
Modifying a Style
- Make the desired changes to the formatting. If you want, you can also change the name of the style.
The Formatting options for the Style
- Click OK to apply the modifications to the style.
To create a new style:
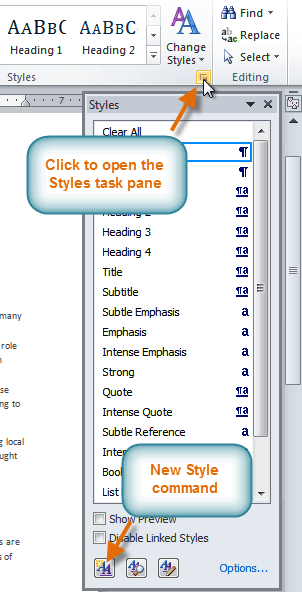
- Click the arrow in the bottom-right corner of the Styles group. This opens the Styles task pane.
The Styles task pane
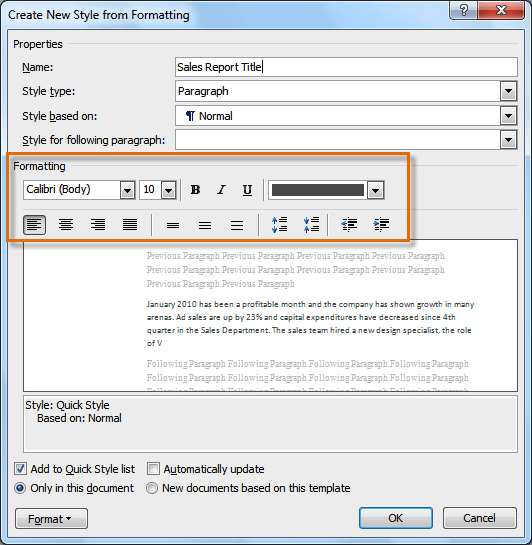
- Select the New Style button at the bottom. A dialog box will appear.
- Enter a name for the style, and set the text formatting the way you want.
Formatting options for the new Style
- Click OK, and the new style will appear in the task pane.
Using themes
A theme is a set of colors, fonts, and effects that determines the overall look of your document. Themes are a great way to change the tone of your entire document quickly and easily.
What is a theme?
All documents in Word 2010 use a theme. You’ve already been using a theme, even if you didn’t know it: the default Office theme. Every theme, including the Office theme, has its own theme elements:
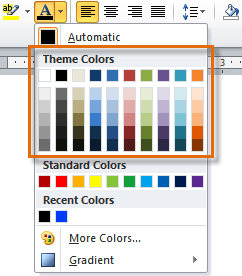
- Theme colors (available in every Color menu)
Theme Colors
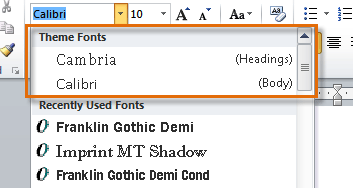
- Theme fonts (available in the Font menu)
Theme Fonts
- Shape styles (available in the Format tab when you click a shape)
Shape Styles

Why should you use theme elements?
If you’re using theme elements, you’ll probably find that your document looks pretty good and that all of the colors work well together, which means you don’t have to spend as much time tweaking the document. But there’s another great reason to use theme elements: When you switch to a different theme, all of these elements will update to reflect the new theme. You can drastically change the look of the document in a few clicks, and it will usually still look good.
 Oriel Theme
 Tradeshow Theme
Remember, the colors and fonts will only update if you’re using theme fonts or theme colors. If you choose one of the standard colors or any of the fonts that are not theme fonts, your text will not change when you change the theme. This can be useful if you’re creating a logo or title that always needs to look the same.
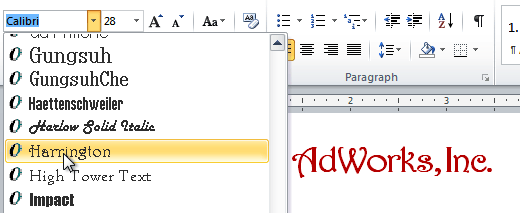 Selecting a non-theme font
If you’re using built-in styles, you may notice that the fonts for these styles change when you select a different theme. This is because all of the built-in styles are based on the theme fonts. If you don’t want the styles to change, you’ll need to create custom styles.
To change the theme:
- Select the Page Layout tab.
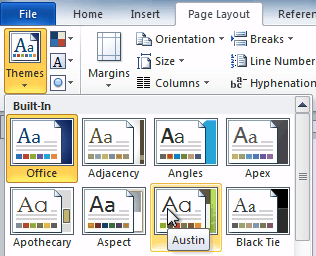
- Click the Themes command. A drop-down menu will appear.
Selecting a Theme
- Hover the mouse over a theme to see a live preview of it.
- Select the desired theme.
Customizing a theme
Let’s say you really like the fonts from one theme, but you want to experiment with different color schemes. Luckily, you can mix and match the colors, fonts, and effects from different themes to create a unique look for your document. If it still doesn’t look exactly right, you can customize the theme colors and theme fonts.
To change theme colors:
- From the Page Layout tab, click the Theme Colors command. A drop-down menu will appear.
Changing the Theme Colors
- Hover your mouse over the different sets of theme colors to see a live preview.
- Select the set of theme colors you want, or select Create New Theme Colors to customize each color individually.

When setting theme colors, try to find a part of your document that uses several colors so you get the best idea of what the color scheme looks like.
To change theme fonts:
- From the Page Layout tab, click the Theme Fonts command. A drop-down menu will appear.
Changing the Theme Fonts
- Hover your mouse over the different sets of theme fonts to see a live preview.
- Select the set of theme fonts you want, or select Create New Theme Fonts to customize each font individually.

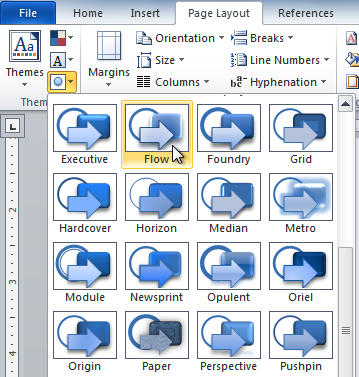
To change theme effects:
- From the Page Layout tab, click the Theme Effects command. A drop-down menu will appear.
Changing the Theme Effects
- Hover your mouse over the different sets of theme effects to see a live preview.
- Select the set of theme effects you want.
Some themes can add a picture fill to shapes, depending on which shape styles are used. For example, the Paper theme can add a paper-like texture to shapes. Try exploring some of the different shape styles after changing the theme.
To save your theme:
Once you’ve found settings you like, you may want to save the theme so you can use it in other documents.
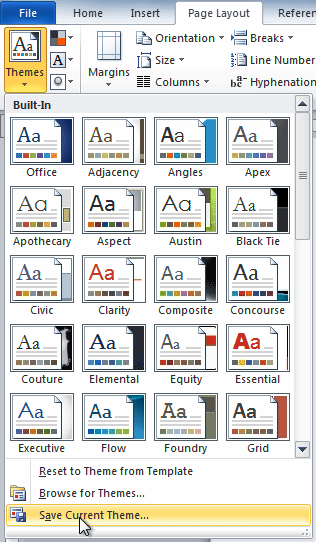
- From the Page Layout tab, click the Themes command. A drop-down menu will appear.
Saving the current Theme
- Select Save Current Theme.
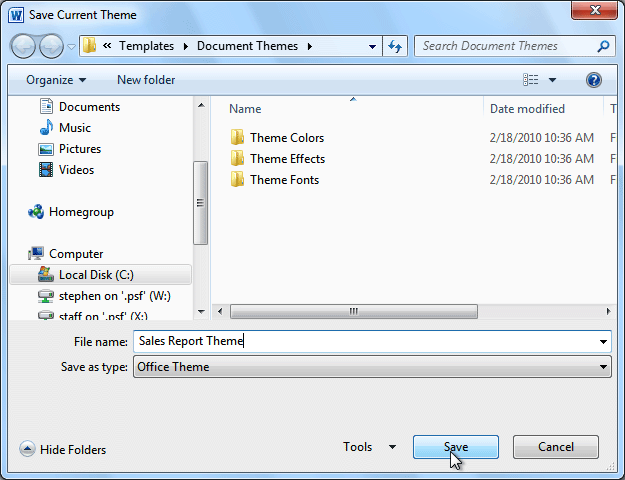
The Save dialog box
- Type a file name for your theme, then click Save.
Challenge!
- Open an existing Word document. If you want, you can use this example.
- Apply several different styles to different parts of your document.
- Apply a style set to your entire document.
- Modify an existing style.
- Apply a theme.
/en/word2010/working-with-headers-and-footers/content/
(Image credit: Windows Central )
Although you can style every part of a Microsoft Word document individually with unique fonts and colors, it is not a convenient approach since you have to repeat the steps many times, consuming more time and increasing the chances of mistakes, and this is when styles and themes can come in handy.
In the Office apps, styles are collections of fonts, text sizes, and colors that you can apply to different parts of the document (titles, subheadings, quotation, etc.). On the other hand, themes are collections of styles that you can use to format the entire document quickly.
When you use styles and themes, you will still be using a few steps, but it is a more organized way to format a document on Windows 10, and you will really see the benefit when you need to make changes since updating the format can be as easy as selecting a new theme or style.
In this Windows 10 guide, we will walk you through the steps to change the look and feel of Word documents using the style and themes settings whether you use Office from Microsoft 365 or Office 2019.
- How to use styles in Word
- How to use themes in Word
How to use styles in Word
To change the overall look of a Word document, use these steps:
- Open the Word app.
- Under the «New» section, click the Blank document option (or open an existing document).
- Create the document’s content.
- Select with the mouse the text you want to apply a different format – for example, the title.
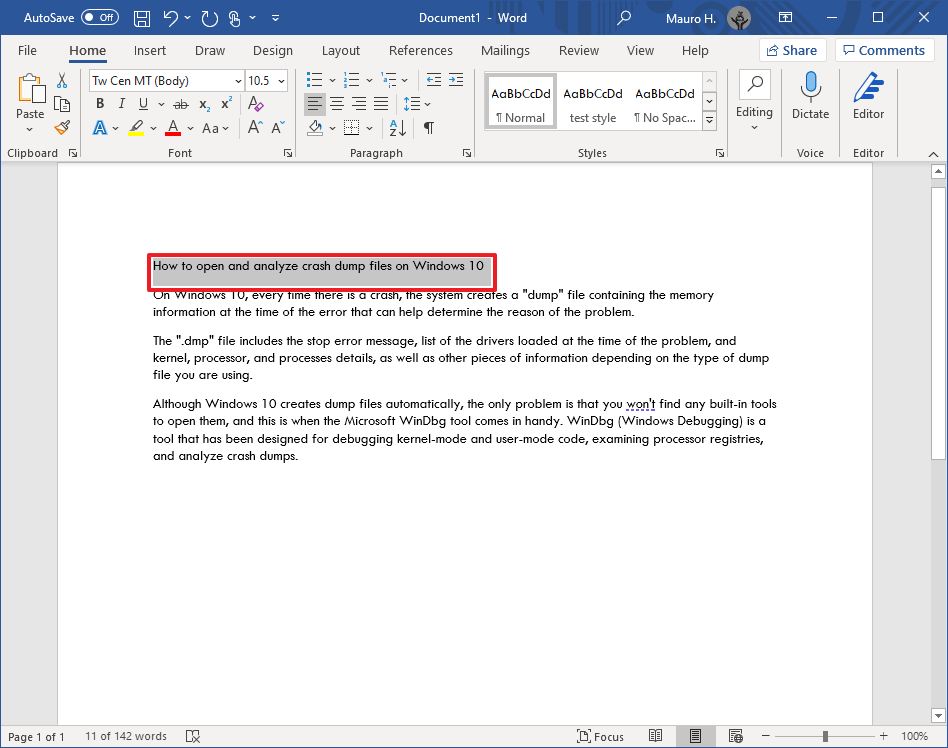
- In the «Home» tab, under the «Styles» section, select the content type to style.Quick note: When selecting a style, make sure to apply it to the correct formating. For example, if you choose the title, then the style should be «Title.» For the subtitle, select the «Subtitle» style and the rest of the headings using «Heading» 1 through 9 accordingly. And don’t worry about the colors. You will customize these when applying a theme. Also, to view all the available elements, click the More button in Styles’s bottom-right corner.

- Continue applying the styling for subtitles, headings, quotes, and anything else you want to format.Quick tip: You can always click and hold the Ctrl key and use the mouse pointer to select the same parts of the document, including the same stying, for instance, all the subtitles (headings).
Once you complete the steps, the document will be formatted with the styling you selected, and when you make changes to the style, the formatting will change automatically for all the same parts of the document.
In addition to selecting from the predefined settings, you can also create new or modify existing elements to style documents with custom settings.
Create new style element
To create a custom style element in Microsoft Word, use these steps:
- Open the Word app.
- Click the Open option.
- In the «Home» tab, under the «Styles» section, click the More (down-arrow button) menu.
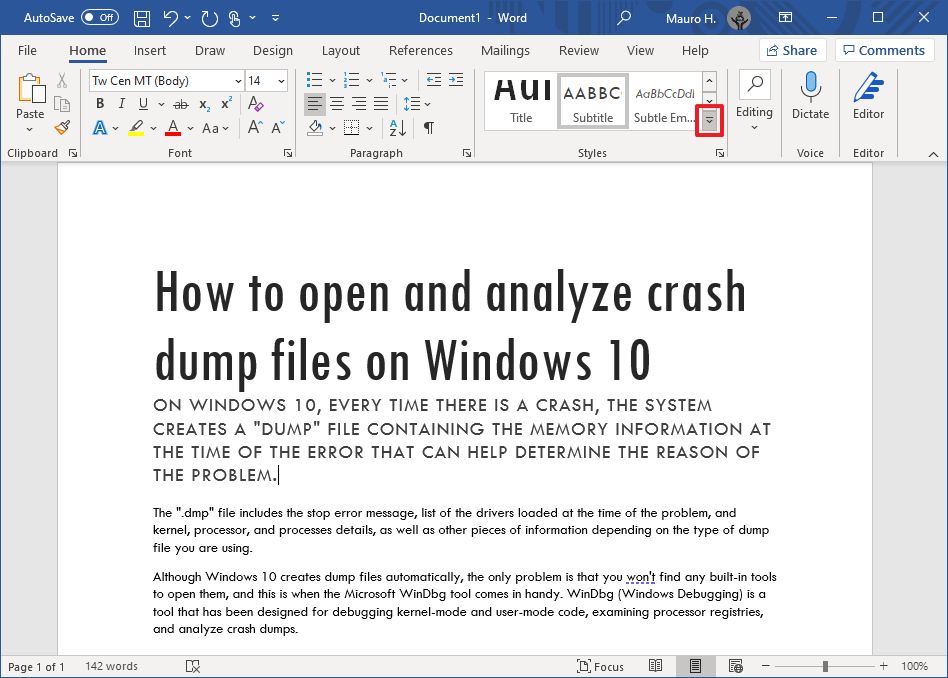
- Click the Create a style option.
- Specify a name for the style.
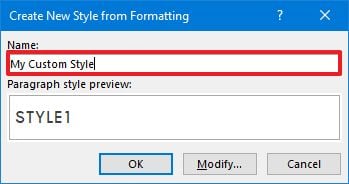
- Click OK button.
After you complete the steps, the new element will appear in the Styles menu.
Modify style elements
To modify a new or existing style element, use these steps:
- Open the Word app.
- Click the Open option.
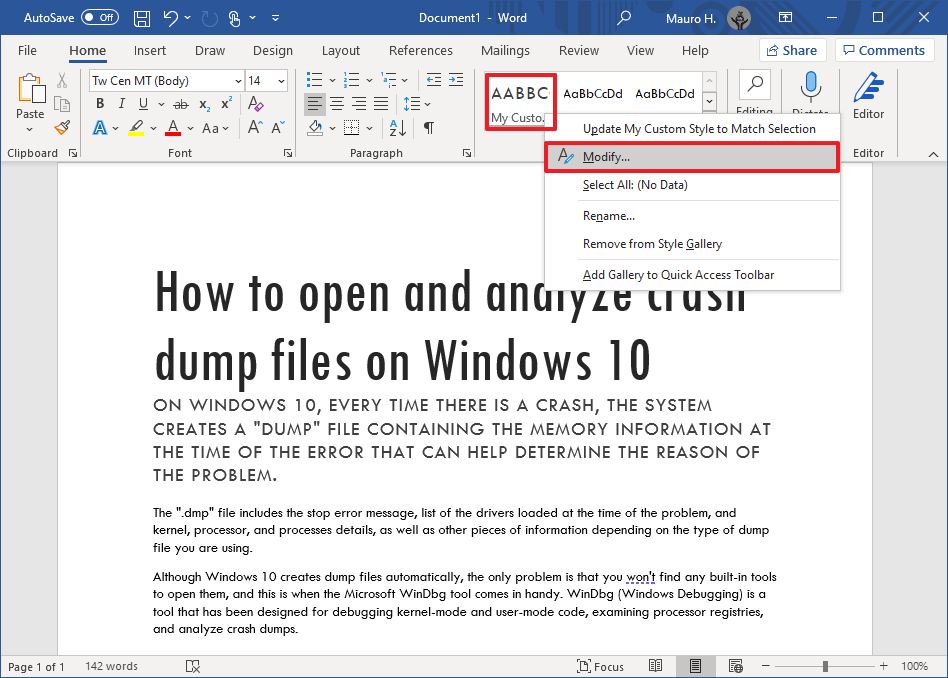
- In the «Home» tab, under the «Styles» section, right-click the style and select the Modify Option.
- Customize the style name and formatting settings (for example, font, size, color, aligment, etc.) as necessary.
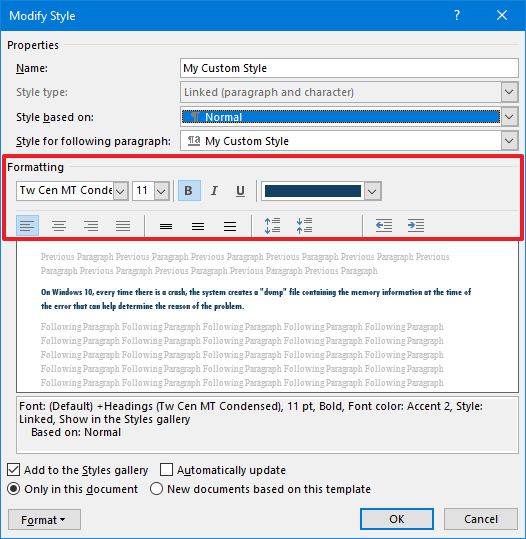
- Click the OK button.
Once you complete the steps, the new styling changes will apply to the element.
 Get subscribed
Microsoft 365 gives you full access to all the Office apps and perks, such as 1TB OneDrive storage and Skype minutes. You can also install Word, Excel, PowerPoint, Outlook, and other apps on up to five devices, and depending on the subscription, you can share the account with up to five people.
How to use themes in Word
After applying the style, you can use themes to give the document a different look and feel with colors and a combination of fonts.
To apply a theme to a Microsoft Word document, use these steps:
- Open the Word app.
- Click the Open option.
- Select the document you already styled to open it.
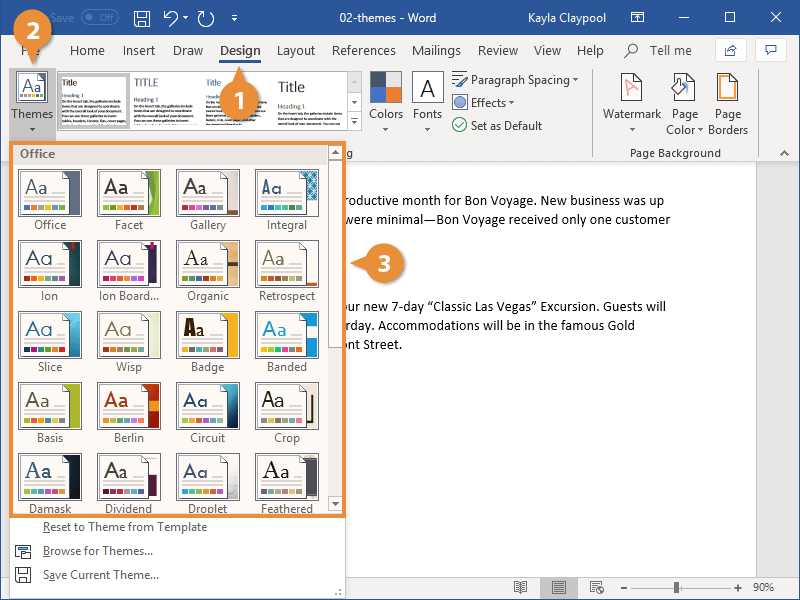
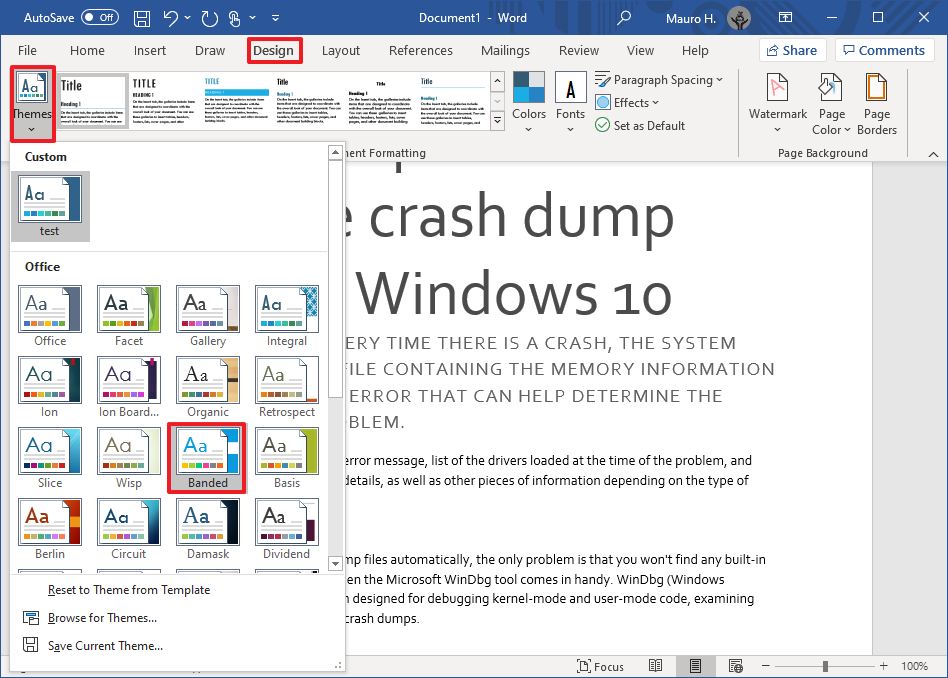
- Click the Design tab.
- Click the Themes button.
- Roll the mouse pointer over the themes to see a live preview of each available theme.
- Click the theme you want for the document.
- (Optional) Use the «Document Formatting» section to select another version of the theme with different combinations of fonts and colors.
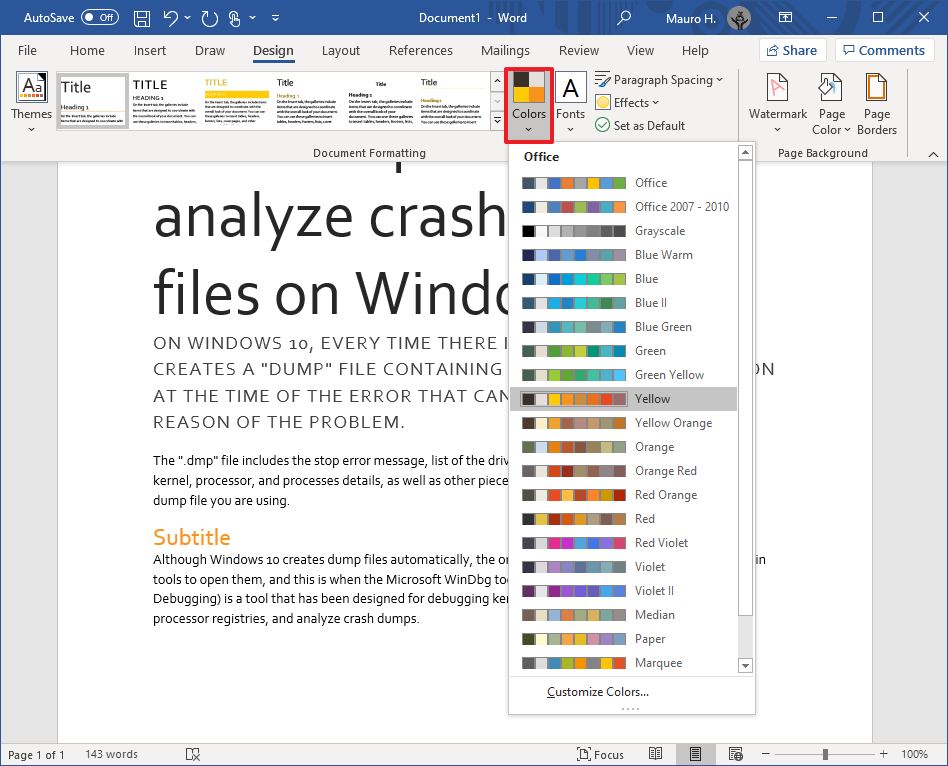
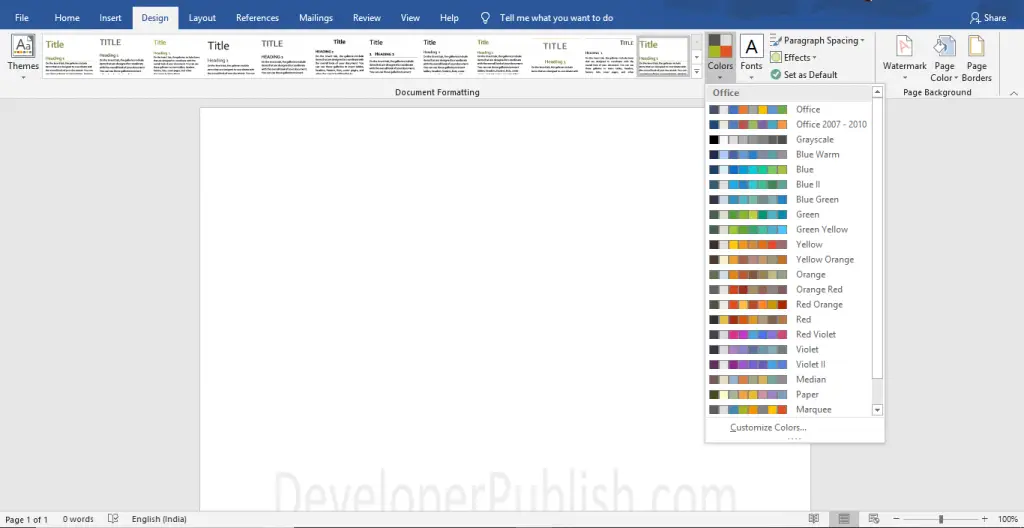
- (Optional) Click the «Colors» menu to select a different color scheme.
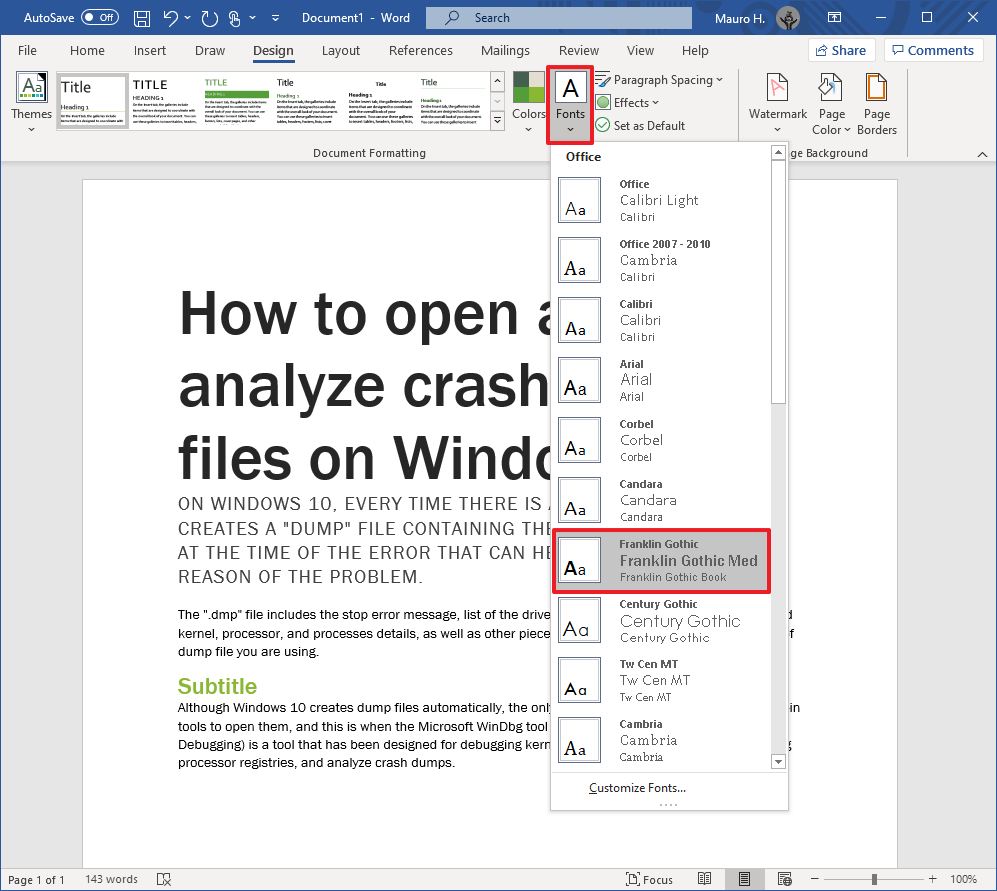
- (Optional) Click the «Fonts» menu to select a different combination of fonts.Quick note: As you open the menu, the top font is one for the title, the one in the middle is for the subheadings, and the one at the bottom is for the content.
After you complete the steps, the content will incorporate the new colors and fonts available through the theme you selected.
Set theme as the default
To set a theme as the default for Word, use these steps:
- Open the Word app.
- Click the Open option.
- Select the document you already styled to open it.
- Click the Design tab.
- Customize the formatting of the document with colors, fonts, spacing, and effects.
- Click the Set as Default button.
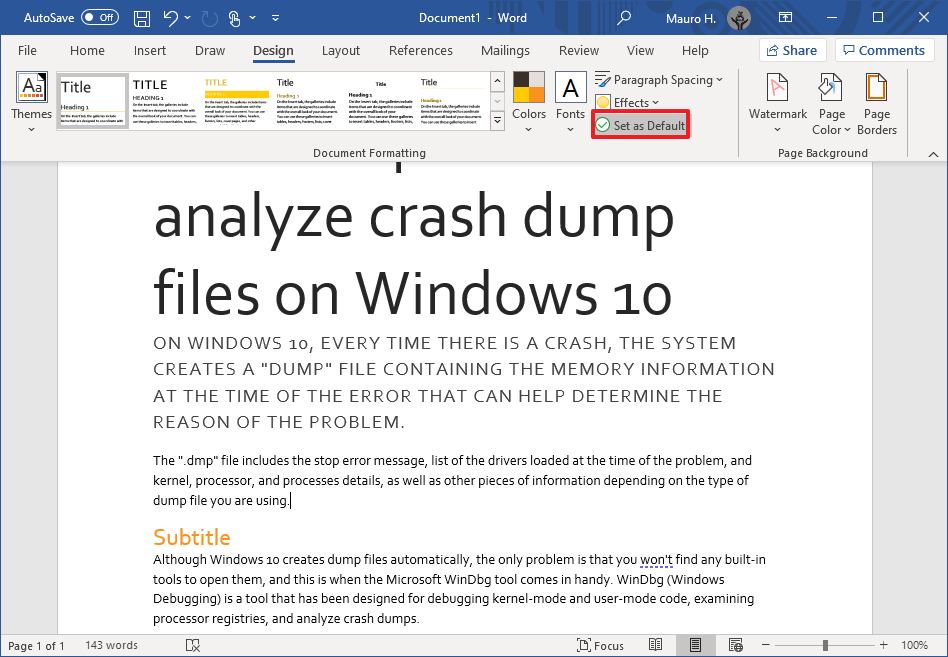
- Click the OK button.
Once you complete the steps, the theme will be available as the default for every new document. However, it won’t apply to the document automatically. Instead, it will be the default theme in the «Style» section, in the «Home» tab.
Create a new theme template
To create a new theme for Microsoft Word documents, use these steps:
- Open the Word app.
- Click the Open option.
- Select the document you already styled to open it.
- Click the Design tab.
- Use the «Document Formatting» section to select a format.
- Click the «Colors» menu to select a color scheme.
- Click the «Fonts» menu to select a combination of fonts.
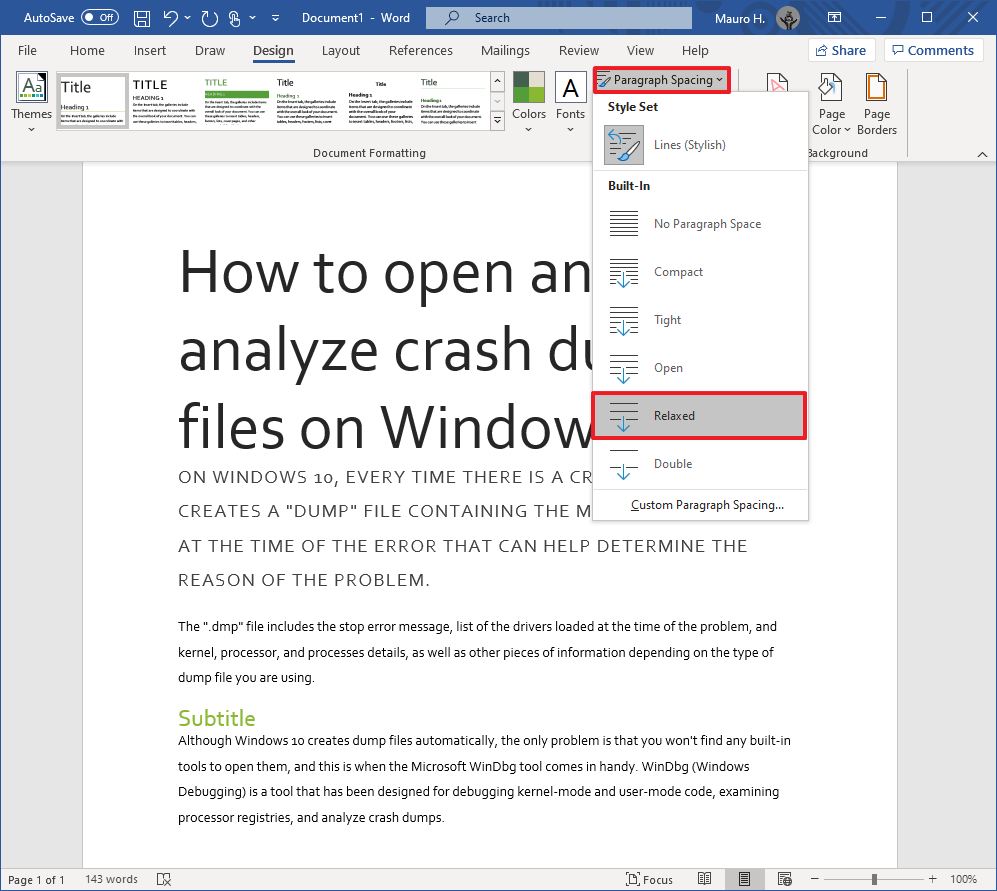
- Click the «Paragraph Spacing» menu and select one of the predefined options.Quick tip: You can also click the Custom Paragraph Spacing option to create a new style.
- (Optional) Click the «Effects» menu and select the effect you want to use when inserting objects.
- Click the «Themes» menu and choose the Save Current Theme option.
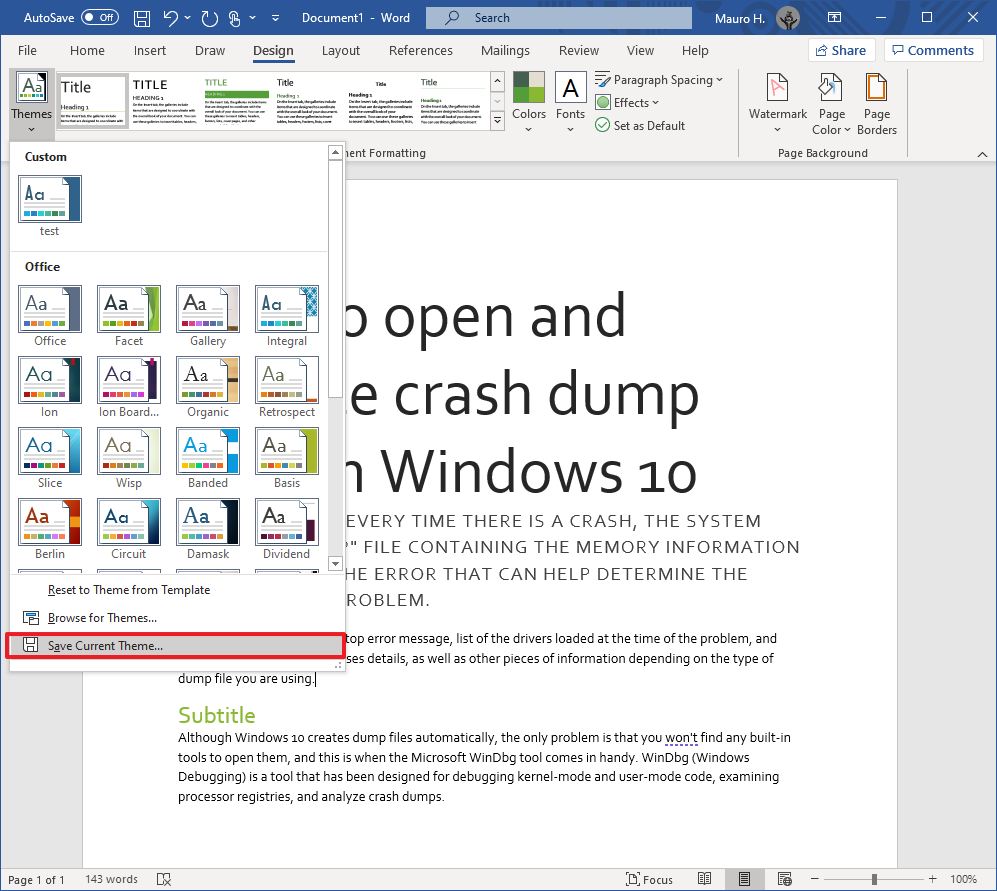
- Confirm a name for the theme.
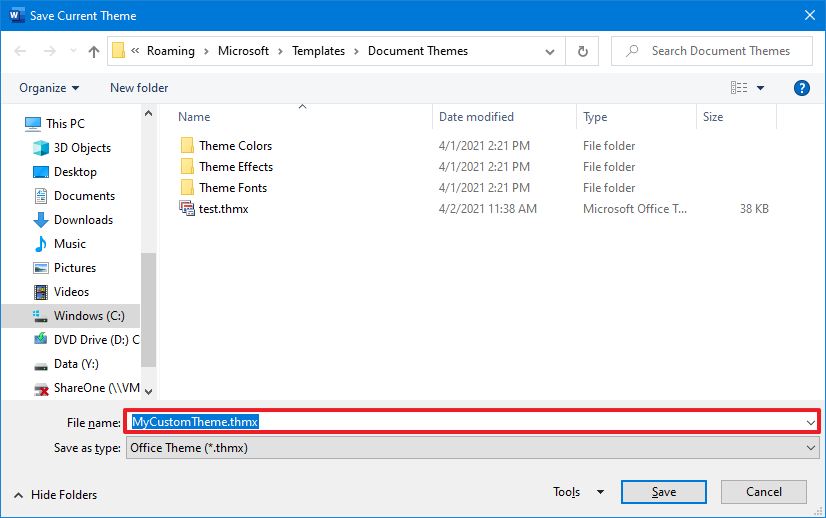
- Click the Save button.
After you complete the steps, the new theme will be available from the «Themes» menu in the «Custom» section.
More Windows 10 resources
For more helpful articles, coverage, and answers to common questions about Windows 10, visit the following resources:
- Windows 10 on Windows Central – All you need to know
- Windows 10 help, tips, and tricks
- Windows 10 forums on Windows Central
All the latest news, reviews, and guides for Windows and Xbox diehards.
Mauro Huculak is technical writer for WindowsCentral.com. His primary focus is to write comprehensive how-tos to help users get the most out of Windows 10 and its many related technologies. He has an IT background with professional certifications from Microsoft, Cisco, and CompTIA, and he’s a recognized member of the Microsoft MVP community.
Most Popular
This post shows you how to change the Theme of the document in Microsoft Word.
Themes is a unique set of Color, Font, and Effects. Changing Themes in Word documents helps you to make a consistent look and feel in your document.
Changing the Theme in Word Document
- To change the Theme of your document, click Themes Button on the Design Tab in the ribbon.
- Click the down arrows in the themes button to get the themes gallery.
- Select your desired theme from the gallery.
To change the theme color, click the Colors Button on the Design Layout in the ribbon. Select your desired color by clicking the down arrow.
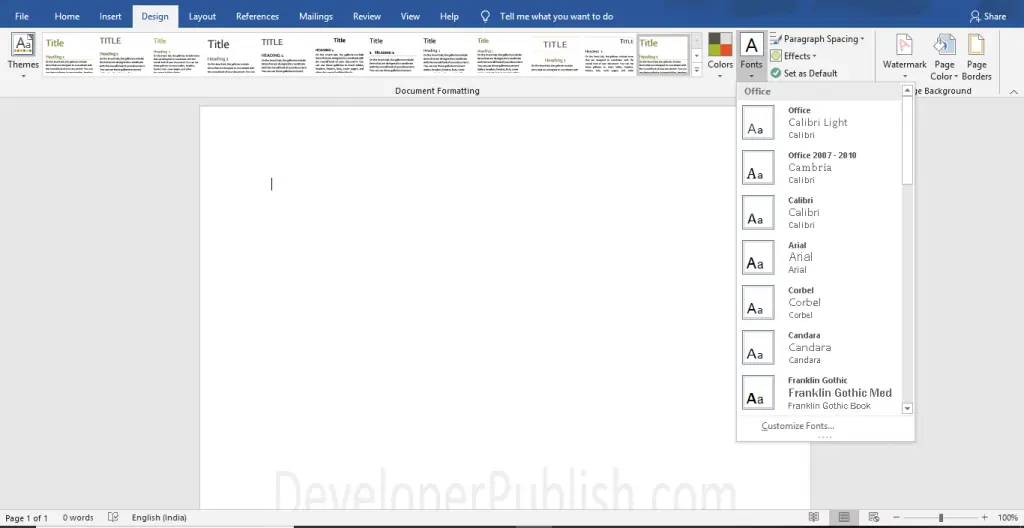
You can also change the font size by clicking the Fonts Button on the Design Layout and select your desired font type by clicking the down arrows.

Here, you can see the theme applied in the Word Document.