
Word for Microsoft 365 Word for Microsoft 365 for Mac Word for the web Word 2021 Word 2021 for Mac Word 2019 Word 2019 for Mac Word 2016 Word 2016 for Mac Word 2013 Word 2010 Word for Mac 2011 More…Less
You can control the vertical space between the lines of text in your document by setting the line spacing. Or, you can change the vertical space between paragraphs in your document by setting the spacing before or spacing after paragraphs. You can also choose to keep lines of text together or keep paragraphs together on a page.
Change the line spacing in an entire document
-
Go to Design > Paragraph Spacing.
-
Choose an option. To single space your document, select No Paragraph Space.
To return to the original settings later, go to Design > Paragraph Spacing and choose the option under Style Set. This may be Default or the name of style you’re currently using.
Change the line spacing in a portion of the document
-
Select one or more paragraphs to update. Press Ctrl + A to select all.
-
Go to Home > Line and Paragraph Spacing

-
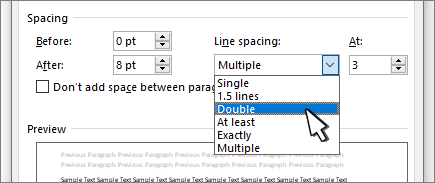
Select Line Spacing Options and choose an option in the Line spacing box.
-
Adjust the Before and After settings to change spacing between paragraphs.
-
Select OK.

For more info, see Adjust indents and spacing.
Change the line spacing in an entire document
-
Go to Design > Paragraph Spacing.
-
Choose the option you want. If you want to single space your document, choose No Paragraph Space.

This overrides the settings of the style you’re currently using. If you decide later to return to the original settings, go to Design > Paragraph Spacing and choose the option under Style Set. The option might be Default, as shown above, or it will show the name of style you’re currently using.
Change the line spacing in a portion of the document
-
Select the paragraphs you want to change.
-
Go to Home > Line and Paragraph Spacing.
-
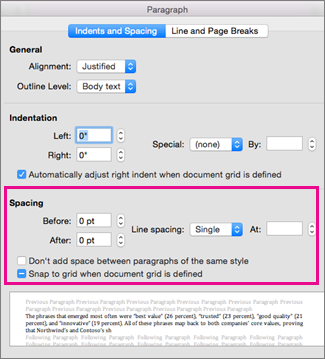
Choose the number of line spaces you want or select Line Spacing Options, and then select the options you want under Spacing.
-
To change the spacing before or after each of the paragraphs in the text you selected, click the arrow next to Before or After and enter the amount of space that you want.
-
Select OK.

-
Select the paragraph whose lines you want to keep together.
-
Go to Format > Paragraph >Line and Page Breaks.
-
Select Keep lines together.
-
Select the first of the two paragraphs that you want to keep together.
Tip: If you want to keep more than two paragraphs together, select all but the last paragraph.
-
Go to Format > Paragraph.
-
Go to Line and Page Breaks.
-
Select Keep with next.
-
Select OK.
-
Select the paragraphs you want to change, or press Ctrl+A to select everything.
-
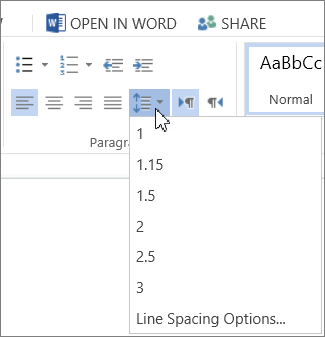
Go to Home > Line Spacing.
-
Choose the number of line spaces you want, or select Line Spacing Options and then select the options you want in the Paragraph dialog box under Spacing:
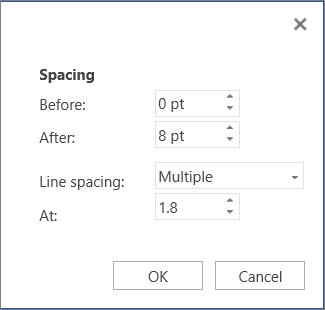
Tip: If you want to change the spacing before or after the selected paragraphs, select the arrows in the Before or After boxes, or type a number directly.
Need more help?
Spruce up the formatting in your Word docs
What to Know
- To fix spacing between words, go to Find and Replace. Enter a space in both fields, then go to More > Format > Font and choose a font size.
- To adjust spacing between characters, go to Home, select Expand (the down-arrow) next to Font, and select the Advanced tab.
- To change spacing between lines, go to Home and select Expand (the down-arrow) next to Paragraph and adjust the Spacing options.
This article explains how to fix spacing in Word 2021, 2019, 2016, and Word for Microsoft 365.
How to Fix Spacing Between Words in Word
Using different fonts or font sizes in your document can lead to inconsistent spacing between words. Follow these steps to adjust the spacing between words without affecting the space between letters:
To show paragraph breaks and spaces, go to the Home tab and select the Show/Hide icon (¶) in the Paragraph group.
-
Highlight the text you want to change and select the Home tab. Press Ctrl+A (Windows) or Cmd+A (Mac) to highlight the entire document.
-
Select Replace in the Editing group.
On Mac, go to Edit > Find > Advanced Find and Replace, then select the Replace tab.
-
Click in the Find what text field and press your spacebar to create a space.
-
Click in the Replace with field and press your spacebar to create a space.
-
Select More to expand the window.
-
Select Format and choose Font.
-
Under Size, choose the font size you use most consistently throughout the document, then select OK.
-
Select Replace All.
-
In a new window, Word will report the number of replacements. Select Yes to apply changes to the entire document, or select No to change only the highlighted text.
The spacing between words should now be consistent. You can now close the Find and Replace window.
Don’t add multiple spaces between words because it makes formatting the entire document more difficult.
You can justify text in Word if you want to expand word spacing so the right margin is always straight (like a newspaper column).
How Do I Fix Spacing Between Characters?
To adjust the spacing between characters (letters, numbers, symbols, etc.), follow these steps:
-
Highlight the text you want to change and select the Home tab.
-
Next to Font, select Expand (the down-arrow).
-
Go to the Advanced tab. To stretch or compress the text, increase or decrease Scaling. For Spacing, choose Expanded or Condensed to adjust the spacing between all characters.
Select Kerning for fonts to enable text kerning. This feature automatically adjusts the spacing between characters to be more aesthetically pleasing. You can choose to kern characters above a certain size.
How to Fix Line Spacing in Word
Follow these steps to change the amount of space between lines within a paragraph:
To adjust the spacing between paragraphs, go to the Design tab, select Paragraph Spacing and choose from the options. For single spacing, choose No Paragraph Space.
-
Highlight the text you want to change and select the Home tab.
-
Next to Paragraph, select Expand (the down-arrow).
-
In the Spacing section, manually set the amount of space before and after line breaks, or choose one of the options under Line spacing. Select the Line and Page Breaks tab for more advanced options like text wrapping and pagination settings.
When you’re done, select OK to save changes.
FAQ
-
How do I change the tab spacing in Word?
The quickest way to set tab stops is to click the ruler where you want a tab. Alternatively, go to the Home tab and select Paragraph Settings in the Paragraph group. Next, select the Tabs button. Finally, set the desired Tab stop position, click Set, and click OK.
-
How do I fix the spacing between bullet points in Word?
To change line spacing between bullets in a list, select the list and then click the Paragraph Dialog Box Launcher. On the Indents and Spacing tab, under Spacing, clear the Don’t add space between paragraphs of the same style check box.
Thanks for letting us know!
Get the Latest Tech News Delivered Every Day
Subscribe
Updated: 12/31/2020 by

Alternatively called a fixed space or hard space, NBSP (non-breaking space) is used in programming and word processing to create a space in a line that cannot be broken by word wrap. With HTML, lets you create multiple spaces that are visible on a web page and not only in the source code.
Creating a fixed space in a word processor and other programs
To create a fixed or hard space in a word processor such as Microsoft Office or LibreOffice, use one of the keyboard shortcuts below.
Microsoft Windows
Ctrl+Alt+Spacebar, or Ctrl+Spacebar.
Or, hold down Alt and press 0160 or 255 on the num pad.
macOS
Option+Spacebar.
Microsoft Word
Ctrl+Shift+Spacebar.
WordPerfect
Ctrl+Spacebar.
LibreOffice
Ctrl+Spacebar (before 3.0) or Ctrl+Shift+Spacebar (after 3.0).
Creating an NBSP in HTML
An example of how a user may insert an NBSP in HTML would be by adding the below extended HTML tag.
or
With the examples above, using this tag would allow you to create multiple spaces in a row, something that cannot be done by only pressing the Spacebar. To create multiple spaces, add one of the above non-breaking space tags for each time you want an extra space. For example, if you wanted ten extra spaces in front of text you could add ten of these tags.
Tip
If you need to indent or add extra spacing to a paragraph, sentence, or another portion of your web page, we suggest using CSS instead of multiple non-breaking spaces. You can also use the <pre> tag.
Null character, Programming terms, Spacebar
Single-space part of a document
- Select the paragraphs you want to change.
- Go to Home > Line and Paragraph Spacing .
- Choose 1.0.
Contents
- 1 How do I set Microsoft Word to default to single space?
- 2 How do I change word from double space to single space?
- 3 Why will Microsoft Word not single space?
- 4 How do I fix the spacing between words in Word?
- 5 Is 1.5 single spacing in Word?
- 6 Is 1.0 single spacing?
- 7 What is the shortcut key for 1.5 line spacing?
- 8 Is 1.15 single spacing?
- 9 What size is single spacing?
- 10 What is the shortcut command of single spacing?
- 11 What is Ctrl +N?
- 12 What is L Ctrl?
- 13 How do you single space in Word on a Mac?
- 14 Should I use 1.5 spacing?
- 15 What does single space in word mean?
How do I set Microsoft Word to default to single space?
Set single space as the default
- Go to Design > Paragraph Spacing > Custom Paragraph Spacing.
- Under Line Spacing, choose Single.
- At the bottom, select New documents based on this template.
- Select OK.
How do I change word from double space to single space?
You can double-space all or part of a Word document. To double-space the whole document, go to Design > Paragraph Spacing, and choose Double. Tip: To double-space only part of the document, select the paragraphs you want to change, go to Home > Line and Paragraph Spacing, and choose 2.0.
Why will Microsoft Word not single space?
The default paragraph spacing in Word 2010 is 1.15 lines and 10 points Spacing After. In order to get completely single spacing, you must not only change the line spacing to Single but also change the Spacing After to 0.
How do I fix the spacing between words in Word?
Change the spacing between characters
- Select the text that you want to change.
- On the Home tab, click the Font Dialog Box Launcher, and then click the Advanced tab.
- In the Spacing box, click Expanded or Condensed, and then specify how much space you want in the By box.
Is 1.5 single spacing in Word?
In the Paragraph dialog box, select one of the options from the dropdown menu under “Line spacing.” You can select single-, 1.5-, or double-spacing, or you can select “Multiple” and set your own custom line spacing. To apply your selected line spacing, select “OK.”
Is 1.0 single spacing?
Line spacing is the distance between lines. In earlier versions of Word, the default line spacing distance is “1.0,” or single-spacing, which stacks lines closely together with minimal space between. The amount of that space varies depending on the font used.
What is the shortcut key for 1.5 line spacing?
Ctrl+5
Pressing Ctrl+5 changes to 1.5 line spacing.
Is 1.15 single spacing?
The value of “single” line spacing is 1.15 or 115%.
What size is single spacing?
Line spacing is the distance between lines. In earlier versions of Word, the default line spacing distance is “1.0,” or single-spacing, which stacks lines closely together with minimal space between. The amount of that space varies depending on the font used. Single line (1.0 line) spacing is Word’s default.
What is the shortcut command of single spacing?
Ctrl+1
Align and format paragraphs
| To do this | Press |
|---|---|
| Apply single spacing to the paragraph. | Ctrl+1 |
| Apply double spacing to the paragraph. | Ctrl+2 |
| Apply 1.5-line spacing to the paragraph. | Ctrl+5 |
| Add or remove space before the paragraph. | Ctrl+0 (zero) |
What is Ctrl +N?
☆☛✅Ctrl+N is a shortcut key often used to create a new document, window, workbook, or another type of file. Also referred to as Control N and C-n, Ctrl+N is a shortcut key most often used to create a new document, window, workbook, or another type of file.
What is L Ctrl?
Alternatively referred to as Control+L and C-l, Ctrl+L is a keyboard shortcut whose function differs depending on the program being. For example, in Microsoft Word, Ctrl+L is used to align text with the left edge of a document (margin).Ctrl+L in Excel and other spreadsheet programs.
How do you single space in Word on a Mac?
Current Document Line Spacing
- Open the document in Word for Mac, and select all text you would like to format to single space.
- Click the “Home” tab in the top navigation ribbon, and then click “Line Spacing” in the Paragraph section.
- Click the “Single Space” icon to change the selected text to single space.
Should I use 1.5 spacing?
Go to the menu under Line spacing . Exactly is best—enter a fixed measurement. Single , 1.5 lines , and Double are equivalent to about 117%, 175%, and 233% line spacing, contrary to what their names suggest. Don’t use these—they miss the target zone of 120–145%.
What does single space in word mean?
: to type or print with no blank lines between lines of text.
Проблема: в версии Microsoft Word 2013 всем известный неразрывный пробел (No-Break Space), вводимый по сочетанию Ctrl + Shift + Пробел, перестал быть «привычно неразрывным». Он потерял одно из своих свойств — фиксированную ширину, т.е. возможность оставаться неизменным при выравнивании по ширине, теперь он ведет себя в этом случае также, как и обыкновенный пробел, растягиваясь на варьируемую ширину при выравнивании строки. Функция же «неразрывности» теперь его единственное предназначение — т.е. не давать словам «разрываться» на разные строки при переносе.
Возможно это и правильно в некоторых случаях. Но многие привыкли использовать неразрывный пробел, например, при вводе номеров документов, единиц измерения и т.п.
Решение: использование пробела вида «Narrow No-Break Space», назначив его на привычные сочетания клавиш.
Итак, рассмотрим, как это сделать…
По умолчанию на сочетание клавиш Ctrl + Shift + Пробел назначен символ неразрывного пробела, о котором сказано выше. Хотелось бы, чтобы это сочетание выполняло ту же функцию в Word 2013, как и раньше.
Вот пример текста, набранного в новосозданном документе Word 2013 с использованием старого и нового неразрывного пробела (см. на фрагменты «№ 1548» и «2001 г.»):
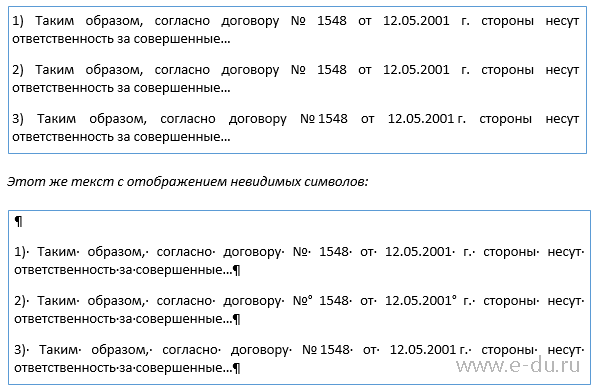
В предложении 1 использован обычный пробел, 2 — традиционный неразрывный пробел, а в 3 — пробел «Narrow No-Break Space».
Говорят, решение о переназначении функции неразрывного пробела в новой версии Word было принято ради совместимости с правилами пробелов в каскадных стилях CSS.
Если требуется именно фиксация ширины пробела, то, конечно, можно использовать «короткий пробел» (En Space, код символа 2002), но он не обладает свойством «неразрывности».
Если же необходима как фиксация ширины, так и неразрывность, то лучше всего использовать специальный пробел — «Narrow No-Break Space» (код символа 202F), который обладает этими свойствами.
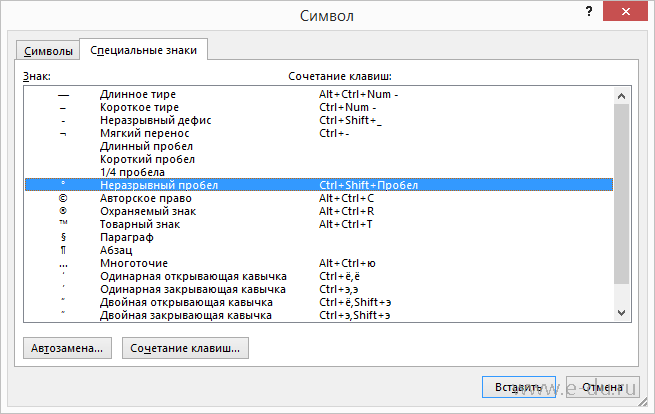
Чтобы ввести такой пробел, делаем команду вставки символа и вводим код знака 202F:

Чтобы постоянно не искать его через вставку символов, можно назначить ввод на привычное сочетание клавиш. Для этого переходим по кнопке «Сочетание клавиш…» и в открывшемся окне «Настройка клавиатуры» сразу же нажимаем сочетание — Ctrl-Shift-Space. Сохраняем по кнопке «Назначить».

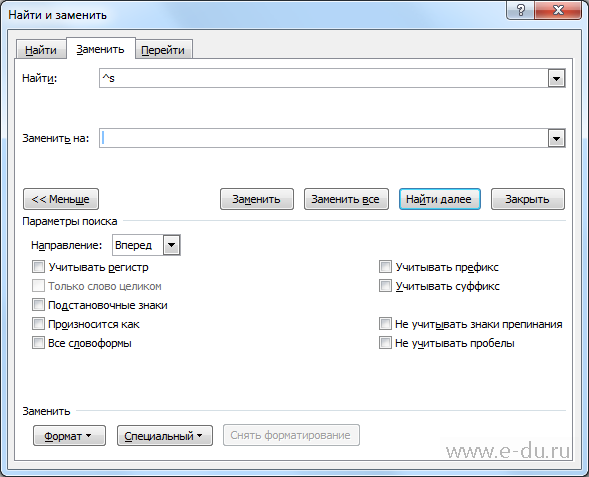
Теперь привычная функция будет на своем месте, однако проблема может «выползти» в документах предыдущих версий, где ранее использовался неразрывный пробел, при попытке преобразовать его в формат документа 2013 версии. Придется вручную сделать замену на новый символ, например, через форму поиска и замены:
При включении режима отображения скрытых символов новый неразрывный пробел (Narrow No-Break Space) визуально никак показываться не будет, в отличие от обычного пробела, который отображается в виде точки (.) или предыдущего неразрывного пробела (в виде º).
Кстати, в Word 2016 вернули всё обратно и пробел по ctrl+shift снова стал неразрывный и фиксированным. Однако теперь появилась обратная задача — как сделать такой пробел неразрывным, но при этом масштабируемым (растягиваемым по ширине при необходимости). Как это сделать смотрите в статье Word 2016 — неразрывный масштабируемый пробел