
How to Make a Word Document Fit on One Page
- Click the top, left “Office” button, point to “Print” and select “Print Preview.”
- Click “Shrink One Page” in the Preview group.
- Click the “Close Print Preview” button in the Preview group to exit print preview and retain your changes.
Contents
- 1 How do I make 2 pages into 1 page in Word?
- 2 How do I stop Word from showing two pages?
- 3 Is there a fit to page option in Word?
- 4 How do you make a document fit on one page?
- 5 Why does my Word document have two pages?
- 6 How do you change the layout of just one page in Word?
- 7 How do I get Word to open on one page?
- 8 How do I make a Word document fit to one page?
- 9 How do I make my Word document fit to paper?
- 10 How do you shrink a Word document to one page on a Mac?
- 11 How do you fit to page in Word on a Mac?
- 12 How do I reduce the size of a Word document?
- 13 How do you separate pages in Word?
- 14 How do I put pages side by side in Word?
- 15 How do I make just one page landscape?
- 16 How do I make one page landscape in Word 2020?
- 17 How do I fit to page?
- 18 How do I set scaling in Word?
How do I make 2 pages into 1 page in Word?
Click the “1 Page Per Sheet” button to open a drop-down menu with more options. Click “2 Pages Per Sheet.”
How do I stop Word from showing two pages?
All replies
- Open a Word document.
- On the View tab, in the Document Views group, click Full Screen Reading. Tip using the keyboard: Press ALT+W, and then press F.
- click View Options, select Show one page.
- Press and hold CTRL while you rotate the Wheel button to Zoom In or Out.
Is there a fit to page option in Word?
“Shrink to Fit” changes the font size and margins to make the document fit on one page. In Microsoft Word 2007 and 2010, go to “Print,” “Print Preview” and then “Shrink to Fit” under the “Preview” option.
How do you make a document fit on one page?
Shrink Text in Word on the Web
- Open your document in Word on the web and select all of the text. You can use the keyboard shortcut Ctrl + A on Windows or Command + A on Mac.
- Go to the Home tab and click the Shrink Text Size button.
- You can click the button as many times as you need to shrink the text to fit one page.
Why does my Word document have two pages?
As you adjust the zoom settings used by Word, you may notice that Word automatically displays multiple pages of your document at the same time.In that case, as you get your zoom factor down to near 50%, Word automatically switches to display two pages.
How do you change the layout of just one page in Word?
To change the orientation of one page, or a few pages of the document, do the following:
- Select the text of the page or of the several pages for which you want to change the page orientation.
- On the Layout tab, in the Page Setup group, click Margins:
- In the Page Setup dialog box, on the Margins tab:
- Click OK.
- Notes:
How do I get Word to open on one page?
In Word 2016 (365), in the View Ribbon, select Print View. Then Words opens to just one page.
Click Page Layout. Select the Page tab in the Page Setup dialog box. Select Fit to under Scaling. To fit your document to print on one page, choose 1 page(s) wide by 1 tall in the Fit to boxes.
How do I make my Word document fit to paper?
Scaling Your Output
- Load the document you want to print.
- Press Ctrl+P. Word displays the Print dialog box.
- Use the Scale to Paper Size drop-down list (lower-right corner) to specify the paper on which your document will be printed.
- Specify any other printing options, as desired.
- Click on OK to print your document.
How do you shrink a Word document to one page on a Mac?
In the Word Options window, the “Quick Access Toolbar” category should already be selected on the left. On the right, click the “Choose Commands From” drop-down menu and select the “All Commands” option. On the long list of commands on the left, scroll down and select the “Shrink One Page” command.
How do you fit to page in Word on a Mac?
Word for Mac 2011 Toolbar: Adding the Fit to Window Command
- In Word, choose View→Toolbars→Customize Toolbars and Menus.
- Click the Commands tab.
- In the Categories list (on the left), select the View category.
- In the Commands list (on the right), scroll down to find the Fit to Window command, and then select it.
How do I reduce the size of a Word document?
When you’re ready to change the paper size of a Word file, open the document and navigate to the “Page Setup” group in the “Layout” tab. Here, click “Size.” A drop-down menu appears in which you see a generous list of paper sizes. Just select an option from this list to change the paper size of the entire document.
How do you separate pages in Word?
To view multiple pages at one time, keep the “View” tab active. Place your cursor in the text of the first page you want to view in the multiple-page view. In the “Zoom” section, click “Multiple Pages.” By default, two pages are shown side-by-side.
How do I put pages side by side in Word?
How to Enable Side to Side View in Word
- Click the View tab and in the Views section of the ribbon, select Print Layout.
- Next, on the View tab, go to the Page Movement section of the ribbon and select Side to Side.
- You’ll immediately see the window adjust to show two pages at the same time.
How do I make just one page landscape?
Word 2019 & 2016: How to Make a Single Page Landscape
- Place your cursor at the very beginning of the page that you would like to flip to landscape. (
- Select “Layout” or “Page Layout” > “Breaks” > “Next Page” to create a section.
- Select the “Page Layout” tab and select “Orientation” > “Landscape“.
How do I make one page landscape in Word 2020?
Change part of a document to landscape
- Select the content that you want on a landscape page.
- Go to Layout, and open the Page Setup dialog box.
- Select Landscape, and in the Apply to box, choose Selected text.
How do I fit to page?
Fit to one page
- Click Page Layout. Click the small Dialog Box Launcher on the bottom right.
- Select the Page tab in the Page Setup dialog box.
- Select Fit to under Scaling.
- To fit your document to print on one page, choose 1 page(s) wide by 1 tall in the Fit to boxes.
- Press OK at the bottom of the Page Setup dialog box.
How do I set scaling in Word?
To change the scale of a Word document without adjusting its formatting, open the “File” menu, click “Print” and open the zoom option, which by default reads “1 Page Per Sheet.” Choose “Scale to Paper Size” and pick a new size.
In this article, we are willing to share with you 3 easy ways to adjust the page width to fit your Word window.
Now and then, there are times when we need to view more than one Word document at the same time. To do so, we have to resize Word windows. However, you must have noticed that when window size changes, the document zoom percentage does stays stalled, with limited only contents being displayed. For example, we can see the left-side texts in the following sample:
Therefore, we must take action to show the invisible part of the file. Here are our 3 ways you may consider to have a try.
Method 1: Adjust Zoom Percentage
Every time you have the Word window resized, just click and drag the zoom slider on the status bar on the down-right corner to adjust the zoom percentage of the document.
By doing it manually, you can zoom in or zoom out to view the file.
Method 2: Use “Page Width” Command
- First off, before you starting modifying the Word window size, click “View” tab.
- Then go to “Zoom” group and click “Page Width” there.

- Now you shall notice the default zoom percentage has changed even the window size is still in its maximum. Then each time you resize the window, the page width shall change automatically to match that of the window.

To have a better idea of the outcome, you can check the bellowing demonstration:
Method 3: Run a Word Macro
In order to have a task done automatically, running a Word macro remains our top choice.
- First and foremost, click “Developer” tab in the Ribbon.
- Next click “Visual Basic” to trigger the Word VBA editor. If the “Developer” tab is not available yet, just press “Alt+ F11” instead.

- Then click “Normal”.
- And continue to click “Insert”.
- Then choose “Module” so as to insert a new one in the normal project.

- Double click on it.
- On the right side of editing space, paste the following codes:


'Automatically change the page width to match with the Word window's.
Sub AutoChangePageWidth()
  Dim objDoc As Document

  'Initialization
  Set objDoc = ActiveDocument

  With objDoc.ActiveWindow.View
    .Zoom.PageFit = wdPageFitBestFit
  End With
End Sub
- Hit “Run” before you resize the Word window.


In case you may use the macro in the future, do consider to assign it to a button in the Ribbon. You may refer to this article for instructions: How to Remove the Formatting of Pasted Texts with Macro and VBA in Your Word
Bring back Your Lost Word File
Since Word is not foolproof, it can easily fall victim to power surges, virus attacks, user errors, etc. All of these accidents happen all the day at the price of getting files corrupted. As a result, you need to figure out how to deal with broken files. The best way is to find a Word file problem fix tool. It can save you much precious time.
Author Introduction:
Vera Chen is a data recovery expert in DataNumen, Inc., which is the world leader in data recovery technologies, including Excel xls data problem repair product and pdf repair software products. For more information visit www.datanumen.com
Excel for Microsoft 365 Word for Microsoft 365 Outlook for Microsoft 365 PowerPoint for Microsoft 365 Excel 2021 Word 2021 Outlook 2021 PowerPoint 2021 Excel 2019 Word 2019 Outlook 2019 PowerPoint 2019 Excel 2016 Word 2016 Outlook 2016 PowerPoint 2016 Excel 2013 Word 2013 Outlook 2013 PowerPoint 2013 Excel 2010 Word 2010 Outlook 2010 PowerPoint 2010 More…Less
You can zoom in to get a close-up view of your file or zoom out to see more of the page at a reduced size. You can also save a particular zoom setting.
Quickly zoom in or out
-
On the status bar of your Office app, click the zoom slider.

-
Slide to the percentage zoom setting that you want. Click — or + to zoom in gradual increments.

Note: In Outlook, the zoom slider zooms only the content in the Reading Pane.
Click the headings below for more information.
Note: This procedure isn’t available in Excel for the web. As a workaround, consider opening the file in Excel Desktop to change the setting.
You can choose how much of a document, presentation, or worksheet you view on the screen.
In Word
Do one of the following:

-
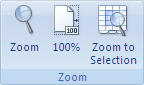
On the View tab, in the Zoom group, click Zoom 100%. This returns the view to 100% zoom.
-
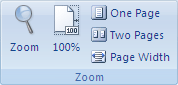
On the View tab, in the Zoom group, click One Page, Multiple Pages, or Page Width.
-
On the View tab, in the Zoom group, click Zoom, and then enter a percentage or choose any other settings that you want.
In PowerPoint
Do one of the following:
-
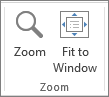
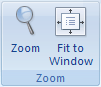
On the View tab, in the Zoom group, click Fit to Window, which changes the current slide to the size of your PowerPoint window.
Note: There also is a Fit to Window button near the zoom slider on the status bar.
-
On the View tab, in the Zoom group, click Zoom, and then enter a percentage or choose any other settings that you want.

In Excel
Do one of the following:
-
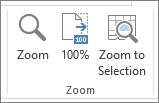
On the View tab, in the Zoom group, click Zoom 100%.
-
On the View tab, in the Zoom group, click Zoom to Selection, which maximizes the view of cells that you’ve selected.
-
On the View tab, in the Zoom group, click Zoom, and then enter a percentage or choose any other settings that you want.
In Outlook
In the main Outlook window, the zoom slider is the only way to zoom in or out. When you are reading or editing a message, zoom from the ribbon:
-
In an open message, on the Message tab, in the Zoom group, click Zoom.
-
In the Zoom dialog box, enter a percentage or choose any other settings that you want.
Notes:
-
Word doesn’t save zoom settings in documents. Instead, it opens a document at the last zoom level you used.
-
Excel for the web doesn’t support saving the zoom level, because the View tab doesn’t have a Zoom group, so you must use the status bar to change the zoom level. As a workaround, consider opening the file in Excel Desktop to save the zoom level using the following procedure.
-
Open the presentation or worksheet that you want to save with a particular zoom setting.
-
On the View tab, in the Zoom group, click Zoom.
-
Choose the setting that you want.
-
Click Save.
Keyboard shortcut: Ctrl+S
-
In Word, Outlook, PowerPoint or Excel, on the status bar, click the zoom slider
. -
Slide to the percentage zoom setting that you want. Click the — or + buttons to zoom in gradual increments.
 .
.Note: In Outlook, the zoom slider zooms only the content in the Reading Pane.
You can choose how much of a document, presentation, or worksheet you view on the screen.
In Word
Do one of the following:
-
On the View tab, in the Zoom group, click Zoom 100%. This returns the view to 100% zoom.
-
On the View tab, in the Zoom group, click One Page, Two Pages, or Page Width.
-
On the View tab, in the Zoom group, click Zoom, and then enter a percentage or choose any other settings that you want.
In Microsoft PowerPoint
Do one of the following:
-
On the View tab, in the Zoom group, click Fit to Window, which changes the current slide to the size of your PowerPoint window.
Note: There also is a Fit to Window button near the zoom slider on the status bar.
-
On the View tab, in the Zoom group, click Zoom, and then enter a percentage or choose any other settings that you want.

In Excel
Do one of the following:
-
On the View tab, in the Zoom group, click Zoom 100%.
-
On the View tab, in the Zoom group, click Zoom to Selection, which maximizes the view of cells that you’ve selected.
-
On the View tab, in the Zoom group, click Zoom, and then enter a percentage or choose any other settings that you want.
In Outlook
In the main Outlook window, the zoom slider is the only way to zoom in or out. When you are reading or editing a message, zoom from the ribbon:
-
In an open message, on the Message tab, in the Zoom group, click Zoom.
-
In the Zoom dialog box, enter a percentage or choose any other settings that you want.

In Word
To save a particular zoom setting with your document or template so that it always opens with that zoom setting, you must make a change in the document or template first. That can be as simple as adding and deleting one character (or a single space).
-
Open the document or template that you want to save with a particular zoom setting.
-
On the View tab, in the Zoom group, click Zoom.
-
Choose the setting that you want.
-
Add and delete a single character in the document or template.
-
Click Save.
Keyboard shortcut: Ctrl+S
In PowerPoint or Excel
-
Open the presentation or worksheet that you want to save with a particular zoom setting.
-
On the View tab, in the Zoom group, click Zoom.
-
Choose the setting that you want.
-
Click Save.
Keyboard shortcut: Ctrl+S
Need more help?
In “Table Tools” click the [Layout] tab > locate the “Cell Size” group and choose from of the following options:
- To fit the columns to the text (or page margins if cells are empty), click [AutoFit] > select “AutoFit Contents.”
- To fit the table to the text, click [AutoFit] > select “AutoFit Window.”
Besides, How do you fit to page in Word 2010?
You’ll see the Shrink to Fit option on the far right of Word 2010’s Quick Access Toolbar in the top-left corner of the screen. When you select the Shrink to Fit button, Word will attempt to squish the document onto a single page.
Keeping this in mind, How do I fit a picture to a page in Word?
Here are the steps on how you can do that.
- Step 1: Open an MS Word document. First, you have to open up a Word document. …
- Step 2: Insert the image. …
- Step 3: Select the Text Wrap Style. …
- Step 4: Drag and resize the image.
Related Contents
- 1 How do I get a PDF to Fit to page?
- 2 How do I shrink a table to fit one page in Word?
- 3 How do you shrink to fit in Word 2010?
- 4 How do I change Page Setup in Word 2010?
- 5 How do I fix page layout in Word?
- 6 How do I print a picture full page?
- 7 How do I resize an image in Word?
- 8 How do I resize an image?
- 9 How do I resize a PDF?
- 10 How do I resize a PDF for printing?
- 11 How do you print to fit to page?
- 12 How do I fit a table to one page in Word?
- 13 How do I shrink a table in Word?
- 14 Why can’t I make my table smaller on word?
- 15 How do you shrink to fit on one page?
- 16 Where is Shrink to fit?
- 17 How do I change the default page layout in Word 2010?
- 18 What is the shortcut key for Page Setup?
- 19 How do I change the layout of a Word document?
- 20 How do you scale a document to legal size?
How do I get a PDF to Fit to page?
Acrobat can size the pages of a PDF to fit the selected paper size.
…
Automatically scale to fit paper
- Choose File > Print.
- From the Page Scaling pop-up menu, select one of the following options: Fit To Printable Area Scales small pages up and large pages down to fit the paper. …
- Click OK or Print.
How do I shrink a table to fit one page in Word?
Make sure your cursor is inside the table so you can see the Table Tools tab on the ribbon. Click the Layout tab and select the AutoFit icon from the Cell Size group. Select AutoFit Window from the drop down menu. Your table will fit on the page between the left and right margins.
How do you shrink to fit in Word 2010?
How to find the Shrink to Fit Option in Word 2010
- Start Word.
- Click the File tab, click Options, and then click Customize Ribbon.
- In the Choose commands from drop-down list, select All Commands.
- Search for Shrink One Page, and then click it.
How do I change Page Setup in Word 2010?
To change page orientation:
- Select the Page Layout tab.
- Click the Orientation command in the Page Setup group. Changing the page orientation.
- Click either Portrait or Landscape to change the page orientation.
How do I fix page layout in Word?
Select the pages or paragraphs whose orientation you want to change. Click PAGE LAYOUT > Page Setup dialog box launcher. In the Page Setup box, under Orientation, click Portrait or Landscape. Click the Apply to box, and click Selected text.
How do I print a picture full page?
Start by choosing “File” and then “Print,” and clicking the “Position and Size” settings. Usually, the default option is “Scale to Fit Media,” which prints to the page margins. Deselect it, then manually enter scale, height and width values that equal the full size of your paper. Click “Print” to print your image.
How do I resize an image in Word?
Resize an Image by Clicking and Dragging
- In the Word document, select the object you want to resize.
- Use the mouse or touchpad to select and drag a Sizing handle. …
- To keep the proportions of the object the same, press and hold the Shift key while you select and drag.
How do I resize an image?
How to resize an image on Windows using the Photos app
- Double-click the image file you want to resize to open it in Photos.
- Once it’s opened, click the three dots in the top-right corner, then click “Resize.”
- A small pop-up will appear, offering you three preset sizes for the picture.
How do I resize a PDF?
The simplest is to re-save your file as a reduced-size PDF. In the latest version of Adobe Acrobat, open the PDF you wish to re-save as a smaller file, choose File, Save as Other, and then Reduced Size PDF. You’ll be prompted to select the version compatibility you need and then you can click OK to save.
How do I resize a PDF for printing?
Acrobat can automatically scale a PDF to fit the paper, or you can resize pages by setting a specifc percentage.
- Choose File > Print.
- Click Size, and choose one of the following options: Fit. Scales small pages up and large pages down to fit the paper. Shrink Oversize Pages.
How do you print to fit to page?
Fit to one page
- Click Page Layout. Click the small Dialog Box Launcher on the bottom right. …
- Select the Page tab in the Page Setup dialog box.
- Select Fit to under Scaling.
- To fit your document to print on one page, choose 1 page(s) wide by 1 tall in the Fit to boxes. …
- Press OK at the bottom of the Page Setup dialog box.
How do I fit a table to one page in Word?
Keeping Tables on One Page
- Select all the rows in the table.
- Display the Home tab of the ribbon.
- Click the small icon at the bottom-right of the Paragraph group. …
- Make sure the Line and Page Breaks tab is selected. …
- Make sure the Keep Lines Together check box is selected.
- Click on OK.
How do I shrink a table in Word?
Word
- On the View menu, click Print Layout or Publishing Layout.
- Click the table.
- Rest the pointer on the lower-right corner of the table until. appears, and then drag the table boundary until the table is the size that you want.
Why can’t I make my table smaller on word?
From the Table menu, select “Table Properties.” Click on the Table tab, then the Options button. Uncheck “Automatically resize to fit contents.” Click “OK.” Now click on the “Row” tab in Table Properties. Make sure that “Specify Height” is checked and the size in the middle box is the height you want your rows to be.
How do you shrink to fit on one page?
Shrink Text in Word on the Web
- Open your document in Word on the web and select all of the text. You can use the keyboard shortcut Ctrl + A on Windows or Command + A on Mac.
- Go to the Home tab and click the Shrink Text Size button.
- You can click the button as many times as you need to shrink the text to fit one page.
Where is Shrink to fit?
Resolution: Click on File on the top left corner of Internet Explorer. In the drop down, click on Page Setup. In the Page Setup, put a tick mark beside Enable Shrink to Fit.
How do I change the default page layout in Word 2010?
Change the default layout
- Open the template or a document based on the template whose default settings you want to change.
- On the Format menu, click Document, and then click the Layout tab.
- Make any changes that you want, and then click Default.
What is the shortcut key for Page Setup?
Or you can use the keyboard shortcut: Alt+P, S, P. The Page Setup dialog box sports three tabs: Margins for setting margins, Paper for selecting the page size, and Layout for dealing with other page formatting issues. Click the OK button to confirm your changes and close the Page Setup dialog box.
How do I change the layout of a Word document?
Change orientation of whole document
- To change the orientation of the whole document, select Layout > Orientation.
- Choose Portrait or Landscape.
How do you scale a document to legal size?
How to scale the document to the legal paper size?
- Firstly, open and navigate to the Layout tab (Office 360, and MS Office 2019)
- On the layout tab, in the Page Setup group, click “Size” to expand its drop-down menu.
- On the drop-down menu select legal (size 8.5 x 14 in centimeters 21.59 cm x 35.56 cm).
This handy trick is useful for tables in your main document and any tables you might use for layout in your headers/footers. It’s particularly useful if you ever change the page margins in your document — with a table set to ‘autofit to window’, changing the page margins means that the table resizes too and you don’t have to resize the columns manually.
Here’s how in Word 2003 and Word 2007:
Word 2003:
- Click inside the table.
- On the menu, select Table > AutoFit > AutoFit to Window.
Word 2007:
- Click inside the table.
- Go to the Table Tools > Layout tab.
- Click the large AutoFit icon, then click AutoFit Window.
 See also:
- Macro to autofit ALL tables in a document: https://cybertext.wordpress.com/2008/10/06/author-it-autofit-tables-in-word-output/
- Various table resizing options: https://cybertext.wordpress.com/2008/07/02/word-table-column-widths/
- Repeating the autofit action for the next table: https://cybertext.wordpress.com/2010/04/12/word-repeat-immediate-past-action/ (combined with https://cybertext.wordpress.com/2010/02/01/word-jumping-to-next-table-graphic-or-field/)