
One way you can change the style of a document is by adding a new text font. To add a font to Word, download and install the font in Windows, where it will become available to all Microsoft 365 applications.
Fonts come as files, and there are many sites on the Internet where you can download free fonts, such as DaFont. You can also import font files from a CD, a DVD, or your organization’s network. TrueType (file extension .ttf) and OpenType (.otf) fonts both work fine.
Note: Before you download a font, make sure that you trust the source.
Add a font
-
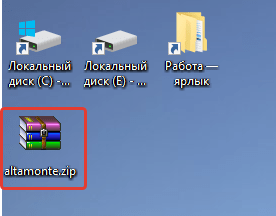
Download the font files. These often come compressed in .zip folders. In one .zip folder, you might find several variations on the same font, such as “light” and “heavy.” A .zip folder usually looks like this:

-
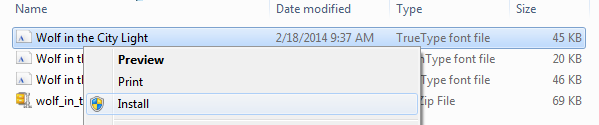
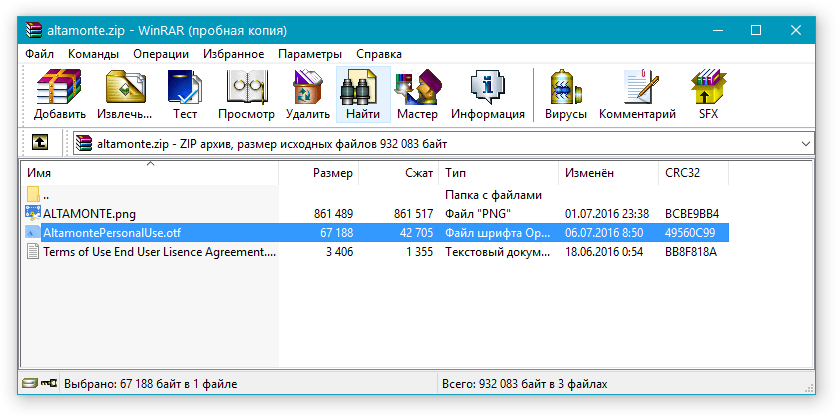
If the font files are zipped, unzip them by right-clicking the .zip folder and then clicking Extract. Now you’ll see the available TrueType and OpenType font files:
-
Right-click the fonts you want, and click Install.
-
If you’re prompted to allow the program to make changes to your computer, and if you trust the source of the font, click Yes.
Your new fonts will appear in the fonts list in Word.


Here are two other ways to install and manage fonts:
-
All fonts are stored in the C:WindowsFonts folder. You can also add fonts by simply dragging font files from the extracted files folder into this folder. Windows will automatically install them. If you want to see what a font looks like, open the Fonts folder, right-click the font file, and then click Preview.
-
Another way to see your installed fonts is through Control Panel. In Windows 7 and Windows 10, go to Control Panel > Fonts. In Windows 8.1, go to Control Panel > Appearance and Personalization > Fonts.
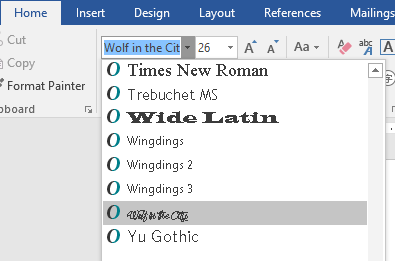
The next time you start Word, you’ll see the fonts you added in the Font list.
Need more help?
Want more options?
Explore subscription benefits, browse training courses, learn how to secure your device, and more.
Communities help you ask and answer questions, give feedback, and hear from experts with rich knowledge.
Font Substitution Dialog Box
- Click on the File button, go to Options in the left panel and then click Advanced. …
- In the Font Substitution dialog box, select a missing font from the list of fonts.
- In the Substituted font list, select a font.
Furthermore, How do I get a font from Font Book to Word?
Tap Explore data and find the font directory by navigating to Files > Data > Fonts. Paste the font file inside the font directory by tapping the “1 copied” icon in the upper right of your screen and selecting Paste from the menu that appears. The font will now appear as an option in MS Word.
Simply so How do I find a missing font?
If you search for a missing font using the Find Font dialog box and can’t locate the troublemaker on a page, click More Info. The dialog box will expand and list the page and character count of text formatting with the missing font. If you still can’t locate it, click Done to close the Find Font dialog box.
Also, How do I find a font in a Word document? If you are viewing a document in a word processor, highlight the text and look in the toolbar at the font option. It should display what font is used in the highlighted text.
Where is the Font Book on a Mac?
Computer: Fonts are available to any user on this Mac and are located in the Fonts folder in the system Library (/Library/Fonts/). You must enter an administrator’s password to install fonts here.
How do I find my fonts on Mac? Preview fonts
If the preview pane isn’t shown, choose View > Show Preview. In the Font Book app on your Mac, select a font collection in the sidebar to see the fonts in it: All Fonts: Every font associated with the Computer and User collections, as well as additional system fonts available for download.
What is Apple’s system font?
SF Pro. This neutral, flexible, sans-serif typeface is the system font for iOS, iPad OS, macOS and tvOS. SF Pro features nine weights, variable optical sizes for optimal legibility, and includes a rounded variant.
Select Start > Settings. In Settings, select Apps, select Apps & features, and then select Manage optional features. If you don’t see Hebrew Supplemental Fonts in the list of installed features, select the plus sign (+) to add a feature. Select Hebrew Supplemental Fonts in the list, and then clselectick Install.
How do I find a missing font in a PDF?
Here are the necessary steps:
- Open Adobe Acrobat.
- Ctrl+D open property panel.
- Select the Font tab to check any fonts that are not embedded.
- Open the tool panel, and search for print.
- Open the preflight tool.
- Lookup and select PDF fixups -> embed missing fonts.
- Click analyze , and save the new file.
Why are my Typekit fonts not showing up?
Your Adobe Typekit fonts not showing up in Illustrator, Photoshop, or any other Adobe application is most likely due to one of two reasons: 1.) … the Creative Cloud application is running, but your preferences are not set to sync Typekit fonts with your installed applications.
How do I find all occurrences of a font in Word?
Find and replace text
- Go to Home > Replace or press Ctrl+H.
- Enter the word or phrase you want to locate in the Find box.
- Enter your new text in the Replace box.
- Select Find Next until you come to the word you want to update.
- Choose Replace. To update all instances at once, choose Replace All.
How do I use Find and Replace font in Word?
Replacing text in Word document based on Font (Windows & Mac)
- Select the Replace button on the Home Tab.
- Select the More button.
- Make sure your cursor is in the “Find what:” field, Select Format and then Font.
- Select the font you wish to replace (1).
How do I find a font in a document?
If you have Adobe Acrobat/Reader, you can find out the fonts used in the file by looking at the Fonts tab in the document’s properties ( CTRL + D or File->Properties->Fonts ). There you will see a list of all the fonts used in the document.
Do fonts slow down Mac?
Having a large collection of fonts can considerably slow down your Mac. The more fonts that you have installed, the longer many applications will take to load. Applications such as word processors, graphic design software, and even internet browsers.
How do I change font on Mac?
Choose Format > Font > Replace Fonts (from the Format menu at the top of the screen). Click the double arrows to the right of the font you want to replace, then choose a replacement. If the font is listed as a missing font, also choose a typeface.
What is the font size for a book?
Font: Your font should generally be 12 point Times New Roman. Though some agents and editors may prefer different serif or sans serif fonts like Arial or Courier New, Times New Roman with a 12 point font size is the industry standard.
How do I find a font on my computer?
View Installed Fonts
Open Control Panel (type Control Panel in the search field and select it from the results). With Control Panel in Icon View, click the Fonts icon. Windows displays all the installed fonts.
How do I install a TTF font on a Mac?
Installing TTF TrueType or OTF OpenType fonts on the Mac:
- Drag or copy and paste the TTF or OTF font files to the Library/Fonts folder.
- To activate the fonts, restart the application – some applications may require a computer restart.
- The fonts should now be active in the font menu of the application.
How do you change the font on a Mac?
Change the font sizes available in the Fonts window.
- In an app on your Mac, choose Format > Show Fonts or Format > Font > Show Fonts.
- In the Fonts window, click the Action pop-up menu , choose Edit Sizes, then do any of the following: Add a font size: Type a new size, then click the Add button . …
- Click Done.
How do I install font on Mac?
Install fonts
On your Mac, do any of the following: In the Font Book app , click the Add button in the Font Book toolbar, locate and select a font, then click Open. Drag the font file to the Font Book app icon in the Dock. Double-click the font file in the Finder, then click Install Font in the dialog that appears.
What font does Apple use iOS 14?
San Francisco (SF).
SF Pro is the system font in iOS, macOS, and tvOS; SF Compact is the system font in watchOS. Designed to match the visual clarity of the platform UIs, the system fonts are legible and neutral.
How do I add new fonts to my keyboard?
Go to Settings > Display > Font Size and Style.
Your newly installed font should appear on the list. Tap on the new font to use it as the system font.
How do I reinstall all fonts?
To do it:
- Go to the Control Panel -> Appearance and Personalization -> Fonts. This Control Panel item can be opened by running the command: control fonts.
- Select Font settings in the left pane;
- In the next window click the Restore default font settings button.
In this tutorial, you will learn about how to see list of fonts used in a Word document. By default, there is no option in MS Word that can help you know which fonts are exactly used in a word document. That means if you want to know the same, then the only option you have is to open the document and then manually check the fonts. But today, I came across a free tool which can help you see which fonts are used in any Word document.
For that, you would need to simply open this software, select a Word file, and voila you get the result instantly. Do note that it supports only the “DOC” files. There are also many font identifiers available which can help you find fonts from images and webpages. But, none of them has the option to find fonts used in a Word document.
To get started, the first thing you need to do is download “UsedFonts” on your PC. The link is given at the end of this post. After that, extract the archive and then you can see a “UsedFonts.exe” file inside the extracted folder.
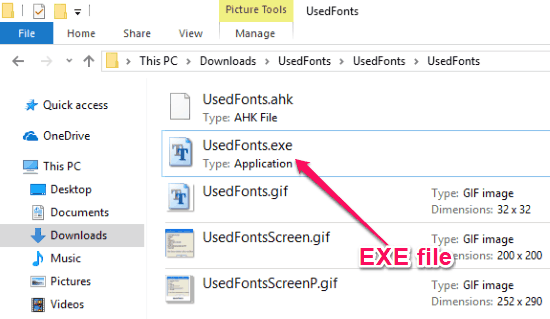
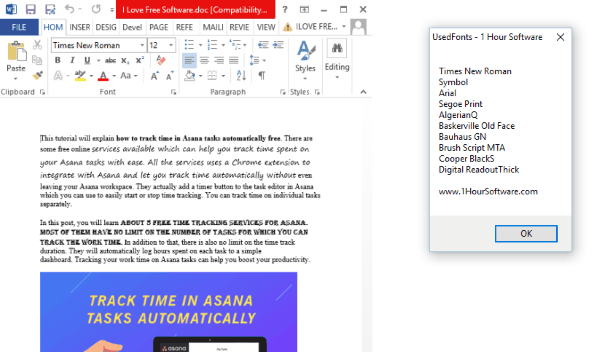
Now, to see the list of fonts used in a Word document, simply double-click on the EXE file. Then it will ask you to select the source Word document from your PC. Remember, it only supports DOC file.
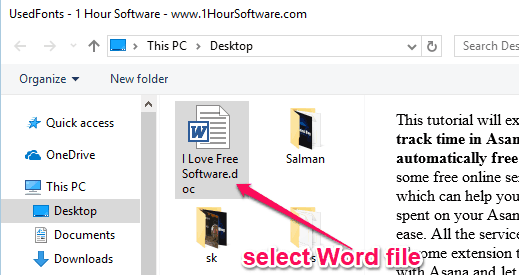
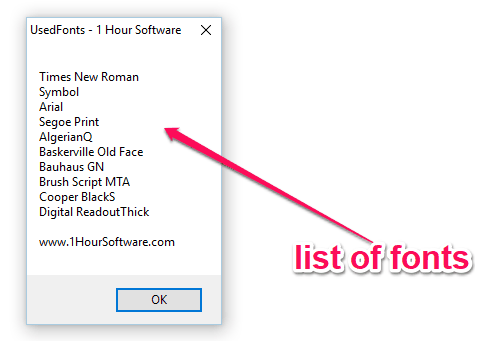
As soon as you do that, it will automatically analyze the text in the Word document and generate a list of fonts used in the document. You can see the list of fonts in a small popup window, as shown below.
Closing Words:
So, if you have been looking for a way to find out which fonts are used in a Word document, then this tutorial can be helpful for you. UsedFonts makes it super easy for you to do that. No Rocket Science required, as all you gotta do is select a Word file in this tool and the rest is done automatically. Go ahead try it out for free.
Get “UsedFonts” from here.
|
Editor Ratings: |
|
|
User Ratings: [Total: 1 Average: 4] |
|
| Home Page URL: | Click Here |
| Works With: | Windows |
| Free/Paid: | Free |
|
Tags: fonts |
 Please Note:
This article is written for users of the following Microsoft Word versions: 97, 2000, 2002, and 2003. If you are using a later version (Word 2007 or later), this tip may not work for you. For a version of this tip written specifically for later versions of Word, click here: Finding Text Not Using a Particular Font.
![]()
Written by Allen Wyatt (last updated July 5, 2022)
This tip applies to Word 97, 2000, 2002, and 2003
Hilary notes that most of the documents their company uses are standardized on a Times Roman font. However, once in a while someone will edit a document and apply a different font to some of the text it contains. She’d like to easily find those «formatting anomalies.» Hilary wonders if there is a way to search a document for text that is not using a particular font.
There are a couple of ways that you can go about finding what you need and, potentially, fixing the problem. First, you could use Find and Replace in this manner:
- Press Ctrl+F. Word displays the Find tab of the Find and Replace dialog box.
- Click the More button, if it is available.
- Make sure the Find What box is empty.
- Click Format and then choose Font. Word displays the Find Font dialog box. (See Figure 1.)
- Use the controls in the dialog box to specify that you want to find the Times Roman font you are using. (Just choose the font. You don’t have to specify any other settings unless you want to.)
- Click on OK. The font specifications you are looking for appear just below the Find What box.
- Click the Highlight All Items check box.
- Click Find All.
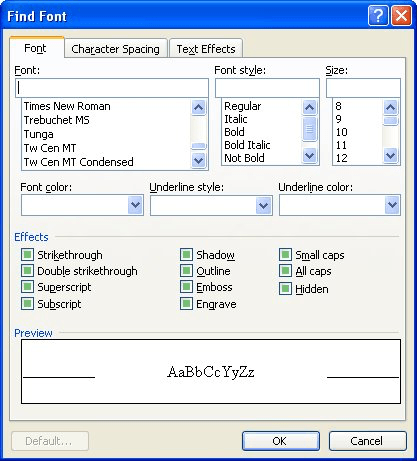
Figure 1. The Find Font dialog box.
At this point, the dialog box closes and Word dutifully highlights all instances of Times Roman in your document. You can easily scroll through the document to see what isn’t highlighted—these are the «anomalies» you are seeking.
You could also use Find and Replace to apply some stand-out formatting to text that isn’t in Times Roman font. Just figure out some formatting that you are not using in the document, such as double underlines or red text. Select the whole document (Ctrl+A) and apply that formatting to the whole document. Then use Find and Replace to find all instances to Times Roman (see the steps above) and replace it with Times Roman without the stand-out formatting you previously applied. What you end up with is only the text that is not Times Roman formatted with the stand-out formatting.
If you prefer, you can use a macro to modify the font used in the document. The following is a short little macro that looks at the font used for each word in your document:
Sub FixFormatAnomalies()
    Dim aWord

    For Each aWord In ActiveDocument.Words
        If aWord.Font.Name <> "Times Roman" Then
            aWord.Font.Name = "Times Roman"
        End If
    Next aWord
End Sub
If the font used for a word doesn’t match what you want, then the routine changes the font. The only thing you’ll need to do to make the macro work in your case is to change the desired font name on two lines. (You’ll want to use the font name exactly as it appears in the list of fonts usable by Word. Pay particular attention to capitalization.)
Another approach is to simply check each character in the document and highlight the character if it doesn’t use your desired font. The following macro highlights the offending characters in yellow:
Sub HighlightOtherFonts()
    Dim iCounter As Integer
    Dim sFontName As String
    Dim sPrompt As String
    Dim sTitle As String
    Dim sDefault As String
    Dim c As Range

    ' Gets the name of the font as typed by the user
    sPrompt = "Type the name of the font that is OK to "
    sPrompt = sPrompt & "have in the document."
    sTitle = "Acceptable Font Name"
    sDefault = ActiveDocument.Styles(wdStyleNormal).Font.Name
    sFontName = InputBox(sPrompt, sTitle, sDefault)

    ' Verifies that the name of the font is valid
    For Each sFont In Application.FontNames
        If UCase(sFontName) = UCase(sFont) Then
            ' Changes the user-typed name of the font to
            ' the version recognized by the application
            ' Example: 'times new roman' (user-typed) is
            ' changed to 'Times New Roman' (application version)
            sFontName = sFont
            Exit For
        Else
            ' Terminates the loop if the name of the font is invalid
            iCounter = iCounter + 1
            If iCounter = FontNames.Count Then
                sPrompt = "The font name as typed does not match "
                sPrompt = sPrompt & "any fonts available to the "
                sPrompt = sPrompt & "application."
                sTitle = "Font Name Not Found"
                MsgBox sPrompt, vbOKOnly, sTitle
                Exit Sub
            End If
        End If
    Next sFont

    ' Checks each character in the document, highlighting
    ' if the character's font doesn't match the OK font
    For Each c In ActiveDocument.Characters
        If c.Font.Name <> sFontName Then
            ' Highlight the selected range of text in yellow
            c.FormattedText.HighlightColorIndex = wdYellow
        End If
    Next c
End Sub
One of the nice features of this macro is that it prompts you for the font that you find acceptable. It then checks to make sure that what you enter matches one of the fonts available in the system. Because the macro checks each character in the document individually, you may need to be patient while it is running. The longer the document, the longer the macro takes to complete its work.
If you simply want to find the next occurrence of a font change, then the following very short macro is quite handy:
Sub FindDifferentFont()
  Selection.SelectCurrentFont
  Selection.Collapse wdCollapseEnd
End sub
The SelectCurrentFont method extends the current selection until there is a change in either the font (typeface) or the font size. So if you start at the beginning of the document and run the macro (perhaps you could assign it to a shortcut key), then the insertion point is moved to where the current font ends and a new font begins.
If you would like to know how to use the macros described on this page (or on any other page on the WordTips sites), I’ve prepared a special page that includes helpful information. Click here to open that special page in a new browser tab.
WordTips is your source for cost-effective Microsoft Word training.
(Microsoft Word is the most popular word processing software in the world.)
This tip (11069) applies to Microsoft Word 97, 2000, 2002, and 2003. You can find a version of this tip for the ribbon interface of Word (Word 2007 and later) here: Finding Text Not Using a Particular Font.
Author Bio
With more than 50 non-fiction books and numerous magazine articles to his credit, Allen Wyatt is an internationally recognized author. He is president of Sharon Parq Associates, a computer and publishing services company. Learn more about Allen…
MORE FROM ALLEN
ISO Week Numbers in Excel
Work in an industry that uses ISO standards when it comes to working with dates? You’ll love the formula in this tip …
Discover More
Locking the Print Area
Excel allows you to specify an area of your worksheet that should be printed. Here’s how to «lock» that area so it cannot …
Discover More
Limiting Where a Workbook is Used
Want to limit who can use your workbook and on what system? Locking down a workbook can be trickier than you might imagine.
Discover More
Even though the basic Find and Replace function in Microsoft Word is helpful for finding words that match a search term, it may not be the ideal tool if you want to search for individual words or large portions of text that have the same format. Luckily, you can expand the function of Find and Replace to add filters to the search such as font style or color and receive the results in no time.
1. Launch Word, and open the document you want to edit.
2. Once the file is loaded, press Ctrl + F to open the Navigation panel, click on the arrow next to the magnifying glass, and choose Advanced Find….

3. When the Find and Replace window appears onscreen, it should be displayed in basic mode, which only allows you to find words inside the document without any other filter. In order to switch to the advanced mode, click More.
To add the font filter to the search, click Format -> Font.

4. In the new Find Font window, use the Font drop-down menu to choose the desired font. You can use other font filters such as font style, size, or color to narrow down the result list. These additional options are helpful when you use the same font with different styles for many parts in the document.
After you add all the necessary filters, click OK to return the filters to the main Find and Replace option.

5. Now, you should notice an extra format filter under the search box. If you want to search for all texts in the chosen format, leave the search box empty, and click Find Next.
You can also switch to the Replace tab and swap the matched result for a new word as you typically would using the basic Find and Replace feature.
To highlight all the results, click Reading Highlight -> Highlight All, and close the search window.


Lê Hoàng
When not creating exciting new Android games, Lê Hoàng is here crafting tutorials, tweaks, and fixes for your enjoyment.
 This tutorial shows how to find and replace font formatting in Microsoft Word. Font formatting includes style (i.e., italics or bold font), color, size, and underlining.
First, we will find and replace font formatting in the whole document. Then, we will find and replace font formatting applied to specific text. We will close with two important tips for finding and replacing font formatting.
Table of Contents:
- How to Find and Replace Font Formatting in the Whole Document
- How to Find and Replace Font Formatting Applied to Specific Text
- Two Tips for Finding and Replacing Font Formatting
Watch all the steps shown here in real time!
Explore more than 200 writing-related software tutorials on my YouTube channel.
The images below are from Word for Microsoft 365. These steps also apply to Word 2021, Word 2019, and Word 2016.
Are you on a Mac? Please see “How to Find and Replace Font Formatting in Word for Mac.”
How to Find and Replace Font Formatting in the Whole Document
For this example, we will replace all bold text with regular text. Please modify these steps according to your own needs.
- Select the Home tab in the ribbon.

- Select Replace in the Editing group.

- Insert your cursor into the Find what text box in the Find and Replace dialog box.

- Select the More button.

- Select All in the Search menu.

- Select the Format button.

- Select Font from the drop-down menu.

- Select Bold (or another option) from the Font Style menu in the Find Font dialog box.

- Select the OK button.

The words Font: Bold should appear under the Find what text box.

- Insert your cursor into the Replace with text box.

- Select the Format button (see figure 6).
- Select Font from the drop-down menu (see figure 7).
- Select Regular (or another option) from the Font Style menu in the Replace Font dialog box.

- Select the OK button.

The words Font: Not Bold, Not Italic should appear under the Replace with text box.

- Select the Replace All button to make all the replacements at once. Or, select the Find Next and Replace buttons to make one replacement at a time.

- If you selected Replace All, select OK in the dialog box telling you how many replacements were made.

- Select the Close button.

The font formatting should be replaced in your document.
How to Find and Replace Formatting Applied to Specific Text
For this example, we will find specific text formatted in red and replace that same text with green formatting. Please modify these steps according to your own needs.
- Select the Home tab in the ribbon (see figure 1).
- Select Replace in the Editing group (see figure 2).
- Type the text you want to find into the Find what text box.

- Select the More button (see figure 4).
- Select All in the Search menu (see figure 5).
- Select the Format button (see figure 6).
- Select Font from the drop-down menu (see figure 7).
- Select red (or other formatting) from the Font color menu in the Find Font dialog box.

- Select the OK button (see figure 9).
The words Font color: Red should appear under the Find what text box.

- Type the same text (or different text if desired) into the Replace with text box.

- Select the Format button (see figure 6).
- Select Font from the drop-down menu (see figure 7).
- Select green (or another formatting) from the Font color menu in the Replace Font dialog box.

- Select the OK button (see figure 13).
The words Font color: Green should appear under the Replace with text box.

- Select the Replace All button to make all the replacements at once. Or, use the Find Next and Replace buttons to make one replacement at a time (see figure 15).
- If you selected Replace All, select OK in the dialog box telling you how many replacements were made (see figure 16).
- Select the Close button to close the Find and Replace dialog box (see figure 17).
The font formatting should be replace for the specific text in your document.
Two Tips for Finding and Replacing Font Formatting
Finding and replacing font formatting can be messy. Here are two tips to consider before your next formatting session.
Tip 1: Use the No Formatting Button to Clear Formatting
When you add formatting to the Find and Replace dialog box, Word will normally keep that selection in the dialog box until you close the software. If you want to clear previously selected formatting from the Find and Replace dialog box before closing the software, place your cursor in the affected text box (Find what or Replace with) and then select the No Formatting button.

Tip 2: Experiment with Multiple Replacement Sequences
Occasionally, the formatting options entered into the Replace with text box don’t replace the options in the Find what text box; instead, they are added to the options in the Find what text box. When this occurs, experiment with multiple replacement sequences to reach the formatting you need.
For example, if you put the bold format into the Find what text box and put the italic format into the Replace with text box, Word won’t replace the bold text with italic text as you might expect. Instead, it will add italics to the bold words. But you can still remove the bold format if you do a second replacement sequence, this time replacing the bold format with the Not Bold format option.
Related Resources
How to Use the Format Painter in Microsoft Word (PC & Mac)
How to Find and Replace Special Characters in Microsoft Word
Updated December 03, 2022
В Microsoft Office Word есть шрифты на любой вкус. Чтобы нестандартно оформить текст или напечатать красивую листовку, используйте оригинальную каллиграфию или графический объект. Но встроенные возможности программы меркнут в сравнении с тысячами разнообразных стилей, которые можно скачать в сети. Если вам не хватает того, что есть в офисе, узнайте, как установить шрифт в Ворд.

Где найти новый шрифт
Существуют целые сервера, на которых выложены коллекции бесплатной каллиграфии. Там сразу можно посмотреть, как будут выглядеть буквы и цифры. Вы подберёте печатные знаки под любые нужды. Доступна даже имитация рукописного ввода.
Перед тем как добавить шрифт в Word, его надо найти в интернете. Скачивайте файлы только из надёжных источников. Есть несколько проверенных сайтов. Например, «Fontspace» или «Xfont». После загрузки каллиграфию можно будет установить в Ворд. Если вы хотите посмотреть весь ассортимент, сделайте следующее:
- Откройте любой поисковик.
- Введите запрос «Скачать шрифт для Word». На первых страницах будут самые популярные сервисы. Можете задать конкретные параметры: «Готические буквы», «Фигурные символы», «Старославянская кириллица» и тому подобное. Всегда найдётся какой-нибудь новый, никем не используемый стиль.

- Зайдите на понравившийся сайт.
- Не загружайте исполняемые файлы с расширением .EXE — скорее всего, это вирус или другая вредоносная программа. Каллиграфия для Ворд имеет формат .TTF (True Type Font) или .OTF, а коллекции стилей хранятся в архивах .ZIP или .RAR.

- Если вы знаете, какой шрифт вам нужен, вбейте в строку поиска его название вместе с фразой «Скачать для Word». Так вы быстрее найдёте то, что хотите.


Лучше брать архив со стилями, а не качать по одному файлу. Вы сможете добавить несколько видов печатных знаков и уже в самой программе посмотреть, что вам подходит.
Когда вы нашли каллиграфию, можно разбираться, как вставить шрифт в Word.
- Распакуйте архив со стилями, если качали их в сжатом виде. Для этого надо установить архиватор. Подойдёт WinZip или WinRar. Кликните правой кнопкой мыши по файлу с коллекцией и в выпавшем списке выберите «Извлечь». Теперь вы можете копировать и перемещать данные, которые хранились в архиве. Чтобы посмотреть, как выглядят символы, откройте один из файлов с каллиграфией. И для этого не надо открывать Ворд.

- Перейдите в Пуск — Панель управления. В разделе «Оформление и персонализация» кликните значок «Шрифты». Он открывает папку со стилями символов в Word. В неё также можно войти через С:WindowsFonts. Чтобы лучше ориентироваться в панели управления, в меню «Просмотр» (находится в правом верхнем углу) выберете подходящие настройки отображения.

- Скопируйте скачанные файлы с каллиграфией в папку «Fonts» (не сам архив, а извлечённые из него данные). Новый вид символов должен появиться и в Office. Некоторые из них уже могут быть в системе. В таком случае появится диалоговое окно, предлагающее заменить имеющиеся печатные знаки. Не соглашайтесь, чтобы случайно не удалить «родные» стили офиса.


Если не получилось добавить их таким образом, попробуйте другой способ.
- Откройте папку с загруженной каллиграфией.
- Кликните по одному из файлов правой кнопкой мыши.
- Нажмите «Установить».

После этого стили точно отобразятся в Word.
Как добавить шрифты в файл Word
Если вы решите поработать с текстом на компьютере, на котором отсутствует используемая вами каллиграфия, она не отобразится. Но можно добавить стиль в прямо документ.
- Нажмите синюю кнопку «Файл». В Office 2007 это меню вызывается кликом на логотип в левой верхней части окна.
- Выберете «Параметры», раздел «Сохранение».

- Галочку рядом с пунктом «Внедрять шрифты в файл».


Лучше активировать эту опцию, если вы используете не только системные стили. У вас ведь не будет возможности установить свою каллиграфию на чужой ПК.
Как узнать название шрифта
Вам понравился внешний вид символов, но вы не знаете название этого дизайна? И как загрузить шрифты в Word, если вы не можете их найти? Не надо ходить по сайтам, надеясь случайно наткнуться на нужные символы. Название легко узнать. Для этого существуют специальные программы и даже целые сайты.
- What The Font. Популярный и надёжный сервис. Определяет вид каллиграфии по картинке. Найденный стиль можно сразу же скачать и установить в Word. Ресурс имеет свой форум. Если поиск по базе данных ничего не дал, можете спросить совета у других пользователей.
- Расширение для браузера Google Chrome. Сканирует HTML-код страницы и выдаёт название.
- Определяет шрифт, задавая вопросы о его внешнем виде. Если вы примерно представляете, что ищите, но конкретной информации у вас нет — этот ресурс подойдёт.
- Bowfin Printworks. Здесь можно подобрать стиль вплоть до мельчайших деталей. Спрашивает о форме каждого символа.
- Сообщество людей, которые занимаются дизайном каллиграфии или просто в ней разбираются. Надо создать тему и вставить рисунок с символами. Пользователи форума помогут найти нужный стиль.
- WhatTheFont для мобильных устройств. Сфотографируйте слово — приложение определит, какой это стиль.

Если вы увидели интересную каллиграфию в интернете или хотите расширить возможности Office, разберитесь, как установить новый шрифт в Word. Нестандартными надписями можно разбавить скучный текст. Их используют для листовок, поздравлений, открыток, презентаций. Их существуют тысячи — вы обязательно найдёте подходящий.
If you’ve ever worked on a document originally created by somebody else, you’ll most likely immediately be frustrated by their horrible choice of fonts and formatting. What you might not realize is that the search and replace functionality in Word allows you to replace more than just text.
You can easily search and replace all bolded or italicized text in a document, for instance. Or you could remove that ugly Heading 2 style they used… what were they thinking using bright red?
Open up the Find and Replace dialog from the menus, or just use the Ctrl+H keyboard shortcut.

Click in the blank Find box, and then you can use the regular keyboard shortcuts to specify specific formatting. For instance, if you wanted to replace all bolded text with regular text, you’d use Ctrl+B in the “Find what” box, or for italics you would use Ctrl+I. You can even use multiple search criteria here.
If you have styles that are more difficult to replace with simple keyboard shortcuts, you can click the “More” button on the lower left-hand side to show a lot more options.

The “Format” dropdown will give you access to select specific formatting options, like fonts or styles. Just make sure that you first click in the “Find what” box before you select an option.
For the “Replace with”, you’ll need to click in that box first, and then select the options that you want just the same.
READ NEXT
- › How to Find and Replace Text in Microsoft Word
- › This New Google TV Streaming Device Costs Just $20
- › HoloLens Now Has Windows 11 and Incredible 3D Ink Features
- › How to Adjust and Change Discord Fonts
- › Google Chrome Is Getting Faster
- › The New NVIDIA GeForce RTX 4070 Is Like an RTX 3080 for $599
- › BLUETTI Slashed Hundreds off Its Best Power Stations for Easter Sale
How-To Geek is where you turn when you want experts to explain technology. Since we launched in 2006, our articles have been read billions of times. Want to know more?
- Remove From My Forums
-
Question
-
Dear Frnz,
Is there any alternative method to Find And Replace method in terms of finding characters and fonts.
Thanks,
Regards,
Hari.A
hari
Answers
-
Send a document containing the things that you want to find and an explanation of what they are and what you want to do with them to me at dkr[atsymbol]mvps[dot]org
— Hope this helps.
Doug Robbins — Word MVP,
dkr[atsymbol]mvps[dot]org
Posted via the Community Bridge«Hari.A» wrote in message news:a6a7a005-9b40-47e1-b164-2ba49420d948@communitybridge.codeplex.com…
Dear Doug Robbins,
Thank you for your quick reply.
could you please send me a link which guides me to do iterations in word to find special fonts and special characters
thanks,
Regards,
Hari.A
— hari
Doug Robbins — Word MVP dkr[atsymbol]mvps[dot]org
-
Marked as answer by
Monday, August 23, 2010 3:46 AM
-
Marked as answer by
Содержание
- Установка нового шрифта в систему
- Установка нового шрифта в Word
- Внедрение шрифта в документ
- Вопросы и ответы

В последних версиях текстового редактора Microsoft Word имеется довольно большой набор встроенных шрифтов. Большинство из них, как и полагается, состоят из букв, но в некоторых вместо букв используются различные символы и знаки, что тоже весьма удобно и необходимо во многих ситуациях.
Урок: Как в Ворде поставить галочку
И все же, сколько бы в MS Word не было встроенных шрифтов, активным пользователям программы стандартного набора всегда будет мало, особенно, если хочется чего-то действительно необычного. Неудивительно, что на просторах интернета можно найти множество шрифтов для этого текстового редактора, созданных сторонними разработчиками. Именно поэтому в данной статье мы расскажем о том, как добавить шрифт в Ворд.
Важное предупреждение: Скачивайте шрифты, как и любое другое ПО, только с проверенных сайтов, так как во многих из них вполне могут содержаться вирусы и прочий вредоносный софт. Не забывайте о собственной безопасности и сохранности личных данных, не качайте шрифты, представленные в установочных файлах EXE, так как на самом деле распространяются они в архивах, внутри которых содержатся файлы форматов OTF или TTF, поддерживаемых ОС Windows.
Вот список безопасных ресурсов, с которых можно скачивать шрифты для MS Word и других совместимых программ:
www.dafont.com
www.fontsquirrel.com
www.fontspace.com
www.1001freefonts.com
Отметим, что все вышеперечисленные сайты крайне удобно реализованы и каждый из шрифтов там представлен наглядно и понятно. То есть, вы смотрите на картинку превью, решаете, нравиться ли вам этот шрифт и нужен ли он вам вообще, и только после этого качаете. Итак, приступим.

Установка нового шрифта в систему
1. Выберите на одном из предложенных нами сайтов (либо на другом, которому полностью доверяете) подходящий шрифт и скачайте его.
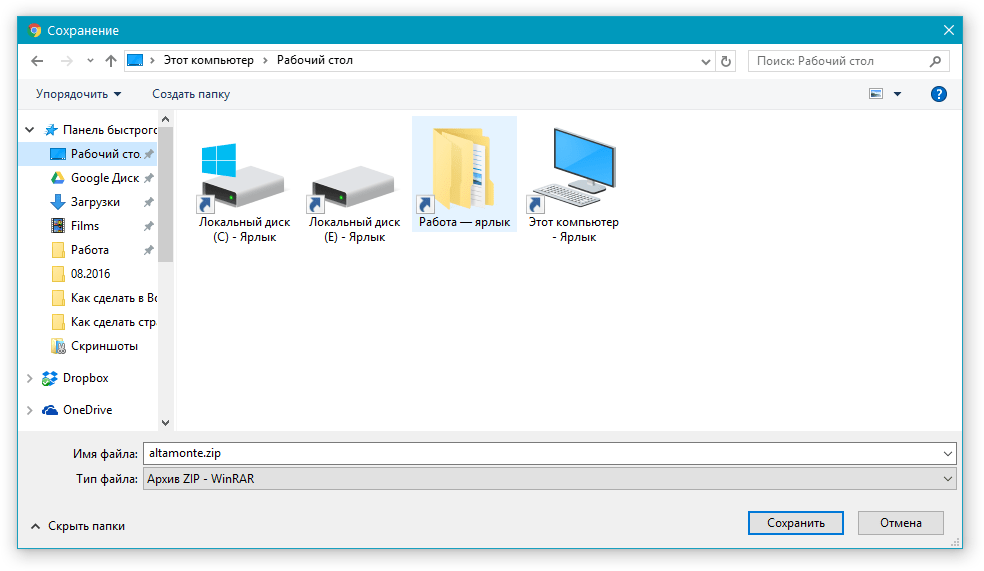
2. Перейдите в папку, в которую вы скачали архив (или просто файл) со шрифтом (шрифтами). В нашем случае это рабочий стол.
3. Откройте архив и извлеките его содержимое в любую удобную папку. Если вы скачали шрифты, не запакованные в архив, просто переместите их туда, откуда вам будет удобно к ним добраться. Не закрывайте эту папку.

Примечание: В архиве со шрифтами помимо файла OTF или TTF могут также содержаться и файлы другого формата, к примеру, изображение и текстовый документ, как в нашем примере. Извлекать эти файлы отнюдь не обязательно.

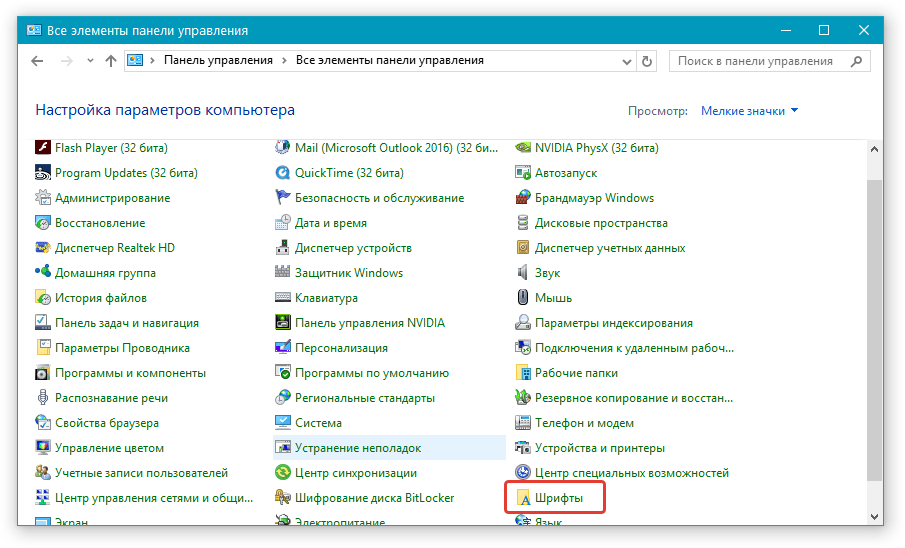
4. Откройте “Панель управления”.
В Windows 8 — 10 сделать это можно с помощью клавиш Win+X, где в появившемся списке нужно выбрать “Панель управления”. Вместо клавиш также можно использовать клик правой кнопкой мышки по значку меню “Пуск”.
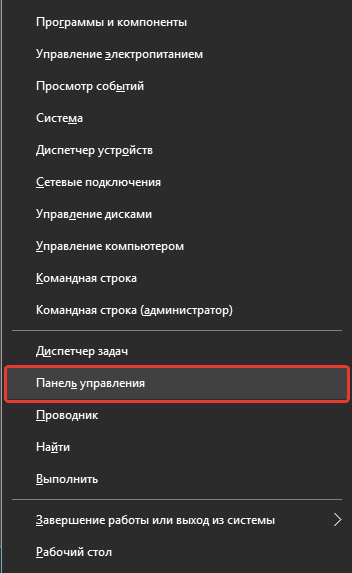
В Windows XP — 7 этот раздел находится в меню “Пуск” — “Панель управления”.

5. Если “Панель управления” находится в режиме просмотра “Категории”, как на нашем примере, переключитесь на режим отображения мелких значков — так вы сможете быстрее найти необходимый пункт.
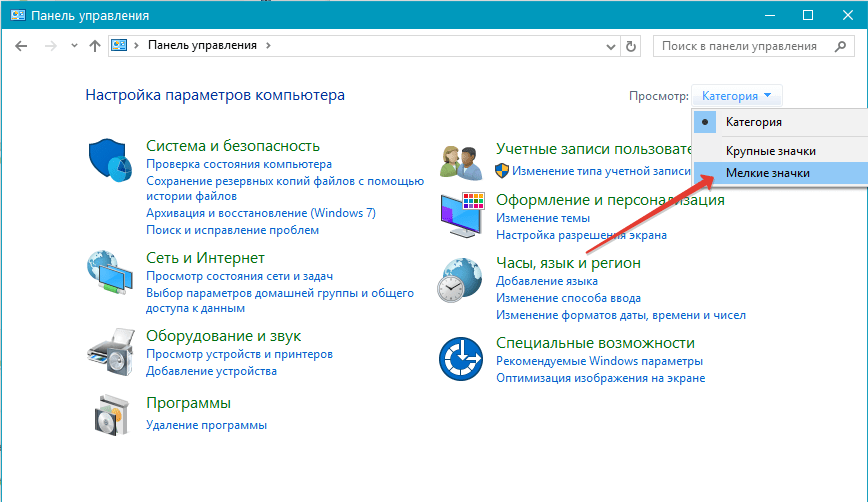
6. Найдите там пункт “Шрифты” (скорее всего, он будет одним из последних), и нажмите на него.
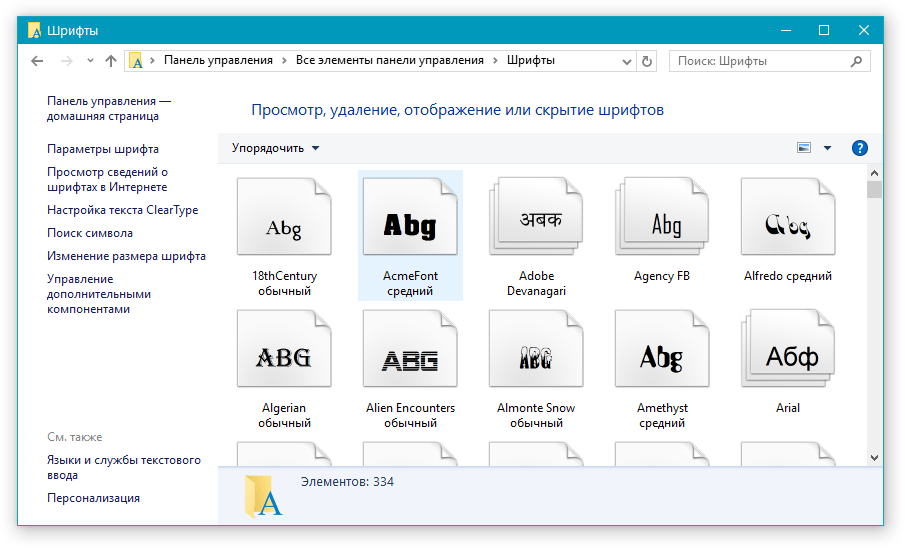
7. Откроется папка со шрифтами, установленными в ОС Windows. Поместите в нее файл шрифта (шрифтов), ранее скачанный и извлеченный из архива.
Совет: Вы можете просто перетащить его (их) мышкой из папки в папку или использовать команды Ctrl+C (копировать) или Ctrl+X (вырезать), а затем Ctrl+V (вставить).
8. После короткого процесса инициализации шрифт будет установлен в систему и появится в папке, в которую вы его переместили.
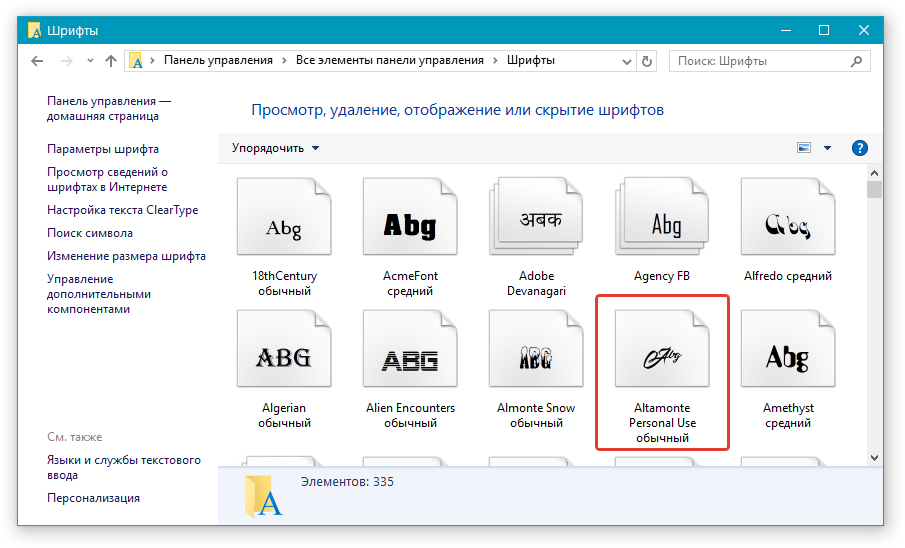
Примечание: Некоторые шрифты могут состоять из нескольких файлов (например, обычный, курсив и полужирный). В таком случае необходимо помещать в папку со шрифтами все эти файлы.
На данном этапе мы добавили новый шрифт в систему, теперь же нам необходимо добавить его и непосредственно в Ворд. О том, как это сделать, читайте ниже.
Установка нового шрифта в Word
1. Запустите Ворд и найдите новый шрифт в списке со стандартными, встроенными в программу.
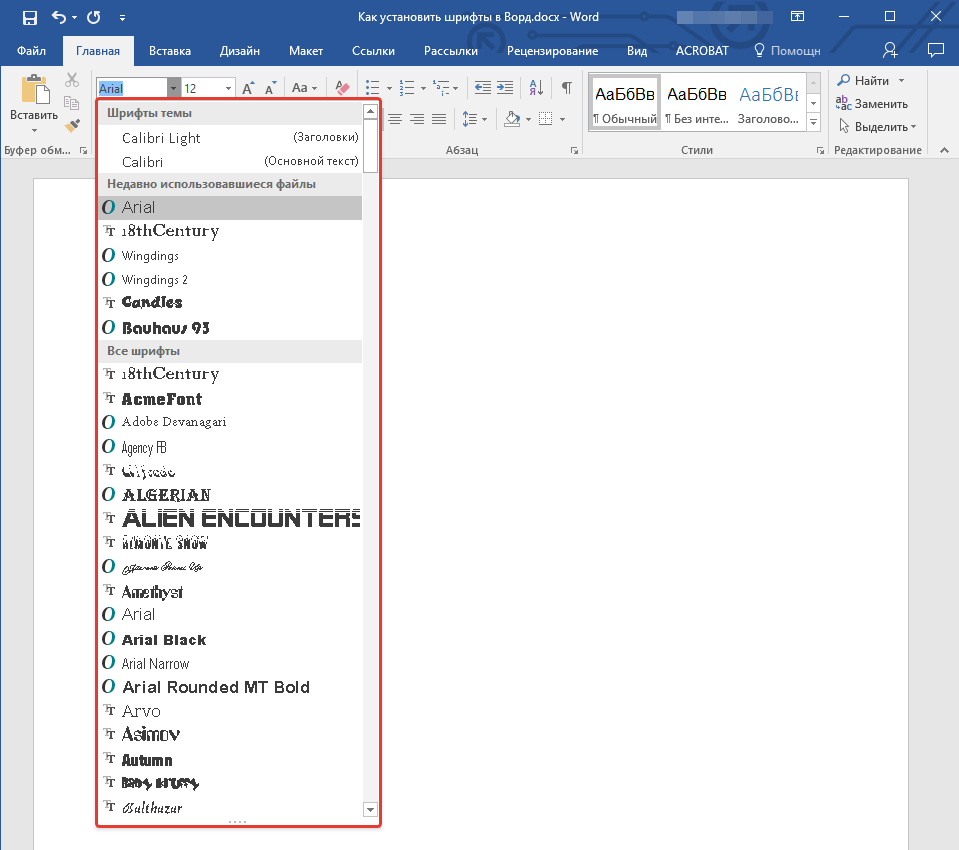
2. Зачастую, отыскать новый шрифт в списке не так просто, как может показаться: во-первых, их там и без того довольно много, во-вторых, его название, хоть и написано собственным шрифтом, но довольно мелкое.
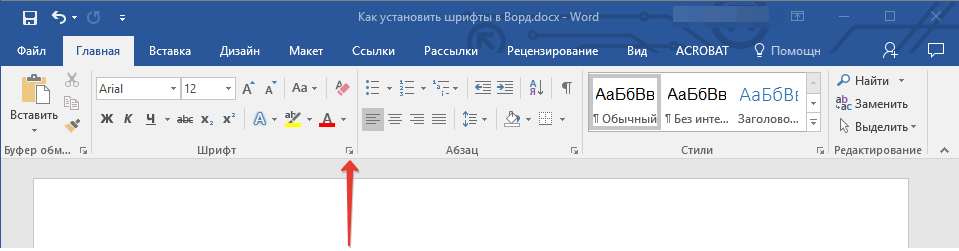
Чтобы быстро отыскать новый шрифт в MS Word и приступить к его использованию в наборе текста, откройте диалоговое окно группы “Шрифт”, нажав на небольшую стрелочку, расположенную в правом нижнем углу этой группы.
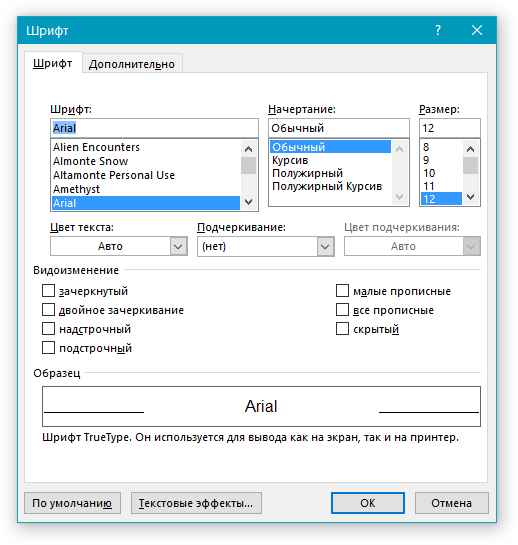
3. В списке “Шрифт” найдите название нового, установленного вами шрифта (в нашем случае это Altamonte Personal Use) и выберите его.
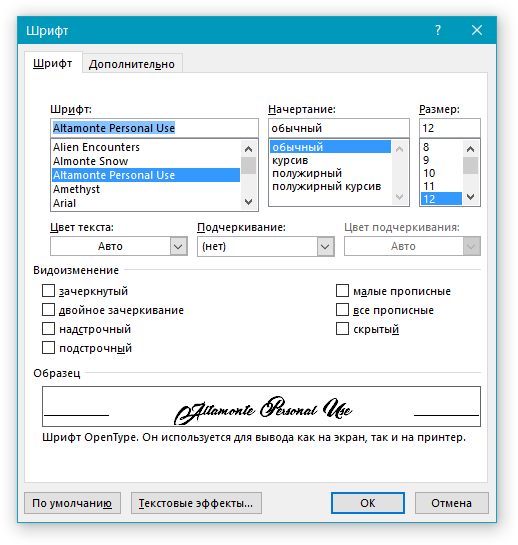
Совет: В окне “Образец” вы можете видеть то, как выглядит шрифт. Это поможет быстрее его найти, если вы не запомнили название шрифта, но запомнили его визуально.
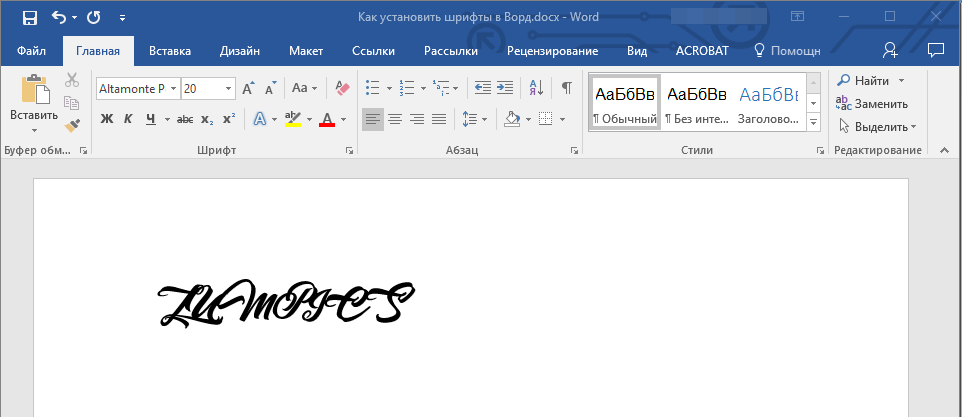
4. После того, как вы нажмете “ОК” в диалоговом окне “Шрифт”, вы переключитесь на новый шрифт и сможете начать его использовать.
Внедрение шрифта в документ
После того, как вы установите новый шрифт на свой компьютер, использовать его вы сможете только у себя. То есть, если вы отправите текстовый документ, написанный новым шрифтом другому человеку, у которого этот шрифт не установлен в системе, а значит, и не интегрирован в Ворд, то у него он отображаться не будет.
Если вы хотите, чтобы новый шрифт был доступен не только на вашем ПК (ну и на принтере, точнее, уже на распечатанном листе бумаги), но и на других компьютерах, другим пользователям, его необходимо внедрить в текстовый документ. О том, как это сделать, читайте ниже.
Примечание: Внедрение шрифта в документ приведет к увеличению объема документа MS Word.
1. В вордовском документе перейдите во вкладку “Параметры”, открыть которую можно через меню “Файл” (Word 2010 — 2016) или кнопку “MS Word” (2003 — 2007).
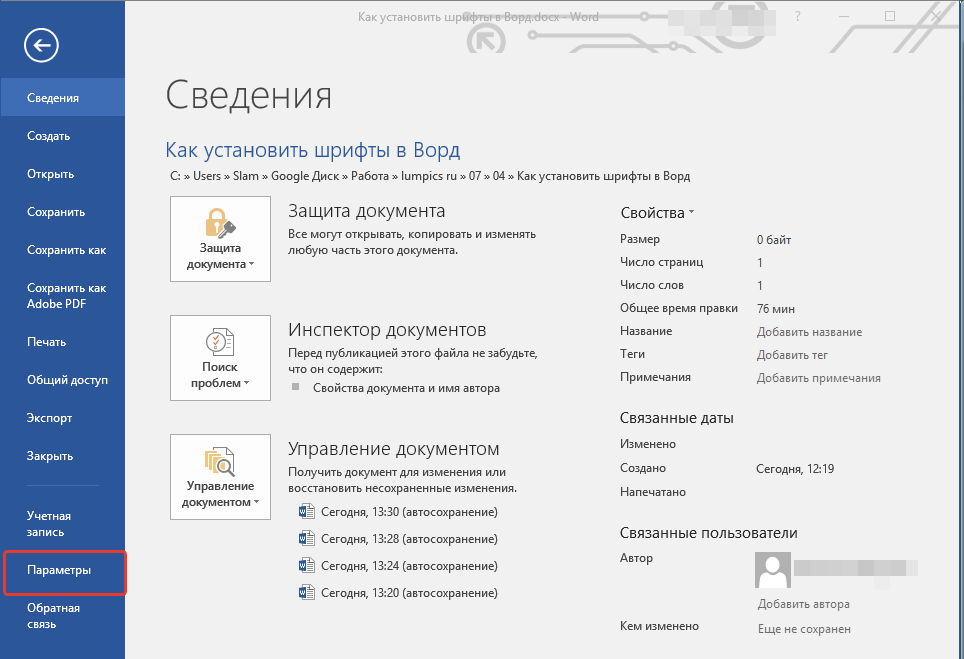
2. В диалоговом окне “Параметры”, которое перед вами откроется, перейдите к разделу “Сохранение”.
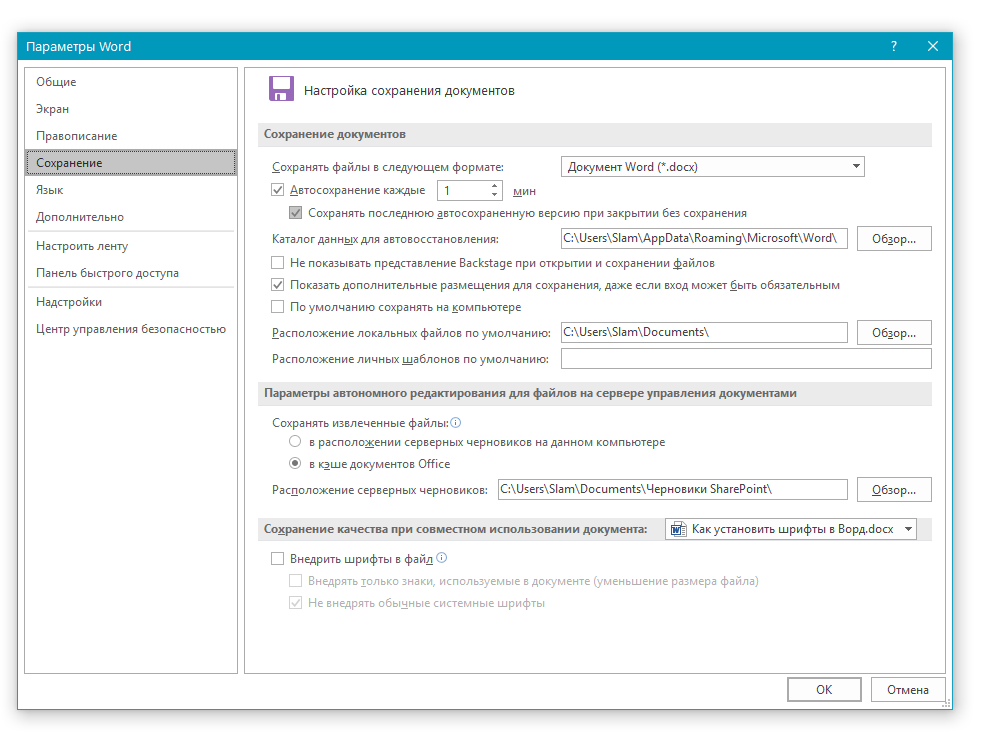
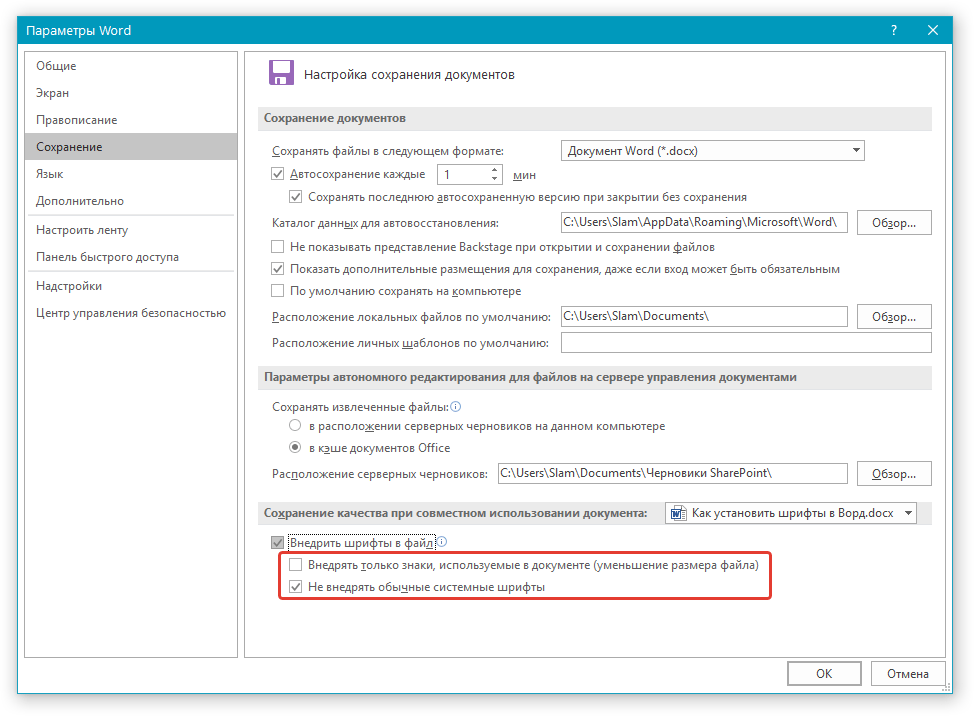
3. Установите галочку напротив пункта “Внедрить шрифты в файл”.

4. Выберите, хотите ли вы внедрить только знаки, которые используются в текущем документе (это уменьшит объем файла), хотите ли вы исключить внедрение системных шрифтов (по сути, оно и не нужно).
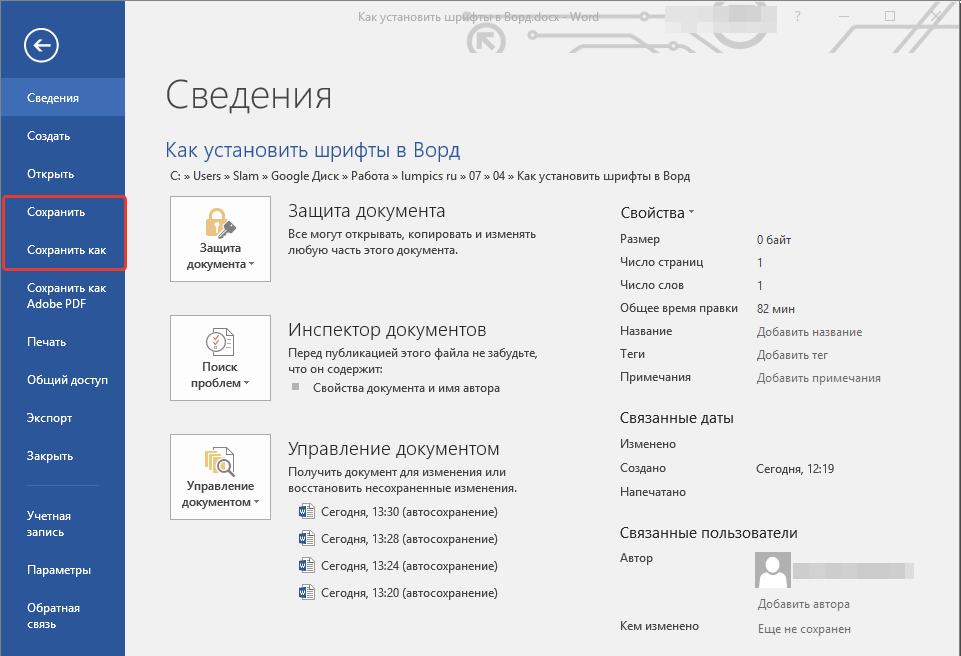
5. Сохраните текстовый документ. Теперь вы можете поделиться им с другими пользователями, ведь новый, добавленный вами шрифт будет отображаться и на их компьютере.
Собственно, на этом можно и закончить, ведь теперь вы знаете о том, как установить шрифты в Ворд, предварительно инсталлировав их в ОС Windows. Желаем вам успехов в освоении новых функций и безграничных возможностей программы Microsoft Word.