

CITY OF ABERDEEN
60 North Parke Street
Aberdeen, Maryland 21001
PUBLIC INFORMATION REQUEST APPLICATION
This application is in accordance with the Maryland Public Information Act (“MPIA”), Title 4 of the
General Provisions Article of the Annotated Code of Maryland. It may be dropped off at City Hall, mailed,
faxed (410-273-7402), or e-mailed as an attachment to the City Clerk at mcorrell@aberdeenmd.gov. Under the
MPIA, the applicant is entitled to review and obtain copies of available records, subject to certain exceptions.
The City is not obligated to do research, create records, or conduct investigations. More information on this may
be found at www.marylandattorneygeneral.gov.
The City is given 30 days to comply with the request; however, the City Clerk will provide documents
for inspection as soon as possible. If the application is denied, or if the records do not exist, or if there are any
delays, etc., the applicant will be notified, in writing, within ten (10) working days from receipt of the
application. If you should have any questions, contact the City Clerk at 410-272-1600.
Date: __________________________
Name of Individual or Company: ______________________________________________________________
Address: __________________________________________________________________________________
Telephone/Mobile No.: _________________ Fax: __________________ E-mail:________________________
Records Requested (be specific): _______________________________________________________________
__________________________________________________________________________________________
Do you need to schedule an appointment to review public records: Yes _____ No _____
Please read and sign below:
I understand and agree to the terms of this application according to Title 4 of the General Provisions
Article of the Annotated Code of Maryland and the City of Aberdeen. I understand that I have the right to seek
judicial review of a decision to deny access to any public record pursuant to General Provisions Article §4-362.
If I am permitted to examine records, I shall not alter, falsify, cancel, destroy, mutilate or remove any part
thereof, under penalty of law. I understand that Freedom of Information Requests are subject to disclosure under
the Maryland Public Information Act.
SIGNATURE OF APPLICANT: ____________________________________
………………………………………………………………………………………………………………………
FOR OFFICE USE ONLY
Date application received: _____________ Application No.: ______________ Approved / Denied _________
Requestor notified of response on: _____________ Notified of fee estimate (if applicable) on: _____________
Fee (if applicable): $_________________________ Comments: ____________________________________
Signature of Custodian: ____________________________________
Signature of person receiving documents: ________________________________
click to sign
signature
click to edit
click to sign
signature
click to edit
click to sign
signature
click to edit

City of Aberdeen
Public Information Request Fees
The following are the current hourly rates and miscellaneous costs charged by the City of
Aberdeen for Access to Public Records:
Copy charge: $0.25 per page.
Administrative fee: The first two hours are provided free of charge. After that, the fee is based
on the time and hourly rate of the individual staff in locating, reviewing, and producing public
records, and attorney, if necessary, who must conduct the review.
Architectural/Construction Drawings:
Applicant will be charged the rate it costs to have a large document (i.e. comprehensive plans,
transportation plans, architectural/construction documents, etc.) reproduced.
11” x 17” $ 2.50
24” x 36” $ 5.00
4 ft. x 3 ft. $10.00
20 ft. or more Cost of reproduction/actual cost.
Recording of City Meetings: $15.00 per DVD
Contact Kay Moore at kmoore@harfordcountymd.gov or call at 410-638-3899.
Aberdeen Police Department
$5.00 Administrative Fee per Police Incident Report (obtain at Police Department).
Motor Vehicle Records: $5.00 for individuals per accident report.
Photos at additional charge: $10.00 flat fee for up to 5 sheets.
To create a form in Word that others can fill out, start with a template or document and add content controls. Content controls include things like check boxes, text boxes, date pickers, and drop-down lists. If you’re familiar with databases, these content controls can even be linked to data.
Show the Developer tab
If the developer tab isn’t displayed in the ribbon, see Show the Developer tab.
Open a template or a blank document on which to base the form
To save time, start with a form template or start from scratch with a blank template.
-
Go to File > New.
-
In Search online templates, type Forms or the type of form you want and press ENTER.
-
Choose a form template, and then select Create or Download.
-
Go to File > New.
-
Select Blank document.
Add content to the form
Go to Developer, and then choose the controls that you want to add to the document or form. To remove a content control, select the control and press Delete. You can set properties on controls once inserted.
Note: You can print a form that was created using content controls, but the boxes around the content controls will not print.
In a rich text content control, users can format text as bold or italic, and they can type multiple paragraphs. If you want to limit what users add, insert the plain text content control.
-
Click or tap where you want to insert the control.
-
Select Developer > Rich Text Content Control
 or Plain Text Content Control .
 or Plain Text Content Control
  .
.To set specific properties on the control, see Set or change properties for content controls.
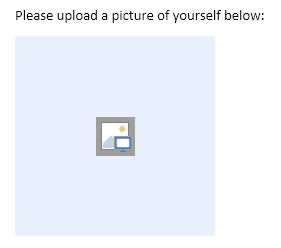
A picture control is often used for templates, but you can also add a picture control to a form.
-
Click or tap where you want to insert the control.
-
Select Developer > Picture Content Control
.
 .
.To set specific properties on the control, see Set or change properties for content controls.
Use building block controls when you want people to choose a specific block of text. For example, building block controls are helpful when you need to add different boilerplate text depending on the contract’s specific requirements. You can create rich text content controls for each version of the boilerplate text, and then you can use a building block control as the container for the rich text content controls.
-
Click or tap where you want to insert the control.
-
Go to DeveloperBuilding Block Gallery Content Control
(or Building Block Content Control). -
Select Developer and content controls for the building block.
 (or Building Block Content Control).
-
Click or tap where you want to insert the control.
To set specific properties on the control, see Set or change properties for content controls.
In a combo box, users can select from a list of choices that you provide or they can type in their own information. In a drop-down list, users can only select from the list of choices.
-
Go to Developer > Combo Box Content Control
or Drop-Down List Content Control . -
Select the content control, and then select Properties.
-
To create a list of choices, select Add under Drop-Down List Properties.
-
Type a choice in Display Name, such as Yes, No, or Maybe.
Repeat this step until all of the choices are in the drop-down list.
-
Fill in any other properties that you want.
Note: If you select the Contents cannot be edited check box, users won’t be able to click a choice.
 or Drop-Down List Content Control
  .
.-
Click or tap where you want to insert the date picker control.
-
Select Developer > Date Picker Content Control
.
 .
.To set specific properties on the control, see Set or change properties for content controls.
-
Click or tap where you want to insert the check box control.
-
Select Developer > Check Box Content Control
.
 .
.To set specific properties on the control, see Set or change properties for content controls.
Legacy form controls are for compatibility with older versions of Word and consist of legacy form and Active X controls.
-
Click or tap where you want to insert a legacy control.
-
Go to Developer > Legacy Forms
drop-down. -
Select the Legacy Form control or Active X Control that you want to include.
 drop-down.
Set or change properties for content controls
Each content control has properties that you can set or change. For example, the Date Picker control offers options for the format you want to use to display the date.
-
Select the content control that you want to change.
-
Go to Developer > Properties.
-
Change the properties that you want.

Add protection to a form
If you want to limit how much others can edit or format a form, use the Restrict Editing command:
-
Open the form that you want to lock or protect.
-
Select Developer > Restrict Editing.
-
After selecting restrictions, select Yes, Start Enforcing Protection.


Advanced Tip:
If you want to protect only parts of the document, separate the document into sections and only protect the sections you want.
To do this, choose Select Sections in the Restrict Editing panel. For more info on sections, see Insert a section break.

Show the Developer tab
If the developer tab isn’t displayed in the ribbon, see Show the Developer tab.
Open a template or use a blank document
To create a form in Word that others can fill out, start with a template or document and add content controls. Content controls include things like check boxes, text boxes, and drop-down lists. If you’re familiar with databases, these content controls can even be linked to data.
-
Go to File > New from Template.
-
In Search, type form.
-
Double-click the template you want to use.
-
Select File > Save As, and pick a location to save the form.
-
In Save As, type a file name and then select Save.

-
Go to File > New Document.
-
Go to File > Save As.
-
In Save As, type a file name and then select Save.

Add content to the form
Go to Developer, and then choose the controls that you want to add to the document or form. To remove a content control, select the control and press Delete. You can set Options on controls once inserted. From Options, you can add entry and exit macros to run when users interact with the controls, as well as list items for combo boxes, .
-
In the document, click or tap where you want to add a content control.
-
On Developer, select Text Box, Check Box, or Combo Box.
-
To set specific properties for the control, select Options, and set .
-
Repeat steps 1 through 3 for each control that you want to add.

Options let you set common settings, as well as control specific settings. Select a control and then select Options to set up or make changes.
-
Set common properties.
-
Select Macro to Run on lets you choose a recorded or custom macro to run on Entry or Exit from the field.
-
Bookmark Set a unique name or bookmark for each control.
-
Calculate on exit This forces Word to run or refresh any calculations, such as total price when the user exits the field.
-
Add Help Text Give hints or instructions for each field.
-
OK Saves settings and exits the panel.
-
Cancel Forgets changes and exits the panel.
-
-
Set specific properties for a Text box
-
Type Select form Regular text, Number, Date, Current Date, Current Time, or Calculation.
-
Default text sets optional instructional text that’s displayed in the text box before the user types in the field. Set Text box enabled to allow the user to enter text into the field.
-
Maximum length sets the length of text that a user can enter. The default is Unlimited.
-
Text format can set whether text automatically formats to Uppercase, Lowercase, First capital, or Title case.
-
Text box enabled Lets the user enter text into a field. If there is default text, user text replaces it.
-
-
Set specific properties for a Check box.
-
Default Value Choose between Not checked or checked as default.
-
Checkbox size Set a size Exactly or Auto to change size as needed.
-
Check box enabled Lets the user check or clear the text box.
-
-
Set specific properties for a Combo box
-
Drop-down item Type in strings for the list box items. Press + or Enter to add an item to the list.
-
Items in drop-down list Shows your current list. Select an item and use the up or down arrows to change the order, Press — to remove a selected item.
-
Drop-down enabled Lets the user open the combo box and make selections.
-
-
Go to Developer > Protect Form.
Note: To unprotect the form and continue editing, select Protect Form again.
-
Save and close the form.

If you want, you can test the form before you distribute it.
-
Protect the form.
-
Reopen the form, fill it out as the user would, and then save a copy.
Show the Developer tab
-
On the right side of the ribbon, select
, and then select Ribbon Preferences. -
Under Customize, select Developer .
 , and then select Ribbon Preferences.
Open a template or a document on which to base the form
You can start with a blank document and create your own form. Or, to save time, you can start with a form template.
-
Go to File > New from Template.
-
In the left pane, expand Online Templates, and then select Forms.
-
Double-click the form template that you want to use.
Add content controls to the form
-
In the document, click where you want to add the control.
-
On the Developer tab, under Form Controls, select Text Box, Check Box, or Combo Box.
-
To set specific properties for the control, select Options, and then configure the properties that you want.
Note: To create a list of drop-down items in a combo box, select the combo box placeholder, click Options, and then add the items that you want to appear in the drop-down list.
-
Repeat steps 1 through 3 for each control that you want to add.
Add instructional text (optional)
Instructional text (for example, «Type First Name») in a text box can make your form easier to use. By default, no text appears in a text box, but you can add it.
-
Select the text box control that you want to add instructional text to.
-
On the Developer tab, under Form Controls, select Options.
-
In Default Text, type the instructional text.
-
Make sure that Fill-in enabled is selected, and then select OK.
Protect the form
-
On the Developer tab, under Form Controls, select Protect Form.
Note: To unprotect the form and continue editing, click Protect Form again.
-
Save and close the form.
Test the form (optional)
If you want, you can test the form before you distribute it.
-
Protect the form.
-
Reopen the form, fill it out as the user would, and then save a copy.
Creating fillable forms isn’t available in Word for the web.
You can create the form with the desktop version of Word with the instructions in Create a fillable form.
When you save the document and reopen it in Word for the web, you’ll see the changes you made.
You can edit Word document online as an image with ScanWritr. ScanWritr is an online editor and converter that brings old fashioned paperwork into the 21st century as it enables you to open Word document from your computer, Dropbox or Google Drive and edit it. Use your PC, Mac or other device to open document and fill it as appropriate. Furthermore, you don’t have to install any app. Simply visit ScanWritr web!

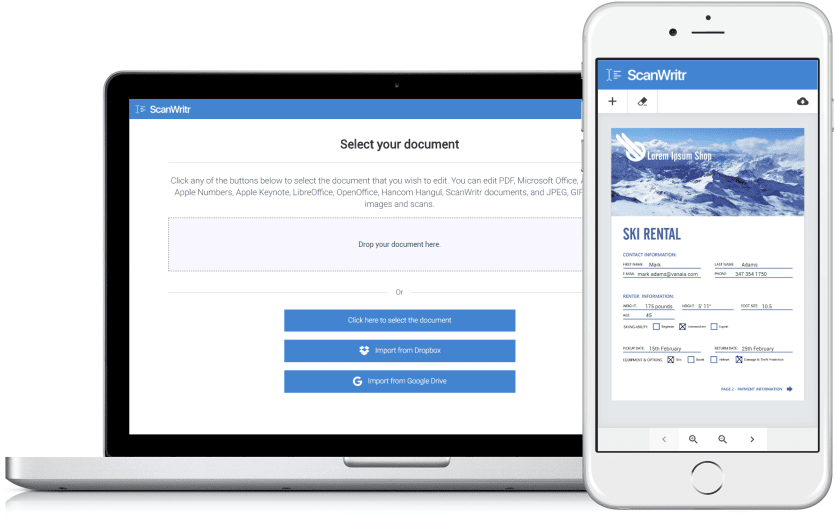
To edit Word document online you can use any device connected to the internet. Just go to the ScanWritr web and upload the document you want to edit. Then fill it, sign it, preview it, export it and that’s it. ScanWritr recognizes all most common document formats. Open MS Office documents, Apple iWork documents, Adobe Acrobat PDF, OpenOffice and many others with just a click. So, you don’t have to convert documents manually. ScanWritr also supports uploading JPEG, GIF, PNG, HEIC and BMP picture formats, therefore you can easily take a photo of your physical document using your smartphone. You can also scan a document using your home or office scanner. ScanWritr will automatically convert and optimize it for editing.
All you need to perfectly prepare your document
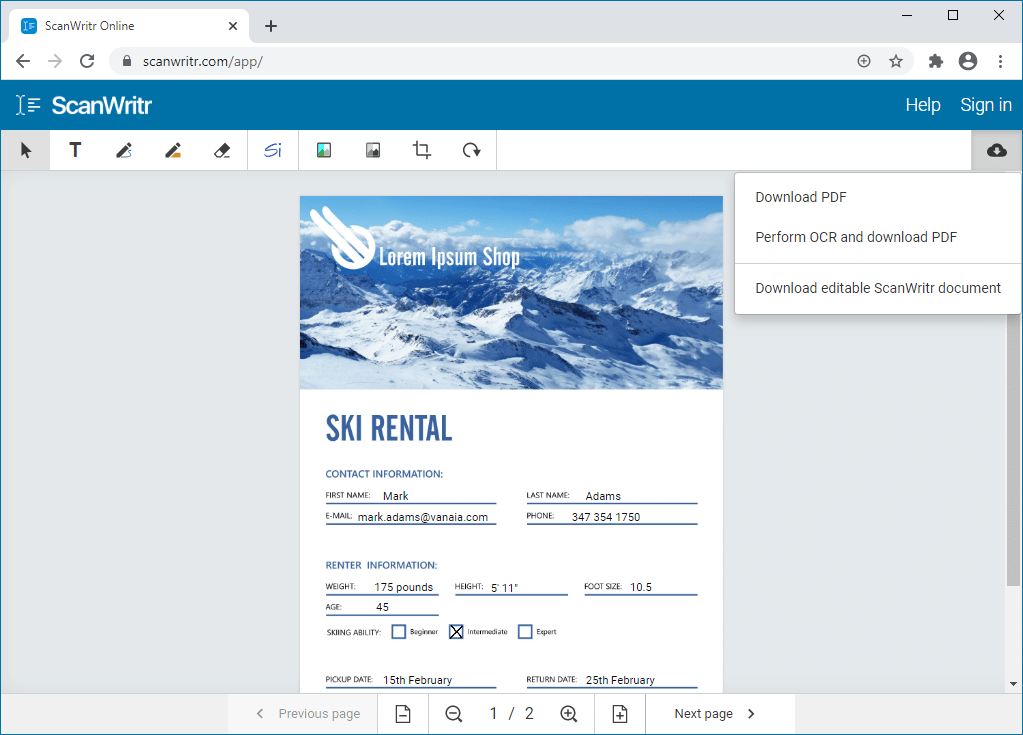
ScanWritr enables you to edit imported documents as an image. You can add signature, annotation, use eraser or pen, and fill out the blanks using writing tool. Then convert it to PDF, making it ready for sending, sharing, printing or faxing.
But beside this, you can also improve document quality and retouch. Document is improved by using our comprehensive edge detection and image enhancement feature. It will make the digital copy of your document as high quality as possible.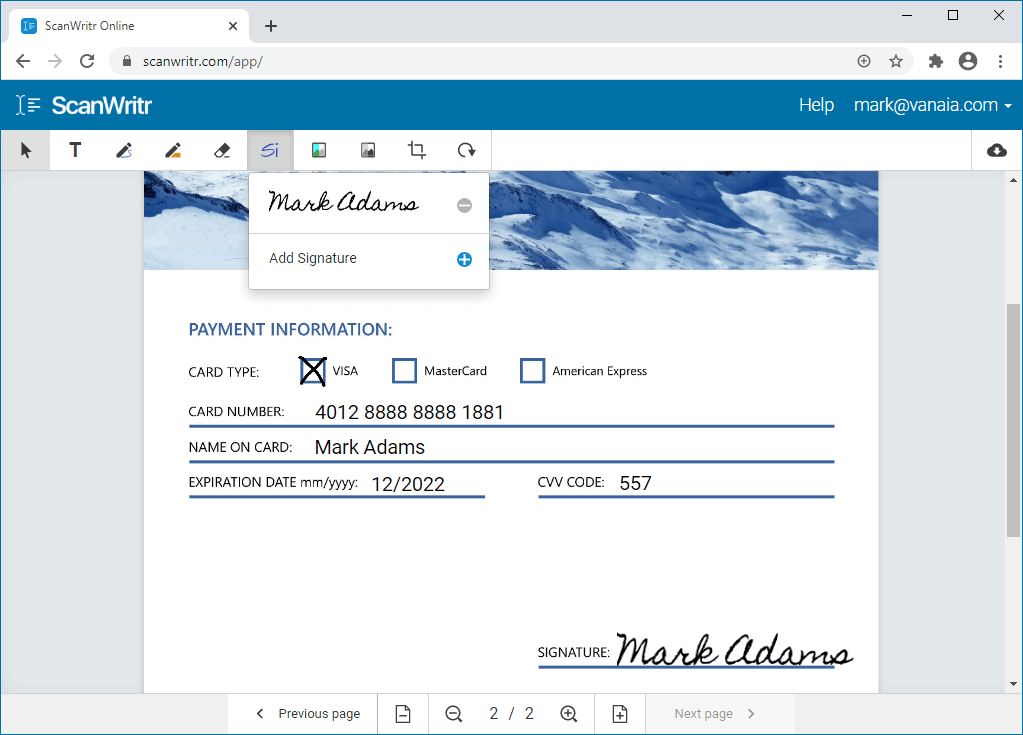
You need no installation to convert and edit a document
If you need to open MS Word document and fill it, there is no quicker and better option as using ScanWritr. Just visit the ScanWritr page and upload document. Then prepare it, insert text, ticks, marks, signatures and save it to PDF. Document is ready for sending, sharing or faxing!
Word Editor Online
Create and edit Word documents online
Open, create and edit Word files online for free. The handy Word editor can be a simple online alternative to Microsoft Word and OpenOffice.
This is an Easy to use, Fast and 100% Free solution to edit Word documents online. No registration, no ads, no watermarks, no need to download or install anything. Free Word Editor works from any web browser.
Online Word Editor
Have you ever been in a situation where you need to edit a Word document but don’t have a full-featured MS Office at hand? This may be the case when your colleague emailed you a Word file and you need to quickly fill it out and send it back.
Use this service to edit Word file online with your laptop, mobile phone, tablet, and anywhere you have an internet connection. After modifying a document, you can save it back to your device in a wide variety of file formats.
Edit Word file online
Just upload a Word file and start working with it like you would with a common Office suite. The user-friendly Word Editor opens files quickly and provides standard text formatting features that you may need in your work. It also supports full-screen mode designed for distraction-free work.
Online Word Editor with a simple design is available around the clock and always at your fingertips. Our company develops modern Word editing solutions for the digital office.
Did you know that you can create forms in Word that people can fill out? When you hear about fillable forms, it is almost always related to Adobe and PDF documents because that’s the most popular format.
However, Word is also quite a powerful tool and you can use it to quickly create forms that you can either print or send via email, etc. If you need to create a survey that will go out to many people and you want all the responses tallied for your automatically, it might be best to use Google Docs to create the survey.
In this article, I’ll show you how to create a form with text boxes, check boxes, a date picker and a list box. You can also make your forms a lot better looking if you use tables to organize everything.
Enable Developer Tab
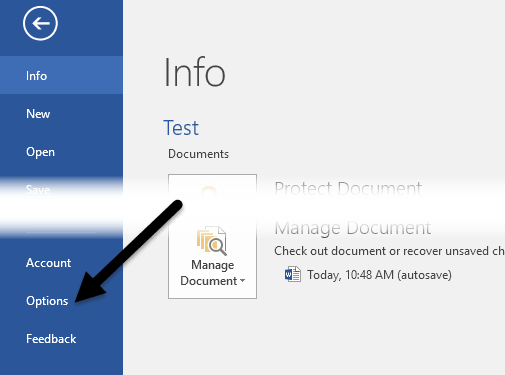
By default, you can’t create forms in Word unless you enable the Developer tab in the ribbon. Since it’s not used by a lot of people, Microsoft disabled it by default. To enable the tab, click on File and then Options.
On the left-hand side, click on Customize Ribbon and then check the Developer box in the right-hand list box.
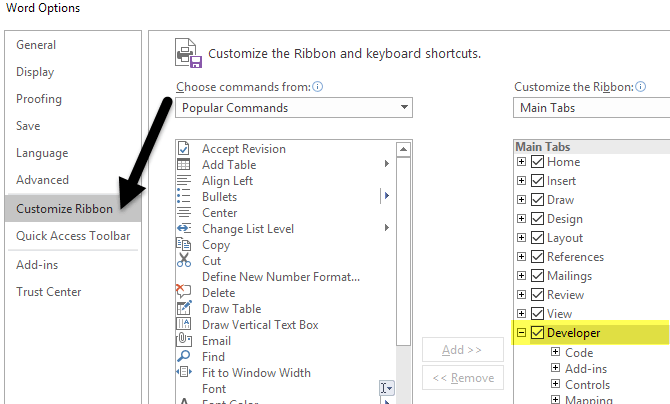
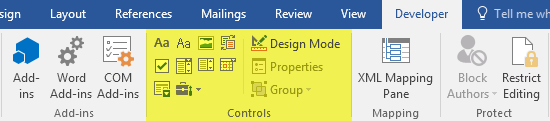
Click OK and click on the tab in the ribbon. The section we are most interested in is Controls.
Creating a Form in Word
The Controls section has about eight different controls that can be added to your Word document: Rich Text, Plain-Text, Picture, Building Block Gallery, Checkbox, Combo Box, Drop-Down List, and Date Picker.
To insert a control, just click on it and it will appear wherever your cursor was located. In my example below, I created a table and added two plain-text boxes for first name and last name.

By default, each control has its own filler text. For a plain text control, it is Click or tap here to enter text. You can edit this text for any control by clicking on the Design Mode button that is to the right of the control icons.
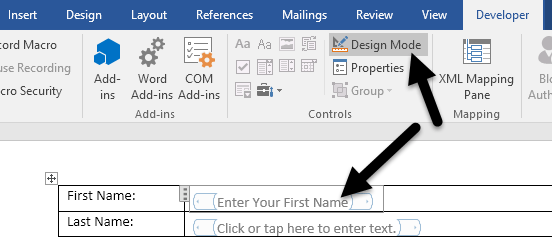
You’ll see some blue placeholders appear on the left and right of any controls you have added to your document. Select the text and change it to whatever you like. Click on the Design Mode button again to exit the mode.
Next, click on your newly added control so that it is highlighted and then click on Properties, which is directly below the Design Mode button. Each control will have a standard set of options with custom options at the bottom based on what type of control it is.
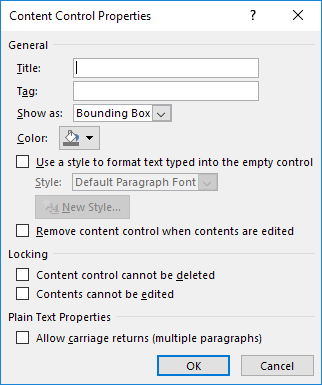
Here you can give the control a title, change the color, style the text and specify whether or not the control can be edited or deleted. At the very bottom are the control specific options, which for the case of a plain text control, is whether you want to allow multiple lines or not. That last option is useful if you need someone to type in a paragraph of text.
So what’s the difference between a plain-text control and a rich text control? Well, not much. In a rich text control, you can change the font/color settings for each word individually, whereas the plain-text control will apply the formatting to all the text. You would think the plain-text control would not allow bold, font changes or color changes, but it does.
Next, I went ahead and added a drop down list control to my form. You’ll see it says Choose an item and that’s it. In order to add items to the list, you have to click on Properties.
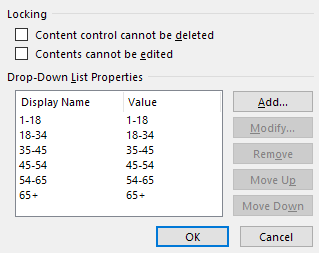
Click the Add button and then type in a name for your choice. By default, the Display Name and Value will be the same, but you can change it if you like. There really is no reason to change the value unless you are writing Word macros and refer to the controls in code.
Once you have added all your choices, go ahead and click OK and you’ll now be able to select the options from the drop-down list.
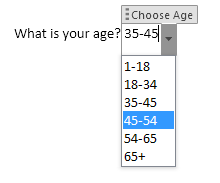
The only difference between the dropdown list control and the combo box control is that the latter allows the user to enter their own value if they please. In the dropdown list, you have to choose from one of choices in the list. In the combo box, you can either choose from the list or type in your own value.
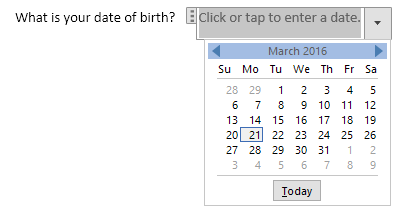
The date picker control works just like any date picker you have probably used on airline booking sites, etc. When you click on it, a calendar appears and you can simply click on the date to select it.
If you click on the Properties button, you’ll see that there are quite a few options for the date picker control.
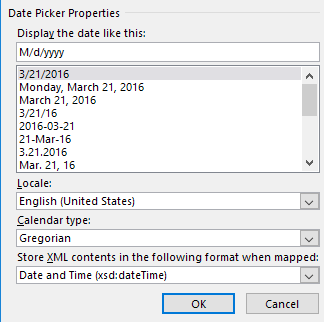
You can choose a different format to display the date and choose a different calendar type. The picture control is another nice option that will allow users to insert a picture easily.
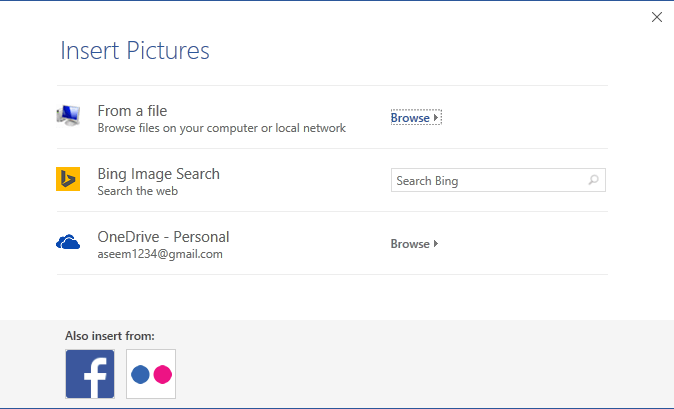
When the user clicks on the image, a dialog will appear where they can choose a picture from their computer, from Bing image search or from OneDrive. They also have options for Facebook and Flickr.
Now let’s add a few checkboxes to our document. Note that when you add a checkbox and try to type text into it, it will tell you that the selection is locked. I believe this is by design. You have to click next to the checkbox and then type in your text.

Lastly, you can insert a building block control, which lets you pick content from Quick Parts and AutoText. If you don’t know what I’m talking about, check out my post on how to use AutoText and Quick Parts in Word. In my example, I added some quotes to a custom AutoText and then linked the control to it via the Properties dialog.

Once you have all the controls in your document the way you want, it might be a good idea to protect the document so that user can only fill out the form fields and that’s it. To do this, click on Restrict Editing on the Developer tab.
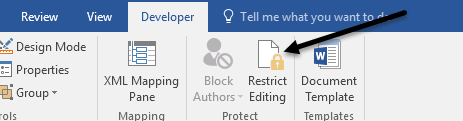
In the pane that shows up on the right, click on the dropdown under Editing restrictions and choose Filling in forms. Make sure to check the Allow only this type of editing in the document box.

Click Yes, Start Enforcing Protection and then enter a password if you like. Now only the form fields will be editable and everything else locked/protected. The user can easily use the TAB key to move between the different form fields.
Overall, Word isn’t the greatest tool for making forms, but it’s decent and probably more than enough for most people. If you have any questions, feel free to comment. Enjoy!