
Excel for Microsoft 365 Word for Microsoft 365 Outlook for Microsoft 365 PowerPoint for Microsoft 365 Project Online Desktop Client Publisher for Microsoft 365 Excel 2021 Word 2021 Outlook 2021 PowerPoint 2021 Project Professional 2021 Project Standard 2021 Publisher 2021 Excel 2019 Word 2019 Outlook 2019 PowerPoint 2019 Project Professional 2019 Project Standard 2019 Publisher 2019 Excel 2016 Word 2016 Outlook 2016 PowerPoint 2016 Project Professional 2016 Project Standard 2016 Publisher 2016 Excel 2013 Word 2013 Outlook 2013 PowerPoint 2013 Project Professional 2013 Project Standard 2013 Publisher 2013 Word 2010 More…Less
In a text box or shape, you can quickly change the color of text, the inside (fill) color, or the color of the border.
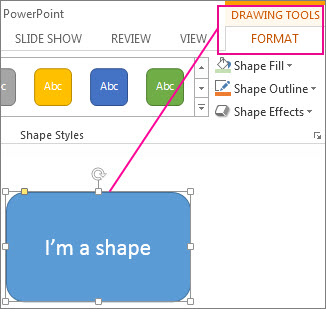
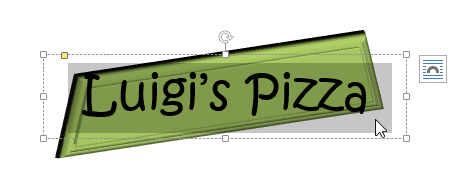
Let’s select the shape—the Drawing Tools appear in the ribbon, with the Format tab active.
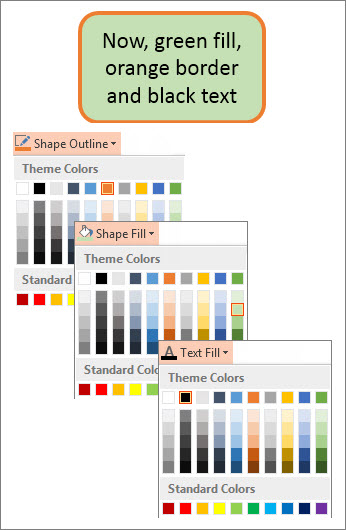
Here’s the same shape after we changed the border to orange, the fill to a light green, and the text to black. We used the Shape Outline, Shape Fill, and Text Fill commands, available on the Format tab under Drawing Tools.
Although the changes we’ll make below are shown in Microsoft PowerPoint, they work the same way in Excel, Word, Outlook, and Project.
Change the text color
-
Select the shape or text box border. When you do that, the Drawing Tools appear.
To change multiple shapes or text boxes, click the first shape or text box, and then press and hold Ctrl while you click the other shapes or text boxes.
-
On the Drawing Tools Format tab, click Text Fill and, under Theme Colors, pick the color you want.
Note: The Text Fill and Text Outline menus might not be active until you start typing in your shape.

To change the text to a color that isn’t in the theme colors
-
Select the shape or text box.
-
On the Drawing Tools Format tab, click Text Fill > More Fill Colors.
-
In the Colors box, either click the color you want on the Standard tab, or mix your own color on the Custom tab. Custom colors and colors on the Standard tab aren’t updated if you later change the document theme.
-
Change the inside (fill) color
-
Select the shape or text box to change. When you do that, the Drawing Tools appear.
To change multiple shapes or text boxes, click the first shape or text box, and then press and hold Ctrl while you click the other shapes or text boxes.
-
Click Shape Fill, and under Theme Colors, pick the color you want.
To change the fill color to a color that isn’t in the theme colors
-
Select the shape or text box.
-
On the Drawing Tools Format tab, click Shape Fill > More Fill Colors.
-
In the Colors box, either click the color you want on the Standard tab, or mix your own color on the Custom tab. Custom colors and colors on the Standard tab aren’t updated if you later change the document theme.
-

Change the border color
-
Select the shape or text box border. When you do that, the Drawing Tools appear.
If you want to change multiple shapes or text boxes, click the first shape or text box, and then press and hold Ctrl while you click the other shapes or text boxes.
-
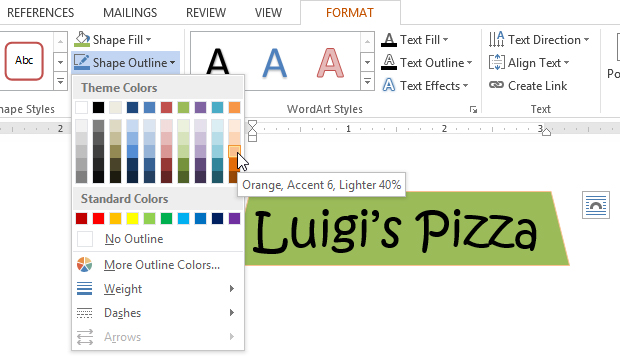
On the Drawing Tools Format tab, click Shape Outline and, under Theme Colors, pick the color you want.
To change the border to a color that isn’t in the theme colors
-
Select the shape or text box.
-
On the Drawing Tools Format tab, click Shape Outline, and then click More Outline Colors.
-
In the Colors box, either click the color that you want on the Standard tab, or mix your own color on the Custom tab. Custom colors and colors on the Standard tab aren’t updated if you later change the document theme.
-

Tip: In PowerPoint, you can also change the border color by clicking Shape Outline (on the Home tab, in the Drawing group).
See Also
Remove or change the border on a text box or shape
Add a fill or effect to a shape
Change the font color (text color)
Change the background or color in Word
Change a message background in Outlook
Change the background color of your slides in PowerPoint
Insert WordArt
Add shapes
Need more help?
Select the shape or text box. On the Drawing Tools Format tab, click Text Fill > More Fill Colors. In the Colors box, either click the color you want on the Standard tab, or mix your own color on the Custom tab.
Just so, Where is fill in Word 2016?
Besides, How do you insert a fill in field in Word 2016? Choose Insert → Field. In the Field names list, choose Fill-in. In the Field Properties Prompt box, enter the text you want to appear to prompt the user for input.
…
After inserting one or more fill-in fields, you treat the document like other Word forms.
- Save the form as a template. …
- Use the form by choosing File ?
What is text fill MS Word? Fill refers to the interior of a WordArt or character. Notes: When you change options in this dialog box, the changes are immediately applied to your WordArt or text, making it easy to see the effects of the changes in your WordArt or text without closing the dialog box.
Subsequently, How do I fill a textbox in Word? Click the shape or text box that you want to add a fill to. To add the same fill to multiple shapes or text boxes, click the first one, and then press and hold SHIFT while you click the others. To add or change a fill color, click the color that you want, or to choose no color, click No Fill.
How do you apply fill text effect in Word?
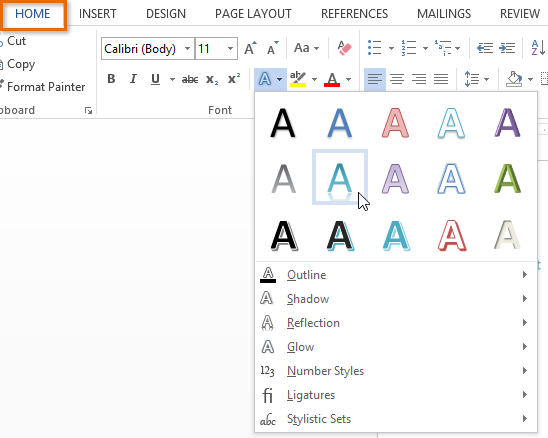
Add or remove text effects
- Select the text that you want to add an effect to.
- On the Home tab, in the Font group, click Text Effect.
- Click the effect that you want. For more choices, point to Outline, Shadow, Reflection, or Glow, and then click the effect that you want to add.
How do you insert a Text Box?
Go to Insert > Text Box, and then select Draw Text Box. Click or tap in the document, and drag to draw the text box the size that you want. To add text to a text box, select inside the text box, and then type or paste text.
How do I insert a Text Box in Word without moving text?
Click the “Insert” tab on the Ribbon and click “Text Box” on the Text panel. Choose the command “Draw Text Box” under the Text Box options.
How do I insert a fill in bubble in Word?
Position the cursor on the Word document and press and hold down the left mouse button. Drag until the word bubble is your preferred size, then release. The bubble appears on the page.
How do you engrave text in Word 2016?
To engrave text, follow these steps:
- Choose the text you want to engrave.
- Make sure the Home tab of the ribbon is displayed.
- Click the small icon at the bottom-right of the Font group. Word displays the Font dialog box. (See Figure 2.)
- Make sure the Engrave check box is selected.
- Click on OK.
Where is the text box in Word?
Insert or Draw a Text Box in Word
Go to the spot in your document where you want the text box and select the Insert tab. Click the Text Box drop-down arrow and pick a Built-In style or Draw a Text Box. If you’re using Word on Mac, go to the Insert tab, click the Text drop-down arrow, and then the Text Box arrow.
How do you insert in Word?
To insert file into Word, the following steps are required:
- First open the Word document. …
- Then click on the place within the document where you want the file to be inserted.
- Click on “Insert” tab located at the top.
- Click on the “Object” drop down.
- Then choose the file to insert. …
- Finally click “Insert”.
How do I insert a text box anywhere in Word?
To insert a text box:
- Select the Insert tab, then click the Text Box command in the Text group.
- A drop-down menu will appear. …
- Click and drag anywhere on the document to create the text box.
- The insertion point will appear inside the text box.
What is a text bubble?
A graphic element taken from comic books that is widely used to convey messages in all forms of publications, including websites. The balloon is a bubble filled with text that points to a person or human-like object. Also called “speech bubbles,” “voice bubbles,” “word balloons” and “text balloons.”
How is engraving done?
Engraving is an intaglio printmaking process in which lines are cut into a metal plate in order to hold the ink. In engraving, the plate can be made of copper or zinc. The metal plate is first polished to remove all scratches and imperfections from the surface so that only the intentional lines will be printed.
What do you put on engraving?
If you want to engrave memorial jewelry to honor your loved one, then check out these engraving ideas.
- We Were Together. I Forgot the Rest.
- Remembered With Love.
- She Walked in Beauty.
- Forever In My Heart.
- We’ll Always Remember You.
- You’ll Always Be in Our Hearts.
How do I emboss a picture in Word?
How do you text bubbles?
To open the conversation, tap the bubble. At the bottom left, tap Manage.
…
To create a bubble for a conversation:
- Swipe down from the top of the screen.
- Under “Conversations,” touch and hold the chat notification.
- Tap Bubble conversation .
How do I make bubble letters in Word?
WordArt
- Open a blank 8.5-by-11 document in Publisher.
- Click the “Insert” tab at the top of the screen. Click the “WordArt” button on the “Insert” tab’s ribbon.
- Click the third WordArt style from the left. When the “Edit WordArt Text” window pops up, type the words to convert into bubble letters into the “Text” box.
What are the typing bubbles called?
Screenshot/Tech Insider If you use Apple’s iMessage, then you know about the “typing awareness indicator” — the three dots that appear on your screen to show you when someone on the other end of your text is typing. Or so you thought.
What is an engraving example?
Examples of contemporary uses for engraving include creating text on jewellery, such as pendants or on the inside of engagement- and wedding rings to include text such as the name of the partner, or adding a winner’s name to a sports trophy. Another application of modern engraving is found in the printing industry.
Can you engrave over an engraving?
It is possible to engrave over the original to bring it back to life. If you want a completely different engraving, it depends on the type of metal and depth of the engraving. Soft metals can be polished down and re-engraved. Harder metals, like stainless steel, are not so easily fixed.
What is engraved writing?
to inscribe (a design, writing, etc) onto (a block, plate, or other surface used for printing) by carving, etching with acid, or other process. to print (designs or characters) from a printing plate so made. to fix deeply or permanently in the mind.
Can you engrave over engraving?
It is possible to engrave over the original to bring it back to life. If you want a completely different engraving, it depends on the type of metal and depth of the engraving. Soft metals can be polished down and re-engraved. Harder metals, like stainless steel, are not so easily fixed.
What do you write in an engraved gift?
Our Favorite Custom Engravings to Express LOVE
- My heart belongs to him.
- My heart belongs to her.
- My heart belongs to you.
- Forever yours.
- Yours forever.
- I Promise to Love you Forever.
- I’m blessed to have you as my first.
- I love you.
What should I engrave for my best friend?
Here are some of our favourite engraving ideas:
- You are enough.
- You have the best smile.
- You inspire me.
- Nothing can stop you.
- Double trouble.
- Lucky to have you.
- Laughter, fun & friendship.
- Blessed to have you.
- Reference 1
- Reference 2
- Reference 3
- Reference 4
- Reference 5
Click the shape or text box that you want to add a fill to. To add the same fill to multiple shapes or text boxes, click the first one, and then press and hold SHIFT while you click the others. To add or change a fill color, click the color that you want, or to choose no color, click No Fill.
Contents
- 1 How do I fill a textbox with color in Word 2016?
- 2 Where is fill effects in Word 2019?
- 3 How do I color the background of text in Word?
- 4 How do I fill a textbox in Word?
- 5 How do I fill in a fillable form in Word?
- 6 How do you apply text effects in Word?
- 7 How do you use fill effects?
- 8 How do I fill a shape with text in Word?
- 9 How do I insert a background into a Word document?
- 10 How do you highlight all text in Word?
- 11 How do I insert Greek text in Word?
- 12 How do I fix indentations in Word?
- 13 How do I make a Word document fillable and not editable?
- 14 How do I create a fillable form in Word with lines?
- 15 How do I create a fill in form?
- 16 How do I insert a GREY text field in Word 2016?
- 17 What is text effects in Microsoft Word?
- 18 What are effects applied to text?
- 19 Which of the following is a text effect?
- 20 What is used Fill option?
How do I fill a textbox with color in Word 2016?
Change the inside (fill) color
- Select the shape or text box.
- On the Drawing Tools Format tab, click Shape Fill > More Fill Colors.
- In the Colors box, either click the color you want on the Standard tab, or mix your own color on the Custom tab.
Where is fill effects in Word 2019?
To see the available effects, follow these steps:
- Select the drawing object you want to modify.
- Click on the down-arrow next to the Fill Color tool on the Drawing toolbar. Word displays a color menu.
- From the color menu, click your mouse on Fill Effects. Word displays the Fill Effects dialog box. (See Figure 1.)
How do I color the background of text in Word?
Change the Text Color in Microsoft Word
- Select the text you want to work with.
- Go to the Home tab.
- Select the Font Color drop-down arrow to open the Font Color menu.
- Hover over the colors to see a preview of the color on the selected text.
- To see additional colors, chose More Colors.
How do I fill a textbox in Word?
Click the shape or text box that you want to add a fill to. To add the same fill to multiple shapes or text boxes, click the first one, and then press and hold SHIFT while you click the others. To add or change a fill color, click the color that you want, or to choose no color, click No Fill.
How do I fill in a fillable form in Word?
Creating Fillable Forms Using Microsoft Word
- Enable Developer Tab. Open Microsoft Word, then go to the File Tab > Options > Customize Ribbon > check the Developer Tab in the right column > Click OK.
- Insert a Control.
- Edit Filler Text.
- Design Mode button again to exit the mode.
- Customize Content Controls.
How do you apply text effects in Word?
Add an effect to text
- Select the text that you want to add an effect to.
- On the Home tab, in the Font group, click Text Effect.
- Click the effect that you want. For more choices, point to Outline, Shadow, Reflection, or Glow, and then click the effect that you want to add.
How do you use fill effects?
Office gives you the option of filling your object with an image that you have downloaded or created.
- Access the Fill Effects dialog box.
- Select the Picture tab.
- Click Select Picture…
- Using the Look in pull-down list, navigate to and select the graphic file you want to use.
- Click Insert.
- Click OK.
- Click OK.
How do I fill a shape with text in Word?
How to Format Text to Fit a Shape in Microsoft Word
- Click on the shape you want, such as a square, circle or star.
- Right-click on the shape and select “Add Text.”
- Type or paste your text into the shape.
- Click outside the shape to finalize the text.
How do I insert a background into a Word document?
Add or change a background image or watermark
- Go to Design or Layout, and select Watermark.
- Select Picture > Select Picture, browse through your image files, and choose the image that you want to use.
- Select Insert.
- If you want the background image to show with full color intensity, clear the Washout check box.
How do you highlight all text in Word?
Select all text
- Click anywhere within the document.
- Press Ctrl+A on your keyboard to select all text in the document.
How do I insert Greek text in Word?
To insert a Greek character through the Symbols menu, select the “Insert” tab, click “Symbol,” and then select “More Symbols… .” All the Greek letters with no markings, capital and lowercase, are available with “(Normal Text)” selected on the Font drop-down menu.
How do I fix indentations in Word?
Adjust indents and spacing in Word
- Select one or more paragraphs that you want to adjust.
- Go to Home and then select the Paragraph dialog box launcher .
- Choose the Indents and Spacing tab.
- Choose your settings, and then select OK.
How do I make a Word document fillable and not editable?
Head on to the “Protect” section on the ribbon and click the button labeled “Protect Document.” You should then click the button named “Restrict Formatting and Editing.” On the options that appear, select the one that says “Allow only this type of editing in the document” and pick “Filling in forms.” Once you’re done,
How do I create a fillable form in Word with lines?
Firstly, click “Underline” under “Home” tab and choose one line style. Then press “Shift+ Underscore” to get a line. Then place cursor above the line and type the content. As you type, you will find the line gets longer and longer.
How do I create a fill in form?
How to create fillable PDF files:
- Open Acrobat: Click on the “Tools” tab and select “Prepare Form.”
- Select a file or scan a document: Acrobat will automatically analyze your document and add form fields.
- Add new form fields: Use the top toolbar and adjust the layout using tools in the right pane.
- Save your fillable PDF:
How do I insert a GREY text field in Word 2016?
Select and highlight the text box, and then select your preferred shape style for the text box. To apply a gray fill color, click the “Shape Fill” button and click on your preferred shade of gray in the color-picker tool.
What is text effects in Microsoft Word?
Text Effects and Typography in Microsoft word means applying special formats to the content such as an Outline, Shadow, Reflection or Glow is known as the Text Effects. Similarly, changing the Styles, Ligatures, and Stylistics Sets of the numbers is called Typography settings.
What are effects applied to text?
You can add shadows, bevels, reflections, and much more. The Text Effects button is in the Font group of the ribbon. The top options in the Text Effects menu have some pre-created styles to choose from. The Text Effects menu also has the options Outline, Shadow, Reflection, and Glow.
Which of the following is a text effect?
Adding additional features for text include background color, making text as blur, changing font color, outlining the text, changing font size, changing font style, and shadowing the text. Text effects can be added in word document as follows:Select the way the text needs to be changed.
What is used Fill option?
What’s this Fill Handle in Excel? ‘Fill Handle’ is a tool that you can use to autocomplete lists in Excel. For example, if you have to enter numbers 1 to 20 in cell A1:A20, instead of manually entering each number, you can simply enter the first two numbers and use the fill handle to do the rest.
Lesson 21: Text Boxes and WordArt
/en/word2013/shapes/content/
Introduction
Text boxes can be useful for drawing attention to specific text. They can also be helpful when you need to move text around in your document. Word allows you to format text boxes and the text within them as WordArt.
Optional: Download our practice document.
To insert a text box:
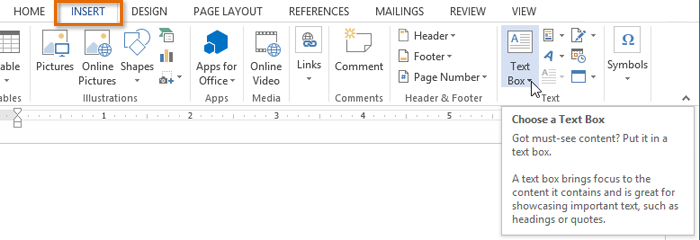
- Select the Insert tab, then click the Text Box command in the Text group.
 Clicking the Text Box command
 - A drop-down menu will appear. Select Draw Text Box.
 Clicking Draw Text Box
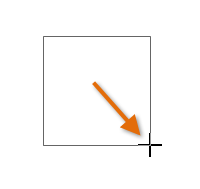
 - Click, hold, and drag to create the text box.
 Drawing a text box
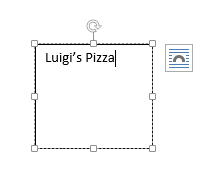
 - The insertion point will appear inside the text box. You can now type to create text inside the text box.
 Creating text
 - If you want, you can select the text and then change the font, color, and size by using the commands on the Home tab.
 The formatted text
 - Click anywhere outside of the text box to return to your document.

You can also select one of the built-in text boxes that have predefined colors, fonts, positions, and sizes. If you choose this option, the text box will appear automatically, so you will not need to draw it.
 A built-in text box
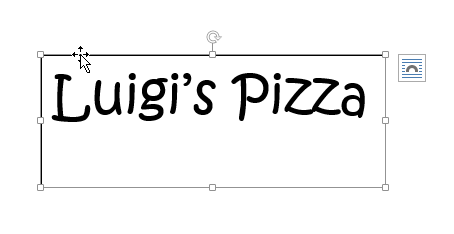
To move a text box:
- Click the text box you want to move.
- Hover the mouse over one of the edges of the text box. The mouse will change into a cross with arrows .
- Click, hold, and drag the text box to the desired location.
 Moving a text box
 .
.
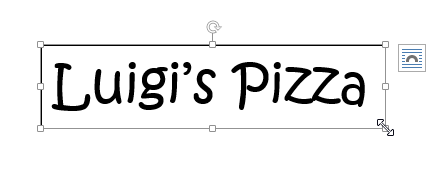
To resize a text box:
- Click the text box you want to resize.
- Click, hold, and drag any of the sizing handles on the corners or sides of the text box until it is the desired size.
 Resizing a text box
Modifying text boxes
Word offers many options for changing the way text boxes appear in your document. You can change the shape, style, and color of text boxes. Additionally, when you want to add a little more dimension you can add a shadow effect.
To change the text box shape:
Changing the shape of a text box can be a useful option for creating an interesting look in your document.
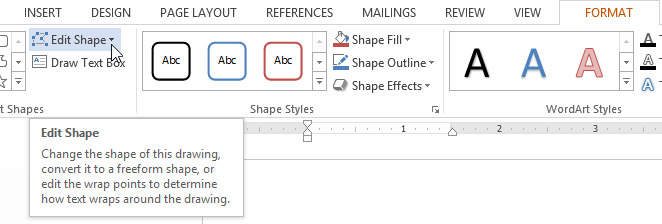
- Select the text box you want to change. The Format tab will appear.
- From the Format tab, click the Edit Shape command.
 Clicking the Edit Shape command
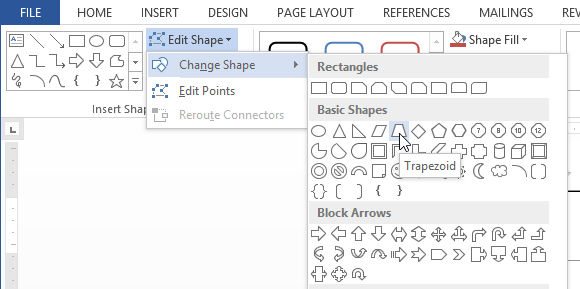
 - Hover the mouse over Change Shape, then select the desired shape from the menu that appears.
 Selecting a shape
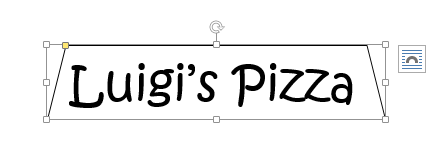
 - The text box will appear formatted as the shape.
 The text box formatted as a shape
To change the fill color:
- Select the text box you want to change.
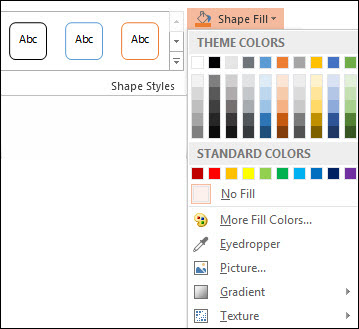
- On the Format tab, click the Shape Fill drop-down arrow. The Shape Fill menu will appear.
- Select the color you want to use. To view more color options, select More Fill Colors.
 Changing the shape fill color
 - The text box will appear in the selected fill color.
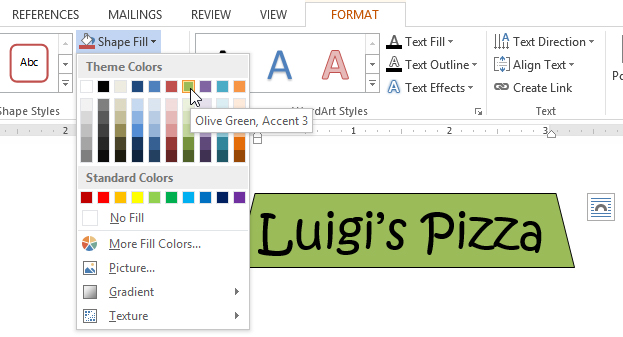
If you want to use a different type of fill, select Gradient or Texture from the drop-down menu. You can also select No Fill to make it transparent.
To change the shape outline:
- Select the text box you want to change.
- On the Format tab, click the Shape Outline drop-down arrow. The Shape Outline menu appears.
- Select the color you want to use. If you want to make the outline transparent, select No Outline.
 Changing the text box outline color
 - The text box will appear in the selected outline color.
From the drop-down menu, you can change the outline color, weight (thickness), and whether or not it is a dashed line.
To change the shape style:
Choosing a shape style allows you to apply preset colors and effects to quickly change the appearance of your text box.
- Select the text box you want to change.
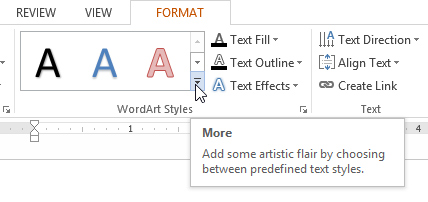
- On the Format tab, click the More drop-down arrow in the Shape Styles group.
 Clicking the More drop-down arrow
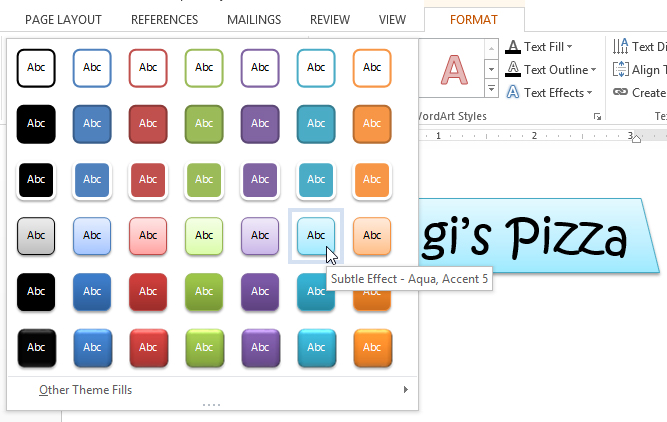
 - A drop-down menu of styles will appear. Select the style you want to use.
 Changing the text box style
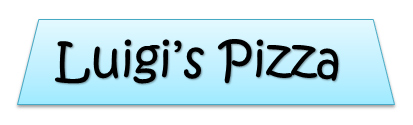
 - The text box will appear in the selected style.
 The new style
To change shadow effects:
Adding a shadow to a shape can make it appear as though it is floating above the page, and it can help to add contrast between the shape and the background.
- Select the text box you want to change.
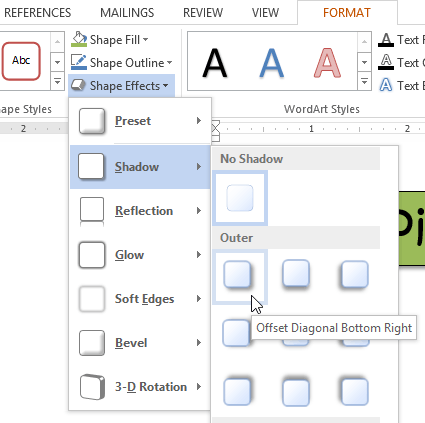
- On the Format tab, click the Shape Effects drop-down arrow. In the menu that appears, select the shadow you want to use.
 Choosing a shadow type
 - The shape will appear with the selected shadow.
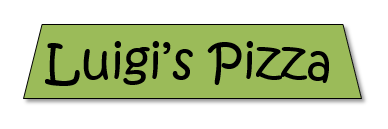
 The text box with a shadow
To adjust the shadow color, size, distance, and more, select Shadow Options from the drop-down menu. The Format Shape pane will appear.
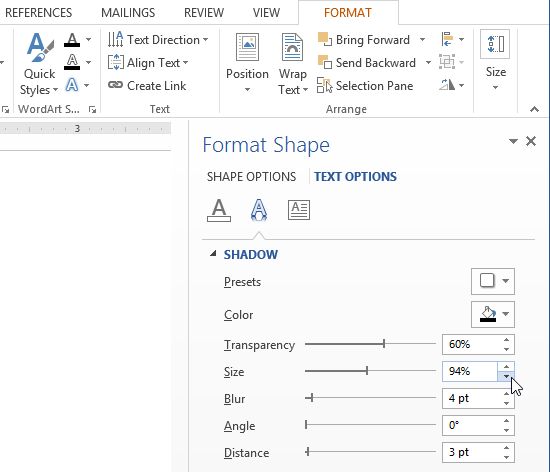 The Format Shape pane
3D effects
There are two kinds of effects you can apply to text boxes to give them a 3D appearance: 3-D Rotation and Bevel. 3-D Rotation makes text boxes appear as if you are viewing the text box from a different angle. Bevel adds thickness and a rounded edge to text boxes.
To use 3-D Rotation:
- Select the text box you want to change.
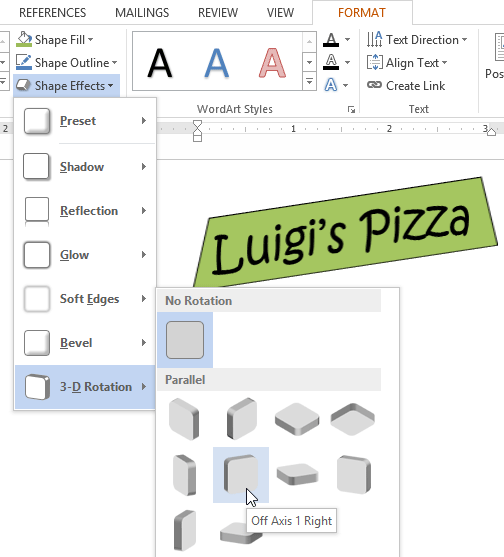
- On the Format tab, click the Shape Effects drop-down arrow. In the menu that appears, select the desired 3-D Rotation effect.
 Choosing a 3-D effect
 - The text box will appear in the selected 3-D Rotation effect.
If you want, you can customize the 3-D Rotation. Select 3-D Rotation Options… from the drop-down menu and the Format Shape pane will appear. From here, you can adjust the rotation values.
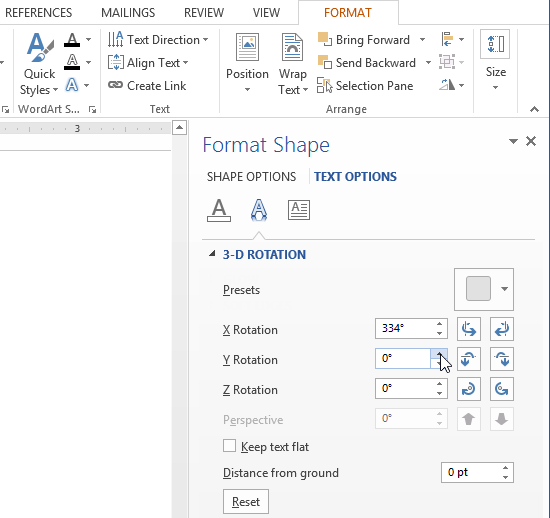 Customizing the 3-D rotation
To use Bevel:
- Select the text box you want to change.
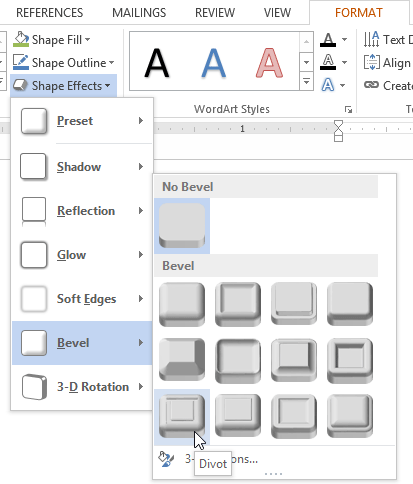
- On the Format tab, click the Shape Effects drop-down arrow. In the menu that appears, select the desired bevel preset.
 Choosing a bevel preset
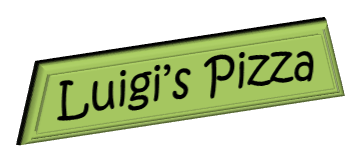
 - The text box will appear in the selected bevel effect.
 The text box with a bevel effect
If you’ve changed the shape of your text box, it’s important to note bevel doesn’t work with every type of shape.
If you want, you can customize the bevel effect. Select 3-D Options… from the drop-down menu. The Format Shape pane will appear. From here, you can modify the width, height, and depth of a bevel.
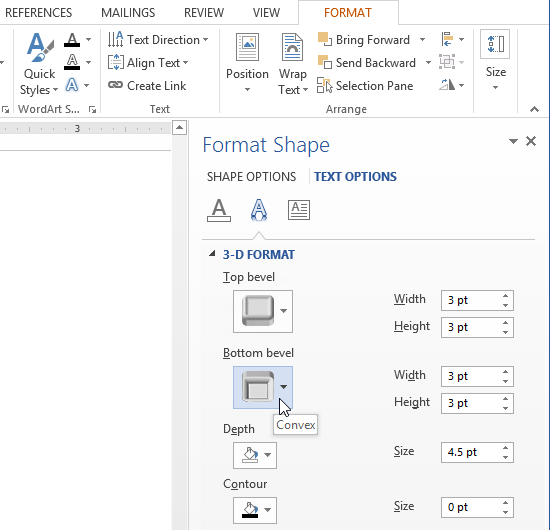 Customizing the bevel
Creating WordArt
In addition to adding effects to a text box, you can add effects to the text inside the text box, which is known as WordArt. For the most part, the types of effects you can add are the same as the ones you can add to shapes or text boxes (shadow, bevel, etc.). However, you can also Transform the text to give it a wavy, slanted, or inflated look.
Generally, you shouldn’t use WordArt in more formal documents like resumes and cover letters because it may appear too casual.
To apply a quick style to text:
A quick style will automatically apply several effects to your text at once. You can then refine the look of your text by adding or modifying text effects.
- Select the text box, or select some text inside of the text box.
 Selecting text inside of a text box
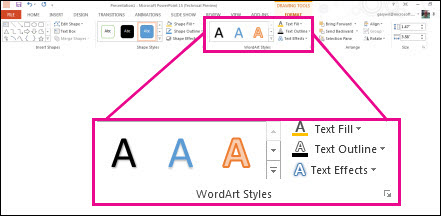
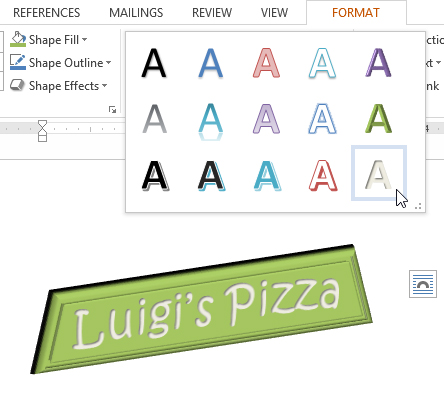
 - On the Format tab, click the Quick Styles command in the WordArt Styles group. A drop-down menu of text styles will appear. Select the style you want to use.
 Selecting a Quick Style
 - The text will appear in the selected style. If you want, you can change the font or font color from the Home tab.
To convert regular text into WordArt:
For text to be formatted as WordArt, it must be inside a text box. However, there is a shortcut that allows you to convert text into WordArt even if it’s not in a text box.
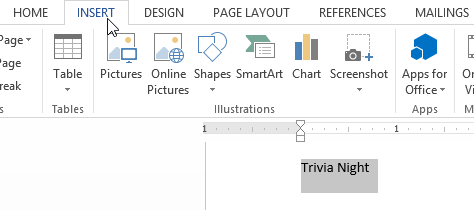
- Select the text you want to convert, then click the Insert tab.
 Clicking the Insert tab
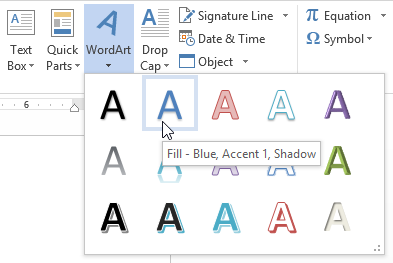
 - Click the WordArt drop-down arrow in the Text group. A drop-down menu of WordArt styles will appear. Select the style you want to use.
 Changing the text to WordArt
 - Word will automatically create a text box for the text, and the text will appear in the selected style. If you want, you can change the font or font color from the Home tab.
 Text as WordArt

Some effects, such as shadows, can be added from the Text Effects menu in the Home tab. When you add effects in this way, it will not place the text in a text box.
 Additional text effects
To transform text:
- Select the text box, or select some text inside of the text box.
 Selecting text inside of a text box
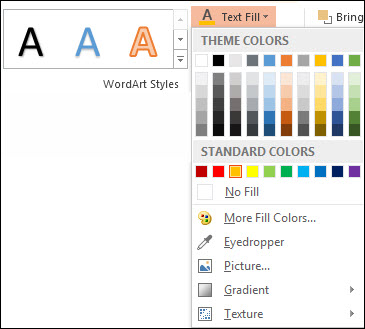
 - On the Format tab, click the Text Effects drop-down arrow in the WordArt Styles group.
 Clicking the Text Effects command
 - A drop-down menu of effects will appear. Hover the mouse over Transform and select a transform effect from the menu that appears.
 Selecting a transform effect
 - The text will transform into the selected style.
 The transformed text

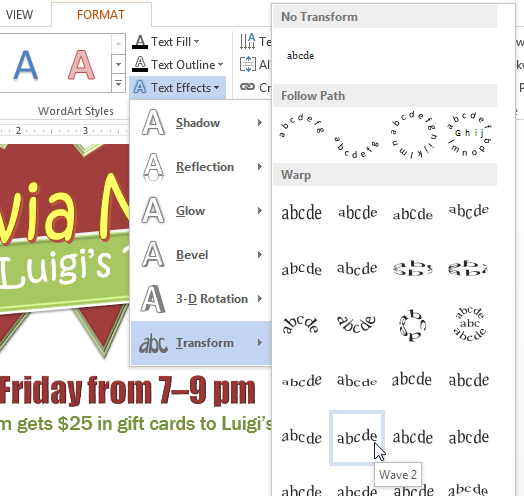

If desired, you can add additional effects such as shadow, bevel, and more to the transformed text.
Challenge!
- Create a new Word 2013 document. If you want, you can use our practice document.
- Insert a text box.
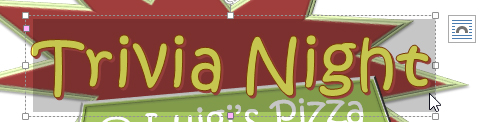
- Enter some text into the text box. If you’re using the example, enter the text Every Friday from 7-9 pm.
- Move the text box to a new location.
- Try changing the shape of the text box.
- Change the fill color of the text box.
- Change the outline of the text box to No Outline.
- Try applying some effects to the text box.
- Add some WordArt effects to the text.
/en/word2013/arranging-objects/content/
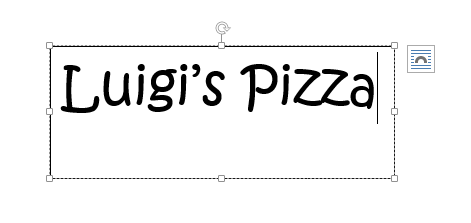
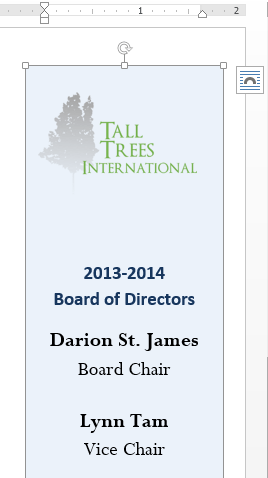
Hello, lovely people, in this tutorial we’re going to look at making this red box column thing that sits over here, with a bunch of text, width fill. Let’s go and make this, it’s called a text box.
So first thing we need to do is, we need to be conscious of where we have our cursor flashing, because it’s where it’s going to kind of be anchored to. It doesn’t really matter, I’m going to put mine at the beginning of my title, and we’ll look at it in a bit more detail afterwards.
So, cursor’s there, I’m going to go to ‘Insert’, you might be at ‘Home’, go to ‘Insert’, and then we’re going to find one called ‘Text Box’, there he is there. Couple of other options, but we’re going to put in this simple text box, and it kind of goes in line, which is a bit weird, it kind of goes in and just kind of gets all jammed in there.
Next thing we need to do, oops, ‘undo’ed too much. Here he is there. What we’re going to do is, with him selected, there’s this little flag option here, it’s called ‘Layout Options’. You got to click the edge, click on this, and then we’re going to use this one that says ‘Text Behind’. It just means it’s kind of detached from the flow of text, and I can move him around. Now I can grab this edge, go upto here, and kind of align him up with this, drag him down so it fits in there. I’m going maybe move him just a tiny bit. Lovely.
You can use your arrow keys. Can you see, on my keyboard, well you can’t see, but tap, tap on my keyboard. We need to do a couple of things now. I want to remove the border, and give it a big background color and play with this padding, so let’s do that now.
So the first thing we need to do is, with this selected, grab the edge of it. You might be still on ‘Home’. Can you see this little option that says ‘Format’? That thing there only appears when you have the text box selected, watch this, it disappears. So grab the edge. It’s contextual, it means that it’s optional on what I’ve got selected. You can see a bunch of different stuff there, some presets, colored presets. There’s some text styles, terrible. I’m ‘undo’ing. So what I want to do though is, ‘Shape Fill’, I want to pick my corporate color, if you haven’t— you can pick any color here, you can add more colors, pick them from here, or type them in if you know the RGB value, but I’ve got ones— I’ve set the defaults to that red. Where it says ‘Outline’, I’m going to go to ‘No Outline’, so there’s no line around the outside.
Next thing I want to do is I want to push the padding away, it’s a bit too close to the edge here, so with it selected, I’ll grab the outside of it, and go up to here where it says ‘Shape Styles’. There’s all sorts of shape styles, but, can you see this little flag, these are really important. They don’t look very exciting, but these little things— showing you some information, if you pop that out it gives you a lot more, and in our case we want to play around with this last one here which says ‘Layout and Properties’. We’re going to go to ‘Text Box’, and there’s our margins. You can just keep adjusting these depending on what you want to do.
Now, I’ve pretty much written mine out, so I know what I want to do. The problem is, I’ve written them down in points because I was designing this stuff on a different computer. Now, let’s say that you’ve got them— at the moment my computer is set to inches, great. If you have got millimeters though, or in my case I’ve used points. You can go in here and just select them, and actually just type in points, and it will convert them for you. It’s a cool little extra feature.
So, I wanted ’24’, you can see inches are going to be too big, but if I put ‘pt’ afterwards, you can see, it’s converted it, and if I ‘tab’ down to the next one, it’s ‘.33 inches’. Nice. So you can type in anything. If I want ‘5mm’, it will convert it for me as well. The left and the right are going to be the same, so I know it’s ‘0.33’, and the top, I can’t remember what was mine, add ’40’ for the top, ‘pt’, and the bottom I’ll do ’40’ as well. ’40 pt’. Great little conversion.
Any text box that you see anywhere in Word, over here you can type these in and it will convert it for you without having to do anything. So that’s how to adjust the padding. We’ve done the color, let’s do the fonts that go inside this thing now.
So what I’m going to use is— I’m going to grab this bit here, these little bits of text I’m going to use, I’m going to cut them out, so ‘Edit’, ‘Cut’, and then there’s an option up here— sorry, not ‘Edit’, ‘Cut’, it’s just click this ‘Cut’ button, or ‘Control X’. I select this text, delete it, paste this in here.
Now I’m going to do some basic formatting, just select all the text, I’m going to go and pick you, ‘Arial’, it’s going to be ’10’ point, no, it’s going to be bigger, it’s going to be ’14’. Calm down, Dan. And it’s going to be ‘Bold’, and it’s going to be ‘white’. And what I want to do is, put a ‘return’ in, I’m going to grab page 2, and say— actually, I’m going to put in ’10’. I’d like all you guys to be ‘white’.
What I’d like to do as well is, I’d like to remove this spacing between the two, it’s called space after, so with this selected here I can go to my little drop down, and go to ‘Remove Space After’, so it kind of jams up next to it, and what I’d like to do is, maybe this line underneath, bit of a horizontal rule, so I’m going to put a ‘return’, because there’s a gap between the two, and I want to put a horizontal rule. To put a horizontal ruler in, that goes to the edge, it’s under this border, so under ‘Home’, there’s little icon, and there’s a bunch of different stuff. The one you want is ‘Horizontal Line’.
By default— I don’t know why Word— Word likes to put a drop shadow underneath it, it takes the font color, so it’s white, but if I double click it I can get into some adjustments for it, and I definitely don’t want to have the shady background, and I want to use this solid color, which is great, and you can play around with how tall it is, how thick the line is, a bunch of different stuff. I’m going to click ‘OK’, that’s what I want.
Now, in terms of the color, I got to double click it again, and there’s the color, white. Nice. I said it takes the font color. That’s that guy. I’m going to put in— I’ve got the line, what I might do for this one as well, there’s this space after between the line and after page 2, so with this selected, I go to this, and I’m going to say ‘Remove Space After’.
The next bit’s going to be just repeating. It could be a little boring, so if you want to skip to the end and skip to the next tutorial, go and do that. If you want to follow me along, I’m going to put in some ‘return’s after these pages, and I’m going to grab this horizontal row, select it, copy it, paste it underneath these, underneath you, underneath you… and I want to match the size and the space before all these things. So, couple of things we need to do. We’ll look at the Format Painter, we’re going to look at it in a bit more detail later on, but basically it’s this. Select the text you’d like, hit ‘Format Painter’, paint it on the things to change them. Can’t be selected… here we go. Same with this, that’s what I like, with the space after gone. Does the Format Painter pick it up? It does. You, you, you…
We could set up styles, and we’re going to look at styles in a little bit, so you probably be— probably differently, you definitely want to do that, especially— this is not too long, there’s not too many things going on, so with the style we have for, it will probably take you just as long as we just did.
One of the things we’re going to do is, there’s a nice big gap at the top, but this guy here at the top is quite jammed in, so I want the space in here, so you could totally just do a return. Nobody’s going to find you after I do, if you’re not doing it properly, but the proper way is, we’ve done space after, we can do space before as well. So, with your cursor anywhere in this heading here, I can say— this one here, go to ‘Line Spacing’, this one called ‘Space Before’. How much do I want? Maybe ’20 pt’ I think, yes, gives a nice space there, so what I can do now is use my Format Painter. I should have totally done this before I put this space before and before I did the first bit of content Format Painter.
Now, cool little shortcut is, we can do ‘Control Shift C’. ‘Control Shift C’ will kind of copy the format, and then I can select this and go ‘Control Shift V’. Highlight you, ‘Control Shift V’.
All right, so that’s formatting of this red box on the side here, it’s a text box, can be moved. We’ve got some padding going on, we’ve looked at format painting a little bit, space before, and horizontal rule. Let’s get on to our next video.