
One of the main aspects of modern business is gathering and sharing information with others.
In this article, several ways to export/import MySQL data to an Excel file will be explained. The first method will show the exporting process when the SELECT INTO … OUTFILE statement is used. After that, the Excel features for export/import MySQL data, as well as MySQL add-in for Excel, will be explained, and in the end, the Export to Excel option from the ApexSQL Database Power Tools for VS Code extension will be shown.
The following methods will be used:
- The SELECT INTO … OUTFILE statement
- The From Database feature in Excel
- The MySQL for Excel add-in
- Export to Excel using a third-party software
Export/Import MySQL data to Excel using the SELECT INTO … OUTFILE statement
One of the commonly used MySQL statement which can be included in the SELECT statements for exporting data to specific (e.g., .txt, .CSV) file format is SELECT INTO … OUTFILE statement. This statement writes a selected row to a file. Columns and line terminators can be specified to produce a specific output format.
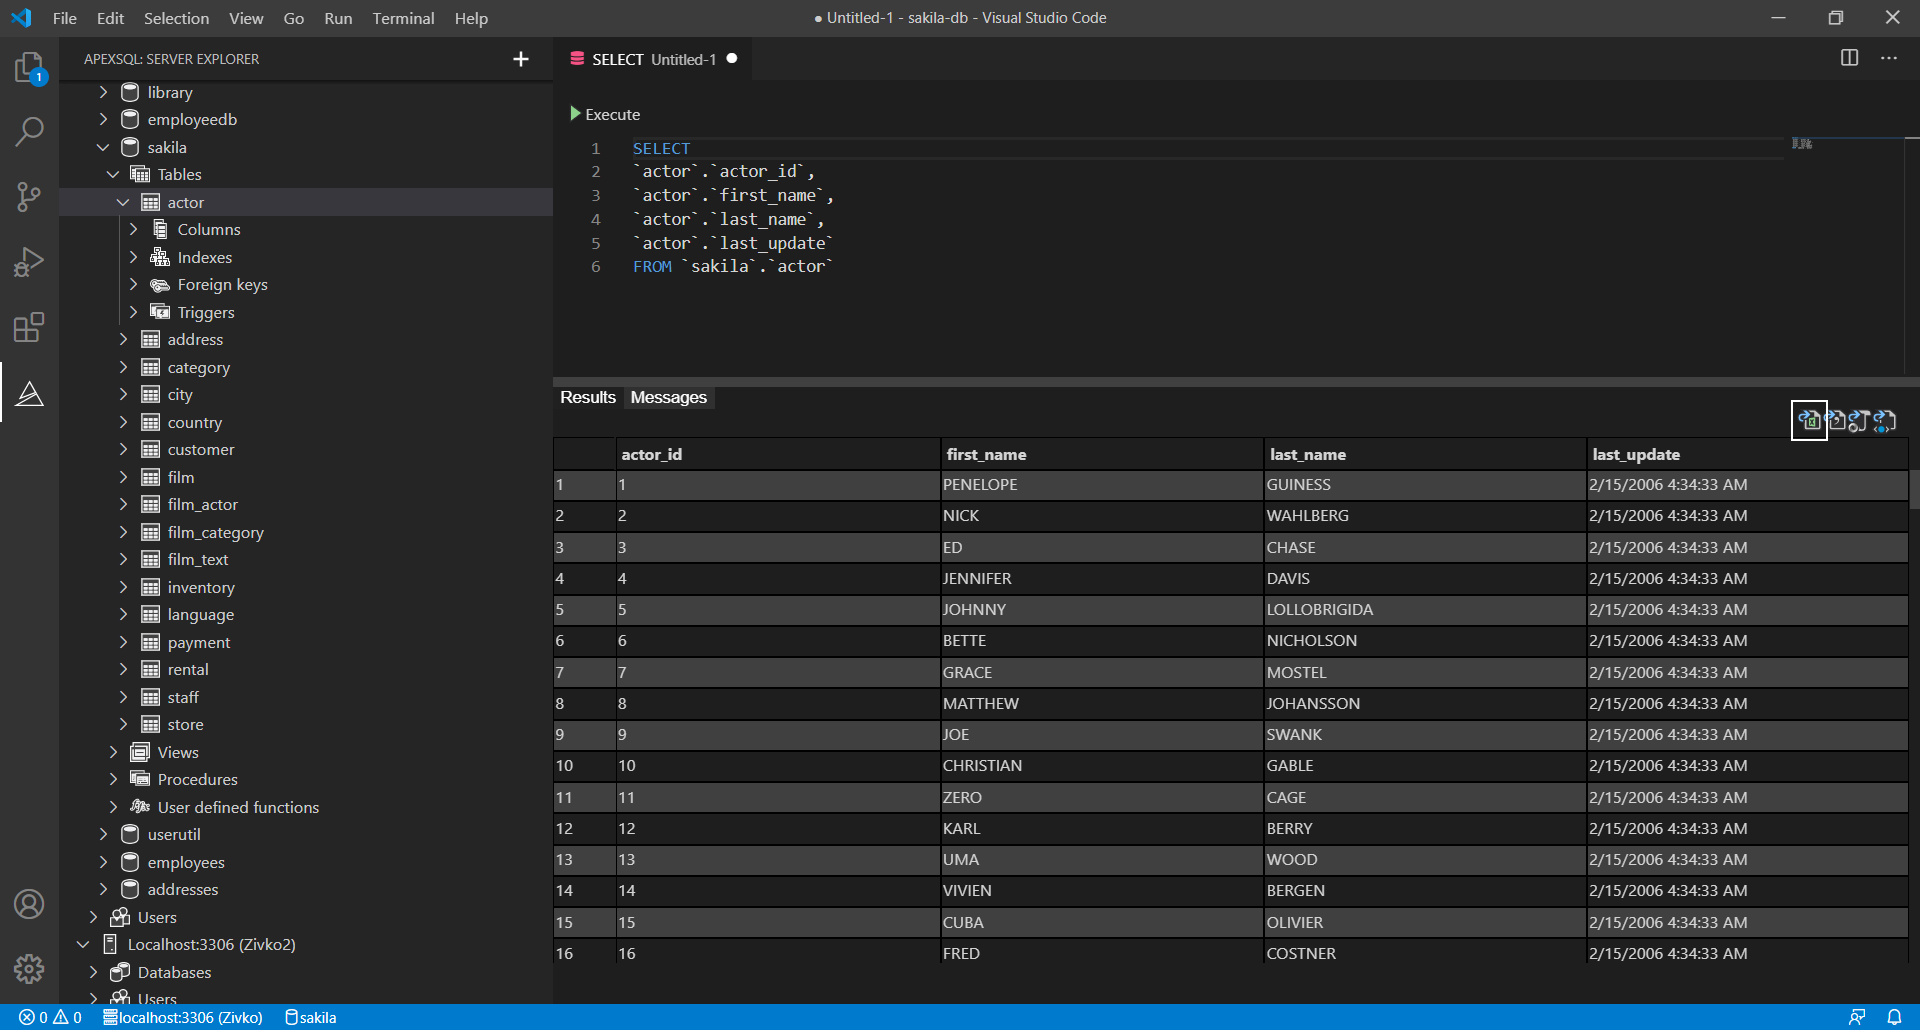
In a query editor, execute a SELECT statement which results want to be exported, add the location where data should be exported, and specify the file format. In the example below, the .txt file format is used:
SELECT `actor`.`actor_id`
   ,`actor`.`first_name`
   ,`actor`.`last_name`
   ,`actor`.`last_update`
 FROM `sakila`.`actor`
 INTO OUTFILE 'C:/ProgramData/MySQL/MySQL Server 8.0/Uploads/actor.txt' FIELDS TERMINATED BY ',' ENCLOSED BY '"' LINES TERMINATED BY 'rn'
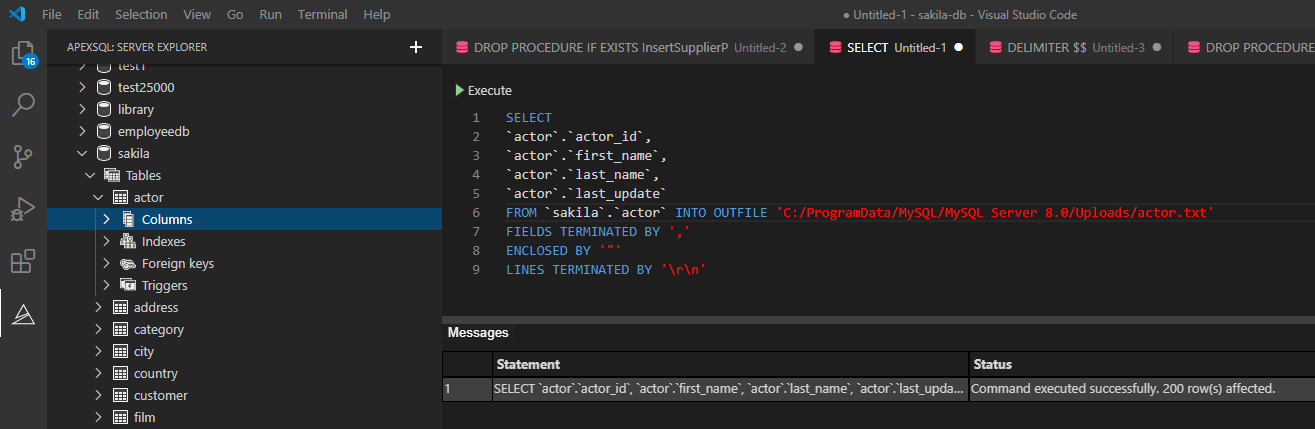
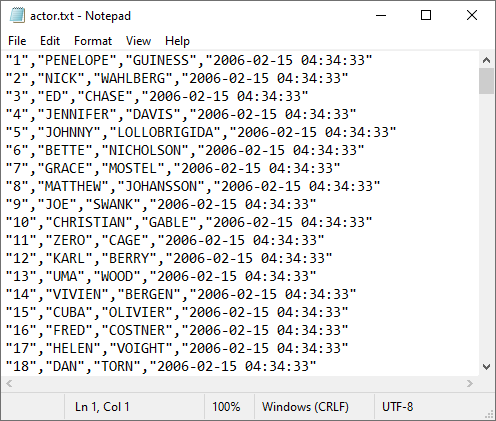
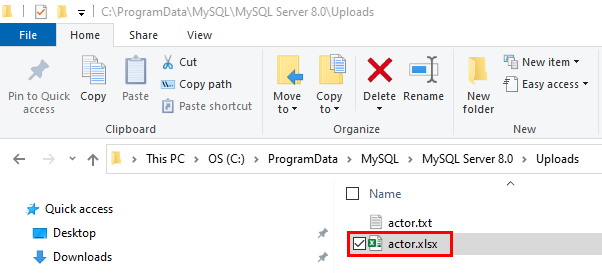
When the above statement is executed, all exported data will be in the actor.txt file:
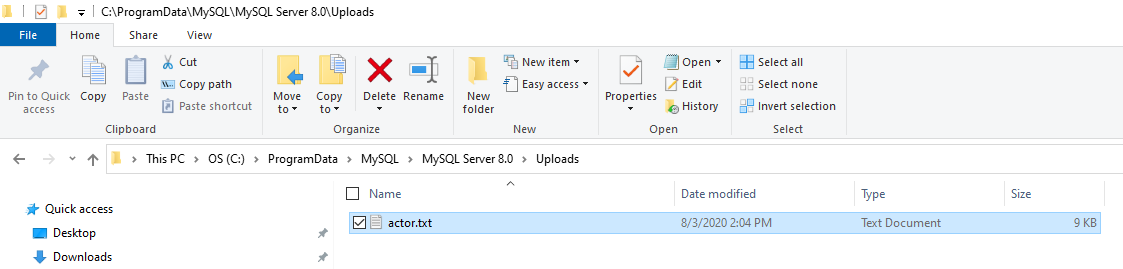
Under the specified location:
-
For more details about SELECT INTO … OUTFILE statement, see How to export MySQL data to CSV article.
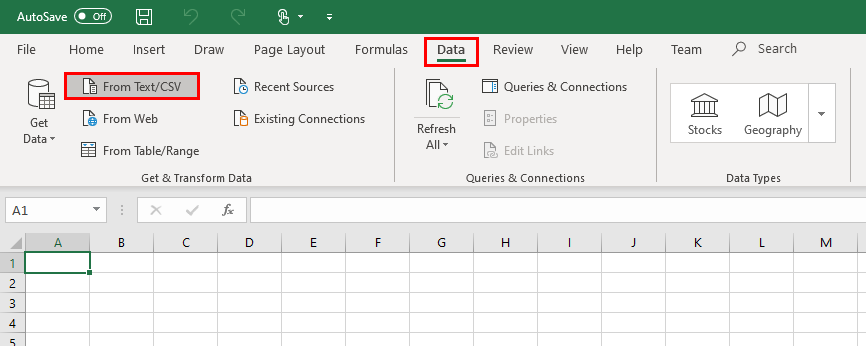
When the data is exported, let’s open it in Excel and save it in .xlsx file format.
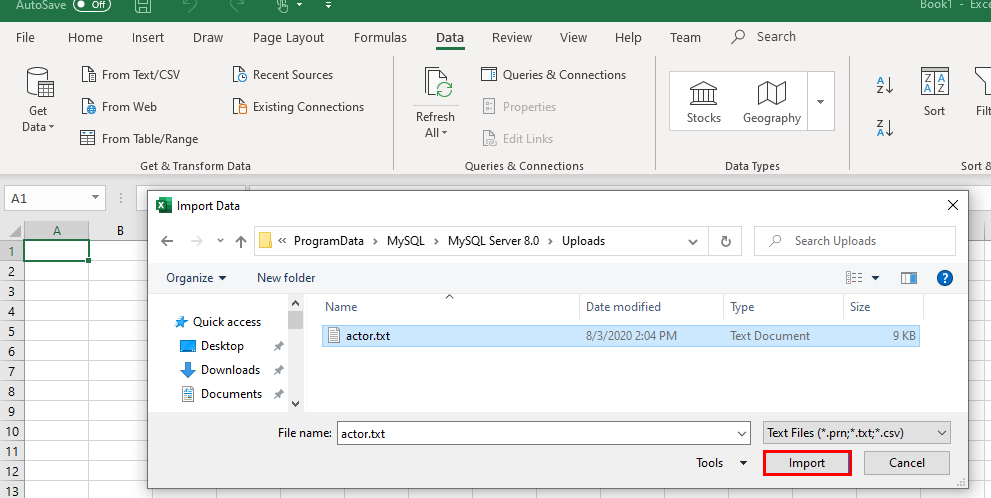
Open Excel and under the Data tab, click the From Text/CSV button:
Navigate to the location of the exported .txt file and click Import:
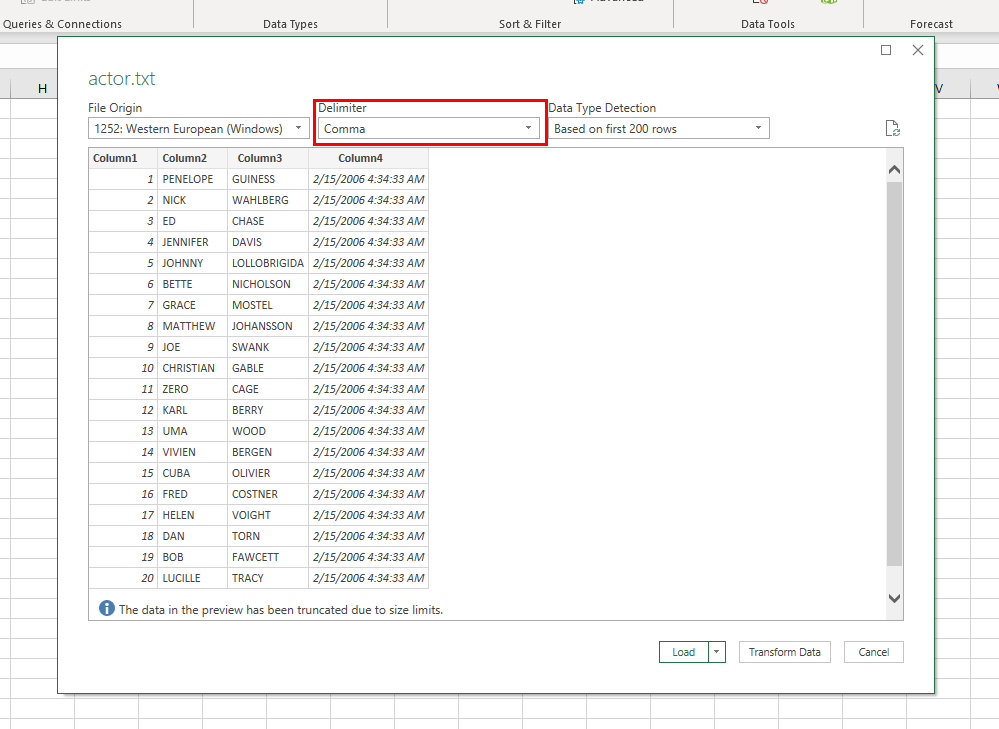
In the newly opened dialog, choose appropriate delimiter and click Transform Data:
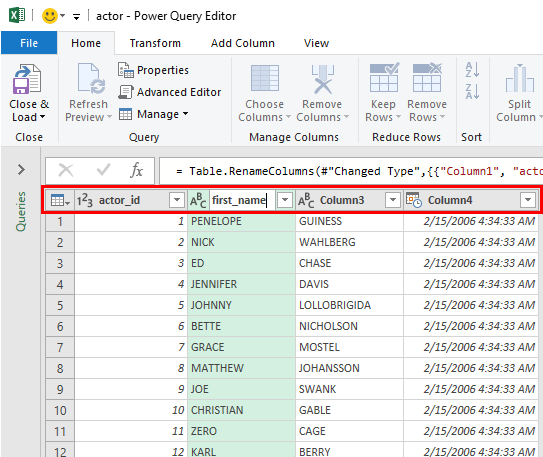
In the Power Query Editor window, it is necessary to set some additional settings (e.g., add the name of the columns):
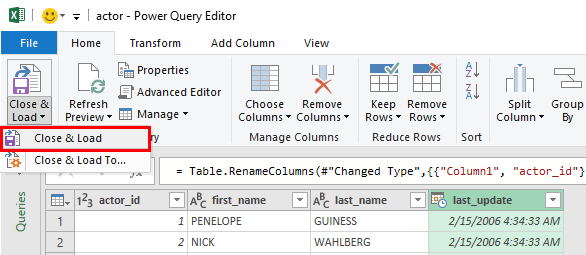
When all is set, click the Close & Load command:
The data will be loaded in a separate sheet:
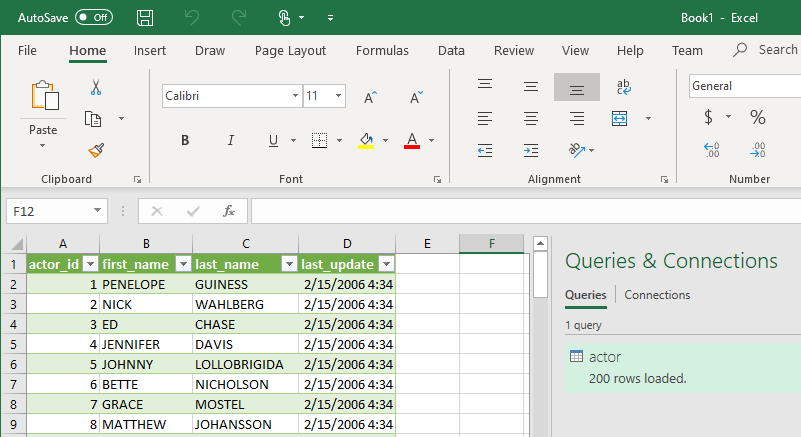
Save newly imported data in .xlsx file format:
Export/Import MySQL data to Excel using the From Database feature
Similar to the method in the section above, Excel provides one more option to load data from the MySQL database to Excel.
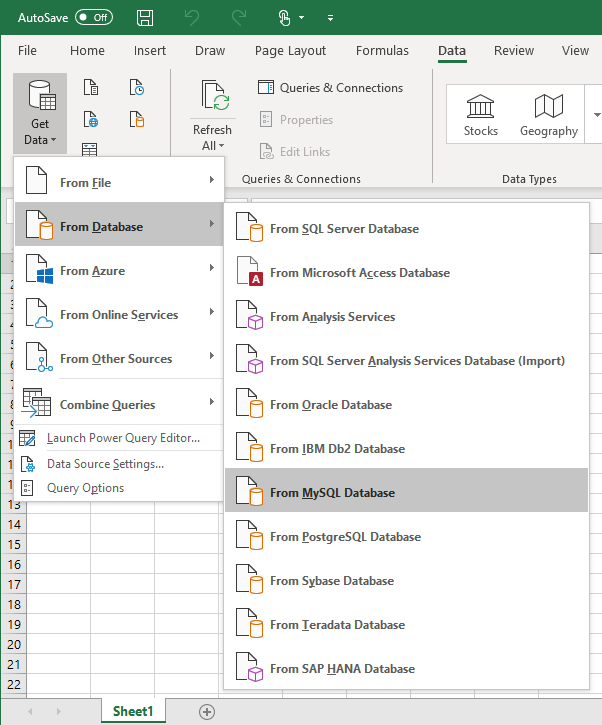
In the Data tab, under the Get Data list, choose the From MySQL Database command:
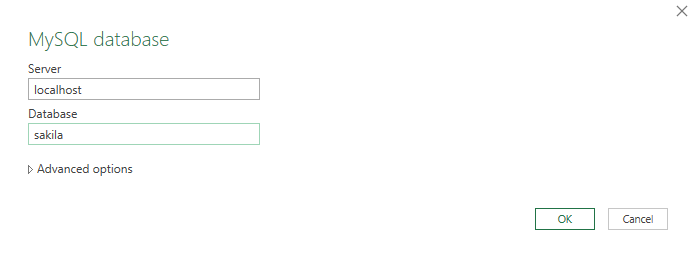
In the MySQL database dialog, enter server and database name from which you want to load data and click the OK button:
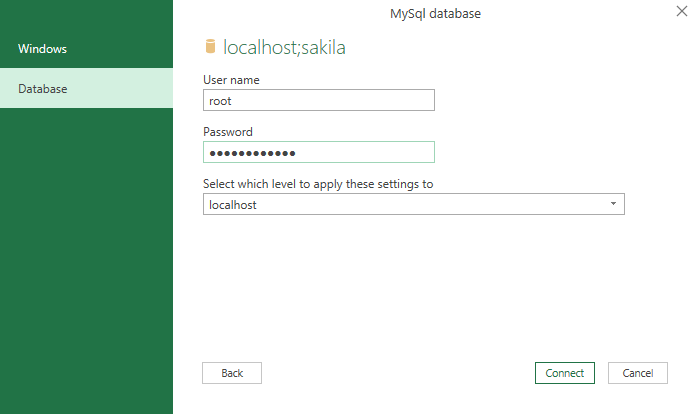
On the next window, under the Database tab, enter credentials for the user that have permission to access the targeted database and click the Connect button:
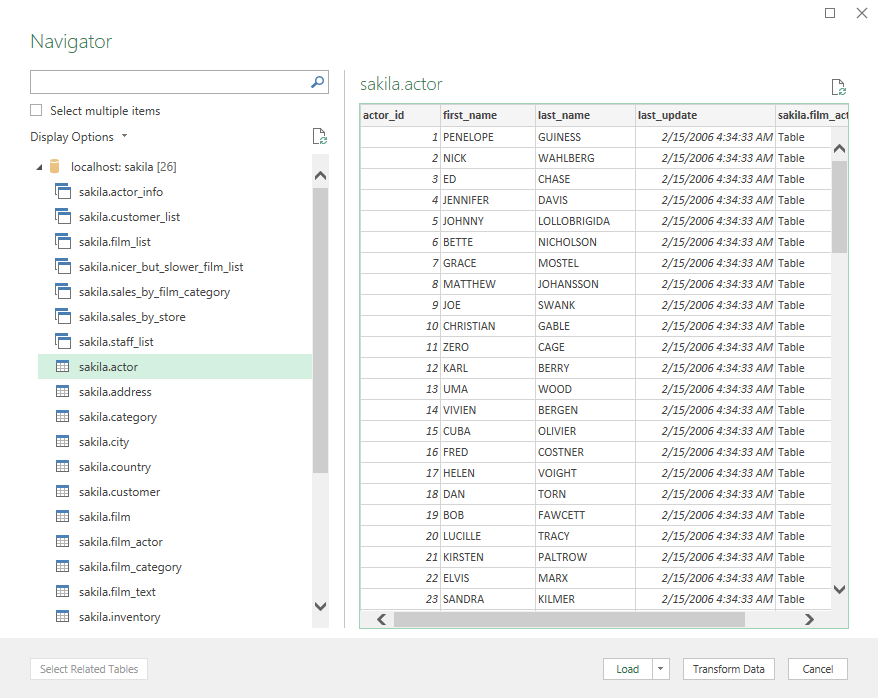
From the Navigator window, choose the tables, views, etc. from which to load data:
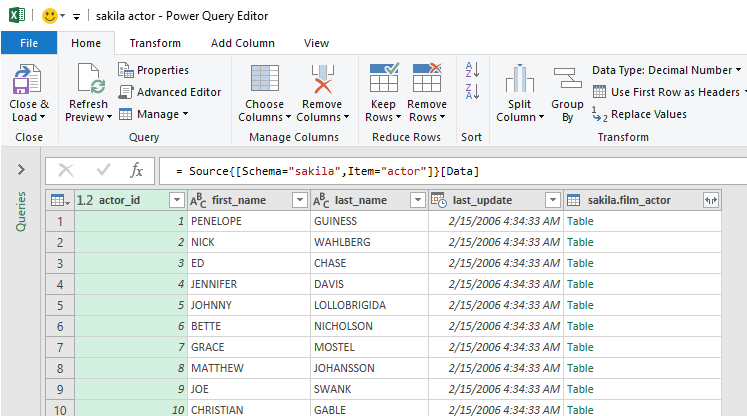
Click the Transform Data button. The Power Query Editor window will appear with desired data in it. Now, the steps for loading data are the same as we explained in the previous section:
Use MySQL for Excel add-in
MySQL for Excel is the Windows-based add-in that integrates into Excel under the Data tab that provides export/import MySQL data capabilities.
To install MySQL for Excel add-in first download the MySQL for Excel MSI file. Before starting with installation, please check that the following requirements are fulfilled:
- .NET Framework 4.5.2 (Client or Full Profile)
- Microsoft Office Excel 2007 or later (for Microsoft Windows)
- Visual Studio 2010 Tools for Office Runtime. MySQL Installer may install this for you. This requirement is different than Office Developer Tools for Visual Studio, which is not a substitute
- An available MySQL server connection
(source: MySQL for Excel Guide / Installation)
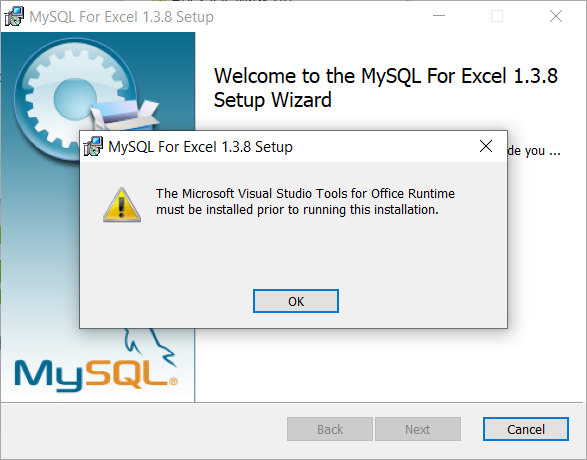
Otherwise, some errors may occur during the installation process, like that one from the image below, when the Visual Studio 2010 Tools for Office Runtime is not installed:
Note: The Microsoft Visual Studio Tools for Office Runtime must be installed prior to running this installation.
Installation
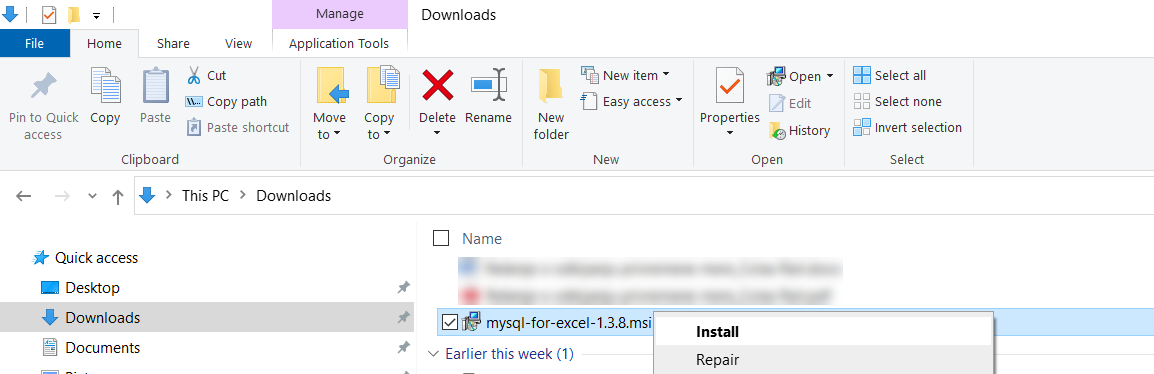
The installation process is straightforward. Go to the location where the installer (mysql-for-excel-1.3.8.msi) is downloaded, right-click on it, and from the context menu, choose the Install command:
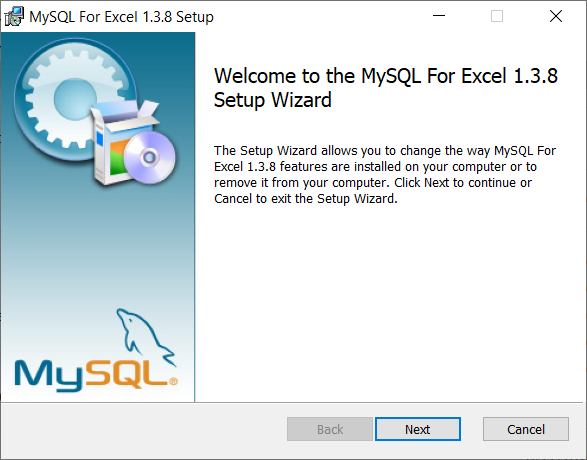
When the installation wizard is launched, click Next:
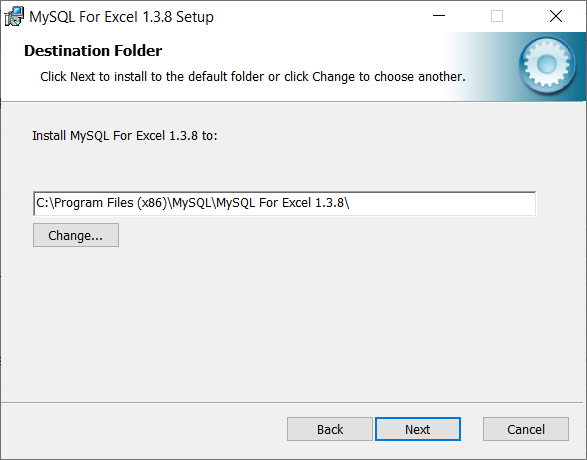
On the Destination Folder step, choose a location where the MySQL For Excel 1.3.8 will be installed and click Next:
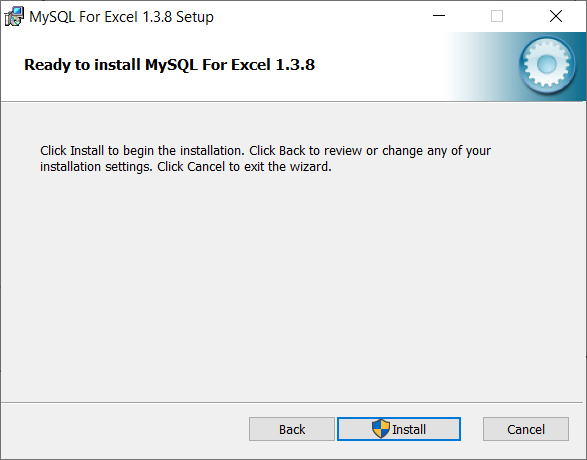
On the next step, click the Install button to start the installation of MySQL For Excel 1.3.8:
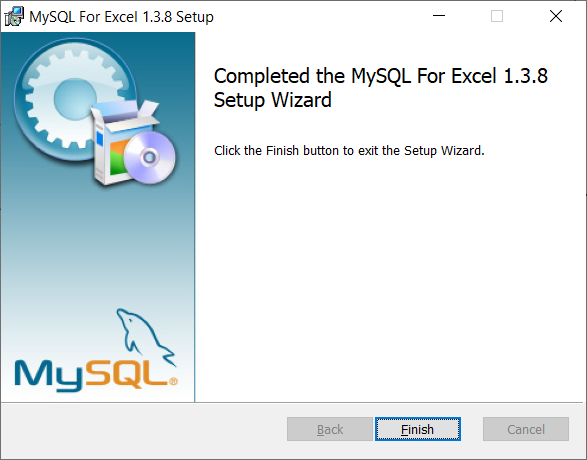
On the last step, click the Finish button to close the setup wizard:
Now when Excel is launched, the MySQL for Excel add-in will appear in the top-right corner of the Data tab:

Connect to MySQL database
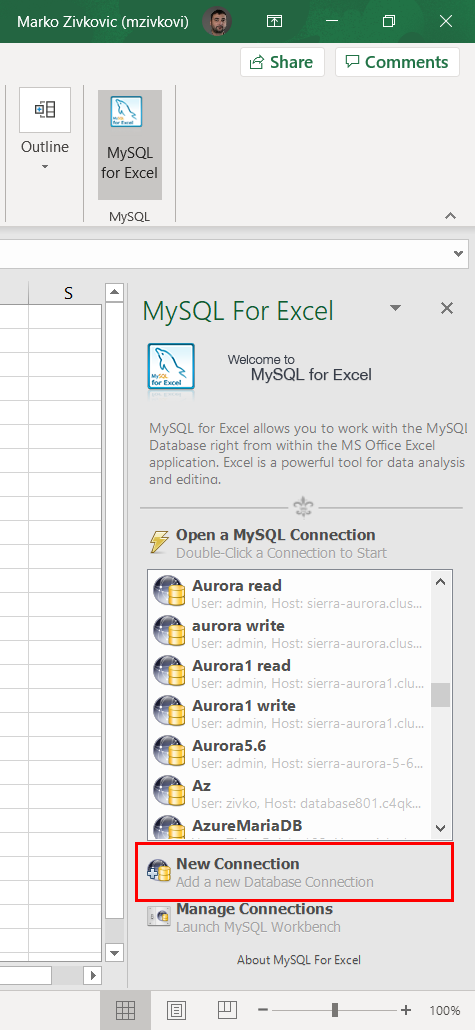
To start MySQL for Excel, click on the MySQL for Excel icon under the Data tab. In the panel that shows find and click the New Connection button:
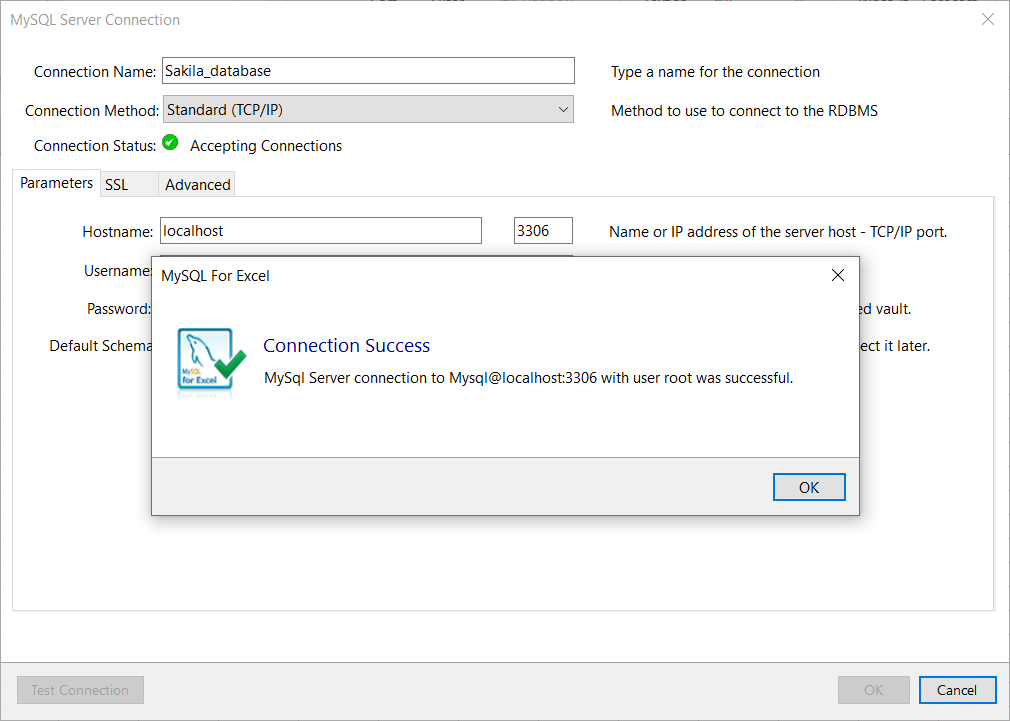
In the MySQL Server Connection window, enter the name for the connection in the Connection Name box (e.g., Sakila_database).
From the Connection Method drop-down list, chose the method to connect to RDBMS (e.g., Standard (TCP/IP)).
In the Hostname box, enter a name or IP address of the server host (e.g., localhost). Under the Port box, enter the TCP/IP port number (e.g., 3306). For the Username and Password fields, enter the credentials for the user that have access to the specified server in the Hostname field:

Optional, from the Default Schema drop-down list, the default schema can be selected.
To confirm that connection to the MySQL Server works properly, click the Test Connection button:
Click the OK button on the MySQL Server Connection window for MySQL for Excel to create a connection in MySQL for Excel panel:
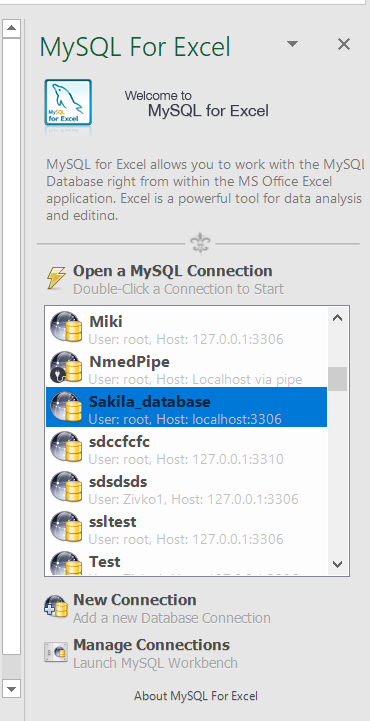
Double-click on the newly created connection will list all available databases from that MySQL server:
Double-click on a database, in the MySQL for Excel panel, will list all tables, views, and procedures from that database:
To import data, on the MySQL for Excel panel, select the desired table, and click the Import MySQL Data button. The Import Data window will appear:
When all settings are set, click the Import button. The imported data will look something like this:
This add-in can return all rows, or a specified range of rows, from a specified table. It cannot import data stored in two different tables, perform table joins, or filter data.
More details about MySQL for Excel tool can be found on the MySQL for Excel page.
Export to Excel using a third-party software
Using the Export to Excel feature from ApexSQL Database Power Tools for VS Code, query results can be exported to MySQL data from the results grid in just a few steps. Besides exporting data to Excel, this VS Code extension provides a couple of more exporting options, such as export data to JSON, CSV, and HTML file format.
In a query editor of the VS Code extension, execute a query from which you want to be data exported. In the top right corner of the Results grid, click the Export to Excel button:
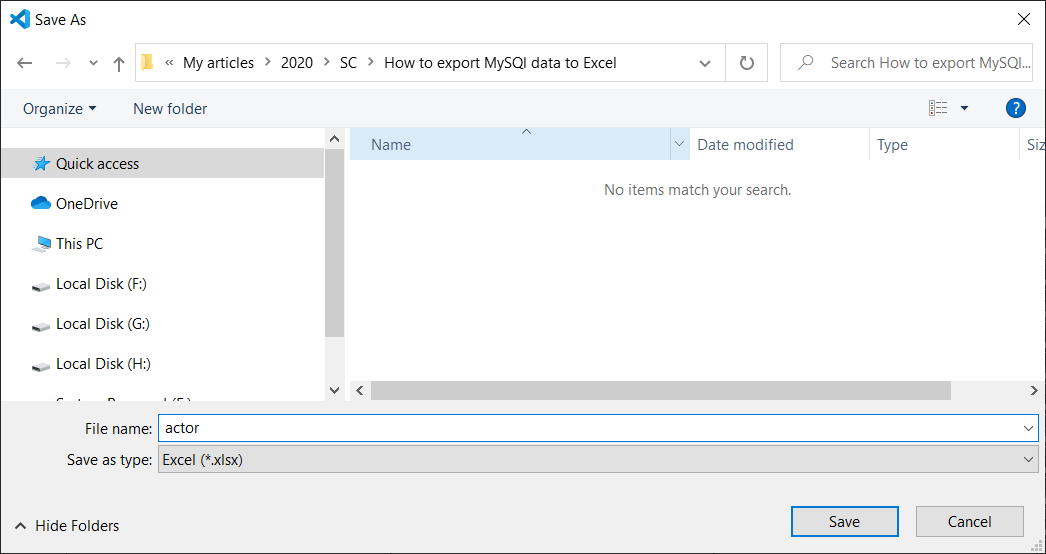
In the Save as window, enter a name and location for a new Excel file and click the Save button:
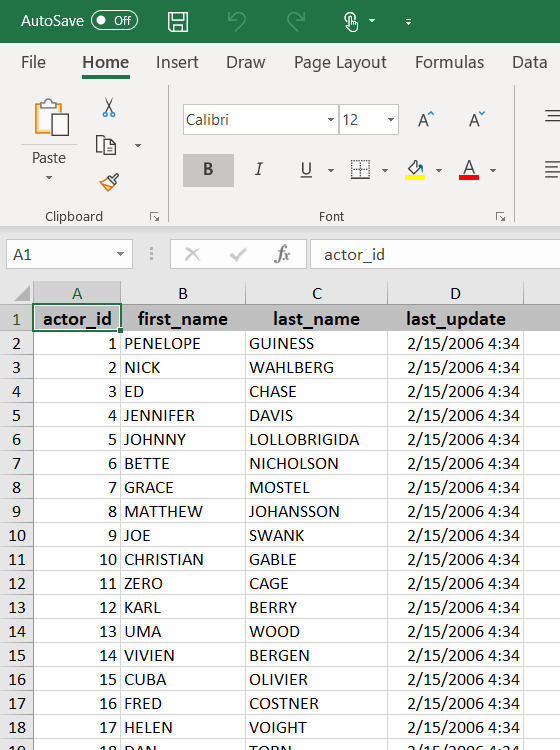
The exported data will look like this:
August 12, 2020
The typical way to achieve this is to export to CSV and then load the CSV into Excel.
TL;DR:
-
For a server-side Excel-friendly CSV file from a
SELECTquery, run this:SELECT ... FROM someTable WHERE etc INTO OUTFILE 'someTableExport.csv' CHARACTER SET utf8mb4 FIELDS TERMINATED BY ',' OPTIONALLY ENCLOSED BY '"' ESCAPED BY '' LINES TERMINATED BY 'rn'; -
For a server-side Excel-friendly CSV file use
mysqldumplike so:mysqldump -h serverHostName -u mysqlUserName -p --tab="someTableExport.csv" --fields-optionally-enclosed-by=0x22 --fields-escaped-by='' --fields-terminated-by=0x2C --lines-terminated-by=0x0D0A --databases databaseName --tables table1 table2 table3 -
For a client-side Excel-friendly CSV file using
mysqlsh(MySQL Shell) like so:mysqlsh --user="mysqlUserName" --host="serverHostName" --port=3306 --schema="databaseName" # Once connected, run this: util.exportTable("tableName", "file:///C:/Users/You/Desktop/test.csv", { dialect: "csv", fieldsEscapedBy: ""})
First, a caution about Excel:
Excel’s vs. MySQL’s default CSV formats:
Remember that Excel has its own underdocumented ideas about how CSV files should be formatted and these stand in-contrast to MySQL’s own ideas about CSV files; though Excel is largely compliant with RFC 4180 you still need to prod and poke MySQL and its associated tooling to generate CSV files that Excel won’t misinterpret:
| Excel | MySQL (default) | MySQL (when configured) | |
|---|---|---|---|
SQL NULL |
Zero-length value | Literal N |
Literal NULL |
| Text values that don’t contain commas, quotes, or line-breaks | Not enclosed | Not enclosed | Enclosed in " |
| Text values that contain commas, quotes, or line-breaks | Enclosed in " |
Not enclosed | Enclosed in " |
| Non-text values | Not enclosed | Not enclosed | Not enclosed |
| Line-breaks and tabs in text values | Literal | Escaped as [r]n |
Literal |
| Double-quotes in text values | Doubled-up "" |
Escaped as " |
Doubled-up "" |
| Field separator | , |
t (Tab) |
, |
| Record separator | rn |
n |
rn |
| Commas inside non-quoted text values | (Results in broken table data) | Not escaped | Will always be quoted if the value contains a comma |
| UTF-8 support |
|
Use utf8mb4.Do not specify the older broken utf8 or utf8mb3 encodings. |
Use utf8mb4 |
As per the table above, MySQL can generate Excel-friendly CSV files, excepting that SQL NULLs will always be interpreted by Excel as literal text, though it’s trivial to use PowerQuery or even just Find-and-Replace in Excel to replace them with empty cells.
Excel and special CSV text markers
- If any of your text values start with
=then you’ll need to manually fudge those as even when quoted Excel will interpret the text following=as a formula instead of literal text. - Also watch out for leading text like
sep=too.
Excel and UTF-8 encoding:
Surprisingly, it wasn’t until Excel was 31 years old (Excel 2016) when Excel added built-in support for UTF-8 encoding in files without needing a BOM, but it still defaults to importing and exporting CSV files using your system-default non-Unicode encoding (e.g. Windows-1252).
- When importing CSV into Excel, be sure to select Codepage
65001for correct UTF-8 handling as Excel still defaults to non-Unicode-based codepages for some reason.-
Note that opening a CSV file in Excel won’t display the Text Import Wizard. (As of Excel 2021) you need to copy-and-paste CSV text into Excel and use the popup menu to use the legacy (frozen-in-1994) wizard, or use Data > From Text/CSV on the ribbon to use the newer (but less flexible, imo) PowerQuery-based CSV import wizard:
-
Your options:
| Option | SELECT INTO OUTFILE |
mysqldump --tab |
mysqldump > file.csv |
mysqlsh |
MySQL Workbench |
|---|---|---|---|---|---|
| Server-side CSV | True | True | True | True | Broken |
| Remote (client-side) CSV | False | False | False | True | Broken |
| MySQL Server version support | All versions | All versions | All versions | Only 5.7 and later | All versions |
Option 1: Exporting an Excel-friendly CSV using INTO OUTFILE:
- You can do a server-side CSV export by using the
INTO OUTFILEclause of aSELECTquery.- Because this is «normal» SQL that’s executed by the MySQL server this works regardless of whatever MySQL client tool you’re using, so you don’t need to install MySQL Workbench.
- …but because this is a server-side export you need to have permission to write to the server’s filesystem which you might not have, in which case consider using specialty export tools like
mysqldump(see below).
- MySQL’s
OUTFILEclause has a number of optional subclauses that must be specified for some-level of compatibility with Excel’s own CSV reader:FIELDS...TERMINATED BY(default:'t', for Excel use',')[OPTIONALLY] ENCLOSED BY(default:'', should be'"'with theOPTIONALLYkeyword)ESCAPED BY(default:'\', for Excel use'')
LINES...TERMINATED BY(default:'n', for Excel use'rn')STARTING BY(default:'', for Excel you can omit this or use the MySQL default).
- Do not use
ENCLOSED BY(without the precedingOPTIONALLYkeyword) as that will enquote all values, regardless of type (i.e. it will enquoteintvalues which will cause Excel (by default) to interpret them as text (strings) instead of numbers).
- Note that there is no option to instruct MySQL to output SQL
NULLs as empty-fields, and so Excel will interpet them as unquoted strings of text (i.e. as"NULL"), so you’ll want to do a Find-and-Replace in Excel after importing the file. - If your
INTO OUTFILE <fileName>filename (e.g.'someTableExport.csv'above) is not an absolute path then it will be saved into your database’sdatadirdirectory. RunSHOW VARIABLES LIKE 'datadir';to get the path. Note that you might not necessarily have read/write permission for new files under that directory.
So your query (SELECT * FROM document WHERE documentid...) would look something like this:
SELECT
    *
FROM
    document
WHERE
    documentid IN ( SELECT documentid FROM TaskResult WHERE taskResult = 2429 )
INTO
    OUTFILE 'someTableExport.csv'
    FIELDS TERMINATED BY ',' OPTIONALLY ENCLOSED BY '"', ESCAPED BY ''
    LINES TERMINATED BY 'rn';
Option 2: Exporting an Excel-friendly CSV using mysqldump:
- To store dump into CSV file using the
--tabcommand-line option, as permysqldump‘s documentation. - Unfortunately
mysqldump‘s--tab=option won’t work for remote MySQL servers: this is because--tab="fileName.csv"can only represent a path on the server.- While you can use
stdoutredirection to generate a local file (i.e.mysqldump --etc > output.csv) you cannot use the--fields-terminated-byand other format options withstdout, making it useless for Excel-compatible output. So if you’re remote and cannotssh-in then you will need to use MySQL Shell (mysqlsh) instead (see below).
- While you can use
- Note that
mysqldumpdoes not supportSELECTqueries for dumping data: it does support simpleWHERE-style filters with the--where=<expr>option but this doesn’t support things like filtering using anINNER JOIN(though as a workaround you couldSELECTinto a new table, then runmysqldumpon that new table. Note that you cannot useTEMPORARY TABLEwithmysqldumpas Temporary Tables are connection-scoped).
In the OP’s case, due to limitations inherent in how the --where= command-line option works, they’ll want to export both tables (document and TaskResult) and apply their filter logic in Excel PowerQuery or similar. Perform the export like so:
mysqldump -h serverHostName -u mysqlUserName -p --tab="someTableExport.csv" --fields-optionally-enclosed-by=0x22 --fields-escaped-by='' --fields-terminated-by=0x2C --lines-terminated-by=0x0D0A --databases databaseName --tables document TaskResult
-
The above command-line should work without modification in Windows’
cmd.exe, macOS’szsh, andbashon Linux — providedmysqldumpis in yourPATH. -
The use of hex-encoded chars means sidestepping the hassle of figurig out how to pass double-quotes and line-breaks as literals in your shell and terminal (
0x22is",0x2Cis,, and0x0D0Aisrn). -
Avoid using the
--password=<value>(aka-p<value>) option on
themysqldumpcommand-line, as it will mean your password will be saved in plaintext to your terminal or console history file, which is an obvious massive security risk.- So if you’re in an interactive command-line session need to specify a password then
mysqldumpwill prompt you for the password immediately when the program runs so it won’t be saved to your history file. - If you want to run
mysqldumpin a non-interactive context (e.g. from within a web-application, daemon, or other process) then there’s (normally) no history file to worry about, but you should still consider alternative approaches before resorting to handling passwords in an insecure way.
- So if you’re in an interactive command-line session need to specify a password then
-
If you don’t specify an absolute path but use a short (unqualified) filename like
INTO OUTFILE 'output.csv'orINTO OUTFILE './output.csv'theb it will store the output file to the directory specified bySHOW VARIABLES LIKE 'datadir';.
Option 3: Exporting an Excel-friendly CSV using MySQL Workbench:
Unfortunately, you can’t (unless you don’t have any double-quotes anywhere in your data): As of late 2022 MySQL Workbench has an open bug regarding its own CSV export feature: output files never escape double-quote characters in text, so pretty much all CSV-handling software out there will report a malformed CSV file or import data to the wrong columns — so this makes it completely unsuitable for use with Excel.
Option 4: Exporting an Excel-friendly CSV using MySQL Shell (aka mysqlsh):
- This is probably the simplest option, but you might need to install the MySQL Shell as it doesn’t come in-box in most MySQL installations.
- MySQL Shell supports connecting to MySQL Server 5.7 and later (but not older versions). If you’re still using MySQL Server 5.6 or earlier (then you really should update to 5.7 or later anyway) you’ll have to stick with
mysqldumprun locally on the MySQL Server itself (but you can use ansshsession, of course).- The new «MySQL X» protocol (
mysqlx://user@host/schema) is not supported by MySQL 5.7, butmysqlshsupports non-X connections with old-style command-line parameters.
- The new «MySQL X» protocol (
- Install MySQL Shell if it isn’t already installed.
- If you start MySQL Shell without any command-line arguments (e.g. because you use the Start Menu shortcut on Windows)) then use the
connectcommand to connect.-
For MySQL 5.7 use
connect mysql://username@hostname -
For MySQL 8.0+ there are a variety of ways to connect, including the «MySQL X» protocol as well as «Classic» connections. Consult the docs for more info.
-
If your username contains literal
@characters then you need to percent-encode them (e.g. if you’re using Azure MySQL then your full username will be likeusername%40servername@servername.mysql.database.azure.com). -
Immediately after you submit the
connectcommand you will be prompted for your password interactively.
-
- If you can start
mysqlshwith arguments, then you can runmysqlsh --user="userName" --host="hostName" --port=3306 --schema="dbName"directly without using theconnectcommand. - Once connected, run the
util.exportTable(tableName, outputUri, options)command with the following arguments:tableName: your table name.- Unfortunately there doesn’t seem to be a way to apply a
WHEREfilter or export the results of aSELECTquery, (though as withmysqldumpyou could always save your query results to a newTABLE, then export that table, thenDROP TABLEwhen you’re done with it. Remember thatTEMPORARY TABLEwon’t work here as tables created in one session aren’t visible from any other session — andmysqlshwill have its own session.
- Unfortunately there doesn’t seem to be a way to apply a
outputUri: To save the file locally use afile:///URI.- On Windows you can use a forward-slash as a directory-name separator instead of a backslash. e.g.
file:///C:/Users/Me/Desktop/export.csv.
- On Windows you can use a forward-slash as a directory-name separator instead of a backslash. e.g.
options: To ensure compatibility with Excel specify{ dialect: "csv", fieldsEscapedBy: ""}.- The
dialect: "csv"option sets Excel-compatible defaults for all-but-one of theOUTFILEparameters, so you must also specifyfieldsEscapedBy: "", otherwise SQLNULLwill be be rendered asN(literally) while double-quotes and line-breaks inside text values will be backslash-escaped, which Excel doesn’t support.
- The
Если нужно быстро и единоразово выгрузить данные из таблицы MySQL в Exel файл, то помогут следующие способы:
1
Экспорт через PHPMyAdmin
В PHPMyAdmin при экспорте можно выбрать формат «CSV for MS Excel»:

При открытии полученного файла в Excel будет сбита кодировка:
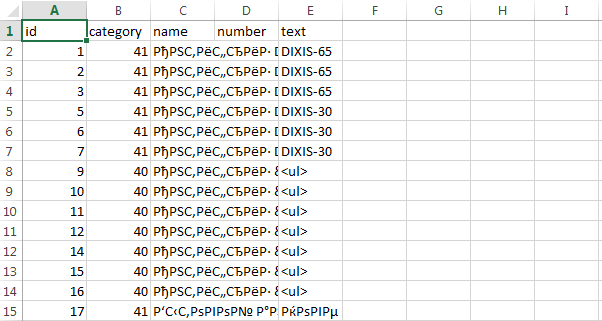
Чтобы это исправить, нужно открыть csv файл в редакторе типа Notepad++ и изменить кодировку на ANSI:
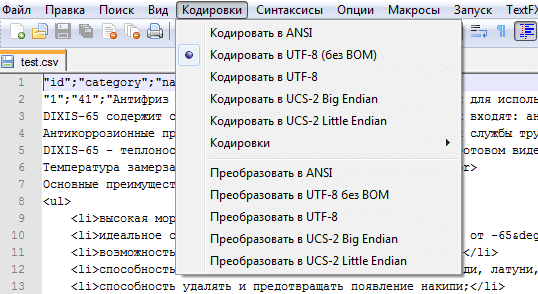
Результат:

2
Экспорт через HTML таблицу
Смысл метода состоит в том чтобы PHP-скриптом сформировать HTML таблицу:
<?php
$dbh = new PDO('mysql:dbname=db_name;host=localhost', 'логин', 'пароль');
$sth = $dbh->prepare("SELECT * FROM `test`");
$sth->execute();
$items = $sth->fetchAll(PDO::FETCH_ASSOC);
?>

<table>
	<tr>
		<td>ID</td>
		<td>Категория</td>
		<td>Название</td>
		<td>Описание</td>
	</tr>
	<?php foreach($items as $row): ?>
	<tr>
		<td><?php echo $row['id']; ?></td>
		<td><?php echo $row['category']; ?></td>
		<td><?php echo $row['name']; ?></td>
		<td><?php echo $row['text']; ?></td>
	</tr>
	<?php endforeach; ?>
</table>
PHP
Результат работы скрипта:
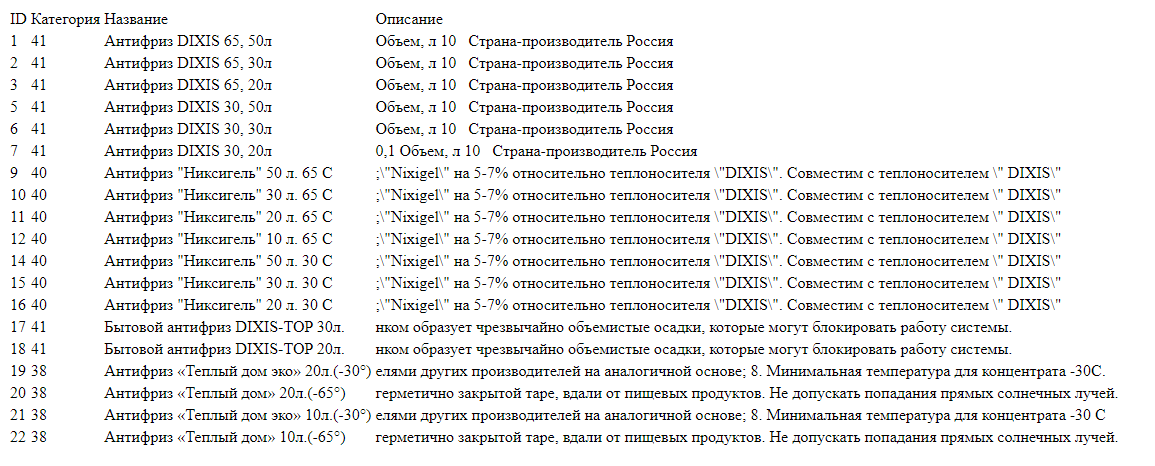
Полученную таблицу копируем и вставляем в чистый лист Microsoft Exel:

3
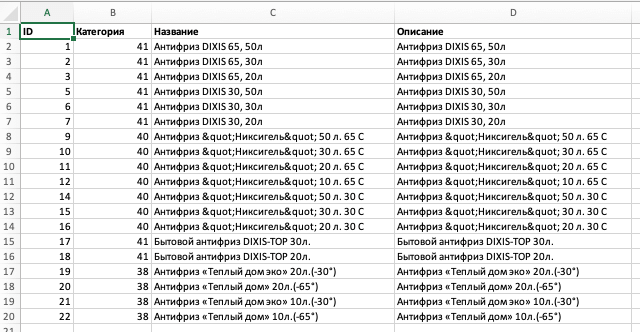
Экспорт через PHPExcel
Третий метод – сформировать xls-файл в библиотеке PHPExcel (PHPExcel.zip).
//spl_autoload_unregister('autoload');
require_once __DIR__ . '/PHPExcel/Classes/PHPExcel.php';
require_once __DIR__ . '/PHPExcel/Classes/PHPExcel/Writer/Excel2007.php';

$xls = new PHPExcel();
$xls->setActiveSheetIndex(0);
$sheet = $xls->getActiveSheet();

// Шапка
$sheet->getStyle("A1:D1")->getFont()->setBold(true);
$sheet->setCellValue("A1", 'ID');
$sheet->setCellValue("B1", 'Категория');
$sheet->setCellValue("C1", 'Название');
$sheet->setCellValue("D1", 'Описание');

// Выборка из БД
$dbh = new PDO('mysql:dbname=db_name;host=localhost', 'логин', 'пароль');
$sth = $dbh->prepare("SELECT * FROM `test`");
$items = $sth->fetch(PDO::FETCH_ASSOC);

$index = 2;
foreach ($items as $row) {
	$sheet->setCellValue("A" . $index, $row['id']);
	$sheet->setCellValue("B" . $index, $row['category']);
	$sheet->setCellValue("C" . $index, $row['name']);
	$sheet->setCellValue("D" . $index, $row['name']);
	$index++;
}

// Отдача файла в браузер
header("Expires: Mon, 1 Apr 1974 05:00:00 GMT");
header("Last-Modified: " . gmdate("D,d M YH:i:s") . " GMT");
header("Cache-Control: no-cache, must-revalidate");
header("Pragma: no-cache");
header("Content-type: application/vnd.ms-excel" );
header("Content-Disposition: attachment; filename=prods.xlsx");

$objWriter = new PHPExcel_Writer_Excel2007($xls);
$objWriter->save('php://output');

exit();
PHP
Результат:
Recently I published an article How to Read CSV and Excel File in PHP Using PhpSpreadsheet. One of the readers asked how to use PhpSpreadsheet to export MySQL database records to the Excel file. The user may need their MySQL data in the Excel or CSV file to read or share it easily. In this article, we discussed how one can export data from a database to Excel and CSV files. In addition to this, we will also study how one can send this exported file as an attachment in the email.
Getting Started
For getting started, you first need to install the PhpSpreadsheet library. I recommend using Composer for the installation of the library. Open the terminal in your project root directory and run the command:
composer require phpoffice/phpspreadsheet
PhpSpreadsheet is the library that provides support for reading and writing different types of file formats. Below is the screenshot of supported file formats.

Our end goal is exporting database table records to the Excel/CSV file. For this, we require a few entries in our database. As an example, I am creating the ‘products’ table by running the below SQL query.
CREATE TABLE `products` (
 `id` int(11) NOT NULL AUTO_INCREMENT,
 `product_name` varchar(255) NOT NULL,
 `product_sku` varchar(255) NOT NULL,
 `product_price` varchar(255) NOT NULL,
 PRIMARY KEY (`id`)
) ENGINE=InnoDB DEFAULT CHARSET=latin1;
Next, add some dummy entries in the table so you will see a few records in the exported file.
INSERT INTO `products` (`product_name`, `product_sku`, `product_price`) VALUES
('Apple', 'app_111', '$1000'),
('Lenovo', 'len_222', '$999'),
('Samsung', 'sam_689', '$1200'),
('Acer', 'ace_620', '$900');
After this create a config.php file where we write the code for database connection.
config.php
<?php
$db_host = 'DATABASE_HOST';
$db_username = 'DATABASE_USERNAME';
$db_password = 'DATABASE_PASSWORD';
$db_name = 'DATABASE_NAME';

$db = new mysqli($db_host, $db_username, $db_password, $db_name);

if($db->connect_error){
    die("Unable to connect database: " . $db->connect_error);
}
Make sure to replace the placeholders with the actual values in the above code. This file will be included later to fetch records from the ‘products’ table.
In the next part of the tutorial, I am allocating a separate section for exporting data to Excel, exporting data to CSV, and sending the email with an exported file as an attachment.
Export MySQL Database Data to Excel Using PHP
You have installed the library and also have a database table with few entries. Now you can go ahead and write the actual code which will export an Excel file with data filled in it.
Create a <code>export-to-excel.php</code> file in the root directory. In this file, I will write a SQL query to fetch data from the database, write this data to Excel, and finally send the Excel file to the browser to download automatically.
export-to-excel.php
<?php
require_once "vendor/autoload.php";
require_once "config.php";

use PhpOfficePhpSpreadsheetSpreadsheet;
use PhpOfficePhpSpreadsheetWriterXlsx;

$spreadsheet = new Spreadsheet();
$Excel_writer = new Xlsx($spreadsheet);

$spreadsheet->setActiveSheetIndex(0);
$activeSheet = $spreadsheet->getActiveSheet();

$activeSheet->setCellValue('A1', 'Product Name');
$activeSheet->setCellValue('B1', 'Product SKU');
$activeSheet->setCellValue('C1', 'Product Price');

$query = $db->query("SELECT * FROM products");

if($query->num_rows > 0) {
    $i = 2;
    while($row = $query->fetch_assoc()) {
        $activeSheet->setCellValue('A'.$i , $row['product_name']);
        $activeSheet->setCellValue('B'.$i , $row['product_sku']);
        $activeSheet->setCellValue('C'.$i , $row['product_price']);
        $i++;
    }
}

$filename = 'products.xlsx';

header('Content-Type: application/vnd.ms-excel');
header('Content-Disposition: attachment;filename='. $filename);
header('Cache-Control: max-age=0');
$Excel_writer->save('php://output');
When you run this code on the browser, an Excel file will be downloaded automatically and the Excel sheet will have the following entries.

Export MySQL Database Data to CSV Using PHP
In the previous section, we exported data to an Excel file. If someone is looking to export data in a CSV file then you need to change a few lines in the above code.
export-to-csv.php
<?php
require_once "vendor/autoload.php";
require_once "config.php";

use PhpOfficePhpSpreadsheetSpreadsheet;
use PhpOfficePhpSpreadsheetWriterCsv;

$spreadsheet = new Spreadsheet();
$Excel_writer = new Csv($spreadsheet);

$spreadsheet->setActiveSheetIndex(0);
$activeSheet = $spreadsheet->getActiveSheet();

$activeSheet->setCellValue('A1', 'Product Name');
$activeSheet->setCellValue('B1', 'Product SKU');
$activeSheet->setCellValue('C1', 'Product Price');

$query = $db->query("SELECT * FROM products");

if($query->num_rows > 0) {
    $i = 2;
    while($row = $query->fetch_assoc()) {
        $activeSheet->setCellValue('A'.$i , $row['product_name']);
        $activeSheet->setCellValue('B'.$i , $row['product_sku']);
        $activeSheet->setCellValue('C'.$i , $row['product_price']);
        $i++;
    }
}

$filename = 'products.csv';

header('Content-Type: application/text-csv');
header('Content-Disposition: attachment;filename='. $filename);
header('Cache-Control: max-age=0');
$Excel_writer->save('php://output');
Send an Email with File as an Attachment
We have seen how to download the file with data in Excel/CSV format. Some users may want to send the exported file as an attachment in the email. Let’s see how to achieve it.
First, install the PHPMailer library using the command:
composer require phpmailer/phpmailer
After installing the library, you can use any SMTP server to send an email. It’s up to you. You may use your hosting SMTP server, AWS SES, or Gmail SMTP server. If you are going with the Gmail SMTP server read our article Send Email Using Gmail SMTP Server from PHP Script which explains the configuration needed for it.
The previous code download Excel/CSV file automatically. But now, instead of making it downloadable, we will save the file in the directory and then send it as an attachment. In short, we will write the code below for saving the file.
...
...
$filename = 'products.csv';

if (!file_exists('files')) {
    mkdir('files', 0755);
}
$Excel_writer->save('files/'.$filename);
Our final code to send the attachment in an email will be as follows:
<?php
require_once "vendor/autoload.php";
require_once "config.php";

use PhpOfficePhpSpreadsheetSpreadsheet;
use PhpOfficePhpSpreadsheetWriterCsv;

//Import PHPMailer classes into the global namespace
use PHPMailerPHPMailerPHPMailer;
use PHPMailerPHPMailerException;

$spreadsheet = new Spreadsheet();
$Excel_writer = new Csv($spreadsheet);

$spreadsheet->setActiveSheetIndex(0);
$activeSheet = $spreadsheet->getActiveSheet();

$activeSheet->setCellValue('A1', 'Product Name');
$activeSheet->setCellValue('B1', 'Product SKU');
$activeSheet->setCellValue('C1', 'Product Price');

$query = $db->query("SELECT * FROM products");

if($query->num_rows > 0) {
    $i = 2;
    while($row = $query->fetch_assoc()) {
        $activeSheet->setCellValue('A'.$i , $row['product_name']);
        $activeSheet->setCellValue('B'.$i , $row['product_sku']);
        $activeSheet->setCellValue('C'.$i , $row['product_price']);
        $i++;
    }
}

$filename = 'products.csv';

if (!file_exists('files')) {
    mkdir('files', 0755);
}
$Excel_writer->save('files/'.$filename);

// send as an attachment
$mail = new PHPMailer(true);
try {
    $mail->isSMTP();
    $mail->Host = 'SMTP_HOST';
    $mail->SMTPAuth = true;
    $mail->Username = 'SMTP_USERNAME';   //username
    $mail->Password = 'SMTP_PASSWORD';   //password
    $mail->SMTPSecure = 'ssl';
    $mail->Port = 465;

    $mail->setFrom('FROM_EMAIL_ADDRESS', 'FROM_NAME');
    $mail->addAddress('RECEPIENT_EMAIL_ADDRESS', 'RECEPIENT_NAME');

    $mail->addAttachment('files/'.$filename);

    $mail->isHTML(true);
    $mail->Subject = 'Products Sheet';
    $mail->Body    = 'Products Sheet';

    $mail->send();
    echo 'Message has been sent';
} catch (Exception $e) {
    echo 'Message could not be sent. Mailer Error: '. $mail->ErrorInfo;
}
Replace the placeholders with the actual values and an email will be sent with an attachment to the recipient’s email address.
I hope you understand how to export MySQL database data to the Excel or CSV file and also send it as an attachment. Please share your thoughts and suggestions in the comment section below.
Related Articles
- How to Transfer Files to Remote Server in PHP
- Send Email Using Mailjet in PHP
- How to Convert HTML to PDF in PHP
If you liked this article, then please subscribe to our YouTube Channel for video tutorials.
Содержание
- How to export/import MySQL data to Excel
- Export/Import MySQL data to Excel using the SELECT INTO … OUTFILE statement
- Export/Import MySQL data to Excel using the From Database feature
- Use MySQL for Excel add-in
- Installation
- Connect to MySQL database
- Export to Excel using a third-party software
- 3 Steps To Export Data From MYSQL To Excel In PHP
- TLDR – QUICK SLIDES
- TABLE OF CONTENTS
- DOWNLOAD & NOTES
- QUICK NOTES
- EXAMPLE CODE DOWNLOAD
- DATABASE TO EXCEL SPREADSHEET
- STEP 1) DOWNLOAD PHPSPREADSHEET
- STEP 2) CREATE A DUMMY DATABASE
- STEP 3) EXPORT FROM DATABASE TO SPREADSHEET
- ALTERNATIVE) EXPORT MYSQL TO CSV FILE
- EXTRA BITS & LINKS
- LINKS & REFERENCES
- TUTORIAL VIDEO
- INFOGRAPHIC CHEAT SHEET
- THE END
How to export/import MySQL data to Excel
One of the main aspects of modern business is gathering and sharing information with others.
In this article, several ways to export/import MySQL data to an Excel file will be explained. The first method will show the exporting process when the SELECT INTO … OUTFILE statement is used. After that, the Excel features for export/import MySQL data, as well as MySQL add-in for Excel, will be explained, and in the end, the Export to Excel option from the ApexSQL Database Power Tools for VS Code extension will be shown.
The following methods will be used:
- The SELECT INTO … OUTFILE statement
- The From Database feature in Excel
- The MySQL for Excel add-in
- Export to Excel using a third-party software
Export/Import MySQL data to Excel using the SELECT INTO … OUTFILE statement
One of the commonly used MySQL statement which can be included in the SELECT statements for exporting data to specific (e.g., .txt, .CSV) file format is SELECT INTO … OUTFILE statement. This statement writes a selected row to a file. Columns and line terminators can be specified to produce a specific output format.
In a query editor, execute a SELECT statement which results want to be exported, add the location where data should be exported, and specify the file format. In the example below, the .txt file format is used:

When the above statement is executed, all exported data will be in the actor.txt file:

Under the specified location:

For more details about SELECT INTO … OUTFILE statement, see How to export MySQL data to CSV article.
When the data is exported, let’s open it in Excel and save it in .xlsx file format.
Open Excel and under the Data tab, click the From Text/CSV button:

Navigate to the location of the exported .txt file and click Import:

In the newly opened dialog, choose appropriate delimiter and click Transform Data:

In the Power Query Editor window, it is necessary to set some additional settings (e.g., add the name of the columns):

When all is set, click the Close & Load command:

The data will be loaded in a separate sheet:

Save newly imported data in .xlsx file format:

Export/Import MySQL data to Excel using the From Database feature
Similar to the method in the section above, Excel provides one more option to load data from the MySQL database to Excel.
In the Data tab, under the Get Data list, choose the From MySQL Database command:

In the MySQL database dialog, enter server and database name from which you want to load data and click the OK button:

On the next window, under the Database tab, enter credentials for the user that have permission to access the targeted database and click the Connect button:

From the Navigator window, choose the tables, views, etc. from which to load data:

Click the Transform Data button. The Power Query Editor window will appear with desired data in it. Now, the steps for loading data are the same as we explained in the previous section:

Use MySQL for Excel add-in
MySQL for Excel is the Windows-based add-in that integrates into Excel under the Data tab that provides export/import MySQL data capabilities.
To install MySQL for Excel add-in first download the MySQL for Excel MSI file. Before starting with installation, please check that the following requirements are fulfilled:
- .NET Framework 4.5.2 (Client or Full Profile)
- Microsoft Office Excel 2007 or later (for Microsoft Windows)
- Visual Studio 2010 Tools for Office Runtime. MySQL Installer may install this for you. This requirement is different than Office Developer Tools for Visual Studio, which is not a substitute
- An available MySQL server connection
Otherwise, some errors may occur during the installation process, like that one from the image below, when the Visual Studio 2010 Tools for Office Runtime is not installed:
Note: The Microsoft Visual Studio Tools for Office Runtime must be installed prior to running this installation.

Installation
The installation process is straightforward. Go to the location where the installer (mysql-for-excel-1.3.8.msi) is downloaded, right-click on it, and from the context menu, choose the Install command:

When the installation wizard is launched, click Next:

On the Destination Folder step, choose a location where the MySQL For Excel 1.3.8 will be installed and click Next:

On the next step, click the Install button to start the installation of MySQL For Excel 1.3.8:

On the last step, click the Finish button to close the setup wizard:

Now when Excel is launched, the MySQL for Excel add-in will appear in the top-right corner of the Data tab:

Connect to MySQL database
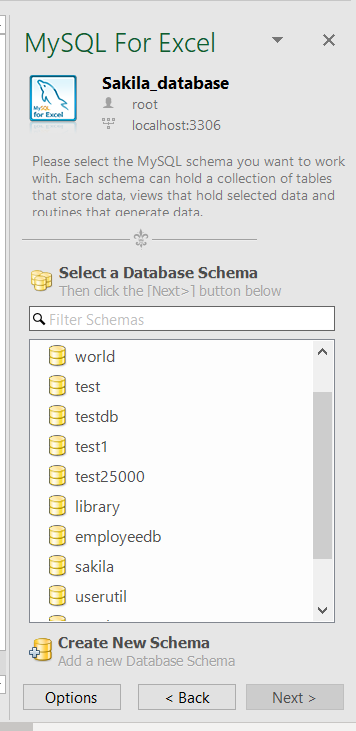
To start MySQL for Excel, click on the MySQL for Excel icon under the Data tab. In the panel that shows find and click the New Connection button:

In the MySQL Server Connection window, enter the name for the connection in the Connection Name box (e.g., Sakila_database).
From the Connection Method drop-down list, chose the method to connect to RDBMS (e.g., Standard (TCP/IP)).
In the Hostname box, enter a name or IP address of the server host (e.g., localhost). Under the Port box, enter the TCP/IP port number (e.g., 3306). For the Username and Password fields, enter the credentials for the user that have access to the specified server in the Hostname field:

Optional, from the Default Schema drop-down list, the default schema can be selected.
To confirm that connection to the MySQL Server works properly, click the Test Connection button:

Click the OK button on the MySQL Server Connection window for MySQL for Excel to create a connection in MySQL for Excel panel:

Double-click on the newly created connection will list all available databases from that MySQL server:

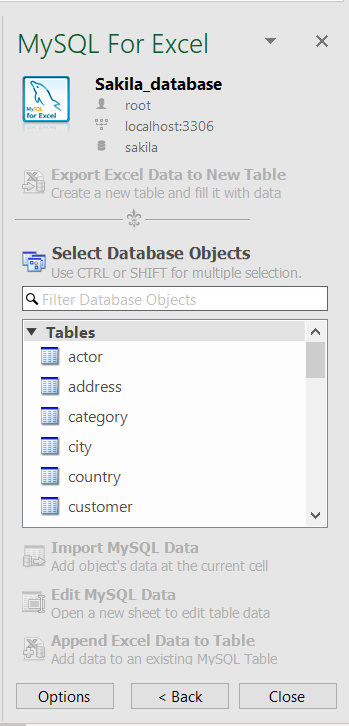
Double-click on a database, in the MySQL for Excel panel, will list all tables, views, and procedures from that database:

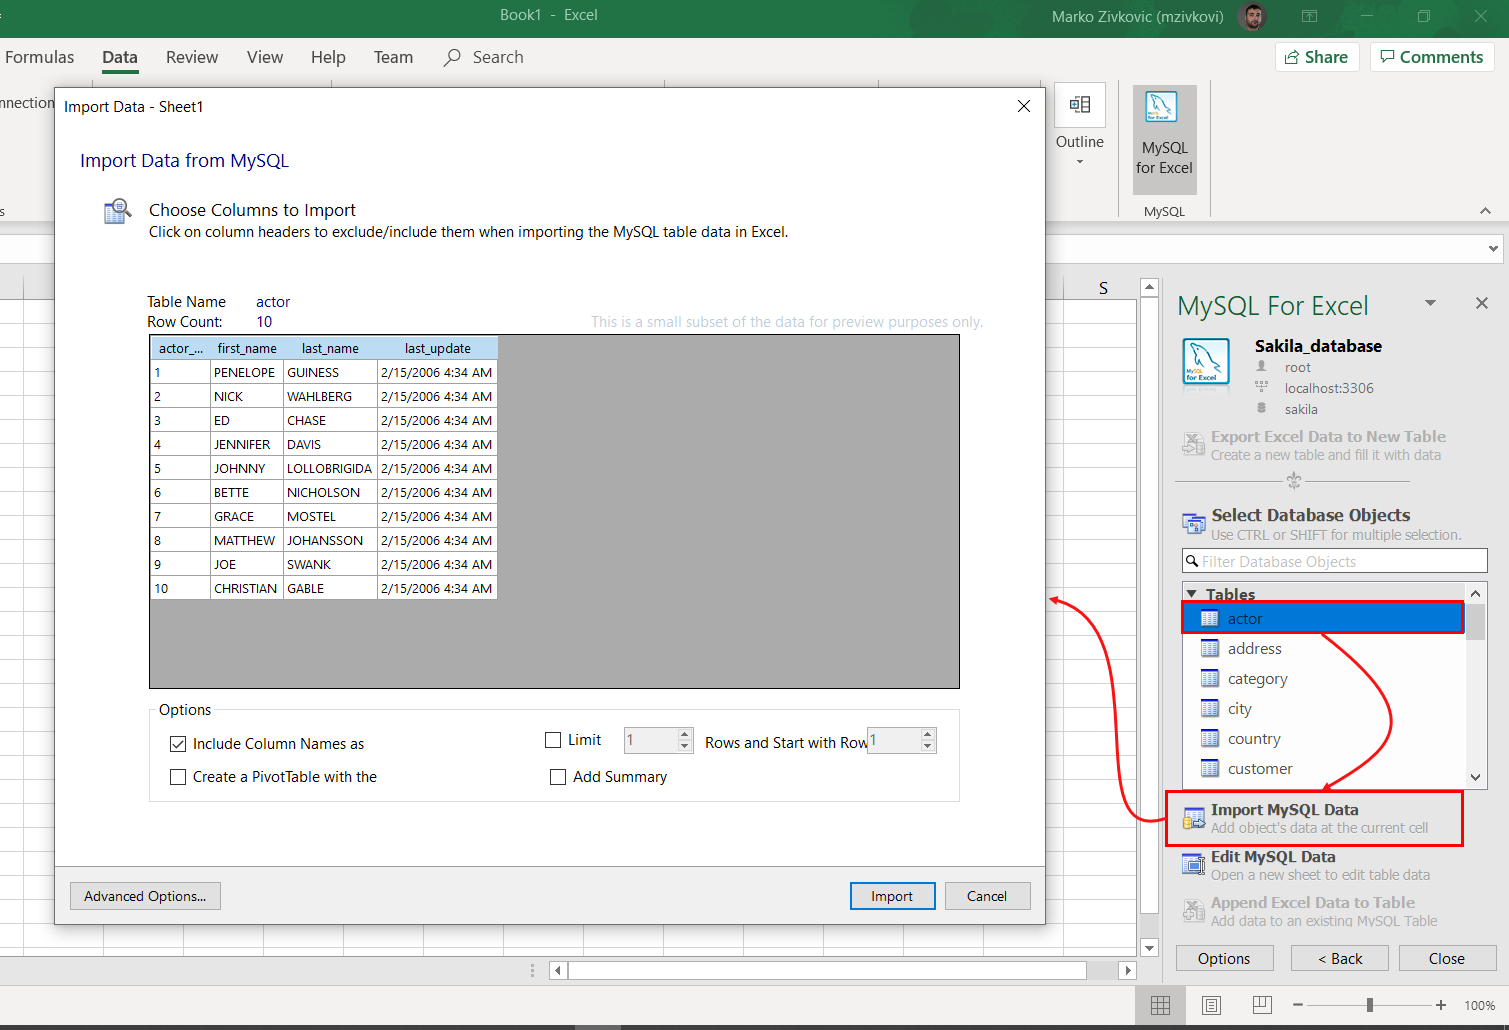
To import data, on the MySQL for Excel panel, select the desired table, and click the Import MySQL Data button. The Import Data window will appear:

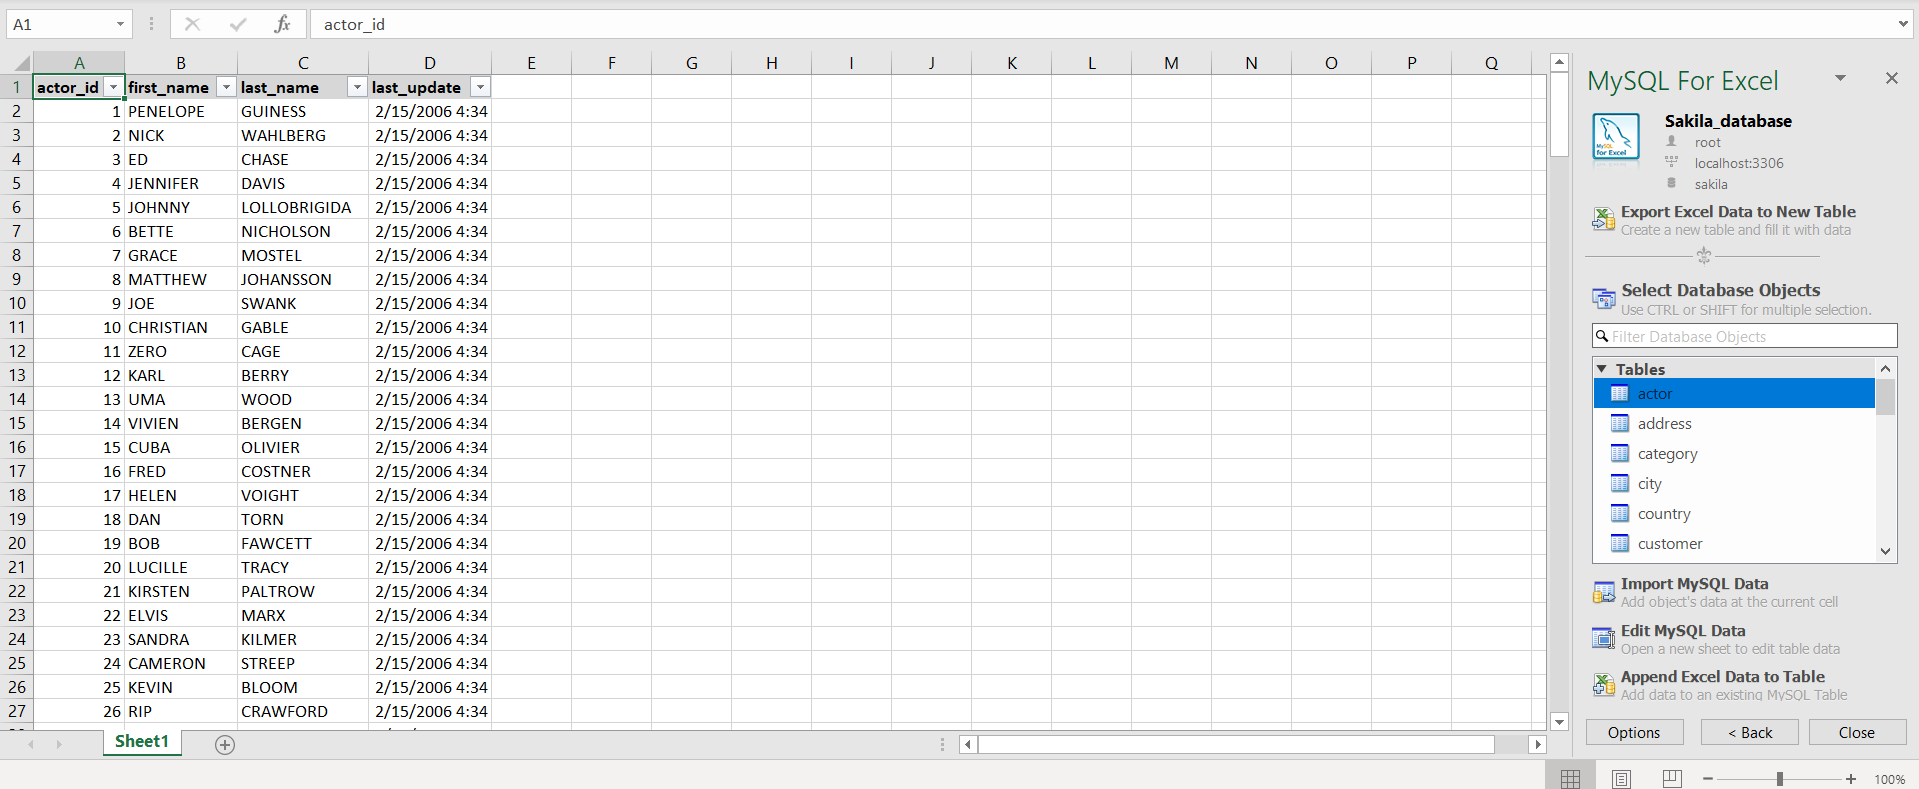
When all settings are set, click the Import button. The imported data will look something like this:

This add-in can return all rows, or a specified range of rows, from a specified table. It cannot import data stored in two different tables, perform table joins, or filter data.
More details about MySQL for Excel tool can be found on the MySQL for Excel page.
Export to Excel using a third-party software
Using the Export to Excel feature from ApexSQL Database Power Tools for VS Code, query results can be exported to MySQL data from the results grid in just a few steps. Besides exporting data to Excel, this VS Code extension provides a couple of more exporting options, such as export data to JSON, CSV, and HTML file format.
In a query editor of the VS Code extension, execute a query from which you want to be data exported. In the top right corner of the Results grid, click the Export to Excel button:

In the Save as window, enter a name and location for a new Excel file and click the Save button:
Источник
3 Steps To Export Data From MYSQL To Excel In PHP
Welcome to a quick tutorial on how to export data from MYSQL to an Excel Spreadsheet. Need to export some data from the database into Excel spreadsheets? Sadly, PHP is unable to generate Excel files natively.
To export data from MySQL to an Excel Spreadsheet:
- We need to use a third-party library to generate Excel files in PHP, a good recommendation is PHPSpreadsheet.
- Fetch entries from the database table.
- Write them to a Spreadsheet using PHPSpreadsheet.
But just how is this done exactly? Let us walk through a simple example in this guide – Read on!
ⓘ I have included a zip file with the example code at the start of this tutorial, so you don’t have to copy-paste everything… Or if you just want to dive straight in.
TLDR – QUICK SLIDES
TABLE OF CONTENTS
DOWNLOAD & NOTES

First, here is the download link to the example source code as promised.
QUICK NOTES
- A copy of PHPSpreadsheet is not included in the zip file. Download the latest version with Composer by yourself – composer require phpoffice/phpspreadsheet
- Create a dummy database and import 2-database.sql .
- Change the database settings in 3-db-spreadsheet.php to your own, and launch in the browser (or command line).
If you spot a bug, feel free to comment below. I try to answer short questions too, but it is one person versus the entire world… If you need answers urgently, please check out my list of websites to get help with programming.
EXAMPLE CODE DOWNLOAD
Click here to download the source code, I have released it under the MIT license, so feel free to build on top of it or use it in your own project.
DATABASE TO EXCEL SPREADSHEET

All right, let us now get into the example of how to export MYSQL data to an Excel spreadsheet.
STEP 1) DOWNLOAD PHPSPREADSHEET
Yep, PHP does not have native functions and extensions to generate Excel files, we will use a library called PHPSpreadsheet.
- One of the lazy ways to get PHPSpreadsheet is to use a package manager called Composer. Just download and install that, quite a hassle, but a one-time effort nonetheless.
- After installing Composer – Open the command line, navigate to your project folder, and run “ composer require phpoffice/phpspreadsheet “.
- That’s all, Composer will automatically fetch the latest version into the vendor/ project.
If you need more, the official manual for PhpSpreadsheet is available online here, and also check out their GitHub page.
STEP 2) CREATE A DUMMY DATABASE
For this example, we will be using this dummy user table. Very simple, and just has 3 fields – ID, name, and email.
STEP 3) EXPORT FROM DATABASE TO SPREADSHEET
This should be pretty straightforward and easy to understand:
- Connect to the database, and remember to change the database settings to your own.
- Captain Obvious. Include and use the PHPSpreadsheet library.
- Create a new spreadsheet, and get the current worksheet.
- Fetch entries from the database and populate the cells.
- Save the spreadsheet onto the server (or force download if you want).
One small thing to take note though – Avoid exporting an entire database and not generate massive spreadsheets… That will probably crash the server.
ALTERNATIVE) EXPORT MYSQL TO CSV FILE
If you do not want to use any extra libraries, we can always export them in CSV format instead. Just like the above, except that we are reading entries from the database and directly echoing them out.

Finally, here are some small extras and links that may be useful to you.
LINKS & REFERENCES
- A massive list of commonly used Excel formula that you might find useful.
- Need to do the opposite of importing data from a spreadsheet instead? Here’s how – Import Excel into MySQL
- Create Excel File In Javascript – Code Boxx
TUTORIAL VIDEO
INFOGRAPHIC CHEAT SHEET
THE END

Thank you for reading, and we have come to the end of this short tutorial. I hope this has helped you to create Excel files in PHP for your project, and if you have anything to share with this guide, please feel free to comment below. Good luck and happy coding!
Источник