
Using the Export Wizard, you can export data from an Access database to in a file format that can be read by Excel. This article shows you how to prepare and export your data to Excel, and also gives you some troubleshooting tips for common problems that might occur.
In this article
-
Exporting data to Excel: the basics
-
Prepare for the export operation
-
Run the export operation
-
What else should I know about exporting?
-
Troubleshoot missing and incorrect values
Exporting data to Excel: the basics
When you export data to Excel, Access creates a copy of the selected data, and then stores the copied data in a file that can be opened in Excel. If you copy data from Access to Excel frequently, you can save the details of an export operation for future use, and even schedule the export operation to run automatically at set intervals.
Common scenarios for exporting data to Excel
-
Your department or workgroup uses both Access and Excel to work with data. You store the data in Access databases, but you use Excel to analyze the data and to distribute the results of your analysis. Your team currently exports data to Excel as and when they have to, but you want to make this process more efficient.
-
You are a long-time user of Access, but your manager prefers to work with data in Excel. At regular intervals, you do the work of copying the data into Excel, but you want to automate this process to save yourself time.
About exporting data to Excel
-
Access does not include a “Save As” command for the Excel format. To copy data to Excel, you must use the Export feature described in this article, or you can copy Access data to the clipboard and then paste it into an Excel spreadsheet.
-
You can export a table, query, form, or report. You can also export selected records in a multiple-record view, such as a datasheet.
-
Microsoft Excel includes a command to import data from an Access database. You can use that command instead of the export command in Access; however, the Excel import command only allows you to import tables or queries. For more information, see the Excel Help article Connect to (import) external data.
-
You cannot export macros or modules to Excel. When you export a form, report, or datasheet that contains subforms, subreports, or subdatasheets, only the main form, report, or datasheet is exported. You must repeat the export operation for each subform, subreport, and subdatasheet that you want to export to Excel.
-
You can only export one database object in a single export operation. However, you can merge multiple worksheets in Excel after you complete the individual export operations.
Top of Pge
Prepare for the export operation
Before performing an export procedure, it is a good idea to review the data that you want to export to make sure that it does not contain any error indicators or error values. If there are any errors, try to resolve them before you export the data to Excel. Otherwise, problems can occur during the export operation, and null values might be inserted into cells in the Excel worksheet. For more information about problems that can occur when exporting to Excel, see the section Troubleshoot missing and incorrect values.
If the source object is a table or a query, decide whether you want to export the data with or without its formatting. This decision affects two aspects of the resulting workbook — the amount of data that is exported and the display format of the data. The following table describes the outcome of exporting formatted and unformatted data.
|
Export |
Source Object |
Fields and records |
Formatting |
|
Without formatting |
Table or query Note: Forms and reports cannot be exported without their formatting. |
All fields and records in the underlying object are exported. |
The Format property settings are ignored during the operation. For lookup fields, only the lookup ID values are exported. For hyperlink fields, the contents are exported as a text column that displays the links in the format displaytext#address#. |
|
With formatting |
Table, query, form, or report |
Only fields and records that are displayed in the current view or object are exported. Filtered records, hidden columns in a datasheet, and fields not displayed on a form or report are not exported. |
The wizard respects the Format property settings. For lookup fields, the lookup values are exported. For hyperlink fields, the values are exported as hyperlinks. For rich text fields, the text is exported but the formatting is not. |
-
Choose the destination workbook and file format. Note that reports can only be exported in the older *.xls file format, not in the newer *.xlsx file format.
During the export operation, Access prompts you to specify the name of the destination workbook. The following table summarizes when a workbook is created (if it does not already exist) and when it is overwritten (if it does already exist).
|
If the destination workbook |
And the source object is |
And you want to export |
Then |
|
Does not exist |
A table, query, form, or report |
The data, with or without the formatting |
The workbook is created during the export operation. |
|
Already exists |
A table or query |
The data, but not the formatting |
The workbook is not overwritten. A new worksheet is added to the workbook, and is given the name of the object from which the data is being exported. If a worksheet having that name already exists in the workbook, Access prompts you to either replace the contents of the corresponding worksheet or specify another name for the new sheet. |
|
Already exists |
A table, query, form, or report |
The data, including the formatting |
The workbook is overwritten by the exported data. All existing worksheets are removed, and a new worksheet having the same name as the exported object is created. The data in the Excel worksheet inherits the format settings of the source object. |
The data is always added in a new worksheet. You cannot append the data to any existing worksheet or named range.
Top of Page
Run the export operation
-
If the destination Excel workbook is open, close it before you continue.
-
In the Navigation Pane of the source database, select the object that you want to export.
Export only a portion of the data
If the object is a table, query, or form, and you want to export only a portion of the data, open the object in Datasheet view and select the records you want.
To open a form in Datasheet view:
-
Double-click the form to open it.
-
Right-click the form, and then click Datasheet View. If this option is not available:
-
Click Design View.
-
Press F4 to display the Property Sheet task pane.
-
Select Form from the drop-down list at the top of the Property Sheet.
-
On the Format tab of the Property Sheet, set the Allow Datasheet View property to Yes.
-
On the Design tab, in the Views group, click Datasheet View.
Note: You cannot export a portion of a report. However, you can select or open the table or query that the report is based on, and then export a portion the data in that object.
-
-
-
On the External Data tab, in the Export group, click Excel.
-
In the Export — Excel Spreadsheet dialog box, review the suggested file name for the Excel workbook (Access uses the name of the source object). If you want, you can modify the file name.
-
In the File Format box, select the file format that you want.
-
If you are exporting a table or a query, and you want to export formatted data, select Export data with formatting and layout. For more information, see the section Prepare for the export operation.
Note: If you are exporting a form or report, this option is always selected but unavailable (it appears dimmed).
-
To view the destination Excel workbook after the export operation is complete, select the Open the destination file after the export operation is complete check box.
If the source object is open, and if you selected one or more records in the view before starting the export operation, you can select Export only the selected records. To export all the records displayed in the view, leave this check box cleared.
Note: This check box remains unavailable (dimmed) if no records are selected.
-
Click OK.
If the export operation fails because of an error, Access displays a message that describes the cause of the error. Otherwise, Access exports the data and, depending on your selection in step 7, opens the destination workbook in Excel. Access then displays a dialog box in which you can create a specification that uses the details from the export operation.
Top of Page
What else should I know about exporting?
-
For information on how to save the details of your export into a specification that you can reuse later, see the article Save the details of an import or export operation as a specification.
-
For information on how to run saved export specifications, see the article Run a saved import or export operation.
-
For information on how to schedule specifications to run at specific times, see the article Schedule an import or export operation.
-
For information on how to change a specification name, delete specifications, or update the names of source files in specifications, see the article Manage Data Tasks.
Top of Page
Troubleshoot missing and incorrect values
The following table describes various ways of troubleshooting common errors.
Tip: If you find that just a few values are missing, fix them in the Excel workbook. Otherwise, fix the source object in the Access database, and then repeat the export operation.
|
Issue |
Description and resolution |
|
Calculated fields |
The results of calculated fields are exported; the underlying expressions that perform the calculations are not. |
|
Multivalued fields |
Fields that support multiple values are exported as a list of values separated by semicolons (;). |
|
Pictures, objects, and attachments |
Graphical elements (such as logos, contents of OLE object fields, and attachments that are part of the source data) are not exported. Add them to the worksheet manually after you complete the export operation. |
|
Graph |
When you export a form or report that contains a Microsoft Graph object, the graph object is not exported. |
|
Data in the wrong column |
Null values in the resulting worksheet are sometimes replaced by the data that should be in the next column. |
|
Missing date values |
Date values earlier than Jan 1, 1900 are not exported. The corresponding cells in the worksheet will contain a null value. |
|
Missing expressions |
Expressions that are used to calculate values are not exported to Excel. Only the results of the calculations are exported. Manually add the formula to the Excel worksheet after you complete the export operation. |
|
Missing subforms, subreports, and subdatasheets |
When you export a form, report, or datasheet, only the main form, report, or datasheet is exported. You must repeat the export operation for each subform, subreport, and subdatasheet that you want to export. |
|
Missing or incorrectly formatted columns |
If none of the columns appear to be formatted in the resulting worksheet, repeat the export operation, being sure to select the Export data with formatting and layout check box in the wizard. Conversely, if only some columns appear to be formatted differently from the versions in the source object, apply the formatting that you want manually in Excel. Format a column in Excel
|
|
«#» value in a column |
You might see the value # in a column that corresponds to a Yes/No field in a form. This can be the result of starting the export operation from the Navigation Pane or in Form view. To resolve this issue, open the form in Datasheet view before exporting the data. |
|
Error indicators or error values |
Check the cells for error indicators (green triangles in the corners) or error values (strings that begin with the # character instead of the appropriate data). |
Top of Page
How to Export Data to Excel
Learn to make reporting much easier
Updated on October 28, 2022
What to Know
- To export, select File > Export > choose Excel-compatible file (CSV or text format).
- To import, make sure exported data is in order > open or create worksheet > Data tab > choose import format/option.
- Import Access database: Select Get Data > From Database > From Microsoft Access Database > choose file.
This article explains how to export data from other applications into Excel for Microsoft 365, Excel 2019, and Excel 2016.
How to Export Data to Excel
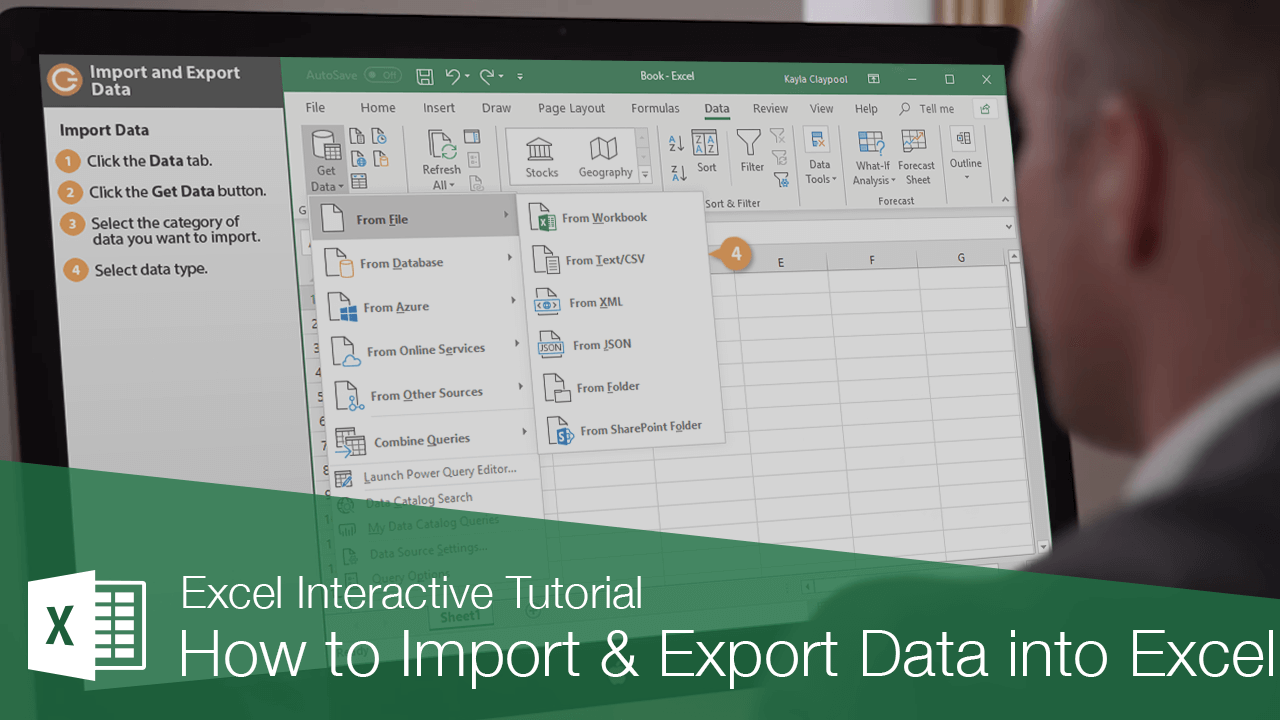
Excel can grab data from a variety of sources, from other Excel workbooks, to text files, Facebook, other tables and data ranges, and any web URL you input. If you have ready access to the data, you can import straight from that source, which is what we’ll address here.
For some applications, you may need to Export the data from that application first, or even have the options to export directly to Excel. That goes beyond the scope of this article as there are too many applications to list individually. But as a rule of thumb, it can be achieved by going to File > Export and selecting a file type that is compatible with Excel, or Excel itself if exporting directly to it. Microsoft Excel supports long list of file formats, but you typically want the data represented in either a Comma Separated Value (CSV) or text format.
How to Import Data to Excel
To import data to Excel, follow these steps:
-
Before you begin your export/import process, it’s a good idea to give your data a quick look to make sure everything is in order. You’re only wasting your time if you import incorrect or incomplete data, because you may need to redo the entire import/export operation.
-
When you’re ready, export the data if necessary with your particular application or source, and then open (or create) the Excel worksheet that you want to import the data to.
-
Select the Data tab in the top menu.
-
Above the Get and Transform Data subheading are a number of options you can select, but if none of them apply, select the generalized Get Data.
-
To import an Access database, select Get Data > From Database > From Microsoft Access Database.
-
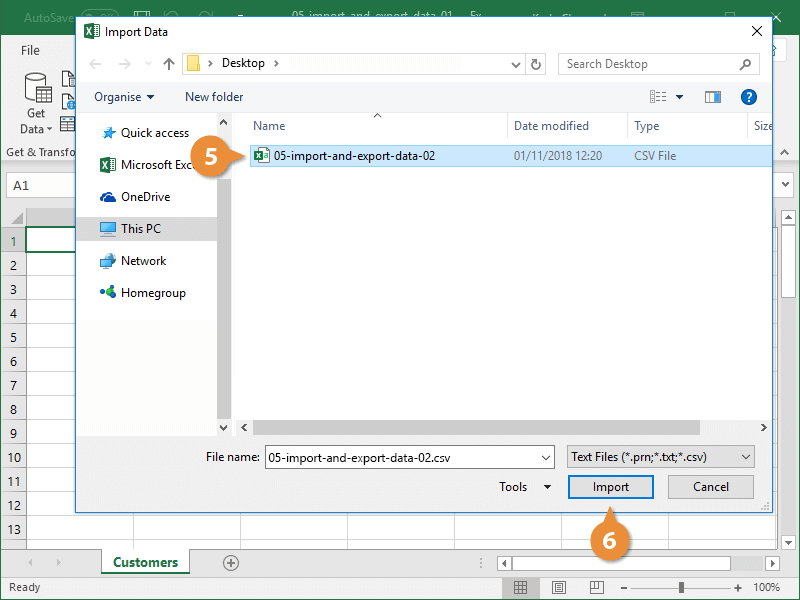
In the subsequent File Explorer window, select the database (or other file type) that you want to import the data from and select OK.
-
If your Access file has a number of databases, the Navigator window will provide a number of import options. In this case, import qrySalesbyCategory by selecting it and then selecting Load. To make any changes to the data before importing it, select Transform Data instead.
Excel can only import the datasheet, form, and report. Extras like macros and modules will not be imported into your Excel worksheet.
Depending on the size of your database and the speed of your PC, importing the data can take some time, so wait for it to complete. But, if all has gone to plan, when it’s finished you should now see your data fully imported into Excel and displayed in a useful format. You can continue to import data if you need more, or get to work on applying functions, formulas, and other useful tools that Excel has to offer.
In some compatible applications, like Access, data can simply be copied from an active Access database and pasted it into Excel.
Thanks for letting us know!
Get the Latest Tech News Delivered Every Day
Subscribe
This article is a detailed step-by-step guide to converting or exporting Word to Excel. We will look at different methods to export or convert a Word file to an Excel file in this article. So, read till the end to know multiple ways to convert your files.
Let’s get started!
Also read: How to Convert Excel to PDF?
Steps to export Word to Excel
Let’s get started with exporting an existing Word file on your system to Excel. Note that we’re not converting a Word file to an Excel spreadsheet here. We will discuss converting Word files later in this tutorial.
We already have unstructured data created in MS Word as an example.

Here are the steps to export an unstructured Word file to Excel.
- Go to the File tab.
- Click Save As.
- Click Browse.
- Choose Plain Text in the Save As type field.

- Click OK when the File Conversion window appears.

Now, import this text file into Excel.
- Open a blank Excel workbook or worksheet.
- Go to the Data tab.
- Click on From Text/CSV in the Get &Transform Data section.

- Choose the saved text file from the file location.

- Click on the Word file saved as a text file.
- Click Import.

- Check if your data is properly formatted. If you’re satisfied with the results click Load.
- If you’re unsatisfied with the format, like this data above, click Transform Data.
- Notice that there are two empty columns that we do not need. So, we will click Transform Data to fix this.

- The Power Query editor opens to help you manage the imported data.
- Right-click on the columns you want to delete.
- Press Remove.
- Once you’re done, click Close & Load in the Home tab.


You can see that the unstructured data from Word is exported to Excel in a structured format.
Let’s learn how to export structured or tabular data from Word to Excel.

To convert the data into a table.
- Select the entire data in Word.
- Go to the Insert tab.
- Click on Table.
- Click Insert Table.
- Right-click on the columns you want to delete.
- Press Delete Columns.
Your table is ready. Let’s export it to Excel.
This step is best for you if you don’t have Power Query in Excel.
- Select the entire data table in Word. CTRL+A to Select All.
- Copy the table. CTRL+C
- Paste the table (CTRL+V) in Excel.
Your structured data is successfully exported.
If you’re on an older version of Office like 2007, 2010, 2013, or 2016, then follow these steps.
The initial step to export Word to Excel is the same in the older versions.
- Save the Word file as a text file.
- Go to the File tab.
- Click Save As.
- Click Browse.
- Choose Plain Text in the Save As type field.
- Click OK when the File Conversion window appears.
Now, import this text file into Excel.
- Open a blank Excel workbook or worksheet.
- Go to the Data tab.
- Click on From Text/CSV in the Get &Transform Data section.
- Choose the saved text file from the file location.
- Click Open.
The Text Import Wizard opens with a few options.

- Choose Delimited if you want to separate each field with existing commas, spaces, or tabs.
- Choose Fixed Width if your fields are aligned properly.
- Click Next.
You can see your data is separated with lines between them.
- Double-click on a line to add or remove it.

- Click Next.
- Click Finish in the next step.
- Click on a cell where you wish to export the data.
- Click OK.

Your data is exported successfully.
Steps to converting Word to Excel online
You can also convert a Word file to Excel by following the steps below.
- Go to Online2PDF.
- Choose the Word file.
- Choose the Excel version you want to convert.

- Click Convert.
Note that you cannot export to the Excel 365 version here.
Conclusion
This tutorial was a detailed step-by-step guide to converting and exporting Word files to Microsoft Excel. We walked through the different methods of exporting data from Word for both newer and older versions of Excel. Stay tuned for more interesting tutorials like these!
References- Computer Hope
Excel can import and export many different file types aside from the standard .xslx format. If your data is shared between other programs, like a database, you may need to save data as a different file type or bring in files of a different file type.
Export Data
When you have data that needs to be transferred to another system, export it from Excel in a format that can be interpreted by other programs, such as a text or CSV file.
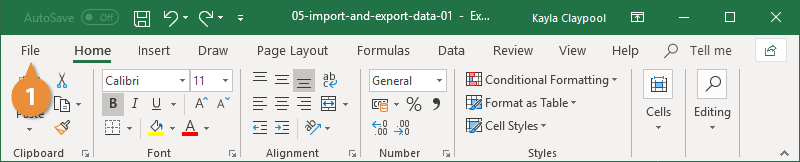
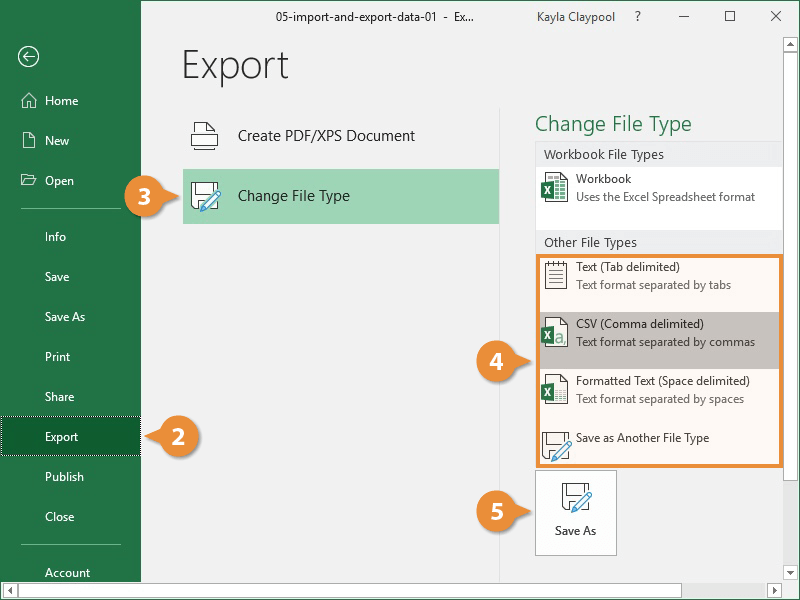
- Click the File tab.

- At the left, click Export.
- Click the Change File Type.
- Under Other File Types, select a file type.
- Text (Tab delimited): The cell data will be separated by a tab.
- CSV (Comma delimited): The cell data will be separated by a comma.
- Formatted Text (space delimited): The cell data will be separated by a space.
- Save as Another File Type: Select a different file type when the Save As dialog box appears.
The file type you select will depend on what type of file is required by the program that will consume the exported data.
- Click Save As.

- Specify where you want to save the file.
- Click Save.
A dialog box appears stating that some of the workbook features may be lost.
- Click Yes.

Import Data
Excel can import data from external data sources including other files, databases, or web pages.
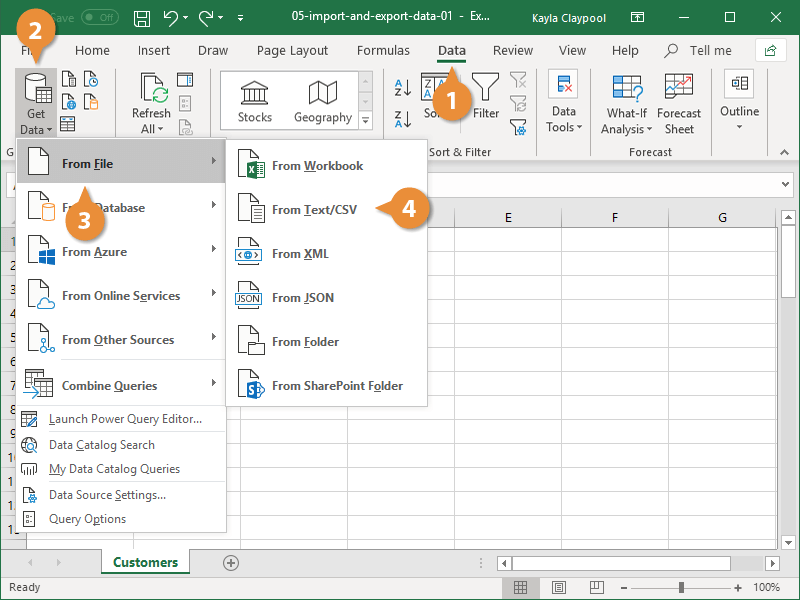
- Click the Data tab on the Ribbon..
- Click the Get Data button.
Some data sources may require special security access, and the connection process can often be very complex. Enlist the help of your organization’s technical support staff for assistance.
- Select From File.
- Select From Text/CSV.
If you have data to import from Access, the web, or another source, select one of those options in the Get External Data group instead.
- Select the file you want to import.
- Click Import.
If, while importing external data, a security notice appears saying that it is connecting to an external source that may not be safe, click OK.
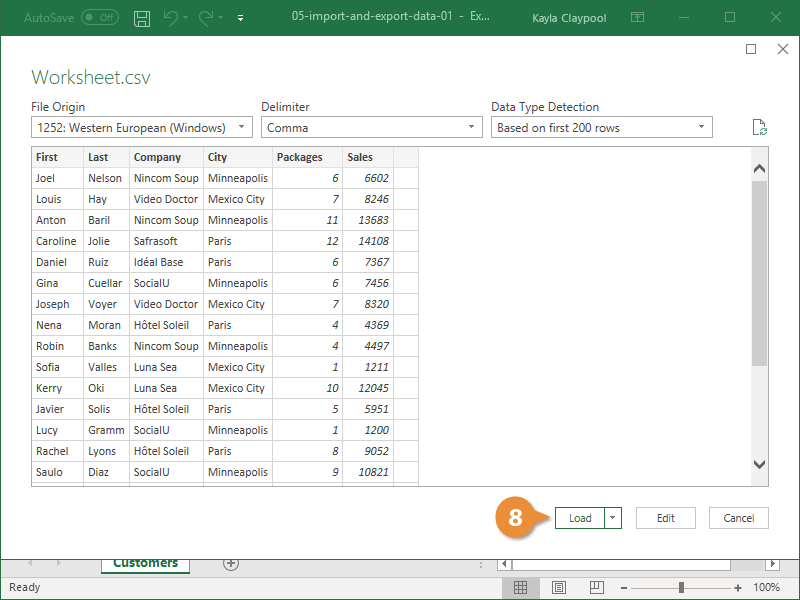
- Verify the preview looks correct.
Because we’ve specified the data is separated by commas, the delimiter is already set. If you need to change it, it can be done from this menu.
- Click Load.

FREE Quick Reference
Click to Download
Free to distribute with our compliments; we hope you will consider our paid training.
Время на прочтение
5 мин
Количество просмотров 43K
В продолжение темы, начатой в предыдущей статье, хочу поделиться своим опытом экспорта данных, в частности, в формате XLSX.
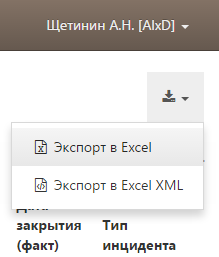
Итак, кому интересно, как заполнить XLSX без больших и сложных библиотек, прошу под кат.
Недавно передо мной возникла задача экспортировать непредсказуемый по размеру объем табличных данных в формате XLSX. Как любой здравомыслящий программист, первым делом полез искать готовые решения.
Почти сразу наткнулся на библиотеку PHPExcel. Мощное решение, с кучей разных функций и возможностей. Порывшись еще немного нашел отзывы программистов о ней. В частности, на форумах встречаются жалобы на скорость работы и отказ работать с большим объемом данных. Отметил библиотеку как один из вариантов решения и начал искать дальше.
Находил еще несколько библиотек для работы с XLSX, но все они были или забытыми, т.к. не обновлялись по 2-3 года, или обязательно тянули за собой сторонние библиотеки, или использовали DOM для работы с файлами, что мне не очень нравилось. Каждый раз, натыкаясь на очередную библиотеку и изучая механизмы ее работы, ловил себя на мысли, что все это «из пушки по воробьям». Не нужно мне такое сложное решение!
Признаюсь честно, изучив поверхностно каждое из найденных решений, не стал ставить и тестировать ни одного. Мне нужно было более простое и надежное, как танк, решение.
Задача
В общем, раз не нашел ничего подходящего, значит надо сформулировать технические требования к тому, что нужно. Требования, как и следовало ожидать, оказались тривиальными:
- Оформить экспортирующий механизм в виде автономного класса
- Реализовать в классе набор функций для записи значений ячеек и ряда
- Возможность работы с неограниченным объемом данных
- Распаковка и упаковка XLSX.
Отдельно остановлюсь только на последнем пункте. Как известно, XLSX представляет собой обычный zip-архив, который можно распаковать и увидеть, что он состоит из нескольких файлов и каталогов. Обратным образом его можно упаковать и переименовать в XLSX. Если все изменения правильные, то Microsoft Excel откроет файл без проблем.
Реализация
Изначально очень хотел создавать все файлы, из которых состоит XLSX, кодом, но, к счастью, быстро понял бессмысленность своей идеи. И родилось иное, более правильно и простое решение. Надо с помощью Microsoft Excel создать файл XLSX в таком виде, в каком он нужен в итоге, но без данных, иными словами — шаблон, а потом, с помощью кода, только добавить данные!
В таком случае, класс должен будет распаковывать шаблон в отдельный каталог, вносить изменения в /xl/worksheets/sheet1.xml и упаковывать содержимое каталога обратно в XLSX.
В объявлении класса присутствуют публичные переменные:
$templateFile – имя файла шаблона
$exportDir – папка, в которую будет распакован шаблон, разумеется с необходимыми правами доступа.
Конструктор класса принимает имя будущего файла, количество колонок и рядов. Потом проверяет, что имя файла корректно, папка для распаковки шаблона существует и формирует полное имя конечной папки для распаковки шаблона.
После создания класса можно распаковать шаблон и открыть на запись sheet1.xml. На самом деле я не просто дописываю в файл, а полностью его перезаписываю. Однажды взяв из него начальную строку, вношу в нее изменение в тэге dimension, который отражает размер экспортируемого диапазона, и записываю в файл.
public function openWriter()
{
	if (is_dir($this->baseDir))
		CFileHelper::removeDirectory($this->baseDir);
	mkdir($this->baseDir);

	exec("unzip $this->templateFullFilename -d "$this->baseDir"");

	$this->workSheetHandler = fopen($this->baseDir.'/xl/worksheets/sheet1.xml', 'w+');

	fwrite($this->workSheetHandler, '<?xml version="1.0" encoding="UTF-8" standalone="yes"?><worksheet xmlns="http://schemas.openxmlformats.org/spreadsheetml/2006/main" xmlns:r="http://schemas.openxmlformats.org/officeDocument/2006/relationships"><dimension ref="A1:'.chr(64+$this->colCount).$this->rowCount.'"/><sheetData>');
}
Обеспечить скорость работы и возможность работы с большим объемом данных позволяют функции resetRow и flushRow. Они отвечают за очистку текущего ряда в памяти и запись текущего ряда на диск.
А вот сохранение значений ячеек с разными типами оказалось не такой простой задачей.
Запись строки
Казалось бы, что сложного записать строковое значение в файл. Однако, в XLSX все не так просто. Все строки внутри XLSX хранятся в отдельном файле /xl/sharedStrings.xml. В ячейки записываются не строковые значения, а их порядковые номера — индексы. Разумное решение с точки зрения сокращения размера файла.
Но такое решение неудобно с точки зрения программного заполнения шаблона. Если выполнять указанное требование, то мне бы пришлось выполнять отдельный проход по всем строковым значениям в массиве данных, исключать повторяющиеся, сохранять их в sharedStrings.xml, проиндексировать и вместо значений в исходном массиве вписать их индексы. Медленно и неудобно.
Оказывается, можно обойти требование и сохранять строковые значения ячеек прямо в ячейках. Но в этом случае формат записи будет иной:
public function appendCellString($value)
{
	$this->curCel++;
	if (!empty($value)) {
		$value = htmlspecialchars($value, ENT_QUOTES, 'UTF-8');
		$value = preg_replace( '/[x00-x13]/', '', $value );
		$this->currentRow[] = '<c r="'.chr(64+$this->curCel).$this->numRows.'" t="inlineStr"'.($this->isBold ? ' s="7"' : '').'><is><t>'.$value.'</t></is></c>';
		$this->numStrings++;
	}
}
Запись числа
Никаких сложностей с записью целых или дробных чисел не возникло. Все просто:
public function appendCellNum($value)
{
	$this->curCel++;
	$this->currentRow[] = '<c r="'.chr(64+$this->curCel).$this->numRows.'"><v>'.$value.'</v></c>';
}
Запись даты и времени
Дата и время хранятся в виде количества секунд прошедших с 01.01.1970 поделенных на количество секунд в сутках. Причем, в вычислении допущена ошибка с определением високосного года. В общем, не вдаваясь в подробности, которые несложно найти в сети, чтобы корректно вычислять дату пришлось объявить в классе две константы:
ZERO_TIMESTAMP – смещение даты в формате Excel от UNIX_TIMESTAMP
SEC_IN_DAY – секунд в сутках.
После вычисления значения даты и времени, целая часть дроби – это дата, дробная часть – время:
const ZERO_TIMESTAMP = 2209161600;
const SEC_IN_DAY = 86400;

public function appendCellDateTime($value)
{
	$this->curCel++;

	if (empty($value))
		$this->appendCellString('');
	else
	{
		$dt = new DateTime($value);
		$ts = $dt->getTimestamp() + self::ZERO_TIMESTAMP;
		$this->currentRow[] = '<c r="'.chr(64+$this->curCel).$this->numRows.'" s="1"><v>'.$ts/self::SEC_IN_DAY.'</v></c>';
	}
}
После записи всех данных остается закрыть рабочий лист и рабочую книгу.
Применение
Как и раньше, использование описанного класса основано на экспорте данных с помощью провайдера CArrayDataProvider. Предполагая, что объем экспортируемых данных может оказаться очень большим, применен специальный итератор CDataProviderIterator, который перебирает возвращаемые данные по 100 записей (можно указать иное число записей).
public function exportXLSX($organization, $user, &$filename)
{
	$this->_provider = new CArrayDataProvider(/*query*/);

	Yii::import('ext.AlxdExportXLSX.AlxdExportXLSX');
	$export = new AlxdExportXLSX($filename, count($this->_attributes), $this->_provider->getTotalItemCount() + 1);

	$export->openWriter();
	$export->resetRow();
	$export->openRow(true);
	foreach ($this->_attributes as $code => $format)
		$export->appendCellString($this->_objectref->getAttributeLabel($code));
	$export->closeRow();
	$export->flushRow();

	$rows = new CDataProviderIterator($this->_provider, 100);
	foreach ($rows as $row)
	{
		$export->resetRow();
		$export->openRow();

		foreach ($this->_attributes as $code => $format)
		{
			switch ($format->type)
            {
                case 'Num':
                    $export->appendCellNum($row[$code]);
                /*other types*/
                default:
                    $export->appendCellString('');
            }
		}

		$export->closeRow();
		$export->flushRow();
	}
	$export->closeWriter();
	$export->zip();

	$filename = $export->getZipFullFileName();
}
Кому интересно, может получить исходный код моего класса AlxdExportXLSX совершенно безвозмездно.