
Export SQL Data to Excel from Microsoft SQL Server
Let’s go over three ways to export an SQL Query to an Excel File Using MSSQL
Despite the pushback from Database aficionados, sometimes it makes sense to export data from SQL to an Excel file. It really depends on who is the audience of the information. Not everyone is great with SQL Analysis. Few people require access to the database.
And lots of times the boss just needs to see the information in Excel.
So, if Excel is the Output required this article is here to help you Export SQL Queries to Excel.
Here are three ways to Export a SQL query to Excel format. The last one can be kind of tricky. I’ll provide a condensed version followed by a detailed version with screenshots.
Three quick ways to Export SQL Data to Excel:
Choose the Summarized Version and then scroll to further down to use the SQL Export Version to Excel that works best for you.
Method Number 1 – Copy Grid results and Paste into Excel
Under Query, Make sure results to Grid are selected.
After Running your query, right-click the top right corner of the grid.
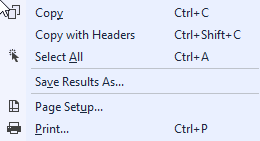
Copy With Headers.
Paste into an Excel File
Possible Issues:
I’ve seen formatting issues with this strategy. For Example, there are situations where the spreadsheet drops preceding zeroes after the copy-paste.
I’ve also noticed lengthy fields, (think of a really long free text field) end up running into the next line.
For the reasons above, I prefer this next method for a clean Excel file.
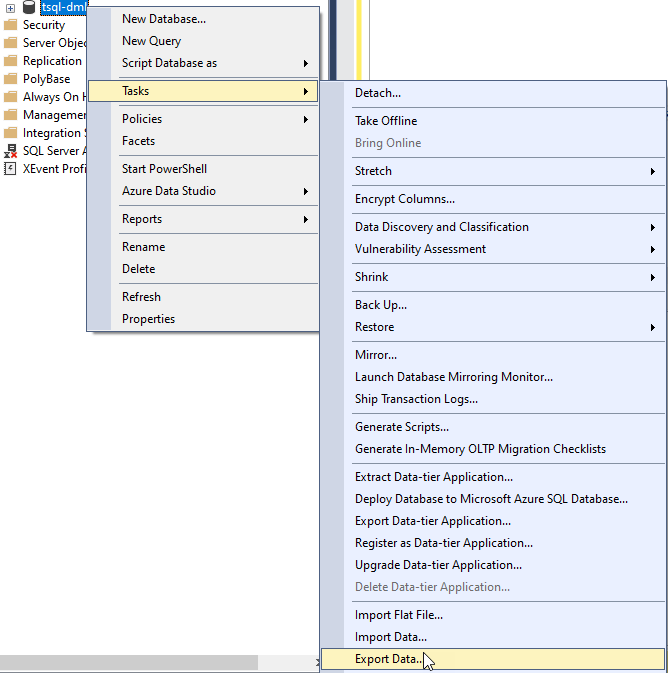
Method Number 2: Export the Query Results as a Task
In the object explorer window, find the database you want to export from.
Right Click the Database, Click Tasks, and Export Data
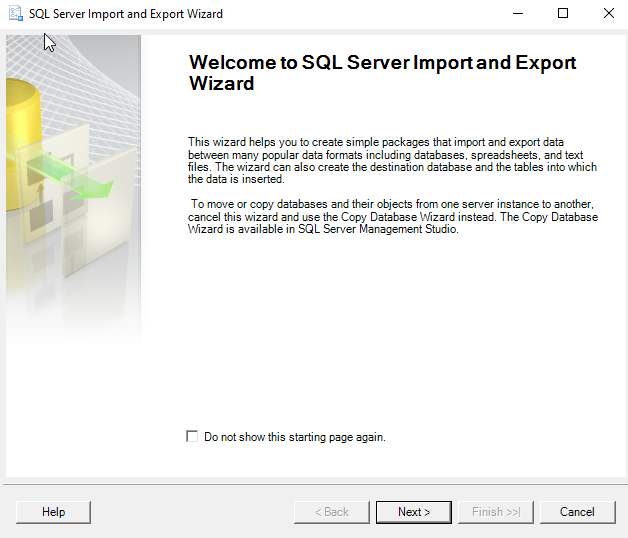
The Wizard walks you through the rest of the steps but I have included screenshots below.
Method Number 3 – Use Good Old fashioned TSQL to send the data to an excel file
For those who value speed above all use the following script format.
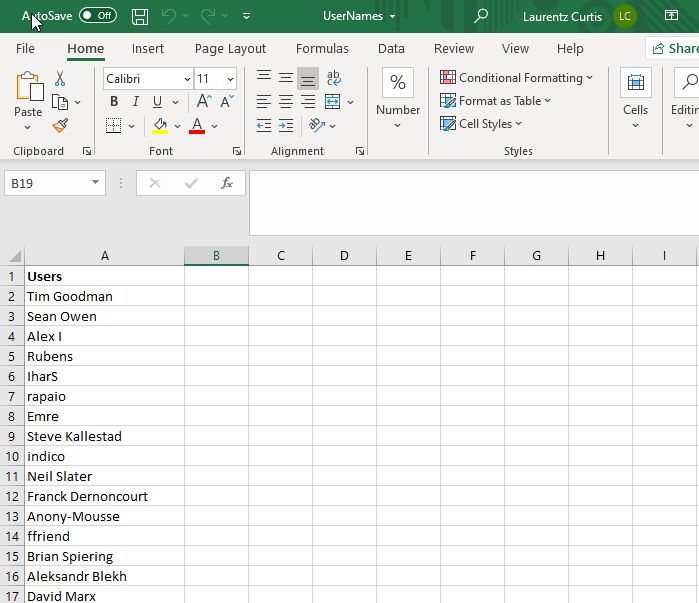
INSERT INTO OPENROWSET(‘Microsoft.ACE.OLEDB.12.0′,’Excel 12.0; Database=C:SQL2019ReportsUsernames.xlsx;’,’SELECT * FROM [Sheet1$]’) SELECT DisplayName FROM dbo.Users Where Reputation > 2000
Possible Issues – Configuring this might not be your type of fun and getting this straight deserves its own article.
Step by Step instructions with screenshots
Method Number 1 – Copy Grid results and paste into Excel
After ensuring results to grid turned on, Execute your query, right-click the top left-hand corner of the results grid.
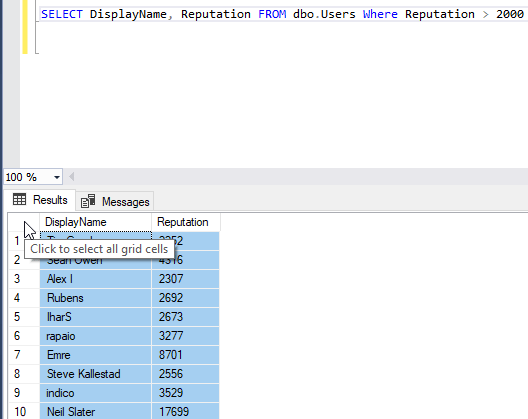
Choose Copy with Headers and then you are ready to paste in Excel with Ctrl + C
Method 2 – Export Via the Export Wizard
Right-click on the database you want to export from. Then Select tasks and “Export Data”.
The SQL Server Wizard will startup. Click Next through the prompts.
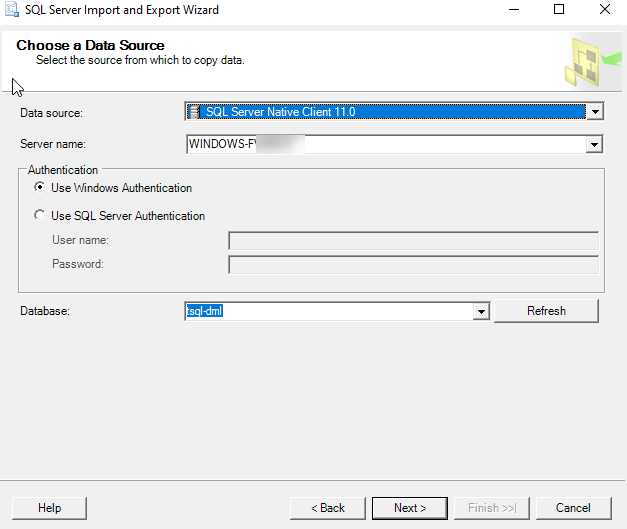
Select the appropriate Native client, your server name, and database and choose “Next”.
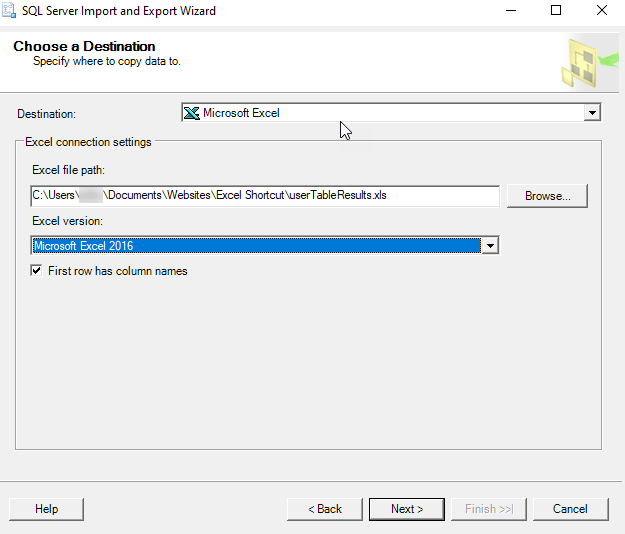
Next, Select Microsoft Excel and the file path where you want to import the data. The .xls file that you name will be created by this process.
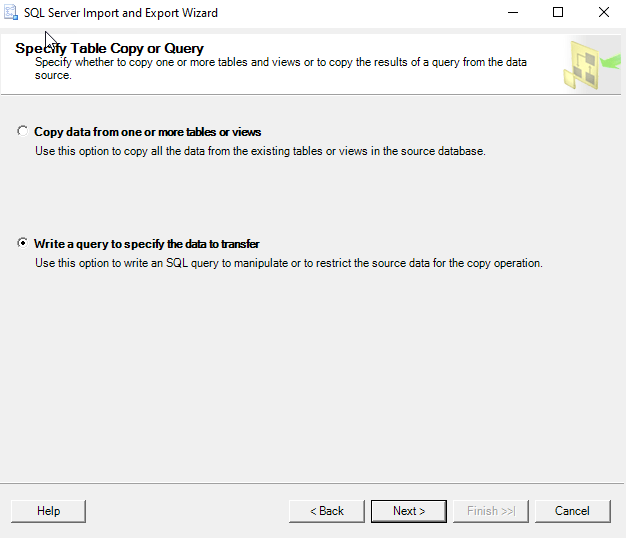
Now you can choose to export a whole table or a query. For the purpose of this exercise, we are creating a query.
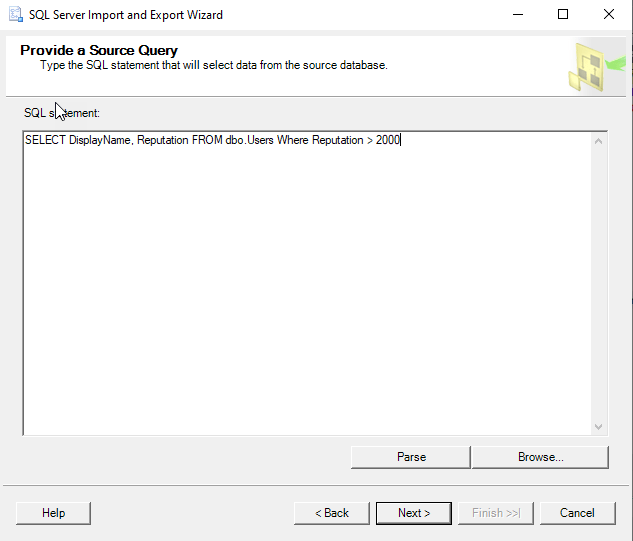
Paste the query into the SQL Statement field. Make sure every output field has a unique name.
Click Next on the “Select Source Tables and Views” screen.

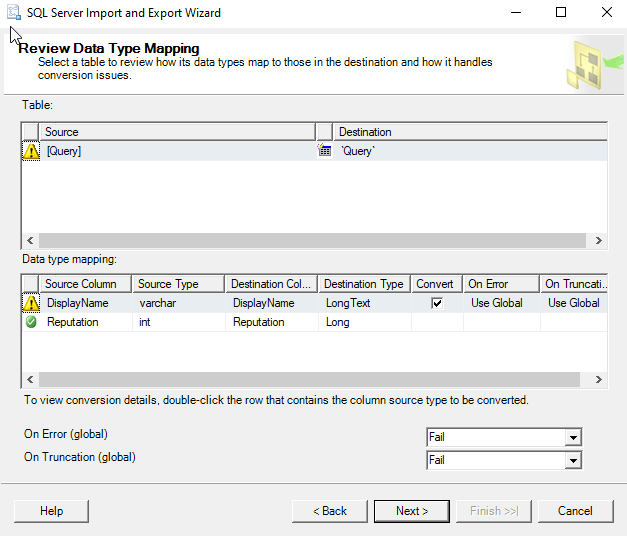
I use the default settings on the “conversion issues and data type mapping screen”
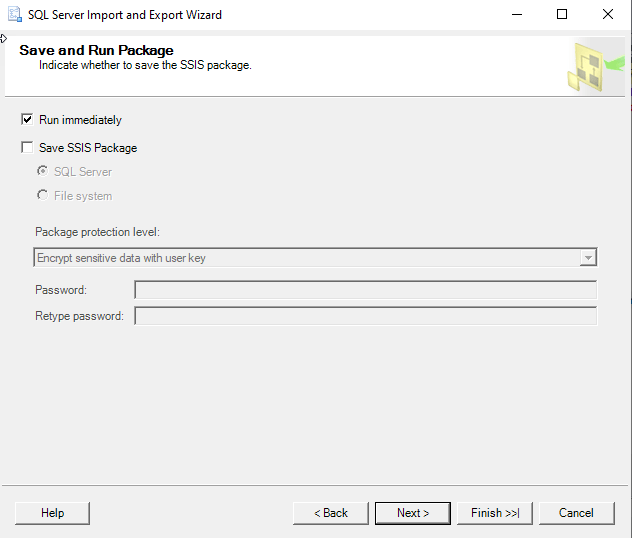
Now you can choose to Run immediately or Save an SSIS Package for later reuse.
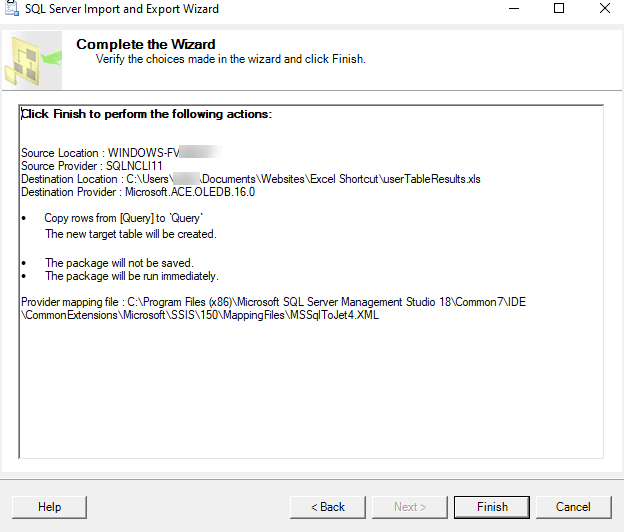
Double Check your settings and click finish.
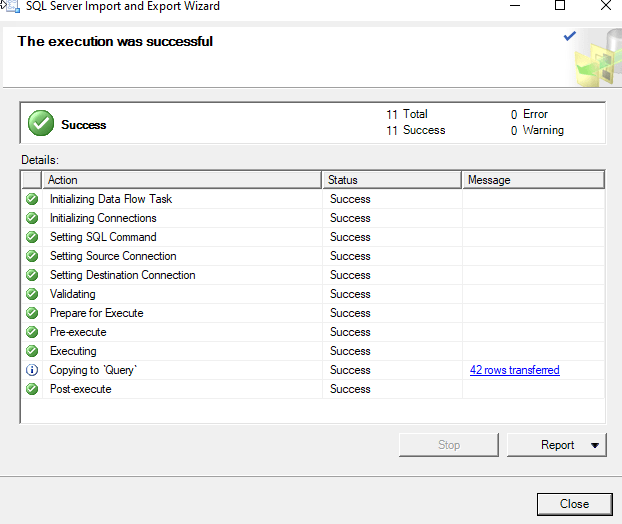
Make sure there were no errors in the Export.
Now Go to the directory you choose earlier and make sure you have a sweet-looking Excel File at that location!
Method Number 3 – Use TSQL to send the data to an excel file
This method is the quickest once you get it set up but the configuration is the tricky part. Permissions can be a limiting factor.
Also with the script below, you have to make sure the file exists before you run the query for it to import properly.
First, create a blank excel file at the directory of your choosing.
C:SQL2019ReportsUsernames.xlsx
Then run this script below.
INSERT INTO OPENROWSET(‘Microsoft.ACE.OLEDB.12.0’,’Excel 12.0;
Database=C:SQL2019ReportsUsernames.xlsx;’,’SELECT * FROM [Sheet1$]’)
SELECT DisplayName FROM dbo.Users Where Reputation > 2000

Configuring this can be tricky and dependent on your level of permissions. Make sure you have the correct Linked Server/Provider installed (‘Microsoft.ACE.OLEDB.12.0’) And check your Database user settings to this server .

For anyone coming here looking for how to do this in C#, I have tried the following method and had success in dotnet core 2.0.3 and entity framework core 2.0.3
First create your model class.
public class User
{
    public string Name { get; set; }
    public int Address { get; set; }
    public int ZIP { get; set; }
    public string Gender { get; set; }
}
Then install EPPlus Nuget package. (I used version 4.0.5, probably will work for other versions as well.)
Install-Package EPPlus -Version 4.0.5
The create ExcelExportHelper class, which will contain the logic to convert dataset to Excel rows. This class do not have dependencies with your model class or dataset.
public class ExcelExportHelper
    {
        public static string ExcelContentType
        {
            get
            { return "application/vnd.openxmlformats-officedocument.spreadsheetml.sheet"; }
        }

        public static DataTable ListToDataTable<T>(List<T> data)
        {
            PropertyDescriptorCollection properties = TypeDescriptor.GetProperties(typeof(T));
            DataTable dataTable = new DataTable();

            for (int i = 0; i < properties.Count; i++)
            {
                PropertyDescriptor property = properties[i];
                dataTable.Columns.Add(property.Name, Nullable.GetUnderlyingType(property.PropertyType) ?? property.PropertyType);
            }

            object[] values = new object[properties.Count];
            foreach (T item in data)
            {
                for (int i = 0; i < values.Length; i++)
                {
                    values[i] = properties[i].GetValue(item);
                }

                dataTable.Rows.Add(values);
            }
            return dataTable;
        }

        public static byte[] ExportExcel(DataTable dataTable, string heading = "", bool showSrNo = false, params string[] columnsToTake)
        {

            byte[] result = null;
            using (ExcelPackage package = new ExcelPackage())
            {
                ExcelWorksheet workSheet = package.Workbook.Worksheets.Add(String.Format("{0} Data", heading));
                int startRowFrom = String.IsNullOrEmpty(heading) ? 1 : 3;

                if (showSrNo)
                {
                    DataColumn dataColumn = dataTable.Columns.Add("#", typeof(int));
                    dataColumn.SetOrdinal(0);
                    int index = 1;
                    foreach (DataRow item in dataTable.Rows)
                    {
                        item[0] = index;
                        index++;
                    }
                }


                // add the content into the Excel file
                workSheet.Cells["A" + startRowFrom].LoadFromDataTable(dataTable, true);

                // autofit width of cells with small content
                int columnIndex = 1;
                foreach (DataColumn column in dataTable.Columns)
                {
                    int maxLength;
                    ExcelRange columnCells = workSheet.Cells[workSheet.Dimension.Start.Row, columnIndex, workSheet.Dimension.End.Row, columnIndex];
                    try
                    {
                        maxLength = columnCells.Max(cell => cell.Value.ToString().Count());
                    }
                    catch (Exception) //nishanc
                    {
                        maxLength = columnCells.Max(cell => (cell.Value +"").ToString().Length);
                    }

                    //workSheet.Column(columnIndex).AutoFit();
                    if (maxLength < 150)
                    {
                        //workSheet.Column(columnIndex).AutoFit();
                    }


                    columnIndex++;
                }

                // format header - bold, yellow on black
                using (ExcelRange r = workSheet.Cells[startRowFrom, 1, startRowFrom, dataTable.Columns.Count])
                {
                    r.Style.Font.Color.SetColor(System.Drawing.Color.White);
                    r.Style.Font.Bold = true;
                    r.Style.Fill.PatternType = OfficeOpenXml.Style.ExcelFillStyle.Solid;
                    r.Style.Fill.BackgroundColor.SetColor(Color.Brown);
                }

                // format cells - add borders
                using (ExcelRange r = workSheet.Cells[startRowFrom + 1, 1, startRowFrom + dataTable.Rows.Count, dataTable.Columns.Count])
                {
                    r.Style.Border.Top.Style = ExcelBorderStyle.Thin;
                    r.Style.Border.Bottom.Style = ExcelBorderStyle.Thin;
                    r.Style.Border.Left.Style = ExcelBorderStyle.Thin;
                    r.Style.Border.Right.Style = ExcelBorderStyle.Thin;

                    r.Style.Border.Top.Color.SetColor(System.Drawing.Color.Black);
                    r.Style.Border.Bottom.Color.SetColor(System.Drawing.Color.Black);
                    r.Style.Border.Left.Color.SetColor(System.Drawing.Color.Black);
                    r.Style.Border.Right.Color.SetColor(System.Drawing.Color.Black);
                }

                // removed ignored columns
                for (int i = dataTable.Columns.Count - 1; i >= 0; i--)
                {
                    if (i == 0 && showSrNo)
                    {
                        continue;
                    }
                    if (!columnsToTake.Contains(dataTable.Columns[i].ColumnName))
                    {
                        workSheet.DeleteColumn(i + 1);
                    }
                }

                if (!String.IsNullOrEmpty(heading))
                {
                    workSheet.Cells["A1"].Value = heading;
                   // workSheet.Cells["A1"].Style.Font.Size = 20;

                    workSheet.InsertColumn(1, 1);
                    workSheet.InsertRow(1, 1);
                    workSheet.Column(1).Width = 10;
                }

                result = package.GetAsByteArray();
            }

            return result;
        }

        public static byte[] ExportExcel<T>(List<T> data, string Heading = "", bool showSlno = false, params string[] ColumnsToTake)
        {
            return ExportExcel(ListToDataTable<T>(data), Heading, showSlno, ColumnsToTake);
        }
    }
Now add this method where you want to generate the excel file, probably for a method in the controller. You can pass parameters for your stored procedure as well. Note that the return type of the method is FileContentResult. Whatever query you execute, important thing is you must have the results in a List.
[HttpPost]
public async Task<FileContentResult> Create([Bind("Id,StartDate,EndDate")] GetReport getReport)
{
    DateTime startDate = getReport.StartDate;
    DateTime endDate = getReport.EndDate;

    // call the stored procedure and store dataset in a List.
    List<User> users = _context.Reports.FromSql("exec dbo.SP_GetEmpReport @start={0}, @end={1}", startDate, endDate).ToList();
    //set custome column names
    string[] columns = { "Name", "Address", "ZIP", "Gender"};
    byte[] filecontent = ExcelExportHelper.ExportExcel(users, "Users", true, columns);
    // set file name.
    return File(filecontent, ExcelExportHelper.ExcelContentType, "Report.xlsx");
}
More details can be found here
SQL Server is very popular in Relational Database and it is used across many software industries. Portability of data is a much-required feature of any database. i.e. Database should support features like exporting database data to Excel/CSV/JSON and also should import data from them. In this article, let us see how to import and export SQL Server Data to an Excel file. Azure data studio is a very useful tool for export options and the best part is it can run on Windows/Linux/Mac Operating system.
Method 1: exporting data to Excel via Azure DataStudio
Step 1: Database creation
We should have a database to proceed further. Let us keep ‘GEEKSFORGEEKS’ as the database name.
Syntax:
--Command to create database:
 - CREATE DATABASE <dbname>;
Create Database GEEKSFORGEEKS:
Query:
--Make the database active
USE GEEKSFORGEEKS;

Step 2: Adding the tables to the database
Creating a table with a Primary Key. Each author will have their unique ID and hence it is a Primary Key.
Query:
CREATE TABLE Posts (
    ID INT IDENTITY NOT NULL PRIMARY KEY,
    PostName VARCHAR(255) NOT NULL,
    Category VARCHAR(255),
    Likes INT,
    Shares INT
);
GO

Step 3: Inserting rows in the table. We can add only the necessary columns.
Query:
insert into Posts(PostName,Category,Likes,Shares)
 VALUES ('Core Java Programming','Java',10,5);
insert into Posts(PostName,Category,Likes,Shares)
VALUES ('SQLServer Programming','Java',20,8);
insert into Posts(PostName,Category,Likes,Shares)
 VALUES ('Oracle Programming','Java',25,12);
insert into Posts(PostName,Category,Likes,Shares)
 VALUES ('MongoDB Programming','Java',50,18);
insert into Posts(PostName,Category,Likes,Shares)
VALUES ('Python Programming','Java',15,10);

Step 4: Let us do a general query
Query:
SELECT * FROM Posts;
Output:

Step 5: Suppose if we want to exporting data to Excel via Azure Datastudio
Azure Datastudio has come with rich features for exporting data to Excel. Even exporting to CSV/JSON/XML/Chart are also possible. As given in below screenshot, need to click the option in the right corner
Output:

On clicking on “Save As Excel”, the resultant output is saved in excel format. We can see the saved contents below:

Step 6: We can write queries as per our needs and those data alone also can be exported. i.e. ultimately whatever results are in the “Results” pane are saved into excel format.
Query:
-- To get the details of Posts in
which category is like Database

SELECT PostName,Category,Likes,Shares FROM Posts
WHERE Category LIKE '%Database%'
ORDER BY PostName
Output:

This output can be exported to excel by clicking on “Save as Excel”, upon completion we can see the results as

Method 2: Import data from EXCEL into SQL server using SQL Server Management Studio
Importing data via SQL Server Management Studio. This is an easier option.
Step 1: Click on “Tasks” and choose “Import Data” option.

Step 2: The below screens are self-explanatory. Let us see one by one.

Step 3:Click on “Microsoft Excel” option.

Step 4: Source location can be selected as given below

Step 5: Destination location can be chosen from this window


Step 6: We can see that a table with the name “dataFromExcelForPostsByCategory” is created. If we compare the contents of excel data, they are the same.

In every database, portability is much important. In SQL server, by above-mentioned ways, they are done. For export, using Azure data studio it is explained and for import, by using SQL Server Management Studio, it is explained.
In several scenarios, we need to use some data which is available in SQL Server, but we need it in MS Excel. Instead of putting every data manually into Excel, the SQL Server provides an option to import and export data from SQL Server to Excel sheets. In this tutorial, we will learn various methods of importing and exporting data from or to SQL Server. Also, we will cover these topics.
- How to export data from SQL Server to Excel using Import and Export Wizard
- How to export data from SQL Server to Excel automatically
- How to export data from SQL Server to Excel using the query
- How to import data from SQL Server into Excel using Data Connection Wizard
- Export data from SQL Server to Excel using stored procedures
Here, for all the functionality, I have used SQL Server 2019 Express edition.
Export data from SQL Server to Excel using Import and Export Wizard
In this section, we will learn how to export data from the SQL Server database into an Excel worksheet automatically using import & export Wizard. We will be using the import and export wizard in SQL Server Management Studio.
- Below is the table that we are going to export automatically using the import and export wizard in SQL Server.

- Right-click on the database using which table is created.
- Select the Tasks option from the dropdown another dropdown will appear.
- Click on the Export Data.

- Once you have clicked on the Export Data option from the drop-down menu then Import and Export wizard window will appear.
- Click on Next to proceed in the process.

- Once you have clicked on the Next button on Import and Export wizard a new window will appear asking to Choose a Data Source
- Select SQL Server Native Client 11.0 in Data Source
- Select the instance from the dropdown for the Server name.
- For Authentication, you can use:
- Use Windows Authentication, which means the username and password of your computer. It automatically picks up from the system.
- Use SQL Server Authentication, this requests the Username and Password that was creating an instance.
- Select the database name from the dropdown and click on the Next button.

- The SQL Server Import and Export Wizard will ask for destination details. Choose Destination field as Microsoft Excel
- Give the path to the Excel file into which you want to export the data
- Select the Excel Version according to the version of the Excel that you have installed on your system and click Next.

- Now the SQL Server Import and Export Wizard will ask whether you want to copy all data from the existing tables or query-specific data. We can select Copy data from one or more tables or views to import all the table data.
- We will also explain how you can copy data that is modified by SQL query with Write a query to specify the data to transfer option
Read: How to Create a Database in SQL Server 2019 [Step by Step]
Export data from SQL Server to Excel automatically
SQL Server 2019 provides a method to export all the data from SQL server to Excel worksheet. In this section, we will demonstrate how to export SQL server data to Excel automatically using Import and Export Wizard.

- Choose the table from the Source tab which you want to export and specify the name of the table in the Destination tab and click Next

- In the next step, you can choose whether you want to save the SSIS Package or not. In this section, we will continue without saving.

- Now you will see the final overview of the operation before the execution, click on the Finish Button.

- Now data has been successfully exported from SQL Server to Excel worksheet.Click on the Close button to exit the window.

- You can check that the file is created at the specified location.

Read: How to create a table in sql server management studio
At times, it is not necessary to export all the table data. Instead, we need to export data using a query. In such situations, we can export query-specific data from SQL Server to Excel worksheet.
- After selecting the source and destination of data using SQL Import and Export Wizard, the wizard show two options. Choose the second option which says Write a query to specify the data to transfer and then click on the Next button.

- Then we need to specify the query which we want to implement. In our case we will execute a query to show the Name and Age of people whose salaries are greater than 100000. After writing the query, click Next

- Now you will see the overview of table source and destination. You can also see how the data looks after the query is implemented by clicking on the Preview button. Then click Next

- Run immediately is checked by default, click on Next button.
- Now all the configurations are complete. You can click on the Finish button to start the Wizard

- If all actions are successfully completed, your query is implemented and the data is exported. You can close this window.

- Navigate to the destination path and you can see that data is exported successfully

Read: Advanced Stored Procedure Examples in SQL Server
How to import data from SQL Server into Excel using Data Connection Wizard
We can also import data from SQL Server to Excel using the Data Connection Wizard in Excel. The benefit of using this method is that we can get live data from SQL Server.
Live data means that the changes made in the SQL Server database will be reflected into the Excel worksheet also. We will demonstrate this with the help of an example
- Open MS Excel and create a new worksheet or open an existing worksheet into which you want to import the data from SQL Server
- Go to the Data tab and click on From Other Sources and then From SQL Server as shown in the image below

- Enter the name of the Server instance that you have created in the Server name field. You can use either Windows Authentication or SQL Server login credentials to make a connection with the database. After inserting the required details, click Next

- Now select the database and the table that you want to import. You can also import data from multiple tables by checking the option Enable selection of multiple tables

- Save the Data Connection File. Add description to it to store more information about the connection. It will help you to know the information about the connection when you will connect to the database again. Click Next

- A small window will appear where you can decide how you want to view your data in the Excel Workbook. You can import the data either in an existing worksheet or in a new worksheet. Select the desired option and then click OK

- Now you can see, your data is imported successfully from SQL Server

- As mentioned above, this type of connection is a live connection to the database. Try to change the data in SQL Server. You will see that the changes will be reflected in the Excel worksheet also. Let us see an example
- Run the following query in the SQL Query Window in SQL Studio Management
update Employees set Age =20 where [Employee ID]=1;
select * from Employees;
Here is the implementation of above mentioned code snippet.

- Changes are made in the table. Now refresh the excel worksheet where you have imported the data or open it again. You will the same changes in the imported data

In this tutorial, we have learned how to import data from SQL Server into MS Excel using Import and Export wizard in different ways. Also, we have covered these topics.
Export data from SQL Server to Excel using stored procedures
- There is a method in SQL Server called OPENROWSET method which is used to export data from SQL Server to Excel
- OPENROWSET method has some requirements that need to be fulfilled before we can use this method
- Administrator permissions to SQL Server Management Studio
- enable “Show Advanced Options”
- enable “Ad Hoc Distributed Queries”
- Run SQL Server Management Studio as Administrator
- Write the query following query to enable these options
EXEC sp_configure 'show advanced options', 1;
RECONFIGURE;
GO
EXEC sp_configure 'Ad Hoc Distributed Queries',1;
RECONFIGURE;
GO
- Give permissions to the Microsoft.ACE.OLEDB.12.0 driver by excecuting the following command
EXEC sp_MSset_oledb_prop N'Microsoft.ACE.OLEDB.12.0', N'AllowInProcess', 1
EXEC sp_MSset_oledb_prop N'Microsoft.ACE.OLEDB.12.0', N'DynamicParameters', 1- After successfully running the above commands, you have to create an Excel sheet with the same fields which are there in the database table

- Now you can write the query to export data from SQL Server to Excel
INSERT INTO OPENROWSET('Microsoft.ACE.OLEDB.12.0','Excel 12.0;
Database=C:UsersBladesDesktopexported_data.xls;','SELECT * FROM [Sheet1$]')
Select * from Employees;- Remember to set the Database path, Excel file name, Excel worksheet name and database name in the above query
- You may encounter the following error while executing the query
- This error states that the SQL Server is running on 64-bit architecture but Microsoft Access Database Engine only has 32-bit drivers installed

This means you have to download the 64-bit Access Database Engine
You can download the 64-bit version of Access Database Engine from the specified link
Install Access Database Engine and this will install the 64-bit version of Microsoft.ACE.OLEDB.12.0 driver.
Now run the query again
INSERT INTO OPENROWSET('Microsoft.ACE.OLEDB.12.0','Excel 12.0;
Database=C:UsersBladesDesktopexported_data.xls;','SELECT * FROM [Sheet1$]')
Select * from Employees;- Now you can see, the query is run successfully

- You can open the Excel file and see if the data is exported

- You can use this OPENROWSET method in your own stored procedure and export data from SQL Server to Excel.
You may like the following sql server articles:
- SQL Server Substring Function
- SQL Server Replace Function + Examples
- SQL Server Convert String to Date
In this tutorial, we learned about the various methods of exporting the data from SQL Server to Excel. We solved some encountered errors also.
- How to export data from SQL Server to Excel using Import and Export Wizard
- How to export data from SQL Server to Excel automatically
- How to export data from SQL Server to Excel using the query
- How to import data from SQL Server into Excel using Data Connection Wizard
- Export data from SQL Server to Excel using stored procedures
I am Bijay having more than 15 years of experience in the Software Industry. During this time, I have worked on MariaDB and used it in a lot of projects. Most of our readers are from the United States, Canada, United Kingdom, Australia, New Zealand, etc.
Want to learn MariaDB? Check out all the articles and tutorials that I wrote on MariaDB. Also, I am a Microsoft MVP.