
- Details
- Written by
- Last Updated on 22 October 2019 | Print Email
This tutorial helps you write Java code to export data from a table in database to an Excel file – a very common task of a software program. To read data from database, we use JDBC with appropriate JDBC driver (MySQL is used in this tutorial). And to generate Excel file, we use Apache POI library.
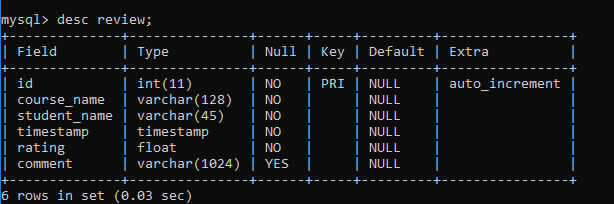
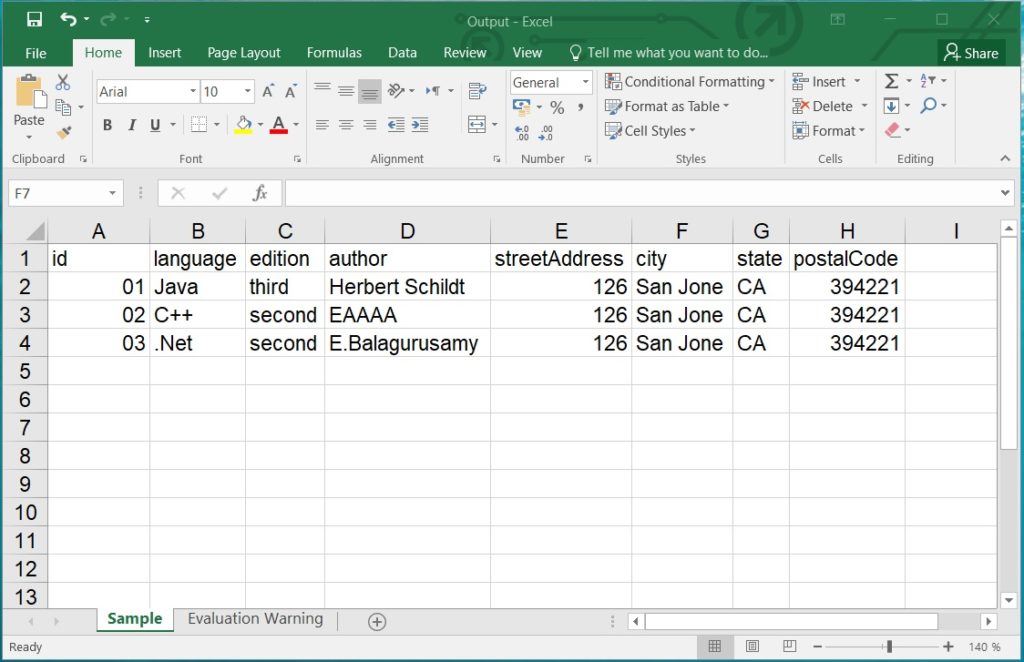
Suppose that we have a table with the following structure:
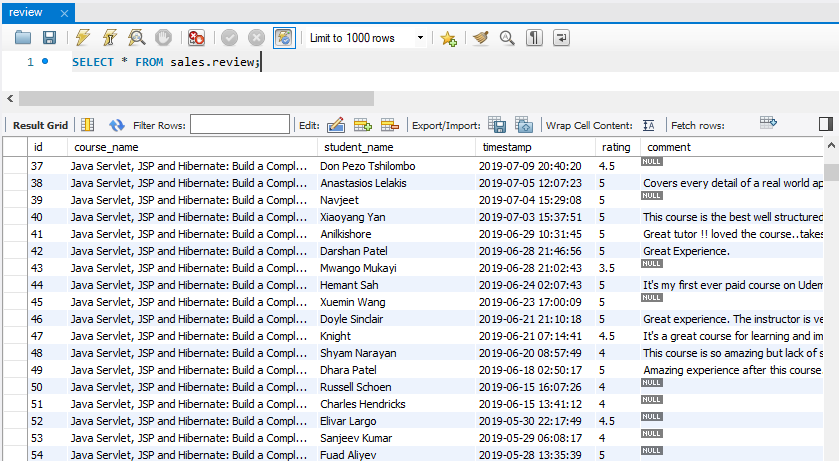
This table contains some data like this:
I will guide you how to code simple program that exports data from this table to Excel 2007+ format (XSLX), and an advanced program that can export data from any table.
First, make sure that you specify the dependencies for MySQL JDBC driver and Apache POI API for Excel in Maven’s pom.xml file:
<dependency>
	<groupId>mysql</groupId>
	<artifactId>mysql-connector-java</artifactId>
	<version>5.1.46</version>
	<scope>runtime</scope>
</dependency>
<dependency>
	<groupId>org.apache.poi</groupId>
	<artifactId>poi-ooxml</artifactId>
	<version>4.1.0</version>
</dependency>
Next, let’s see the code examples.
The following code is for a simple Java program that connects to a MySQL database, reads all rows from the Review table and writes the data to an Excel file:
package net.codejava;

import java.io.*;
import java.sql.*;

import org.apache.poi.ss.usermodel.*;
import org.apache.poi.xssf.usermodel.*;

/**
 * A simple Java program that exports data from database to Excel file.
 * @author Nam Ha Minh
 * (C) Copyright codejava.net
 */
public class SimpleDb2ExcelExporter {

	public static void main(String[] args) {
		new SimpleDb2ExcelExporter().export();
	}

	public void export() {
		String jdbcURL = "jdbc:mysql://localhost:3306/sales";
		String username = "root";
		String password = "password";

		String excelFilePath = "Reviews-export.xlsx";

		try (Connection connection = DriverManager.getConnection(jdbcURL, username, password)) {
			String sql = "SELECT * FROM review";

			Statement statement = connection.createStatement();

			ResultSet result = statement.executeQuery(sql);

			XSSFWorkbook workbook = new XSSFWorkbook();
			XSSFSheet sheet = workbook.createSheet("Reviews");

			writeHeaderLine(sheet);

			writeDataLines(result, workbook, sheet);

			FileOutputStream outputStream = new FileOutputStream(excelFilePath);
			workbook.write(outputStream);
			workbook.close();

			statement.close();

		} catch (SQLException e) {
			System.out.println("Datababse error:");
			e.printStackTrace();
		} catch (IOException e) {
			System.out.println("File IO error:");
			e.printStackTrace();
		}
	}

	private void writeHeaderLine(XSSFSheet sheet) {

		Row headerRow = sheet.createRow(0);

		Cell headerCell = headerRow.createCell(0);
		headerCell.setCellValue("Course Name");

		headerCell = headerRow.createCell(1);
		headerCell.setCellValue("Student Name");

		headerCell = headerRow.createCell(2);
		headerCell.setCellValue("Timestamp");

		headerCell = headerRow.createCell(3);
		headerCell.setCellValue("Rating");

		headerCell = headerRow.createCell(4);
		headerCell.setCellValue("Comment");
	}

	private void writeDataLines(ResultSet result, XSSFWorkbook workbook,
			XSSFSheet sheet) throws SQLException {
		int rowCount = 1;

		while (result.next()) {
			String courseName = result.getString("course_name");
			String studentName = result.getString("student_name");
			float rating = result.getFloat("rating");
			Timestamp timestamp = result.getTimestamp("timestamp");
			String comment = result.getString("comment");

			Row row = sheet.createRow(rowCount++);

			int columnCount = 0;
			Cell cell = row.createCell(columnCount++);
			cell.setCellValue(courseName);

			cell = row.createCell(columnCount++);
			cell.setCellValue(studentName);

			cell = row.createCell(columnCount++);

			CellStyle cellStyle = workbook.createCellStyle();
			CreationHelper creationHelper = workbook.getCreationHelper();
			cellStyle.setDataFormat(creationHelper.createDataFormat().getFormat("yyyy-MM-dd HH:mm:ss"));
			cell.setCellStyle(cellStyle);

			cell.setCellValue(timestamp);

			cell = row.createCell(columnCount++);
			cell.setCellValue(rating);

			cell = row.createCell(columnCount);
			cell.setCellValue(comment);

		}
	}

}
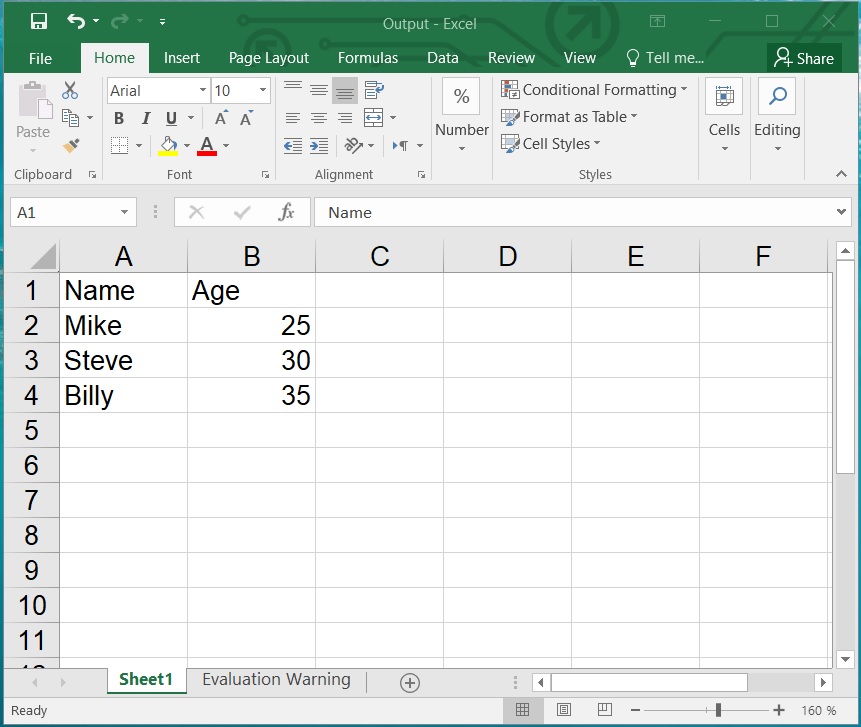
Note that the writeHeaderLine() method writes the column names of the table to the first line in the Excel file. The column names are known beforehand and fixed. The first column (ID) is omitted.
The writeDataLines() method iterates over all rows in the result set returned from the database, and writes data to the Excel file. Note that there’s a datetime value so a cell style is created to format value as datetime.
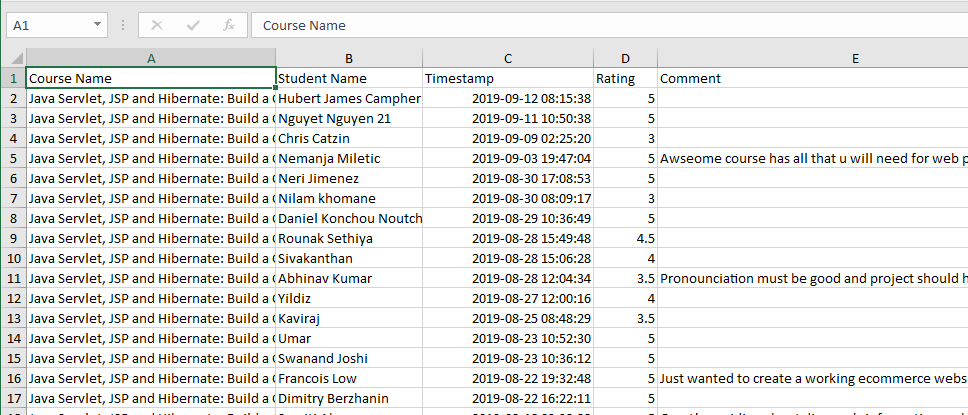
Run this program, you will see the Reviews-export.xlsx file is generated in the same directory of the program. Open this file by Microsoft Excel application and you will see:
2. Advanced Java code example to export data from database to Excel file
Let’s see the code of a more advanced program that can export data from any table in the database to Excel file. Following is the full code:
package net.codejava;

import java.io.*;
import java.sql.*;
import java.text.*;
import java.util.Date;

import org.apache.poi.ss.usermodel.*;
import org.apache.poi.xssf.usermodel.*;

/**
 * An advanced Java program that exports data from any table to Excel file.
 * @author Nam Ha Minh
 * (C) Copyright codejava.net
 */
public class AdvancedDb2ExcelExporter {

	public static void main(String[] args) {
		AdvancedDb2ExcelExporter exporter = new AdvancedDb2ExcelExporter();
		exporter.export("Review");
		exporter.export("Product");
	}

	private String getFileName(String baseName) {
		DateFormat dateFormat = new SimpleDateFormat("yyyy-MM-dd_HH-mm-ss");
		String dateTimeInfo = dateFormat.format(new Date());
		return baseName.concat(String.format("_%s.xlsx", dateTimeInfo));
	}

	public void export(String table) {
		String jdbcURL = "jdbc:mysql://localhost:3306/sales";
		String username = "root";
		String password = "password";

		String excelFilePath = getFileName(table.concat("_Export"));

		try (Connection connection = DriverManager.getConnection(jdbcURL, username, password)) {
			String sql = "SELECT * FROM ".concat(table);

			Statement statement = connection.createStatement();

			ResultSet result = statement.executeQuery(sql);

			XSSFWorkbook workbook = new XSSFWorkbook();
			XSSFSheet sheet = workbook.createSheet(table);

			writeHeaderLine(result, sheet);

			writeDataLines(result, workbook, sheet);

			FileOutputStream outputStream = new FileOutputStream(excelFilePath);
			workbook.write(outputStream);
			workbook.close();

			statement.close();

		} catch (SQLException e) {
			System.out.println("Datababse error:");
			e.printStackTrace();
		} catch (IOException e) {
			System.out.println("File IO error:");
			e.printStackTrace();
		}
	}

	private void writeHeaderLine(ResultSet result, XSSFSheet sheet) throws SQLException {
		// write header line containing column names
		ResultSetMetaData metaData = result.getMetaData();
		int numberOfColumns = metaData.getColumnCount();

		Row headerRow = sheet.createRow(0);

		// exclude the first column which is the ID field
		for (int i = 2; i <= numberOfColumns; i++) {
			String columnName = metaData.getColumnName(i);
			Cell headerCell = headerRow.createCell(i - 2);
			headerCell.setCellValue(columnName);
		}
	}

	private void writeDataLines(ResultSet result, XSSFWorkbook workbook, XSSFSheet sheet)
			throws SQLException {
		ResultSetMetaData metaData = result.getMetaData();
		int numberOfColumns = metaData.getColumnCount();

		int rowCount = 1;

		while (result.next()) {
			Row row = sheet.createRow(rowCount++);

			for (int i = 2; i <= numberOfColumns; i++) {
				Object valueObject = result.getObject(i);

				Cell cell = row.createCell(i - 2);

				if (valueObject instanceof Boolean)
					cell.setCellValue((Boolean) valueObject);
				else if (valueObject instanceof Double)
					cell.setCellValue((double) valueObject);
				else if (valueObject instanceof Float)
					cell.setCellValue((float) valueObject);
				else if (valueObject instanceof Date) {
					cell.setCellValue((Date) valueObject);
					formatDateCell(workbook, cell);
				} else cell.setCellValue((String) valueObject);

			}

		}
	}

	private void formatDateCell(XSSFWorkbook workbook, Cell cell) {
		CellStyle cellStyle = workbook.createCellStyle();
		CreationHelper creationHelper = workbook.getCreationHelper();
		cellStyle.setDataFormat(creationHelper.createDataFormat().getFormat("yyyy-MM-dd HH:mm:ss"));
		cell.setCellStyle(cellStyle);
	}
}
In this program, the name of the Excel file is generated based on table name followed by the current datetime – as you can see in the getFileName() method. The writeHeaderLine() and writeDataLines() methods use ResultSetMetaData to read column names so this program can work with any table.
Note that this program excludes the first column of the table, which is supposed to be the ID column.
And you can specify the table name when running this program, for example:
AdvancedDb2ExcelExporter exporter = new AdvancedDb2ExcelExporter();
exporter.export("Review");
exporter.export("Product");
That’s a couple of example programs that show you how to export data from database to Excel file. To learn more about writing Excel file, read this tutorial: How to Write Excel Files in Java using Apache POI
Other Java Coding Tutorials:
- Java code example to import data from Excel to database
- How to display images from database in JSP page with Java Servlet
- How to implement remember password (remember me) for Java web application
- How to code login and logout with Java Servlet, JSP and MySQL
- How to Code Hit Counter for Java web application
- 10 Common Mistakes Every Beginner Java Programmer Makes
- 10 Java Core Best Practices Every Java Programmer Should Know
- How to become a good programmer? 13 tasks you should practice now
- How to calculate MD5 and SHA hash values in Java
- Java File Encryption and Decryption Example
About the Author:
 Nam Ha Minh is certified Java programmer (SCJP and SCWCD). He started programming with Java in the time of Java 1.4 and has been falling in love with Java since then. Make friend with him on Facebook and watch his Java videos you YouTube.
Add comment
Excel is a widely known and used tool to sort, structure, analyze, and manipulate large amounts of data. If you need to analyze the data in a database, you can convert your data into an Excel spreadsheet first. In this article, I am going to introduce how to export data from an Access table to Excel using Spire.XLS for Java.
Add Spire.Xls jar as dependency
If you are working on a maven project, you can include the dependency in pom.xml file using this:
<repositories>
    <repository>
        <id>com.e-iceblue</id>
        <name>e-iceblue</name>
        <url>https://repo.e-iceblue.com/nexus/content/groups/public/</url>
    </repository>
</repositories>
<dependencies>
    <dependency>
        <groupId>e-iceblue</groupId>
        <artifactId>spire.xls</artifactId>
        <version>12.8.4</version>
    </dependency>
</dependencies>
Enter fullscreen mode
Exit fullscreen mode
If you are not using maven, then you can find the required jar files from the zip file available in this location. Include all the jar files into the application lib folder to run the sample code given in this tutorial.
Export Data from Database to Excel
The following are the steps to export data from database to Excel using Spire.XLS for Java.
- Create a Workbook object.
- Get the first worksheet using Workbook.getWorksheets().get() method.
- Create a DataTable object.
- Connect to the database and export data from database to the datatable.
- Write datatable to the worksheet using Worksheet.insertDataTable() method.
- Save the workbook to an Excel file using Workbook.saveToFile() method.
import com.spire.data.table.DataTable;
import com.spire.data.table.common.JdbcAdapter;
import com.spire.xls.ExcelVersion;
import com.spire.xls.Workbook;
import com.spire.xls.Worksheet;

import java.sql.*;

public class ExportDataFromDatabaseToExcel {

    public static void main(String[] args) {

        //Create a Workbook object
        Workbook wb = new Workbook();

        //Get the first worksheet
        Worksheet sheet = wb.getWorksheets().get(0);

        //Create a DataTable object
        DataTable dataTable = new DataTable();

        //Connect to database
        String url = "jdbc:odbc:driver={Microsoft Access Driver (*.mdb, *.accdb)};"
                + "DBQ=C:\Users\Administrator\Desktop\Document\data.mdb";
        try {
            Class.forName("sun.jdbc.odbc.JdbcOdbcDriver");
            try {
                Connection conn = DriverManager.getConnection(url);
                Statement sta = conn.createStatement();

                //Select table from the database
                ResultSet resultSet = sta.executeQuery("select * from vendors");
                JdbcAdapter jdbcAdapter = new JdbcAdapter();

                //Export data from database to datatable
                jdbcAdapter.fillDataTable(dataTable, resultSet);

            } catch (SQLException e) {
                e.printStackTrace();
            } catch (Exception e) {
                e.printStackTrace();
            }
        } catch (ClassNotFoundException e) {
            e.printStackTrace();
        }

        //Write datatable to the worksheet
        sheet.insertDataTable(dataTable, true, 1, 1);

        //Auto fit column width
        sheet.getAllocatedRange().autoFitColumns();

        //Save to an Excel file
        wb.saveToFile("output/ExportToExcel.xlsx", ExcelVersion.Version2016);
    }
}
Enter fullscreen mode
Exit fullscreen mode
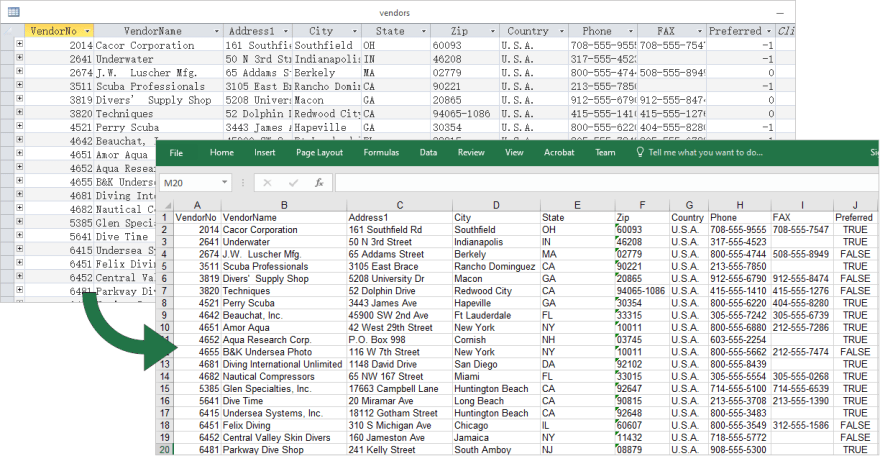
Output
I was searching the internet for an answer to exporting data from my Java desktop app to Excel and I came across the Apache POI API. Then I found out that the JDBC would work, and then I stumbled on JExcel. Are they all equally good, or should I focus on the best among them, and which is it?
Cheers.
![]()
wassimans
8,33210 gold badges48 silver badges58 bronze badges
asked Apr 17, 2012 at 7:49
![]()
Akinwale AgbajeAkinwale Agbaje
3153 gold badges6 silver badges17 bronze badges
6
Why so complicated?
Just TAB separate your columns and write the output to plain text file with an «.xls» extension?
That way, all you need to do is open the generated «.xls» file. Even though it’s actually just a TAB-separated text file, Excel will open it and automatically treat each tab as a new column.
No idea why people still use csv files, frankly.
answered Jan 9, 2013 at 11:16
![]()
5
I might be late to answer this, but I guess your correct choice would be Jxls. I faced a similar scenario in my module where I had to retain a certain template like logo,color,col-span,fixed column… So that’s very hectic to write a separate java code and design it.
Jxls core is poi and syntactically similar to jstl, all you need is to map a array-list of bean with desired column in excel
![]()
answered Jul 20, 2012 at 4:40
![]()
sayannayassayannayas
7649 silver badges15 bronze badges
If the exported excel file is large, maybe there will be outofmemory exception. (It is the problem I met before, I don’t know whether it is improved now.)
The most easiest way is to export as CSV file.
answered Apr 17, 2012 at 9:17
![]()
MavlarnMavlarn
3,7572 gold badges36 silver badges57 bronze badges
The best way is to do Tab separation for column and n for row. Save as .xls.
Perfect solution  ty Zeb
answered Jun 16, 2015 at 22:22
![]()
2
Содержание
- Export Data to Excel in Java
- Java API to Export Data#
- Export Array to Excel in Java#
- Export Two Dimensional Array to Excel#
- Export ArrayList to Excel in Java#
- Export Collection of Custom Objects to Excel in Java#
- Export Data to Excel with Merged Cells in Java#
- Copy Rows and Columns from one Excel file to Another in Java#
- Export JSON Data to Excel in Java#
- Get CSV Data in Excel using Java#
- Get a Free License#
- Best way to export data from Java to MS Excel [closed]
- 4 Answers 4
Export Data to Excel in Java
You can easily export data to Microsoft Excel from various available sources such as JSON, and CSV. As a Java developer, you can export data from Arrays, List of objects, JSON, and CSV to Excel documents programmatically. In this article, you will learn how to export data to Excel using Java.
The following topics are discussed/covered in this article:
Java API to Export Data#
For exporting data to Excel, I will be using Aspose.Cells for Java API. It is a powerful spreadsheet manipulation API that lets you create, edit, or convert Excel files within Java applications. The API enables you to perform Excel automation features programmatically without needing a Microsoft Excel application.
You can download the JAR of the API or just add the following pom.xml configuration in your Maven-based Java application to try the below-mentioned code examples.
Export Array to Excel in Java#
You can easily export data from a one-dimensional array or a two-dimensional array to an Excel document. The array can be of a reference type or a value type. You can export data from an array to Excel by following the simple steps mentioned below:
- Create an instance of the Workbook class
- Get worksheet in an instance of the Worksheet class
- Create an array containing string values
- Call the importArray() method with the array
- Save the output file by calling the save() method of the Workbook class
The following code sample shows how to export an array of strings to Excel using Java.
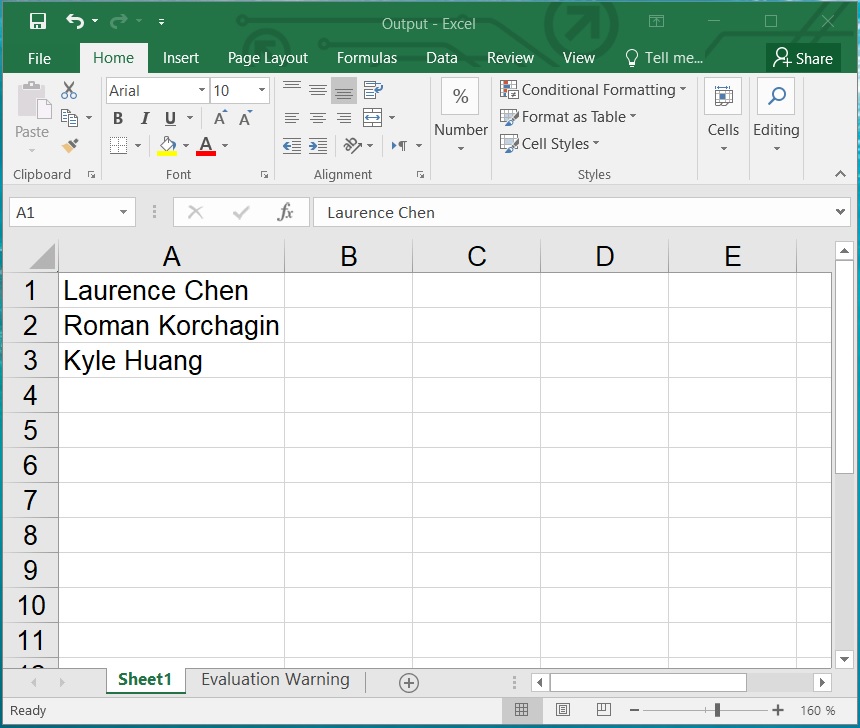
Export Array to Excel in Java
The Workbook class of the API is the main class to create an Excel spreadsheet. It provides functionality to open and save native excel files. The save() method of this class is used to save the output file at the specified file path.
The Worksheet class represents a single worksheet and provides functionality to work with cells and rows.
The importArray() method of the Cells class exports an array of strings to a worksheet. It takes the following input parameters:
- stringArray: The array of String values
- firstRow: The row number of the first cell to export to
- firstColumn: The column number of the first cell to export to
- isVertical: It specifies whether to export data vertically or horizontally
The API also provides the overloaded versions of the importArray() method to export an array of integer or double to a worksheet.
Export Two Dimensional Array to Excel#
Similarly, you can export a two-dimensional array to an Excel file. The following code sample shows how to export a two-dimensional array to an Excel file in Java.
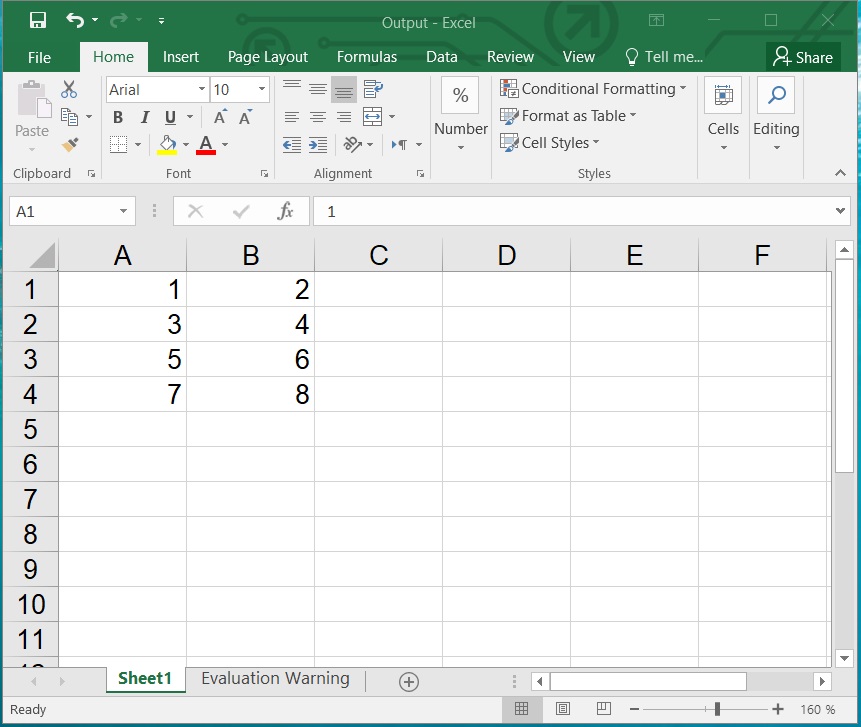
Export Two Dimensional Array to Excel
The Cells class provides importArray() method to export a two-dimension array of integers to a worksheet. The API also provides the overloaded versions of this method to export a two-dimensional array of strings or double into a worksheet.
Export ArrayList to Excel in Java#
You can export data from an ArrayList to Excel by following the steps mentioned below:
- Create an instance of the Workbook class
- Get worksheet in an instance of the Worksheet class
- Create an array list containing string values
- Call the importArrayList() method with the array list
- Save the output file by calling the save() method of the Workbook class
The following code sample shows how to export an ArrayList to Excel in Java.
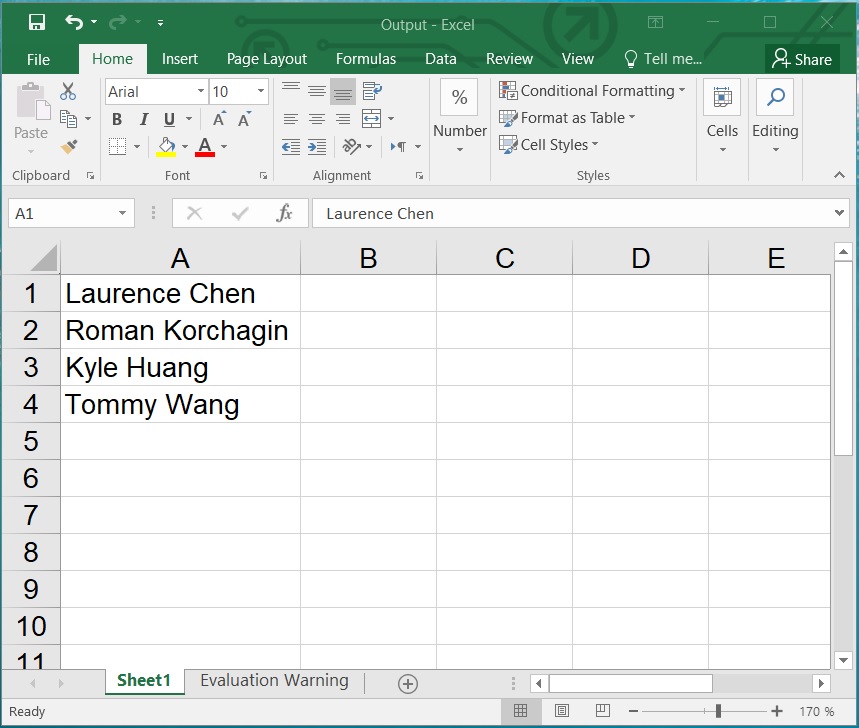
Export ArrayList to Excel in Java
The importArrayList() method of the Cells class exports an ArrayList of data to a worksheet. It takes four parameters including the ArrayList of data. The other parameters are the firstRow, firstColumn, and isVertical.
Export Collection of Custom Objects to Excel in Java#
You can export data from a collection of custom objects to Excel by following the steps mentioned below:
- Create an instance of the Workbook class
- Get worksheet in an instance of the Worksheet class
- Create an array list of custom objects
- Call the importCustomObjects() method with the array list
- Save the output file by calling the save() method of the Workbook class
The following code sample shows how to export a collection of custom objects to Excel in Java.
Collection of Custom Objects to Excel in Java
The importCustomObjects() method of the Cells class exports a list of custom objects and takes the following parameters. The API also provides the overloaded version of this method that takes fewer parameters.
- list: The collection of custom objects
- propertName: Specify name for a specific property to export. If it is null, it will export all properties of the object
- isPropertyNameShown: Indicates whether the property name will be exported to the first row
- firstRow: The row number of the first cell to export
- firstColumn: The column number of the first cell to export
- rowNumber: Number of rows to be exported
- insertRows: Indicates whether extra rows are added to fit data
- dataFormatString: Date format string for cells
- convertStringToNumber: Indicates if this method will try to convert string to number.
Export Data to Excel with Merged Cells in Java#
You can export data from a collection of objects to a worksheet containing merged cells by following the steps mentioned below:
- Create an instance of the Workbook class with template file path
- Get worksheet in an instance of the Worksheet class
- Create an array list of objects
- Create an instance of the ImportTableOptions class
- Call the importCustomObjects() method with the array list
- Save the output file by calling the save() method of the Workbook class
The following code sample shows how to export a collection of custom objects to an Excel worksheet with merged cells in Java.

Export Data to Excel with Merged Cells in Java
The ImportTableOptions class provides several options for exporting data into cells. The setCheckMergedCells indicates whether checking merged cells. The setFieldNameShown property indicates whether the field name should be exported or not.
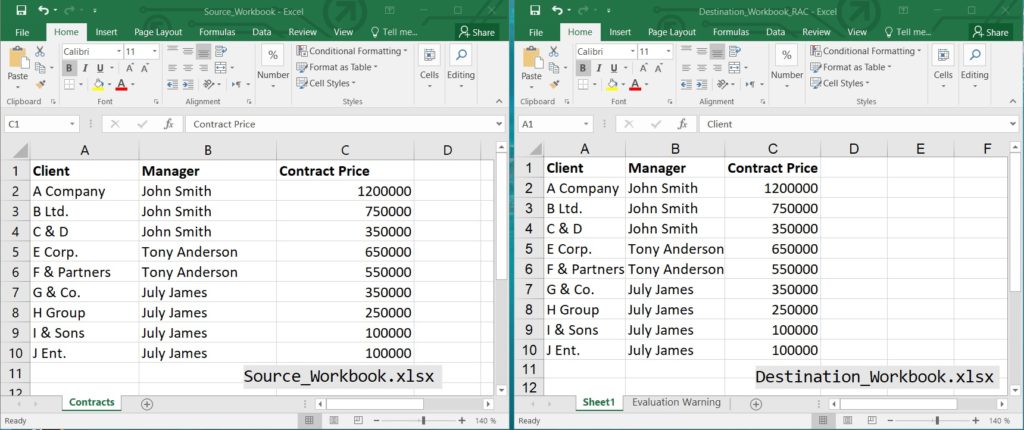
Copy Rows and Columns from one Excel file to Another in Java#
You can easily copy rows and columns from one Excel file to another file programmatically by following the steps mentioned below:
- Create an instance of the Workbook class with source workbook input file
- Create an instance of the Workbook class for destination workbook
- Get source and destination worksheets in seperate instances of the Worksheet class
- Call the copyRows() method of the destination worksheet with the source worksheet cells
- Save the destination workbook output file by calling the save() method of the Workbook class
The following code sample shows how to copy rows and columns from one Excel file to another using Java.
Copy Rows and Columns from one Excel file to Another in Java
You can copy specific rows from one Excel file to another. The following code sample shows how to copy specific rows from one Excel file to another using Java.
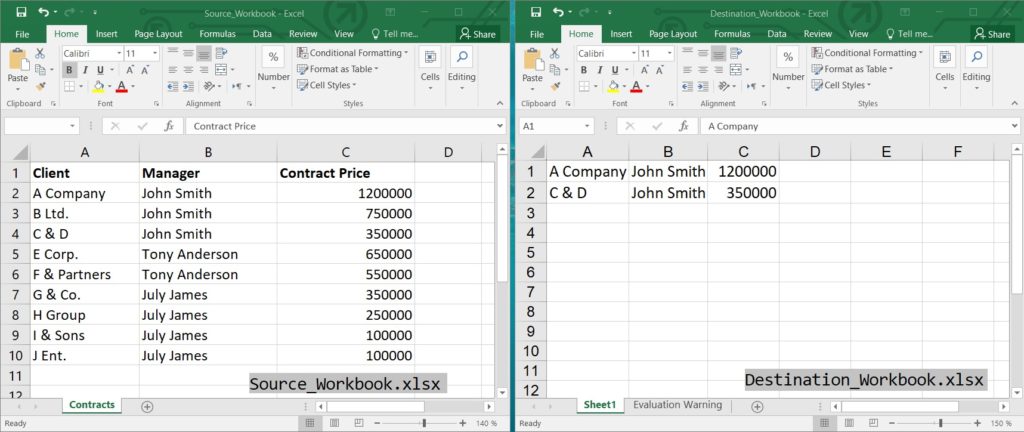
Copy Specific Rows and Columns from one Excel file to Another in Java
The copyRows() method copies data and formats of whole rows. It takes the source worksheet cells to copy as input parameters along with the source row index, destination row index, and the copied row number. The API also provides the overloaded versions of this method to copy rows with CopyOptions and PasteOptions.
Similarly, You can copy columns data from one Microsoft Excel document to another using the copyColumn() or copyColumns() methods.
Export JSON Data to Excel in Java#
You can easily export data from a JSON file to Excel by following the steps mentioned below:
- Create an instance of the Workbook class
- Get worksheet in an instance of the Worksheet class
- Read the JSON file
- Create an instance of the CellsFactory class
- Initiate style by calling the createStyle() method
- Set various style properties such as Horizontal Alignment, Font color, etc.
- Create an instance of the JsonLayoutOptions class
- Set title style with the style object
- Set array as table property to true
- Call the JsonUtility.importData() method with the JSON input and JsonLayoutOptions
- Save the output file by calling the save() method of the Workbook class
The following code sample shows how to export data from a JSON file to Excel using Java.
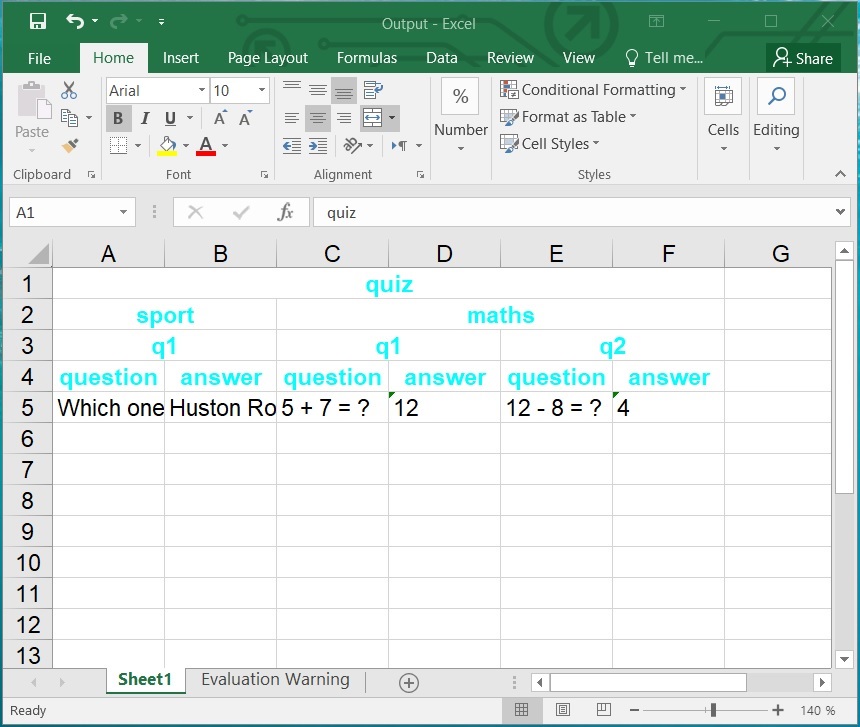
Export JSON Data to Excel in Java
The CellsFactory class instantiates classes of Cells model. The createStyle() method of this class creates a new style object of the Style class. The Style class allows setting display style of Excel document, such as font, color, alignment, border, etc.
The JsonLayoutOptions class provides the options of JSON layout type. The setTitleStyle method of this class is used to set the defined style of the title. The setArrayAsTable method allows processing Array as a table.
The API provides JsonUtility class to process the JSON. The importData() method of this class exports the JSON string and takes the following parameters:
- json: The JSON string
- cells: The Cells
- row: The row index
- column: The column index
- option: The options to export JSON string
Get CSV Data in Excel using Java#
You can export data from a CSV file to Excel by following the simple steps mentioned below:
- Create an instance of the LoadOptions class wih LoadFormat
- Create an instance of the Workbook class with CSV file path and LoadOptions object
- Call the save() method of the Workbook class and save the output file
The following code sample shows how to export data from a CSV file to Excel using Java.
Export CSV Data to Excel in Java
The LoadOptions class of the API provides options for loading the file. The LoadFormat class contains constants representing the load file formats.
Get a Free License#
You can try the API without evaluation limitations by requesting a free temporary license.
Источник
Best way to export data from Java to MS Excel [closed]
Want to improve this question? Update the question so it can be answered with facts and citations by editing this post.
Closed 7 years ago .
I was searching the internet for an answer to exporting data from my Java desktop app to Excel and I came across the Apache POI API. Then I found out that the JDBC would work, and then I stumbled on JExcel. Are they all equally good, or should I focus on the best among them, and which is it?

4 Answers 4
Why so complicated?
Just TAB separate your columns and write the output to plain text file with an «.xls» extension?
That way, all you need to do is open the generated «.xls» file. Even though it’s actually just a TAB-separated text file, Excel will open it and automatically treat each tab as a new column.
No idea why people still use csv files, frankly.
I might be late to answer this, but I guess your correct choice would be Jxls. I faced a similar scenario in my module where I had to retain a certain template like logo,color,col-span,fixed column. So that’s very hectic to write a separate java code and design it.
Jxls core is poi and syntactically similar to jstl, all you need is to map a array-list of bean with desired column in excel

If the exported excel file is large, maybe there will be outofmemory exception. (It is the problem I met before, I don’t know whether it is improved now.)
The most easiest way is to export as CSV file.
The best way is to do Tab separation for column and n for row. Save as .xls.
Источник
In this topic, we will learn to export data into an excel file from a database(H2 Database) in Spring Boot. For this, we will use the Apache POI library for exporting excel. We will create an example project in Spring Boot step-by-step to achieve this export data to an excel file.
Table of content:
1. Keep eclipse IDE ready
2. Configuring Apache POI
3. Create a Spring Boot Starter Project
4. Define Database Connection in application.properties
5. Create Entity class
6. Create a Repository
7. Create a Service
8. Create an Excel File Generator class
9. Create a Controller class
10. Create a view page on the static folder of the export data to the excel project
11. Create CommandLineRunner on SpringBootApplication class
12. Run the Project
13. Conclusion
1. Keep eclipse IDE ready
2. Create a Spring Boot Starter Project
Select Spring Web, Spring Data JPA, and H2 Database dependencies for the project.

3. Configuring Apache POI:
<dependency>
	<groupId>org.apache.poi</groupId>
	<artifactId>poi</artifactId>
	<version>5.1.0</version>
</dependency>
<dependency>
	<groupId>org.apache.poi</groupId>
	<artifactId>poi-ooxml</artifactId>
	<version>5.1.0</version>
</dependency>
→ Configure these dependencies in the pom.xml file of the project.
pom.xml:
<?xml version="1.0" encoding="UTF-8"?>
<project xmlns="http://maven.apache.org/POM/4.0.0" xmlns:xsi="http://www.w3.org/2001/XMLSchema-instance" xsi:schemaLocation="http://maven.apache.org/POM/4.0.0 https://maven.apache.org/xsd/maven-4.0.0.xsd">
   <modelVersion>4.0.0</modelVersion>
   <parent>
      <groupId>org.springframework.boot</groupId>
      <artifactId>spring-boot-starter-parent</artifactId>
      <version>2.6.3</version>
      <relativePath />
      <!-- lookup parent from repository -->
   </parent>
   <groupId>com.example</groupId>
   <artifactId>Export_Excel_Spring_Boot_Example</artifactId>
   <version>0.0.1-SNAPSHOT</version>
   <name>Export_Excel_Spring_Boot_Example</name>
   <description>Demo project for Spring Boot</description>
   <properties>
      <java.version>11</java.version>
   </properties>
   <dependencies>
      <dependency>
         <groupId>org.springframework.boot</groupId>
         <artifactId>spring-boot-starter-data-jpa</artifactId>
      </dependency>
      <dependency>
         <groupId>org.springframework.boot</groupId>
         <artifactId>spring-boot-starter-web</artifactId>
      </dependency>
      <dependency>
         <groupId>com.h2database</groupId>
         <artifactId>h2</artifactId>
         <scope>runtime</scope>
      </dependency>
      <dependency>
         <groupId>org.apache.poi</groupId>
         <artifactId>poi</artifactId>
         <version>5.1.0</version>
      </dependency>
      <dependency>
         <groupId>org.apache.poi</groupId>
         <artifactId>poi-ooxml</artifactId>
         <version>5.1.0</version>
      </dependency>
      <dependency>
         <groupId>org.springframework.boot</groupId>
         <artifactId>spring-boot-starter-test</artifactId>
         <scope>test</scope>
      </dependency>
   </dependencies>
   <build>
      <plugins>
         <plugin>
            <groupId>org.springframework.boot</groupId>
            <artifactId>spring-boot-maven-plugin</artifactId>
         </plugin>
      </plugins>
   </build>
</project>
4. Define Database Connection in application.properties
#H2 Database
spring.datasource.url=jdbc:h2:mem:testdb
spring.datasource.driverClassName=org.h2.Driver
spring.datasource.username=admin
spring.datasource.password=
spring.jpa.database-platform=org.hibernate.dialect.H2Dialect
spring.h2.console.enabled=true
spring.jpa.show-sql=true
spring.jpa.properties.hibernate.dialect=org.hibernate.dialect.H2Dialect
spring.jpa.hibernate.ddl-auto= update
server.port=8888
server.servlet.context-path= /demo
5. Create Entity class
Student.java:
package com.example.entity;
import javax.persistence.Entity;
import javax.persistence.GeneratedValue;
import javax.persistence.GenerationType;
import javax.persistence.Id;

@Entity
public class Student {
    @Id
    @GeneratedValue(strategy = GenerationType.IDENTITY)
    private long id;
    private String studentName;
    private String email;
    private String mobileNo;

    public Student() {
    }
    public long getId() {
        return id;
    }
    public void setId(long id) {
        this.id = id;
    }
    public String getStudentName() {
        return studentName;
    }
    public void setStudentName(String studentName) {
        this.studentName = studentName;
    }
    public String getEmail() {
        return email;
    }
    public void setEmail(String email) {
        this.email = email;
    }
    public String getMobileNo() {
        return mobileNo;
    }
    public void setMobileNo(String mobileNo) {
        this.mobileNo = mobileNo;
    }
}
6. Create a Repository
StudentRepository.java:
package com.example.repo;
import org.springframework.data.jpa.repository.JpaRepository;
import com.example.entity.Student;
public interface StudentRepos extends JpaRepository < Student, Long > {
}
7. Create a Service
StudentService.java:
package com.example.service;
import java.util.List;
import com.example.entity.Student;

public interface StudentService {
    void addStudent(Student student);
    List < Student > getTheListStudent();
}
StudentServiceImpl.java:
package com.example.service;
import java.util.List;
import org.springframework.beans.factory.annotation.Autowired;
import org.springframework.stereotype.Service;
import com.example.entity.Student;
import com.example.repo.StudentRepos;

@Service
public class StudentServiceImpl implements StudentService {

    @Autowired
    StudentRepos studentRepo;

    @Override
    public void addStudent(Student student) {
        studentRepo.save(student);
    }
    @Override
    public List < Student > getTheListStudent() {
        return studentRepo.findAll();
    }
}
8. Create an Excel File Generator class
ExcelGenerator.java:
package com.example.util;
import java.io.IOException;
import java.util.List;
import javax.servlet.ServletOutputStream;
import javax.servlet.http.HttpServletResponse;
import org.apache.poi.ss.usermodel.Cell;
import org.apache.poi.ss.usermodel.CellStyle;
import org.apache.poi.ss.usermodel.Row;
import org.apache.poi.xssf.usermodel.XSSFFont;
import org.apache.poi.xssf.usermodel.XSSFSheet;
import org.apache.poi.xssf.usermodel.XSSFWorkbook;
import com.example.entity.Student;

public class ExcelGenerator {

    private List < Student > studentList;
    private XSSFWorkbook workbook;
    private XSSFSheet sheet;

    public ExcelGenerator(List < Student > studentList) {
        this.studentList = studentList;
        workbook = new XSSFWorkbook();
    }
    private void writeHeader() {
        sheet = workbook.createSheet("Student");
        Row row = sheet.createRow(0);
        CellStyle style = workbook.createCellStyle();
        XSSFFont font = workbook.createFont();
        font.setBold(true);
        font.setFontHeight(16);
        style.setFont(font);
        createCell(row, 0, "ID", style);
        createCell(row, 1, "Student Name", style);
        createCell(row, 2, "Email", style);
        createCell(row, 3, "Mobile No.", style);
    }
    private void createCell(Row row, int columnCount, Object valueOfCell, CellStyle style) {
        sheet.autoSizeColumn(columnCount);
        Cell cell = row.createCell(columnCount);
        if (valueOfCell instanceof Integer) {
            cell.setCellValue((Integer) valueOfCell);
        } else if (valueOfCell instanceof Long) {
            cell.setCellValue((Long) valueOfCell);
        } else if (valueOfCell instanceof String) {
            cell.setCellValue((String) valueOfCell);
        } else {
            cell.setCellValue((Boolean) valueOfCell);
        }
        cell.setCellStyle(style);
    }
    private void write() {
        int rowCount = 1;
        CellStyle style = workbook.createCellStyle();
        XSSFFont font = workbook.createFont();
        font.setFontHeight(14);
        style.setFont(font);
        for (Student record: studentList) {
            Row row = sheet.createRow(rowCount++);
            int columnCount = 0;
            createCell(row, columnCount++, record.getId(), style);
            createCell(row, columnCount++, record.getStudentName(), style);
            createCell(row, columnCount++, record.getEmail(), style);
            createCell(row, columnCount++, record.getMobileNo(), style);
        }
    }
    public void generateExcelFile(HttpServletResponse response) throws IOException {
        writeHeader();
        write();
        ServletOutputStream outputStream = response.getOutputStream();
        workbook.write(outputStream);
        workbook.close();
        outputStream.close();
    }
}- XSSFWorkbook is creating a Workbook that is our excel file.
- We are creating an instance of XSSFWorkbook then we are calling the «createSheet()» method for creating an excel file with a name.
- We are creating Rows and cells of an excel sheet.
- After that we are writing data into the excel sheet.
9. Create a Controller class
StudentController.java:
package com.example.controller;
import java.io.IOException;
import java.text.DateFormat;
import java.text.SimpleDateFormat;
import java.util.Date;
import java.util.List;
import javax.servlet.http.HttpServletResponse;
import org.springframework.beans.factory.annotation.Autowired;
import org.springframework.stereotype.Controller;
import org.springframework.web.bind.annotation.GetMapping;
import com.example.entity.Student;
import com.example.service.StudentService;
import com.example.util.ExcelGenerator;

@Controller
public class StudentController {
    @Autowired
    private StudentService studentService;

    @GetMapping("/export-to-excel")
    public void exportIntoExcelFile(HttpServletResponse response) throws IOException {
        response.setContentType("application/octet-stream");
        DateFormat dateFormatter = new SimpleDateFormat("yyyy-MM-dd_HH:mm:ss");
        String currentDateTime = dateFormatter.format(new Date());

        String headerKey = "Content-Disposition";
        String headerValue = "attachment; filename=student" + currentDateTime + ".xlsx";
        response.setHeader(headerKey, headerValue);

        List <Student> listOfStudents = studentService.getTheListStudent();
        ExcelGenerator generator = new ExcelGenerator(listOfStudents);
        generator.generateExcelFile(response);
    }
}
10. Create a view page on the static folder of the export data to the excel project
index.html:
<!DOCTYPE html>
<html>
  <head>
    <title>Export Excel File</title>
  </head>
  <body class="container">
    <p>Click on the download button for exporting data into the excel file.</p>
    <a href="http://localhost:8888/demo/export-to-excel" class="btn btn-primary">Download the Excel File</a>
  </body>
</html>
11. Create CommandLineRunner on SpringBootApplication class
package com.example;
import org.springframework.beans.factory.annotation.Autowired;
import org.springframework.boot.CommandLineRunner;
import org.springframework.boot.SpringApplication;
import org.springframework.boot.autoconfigure.SpringBootApplication;
import com.example.entity.Student;
import com.example.service.StudentService;

@SpringBootApplication
public class ExportExcelSpringBootExampleApplication implements CommandLineRunner {

    @Autowired
    private StudentService studentService;

    public static void main(String[] args) {

        SpringApplication.run(ExportExcelSpringBootExampleApplication.class, args);
    }
    @Override
    public void run(String...a) {
        for (int i = 0; i <= 10; i++) {
            Student student = new Student();
            student.setStudentName("Student Name");
            student.setEmail("student@mail.com");
            student.setMobileNo("XXXXXXXXXX");
            studentService.addStudent(student);
        }
    }
}
12. Run the Project
- Right Click on the SpringBootApplication class (ExportExcelSpringBootExampleApplication)
- Click on Run as Java Application.
- Check the database console.
- You can type this URL on the browser «http://localhost:8888/demo/h2-console/» for the testing table to be created and whether data is inserted properly or not.
Type this URL on the browser «http://localhost:8888/demo/» for testing the database’s table of data is exporting properly or not.
Click on the Download Excel File link to download the excel file.
13. Conclusion
In this topic, we learned about How to transform data into an excel file from a database in the Spring Boot Application and use the Apache POI library?
 Needless to mention, data is everything for an application. If there is no data, no need of an application. Since data is everything for an application, we need to know each & every way where & how we can import/export data. Many a time, almost every client needs the data in the form of text reports. When we talk about reports in a web application from front-end, two popular reports come into mind: Excel Report, and the PDF report. Spring Boot has an integration with Excel & PDF and offers us an API to create such type of reports easily. In this article, we are going to learn about ‘How to export data into Excel in a Spring Boot MVC Application?’.
Moreover, we will also provide you all the steps to build a MVC pattern based web App starting from user interface till the data layer. Obviously, our final goal is to learn ‘How to export data into Excel in a Spring Boot MVC Application?’. As a development part, we will start with building an MVC based web App and end with creating an excel report using the API provided by Spring Boot. Let’s discuss our topic ‘How to export data into Excel in a Spring Boot MVC Application?’ and the related concepts.
What all Technology & Software we used?
♦ STS (Spring Tool Suite) : Version-> 4.7.1.RELEASE
⇒ Dependent Starters : ‘Spring Web’, ‘Spring Data JPA’, ‘MySQL Driver’, ‘Thymeleaf’, ‘Lombok’ and ‘Spring Boot DevTools’
♥ User Interface : Thymeleaf, Bootstrap, Font-Awesome
♦ MySQL Database : Version ->8.0.19 MySQL Community Server
♦ JDK8 or later versions (Extremely tested on JDK8, JDK9 and JDK14)
POI Dependency
We require below two dependencies to be added at pom.xml.
<!-- https://mvnrepository.com/artifact/org.apache.poi/poi -->
<dependency>
    <groupId>org.apache.poi</groupId>
    <artifactId>poi</artifactId>
    <version>5.0.0</version>
</dependency>
<!-- https://mvnrepository.com/artifact/org.apache.poi/poi -->
<dependency>
    <groupId>org.apache.poi</groupId>
    <artifactId>poi-ooxml</artifactId>
    <version>5.0.0</version>
</dependency>
What is Excel Export functionality in a Web Application?
In a web application, we generally have some pages where we show data directly or indirectly mapped to the database. We store these data into the database once the user fills some data in the UI and submits the same. Sometimes we have a requirement to pull all data from the UI and save it into an excel file. In short, we generally call this functionality as an Excel Export. Now-a-days, having this functionality in an application becomes more common.
What will be the output of the Excel Export functionality?
Below is the output that we can expect after implementing this functionality in the form of excel sheet as a whole.

How does Spring Boot internally work with Apache Excel POI?
Undoubtedly, when we use Spring Boot to export excel, the whole process becomes very easy to implement and coding steps also gets reduced. In fact, Spring Boot has integration with POI to make the excel generation process easy. We only need to create excel specific components such as worksheet, columns and rows by using POI API. Rest of the process is handled by Spring Boot itself.
As a part of the MVC pattern, Spring Boot classifies generation of an Excel as a View. There is an interface ‘org.springframework.web.servlet.View’ in Spring Boot API. An abstract class ‘org.springframework.web.servlet.view.AbstractView’ implements ‘org.springframework.web.servlet.View’. Furthermore, ‘org.springframework.web.servlet.view.document.AbstractXlsView’ extends ‘AbstractView’. Subsequently, ‘AbstractXlsxView’ extends ‘AbstractView’. Here, ‘AbstractXlsxView‘ is an abstract class that we will be using to generate our excel. It has below abstract method in its hierarchy that we need to implement in our excel generation class.

protected abstract void buildExcelDocument(
         Map<String, Object> model, Workbook workbook, HttpServletRequest request, HttpServletResponse response)
         throws Exception;
If we open this method of the API, the comment above the method clearly states “Application-provided subclasses must implement this method to populate the Excel workbook document, given the model.”.
What all functionalities can you expect from this Spring Boot MVC example?
Below is the summary of page-wise functionalities that you can expect from this Spring Boot MVC CRUD Example.
Home Page
1) When the user hits the application URL into the browser, he/she will see the home page that is the entry point of the application. From Here, users will be able to visit the ‘Invoice registration page’ and the ‘list of All invoices’ Page by clicking on the given links.
Invoice Registration Page
2) If user clicks on the ‘Add Invoice’ link available on the home page, he/she will redirect to the invoice registration page.
3) In the Invoice registration page, the user can fill the form and save it after clicking on the ‘Save Invoice’ button. After the successful addition of the record, a message “Invoice with id: ‘XXX’ is added successfully !” will be displayed at the bottom. From this page user can also visit to list of Invoice Pages after clicking on the ‘List Of Invoices’ link.
4) If user clicks on the ‘Show All Invoices’ link available on the home page, he/she will enter to the list of invoice Pages and can see all pre-existing invoices.
List Of Invoices Page
5) In the List Of Invoices page, we will have a link in the form of Icon that we can use to export all the data of the page in an excel sheet.
6) Apart from that, in the List Of Invoices page, user can perform ‘edit’ or ‘delete’ operation on the invoices. Additionally, user can also enter into the Invoice registration page after clicking on the ‘Add Invoice’ link.
7) If user clicks on the ‘Edit’ link available at List Of Invoices page, a new form will open. User can modify the value and update it into the DB after clicking on the ‘Update’ button. After a successful update, a message “Invoice with id: ‘XXX’ is updated successfully !” will be displayed at the bottom.
 If user clicks on the ‘Delete’ link available at List Of Invoices page, the record will be deleted. After successful removal of the record, a message “Invoice with id: ‘XXX’ is deleted successfully !” will be displayed at the bottom.
9) From the list of Invoices page, user can go back to the home page after clicking on the ‘Go to Home’ link.
Steps to implement the excel export functionality
In order to implement the excel export functionality, we need to have some data into a page on UI side. To achieve all this, we have divided the whole implementation into two parts as shown below.
1) Create an MVC web application using Spring Boot that supports CRUD operation and save some data from UI.
2) Implement excel export functionality in this MVC web application.
However, if you already have a web application and want to implement excel export functionality, you can directly go the the section ‘What are the steps to implement excel export functionality in a Spring Boot MVC Application?’.
What are the steps to develop a Spring Boot MVC CRUD Application?
If we develop any software following the specific steps, we minimize the chances of getting bugs. Furthermore, in case we face any issue after the implementation, we also reduce the time to fix it. Here are the common steps to develop a ‘Spring Boot MVC CRUD Example’.
Step#1: Create a starter Project using an IDE
Create a Spring Boot starter project using any IDE like STS, Netbeans, Intellij Idea etc. While creating Starter Project select ‘Spring Web’, ‘Spring Data JPA’, ‘MySQL Driver’, ‘ Thymeleaf’, ‘Lombok’ and ‘Spring Boot DevTools’ as starter project dependencies. Here ‘Lombok’ and ‘Spring Boot Dev Tools’ are optional to add.
Step#2: Update application.properties or application.yml
The next step to update either application.properties or application.yml whichever is applicable. Here we need to provide datasource details like DB driver class name, DB url, DB username and DB password. Additionally, we can provide other configuration properties such as dialect, ddl-auto, show-sql etc. However, as we are talking about a basic MVC application, our purpose to update this file is just to connect through the database.
Step#3: Create Entity (model) class
Now, it’s the first step to start coding. It’s a recommendation that we should start with Entity class.
Step#4: Create Repository Interface for DB access
In order to access the database programmatically, we need to create one Repository Interface that will extend any Repository Interface provided by Spring Data JPA such as JpaRepository, CrudRepository, PagingAndSortingRepository etc. as per our requirement. However, for a basic CRUD operation, we don’t need to write any custom method in this interface. Spring Data JPA will provide all the methods by default that we require in a standard CRUD operation.
Step#5: Create Service Interface & Service Impl classes
Now we are in the Service Layer of the application. Here, we need to create one Service Interface and its Implementation class. Annotate this class with @Service to inform Spring Container that this class will act as a service. In order to connect to Data Layer, we need to provide dependency of the Repository interface (created in Step#4) in our service implementation class via auto-wiring.
Step#6: Create Controller class
Having followed the above steps, once we complete flow of data access, at the last, we need to create a Controller class to handle requests coming from the browser. Annotate this class with @Controller to inform Spring Container that this is a controller. The controller class will have handler methods to serve the requests for performing various operations involved in CRUD with the help of other layers. Please note that the Controller class will connect to the service layer via auto-wiring of Service Interface.
Step#7: Create pages as part of view
In this step, we need to develop user interface part from where a user interacts with the application to perform various operations included in the CRUD. Moreover, any request made by the user from UI page will be handed over to the Controller. Subsequently, based on the request nature, the controller will connect to service layer to serve the request accordingly. However, we can develop Step#6 and Step#7 interchangeably as both are dependent on each other.
Spring Boot MVC CRUD Application Example
Use-case Details
Let’s assume we have to develop an Invoice Processing Application. As the application name suggests, we must have an Invoice entity in this application. In this example, we will develop CRUD operations for Invoice as an entity.
Let’s develop Spring Boot MVC CRUD Example step by step as below:
Step#1: Create a Spring Boot Starter Project using STS
Here, we are using STS (Spring tool Suite) as an IDE to develop the example. While creating Starter Project select ‘Spring Web’, ‘Spring Data JPA’, ‘MySQL Driver’, ‘Thymeleaf’, ‘Lombok’ and ‘Spring Boot DevTools’ as starter project dependencies. Here ‘Lombok’ and ‘Spring Boot Dev Tools’ are optional to add. Even If you don’t know how to create Spring Boot Starter Project, Kindly visit Internal Link. Also, if you want to know more about Lombok, then visit separate article on ‘How to work with Lombok?‘.
Step#2: Update application.properties
Let’s update application.properties that we already have after creating the starter project in step#1. For example, we need to include below entries.
application.properties
server.port=8888

spring.datasource.driver-class-name=com.mysql.cj.jdbc.Driver
spring.datasource.url=jdbc:mysql://localhost:3306/invoice-mvc
spring.datasource.username=root
spring.datasource.password=****

spring.jpa.show-sql=true
spring.jpa.database-platform=org.hibernate.dialect.MySQL8Dialect
spring.jpa.hibernate.ddl-auto=update
Step#3: Create Entity (model) class
Since our use-case for this example is Invoice Processing, we will create an entity class as Invoice.java as below.
Invoice.java
package com.dev.springboot.model;

import javax.persistence.Entity;
import javax.persistence.GeneratedValue;
import javax.persistence.Id;
import lombok.AllArgsConstructor;
import lombok.Data;
import lombok.NoArgsConstructor;

@Entity
@Data
@NoArgsConstructor
@AllArgsConstructor
public class Invoice {

    @Id
    @GeneratedValue
    private Long id;
    private String name;
    private String location;
    private Double amount;
}
Step#4: Create Repository Interface for DB access
Next step is to create one Repository Interface. Please note that we should create a separate repository interface for each Entity in the application. This is also applicable for classes taking part in other layers accordingly. Since we have only one Entity, we will create one Repository Interface for now. As a naming convention, we will create a repository interface as InviceRepository.java as below.
InvoiceRepository.java
package com.dev.springboot.repo;

import org.springframework.data.jpa.repository.JpaRepository;
import com.dev.springboot.model.Invoice;

public interface InvoiceRepository extends JpaRepository<Invoice, Long> {

}
Step#4A: Create a custom Exception class
However, this is an additional step to handle exceptions if any user search for an Invoice by Invoice Id and the same doesn’t exist at all. Let’s assume that a user search from the browser using direct URL, then there is a possibility that the invoice may not exist. In order to handle this scenario, we need to provide the user a readable message. It is possible with the help of creating a custom exception class. For example, below code demonstrates the concept of creating a custom exception.
InvoiceNotFoundException.java
package com.dev.springboot.exception;

public class InvoiceNotFoundException extends RuntimeException {

    private static final long serialVersionUID = 1L;

    public InvoiceNotFoundException() {
        super();
    }

    public InvoiceNotFoundException(String customMessage) {
        super(customMessage);
    }
}
Step#5: Create Service Interface & Service Impl classes
As part of service layer, we need to create an interface and its implementation. Don’t forget to include @Service at the top of the service implementation class. Additionally, inject the dependency of the Repository interface via @Autowired. For example, below code demonstrates the concept behind the service layer. As a convention, the service interface should start with the letter ‘I’ to be recognized as an interface. Subsequently, the service implementation class should have a suffix ‘Impl’ in its name as shown below.
IInvoiceService.java
package com.dev.springboot.service;

import java.util.List;
import com.dev.springboot.model.Invoice;

public interface IInvoiceService {

    public Invoice saveInvice(Invoice invoice);
    public List<Invoice> getAllInvoices();
    public Invoice getInvoiceById(Long id);
    public void deleteInvoiceById(Long id);
    public void updateInvoice(Invoice invoice);

}
InvoiceServiceImpl.java
package com.dev.springboot.service.impl;

import java.util.List;
import java.util.Optional;
import org.springframework.beans.factory.annotation.Autowired;
import org.springframework.stereotype.Service;
import com.dev.springboot.exception.InvoiceNotFoundException;
import com.dev.springboot.model.Invoice;
import com.dev.springboot.repo.InvoiceRepository;
import com.dev.springboot.service.IInvoiceService;

@Service
public class InvoiceServiceImpl implements IInvoiceService{

    @Autowired
    private InvoiceRepository repo;

    @Override
    public Invoice saveInvice(Invoice invoice) {
       return repo.save(invoice);
    }

    @Override
    public List<Invoice> getAllInvoices() {
       return repo.findAll();
    }

    @Override
    public Invoice getInvoiceById(Long id) {
       Optional<Invoice> opt = repo.findById(id);
       if(opt.isPresent()) {
           return opt.get();
       } else {
           throw new InvoiceNotFoundException("Invoice with Id : "+id+" Not Found");
       }
    }

    @Override
    public void deleteInvoiceById(Long id) {
       repo.delete(getInvoiceById(id));
    }

    @Override
    public void updateInvoice(Invoice invoice) {
       repo.save(invoice);
    }
}
Step#6: Create Controller class
In order to handle various requests of a client, we need to create a controller as InvoiceController.java. Each handler method will return a UI page based on the criteria it implemented for. For example, below code snippet of InvoiceController will demonstrate the relation between UI page and the controller.
InvoiceController.java
package com.dev.springboot.controller;

import java.util.List;
import org.springframework.beans.factory.annotation.Autowired;
import org.springframework.stereotype.Controller;
import org.springframework.ui.Model;
import org.springframework.web.bind.annotation.GetMapping;
import org.springframework.web.bind.annotation.ModelAttribute;
import org.springframework.web.bind.annotation.PostMapping;
import org.springframework.web.bind.annotation.RequestMapping;
import org.springframework.web.bind.annotation.RequestParam;
import org.springframework.web.servlet.mvc.support.RedirectAttributes;
import com.dev.springboot.exception.InvoiceNotFoundException;
import com.dev.springboot.model.Invoice;
import com.dev.springboot.service.IInvoiceService;

@Controller
@RequestMapping("/invoice")
public class InvoiceController {

    @Autowired
    private IInvoiceService service;

    @GetMapping("/")
    public String showHomePage() {
       return "homePage";
    }

    @GetMapping("/register")
    public String showRegistration() {
       return "registerInvoicePage";
    }

    @PostMapping("/save")
    public String saveInvoice(
            @ModelAttribute Invoice invoice,
            Model model
            ) {
        service.saveInvice(invoice);
        Long id = service.saveInvice(invoice).getId();
        String message = "Record with id : '"+id+"' is saved successfully !";
        model.addAttribute("message", message);
        return "registerInvoicePage";
    }

    @GetMapping("/getAllInvoices")
    public String getAllInvoices(
            @RequestParam(value = "message", required = false) String message,
            Model model
            ) {
       List<Invoice> invoices= service.getAllInvoices();
       model.addAttribute("list", invoices);
       model.addAttribute("message", message);
       return "allInvoicesPage";
    }

    @GetMapping("/edit")
    public String getEditPage(
            Model model,
            RedirectAttributes attributes,
            @RequestParam Long id
            ) {
       String page = null;
       try {
       Invoice invoice = service.getInvoiceById(id);
       model.addAttribute("invoice", invoice);
       page="editInvoicePage";
       } catch (InvoiceNotFoundException e) {
           e.printStackTrace();
           attributes.addAttribute("message", e.getMessage());
           page="redirect:getAllInvoices";
       }
       return page;
    }

    @PostMapping("/update")
    public String updateInvoice(
            @ModelAttribute Invoice invoice,
            RedirectAttributes attributes
            ) {
       service.updateInvoice(invoice);
       Long id = invoice.getId();
       attributes.addAttribute("message", "Invoice with id: '"+id+"' is updated successfully !");
       return "redirect:getAllInvoices";
    }

    @GetMapping("/delete")
    public String deleteInvoice(
            @RequestParam Long id,
            RedirectAttributes attributes
            ) {
        try {
        service.deleteInvoiceById(id);
        attributes.addAttribute("message", "Invoice with Id : '"+id+"' is removed successfully!");
        } catch (InvoiceNotFoundException e) {
            e.printStackTrace();
            attributes.addAttribute("message", e.getMessage());
        }
        return "redirect:getAllInvoices";
    }
}
Step#7: Create pages for view
Last part of our example is to create UI pages that will help users to interact with the application. Here, we have four pages : homePage.html as an entry point of the application, registerInvoicePage.html to fill the form and register an Invoice, allInvoicesPages.html to see the list of registered invoices, and editInvoicePage.html to update the data of any invoice accordingly.
homePage.html
homepage.html
<html xmlns:th="https://www.thymeleaf.org/">
<head>
<link rel="stylesheet"
	href="https://cdn.jsdelivr.net/npm/bootstrap@4.5.3/dist/css/bootstrap.min.css" />
<script
	src="https://cdn.jsdelivr.net/npm/bootstrap@4.5.3/dist/js/bootstrap.bundle.min.js"></script>
<link rel="stylesheet"
	href="https://cdnjs.cloudflare.com/ajax/libs/font-awesome/4.7.0/css/font-awesome.css" />
</head>
<body>
<div class="col-5">
<div class="container">		<div class="card">
			<div class="card-header bg-info text-center text-white">
				<h3>Welcome to Invoice MVC App</h3>
			</div>
			<div class="card-body">
				<form>
					<a th:href="@{/invoice/register}" class= "btn btn-success ">Add Invoice <i class="fa fa-plus-square" aria-hidden="true"></i></a>
					<a th:href="@{/invoice/getAllInvoices}" class= "btn btn-primary">Show All Invoices</a>
				</form>
			</div>
			</div>
		</div> </div>
</body>
</html>
registerInvoicePage.html
registerInvoicePage.html
<html xmlns:th="https://www.thymeleaf.org/">
<head>
<link rel="stylesheet"
	href="https://cdn.jsdelivr.net/npm/bootstrap@4.5.3/dist/css/bootstrap.min.css" />
<script
	src="https://cdn.jsdelivr.net/npm/bootstrap@4.5.3/dist/js/bootstrap.bundle.min.js"></script>
<link rel="stylesheet"
	href="https://cdnjs.cloudflare.com/ajax/libs/font-awesome/4.7.0/css/font-awesome.css" />
</head>
<body>
<div class="col-5">
<div class="container">		<div class="card">
			<div class="card-header bg-info text-center text-white">
				<h3>Register Invoices</h3>
			</div>
			<div class="card-body">
				<form th:action="@{/invoice/save}" method="POST" id="invoiceForm">
					<div class="row">
						<div class="col-2">
							<label for="name"><b>NAME</b></label>
						</div>
						<div class="col-4">
							<input type="text" name="name" id="name"
								class="form-control" />
						</div>
					</div> <br/>
					<div class="row">
						<div class="col-2">
							<label for="location"><b>LOCATION</b></label>
						</div>
						<div class="col-4">
							<input type="text" name="location" id="location"
								class="form-control" />
						</div>
					</div><br/>
					<div class="row">
						<div class="col-2">
							<label for="amount"><b>AMOUNT</b></label>
						</div>
						<div class="col-4">
							<input type="text" name="amount" id="amount"
								class="form-control" />
						</div>
					</div> <br/>
					<button type="submit" class="btn btn-success">Save Invoice <i class="fa fa-plus-square" aria-hidden="true"></i></button>
					<a th:href="@{/invoice/getAllInvoices}" class= "btn btn-primary">Show All Invoices</a>
				</form>
			</div>
			<div th:if="${message!=null}"  class="card-footer bg-white text-info">
				<span th:text="${message}"></span>
			</div>
			</div>
		</div> </div>
</body>
</html>
allInvoicesPage.html
allInvoicesPage.html
<html xmlns:th="https://www.thymeleaf.org/">
<head>
<link rel="stylesheet"
	href="https://cdn.jsdelivr.net/npm/bootstrap@4.5.3/dist/css/bootstrap.min.css" />
<script
	src="https://cdn.jsdelivr.net/npm/bootstrap@4.5.3/dist/js/bootstrap.bundle.min.js"></script>
<link rel="stylesheet"
	href="https://cdnjs.cloudflare.com/ajax/libs/font-awesome/4.7.0/css/font-awesome.css" />
</head><body>
  <div class="col-5">
	<div class="container">
		<div class="card">
			<div class="card-header bg-info text-center text-white">
				<h3>List Of Invoices</h3>
			</div>
			<div class="card-body">
				<table class="table table-hover">
					<tr class="bg-dark text-white">
						<th>ID</th>
						<th>Name</th>
						<th>Location</th>
						<th>Amount</th>
						<th>Edit/Delete</th>
					</tr>
					<tr th:each="ob:${list}">
						<td th:text=${ob.id}></td>
						<td th:text=${ob.name}></td>
						<td th:text=${ob.location}></td>
						<td th:text=${ob.amount}></td>
						<td><a th:href="@{/invoice/delete(id=${ob.id})}" class= "btn btn-danger">DELETE <i class="fa fa-trash-o" aria-hidden="true"></i></a> |
						    <a th:href="@{/invoice/edit(id=${ob.id})}" class="btn btn-warning">EDIT <i class="fa fa-pencil-square-o" aria-hidden="true"></i></a></td>
					</tr>
				</table>
				<a th:href="@{/invoice/register}" class= "btn btn-success ">Add Invoice <i class="fa fa-plus-square" aria-hidden="true"></i></a>
				<a th:href="@{/invoice/}" class= "btn btn-primary">Go to Home</a>
			</div>
			<div class="card-footer bg-white text-success" th:if="${message!=null}">
				<span th:text="${message}"></span>
			</div>
		</div>
	</div></div>
</body>
</html>
editInvoicePage.html
editInvoicePage.html
<html xmlns:th="https://www.thymeleaf.org/">
  <head>
    <link
      rel="stylesheet"
      href="https://cdn.jsdelivr.net/npm/bootstrap@4.5.3/dist/css/bootstrap.min.css"
    />
    <script src="https://cdn.jsdelivr.net/npm/bootstrap@4.5.3/dist/js/bootstrap.bundle.min.js"></script>
    <link
      rel="stylesheet"
      href="https://cdnjs.cloudflare.com/ajax/libs/font-awesome/4.7.0/css/font-awesome.css"
    />
  </head>
  <body>
  <div class="col-5">
    <div class="container">
      <div class="card">
        <div class="card-header bg-primary text-white text-center">
            <h3>Edit Invoice</h3>
        </div>
        <div class="card-body">
            <form th:action="@{/invoice/update}" method="POST" id="invoiceForm" th:object="${invoice}">
                <div class="row">
                    <div class="col-2">
                        <label for="id">ID</label>
                    </div>
                    <div class="col-4">
                        <input type="text" th:field="*{id}" class="form-control" readonly/>
                    </div>
                </div><br/>
                <div class="row">
                    <div class="col-2">
                        <label for="name">NAME</label>
                    </div>
                    <div class="col-4">
                        <input type="text" th:field="*{name}" class="form-control"/>
                    </div>
                </div><br/>
                <div class="row">
                    <div class="col-2">
                        <label for="location">LOCATION</label>
                    </div>
                    <div class="col-4">
                        <input type="text" th:field="*{location}" class="form-control"/>
                    </div>
                </div><br/>
                <div class="row">
                    <div class="col-2">
                        <label for="amount">AMOUNT</label>
                    </div>
                    <div class="col-4">
                        <input type="text" th:field="*{amount}" class="form-control" />
                    </div>
                </div> <br/>
                <button type="submit" class="btn btn-success">Update <i class="fa fa-wrench" aria-hidden="true"></i></button>
				<a th:href="@{/invoice/getAllInvoices}" class= "btn btn-primary">Show All Invoices</a>
            </form>
        </div>
        <div class="card-footer"></div>
      </div>
    </div></div>
  </body>
</html>
What are the steps to implement excel export functionality in a Spring Boot MVC Application?
As we have already built a Spring Boot web based MVC application, now in this section we will particularly talk about the changes that we need to do to get the excel export functionality implemented. Moreover, this section is very specific to our article ‘How to export data into Excel in a Spring Boot MVC Application?’. Let’s do it step by step as shown below.
Step#1: Add Apache POI dependency to pom.xml
First of all add below Apache POI dependencies to pom.xml.
<!-- https://mvnrepository.com/artifact/org.apache.poi/poi -->
<dependency>
    <groupId>org.apache.poi</groupId>
    <artifactId>poi</artifactId>
    <version>5.0.0</version>
</dependency>
<!-- https://mvnrepository.com/artifact/org.apache.poi/poi -->
<dependency>
    <groupId>org.apache.poi</groupId>
    <artifactId>poi-ooxml</artifactId>
    <version>5.0.0</version>
</dependency>
Step#2: Create a class to implement excel export functionality
In order to implement excel export functionality, we will create a class, let’s say InvoiceDataExcelExport.java that will extend AbstractXlsxView.java as below. As aforementioned, AbstractXlsxView is provided by Spring framework under package ‘org.springframework.web.servlet.view.document’.
package com.dev.springboot.view;

import java.util.List;
import java.util.Map;
import javax.servlet.http.HttpServletRequest;
import javax.servlet.http.HttpServletResponse;
import org.apache.poi.ss.usermodel.Row;
import org.apache.poi.ss.usermodel.Sheet;
import org.apache.poi.ss.usermodel.Workbook;
import org.springframework.web.servlet.view.document.AbstractXlsxView;
import com.dev.springboot.model.Invoice;

public class InvoiceDataExcelExport extends AbstractXlsxView {

    @Override
    protected void buildExcelDocument(
           Map<String, Object> model,
           Workbook workbook,
           HttpServletRequest request,
           HttpServletResponse response) throws Exception {

       // define excel file name to be exported
       response.addHeader("Content-Disposition", "attachment;fileName=InvoiceData.xlsx");

       // read data provided by controller
       @SuppressWarnings("unchecked")
       List<Invoice> list = (List<Invoice>) model.get("list");

       // create one sheet
       Sheet sheet = workbook.createSheet("Invoice");

       // create row0 as a header
       Row row0 = sheet.createRow(0);
       row0.createCell(0).setCellValue("ID");
       row0.createCell(1).setCellValue("NAME");
       row0.createCell(2).setCellValue("LOCATION");
       row0.createCell(3).setCellValue("AMOUNT");

       // create row1 onwards from List<T>
       int rowNum = 1;
       for(Invoice spec : list) {
           Row row = sheet.createRow(rowNum++);
           row.createCell(0).setCellValue(spec.getId());
           row.createCell(1).setCellValue(spec.getName());
           row.createCell(2).setCellValue(spec.getLocation());
           row.createCell(3).setCellValue(spec.getAmount());
       }
    }
}
Step#3: Create a method in Controller to accept excel export requests
Add a method as shown below in the code snippet in your InvoiceController.java. When we click on the Excel Export link given in the UI, request will come to this method.
/***
* Export data to excel file
*/
@GetMapping("/excelExport")
public ModelAndView exportToExcel() {
    ModelAndView mav = new ModelAndView();
    mav.setView(new InvoiceDataExcelExport());
  //read data from DB
    List<Invoice> list= service.getAllInvoices();
  //send to excelImpl class
    mav.addObject("list", list);
    return mav;
}
Step#4: Modify UI page to send excel export requests
Add below code snippet in allInvoicesPage.html just before the start of ‘table’ tag.
<div>
<a th:href="@{/invoice/excelExport}" class="btn btn-success">Export data into Excel
 <i class="fa fa-file-excel-o" aria-hidden="true"></i></a>
</div><br/>
The structure of the project should look like below:

How to test the Application?
In order to test the application, we need to open a browser and hit the URL http://localhost:8888/invoice/. On hitting the URL, home page will get displayed. Further, we need to click on ‘Add Invoice’ link to get into the ‘Register Invoices’ page. From there, we need to add some invoices to test the excel export functionality. Next, in the ‘List of Invoices’ page, we should be able to see the Excel icon labelled as “Export data into Excel”. In order to get the exported excel, we need to click on that icon. Once clicked, the excel will get downloaded by the browser.
Conclusion
In this article we have covered all the theoretical and example part of ‘How to export data into Excel in a Spring Boot MVC Application?’, finally, you should be able to build a functionality of excel export using Spring Boot. Similarly, we expect from you to further extend this example, as per your requirement. Also try to implement it in your project accordingly. Moreover, Feel free to provide your comments in the comments section below.