
April 2023 Community Newsletter
Welcome to our April 2023 Community Newsletter, where we’ll be highlighting the latest news, releases, upcoming events, and the great work of our members inside the Biz Apps communities. You can subscribe to the News & Announcements and stay up to date with the latest news from our ever-growing membership network who quickly discover that «Community is bigger on the inside».
LATEST NEWS
Microsoft Business Applications Launch Event — On Demand
Sign up below for an in-depth look into the latest updates from across Microsoft #PowerPlatform and #Dynamics365. Find out about new features, capabilities, and best practices for connecting data to deliver exceptional customer experiences, collaborating using AI-powered analytics, and driving productivity with automation. Guest speakers include Charles Lamanna, Emily He, Georg Glantschnig, Julie Strauss, Jeff Comstock, Lori Lamkin, Mike Morton, Ray Smith, and Walter Sun.
Watch Now: Business Applications Launch Event
Power Platform Connections — Episode Nine
Episode Nine of #PowerPlatform Connections premieres today at 12pm PST, as David Warner II and Hugo Bernier chat to Principal Program Manager Vesa Juvonen, alongside the great work of Troy Taylor, Geetha Sivasailam, Michael Megel, Nathalie Leenders, Ritesh Ranjan Choubey, Clay Wesener, Tristan DEHOVE, Dian Taylor, and Cat Schneider.
Click the link below to subscribe and get notified, with David and Hugo LIVE in the YouTube chat from 12pm PST. And remember to use the hashtag #PowerPlatformConnects on social to have your work featured on the show!
App in a Day — Free Workshop
Looking for a way to build a solution to quickly meet your business needs? Register below for a FREE «App in a Day» workshop to find out how to create custom business applications without writing code!
Microsoft Power Platform In a Day workshops
UPCOMING EVENTS
Directions Asia
Find out more about Directions 4 Partners Asia 2023, which will be taking place in Bangkok on 27-28th April 2023, featuring key speakers Mike Morton, Jannik Bausager and Dmitry Chadayev.
This event is for SMB focused Dynamics partners and their employees to receive product knowledge about Business Central, Power Platform and #DynamicsSales, and to be inspired and motivated by best practices, expert knowledge and innovative ideas.
If you want to meet industry experts, gain an advantage in the SMB-market, and acquire new knowledge about #MicrosoftDynamics Business Central, click the link below to buy your ticket today!
Click here to Register
Iberian Tech Summit
Come take a look at the Iberian Technology Summit which will be held at the Real Marina Hotel & Spa in Olhão, Portugal, between 28-30th April 2023.
The Iberian Technology Summit is the first of its kind with a clear goal to achieve — cross the borders of peninsula and help to empower the community of professionals, workers and businesses to grow stronger together.
Congrats to Kaila Bloomfield, Adam B., Ana Inés Urrutia de Souza and the team for putting together this great event. Click below to find out more details.
Click here to Register
Power Platform Conference 2023
We are so excited to see you for the Microsoft Power Platform Conference in Las Vegas October 3-5th, 2023! But first, let’s take a look back at some fun moments and the best community in tech from MPPC 2022 in Orlando Florida.
Featuring guest speakers such as Heather Cook, Julie Strauss, Nirav Shah, Ryan Cunningham, Sangya Singh, Stephen Siciliano, Hugo Bernier and many more, click the link below to register for the 2023 #MPPC23 today!
www.powerplatformconf.com
COMMUNITY HIGHLIGHTS
Check out our top Super and Community Users reaching new levels! These hardworking members are posting, answering questions, kudos, and providing top solutions in their communities.
Power Apps:
Super Users: @BCBuizer , @WarrenBelz,
Community Users: @mmollet, @Amik, @RJM07
Power Automate:
Super Users: @Expiscornovus , @grantjenkins, @abm
Community Users: @Nived_Nambiar
Power Virtual Agents:
Super Users: @Expiscornovus, @Pstork1,
Community Users: @nikviz, @DaniBaeyens
Power Pages:
Super Users: @ragavanrajan
Community Users: @OOlashyn, @gospa, @Fubar
LATEST PRODUCT BLOG ARTICLES
Power Apps Community Blog
Power Automate Community Blog
Power Virtual Agents Community Blog
Power Pages Community Blog
Check out ‘Using the Community’ for more helpful tips and information:
Power Apps, Power Automate, Power Virtual Agents, Power Pages

Collections are special classes that hold a group of related values or objects in a specific series. Generic collections in C# help you maximize code reuse, type safely, and improve performance.
You know that Microsoft Excel is meant for storing data and analyzing it efficiently. So, you may wonder what can be done with collections and Microsoft Excel, as they both can store data. You can export data either from collections to Excel worksheets or from Excel worksheets to collections.
In this blog, we are going to see how the Syncfusion Excel (XlsIO) Library supports exporting data from collections to Excel worksheets and grouping the exported data in C#.
Let’s consider the data of vehicles in the market as shown in the following screenshot. The brands, vehicle types, and models are considered for our scenario.

Export data from collections to Excel worksheet
As an example, say you are using a grid control that is bound to a data model. To export the data from the grid to an Excel worksheet, you do not need to iterate each cell of a grid. Instead, you can make use of the collections that are used to bind the data model. To perform this operation, Syncfusion Excel Library provides support to export data in an easy and efficient way.
Using Syncfusion Excel Library, data can be exported from:
- Collections to Excel worksheets.
- Nested collections to Excel worksheets.
To export data from different sources to an Excel worksheet, refer to this blog post.
Export data from collections to Excel worksheets
Exporting data from a collection to an Excel worksheet is helpful if you need to export data from a model to an Excel worksheet.
The Syncfusion Excel Library provides support to export data from a collection of objects to an Excel worksheet. This can be achieved through the ImportData method. The following code example shows how to export data from a collection to an Excel worksheet.
using (ExcelEngine excelEngine = new ExcelEngine())
{
    IApplication application = excelEngine.Excel;
    application.DefaultVersion = ExcelVersion.Excel2016;

    //Read the data from XML file.
    StreamReader reader = new StreamReader(Path.GetFullPath(@"../../Data/Customers.xml"));

    //Assign the data to the customerObjects collection.
    IEnumerable customerObjects = GetData (reader.ReadToEnd());

    //Create a new workbook.
    IWorkbook workbook = application.Workbooks.Create(1);
    IWorksheet sheet = workbook.Worksheets[0];

    //Import data from customerObjects collection.
    sheet.ImportData(customerObjects, 5, 1, false);

    #region Define Styles
    IStyle pageHeader = workbook.Styles.Add("PageHeaderStyle");
    IStyle tableHeader = workbook.Styles.Add("TableHeaderStyle");

    pageHeader.Font.RGBColor = Color.FromArgb(0, 83, 141, 213);
    pageHeader.Font.FontName = "Calibri";
    pageHeader.Font.Size = 18;
    pageHeader.Font.Bold = true;
    pageHeader.HorizontalAlignment = ExcelHAlign.HAlignCenter;
    pageHeader.VerticalAlignment = ExcelVAlign.VAlignCenter;

    tableHeader.Font.Color = ExcelKnownColors.White;
    tableHeader.Font.Bold = true;
    tableHeader.Font.Size = 11;
    tableHeader.Font.FontName = "Calibri";
    tableHeader.HorizontalAlignment = ExcelHAlign.HAlignCenter;
    tableHeader.VerticalAlignment = ExcelVAlign.VAlignCenter;
    tableHeader.Color = Color.FromArgb(0, 118, 147, 60);
    tableHeader.Borders[ExcelBordersIndex.EdgeLeft].LineStyle = ExcelLineStyle.Thin;
    tableHeader.Borders[ExcelBordersIndex.EdgeRight].LineStyle = ExcelLineStyle.Thin;
    tableHeader.Borders[ExcelBordersIndex.EdgeTop].LineStyle = ExcelLineStyle.Thin;
    tableHeader.Borders[ExcelBordersIndex.EdgeBottom].LineStyle = ExcelLineStyle.Thin;
    #endregion

    #region Apply Styles
    //Apply style to the header.
    sheet["A1"].Text = "Yearly Sales Report";
    sheet["A1"].CellStyle = pageHeader;

    sheet["A2"].Text = "Namewise Sales Comparison Report";
    sheet["A2"].CellStyle = pageHeader;
    sheet["A2"].CellStyle.Font.Bold = false;
    sheet["A2"].CellStyle.Font.Size = 16;

    sheet["A1:D1"].Merge();
    sheet["A2:D2"].Merge();
    sheet["A3:A4"].Merge();
    sheet["D3:D4"].Merge();
    sheet["B3:C3"].Merge();

    sheet["B3"].Text = "Sales";
    sheet["A3"].Text = "Sales Person";
    sheet["B4"].Text = "January - June";
    sheet["C4"].Text = "July - December";
    sheet["D3"].Text = "Change(%)";
    sheet["A3:D4"].CellStyle = tableHeader;
    #endregion

    sheet.UsedRange.AutofitColumns();

    //Save the file in the given path.
    Stream excelStream = File.Create(Path.GetFullPath(@"Output.xlsx"));
    workbook.SaveAs(excelStream);
    excelStream.Dispose();
}

Export data from nested collections to Excel worksheet and group
Nested collections hold their data in a hierarchy with the parent-child relation. For each parent record, there can be multiple child records. Exporting such hierarchical data from nested collections to Excel worksheets helps the users analyze data in the same structure. Thus, Syncfusion Excel Library provides support with more flexible options to analyze hierarchical data by exporting it into different layouts and grouping it, as explained in the following sections.
Export data to Excel worksheet in different layouts
Data layout helps to analyze in an organized pattern and identify data redundancies easily. Here, we can see the different layout options that Excel Library provides:
- Default —Parent records exported in the first row of its collection.
- Merge —Parent records exported in merged rows.
- Repeat —Parent records exported in all the rows.
Let’s see these options in detail along with code examples and screenshots.
Default layout option
This is the default layout option while exporting data from collections to an Excel worksheet. As shown in the following screenshot, the parent values such as Brands and Products are exported only at the first row of their occurrence. The other rows are left empty, which clearly shows the Items of each parent.

The following code snippet demonstrates how to import data directly from nested collection objects with the Default layout option. The input XML file used in the code can be downloaded.
Step 1: Include the following namespaces in the program.
using Syncfusion.XlsIO;
using System.Collections.Generic;
using System.ComponentModel;
using System.IO;
using System.Xml.Serialization;
Step 2: Create the classes Brand , VehicleType , and Model. Model is declared as a collection object in the class VehicleType , and VehicleType is declared as a collection object in the class Brand.
//Parent class.
public class Brand
{
    private string m_brandName;

    [DisplayNameAttribute("Brand")]
    public string BrandName
    {
        get { return m_brandName; }
        set { m_brandName = value; }
    }

    //Vehicle types collection.
    private IList<VehicleType> m_vehicleTypes;

    public IList<VehicleType> VehicleTypes
    {
        get { return m_vehicleTypes; }
        set { m_vehicleTypes = value; }
    }

    public Brand(string brandName)
    {
        m_brandName = brandName;
    }
}

//Child class.
public class VehicleType
{
    private string m_vehicleName;

    [DisplayNameAttribute("Vehicle Type")]
    public string VehicleName
    {
        get { return m_vehicleName; }
        set { m_vehicleName = value; }
    }

    //Models collection.
    private IList<Model> m_models;
    public IList<Model> Models
    {
        get { return m_models; }
        set { m_models = value; }
    }

    public VehicleType(string vehicle)
    {
        m_vehicleName = vehicle;
    }
}

//Sub-child class.
public class Model
{
    private string m_modelName;

    [DisplayNameAttribute("Model")]
    public string ModelName
    {
        get { return m_modelName; }
        set { m_modelName = value; }
    }

    public Model(string name)
    {
        m_modelName = name;
    }
}
Step 3: Have the helper class BrandObjects read data from a relevant XML file. This class is optional, and data can be added to collection objects in different ways.
//Helper classes.
[XmlRootAttribute("BrandObjects")]
public class BrandObjects
{
    [XmlElement("BrandObject")]
    public BrandObject[] BrandObject { get; set; }
}

public class BrandObject
{
    public string BrandName { get; set; }
    public string VahicleType { get; set; }
    public string ModelName { get; set; }
}
Step 4: Add the helper method to fill in data from XML to the collections.
//Helper method to load data from XML file and add it in collections.
private static IList<Brand> GetVehicleDetails()
{
    XmlSerializer deserializer = new XmlSerializer(typeof(BrandObjects));

    //Read data from XML file.
    TextReader textReader = new StreamReader(@"....DataExportData.xml");
    BrandObjects brands = (BrandObjects)deserializer.Deserialize(textReader);

    //Initialize parent collection to add data from XML file.
    List<Brand> list = new List<Brand>();

    string brandName = brands.BrandObject[0].BrandName;
    string vehicleType = brands.BrandObject[0].VahicleType;

    string modelName = brands.BrandObject[0].ModelName;

    //Parent class.
    Brand brand = new Brand(brandName);
    brand.VehicleTypes = new List<VehicleType>();

    VehicleType vehicle = new VehicleType(vehicleType);
    vehicle.Models = new List<Model>();

    Model model = new Model(modelName);
    brand.VehicleTypes.Add(vehicle);

    list.Add(brand);

    foreach (BrandObject brandObj in brands.BrandObject)
    {
        if (brandName == brandObj.BrandName)
        {
            if (vehicleType == brandObj.VahicleType)
            {
                vehicle.Models.Add(new Model(brandObj.ModelName));
                continue;
            }
            else
            {
                vehicle = new VehicleType(brandObj.VahicleType);
                vehicle.Models = new List<Model>();
                vehicle.Models.Add(new Model(brandObj.ModelName));
                brand.VehicleTypes.Add(vehicle);
                vehicleType = brandObj.VahicleType;
            }
            continue;
        }
        else
        {
            brand = new Brand(brandObj.BrandName);
            vehicle = new VehicleType(brandObj.VahicleType);
            vehicle.Models = new List<Model>();
            vehicle.Models.Add(new Model(brandObj.ModelName));
            brand.VehicleTypes = new List<VehicleType>();
            brand.VehicleTypes.Add(vehicle);
            vehicleType = brandObj.VahicleType;
            list.Add(brand);
            brandName = brandObj.BrandName;
        }
    }

    textReader.Close();
    return list;
}
Step 5: Add the code to the main class to initialize Excel engine, create a workbook, and export data from collections to an Excel worksheet.
class Program
{
    static void Main(string[] args)
    {
        ImportData();
    }

    //Main method to import data from nested collection to Excel worksheet.
    private static void ImportData()
    {
        ExcelEngine excelEngine = new ExcelEngine();
        IApplication application = excelEngine.Excel;

        application.DefaultVersion = ExcelVersion.Excel2016;

        IWorkbook workbook = excelEngine.Excel.Workbooks.Create(1);
        IWorksheet worksheet = workbook.Worksheets[0];

        IList<Brand> vehicles = GetVehicleDetails();

        ExcelImportDataOptions importDataOptions = new ExcelImportDataOptions();

        //Import from fourth row.
        importDataOptions.FirstRow = 4;

        //Import column headers.
        importDataOptions.IncludeHeader = true;

        //Set layout options.
        importDataOptions.NestedDataLayoutOptions = ExcelNestedDataLayoutOptions.Default;

        //Import data from the nested collection.
        worksheet.ImportData(vehicles, importDataOptions);

        string fileName = @"ImportData.xlsx";

        //Apply style to headers
        worksheet["A1:C2"].Merge();
        worksheet["A1"].Text = "Automobile Brands in the US";

        worksheet.UsedRange.AutofitColumns();

        workbook.SaveAs(fileName);

        workbook.Close();
        excelEngine.Dispose();
    }
}

Merge layout option
This option is like the Default layout option. However, the empty parent rows are merged to get rid of unnecessary views. Data exported from hierarchical grids to Excel worksheets can be organized in an efficient way to analyze it.
As shown in the following screenshot, the parent values such as Brands and Products are exported only on the first row of their occurrence, like with the Default layout option. The empty parent rows are merged, which clearly shows the Items of each parent.

All the steps mentioned in the code snippets of the default layout option are necessary here. The only difference is the NestedDataLayoutOptions is changed to Merge , as shown.
importDataOptions.NestedDataLayoutOptions = ExcelNestedDataLayoutOptions.Merge;

Repeat layout option
The Repeat layout option behaves differently from the other two options, as the parent data is repeated in all the rows. This option is similar to exporting data from DataTable, but the data is exported hierarchically. Such an option is helpful in analyzing data with the help of the Pivot Table in Excel.
As shown in the following screenshot, the parent values, such as Brands and Products , are exported in all the row for each Item.

All the steps mentioned in the code snippets of the default layout option are necessary here. The only difference is the NestedDataLayoutOptions is changed to Repeat , as shown.
importDataOptions.NestedDataLayoutOptions = ExcelNestedDataLayoutOptions.Repeat;

Export grouped data to Excel
Exporting hierarchical data from various grids like Grid Grouping to an Excel worksheet is now much easier. Before, data had to be exported to Excel and then it was grouped by comparing it with the grid control. Now, this hectic operation vanishes with the introduction of exporting nested collections to Excel worksheets with grouping options.
Here, data can be exported with the following grouping options:
- Expand —Exported data will be grouped and expanded.
- Collapse —Exported data will be grouped and collapsed at the first level by default.
In addition, CollapseLevel will collapse the group at the mentioned level, up to a maximum of eight levels.
Follow the steps to export data from nested collections to Excel worksheets like in the Default layout option. To group while exporting, the following code snippet must be added.
//Set grouping option.
importDataOptions.NestedDataGroupOptions = ExcelNestedDataGroupOptions.Collapse;

//Set collapse level.
//GroupingOption must set to ‘Collapse’ before applying ‘CollapseLevel’.
importDataOptions.CollapseLevel = 2;

GitHub samples
You can download examples of exporting data from collections to Excel in C# from GitHub.
Conclusion
As you can see, the Syncfusion Excel (XlsIO) Library provides an easy way to analyze data exported from collections to Excel in C#. Use it effectively to generate Excel reports with high performance and to process large data. Take a moment to peruse the documentation, where you’ll find other options and features, all with accompanying code samples. Using the library, you can also export Excel data to PDF, image, data table, CSV, TSV, HTML, collections of objects, ODS file format, and more.
If you are new to our Excel Library, we recommend you follow our Getting Started guide.
Are you already a Syncfusion user? You can download the product setup here. If you’re not yet a Syncfusion user, you can download a free, 30-day trial here.
If you have any questions about these features, please let us know in the comments below. You can also contact us through our support forum, Direct-Trac, or Feedback Portal. We are happy to assist you!
The post Export Data from Collection to Excel and Group It in C# appeared first on Syncfusion Blogs.
After some research, I realized that recursion does not works here because of different Collections in my object(First i was thinking about some sort of two way recursions, one by Lists second by Maps but was unable to implement it). I know that, may be it is not the best solution, but I had to use iterations.
So I had two tasks here, first iterate thru all data and second export to excel. I separated them and wrote iterations with output to console first(for easier debug)
Then I added excel export using Apache POI.
Iteration contains if`s{} because Collections have different depth levels.
Here is code:
private void exportPermissionDataToExcel(SortedMap allPermissions, HttpServletResponse response) {

    PropertyManager props = ResourcesProperties.getInstance();

    HSSFWorkbook wb = null;
    try {

        String headerString = "attachment; filename="" + EXCEL_FILE_NAME + ".xls";";
        wb = new HSSFWorkbook();

        CellStyle style = wb.createCellStyle();
        Font font = wb.createFont();
        font.setBoldweight(Font.BOLDWEIGHT_BOLD);
        style.setFont(font);

        HSSFSheet workSheet = wb.createSheet(EXCEL_FILE_NAME);
        workSheet.createRow(1);

        int columnNumber = 0;

        for (Object pair : allPermissions.entrySet()) {

            Object key = ((Map.Entry) pair).getKey();
            Object values = ((Map.Entry) pair).getValue();

            int rowNumber = 0;
            Row row = workSheet.createRow(rowNumber);
            Cell cell = row.createCell(columnNumber);
            rowNumber++;

            if (key instanceof User) {
                cell.setCellValue(((User) key).getFullName() + " (" + ((User) key).getUsername() + ")");
            } else {
                cell.setCellValue(((Group) key).getName());
            }
            cell.setCellStyle(style);

            for (Object permissionsList : (List) values) {
                for (Object permissionValue : ((Map) permissionsList).entrySet()) {

                    Object key1 = ((Map.Entry) permissionValue).getKey();
                    Object listOfValues1 = ((Map.Entry) permissionValue).getValue();

                    columnNumber = 1;
                    row = workSheet.createRow(rowNumber);
                    cell = row.createCell(columnNumber);
                    rowNumber++;
                    cell.setCellValue(props.getProperty(key1.toString()));
                    cell.setCellStyle(style);

                    for (Object permissionsList1 : (List) listOfValues1) {

                        for (Object permissionMap : (List) permissionsList1) {

                            for (Object permissionMap1 : ((Map) permissionMap).entrySet()) {

                                Object key2 = ((Map.Entry) permissionMap1).getKey();
                                Object listOfValues2 = ((Map.Entry) permissionMap1).getValue();

                                columnNumber = 2;
                                //if property not found returns null, some records can be already transalted, translations for translations cannot be found => null
                                String message2 = props.getProperty(key2.toString());
                                if (message2 == null) {
                                    rowNumber = createCellAndSetValue(workSheet, row, cell, rowNumber, columnNumber,key2.toString());
                                } else {
                                    rowNumber = createCellAndSetValue(workSheet, row, cell, rowNumber, columnNumber, message2);
                                }

                                if (!key1.equals("lv.alise.usermanager.permissions.ConnectPermission")) {

                                    for (Object permissionValue3 : (List) listOfValues2) {
                                        if (key1.equals("lv.alise.usermanager.permissions.WorkflowPermission")) {

                                            for (Object permissionMap2 : ((Map) permissionValue3).entrySet()) {

                                                Object key3 = ((Map.Entry) permissionMap2).getKey();
                                                Object listOfValues3 = ((Map.Entry) permissionMap2).getValue();

                                                columnNumber = 3;
                                                rowNumber = createCellAndSetValue(workSheet, row, cell, rowNumber, columnNumber,props.getProperty(key3.toString()) );

                                                for (Object permissionValue4 : (List) listOfValues3) {
                                                    columnNumber = 4;
                                                    rowNumber = createCellAndSetValue(workSheet, row, cell, rowNumber, columnNumber,props.getProperty(permissionValue4.toString()) );
                                                }
                                            }
                                        } else {
                                            columnNumber = 3;
                                            rowNumber = createCellAndSetValue(workSheet, row, cell, rowNumber, columnNumber,props.getProperty(permissionValue3.toString()) );
                                        }
                                    }
                                }
                            }
                        }
                    }
                }
            }
        }

        response.setContentType("application/octetstream");
        response.setHeader("Content-Disposition", headerString);
        OutputStream out = response.getOutputStream();
        wb.write(out);
        out.close();
        wb.close();

    } catch (Exception e) {
        System.out.println(e.getMessage());
    }
}

private int createCellAndSetValue(HSSFSheet workSheet, Row row, Cell cell, int rowNumber, int columnNumber, String value) {
    row = workSheet.createRow(rowNumber);
    cell = row.createCell(columnNumber);
    rowNumber++;
    cell.setCellValue(value);
    return rowNumber;
}
May be someone will find it usefull.
Do you want to export MongoDB to Excel? Do you find it grueling to perform all the work? We’ve got you covered! This blog is aimed at educating you with in-depth knowledge about the various tools and techniques that will help you export MongoDB data to Excel & CSV formats. Follow our easy step-by-step guide to export your MongoDB documents to the data warehouse/database of your choice in CSV format and perform insightful analysis.
Introduction To MongoDB
MongoDB is a popular high-performance NoSQL database that enables you to store your data in a non-relational format. MongoDB is known for its scalability, ease of use, reliability & no compulsion for using a fixed schema among all stored documents, giving them the ability to have varying fields (columns).
MongoDB stores its data as objects which are commonly identified as documents. These documents are stored in collections, analogous to how tables work in relational databases.
BSON (Binary JSON) can be used to communicate with the data stored in MongoDB.
Introduction To CSV Files
CSV stands for Comma Separated Values. In layman terms, it is a plain text file containing a list of values. These files are typically used as a medium of exchanging data between multiple applications. They are also known as Character Separated Values or Comma Delimited Files.
CSV files can be used with a majority of spreadsheet applications such as Google Spreadsheets or Microsoft Excel. One feature that sets the CSV files apart from normal sheets, is that it doesn’t allow saving formulas, and only one sheet is allowed per file with restrictions on saving rows, columns, etc.
Complex data is usually taken from an application, it is then converted into the CSV format and loaded onto any other application.
A fully managed, No-code Data Pipeline platform like Hevo Data, helps you export data from MongoDB (among 100+ Sources) to your desired destination in real-time, in an effortless manner. Hevo with its minimal learning curve can be set up in a matter of minutes making the users ready to export MongoDB documents without compromising performance. Its strong integration with various sources such as databases, files, analytics engine, etc gives users the flexibility to bring in data of all different kinds in a way that’s as smooth as possible.
Get started with hevo for free
Salient Features Of Hevo Data:
- Real-Time Data Export: Hevo with its strong integration with 100+ sources, allows you to transfer data quickly & efficiently. This ensures efficient utilization of bandwidth on both ends.
- Live Support: The Hevo team is available round the clock to extend exceptional support to its customers through chat, email, and support calls.
- Schema Management: Hevo takes away the tedious task of schema management & automatically detects schema of incoming data and maps it to the destination schema.
- Minimal Learning: Hevo with its simple and interactive UI, is extremely simple for new customers to work on and perform operations.
- Secure: Hevo has a fault-tolerant architecture that ensures that the data is handled in a secure, consistent manner with zero data loss.
- Live Monitoring: Hevo allows you to monitor the data flow so you can check where your data is at a particular point in time.
Sign up here for a 14-day free trial!
Prerequisites
- Working knowledge of MongoDB.
- A general idea about the CSV file structure.
- Installing MongoDB tools package in advance.
- MongoDB installed at the host workstation.
Exporting documents from MongoDB in CSV format can be done in multiple ways as listed below:
- Method 1: Using mongoexport
- Method 2: Using Tools Such As Studio 3T
Method 1: Using mongoexport
Mongoexport is a command-line utility that is used to export data from a MongoDB instance in a CSV file format. Mongoexport runs directly on the MongoDB command line and not on the Mongo Shell. It can be used in the following way:
mongoexport --collection=<coll> [options]Mongoexport is part of MongoDB’s tools package, which is available through the MongoDB Download Center. The tools package must be installed well in advance so that the command-line can be accessed.
The user must specify the collection they want to export along with an output file name.
Mongoexport helps to export MongoDB to Excel in CSV format in two simple steps:
- Step 1: Connecting To A MongoDB Instance
- Step 2: Commands To Export MongoDB Documents In CSV
Step 1: Connecting To A MongoDB Instance
A MongoDB instance running on port “27017”, doesn’t necessarily require a host or port to be specified.
Example query: Here stores represents the database from which sparkle collection is being exported.
mongoexport --collection=sparkle --db=stores --out=sparkle.csva) Specifying the collection that you want to export, can be done in two ways:
--collection=<collection> or -c=<collection>b) Specifying the output file that you want to export to, can similarly be done in two ways:
--out=<output_name> or -o=<output_name>c) Specifying the database you will be exporting from is represented as:
--db=<database_name> or -d=<database_name>Step 2: Commands To Export MongoDB Documents In CSV
To export MongoDB to Excel & CSV format, you have to specify all the fields in your export query that you want, along with the order you want them in.
Example query:
mongoexport --db=customers --collection=info --type=csv --fields=name,address,phone --out=/opt/backups/info.csvThis query exports data from the collection named info which is a part of the database called customers, in the desired CSV format in a file stored as /opt/backups/info.csv.
Name, address, phone
Rahul Batra, Golf Course Gurugram, 98xxxxxxx
Anirudh Behal, Estancia, Guduvanchery, 81xxxxxxx
It is also possible to specify the required fields using a text file, which contains only one field per line. Such a file is usually in the .txt format.
Example file: Here name, address & phone fields are specified in a file called field_name.txt.
Name
Address
Phone
This method requires using the –fieldFile option while writing the query to mention which text file needs to be looked into for getting the field names.
mongoexport --db=customers --collection=info --type=csv --fieldFile=field_name.txt --out=/opt/backups/info.csvThe output CSV file can be tailored to return only the documents, excluding the field names.
This is possible by including –noHeaderLine option in the export query, this option suppresses the output field to have only the documents.
Example query:
mongoexport --db=customers --collection=info --type=csv --fields=name, address, phone --noHeaderLine --out=/opt/backups/contacts.csvExample output:
Rahul Batra, Golf Course Gurugram, 98xxxxxxx
Anirudh Behal, Estancia, Guduvanchery, 81xxxxxxx
This is how mongoexport can be used to export MongoDB to Excel & CSV format.
Once you have exported the desired collection/document, go to the file location on your system and open it to view the exported data using any spreadsheet application like Microsoft Excel.
For more information on the mongoexport syntax and its various operations, you can look into the mongoexport manual.


Method 2: Using Tools Such As Studio 3T
Studio 3T provides the Export Wizard facility, which helps export MongoDB data, query results, and even collections in various formats like CSV. The process begins by establishing a connection with the desired MongoDB instance and then working on the collection and its documents using the Studio 3T wizard.
Using Studio 3T, you can export MongoDB to Excel & CSV formats in 2 steps:
- Step 1: Using The Wizard Toolbar
- Step 2: Exporting Documents In CSV & Excel
Step 1: Using The Wizard Toolbar
Click on the Export option and then use a right-click to select any database followed by a collection that you want to export.
With Studio 3T, you can export data & simultaneously query in applications like Visual Query Builder, IntelliShell, SQL, etc.
The Export configuration allows to dynamically change the source of export i.e database, connection, etc. You can click on the export source and make changes as required.
The progress of an export process can be monitored using the operations window which is usually found in the bottom left corner of the wizard.
Step 2: Exporting Documents In CSV & Excel
Begin by launching the wizard, and select the source from where you want to export the document.
Select the final export format as CSV.
The Studio 3T Wizard performs a scan of 500 documents by default to find the desired fields from your collection. You can select the full scan option to detect all the fields or manually add fields using the add custom field option.
This will open a new tab called export overview along with a default tab by the name of Export unit#1-CSV.
There are six parts of the Export unit#1-CSV tab:
- Source: Displays the source of the document.
- Select Fields: It is used to add/remove custom fields and then export data.
- Target: Choose between clipboard/file & make sure the file path is defined.
- CSV format: It is used to configure settings like preset, delimit, record separator, etc.
- Other: It is used to configure non-formatting settings such as how to treat null values, column headers, etc.
- Output preview: It will display a preview of the CSV file.
Click on execute to export MongoDB to Excel & CSV format using Studio 3T.
Conclusion
This article teaches you how to export MongoDB documents with ease and answers all your queries regarding mongoexport, Studio 3T. It provides a brief introduction to these methods and their operations to help the users understand them better and use them to export MongoDB documents in the most efficient way possible. It also introduces an alternative method that is Hevo Data, a No-code Data Pipeline, to export MongoDB documents in an effortless and highly secure manner.
visit our website to explore hevo
Export your data seamlessly, give Hevo a try today! sign up for a 14 Day Free Trial!. Look at our affordable pricing, which will help you choose the right plan.
How do you export MongoDB to Excel? Share your thoughts in the comments section below.

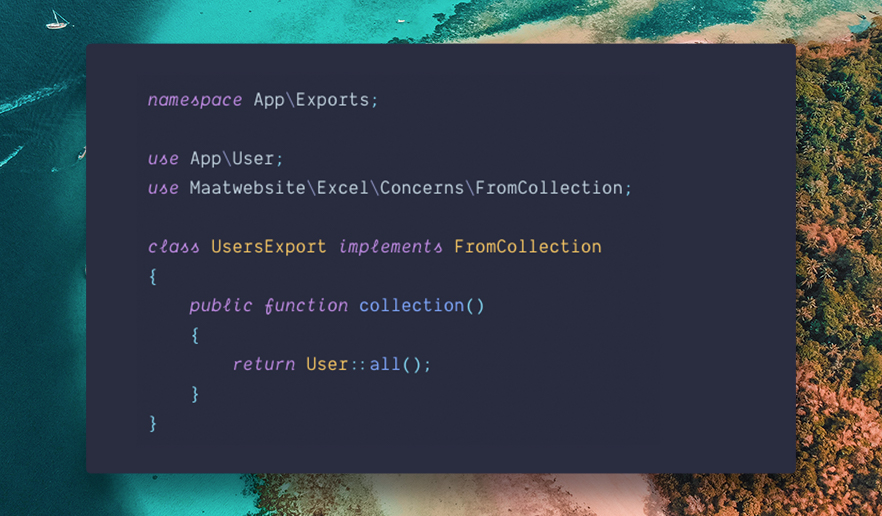
Supercharged Excel exports and imports
A simple, but elegant Laravel wrapper around PhpSpreadsheet
exports and imports.
Quickstart
·
Documentation
·
Video Course
·
Nova
·
Blog
·
Contributing
·
Support
![]()

✨ Features
-
Easily export collections to Excel. Supercharge your Laravel collections and export them directly to an Excel or CSV document. Exporting has never been so easy.
-
Supercharged exports. Export queries with automatic chunking for better performance. You provide us the query, we handle the performance. Exporting even larger datasets? No worries, Laravel Excel has your back. You can queue your exports so all of this happens in the background.
-
Supercharged imports. Import workbooks and worksheets to Eloquent models with chunk reading and batch inserts! Have large files? You can queue every chunk of a file! Your entire import will happen in the background.
-
Export Blade views. Want to have a custom layout in your spreadsheet? Use a HTML table in a Blade view and export that to Excel.
🎓 Learning Laravel Excel
You can find the full documentation of Laravel Excel on the website.
We welcome suggestions for improving our docs. The documentation repository can be found at https://github.com/SpartnerNL/laravel-excel-docs.
Some articles and tutorials can be found on our blog: https://medium.com/maatwebsite/laravel-excel/home
📬 License & Postcardware

Laravel Excel is created with love and care by Spartner (formerly known as Maatwebsite) to give back to the Laravel community. It is completely free (MIT license) to use, however the package is licensed as Postcardware. This means that if it makes it to your production environment, we would very much appreciate receiving a postcard from your hometown.
Spartner
Markt 2
6231 LS Meerssen
The Netherlands.
More about the license can be found at: https://docs.laravel-excel.com/3.1/getting-started/license.html
Created by Spartner (formerly Maatwebsite)
We are a strategic development partner, creating web-based custom built software from Laravel. In need of a digital solution for your challenge? Give us a call.
https://spartner.software
info@spartner.nl
+31 (0) 10 — 7449312
🔧 Supported Versions
Versions will be supported for a limited amount of time.
| Version | Laravel Version | Php Version | Support |
|---|---|---|---|
| 2.1 | <=5.6 | <=7.0 | Unsupported since 15-5-2018 |
| 3.0 | ^5.5 | ^7.0 | Unsupported since 31-12-2018 |
| 3.1 | >=5.8 | <=10.x | ^7.2 | ^8.0 | New features |