
When you’re working on a long, complicated document, you can collapse everything except the part you want to focus on. Or, if you think you might be overloading your readers with too much information, you can display summaries and leave it to your readers to open the summary and read the details if they want.
The ability to collapse and expand content in your document is based on its outline level. You can quickly add an outline level and make part of your document collapsible by adding a heading using Word’s built-in styles.
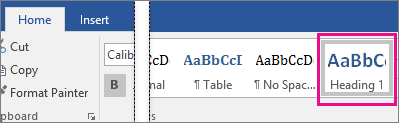
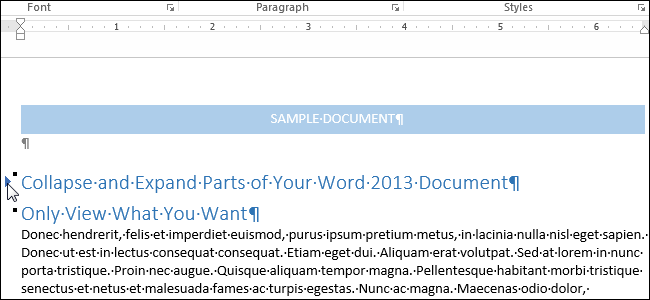
After applying the heading style, you’ll see a small triangle when you move your cursor over the heading. Click the triangle to collapse the body text and subheadings below it.

Tip: If you’re working on a touch device, tap to place your cursor in the heading to see the triangle.
Click the triangle again to expand that part of the document.
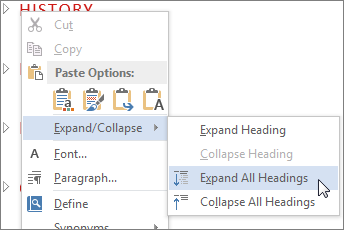
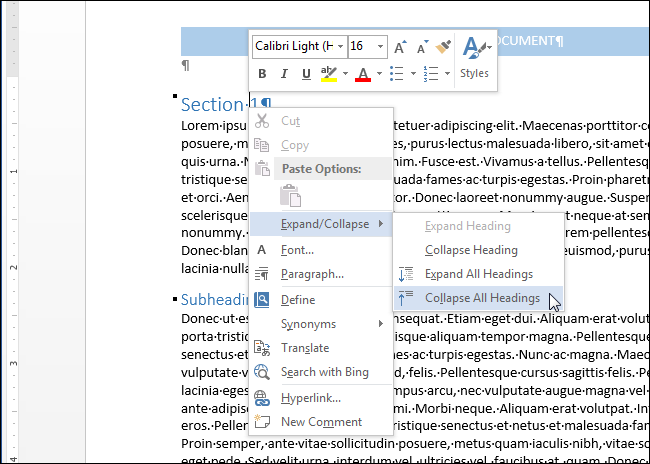
To collapse or expand all the headings in your document, right-click the heading and click Expand/Collapse > Expand All Headings or Collapse All Headings.
When you close and reopen a document, the headings will be expanded by default. If you want the document to open with the headings collapsed, follow these steps.
-
Place your cursor in the heading.
-
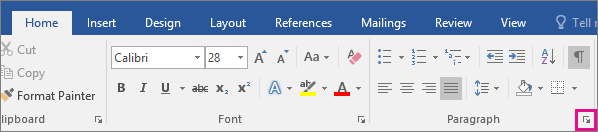
On the Home tab, click the arrow in the Paragraph group.

-
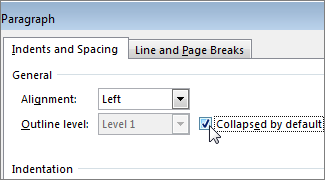
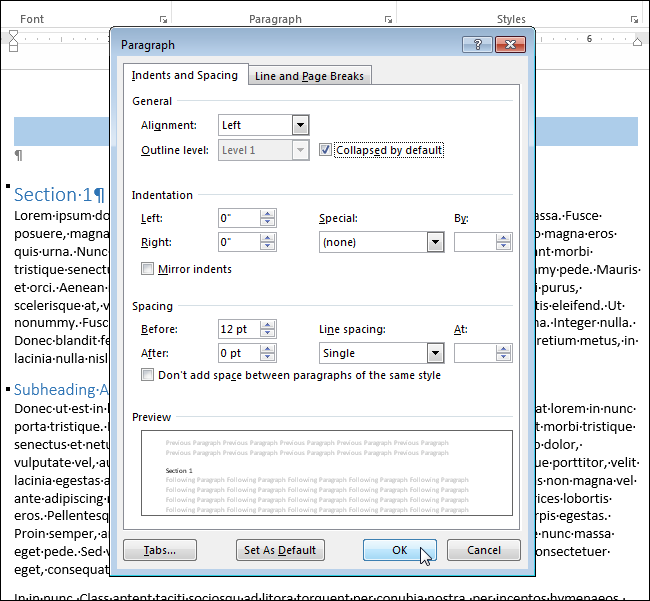
In the Paragraph dialog box, click the checkbox next to Collapsed by default.
-
Click OK.
When you’re working on a long, complicated document in the Word desktop application, you can collapse everything except the part you want to focus on. Unfortunately, this feature isn’t in Word for the web yet.
If you have the Word desktop program, you can click Open in Word to open your document in Word and collapse or expand parts of the document there, but those sections will be expanded when you view your document in Word for the web.

After opening your document in Word, collapse or expand parts of a document there. Then, press Ctrl+S to save your document to its original location.
When working on a long and complicated document, you can hide everything except the text you want to focus on. Or, if you think there are too much information to display, you can display titles only and leave it to others to open them and read the details if they want. This function in Word is named Expand and Collapse. Just follow these steps below and you can achieve it.
1. Select all the titles in your document.

2. Go to Home tab, click Heading 1 in the Styles group.

3. The font size of all titles has been enlarged as below, now you select all text.

4. Right-click and here comes an option box, click Expand/Collapse and select Collapse Heading.

5. The detailed information have been collapsed, simply click the arrow next to each title, then you can expand them when you want to view the text again.

Copyright Statement: Regarding all of the posts by this website, any copy or use shall get the written permission or authorization from Myofficetricks.
In this article, we are going to offer you 2 smart ways to collapse or expand parts of your Word document.
Every now and then, have you wonder how wonderful it would be if you can collapse a certain range of document to view two nonconsecutive parts? The good news is there is this built-in feature in Word 2013 and versions later.
If you have Word 2013 or version later, you may refer to this link to know more about the function: https://support.microsoft.com/en-us/office/collapse-or-expand-parts-of-a-document-701786e0-95e2-40bf-bfe5-f0233cd3520c
However, if you are using Word 2010 or versions earlier, there is no such luck. For this reason, we found 2 solutions you can adopt in versions prior to Word 2013.
Method 1: Collapse or Expand a Single Part of a Document
- First off, select the text you want to collapse.
- Next click “Insert” tab.
- Then click “Bookmark” in “Links” group to open the “Bookmark” dialog box.
- Enter a bookmark name in the text box and click “Add” to create a bookmark for the selected content.

- Now press “Alt+ F11” to open the VBA editor.
- Next click “Normal” and then the “Insert” tab.
- Choose “Module”.

- Double click on module to open the coding area on the right side and paste the following codes:


Sub CollapseOrExpandTheSelectedText1()
  ActiveDocument.Bookmarks("Introduction").Range.Font.Hidden = _
    Not ActiveDocument.Bookmarks("Introduction").Range.Font.Hidden
End Sub
Notes:
- You can change the macro name to whatever you want to call it.
- The “Introduction” refers to the bookmark name. Make sure it is as same as the name you entered in step 4.
- Click “Save” to save the macro.

- Next put insertion pointer near the bookmark but never inside it. For instance, we place it at the line above the selected text.
- Then press “Ctrl+ F9” to insert a field.
- Inside the field, enter the bellowing codes:

MACROBUTTON CollapseOrExpandTheSelectedText1 Introduction
Notes:
- The “CollapseOrExpandTheSelectedText1” is the macro name in step 8.
- The “Introduction” is the label you want to show on the button.


- Now press “Alt+ F9” and you shall see the button.
- Double click on the button to either expand or collapse the text.


Method 2: Collapse or Expand Multi-part of a Document
If you apply method 1 to create several buttons to collapse or expand contents, you can use the following method to show or hide the texts in batches.
- Repeat from step 5 to 8 in method 1.
- Then to collapse all texts, paste this macro there:
Sub CollapseAllSelectedTexts()
  Dim objBookmark As Bookmark

  For Each objBookmark In ActiveDocument.Bookmarks
    objBookmark.Range.Font.Hidden = True
  Next
End Sub
To expand all texts, you will need this one:
Sub ExpandAllSelectedTexts()
  Dim objBookmark As Bookmark

  For Each objBookmark In ActiveDocument.Bookmarks
    objBookmark.Range.Font.Hidden = False
  Next
End Sub
- Next click “Run” or hit “F5”.
Besides, you can take step 10 to 14 in method 1 to create buttons in the document to expand or collapse all texts at once.
Cope with the Consequences of Word Failure
Word fails from time to time. And there are consequences. Some of them are fine while others can get you busy in recovering the data back. If the latter is your case, you’d better choose a doc recovery tool to help you with the business.
Author Introduction:
Vera Chen is a data recovery expert in DataNumen, Inc., which is the world leader in data recovery technologies, including xlsx damage and pdf repair software products. For more information visit www.datanumen.com

A new feature was introduced in Word 2013 that allows you to collapse parts of your document and expand them when you want to view that content again. This feature makes it easier to find and view only what you want.
NOTE: We used Word 2013 to illustrate this feature.
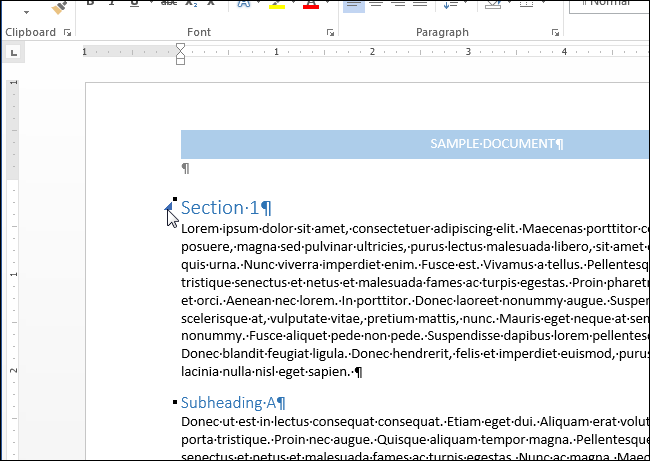
To do this, you must use the Heading styles in Word to format the headings in your document. When you move the mouse over the space to the left of a heading, a right arrow displays. When you click on the arrow, the text below the heading is hidden.

The content below the heading collapses and only the heading displays. To view the content again, simply click the arrow to the left of the heading again.
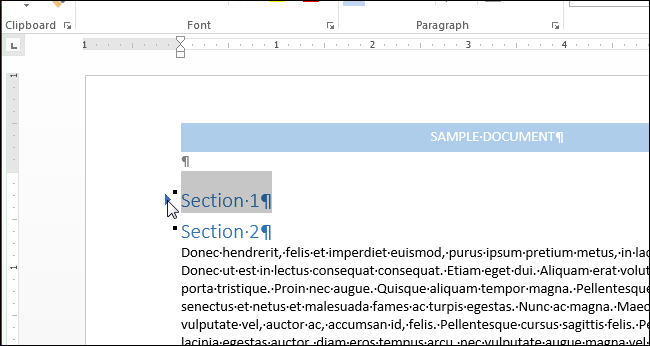
NOTE: When you collapse a heading, only the content up to the next heading of equal or lesser value is collapsed. Notice in the image below that all the content below “Section 1” is collapsed up to “Section 2” because “Section 2” is the at same heading level (Heading 1) as “Section 1.”
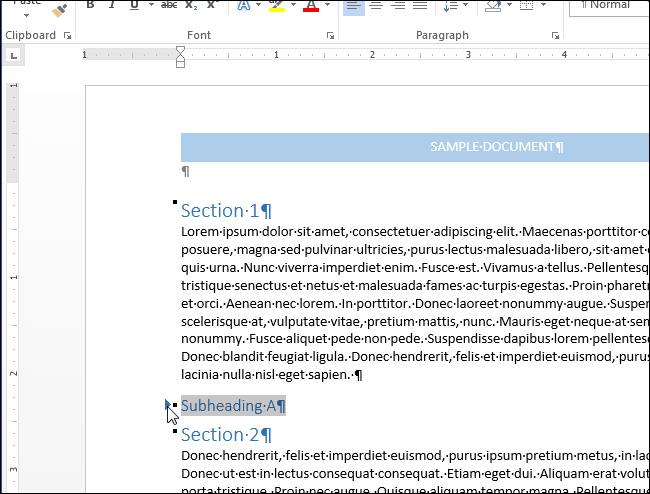
When we collapsed “Subheading A,” which is a Heading 2, it collapses the content up to “Section 2” because that heading level is greater than “Subheading A.” However, when we collapsed “Section 1,” “Subheading A” and the content below it was collapsed as well because it is a lesser heading level than “Section 1.”
Word provides a quick way to collapse or expand all headings at once. To do this, right-click on any heading and move your mouse over “Expand/Collapse” on the popup menu. Then, select “Collapse All Headings” from the submenu to collapse all the headings in your document, or “Expand All Headings” to expand all the headings again.
You can also set up Word to automatically collapse certain heading levels by default. To do this, make sure the “Home” tab is active on the ribbon. If it isn’t, click on it to activate it.
Place the cursor in a heading formatted with the heading level you want to collapse (such as Heading 1) and click the “Paragraph Settings” dialog box button in the “Paragraph” section of the “Home” tab.
On the “Indents and Spacing” tab of the “Paragraph” dialog box, select the “Collapsed by default” check box to the right of the “Outline level” drop-down list so there is a check mark in the box. If you don’t have the cursor in a heading, the “Collapsed by default” is grayed out and cannot be selected.
NOTE: This change only applies to the current heading and not all headings at the same level, unless you modify the heading style to include this change.
Note that you can only collapse and expand parts of your document when you’re viewing it on your computer. When you print the document, all headings are automatically expanded.
This feature is useful for viewing your document as an outline, although you can also use the Navigation Pane to view an outline of your document and easily jump to parts of your document, as well as to reorganize your document.
READ NEXT
- › How to Use Researcher in Microsoft Word for Essays and Papers
- › BLUETTI Slashed Hundreds off Its Best Power Stations for Easter Sale
- › Google Chrome Is Getting Faster
- › How to Adjust and Change Discord Fonts
- › The New NVIDIA GeForce RTX 4070 Is Like an RTX 3080 for $599
- › HoloLens Now Has Windows 11 and Incredible 3D Ink Features
- › This New Google TV Streaming Device Costs Just $20
How-To Geek is where you turn when you want experts to explain technology. Since we launched in 2006, our articles have been read billions of times. Want to know more?
На чтение 3 мин Опубликовано 21.09.2015
В Word 2013 появилась новая возможность – сворачивать разделы документа, а также разворачивать их, когда снова нужно сделать содержимое видимым. Такая возможность упрощает поиск и просмотр только нужной информации.
Примечание: Иллюстрации для этой статьи мы взяли из Word 2013.
Чтобы воспользоваться этой возможностью, нужно использовать стили текста в Word для форматирования заголовков в документе.
Наведите указатель мыши на пространство слева от заголовка, чтобы появилась стрелка вправо. Кликните по этой стрелке, текст под заголовком скроется.
Чтобы вновь отобразить содержимое, еще раз кликните по этой стрелке.
Примечание: Когда Вы сворачиваете заголовок, скрытым оказывается текст только до следующего заголовка того же или более высокого уровня. Посмотрите на картинку ниже: всё содержимое под «Section 1» скрыто вплоть до «Section 2«, поскольку оба заголовка одного уровня.
Когда мы сворачиваем заголовок «Subheading A«, который является подзаголовком в «Section 1«, то скрывается содержимое вплоть до «Section 2«, поскольку уровень второго выше, чем уровень первого. Однако, при сворачивании «Section 1» скрывается все содержимое раздела, включая «Subheading A«.
Word предлагает быстрый способ свернуть или развернуть все заголовки разом. Для этого кликните правой кнопкой мыши по любому из заголовков и в появившемся меню наведите указатель на строку Развернуть или свернуть (Expand/Collapse). Далее выберите Свернуть все заголовки (Collapse All Headings) или Развернуть все заголовки (Expand All Headings).
Можно настроить в Word автоматическое сворачивание заголовков определённого уровня. Для этого откройте вкладку Главная (Home).
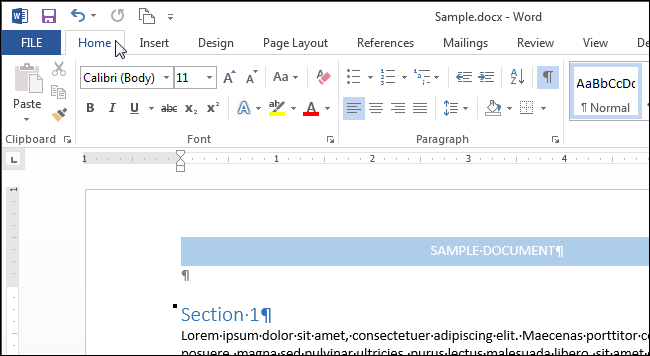
Поставьте курсор в нужный заголовок и нажмите кнопку вызова диалогового окна Параметры абзаца (Paragraph Settings).

В диалоговом окне Абзац (Paragraph) на вкладке Отступы и интервалы (Indents and Spacing) поставьте галочку напротив параметра Свёрнуты по умолчанию (Collapsed by default), который находится справа от выпадающего списка Уровень (Outline level). Если курсор находится не в заголовке, параметр Свёрнуты по умолчанию (Collapsed by default) окрашен серым и не может быть включен.
Примечание: Изменение параметра затронет не все заголовки этого уровня, а только текущий заголовок.
Обратите внимание, что сворачивать и разворачивать части документа можно только, когда Вы просматриваете его. При редактировании документа, все заголовки автоматически разворачиваются.
Данный инструмент особенно полезен при просматривании структуры документа, хотя для того, чтобы просматривать, легко изменять структуру документа и быстро перемещаться между его частями, можно использовать Панель навигации.
Оцените качество статьи. Нам важно ваше мнение: