
Watch Video – 3 Ways to Select Visible Cells in Excel
What do you do when you have to copy a range of cells in Excel and paste it somewhere else?
In most cases, the below three steps get the work done:
- Select the cells that you want to copy.
- Copy the cells (Control + C).
- Select the destination cell and paste these cells (Control + V).
But what if you have some hidden cells in the dataset?
Then – these above three steps are not enough.
Let me show you what happens when you try to copy cells that have hidden rows/columns in it.
Suppose you have a dataset as shown below:

Note that there are hidden rows in this dataset (look at the row numbers).
Now see what happens when I try to copy these cells and paste it somewhere else.

In the above example, I selected the visible cells, but when I paste these cells into another location, it copied the visible as well as the hidden cells.
The workaround to this is to make sure that Excel only selects the visible cells. Then I can copy and paste these visible cells only.
In this tutorial, I will show you three ways to select visible cells only in Excel.
Select Visible Cells using a Keyboard Shortcut
The easiest way to select visible cells in Excel is by using the following keyboard shortcut:
- For windows: ALT + ; (hold the ALT key and then press the semicolon key)
- For Mac: Cmd+Shift+Z
Here is a screencast where I select only the visible cells, copy the visible cells (notice the marching ants around selection), and paste these:

Select Visible Cells using Go To Special Dialog Box
While using the keyboard shortcut is the fastest way to select visible cells, if you don’t want to use the keyboard or don’t remember the shortcut, there is another way.
You can use the ‘Go To Special’ dialog box to select visible cells in a dataset.
Here are the steps:
- Select the data set in which you want to select the visible cells.
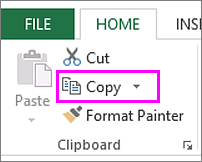
- Go to the Home tab.

- In the Editing group, click on Find and Select.

- Click on Go To Special.

- In the ‘Go To Special’ dialog box, select ‘Visible cells only’.

- Click OK.


This would select all the visible cells in the dataset.
Also read: Select Till End of Data in a Column in Excel (Shortcuts)
Select Visible Cells using a QAT Command
Another great way to select visible cells in Excel is to add a command to the Quick Access Toolbar (QAT).
Once added, you can simply click this command in the QAT, and it will select visible cells in the dataset.
Here are the steps to add ‘Select Visible Cells’ command to the QAT:
- Click on the Customize Quick Access Toolbar icon.

- Select ‘More Commands’.

- In the ‘Excel Options’ dialogue box, from the ‘Choose command from’ drop-down, select ‘All Commands’.

- Scroll down the list and click on ‘Select Visible Cells’ option.

- Click on the Add button.
- Click OK.


The above steps would add the ‘Select Visible Cells’ command to the QAT.

Now you when you select a dataset and click on this command in the QAT, it will select visible cells only.
You May Also Like the Following Excel Tutorials:
- How to Deselect Cells in Excel
- How to Select Non-adjacent cells in Excel?
- Number Rows in Excel
- How to Hide a Worksheet in Excel (that can’t be unhidden).
- How to Select Every Third Row in Excel (or select every Nth Row).
- Highlight EVERY Other ROW in Excel (using Conditional Formatting).
- How to Quickly Select Blank Cells in Excel.
If some cells, rows, or columns on a worksheet do not appear, you have the option of copying all cells—or only the visible cells. By default, Excel copies hidden or filtered cells in addition to visible cells. If this is not what you want, follow the steps in this article to copy visible cells only. For example, you can choose to copy only the summary data from an outlined worksheet.
Follow these steps:
-
Select the cells that you want to copy For more information, see Select cells, ranges, rows, or columns on a worksheet.
Tip: To cancel a selection of cells, click any cell in the worksheet.
-
Click Home > Find & Select, and pick Go To Special.

-
Click Visible cells only > OK.
-
Click Copy (or press Ctrl+C).
-
Select the upper-left cell of the paste area and click Paste (or press Ctrl+V).
Tip: To copy a selection to a different worksheet or workbook, click another worksheet tab or switch to another workbook, and then select the upper-left cell of the paste area.
Note: Excel pastes the copied data into consecutive rows or columns. If the paste area contains hidden rows or columns, you might have to unhide the paste area to see all of the copied cells.
When you copy and paste visible cells in a range of data that has hidden cells or filtering applied, you’ll notice that the hidden cells are pasted along with the visible ones. Unfortunately, you can’t change this when you copy and paste a range of cells in Excel for the web because the option to paste only visible cells isn’t available.
However, if the data is formatted as a table with filtering applied, you can copy and paste only the visible cells.
If you don’t want to format the data as a table and if you have the Excel desktop application, you can open your workbook to copy and paste the visible cells there. To do that, click Open in Excel and follow the steps in Copy and paste visible cells only.
Содержание
- Выберите видимые ячейки с помощью сочетания клавиш
- Выберите видимые ячейки с помощью диалогового окна «Перейти к специальному»
- Выберите видимые ячейки с помощью команды QAT
Посмотреть видео — 3 способа выбора видимых ячеек в Excel
Что вы делаете, когда вам нужно скопировать диапазон ячеек в Excel и вставить его в другое место?
В большинстве случаев следующие три шага делают работу:
- Выделите ячейки, которые хотите скопировать.
- Скопируйте ячейки (Control + C).
- Выберите целевую ячейку и вставьте эти ячейки (Control + V).
Но что, если в наборе данных есть несколько скрытых ячеек?
Тогда — этих трех шагов недостаточно.
Позвольте мне показать вам, что происходит, когда вы пытаетесь скопировать ячейки, в которых есть скрытые строки / столбцы.
Предположим, у вас есть набор данных, как показано ниже:

Обратите внимание, что в этом наборе данных есть скрытые строки (посмотрите на номера строк).
Теперь посмотрим, что произойдет, когда я попытаюсь скопировать эти ячейки и вставить их в другое место.

В приведенном выше примере я выбрал видимые ячейки, но когда я вставляю эти ячейки в другое место, они копируют как видимые, так и скрытые ячейки.
Чтобы решить эту проблему, убедитесь, что Excel выбирает только видимые ячейки. Затем я могу скопировать и вставить только эти видимые ячейки.
В этом уроке я покажу вам три способа выбрать видимые ячейки только в Excel.
Выберите видимые ячейки с помощью сочетания клавиш
Самый простой способ выделить видимые ячейки в Excel — использовать следующую комбинацию клавиш:
- Для окон: ALT +; (удерживая клавишу ALT, нажмите клавишу с точкой с запятой)
- Для Mac: Cmd + Shift + Z
Вот скринкаст, где я выбираю только видимые ячейки, копирую видимые ячейки (обратите внимание на марширующих муравьев вокруг выделения) и вставляю их:

Выберите видимые ячейки с помощью диалогового окна «Перейти к специальному»
Хотя использование сочетания клавиш — самый быстрый способ выделить видимые ячейки, если вы не хотите использовать клавиатуру или не помните сочетание клавиш, есть другой способ.
Вы можете использовать диалоговое окно «Перейти к специальному», чтобы выбрать видимые ячейки в наборе данных.
Вот шаги:
- Выберите набор данных, в котором вы хотите выделить видимые ячейки.
- Перейдите на вкладку «Главная».
- В группе «Редактирование» нажмите «Найти и выбрать».
- Щелкните Перейти к специальному.
- В диалоговом окне «Перейти к специальному» выберите «Только видимые ячейки».
- Щелкните ОК.


Это выберет все видимые ячейки в наборе данных.
Выберите видимые ячейки с помощью команды QAT
Еще один отличный способ выделить видимые ячейки в Excel — добавить команду на панель быстрого доступа (QAT).
После добавления вы можете просто щелкнуть эту команду в QAT, и она выберет видимые ячейки в наборе данных.
Вот шаги, чтобы добавить команду «Выбрать видимые ячейки» в QAT:
- Щелкните значок «Настроить панель быстрого доступа».
- Выберите «Дополнительные команды».
- В диалоговом окне «Параметры Excel» в раскрывающемся списке «Выбрать команду из» выберите «Все команды».
- Прокрутите список вниз и нажмите «Выбрать видимые ячейки».
- Щелкните по кнопке Добавить.
- Щелкните ОК.


Вышеупомянутые шаги добавят команду «Выбрать видимые ячейки» в QAT.

Теперь, когда вы выбираете набор данных и нажимаете эту команду в QAT, он выбирает только видимые ячейки.
Вы поможете развитию сайта, поделившись страницей с друзьями
In Microsoft Excel, we can easily copy the range of cells and paste it to some destination.
This can simply be done using the following steps.
- Select the range of the cell
- Copy the selected range using Ctrl + C command
- Paste the copied cell to the destination using Ctrl + V command
But imagine a situation where we have some cells that are hidden in the range (like in the below example).

In the above data, rows 4 to 7 are hidden.
Now, if I copy this data that has hidden rows and paste it a few rows below it, something weird happens.
The hidden rows are also copied and pasted (as shown below)

By default, Excel copies the visible and hidden cells as shown in the above screenshot. So how to overcome this and only select the visible cell?
This tutorial will guide you through all the methods using which you can select the visible cell only in Excel.
Method 1: Keyboard Shortcut to Select Visible Cells Only
This is the easiest method to copy and paste the visible cell only in Excel.
Below is the keyboard shortcut to select the visible cells only:
ALT + ; (for windows)
or
Cmd + Shift + Z (for mac)
Let me explain it with the help of an example in which I am going to use the below dataset, where we have some Employee records with rows 4-7 hidden.

Let’s see how we can select the visible cell only. To achieve this, follow the below steps
- Select the range of data that you want to copy.

- Press the shortcut ALT + ; from the keyboard (hold the ALT key and then press the semicolon key). Remember the command for Mac users is Cmd + Shift + Z.

- To copy the visible range, press Ctrl + C from the keyboard. Some dotted lines appear around the selection, as shown below.

- Paste the cell to the destination using Ctrl + V command

This will paste only the visible cells and exclude the hidden cells, as you can see from the above screenshot.
There are other methods to perform this, which are discussed in the below sections.
Also read: How to Select Every Other Row (Alternate Row) in Excel?
Method 2: Select Visible Cells Only Using the Go to Special Dialog Box
Using the shortcut key (Alt + 😉 is a simple and easy way to copy only visible cells in Excel, but if you don’t want to remember the keyboard shortcut, you can do so by using the Go To Special option that is available in the Home tab of the ribbon.
Let me show you with the help of an example where I am going to use the same employee record data where rows 4-7 are hidden, as shown below.

- Select the range of cells you want to copy.

- Click on the Home tab in the ribbon

- In the Home tab, click on the Find & Select option.

- From the dropdown that gets open select the Go To Special option

This will open the Go To Special dialog box as shown below

- Click on the option Visible cells only

- Click on OK.

In this way, Excel will not follow the default copy-paste mechanism but only copy the visible cell.
- To copy the selected range press Ctrl + C

- Select the cell where you want to paste the range and press Ctrl + V

In this method, I showed you in great detail how you can use the Go To Special option to copy only visible cells.
There is another way you can do so, which is discussed in the below section.
Method 3: By Adding Select Visible Cells Option to Quick Access Toolbar
The above-discussed methods work perfectly for copying visible cells to the destination, but if you like to make it simpler, you can add the Select Visible Cells option to your Quick Access toolbar.
By doing so, you don’t have to remember the shortcut or the long process discussed in method 2.
In this method, first, I will explain how you can add a Select Visible Cells option to the toolbar, and then I will show you how you can quickly copy only visible cells using this option.
So follow all the steps to get a complete insight into the whole process.
a) Add the Select Visible Cells option to Quick Access Toolbar
- Click on the Customizable Quick Access Toolbar option

- From the dropdown that gets open, choose More Commands option

This will open Excel Options as shown below

- Click on the ‘Choose commands from’ option

- From the drop-down that gets opens, choose the “All Commands” option

This will show all the commands in Excel
- Scroll down the command’s list and choose the Select Visible Cells option.

- Click on Add

- Then click on OK

This will add the Select Visible Cells option to the toolbar as shown below

b) Copy Visible Cell using the Select Visible Cells option
In the first part of this method, I showed you how you could add the Select Visible Cells option to your Quick Access Toolbar.
Now I will show you how you can employ this option to copy only visible cells just in a single click.
I am going to use the same dataset that is used in method 1 and method 2, where rows 4-7 are hidden.

- Select the data that you want to copy.

- Click on the Select Visible Cells icon in the Quick Access Toolbar (QAT)

- Copy the data using Ctrl + C

- Paste the data to the destination using Ctrl + V

This will only paste only the visible cell and exclude the hidden ones as shown in the above screenshot.
Tip: In the first part of this method, I also showed you how you could add the Select Visible Cells command to this Quick Access Toolbar. Similarly, you can also add any other command using the same process. Just look for the required command in the command’s list and add it using the procedure discussed in the above method.
If you’re a heavy Excel user, I am sure you will soon encounter this situation where you only need to select the visible cells (and not the hidden ones).
In this tutorial, I have discussed all the methods you can use to copy visible cells only.
I am personally a big fan of the keyboard shortcut, but in case you don’t want to burden yourself with yet another shortcut, you can add the select visible cells only icon in the Quick Access Toolbar and get this done with a single click.
Other Excel articles you may also like:
- How to Select Non-adjacent Cells in Excel?
- Select Row (or Rows) in Excel (Shortcut)
- How to Select Rows with Specific Text in Excel
- How to Select Multiple Items from a Drop Down in Excel?
- How to Select Multiple Rows in Excel
- How to Select Alternate Columns in Excel (or every Nth Column)
- How to Select Every Other Cell in Excel (Or Every Nth Cell)
- How to Paste in a Filtered Column Skipping the Hidden Cells
Transcript
By default, when you select a range of cells in Excel, hidden cells are also selected. This means that any data in hidden rows or columns is included when you copy a selection. Chances are, that’s not what you want. In this video we’ll show you how to work with visible cells only.
Here we have a list of real estate properties. Let’s say we want to give this list to someone else, but without the data in columns E through I.
We can easily hide these columns; but if we then select all the properties, copy, and paste into another worksheet, we get all of the data, including the data in columns that are hidden.
This is because Excel selects both visible and hidden cells by default. To get around this problem, we need to tell Excel to select only visible cells.
First, make the selection normally. Then, on the home tab of the ribbon, click the Find & Select menu and choose Go To Special. In the Go To Special dialog, select Visible Cells Only.
[Mac: Edit > Go To > Special > Visible Cells Only]
Now you can copy the selection, and paste. Only data in cells that were visible will be copied. Back in the original worksheet, we can verify the selection by unhiding the columns. Now you can see the moving dashed line around the cells that were copied. Notice the cells that were hidden are not included.
If that seems like a lot of steps, you’ll be happy to know that Excel provides a keyboard shortcut for selecting visible cells:
On Windows: use Alt ; (semicolon)
On a Mac: use Command Shift Z
Let’s try it out. As before, we’ll hide the columns and then make a normal selection. This time, however, we’ll use Alt ; to change the selection to visible cells only.
Now we’ll copy. When we paste, we get only the data from cells that were visible.