
Вставка таблицы Excel в документ Word с помощью кода VBA Excel. Метод Selection.PasteExcelTable: синтаксис, параметры, пример использования.
Работа с Word из кода VBA Excel
Часть 6. Вставка таблицы Excel в документ Word
[Часть 1] [Часть 2] [Часть 3] [Часть 4] [Часть 5] [Часть 6]
Метод Selection.PasteExcelTable
Метод Range.Paste, использующийся в VBA Word для вставки в документ таблиц, скопированных в буфер обмена из другого документа Word, не применим для вставки в документ таблиц, скопированных из книги Excel. Для этих целей используется метод Selection.PasteExcelTable.
Selection.PasteExcelTable — это метод, предназначенный для вставки Excel-таблицы из буфера обмена в документ Word и ее форматирования в соответствии с заданными параметрами.
Синтаксис
|
Expression.PasteExcelTable(LinkedToExcel, WordFormatting, RTF) |
Expression — переменная, представляющая объект Selection. В том числе, это может быть курсор или закладка.
Параметры
Все параметры метода Selection.PasteExcelTable логического типа и являются обязательными.
| Параметр | Описание |
|---|---|
| LinkedToExcel | True — вставленная таблица связывается с исходным файлом Excel, чтобы изменения, внесенные в файл Excel, отображались в Microsoft Word. False — связь между вставленной таблицей и таблицей в исходном файле не устанавливается. |
| WordFormatting | True — вставленная таблица будет отформатирована как таблица документа Word. False — вставленная таблица будет отформатирована в соответствии с исходным файлом Excel. |
| RTF | True — Excel-таблица будет вставлена в расширенном текстовом формате (RTF). False — Excel-таблица будет вставлена в формате HTML-таблицы. |
Допустим, у нас есть таблица Excel, начинающаяся с ячейки A1 (или с любой другой), и нам необходимо скопировать эту таблицу в существующий документ Word, вставив ее на место закладки «Закладка1».
Решение:
|
Sub Primer() Dim myWord As New Word.Application, myDoc As Word.Document ‘Открываем существующий документ Word Set myDoc = myWord.Documents.Open(«C:ТестоваяДокумент1.docx») ‘Копируем таблицу на активном листе в буфер обмена ‘Вместо ячейки Range(«A1») можно указать любую другую, расположенную внутри таблицы Range(«A1»).CurrentRegion.Copy ‘Вставляем таблицу из буфера обмена на место закладки myDoc.Bookmarks(«Закладка1»).Range.PasteExcelTable False, False, False ‘Отображаем программу Word myWord.Visible = True ‘Очищаем переменные Set myWord = Nothing Set myDoc = Nothing End Sub |
Если необходимо таблицу вставить в конец документа, строку
|
myDoc.Bookmarks(«Закладка1»).Range.PasteExcelTable False, False, False |
следует заменить на
|
With myDoc ‘Переводим курсор в конец документа .Range(.Range.Characters.Count — 1, .Range.Characters.Count — 1).Select ‘Добавляем перенос строки, если необходимо .ActiveWindow.Selection.InsertAfter vbCr ‘Переводим курсор в конец документа .Range(.Range.Characters.Count — 1, .Range.Characters.Count — 1).Select ‘Вставляем таблицу из буфера обмена .ActiveWindow.Selection.PasteExcelTable False, False, False End With |
Sub ExcelRangeToWord()
‘PURPOSE: Copy/Paste An Excel Table Into a New Word Document
‘NOTE: Must have Word Object Library Active in Order to Run _
(VBE > Tools > References > Microsoft Word 12.0 Object Library)
‘SOURCE: www.TheSpreadsheetGuru.com
Dim tbl As Excel.Range
Dim WordApp As Word.Application
Dim myDoc As Word.Document
Dim WordTable As Word.Table
‘Optimize Code
Application.ScreenUpdating = False
Application.EnableEvents = False
‘Copy Range from Excel
Set tbl = ThisWorkbook.Worksheets(Sheet1.Name).ListObjects(«Table1»).Range
‘Create an Instance of MS Word
On Error Resume Next
‘Is MS Word already opened?
Set WordApp = GetObject(class:=»Word.Application»)
‘Clear the error between errors
Err.Clear
‘If MS Word is not already open then open MS Word
If WordApp Is Nothing Then Set WordApp = CreateObject(class:=»Word.Application»)
‘Handle if the Word Application is not found
If Err.Number = 429 Then
MsgBox «Microsoft Word could not be found, aborting.»
GoTo EndRoutine
End If
On Error GoTo 0
‘Make MS Word Visible and Active
WordApp.Visible = True
WordApp.Activate
‘Create a New Document
Set myDoc = WordApp.Documents.Add
‘Copy Excel Table Range
tbl.Copy
‘Paste Table into MS Word
myDoc.Paragraphs(1).Range.PasteExcelTable _
LinkedToExcel:=False, _
WordFormatting:=False, _
RTF:=False
‘Autofit Table so it fits inside Word Document
Set WordTable = myDoc.Tables(1)
WordTable.AutoFitBehavior (wdAutoFitWindow)
EndRoutine:
‘Optimize Code
Application.ScreenUpdating = True
Application.EnableEvents = True
‘Clear The Clipboard
Application.CutCopyMode = False
End Sub
In this part of the code we are determining if Microsoft Word is open or not. If Word is already open, we can set a variable equal to the entire program by using GetObject. If MS Word is not currently running we can use CreateObject to run an instance of Word and then set a variable equal to that specific instance of MS Word.
When using CreateObject, the target application will start running but it is not visible on screen. Therefore we need to turn the Visible setting on (equal to true). Also, VBA with Word is a little bit different than with Excel in that it is much more dependent on its window showing on screen. Therefore a second command must be written to Activate Microsoft Word.
Copy From Excel, Paste Onto Document
Now that you have a new document created, you can command Excel to paste your table into MS Word. Near the beginning of the code, there was a line that allowed you to specify the exact table you wanted to copy. The variable tbl was used to remember this table range and to allow you to reference the range later on in the code.
Guru Tip: It is a good idea to place code that may need to be manually changed at some point in the future near the beginning of the subroutine. This prevents you from having to scroll through your code and pinpoint the exact place where you spelled out which range you wanted to copy or which worksheet you wanted to pull data from. This can save you a bunch of time and prevent confusion!
Word has a special method called PasteExcelTable, which (as you can guess) allows you paste in an Excel table. There are three variables you can tweak to get you table looking and functioning just the way you want.
-
LinkedToExcel — True links the pasted table to the original Excel file so that changes made to the Excel file are reflected in Microsoft Word.
-
WordFormatting — True formats the table using the formatting in the Word document. False formats the table according to the original Excel file.
-
RTF — True pastes the Excel table using Rich Text Format (RTF). False pastes the Excel table as HTML.
Now for the last step! Depending on how large your table is, it may be spilling outside of your document page. In order to prevent this from happening you can go ahead and use AutoFitBehavior to resize the table to fit perfectly inside your Word document.
About The Author
Hey there! I’m Chris and I run TheSpreadsheetGuru website in my spare time. By day, I’m actually a finance professional who relies on Microsoft Excel quite heavily in the corporate world. I love taking the things I learn in the “real world” and sharing them with everyone here on this site so that you too can become a spreadsheet guru at your company.
Through my years in the corporate world, I’ve been able to pick up on opportunities to make working with Excel better and have built a variety of Excel add-ins, from inserting tickmark symbols to automating copy/pasting from Excel to PowerPoint. If you’d like to keep up to date with the latest Excel news and directly get emailed the most meaningful Excel tips I’ve learned over the years, you can sign up for my free newsletters. I hope I was able to provide you with some value today and I hope to see you back here soon!
— Chris
Founder, TheSpreadsheetGuru.com
Using Excel VBA to create Microsoft Word documents
In these examples, we generate Microsoft Word Documents with various formatting features using
the Microsoft Excel VBA scripting language. These techniques can have many useful applications.
For instance if you have a list of data like a price or product list in Excel that you want to present
in a formatted Word Document, these techniques can prove useful.
In these examples, we assume the reader has at least basic knowledge of VBA, so we will not
go over basics of creating and running scripts. This code has been tested on Microsoft Word and Excel
2007. Some changes may be required for other versions of Word and Excel.
Writing to Word
Inserting a Table of Contents
Inserting Tabs
Inserting Tables
Inserting Bullet List
more on Inserting Tables
Multiple Features
Function that demonstrates VBA writing to a Microsoft Word document
The following code illustrates the use of VBA Word.Application object and related properties.
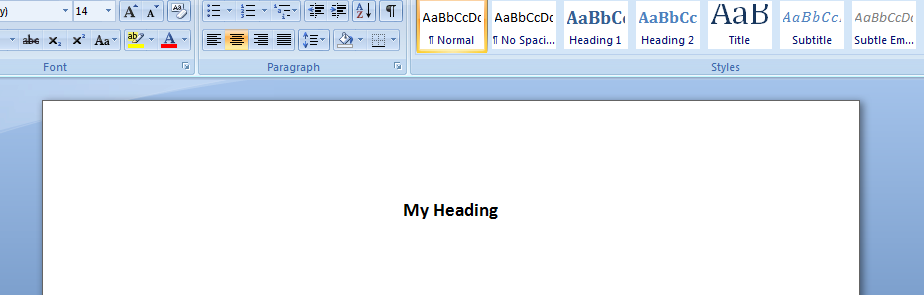
In this example, we create a new Word Document add some text.
    'In Tools > References, add reference to "Microsoft Word XX.X Object Library" before running.

    'Early Binding
    Dim wdApp As Word.Application
    Set wdApp = New Word.Application

    'Alternatively, we can use Late Binding
    'Dim wdApp As Object
    'Set wdApp = CreateObject("word.Application")

    With wdApp
        .Visible = True
        .Activate
        .Documents.Add

        With .Selection
            .ParagraphFormat.Alignment = wdAlignParagraphCenter
            .Font.Bold = True
            .Font.Name = "arial"
            .Font.Size = 14
            .TypeText ("My Heading")
            .TypeParagraph
        End With
    End With
Some VBA Vocabulary
ParagraphFormat
Represents all the formatting for a paragraph.
output in MS Word:
Inserting a Table of Contents into Word Document using Excel VBA
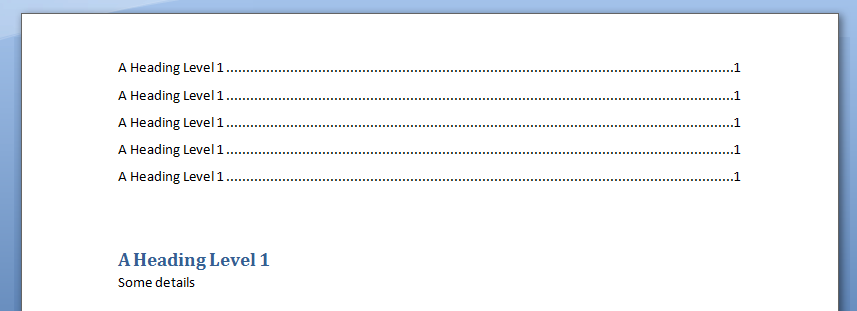
In this example, we generate a Table of Contents into a Word Document using Excel VBA
Sub sAddTableOfContents()

    Dim wdApp As Word.Application
    Set wdApp = New Word.Application

    'Alternatively, we can use Late Binding
    'Dim wdApp As Object
    'Set wdApp = CreateObject("word.Application")

    Dim wdDoc As Word.Document
    Set wdDoc = wdApp.Documents.Add

    ' Note we define a Word.range, as the default range wouled be an Excel range!
    Dim myWordRange As Word.range
    Dim Counter As Integer

    wdApp.Visible = True
    wdApp.Activate

    'Insert Some Headers
    With wdApp
        For Counter = 1 To 5
            .Selection.TypeParagraph
            .Selection.Style = "Heading 1"
            .Selection.TypeText "A Heading Level 1"
            .Selection.TypeParagraph
            .Selection.TypeText "Some details"
        Next
    End With

    ' We want to put table of contents at the top of the page
	Set myWordRange = wdApp.ActiveDocument.range(0, 0)

    wdApp.ActiveDocument.TablesOfContents.Add _
     range:=myWordRange, _
     UseFields:=False, _
     UseHeadingStyles:=True, _
     LowerHeadingLevel:=3, _
     UpperHeadingLevel:=1

End Sub
Some VBA Vocabulary
ActiveDocument.TablesOfContents.Add
The TablesOfContents property to return the TablesOfContents collection.
Use the Add method to add a table of contents to a document.
Some TablesOfContents Parameters
Range The range where you want the table of contents to appear. The table of contents replaces the range, if the range isn’t collapsed.
UseHeadingStyles True to use built-in heading styles to create the table of contents. The default value is True.
UpperHeadingLevel The starting heading level for the table of contents. Corresponds to the starting value used with the o switch for a Table of Contents (TOC) field. The default value is 1.
LowerHeadingLevel The ending heading level for the table of contents. Corresponds to the ending value used with the o switch for a Table of Contents (TOC) field. The default value is 9.
output Word Table in MS Word:
Write Microsoft Word Tabs
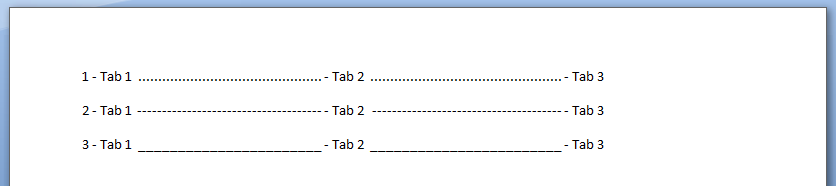
A function that writes tabbed content to a Microsoft Word Document. Note in each iteration, we change the
value of the leader character (characters that are inserted in the otherwise blank area created by the tab).
Public Sub sWriteMicrosoftTabs()

    'In Tools > References, add reference to "Microsoft Word XX.X Object Library" before running.

    'Early Binding
    Dim wdApp As Word.Application
    Set wdApp = New Word.Application

    'Alternatively, we can use Late Binding
    'Dim wdApp As Object
    'Set wdApp = CreateObject("word.Application")

    With wdApp
        .Visible = True
        .Activate
        .Documents.Add

        For Counter = 1 To 3
            .Selection.TypeText Text:=Counter & " - Tab 1 "

            ' position to 2.5 inches
            .Selection.Paragraphs.TabStops.Add Position:=Application.InchesToPoints(2.5), _
                Leader:=Counter, Alignment:=wdAlignTabLeft

            .Selection.TypeText Text:=vbTab & " - Tab 2 "

            ' position to 5 inches
            .Selection.Paragraphs.TabStops.Add Position:=Application.InchesToPoints(5), _
                Leader:=Counter, Alignment:=wdAlignTabLeft

            .Selection.TypeText Text:=vbTab & " - Tab 3 "

            .Selection.TypeParagraph
        Next Counter

    End With
End Sub
Some VBA Vocabulary
.TabStops.Add Use the TabStops property to return the TabStops collection. In the example above,
nprogram adds a tab stop positioned at 0, 2.5 and 5 inches.
output in MS Word:
Write Microsoft Word Tables
In this example, we generate a Microsoft Table using Excel VBA
Sub sWriteMSWordTable ()

    'In Tools > References, add reference to "Microsoft Word XX.X Object Library" before running.

    'Early Binding
    Dim wdApp As Word.Application
    Set wdApp = New Word.Application

    'Alternatively, we can use Late Binding
    'Dim wdApp As Object
    'Set wdApp = CreateObject("word.Application")

    With wdApp
        .Visible = True
        .Activate
        .Documents.Add

        With .Selection

            .Tables.Add _
                    Range:=wdApp.Selection.Range, _
                    NumRows:=1, NumColumns:=3, _
                    DefaultTableBehavior:=wdWord9TableBehavior, _
                    AutoFitBehavior:=wdAutoFitContent

            For counter = 1 To 12
                .TypeText Text:="Cell " & counter
                If counter <> 12 Then
                    .MoveRight Unit:=wdCell
                End If
            Next

        End With

    End With

End Sub
Some VBA vocabulary
Table.AddTable object that represents a new, blank table added to a document.
Table.Add properties
Range The range where you want the table to appear. The table replaces the range, if the range isn’t collapsed.
NumRows The number of rows you want to include in the table.
NumColumns The number of columns you want to include in the table.
DefaultTableBehavior Sets a value that specifies whether Microsoft Word automatically resizes cells in tables to fit the cells� contents (AutoFit). Can be either of the following constants: wdWord8TableBehavior (AutoFit disabled) or wdWord9TableBehavior (AutoFit enabled). The default constant is wdWord8TableBehavior.
AutoFitBehavior Sets the AutoFit rules for how Word sizes tables. Can be one of the WdAutoFitBehavior constants.
output in MS Word:

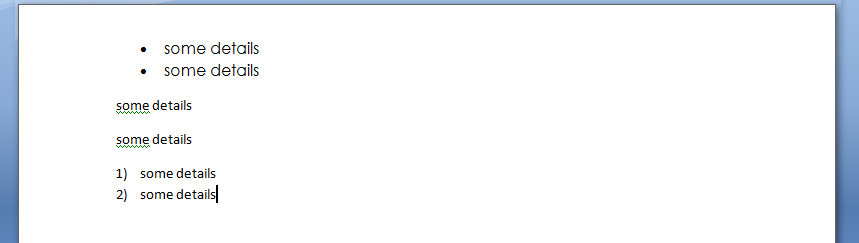
Write Microsoft Word bullet list
In this example, we write with bullet list and outline numbers with Excel VBA
    'In Tools > References, add reference to "Microsoft Word XX.X Object Library" before running.

    'Early Binding
    Dim wdApp As Word.Application
    Set wdApp = New Word.Application

    'Alternatively, we can use Late Binding
    'Dim wdApp As Object
    'Set wdApp = CreateObject("word.Application")

    With wdApp
        .Visible = True
        .Activate
        .Documents.Add
        ' turn on bullets
        .ListGalleries(wdBulletGallery).ListTemplates(1).Name = ""
        .Selection.Range.ListFormat.ApplyListTemplate ListTemplate:=.ListGalleries(wdBulletGallery).ListTemplates(1), _
            continuepreviouslist:=False, applyto:=wdListApplyToWholeList, defaultlistbehavior:=wdWord9ListBehavior

        With .Selection
            .ParagraphFormat.Alignment = wdAlignParagraphLeft
            .Font.Bold = False
            .Font.Name = "Century Gothic"
            .Font.Size = 12
            .TypeText ("some details")
            .TypeParagraph
            .TypeText ("some details")
            .TypeParagraph
        End With

        ' turn off bullets
        .Selection.Range.ListFormat.RemoveNumbers wdBulletGallery

        With .Selection
            .ParagraphFormat.Alignment = wdAlignParagraphLeft
            .TypeText ("some details")
            .TypeParagraph
            .TypeText ("some details")
            .TypeParagraph

        End With

        ' turn on outline numbers
        .ListGalleries(wdOutlineNumberGallery).ListTemplates(1).Name = ""
        .Selection.Range.ListFormat.ApplyListTemplate ListTemplate:=.ListGalleries(wdOutlineNumberGallery).ListTemplates(1), _
            continuepreviouslist:=False, applyto:=wdListApplyToWholeList, defaultlistbehavior:=wdWord9ListBehavior

        With .Selection
            .ParagraphFormat.Alignment = wdAlignParagraphLeft
            .TypeText ("some details")
            .TypeParagraph
            .TypeText ("some details")

        End With

    End With
output in MS Word:
Another example of Writing Tables to Microsoft Word
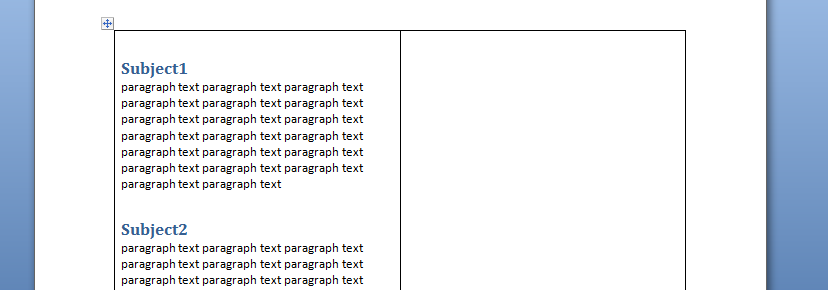
In this example we will create a word document with 20 paragraphs. Each paragraph will have a header with a header style element
   'In Tools > References, add reference to "Microsoft Word XX.X Object Library" before running.
    Dim wdApp As Word.Application
    Dim wdDoc As Word.Document

    Set wdApp = New Word.Application
    wdApp.Visible = True


    Dim x As Integer
    Dim y As Integer

    wdApp.Visible = True
    wdApp.Activate
    wdApp.Documents.Add

    wdApp.ActiveDocument.Tables.Add Range:=wdApp.Selection.Range, NumRows:=2, NumColumns:= _
        2, DefaultTableBehavior:=wdWord9TableBehavior, AutoFitBehavior:= _
        wdAutoFitFixed

    With wdApp.Selection.Tables(1)
        If .Style <> "Table Grid" Then
            .Style = "Table Grid"
        End If
        .ApplyStyleHeadingRows = True
        .ApplyStyleLastRow = False
        .ApplyStyleFirstColumn = True
        .ApplyStyleLastColumn = False
        .ApplyStyleRowBands = True
        .ApplyStyleColumnBands = False
    End With

    With wdApp.Selection

        For x = 1 To 2
            ' set style name
            .Style = "Heading 1"
            .TypeText "Subject" & x
            .TypeParagraph
            .Style = "No Spacing"
            For y = 1 To 20
                .TypeText "paragraph text "
            Next y
            .TypeParagraph
        Next x

        ' new paragraph
        .TypeParagraph

        ' toggle bold on
        .Font.Bold = wdToggle
        .TypeText Text:="show some text in bold"
        .TypeParagraph

        'toggle bold off
        .Font.Bold = wdToggle
        .TypeText "show some text in regular front weight"
        .TypeParagraph


    End With
Some VBA vocabulary
TypeText
Inserts specified text at the beginning of the current selection. The selection is turned into an insertion point at the end of the inserted text.
If Options.ReplaceSelection = True then the original selection will be replaced. This behaves exactly the same as typing some text at the keyboard.
TypeParagraph
Insert a new blank paragraph. The selection is turned into an insertion point after the inserted paragraph mark. If Options.ReplaceSelection = True then the original selection will be replaced. This behaves exactly the same as pressing the Enter key.
output in MS Word:
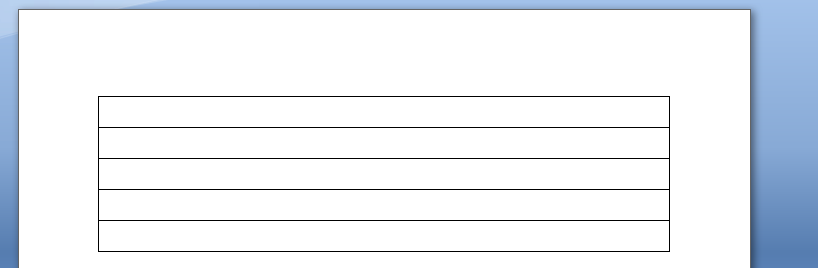
Generating a Word table with VBA
	'In Tools > References, add reference to "Microsoft Word XX.X Object Library" before running.

	Dim wdApp As Word.Application
	Dim wdDoc As Word.Document
	Dim r As Integer

	Set wdApp = CreateObject("Word.Application")
	wdApp.Visible = True

	Set wdDoc = wdApp.Documents.Add
	wdApp.Activate

	Dim wdTbl As Word.Table
	Set wdTbl = wdDoc.Tables.Add(Range:=wdDoc.Range, NumRows:=5, NumColumns:=1)

	With wdTbl

		.Borders(wdBorderTop).LineStyle = wdLineStyleSingle
		.Borders(wdBorderLeft).LineStyle = wdLineStyleSingle
		.Borders(wdBorderBottom).LineStyle = wdLineStyleSingle
		.Borders(wdBorderRight).LineStyle = wdLineStyleSingle
		.Borders(wdBorderHorizontal).LineStyle = wdLineStyleSingle
		.Borders(wdBorderVertical).LineStyle = wdLineStyleSingle

		For r = 1 To 5
			.Cell(r, 1).Range.Text = ActiveSheet.Cells(r, 1).Value
		Next r
	End With
output in MS Word:
Option Explicit
Dim wdApp As Word.Application
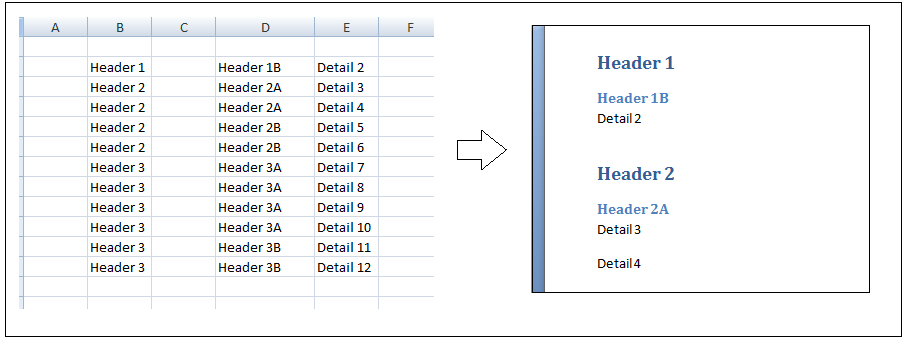
Sub extractToWord()
'In Tools > References, add reference to "Microsoft Word 12 Object Library" before running.
Dim lastCell
Dim rng As Range
Dim row As Range
Dim cell As Range
Dim arrayOfColumns
arrayOfColumns = Array("", "", "", "", "", "", "", "", "", "", "", "", "", "", "")
Dim thisRow As Range
Dim thisCell As Range
Dim myStyle As String
' get last cell in column B
lastCell = getLastCell()
Set rng = Range("B2:H" & lastCell)
'iterate through rows
For Each thisRow In rng.Rows
'iterate through cells in row row
For Each thisCell In thisRow.Cells
If thisCell.Value = arrayOfColumns(thisCell.Column) Or thisCell.Value = "" Then
' do nothing
''frWriteLine thisCell.Value, "Normal"
''frWriteLine arrayOfColumns(thisCell.Column), "Normal"
If thisCell.Value = arrayOfColumns(thisCell.Column) Or thisCell.Value = "" Then
End If
Else
myStyle = "Normal"
Select Case thisCell.Column
Case 2
myStyle = "Heading 1"
Case 3
myStyle = "Heading 2"
Case 4
myStyle = "Heading 3"
Case Is > 5
myStyle = "Normal"
End Select
frWriteLine thisCell.Value, myStyle
End If
arrayOfColumns(thisCell.Column) = thisCell.Value
Next thisCell
Next thisRow
End Sub
Public Function getLastCell() As Integer
Dim lastRowNumber As Long
Dim lastRowString As String
Dim lastRowAddress As String
With ActiveSheet
getLastCell = .Cells(.Rows.Count, 2).End(xlUp).row
End With
End Function
Public Function frWriteLine(someData As Variant, myStyle As String)
If wdApp Is Nothing Then
Set wdApp = New Word.Application
With wdApp
.Visible = True
.Activate
.Documents.Add
End With
End If
With wdApp
With .Selection
.ParagraphFormat.Alignment = wdAlignParagraphCenter
.Style = myStyle
.TypeText (someData)
.TypeParagraph
End With
End With
End Function
output in MS Word:
Хитрости »
24 Февраль 2012 91374 просмотров
Иногда бывает необходимо перенести что-то из Excel в другое приложение. Я возьму для примера Word. Например скопировать ячейки и вставить. Обычно мы это так и делаем — скопировали в Excel, открыли Word — вставили. Но сделать это при помощи кода чуть сложнее, хотя если разобраться никаких сложностей нет. Ниже приведен пример кода, который открывает Word, открывает в нем определенный документ, копирует данные из Excel и вставляет в открытый документ Word.
Sub OpenWord()
    Dim objWrdApp As Object, objWrdDoc As Object
    'создаем новое приложение Word
    Set objWrdApp = CreateObject("Word.Application")
    'Можно так же сделать приложение Word видимым. По умолчанию открывается в скрытом режиме
    'objWrdApp.Visible = True
    'открываем документ Word - документ "Doc1.doc" должен существовать
    Set objWrdDoc = objWrdApp.Documents.Open("C:Doc1.doc")
    'Копируем из Excel диапазон "A1:A10"
    Range("A1:A10").Copy
    'вставляем скопированные ячейки в Word - в начала документа
    objWrdDoc.Range(0).Paste
    'закрываем документ Word с сохранением
    objWrdDoc.Close True    ' False - без сохранения
    'закрываем приложение Word - обязательно!
    objWrdApp.Quit
    'очищаем переменные Word - обязательно!
    Set objWrdDoc = Nothing: Set objWrdApp = Nothing
End Sub
Скачать пример:
 Tips_Macro_OpenWord.xls (49,5 KiB, 6 261 скачиваний)
В файле-примере, приложенном к данной статье, в комментариях к коду есть несколько добавлений. Например, как вставить текст из ячеек в определенные закладки Word-а и как добавить новый документ, а не открывать уже имеющийся. Так же так есть код проверки — открыто ли приложение Word в данный момент. Порой это тоже может пригодиться, чтобы работать с запущенным приложением Word, а не создавать новое:
Sub Check_OpenWord()
    Dim objWrdApp As Object
    On Error Resume Next
    'пытаемся подключится к объекту Word
    Set objWrdApp = GetObject(, "Word.Application")
    If objWrdApp Is Nothing Then
        'если приложение закрыто - создаем новый экземпляр
        Set objWrdApp = CreateObject("Word.Application")
        'делаем приложение видимым. По умолчанию открывается в скрытом режиме
        objWrdApp.Visible = True
    Else
        'приложение открыто - выдаем сообщение
        MsgBox "Приложение Word уже открыто", vbInformation, "Check_OpenWord"
    End If
End Sub
В принципе, активировать или вызвать(если закрыто) другое приложение Офиса можно одной строкой:
Sub Open_AnotherApp()
    Application.ActivateMicrosoftApp xlMicrosoftWord
End Sub
но данный метод может пригодиться только в том случае, если Вам необходимо действительно лишь активировать другое приложение, но дальше обращаться к этому приложению Вы уже не сможете.
По сути, методами CreateObject и GetObject можно обратиться к любому стороннему приложению(например Internet Explorer). Куда важнее при обращении к этим объектам знать объектную модель того приложения, к которому обращаетесь. Чтобы увидеть свойства и методы объектной модели приложения, можно в редакторе VBA подключить необходимую библиотеку, объявить переменную, назначив ей тип приложения. Покажу на примере того же Word-а.
Для начала открываем меню Tools -References:

Подключаем библиотеку:

Затем объявляем переменную и присваиваем ей тип нужного приложения:
Sub OpenWord()
    Dim objWrdApp As Word.Application
    Set objWrdApp = New Word.Application
    objWrdApp.Visible = True
End Sub
Если теперь в редакторе, внутри этой процедуры в любом месте ниже объявления переменной набрать objWrdApp и точку, то сразу после ввода точки выпадет меню, в котором будут перечислены все доступные методы и свойства этого приложения.

Так же можно нажать F2 и через поиск найти Word и просмотреть все методы и свойства данного приложения.
Метод установки ссылки на библиотеку приложения через Tools—References называют еще ранним связыванием. Подобный метод позволяет создать ссылку на приложение быстрее и, как описано выше, предоставляет разработчику доступ к визуальному отображению свойств и методов объекта. Но есть существенный минус: если в своем коде Вы установите ссылку на Word 12 Object Libbary(Word 2007), то на ПК с установленным Word 2003 получите ошибку MISSING, т.к. Word 2003 относится к библиотеке Word 11 Object Libbary. Подробнее можно прочитать в статье Ошибка — Cant find project or library.
Метод же CreateObject еще называется методом позднего связывания. Применяя его не возникнет проблем с MISSING, очень часто возникающих при раннем связывании. Поэтому я рекомендовал бы при разработке использовать раннее связывание для удобства использования свойств и методов(если Вы их не знаете), а перед распространением приложения в коде заменить все именованные константы(типа wdLine) на числовые константы(для wdLine это 5) и применить позднее связывание. Посмотреть числовое значение константы можно просто записав её в коде, начать выполнение кода через F8 и навести курсор мыши на эту константу. Всплывающая подсказка покажет числовое значение. Так же можно отобразить окно Immediate(View —Immediate Window или сочетание клавиш Ctrl+G), записать вопросительный знак и вставить эту константу и нажать Enter:
?wdLine
ниже будет выведено числовое представление этой константы.
А заменять эти константы их числовыми значениями в случае с поздним связыванием необходимо, т.к. Excel не знает их значений.
Попробую пояснить поподробнее про эти константы и почему их надо заменять какими-то числами: при подключении библиотеки Wordа(Word 12 Object Libbary) мы так же подключаем и все свойства, методы и константы, которые доступны из Wordа. И их использование напрямую становится доступно из Excel и мы можем смело написать что-то вроде wbLine и Excel поймет эту константу. При позднем же связывании мы уже не подключаем библиотеки Word(во избежание ошибок совместимости) и как следствие — методы, свойства и константы Wordа для Excel становятся чем-то неизвестным и не документированным и мы получим ошибку «Variable not defined»(если включена директива Option Explicit) при попытке назначить свойство через wdLine. Если же Option Explicit не включена — то хоть ошибки не будет, но и код будет работать неверно, т.к. для неизвестной для Excel переменной wbLine будет назначено значение 0(Empty). Поэтому и надо все константы другого приложения заменять их числовыми значениями.
Главная ошибка новичка
И хочу так же упомянуть про ошибку, которую очень часто совершают при обращении к одному приложению из другого. Допустим, необходимо скопировать из Word все данные в Excel. Часто начинающие делают это так:
Sub OpenWord()
    Dim objWrdApp As Object, objWrdDoc As Object
    'создаем новое приложение Word
    Set objWrdApp = CreateObject("Word.Application")
    'Можно так же сделать приложение Word видимым. По умолчанию открывается в скрытом режиме
    'objWrdApp.Visible = True
    'открываем документ Word - документ "Doc1.doc" должен существовать
    Set objWrdDoc = objWrdApp.Documents.Open("C:Doc1.doc")
    'Копируем из Word все данные, обращаясь к объекту Range документа
    Range.Copy
    'вставляем скопированное в ячейку А1 активного листа Excel
    ActiveSheet.Paste
    'закрываем документ Word без сохранения
    objWrdDoc.Close False
    'закрываем приложение Word
    objWrdApp.Quit
    'очищаем переменные Word - обязательно!
    Set objWrdDoc = Nothing: Set objWrdApp = Nothing
End Sub
На строке Range.Copy обязательно получите ошибку от VBA, указывающую, что нужен аргумент для объекта. Можно попробовать добавить этот аргумент: Range(1).Copy. Но все равно получим ошибку. Можно, конечно, указать даже ячейки: Range(«A1»).Copy. Но это приведет к тому, что скопирована будет ячейка А1 активного листа Excel.
Все дело в том, что мы хотим скопировать данные из Word-а, выполняя при этом код из Excel. А у Excel тоже есть объект Range с другими аргументами. И если не указать какому приложению, листу или документу принадлежит Range, то по умолчанию он будет отнесен к тому приложению, из которого выполняется код. Т.е. к Excel. Если совсем кратко об этом — всегда надо указывать какому приложению или объекту принадлежит используемый объект или свойство. Правильно код должен выглядеть так:
Sub OpenWord()
    Dim objWrdApp As Object, objWrdDoc As Object
    'создаем новое приложение Word
    Set objWrdApp = CreateObject("Word.Application")
    'Можно так же сделать приложение Word видимым. По умолчанию открывается в скрытом режиме
    'objWrdApp.Visible = True
    'открываем документ Word - документ "Doc1.doc" должен существовать
    Set objWrdDoc = objWrdApp.Documents.Open("C:Doc1.doc")
    'Копируем из Word все данные, обращаясь к объекту Range документа
    'при этом перед Range явно указываем откуда его брать - из документа Word -objWrdDoc("C:Doc1.doc")
    objWrdDoc.Range.Copy
    'вставляем скопированное из Word в активную ячейку активного листа Excel
    ActiveSheet.Paste
    'закрываем документ Word без сохранения
    objWrdDoc.Close False
    'закрываем приложение Word
    objWrdApp.Quit
    'очищаем переменные Word - обязательно!
    Set objWrdDoc = Nothing: Set objWrdApp = Nothing
End Sub
Вместо Range ту же ошибку делают и с Selection(потому что Selection часто присутствует в записанных макрорекордером макросах), т.к. этот объект есть и в Excel и в Word и без явного указания приложения будет относится к приложению, в котором записано.
В приложенном файле код немного отличается от представленных выше — в нем можно посмотреть как вставить текст из ячеек в определенные(созданные заранее) закладки Word-а. Это удобно для создания бланков в Word и заполнения их через Excel
Скачать пример:
Tips_Macro_OpenWord.xls (49,5 KiB, 6 261 скачиваний)
А в архиве ниже — практически готовое решение заполнения всевозможных бланков Word из Excel. Как это работает. У нас есть таблица Excel с данными для заполнения бланков заявлений на пособия:

Обращаю внимание, что в первой строке расположены метки. Они нужны для того, чтобы код мог понять значения какого столбца в какое место шаблона Word должны попасть. А в самом шаблоне Word мы должны проставить эти самые метки:

Фигурные скобки сделаны для того, чтобы код 100% искал и заменял только метку в шаблоне, исключая при этом замену случайного текста вне скобок(ведь слово «Должность» может встречаться и само по себе).
А здесь я схематично привел то, как будут происходить замены:

Сначала программа создаст новую папку, в которую и будет сохранять создаваемые файлы(имя папки состоит из даты и времени запуска кода). Далее программа циклом пройдется по каждой строке таблицы, создаст на основании шаблона Word(«Шаблон.doc») новый файл для этой строки, заполнит этот шаблона данными на основании меток, и сохранит созданный файл под новым именем. Сам файл шаблона при этом не изменяется — все метки в нем сохраняются как были настроены до запуска кода. Конкретно в приложенном коде значение для имени нового файла берется из первого столбца «ФИО с инициалами». Но это можно изменить в коде при необходимости. Делается это в этой строке:
'считываем фамилию с инициалами
sWDDocName = .Cells(lr, 1).Value
Что еще важно: файл шаблона Word должен находиться в той же папке, что и файл с кодом. Название файла в приложенном к статье файле должно быть «Шаблон.doc». Но его так же можно изменить, не забыв изменив его в коде в этой строке:
'имя шаблона Word с основным текстом и метками
Const sWDTmpl As String = "Шаблон.doc"
В общем-то, если хоть чуть-чуть разбираетесь, то поменять можно многое. А для тех, кто не разбирается достаточно будет просто создавать метки в файле Word и обозначать ими столбца в таблице Excel. Количество столбцов и строк в таблице код определяет автоматически и при изменении размеров таблицы ничего изменять не надо. Главное, чтобы метки находились в первой строке, вторая строка — заголовок(необязательно), а с третьей строки начинаются данные, которые и используются для наполнения шаблонов.
Скачать пример:
 Автосоздание бланков Word из таблицы Excel.zip (37,6 KiB, 1 468 скачиваний)
Примеры работы с тем же Outlook можно посмотреть в моих статьях:
Как отправить письмо из Excel?
Сохранить вложения из Outlook в указанную папку
Статья помогла? Поделись ссылкой с друзьями!
![]() Видеоуроки
Видеоуроки
Поиск по меткам
Access
apple watch
Multex
Power Query и Power BI
VBA управление кодами
Бесплатные надстройки
Дата и время
Записки
ИП
Надстройки
Печать
Политика Конфиденциальности
Почта
Программы
Работа с приложениями
Разработка приложений
Росстат
Тренинги и вебинары
Финансовые
Форматирование
Функции Excel
акции MulTEx
ссылки
статистика
To copy data from Excel to a Word file using VBA we need to access the word application using Excel VBA. In this tutorial we will learn how to open a word application, add a document and copy-paste data from excel to it.
In this article, we will use the Early Binding method to create an object of word application instead of using the late binding. You can read about it here in detail.
The Process Of Copying Excel Data To A Word File Using Excel VBA
To copy data from excel to a word file using VBA, we first need to open the Word Application of course. Then add a document to it (if you want a new document). Copy data from excel file. Select the paragraph on the doc and paste on it.Finally save and close the document. Each of these steps can be done easily from Excel. You will not need to interact with the Word Document.
Let’s get started with an example without getting any further into theory. Because Iron Man said, «Sometimes you gotta run before you can walk».
Example : Paste Excel Data To Word Using VBA
The below code is an example of how you can copy some range of excel and paste it into a new word document and save it on the drive to use later
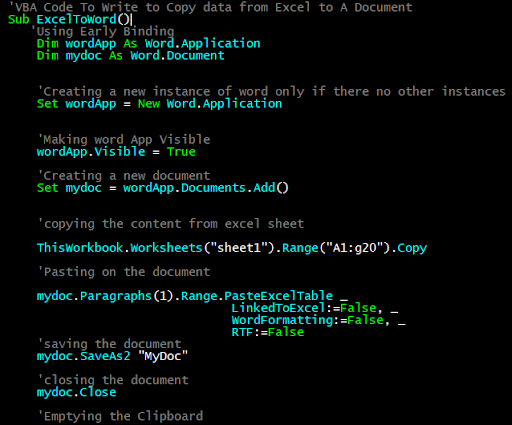
'VBA Code To Write to Copy data from Excel to A Document

Sub ExcelToWord()

   'Using Early Binding

    Dim wordApp As Word.Application

    Dim mydoc As Word.Document


    'Creating a new instance of word only if there no other instances

    Set wordApp = New Word.Application


    'Making word App Visible

    wordApp.Visible = True


    'Creating a new document

    Set mydoc = wordApp.Documents.Add()


    'copying the content from excel sheet


    ThisWorkbook.Worksheets("sheet1").Range("A1:g20").Copy


    'Pasting on the document


    mydoc.Paragraphs(1).Range.PasteExcelTable _

                               LinkedToExcel:=False, _

                               WordFormatting:=False,

                               RTF:=False

    'saving the document

    mydoc.SaveAs2 "MyDoc"


    'closing the document

    mydoc.Close


    'Emptying the Clipboard

    CutCopyMode = False


End Sub
Explanation of the Code:
Well I have explained each step in the code itself using comments but let’s have some word about the lines we have used in this sub.
‘Created variables of word application and document type
Dim wordApp As Word.Application
Dim mydoc As Word.Document
Here we have declared two variables of the required types. We can do this because we have already added the reference to the word application. You can do this by going to tools in menu. Find references option and then look for the word reference.

‘Creating a new instance of word only if there no other instances
Set wordApp = New Word.Application
‘Making word App Visible
wordApp.Visible = True
‘Creating a new document
Set mydoc = wordApp.Documents.Add()
In the first line above, we are intentiating the wordApp variable with an object of type Word.App using the New keyword. This will open the Word Application.
In the second line we are making the word application visible so that we can work with it.
In the next line, we add a new document to the word application using Word.Documents.Add() function. This is stored in the mydoc variable.
‘copying the content from excel sheet
ThisWorkbook.Worksheets(«sheet1»).Range(«A1:G20»).Copy
Here we are simply copying a range from excel. You must have done it before. It is stored on the clipboard.
‘Pasting on the document
mydoc.Paragraphs(1).Range.PasteExcelTable _
LinkedToExcel:=False, _
WordFormatting:=False,
RTF:=False
We are using the PasteExcelTable method of Paragraph.Range class of mydoc to paste data from clipboard.
‘saving the document
mydoc.SaveAs2 «MyDoc»
‘closing the document
mydoc.Close
‘Emptying the Clipboard
CutCopyMode = False
We are saving the document with the name MyDoc. Then we close the document using the Close function. Finally we release the clipboard to be used by others.
So yeah guys, this is how you can create a new Word document and copy Excel data to it using VBA. I have not gone into details as it would make the article exhaustingly long. This was only to learn how you can paste to a word document through Excel. I hope it helped you understand the process. If you have any questions regarding this article, you can contact me through the comments section below.
Related Articles:
Getting Started With Excel VBA UserForms| I will explain how to create a form in excel, how to use VBA toolbox, how to handle user inputs and finally how to store the user inputs. We will go through these topics using one example and step by step guide.
VBA variables in Excel| VBA stands for Visual Basic for Applications. It is a programming language from Microsoft. It is used with Microsoft Office applications such as MSExcel, MS-Word and MS-Access whereas VBA variables are specific keywords.
Excel VBA Variable Scope| In all the programming languages, we have variable access specifiers that define from where a defined variable can be accessed. Excel VBA is no Exception. VBA too has scope specifiers.
ByRef and ByVal Arguments | When an argument is passed as a ByRef argument to a different sub or function, the reference of the actual variable is sent. Any changes made into the copy of the variable, will reflect in the original argument.
Delete sheets without confirmation prompts using VBA in Microsoft Excel | Since you are deleting sheets using VBA, you know what you are doing. You would like to tell Excel not to show this warning and delete the damn sheet.
Add And Save New Workbook Using VBA In Microsoft Excel 2016| In this code, we first created a reference to a workbook object. And then we initialized it with a new workbook object. The benefit of this approach is that you can do operations on this new workbook easily. Like saving, closing, deleting, etc
Display A Message On The Excel VBA Status Bar| The status bar in excel can be used as a code monitor. When your VBA code is lengthy and you do several tasks using VBA, you often disable the screen update so that you don’t see that screen flickering.
Turn Off Warning Messages Using VBA In Microsoft Excel 2016| This code not only disables VBA alerts but also increases the time efficiency of the code. Let’s see how.
Popular Articles:
50 Excel Shortcuts to Increase Your Productivity | Get faster at your task. These 50 shortcuts will make you work even faster on Excel.
The VLOOKUP Function in Excel | This is one of the most used and popular functions of excel that is used to lookup value from different ranges and sheets.
COUNTIF in Excel 2016 | Count values with conditions using this amazing function. You don’t need to filter your data to count specific values. Countif function is essential to prepare your dashboard.
How to use SUMIF Function in Excel | This is another dashboard essential function. This helps you sum up values on specific conditions.