
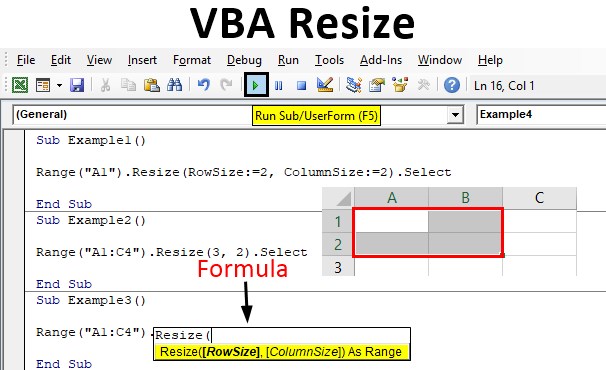
Свойство Resize объекта Range позволяет в коде VBA Excel изменять размер указанного диапазона. Синтаксис свойства Range.Resize, его параметры и примеры использования.
Свойство Range.Resize устанавливает новый размер исходного диапазона по указанному количеству строк и столбцов.
Синтаксис свойства Range.Resize
|
Expression.Resize(RowSize, ColumnSize) |
Конструкция, представляющая синтаксис свойства, не может использоваться отдельно сама по себе, иначе VBA Excel сгенерирует ошибку. Поскольку свойство Range.Resize возвращает диапазон нового размера, его можно присвоить переменной или применить к нему какой-либо метод.
Параметры свойства Range.Resize
| Параметр | Описание |
|---|---|
| Expression | Выражение, возвращающее исходный диапазон, которому требуется изменить размер. Тип данных параметра — Range. |
| RowSize | Число строк или выражение, возвращающее количество строк нового диапазона. Тип данных параметра — Variant. Если этот аргумент пропущен, число строк в диапазоне останется прежним. |
| ColumnSize | Число столбцов или выражение, возвращающее количество столбцов нового диапазона. Тип данных параметра — Variant. Если этот аргумент пропущен, число столбцов в диапазоне останется прежним. |
Параметры RowSize и ColumnSize определяют именно количество строк и столбцов нового диапазона, а не количество добавляемых или вычитаемых из исходного диапазона. Значения аргументов RowSize и ColumnSize должны быть больше нуля, иначе VBA Excel сгенерирует ошибку.
Примеры использования в VBA Excel
Пример 1
|
Sub Primer1() Dim a As Range Set a = Range(«C3:E5») Set a = a.Resize(5, 5) MsgBox a.Address End Sub |
В первом примере мы присваиваем переменной a диапазон из трех столбцов и трех строк, а затем преобразуем его с помощью кода VBA Excel в диапазон из пяти столбцов и пяти строк и перезаписываем его в ту же переменную a. Обратите внимание, что диапазон расширяется вправо (столбцы) и вниз (строки). При уменьшении диапазона, «лишние столбцы и строки» будут исключены из него, соответственно, справа и снизу.
Пример 2
|
Sub Primer2() Dim a As Range Set a = Range(«A1:E5») a.Resize(2, 2).Select MsgBox a.Address End Sub |
Во втором примере мы уменьшили размер исходного диапазона и применили к нему метод Select. Обратите внимание, что уменьшенный диапазон выбран с помощью метода Select на активном листе рабочей книги Excel, а в переменной a диапазон остался прежним, что и покажет информационное окно MsgBox.
Пример 3
|
Sub Primer3() Dim a As Range Set a = Union(Range(«A1:A5»), Range(«B1:B5»)).Resize(4, 4) MsgBox a.Address End Sub |
В третьем примере кода VBA в качестве Expression свойства Range.Resize используется выражение с методом Union.
| title | keywords | f1_keywords | ms.prod | api_name | ms.assetid | ms.date | ms.localizationpriority |
|---|---|---|---|---|---|---|---|
|
Range.Resize property (Excel) |
vbaxl10.chm144187 |
vbaxl10.chm144187 |
excel |
Excel.Range.Resize |
05af0539-8aa3-c83c-1972-dfac618929b9 |
05/11/2019 |
medium |
Range.Resize property (Excel)
Resizes the specified range. Returns a Range object that represents the resized range.
Syntax
expression.Resize (RowSize, ColumnSize)
expression An expression that returns a Range object.
Parameters
| Name | Required/Optional | Data type | Description |
|---|---|---|---|
| RowSize | Optional | Variant | The number of rows in the new range. If this argument is omitted, the number of rows in the range remains the same. |
| ColumnSize | Optional | Variant | The number of columns in the new range. If this argument is omitted, the number of columns in the range remains the same. |
Return value
Range
Example
This example resizes the selection on Sheet1 to extend it by one row and one column.
Worksheets("Sheet1").Activate
numRows = Selection.Rows.Count
numColumns = Selection.Columns.Count
Selection.Resize(numRows + 1, numColumns + 1).Select
This example assumes that you have a table on Sheet1 that has a header row. The example selects the table without selecting the header row. The active cell must be somewhere in the table before you run the example.
Set tbl = ActiveCell.CurrentRegion
tbl.Offset(1, 0).Resize(tbl.Rows.Count - 1, _
 tbl.Columns.Count).Select
[!includeSupport and feedback]
Excel VBA Resize
Resize is a property available in VBA to change or resize the range of cells from the active cell as needed. For example, assume you are in cell B5. If you want to select 3 rows and two columns from this cell, we can change the range size by using the RESIZE property of VBA.
Table of contents
- Excel VBA Resize
- Syntax of VBA Resize Property
- Examples of using Resize in VBA
- Example #1
- Example #2
- Example #3
- Things to Remember
- Recommended Articles
Syntax of VBA Resize Property
Below is the syntax of the VBA RESIZE property.
Range().Resize([Row Size], [Column Size])
First, we need to supply from which cell we need to resize using the Range object.
Then use the Excel VBA Resize property. In this property, we need to supply row and column size limits. Based on the provided row numbers and column numbers, it will resize them.
Examples of using Resize in VBA
Below are examples of using resize in Excel VBA.
You can download this VBA Resize Excel Template here – VBA Resize Excel Template
Example #1
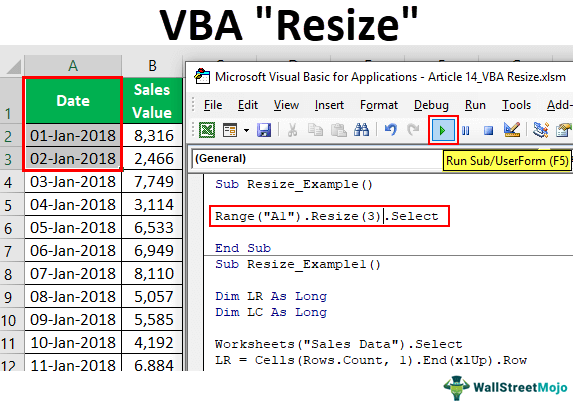
Assume you have data from A1 to B14 cells. For example, from the A1 cell, if you want to select 3 rows down and two columns left range, we can do this by using the RESIZE property in Excel VBA.
Below is the data we are using for this example.

First, we must supply the first cell referenceCell reference in excel is referring the other cells to a cell to use its values or properties. For instance, if we have data in cell A2 and want to use that in cell A1, use =A2 in cell A1, and this will copy the A2 value in A1.read more or starting point using the RANGE object. In this example, the starting point is the A1 cell.
Code:
Sub Resize_Example()

 Range ("A1").

End Sub

For this range, use RESIZE property.
Code:
Sub Resize_Example()

 Range ("A1").Resize(

End Sub
The first argument of RESIZE is Row Size, so we need to select 3 rows of the data and supply the numerical value of 3.
Code:
Sub Resize_Example()

Range ("A1").Resize(3,

End Sub

The next argument is Column Size. For this, enter how columns you need to select. For example, we will enter 3 columns.
Code:
Sub Resize_Example()

 Range ("A1").Resize(3,3)

End Sub

Once the resizing is complete, we need to supply what we need to do with this range. We will choose the “Select” method to start.
Code:
Sub Resize_Example()

 Range("A1").Resize(3, 3).Select

End Sub
Run the code and see how many rows and columns it would select.
As you can see above from the A1 cell, it has selected three rows down and three columns to the right.
Example #2
Now, take a look at the below VBA codeVBA code refers to a set of instructions written by the user in the Visual Basic Applications programming language on a Visual Basic Editor (VBE) to perform a specific task.read more.
In the above code for Row Size, we have supplied blank cells. For Column Size, we have supplied 3.
Code:
Sub Resize_Example()

 Range("A1").Resize(0, 3).Select

End Sub
Run the code and see how many rows and columns it would select.
As you can see, it has selected only the active cell row, i.e., 1st row and three columns. It is because, for Row Size, we have supplied blank cells, and for Column Size, we have supplied 3. Accordingly, it has selected the data range.
Now, look at the code below.
Code:
Sub Resize_Example()

  Range("A1").Resize(3).Select

End Sub
What this code will do is it will select only three rows, including the active cell row but no extra columns.
Example #3
Use resize to select unknown ranges. Resize is best utilized when you want to select an unknown range of cells. For example, look at the below image of the data range.

It has data from column A to column P. So, we have up until the 700th row.
Assume you know your data will keep changing. You want to select the data range now and then by manually changing the row and column number. However, we can do this easily by using the VBA RESIZE property.
Look at the below code.
Code:
Sub Resize_Example1()

  Dim LR As Long
  Dim LC As Long

  Worksheets("Sales Data").Select

  LR = Cells(Rows.Count, 1).End(xlUp).Row
  LC = Cells(1, Columns.Count).End(xlToLeft).Column

  Cells(1, 1).Resize(LR, LC).Select

End Sub
First, we have declared two variables to find the last used row (LR) and the last used column (LC).
Dim LR As Long
Dim LC As Long
Since our data is in the “Sales Data” worksheet, we choose this worksheet using the code below.
Worksheets(“Sales Data”).Select
The code below will find the last used row and last used column.
LR = Cells(Rows.Count, 1).End(xlUp).Row
LC = Cells(1, Columns.Count).End(xlToLeft).Column
Now, from the first cell, we are resizing the range from the last used row to the last used column and selecting the method used. So, now it does not matter how big your data is. It will dynamically select the data by finding the last used row and last used column.

Things to Remember
- The Resize property in VBA will change the range size from the active cell (including the active cell).
- We must provide how many rows and columns to resize from the active cell in VBA.
- We cannot use negative row and column numbers for RESIZE property.
Recommended Articles
This article has been a guide to VBA Resize. Here, we discuss examples of resizing in Excel VBA using the RESIZE property of VBA and downloadable Excel templates. Below are some useful articles related to VBA: –
- VBA CLng
- CDBL VBA
- VBA Delete Sheet
- VBA UnProtect Sheet
- VBA Format Date
Excel VBA Resize
VBA Resize is a method where we use it to highlight the cells by changing their size for visualization. The important thing which needs to be noted is that this method is used only for illustration purposes. Resize is a property that is used with the range property method to display the selection of rows and columns provided as an argument with a reference to a given range.
Syntax of VBA Resize:
The syntax for this property is as follows:
![]()
Row size is the number of rows we want to select or highlight and column size is the number of columns we want to select and highlight. This property needs a reference to a range. If one of the arguments from row size or column size is not provided with this function selects the entire row or the column from the range. The methods to use Resize property in VBA is as follows:
- First, we need to provide a range for reference.
- Next step is to provide the arguments for the rows and size for resize property.
- To illustrate it we need to use the select property method.
Using the Resize Property in Excel VBA
The following examples will teach us how to use Resize Property in Excel by using the VBA Code.
You can download this VBA Resize Excel Template here – VBA Resize Excel Template
Example #1
Let us first begin with the basic resize property. In this example, we will see how to use the resize the property and how we need to provide the inputs for this resize function in general. For this, follow the below steps:
Step 1: Insert a new module inside Visual Basic Editor (VBE). Click on Insert tab > select Module.
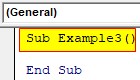
Step 2: Now write the subprocedure for VBA Resize.
Code:
Sub Example1()

End Sub
Step 3: Resize is a range property of VBA let us select a range.
Code:
Sub Example1()

Range("A1")

End Sub

Step 4: After that, we can use the dot operator and use the resize method to select the number of columns and rows.
Code:
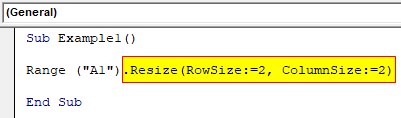
Sub Example1()

Range("A1").Resize(RowSize:=2, ColumnSize:=2)

End Sub
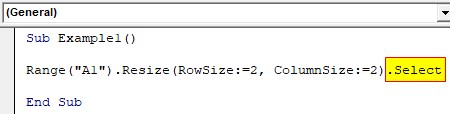
Step 5: Then we can use the select method property for illustration purposes.
Code:
Sub Example1()

Range("A1").Resize(RowSize:=2, ColumnSize:=2).Select

End Sub
Step 6: Run the Code by hitting F5 or the Run button. and see the result in worksheet 1.
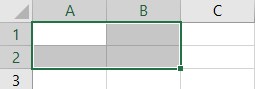
We have selected two rows and two columns to the range.
Example #2
In the above example, we have used the same number of rows and columns for the range. Let us try a different approach and use different selection such as row size to be 3 and column size to be 2. For this, follow the below steps:
Step 1: We can use the same module and begin with our subprocedure for the second example.
Code:
Sub Example2()

End Sub
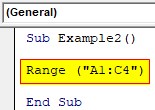
Step 2: Now as this is a range property we will use the range method to reference a cell.
Code:
Sub Example2()

Range("A1:C4")

End Sub
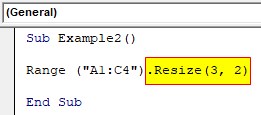
Step 3: Then we will use the resize method and select the row and column size for the arguments.
Code:
Sub Example2()

Range("A1:C4").Resize(3, 2)

End Sub
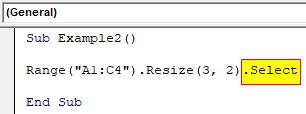
Step 4: And the final step is to use the Select property method for the illustration.
Code:
Sub Example2()

Range("A1:C4").Resize(3, 2).Select

End Sub
Step 5: Now when we execute the above code by hitting F5 .we can see the following result in sheet 1.
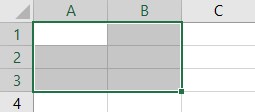
Out of the range A1:C4 this code has selected three rows and two columns.
Example #3
So in the above examples, we saw how to resize property works if there is same number of rows and columns or a different number of rows and columns as the argument. Now let us see what happens when we do not provide one of the arguments to the function. For this, follow the below steps:
Step 1: Declare another Subprocedure.
Code:
Sub Example3()

End Sub
Step 2: Now we can select any random range.
Code:
Sub Example3()

Range("A1:C4")

End Sub

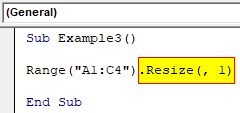
Step 3: Now we will use the resize property but we will remove the row specification from the code.
Code:
Sub Example3()

Range("A1:C4").Resize(, 1)

End Sub
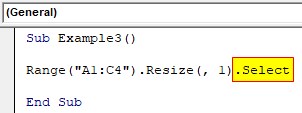
Step 4: Now we will use the select method.
Code:
Sub Example3()

Range("A1:C4").Resize(, 1).Select

End Sub
Step 5: Run the Code by hitting F5 or the Run button.
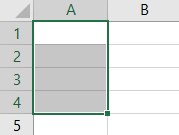
It selected one column but the entire four rows.
Example #4
Now let us use this resize property in a dynamic example. For this example, we will first select some range which will have some number of rows and columns and we will use this resize property to select 2 extra rows and column from the selection. For this, follow the below steps:
Step 1: In the same module let us begin with a subprocedure.
Code:
Sub Example4()

End Sub

Step 2: First let us activate sheet 1 first using the worksheet property method.
Code:
Sub Example4()

Worksheets("Sheet1").Activate

End Sub
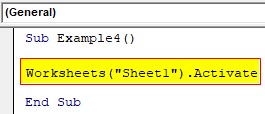
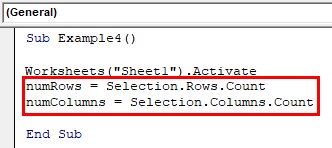
Step 3: Now let us provide the selection with the number of rows and number of columns using the selection property method as shown below.
Code:
Sub Example4()

Worksheets("Sheet1").Activate
numRows = Selection.Rows.Count
numColumns = Selection.Columns.Count

End Sub
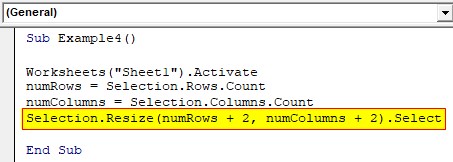
Step 4: Now we can use the resize property to increase the selection by two rows and two columns.
Code:
Sub Example4()

Worksheets("Sheet1").Activate
numRows = Selection.Rows.Count
numColumns = Selection.Columns.Count
Selection.Resize(numRows + 2, numColumns + 2).Select

End Sub
Step 5: So here is our selection before the execution of the code.
Code:
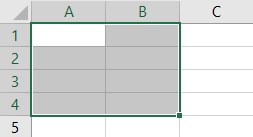
Step 6: When we execute the code.
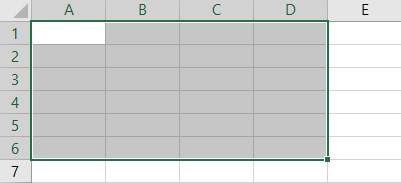
The following code extended the selection by two rows and two columns.
Things to Remember
There are few things which we need to remember about VBA Resize:
- This is a range property method.
- It is used to illustrate the selection of rows and columns from a given range.
- The first argument in this function is a row reference and the second argument is a range reference.
- If one of the arguments from row size or column size is not provided this function selects the entire row or the column from the range.
Recommended Articles
This is a guide to the VBA Resize. Here we discuss how to use the Resize property in Excel VBA along with practical examples and downloadable excel template. You can also go through our other suggested articles –
- VBA SubString
- VBA Dynamic Array
- VBA Login
- VBA Month
Return to VBA Code Examples
In this Article
- Resize Range Using VBA
- Syntax
- Resize Number Of Rows And Columns
- Resize Number Of Rows Only
- Resize Number Of Columns Only
- Resize Table Range To Exclude Header
- Write 2-D Array To Range
Resize Range Using VBA
This tutorial will demonstrate how to use the Resize Property of the Range Object to change to return a new range resized from the original Range object.
Syntax
Syntax for the Resize property is:
Range("A1").Resize (RowSize, ColumnSize)Where Range(“A1”) is your starting range.
RowSize and ColumnSize must be greater than zero. Each input is optional (ex. you can omit RowSize to only change the number of columns, or vice-versa).
Resize Number Of Rows And Columns
Following example expands the range with one cell A1 to range A1:D10 by increasing row count to 10 and columns count to 5.
Range("A1").Resize(10, 5).Select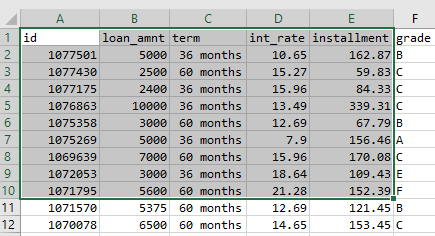
Or, more commonly you’ll assign the resized range to a variable:
    ' Resize range to the desired size and assign to a variable
    Set newRng = ActiveSheet.Range("A1").Resize(10, 5)
Resize Number Of Rows Only
Following example changes the number of rows only:
    ' Change Row Size only, New Range will be $A$1:$A$10
    Set newRng = rng.Resize(10)
Resize Number Of Columns Only
Following example changes the number of columns only:
    ' Change Column Size only, new Range will be $A$1:$E$1
    Set newRng = rng.Resize(, 5)
If you have a table on active sheet with a header row, the code will first select the entire table then move down one row to exclude the header using Range.Offset method. It will then use the Range.Resize property to reduce the size by one row.
Sub SelectTableData()
    ' **IMPORTANT**
    ' Click on any cell of the table before running the macro

    ' Move down one row by using Offset and then reduce range size by one row
    Set tbl = ActiveCell.CurrentRegion.Offset(1, 0)
    Set tbl = tbl.Resize(tbl.Rows.Count - 1, tbl.Columns.Count)

    ' Data is selected excluding header row
    tbl.Select
End Sub
VBA Coding Made Easy
Stop searching for VBA code online. Learn more about AutoMacro — A VBA Code Builder that allows beginners to code procedures from scratch with minimal coding knowledge and with many time-saving features for all users!

Learn More
Write 2-D Array To Range
Another common usage is to write a 2 dimensional array to a sheet. Since the range to be written should match the size of the array, which is normally not known in advance, the Resize method is used to set the output range.
The xxample below will read the data in the range A1:E10 in active sheet to an array and write the array out to ‘Output’ sheet starting from cell A1:
Sub WriteArray()
    ' Read the data to an array
    data = Range("A1:E10").Value
    ' Resize the output range and write the array
    Worksheets("Output").Range("A1").Resize(UBound(data, 1), UBound(data, 2)).Value = data
End Sub
Written by: Vinamra Chandra