
Открытие книги Excel из кода VBA. Проверка существования книги. Создание новой книги, обращение к открытой книге и ее закрытие. Методы Open, Add и Close.
Открытие существующей книги
Существующая книга открывается из кода VBA Excel с помощью метода Open:
|
Workbooks.Open Filename:=«D:test1.xls» |
или
|
Workbooks.Open («D:test1.xls») |
В кавычках указывается полный путь к открываемому файлу Excel. Если такой файл не существует, произойдет ошибка.
Проверка существования файла
Проверить существование файла можно с помощью функции Dir. Проверка существования книги Excel:
|
If Dir(«D:test1.xls») = «» Then MsgBox «Файл не существует» Else MsgBox «Файл существует» End If |
Или, если файл (книга Excel) существует, можно сразу его открыть:
|
If Dir(«D:test1.xls») = «» Then MsgBox «Файл не существует» Else Workbooks.Open Filename:=«D:test1.xls» End If |
Создание новой книги
Новая рабочая книга Excel создается в VBA с помощью метода Add:
Созданную книгу, если она не будет использоваться как временная, лучше сразу сохранить:
|
Workbooks.Add ActiveWorkbook.SaveAs Filename:=«D:test2.xls» |
В кавычках указывается полный путь сохраняемого файла Excel, включая присваиваемое имя, в примере — это «test2.xls».
Обращение к открытой книге
Обращение к активной книге:
Обращение к книге с выполняемым кодом:
Обращение к книге по имени:
|
Workbooks(«test1.xls») Workbooks(«test2.xls») |
Обратиться по имени можно только к уже открытой книге, а чтобы из кода VBA Excel книгу открыть, необходимо указать полный путь к файлу.
Открытая рабочая книга закрывается из кода VBA Excel с помощью метода Close:
|
Workbooks(«test1.xlsx»).Close |
Если закрываемая книга редактировалась, а внесенные изменения не были сохранены, тогда при ее закрытии Excel отобразит диалоговое окно с вопросом: Вы хотите сохранить изменения в файле test1.xlsx? Чтобы файл был закрыт без сохранения изменений и вывода диалогового окна, можно воспользоваться параметром метода Close — SaveChanges:
|
Workbooks(«test1.xlsx»).Close SaveChanges:=False |
или
|
Workbooks(«test1.xlsx»).Close (False) |
Закрыть книгу Excel из кода VBA с сохранением внесенных изменений можно также с помощью параметра SaveChanges:
|
Workbooks(«test1.xlsx»).Close SaveChanges:=True |
или
|
Workbooks(«test1.xlsx»).Close (True) |
Фразы для контекстного поиска: открыть книгу, открытие книги, создать книгу, создание книги, закрыть книгу, закрытие книги, открыть файл Excel, открытие файла Excel, существование книги, обратиться к открытой книге.
In this Article
- The Workbook Object
- Workbook Index Number
- Activate Workbook, ActiveWorkbook, and ThisWorkbook
- Activate Workbook
- ActiveWorkbook
- ThisWorkbook
- Open Workbook
- Open and Assign to Variable
- Open File Dialog
- Create New (Add) Workbook
- Add New Workbook to Variable
- Close Workbook
- Close & Save
- Close without Save
- Workbook Save As
- Other Workbook VBA Examples
- Workbook Name
- Protect Workbook
- Loop Through all Open Workbooks
- Workbook Activate Event
This guide will introduce you working with the Workbook Object in VBA.
The Workbook Object
First, in order to interact with workbooks in VBA, you must understand the Workbook Object.
With the workbook object, you can reference workbooks by their name like this:
Workbooks("Book2.xlsm").ActivateHowever, this code will only work if the workbook is open. If the workbook is closed, you will need to provide the full workbook path:
Workbooks.Open ("C:UsersStevePC2Downloadsbook2.xlsm")Instead of typing out the full path, if your desired workbook is in the same directory as the workbook where your code is stored, you could use this line code to open the workbook:
Workbooks.Open (ThisWorkbook.Path & "book2.xlsm")This makes use of the ThisWorkbook object that we will discuss in the next section.
Workbook Index Number
Last, you can reference workbooks by their “Index Number”. The index number of a workbook corresponds to the order that the workbook was opened (technically its the workbook’s position in the Workbooks Collection).
Workbooks(1).ActivateThis is useful if you want to do something like close the first (or last) opened workbook.
Activate Workbook, ActiveWorkbook, and ThisWorkbook
If a workbook is NOT ACTIVE, you can access the Workbook’s objects like this:
Workbooks("Book2.xlsm").Sheets("Sheet1").Range("A1").value = 1However, if the workbook is Active, you can omit the workbook object:
Sheets("Sheet1").Range("A1").value = 1And if you want to interact with the workbook’s active sheet, you can also ommit the sheets object:
Range("A1").value = 1Activate Workbook
To activate a workbook, use the Activate Method.
Workbooks("Book2.xlsm").ActivateNow you can interact with Book2’s object’s without explicitly stating the workbook name.
ActiveWorkbook
The ActiveWorkbook object always refer to the active workbook. This is useful if you’d like to assign the ActiveWorkbook to a variable to use later.
Dim wb As Workbook
Set wb = ActiveWorkbook
ThisWorkbook
The ThisWorkbook object always refers to the workbook where the running code is stored. To activate ThisWorkbook, use this line of code:
ThisWorkbook.ActivateVBA Coding Made Easy
Stop searching for VBA code online. Learn more about AutoMacro — A VBA Code Builder that allows beginners to code procedures from scratch with minimal coding knowledge and with many time-saving features for all users!

Learn More
Open Workbook
To open a workbook, use the Open Method:
Workbooks.Open ("C:UsersStevePC2Downloadsbook2.xlsm")The newly opened workbook will always become the ActiveWorkbook, allowing you to easily interact with it.
ActiveWorkbook.SaveThe Open Method has several other arguments, allowing you to open read-only, open a password-protected workbook, and more. It’s covered here in our article about Opening / Closing Workbooks.
Open and Assign to Variable
You can also open a workbook and assign it to a variable at the same time:
Dim wb As Workbook
Set wb = Workbooks.Open("C:UsersStevePC2Downloadsbook2.xlsm")
Open File Dialog
You can also trigger the Open File Dialog Box like this:
Sub OpenWorkbook ()

    Dim strFile As String

    strFile = Application.GetOpenFilename()
    Workbooks.Open (strFile)

End Sub
VBA Programming | Code Generator does work for you!
Create New (Add) Workbook
This line of code will create a new workbook:
Workbooks.AddThe new workbook now becomes the ActiveWorkbook, allowing you to interact with it (ex. save the new workbook).
Add New Workbook to Variable
You can also add a new workbook directly to a variable:
Dim wb As Workbook
Set wb = Workbooks.Add
Close Workbook
Close & Save
To close a workbook with saving, use the Close Method with SaveChanges set to TRUE:
ActiveWorkbook.Close SaveChanges:=TrueClose without Save
To close without saving, set SaveChanges equal to FALSE:
ActiveWorkbook.Close SaveChanges:=FalseAutoMacro | Ultimate VBA Add-in | Click for Free Trial!
Workbook Save As
The SaveAs Method is used to save a workbook as.
To save a workbook with a new name, in the same directory, you can imply use this:
ActiveWorkbook.SaveAs "new"where “new” is the new file name.
To save a workbook in a new directory with a specific file extension, simply specify the new directory and file name:
ActiveWorkbook.SaveAs "C:UsersStevePC2Downloadsnew.xlsm"Other Workbook VBA Examples
Workbook Name
To get the name of a workbook:
MsgBox ActiveWorkbook.NameProtect Workbook
To protect the workbook structure from editing, you can use the Protect Method (password optional):
Workbooks("book1.xlsm").Protect "password"To unprotect a workbook use the UnProtect Method:
Workbooks("book1.xlsm").Unprotect "password"AutoMacro | Ultimate VBA Add-in | Click for Free Trial!
Loop Through all Open Workbooks
To loop through all open workbooks:
Sub LoopThroughWBs()

    Dim wb As Workbook

    For Each wb In Workbooks
        MsgBox wb.Name
    Next wb

End Sub
Workbook Activate Event
You can run some code whenever a specific workbook is opened with the Workbook Open Event.
Place this procedure your workbook’s ThisWorkbook Module:
Private Sub Workbook_Open()
    Sheets("sheet1").Activate
End Sub
This procedure will activate Sheet1 every time the workbook is opened.
Excel VBA allows you to open a workbook directly — all you need is the full path of the file, including the file name. However, locating and supplying the file path each time may can be tedious when working with multiple files. In this guide, we’re going to show you how to display File Open dialog in VBA.
Download Workbook
Opening a workbook in VBA
You can open workbooks in VBA using the Workbooks.Open method. This method accepts fifteen optional arguments, including the file name of the workbook you want to open.
Workbooks.Open (FileName, UpdateLinks, ReadOnly, Format, Password, WriteResPassword, IgnoreReadOnlyRecommended, Origin, Delimiter, Editable, Notify, Converter, AddToMru, Local, CorruptLoad)
Supply the file name with its full path to open the workbook.
Workbooks.Open «C:My DocumentsJuneIncome.xlsx»
Or
Workbooks.Open Filename:=»C:My DocumentsJuneIncome.xlsx»
Either line of code can open the workbook in the given path. The opened workbook becomes the active workbook.
Check out other optional arguments to determine how you want to open your workbook, such as in read-only mode, by updating external links, or with a password. Here is the documentation.
Displaying File Open dialog
File Open dialog can return the file name, which is needed for Workbooks.Open, along with its path. To display the File Open dialog, you need to call the Application.GetOpenFilename method.
Application.GetOpenFilename (FileFilter, FilterIndex, Title, ButtonText, MultiSelect)
The Application.GetOpenFilename method can take five optional arguments using which you can select the accepted file types, title of the dialog, or allow selecting multiple files.
To open the dialog in default state (without any filtering and ability to select single file) use it without any arguments. Assign the command to a string variable to set the variable with selected file’s full path.
Dim FullFileName as String
FullFileName = Application.GetOpenFilename
File Filter
On the other hand, applying a filter can be helpful in giving the end user only the files they need. You can use FileFilter to set filters on the Open File dialog box.

The FileFilter argument accepts a special string specifying file filtering criteria. You need to supply file types as friendly name — file type pairs. Each pair, name and type is separated by a comma (,) character.
friendly name 1, file type 1, friendly name 2, file type 2, …
If a friendly name covers multiple types, use semicolon characters to split file types:
friendly name 1, file type 1; file type 2; file type …, friendly name 2, file type 4; file type 5; file type …, …
Here is an example for displaying the dialog that accepts Excel Files only.
FullFileName = Application.GetOpenFilename(FileFilter:=»Excel Files,*.xl*»)
The following sample demonstrates the scenario at the above screenshot which displays two items as filters:
ExternalFileName = Application.GetOpenFilename(FileFilter:=»Excel Files,*.xl*;*.xm*,Text Files,*.txt;*.csv»)
Multiple Files
Another important feature of the Open File dialog is its ability to allow selecting multiple files. If the MultiSelect argument is set to True, the Open File dialog returns each selected file name in an array. Thus, you need to assign the dialog to a Variant type of variable instead of String.
Dim ExternalFileName As Variant
ExternalFileName = Application.GetOpenFilename(FileFilter:=»Excel Files,*.xl*,Text Files,*.txt;*.csv», MultiSelect:=True)

When you click the Open button, the assigned variable will have an array of filenames with paths. A common scenario is to use a loop to access each file name.
For i = LBound(ExternalFileName) To UBound(ExternalFileName)
    Workbooks.Open ExternalFileName(i)
Next i
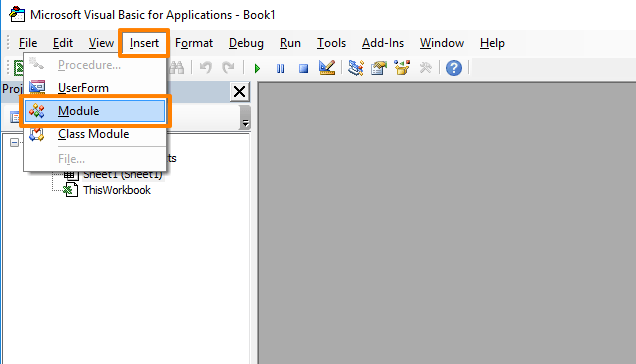
Before start, you need to open the VBA (Visual Basic for Applications) window and add a module. A module is where you can write code.
- Press Alt + F11 to open the VBA window
- In the VBA window, click Insert on the toolbar
- Click the Module option

Open a single workbook
The following code displays the Open File dialog for Excel and some text files by allowing to select a single file only. After file name and path are set to the string variable, the code can copy content from the opened file to the existing file. You can simply copy this code and paste your VBA.

Note: GetFilenameFromPath is a custom function which parse the file name from the full path. You can find its code in the example file.
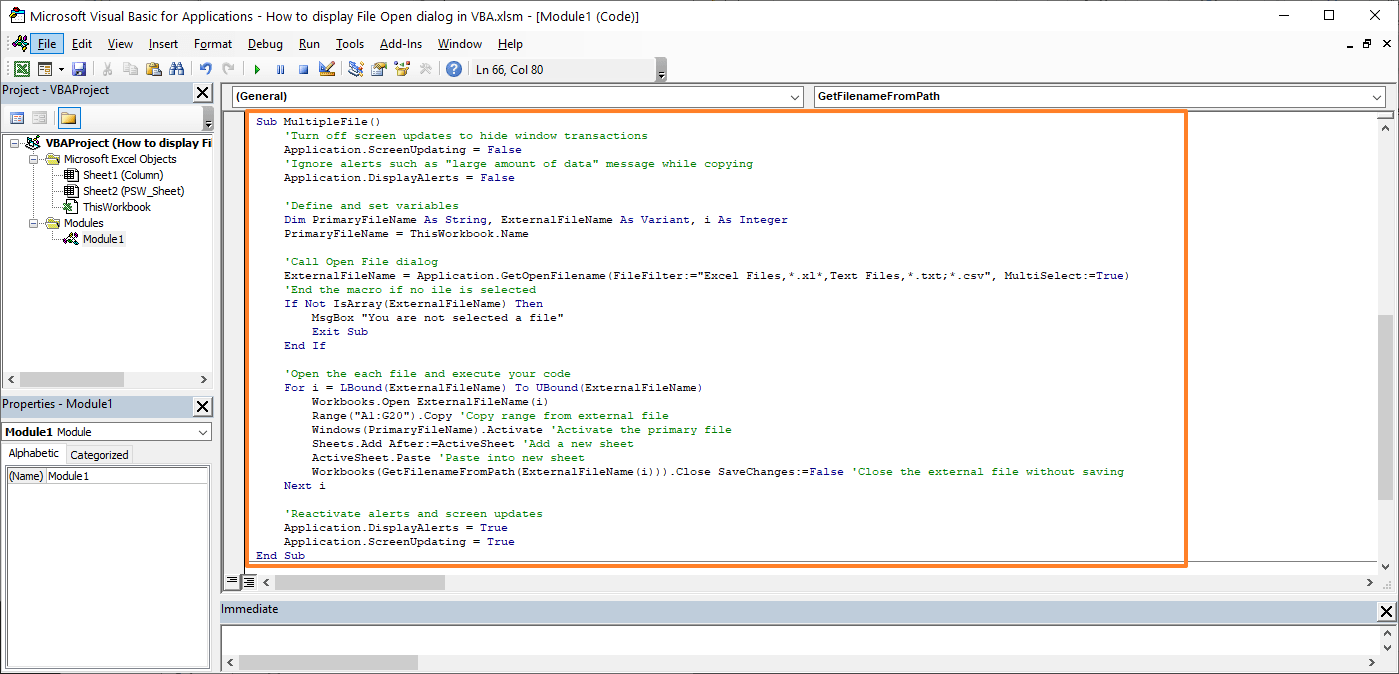
Open multiple workbooks
This time Application.GetOpenFilename method is updated for multiple file selection. You can see the MultiSelect:=True argument in the code below. This is an example where the code was modified to execute same action in a loop.
Sub SingleFile()
    'Turn off screen updates to hide window transactions
    Application.ScreenUpdating = False
    'Ignore alerts such as "large amount of data" message while copying
    Application.DisplayAlerts = False

    'Define and set variables
    Dim PrimaryFileName As String, ExternalFileName As String
    PrimaryFileName = ThisWorkbook.Name

    'Call Open File dialog
    ExternalFileName = Application.GetOpenFilename(FileFilter:="Excel Files,*.xl*,Text Files,*.txt;*.csv")
    'End the macro if no ile is selected
    If ExternalFileName = False Then
        MsgBox "You are not selected a file"
        Exit Sub
    End If

    'Open the specified file and execute your code
    Workbooks.Open ExternalFileName
    Range("A1:G20").Copy 'Copy range from external file
    Windows(PrimaryFileName).Activate 'Activate the primary file
    Sheets.Add After:=ActiveSheet 'Add a new sheet
    ActiveSheet.Paste 'Paste into new sheet
    Workbooks(GetFilenameFromPath(ExternalFileName)).Close SaveChanges:=False 'Close the external file without saving

    'Reactivate alerts and screen updates
    Application.DisplayAlerts = True
    Application.ScreenUpdating = True
End Sub
“We are drowning in information but starved for knowledge.” – John Naisbitt
This post provides a complete guide to using the VBA Workbook.
If you want to use VBA to Open a Workbook then check out Open Workbook
If you want to use VBA to create a new workbook go to Create New Workbook
For all other VBA Workbook tasks, check out the quick guide below.
A Quick Guide to the VBA Workbook
The following table provides a quick how-to guide on the main VBA workbook tasks
| Task | How to |
|---|---|
| Access open workbook using name | Workbooks(«Example.xlsx») |
| Access open workbook (the one opened first) | Workbooks(1) |
| Access open workbook (the one opened last) | Workbooks(Workbooks.Count) |
| Access the active workbook | ActiveWorkbook |
| Access workbook containing VBA code | ThisWorkbook |
| Declare a workbook variable | Dim wk As Workbook |
| Assign a workbook variable | Set wk = Workbooks(«Example.xlsx») Set wk = ThisWorkbook Set wk = Workbooks(1) |
| Activate workbook | wk.Activate |
| Close workbook without saving | wk.Close SaveChanges:=False |
| Close workbook and save | wk.Close SaveChanges:=True |
| Create new workbook | Set wk = Workbooks.Add |
| Open workbook | Set wk =Workbooks.Open («C:DocsExample.xlsx») |
| Open workbook as read only | Set wk = Workbooks.Open («C:DocsExample.xlsx», ReadOnly:=True) |
| Check Workbook exists | If Dir(«C:Docsbook1.xlsx») = «» Then MsgBox «File does not exist.» EndIf |
| Check Workbook is open | See Check Workbook Open section below |
| List all open workbooks | For Each wk In Application.Workbooks Debug.Print wk.FullName Next wk |
| Open workbook with the File Dialog | See File Dialog section below function below |
| Save workbook | wk.Save |
| Save workbook copy | wk.SaveCopyAs «C:Copy.xlsm» |
| Copy workbook if closed | FileCopy «C:file1.xlsx»,«C:Copy.xlsx» |
| SaveAs workbook | wk.SaveAs «Backup.xlsx» |
VBA Workbook Webinar
If you are a member of the website, click on the image below to access the webinar.
(Note: Website members have access to the full webinar archive.)

Getting Started with the VBA Workbook
We can access any open workbook using the code Workbooks(“Example.xlsm“). Simply replace Example.xlsm with the name of the workbook you wish to use.
The following example shows you how to write to a cell on a worksheet. You will notice we had to specify the workbook, worksheet and range of cells.
' https://excelmacromastery.com/
Public Sub WriteToA1()

    ' Writes 100 to cell A1 of worksheet "Sheet1" in MyVBA.xlsm
Workbooks("MyVBA.xlsm").Worksheets("Sheet1").Range("A1") = 100

End Sub
This example may look a little be confusing to a new user but it is actually quite simple.
The first part up to the decimal point is the Workbook, the second part is the Worksheet and the third is the Range. Here are some more examples of writing to a cell
' https://excelmacromastery.com/
Public Sub WriteToMulti()

' Writes 100 to cell A1 of worksheet "Sheet1" in MyVBA.xlsm
Workbooks("MyVBA.xlsm").Worksheets("Sheet1").Range("A1") = 100

' Writes "John" to cell B1 of worksheet "Sheet1" in MyVBA.xlsm
Workbooks("MyVBA.xlsm").Worksheets("Sheet1").Range("B1") = "John"

' Writes 100 to cell A1 of worksheet "Accounts" in MyVBA.xlsm
Workbooks("MyVBA.xlsm").Worksheets("Accounts").Range("A1") = 100

' Writes the date to cell D3 of worksheet "Sheet2" in Book.xlsc
Workbooks("Book.xlsx").Worksheets("Sheet2").Range("D3") = "112016"

End Sub
You can see the simple pattern here. You can write to any cell in any worksheet from any workbook. It is just a matter of changing the workbook name, worksheet name and the range to suit your needs.
Take a look at the workbook part
Workbooks("Example.xlsx")
The Workbooks keyword refers to a collection of all open workbooks. Supplying the workbook name to the collection gives us access to that workbook. When we have the object we can use it to perform tasks with the workbook.
Troubleshooting the Workbooks Collection
When you use the Workbooks collection to access a workbook, you may get the error message:
Run-time Error 9: Subscript out of Range.
This means that VBA cannot find the workbook you passed as a parameter.
This can happen for the following reasons
- The workbook is currently closed.
- You spelled the name wrong.
- You created e new workbook (e.g. Book1) and tried to access it using Workbooks(“Book1.xlsx”). It’s name is not Book1.xlsx until it is saved for the first time.
- (Excel 2007/2010 only) If you are running two instances of Excel then Workbooks() only refers to to the workbooks open in the current Excel instance.
- You passed a number as Index and it is greater than the number of workbooks open e.g. you used Workbooks(3) and only two workbooks are open.
If you cannot resolve the error then use either of the functions in the section Finding all open Workbooks. These will print the names of all open workbooks to the Immediate Window(Ctrl + G).
Examples of Using the VBA Workbook
The following examples show what you can do with the workbook.
Note: To try this example create two open workbooks called Test1.xlsx and Test2.xlsx.
' https://excelmacromastery.com/
Public Sub WorkbookProperties()

    ' Prints the number of open workbooks
    Debug.Print Workbooks.Count

    ' Prints the full workbook name
    Debug.Print Workbooks("Test1.xlsx").FullName

    ' Displays the full workbook name in a message dialog
    MsgBox Workbooks("Test1.xlsx").FullName

    ' Prints the number of worksheets in Test2.xlsx
    Debug.Print Workbooks("Test2.xlsx").Worksheets.Count

    ' Prints the name of currently active sheet of Test2.xlsx
    Debug.Print Workbooks("Test2.xlsx").ActiveSheet.Name

    ' Closes workbook called Test1.xlsx
    Workbooks("Test1.xlsx").Close

    ' Closes workbook Test2.xlsx and saves changes
    Workbooks("Test2.xlsx").Close SaveChanges:=True

End Sub
Note: In the code examples I use Debug.Print a lot. This function prints values to the Immediate Window. To view this window select View->Immediate Window from the menu( Shortcut is Ctrl + G)


Accessing the VBA Workbook by Index
You can also use an Index number with Workbooks(). The index refers to the order the Workbook was open or created.
Workbooks(1) refers to the workbook that was opened first. Workbooks(2) refers to the workbook that was opened second and so on.
' First workbook that was opened
Debug.Print Workbooks(1).Name

' Third workbook that was opened
Debug.Print Workbooks(3).Name

' The last workbook that was opened
Debug.Print Workbooks(Workbooks.Count).Name
In this example, we used Workbooks.Count. This is the number of workbooks that are currently in the Workbooks collection. That is, the number of workbooks currently open. So using it as the Index gives us the last workbook that was opened
Using the index is not really useful unless you really need to know the order. For this reason, you should avoid using it. You should use the workbook name with Workbooks() instead.
Finding all Open Workbooks
Sometimes you may want to access all the workbooks that are open. In other words, all the items in the Workbooks() collection.
You can do this using the For Each loop.
' https://excelmacromastery.com/
Public Sub PrintWrkFileName()

    ' Prints out the full filename of all open workbooks
    Dim wrk As Workbook
    For Each wrk In Workbooks
        Debug.Print wrk.FullName
    Next wrk

End Sub
You can also use the standard For loop to access all the open workbooks
' https://excelmacromastery.com/
Public Sub PrintWrkFileNameIdx()

    ' Prints out the full filename of all open workbooks
    Dim i As Long
    For i = 1 To Workbooks.Count
        Debug.Print Workbooks(i).FullName
    Next i

End Sub
For accessing workbooks, either of these Loops is fine. The standard For loop is useful if you want to use a different order or you need to use a counter.
Note: Both examples read in the order of the first opened to the last opened. If you want to read in reverse order(last to first) you can do this
' https://excelmacromastery.com/
Public Sub PrintWrkFileNameIdxRev()

    ' Prints out the full filename of all open workbooks
    ' in reverse order.
    Dim i As Long
    For i = Workbooks.Count To 1 Step -1
        Debug.Print Workbooks(i).FullName
    Next i

End Sub
Open Workbook
So far we have dealt with workbooks that are already open. Of course, having to manually open a workbook before running a Macro, defeats the purpose of automating tasks. The Open Workbook task should be performed by VBA.
The following VBA code opens the workbook “Book1.xlsm” in the “C:Docs” folder
' https://excelmacromastery.com/
Public Sub OpenWrk()

    ' Open the workbook and print the number of sheets it contains
    Workbooks.Open ("C:DocsBook1.xlsm")

    Debug.Print Workbooks("Book1.xlsm").Worksheets.Count

    ' Close the workbook without saving
    Workbooks("Book1.xlsm").Close saveChanges:=False

End Sub
It is a good idea to check a workbook actually exists before you try to open it. This will prevent you getting errors. The Dir function allows you to easily do this .
' https://excelmacromastery.com/
Public Sub OpenWrkDir()

    If Dir("C:DocsBook1.xlsm") = "" Then
        ' File does not exist - inform user
        MsgBox "Could not open the workbook. Please check it exists"
    Else
        ' open workbook and do something with it
        Workbooks.Open("C:DocsBook1.xlsm")
    End If

End Sub
Check For Open Workbook
If you are opening a workbook as Read-Only, it doesn’t matter if it is already open. However, if you’re going to update data in a workbook then it is a good idea to check if it is already open.
The function below can be used to check if the workbook is currently open. If not, then it will open the workbook. In either case you will end up with the workbook opened.
(The code below is taken from this StackOverFlow entry.)
' https://excelmacromastery.com/
Function GetWorkbook(ByVal sFullFilename As String) As Workbook

    Dim sFilename As String
    sFilename = Dir(sFullFilename)

    On Error Resume Next
    Dim wk As Workbook
    Set wk = Workbooks(sFilename)

    If wk Is Nothing Then
        Set wk = Workbooks.Open(sFullFilename)
    End If

    On Error Goto 0
    Set GetWorkbook = wk

End Function
You can use this function like this
' https://excelmacromastery.com/
Sub ExampleOpenWorkbook()

    Dim sFilename As String
    sFilename = "C:DocsBook2.xlsx"

    Dim wk As Workbook
    Set wk = GetWorkbook(sFilename)

End Sub
This code is fine is most situations. However, if the workbook could be currently open in read-only mode or could be currently opened by another user then you may want to use a slightly different approach.
An easy way to deal this with this scenario is to insist that the file must be closed for the application to run successfully. You can use the function below to simply check is the file already open and if so inform the user that it must be closed first.
(The code below is also taken from this StackOverFlow entry)
' https://excelmacromastery.com/
' Function to check if workbook is already open
Function IsWorkBookOpen(strBookName As String) As Boolean

    Dim oBk As Workbook

    On Error Resume Next
    Set oBk = Workbooks(strBookName)
    On Error GoTo 0

    If Not oBk Is Nothing Then
        IsWorkBookOpen = True
    End If

End Function
An example of using this function is shown below. In this case, if the workbook is already open then you inform the user that is must be closed for the macro to proceed.
' https://excelmacromastery.com/
Sub ExampleUse()

    Dim sFilename As String
    sFilename = "C:tempwritedata.xlsx"

    If IsWorkBookOpen(Dir(sFilename)) = True Then
        MsgBox "File is already open. Please close file and run macro again."
        Exit Sub
    End If

    ' Write to workbook here

End Sub
If you need to check if the workbook is open in another instance of Excel you can use the ReadOnly attribute of the workbook. It will be set to true if it is open in another instance.
Close Workbook
To Close a Workbook in Excel VBA is very simple. You simply call the Close method of the workbook.
wk.Close
Normally when you close a workbook in VBA, you don’t want to see messages from Excel asking if you want to save the file.
You can specify whether to save the workbook or not and then the Excel messages will not appear.
' Don't save changes
wk.Close SaveChanges:= False

' Do save changes
wk.Close SaveChanges:= True
Obviously, you cannot save changes to a workbook that is currently open as read-only.
Save Workbook
We have just seen that you can save a workbook when you close it. If you want to save it any other stage you can simply use the Save method
wk.Save
You can also use the SaveAs method
wk.SaveAs "C:Backupsaccounts.xlsx"
The Workbook SaveAs method comes with twelve parameters which allow you to add a password, set the file as read-only and so on. You can see the details here.
You can also use VBA to save the workbook as a copy using SaveCopyAs
wk.SaveCopyAs "C:DocsCopy.xlsm"
Copy Workbook
If the workbook is open you can use the two methods in the above section to create a copy i.e. SaveAs and SaveCopyAs.
If you want to copy a workbook without opening it then you can use FileCopy as the following example demonstrates
Public Sub CopyWorkbook()
    FileCopy "C:DocsDocs.xlsm", "C:DocsExample_Copy.xlsm"
End Sub
Using the File Dialog To Open a Workbook
The previous section shows you how to open a workbook with a given name. Sometimes you may want the user to select the workbook. You can easily use the Windows File Dialog shown here.

The Windows File Dialog
The FileDialog is configurable and you can use it to
- Select a file.
- Select a folder.
- Open a file.
- “Save As” a file.
If you just want the user to select the file you can use the GetOpenFilename function.
The following function opens a workbook using the File Dialog. The function returns the full file name if a file was selected. If the user cancels it displays a message and returns an empty string.
' https://excelmacromastery.com/
Public Function UserSelectWorkbook() As String

    On Error Goto ErrorHandler

    Dim sWorkbookName As String

    Dim FD As FileDialog
    Set FD = Application.FileDialog(msoFileDialogFilePicker)

    ' Open the file dialog
    With FD
        ' Set Dialog Title
        .Title = "Please Select File"

        ' Add filter
        .Filters.Add "Excel Files", "*.xls;*.xlsx;*.xlsm"

        ' Allow selection of one file only
        .AllowMultiSelect = False

        ' Display dialog
        .Show

        If .SelectedItems.Count > 0 Then
            UserSelectWorkbook = .SelectedItems(1)
        Else
            MsgBox "Selecting a file has been cancelled. "
            UserSelectWorkbook = ""
        End If
    End With

    ' Clean up
    Set FD = Nothing
Done:
    Exit Function
ErrorHandler:
    MsgBox "Error: " + Err.Description
End Function
When you call this function you have to check for the user cancelling the dialog. The following example shows you how to easily call the UserSelectWorkbook function and handle the case of the user cancelling
' https://excelmacromastery.com/
Public Sub TestUserSelect()

    Dim userBook As Workbook, sFilename As String

    ' Call the UserSelectworkbook function
    sFilename = UserSelectWorkbook()

    ' If the filename returns is blank the user cancelled
    If sFilename <> "" Then
        ' Open workbook and do something with it
        Set userBook = Workbooks.Open(sFilename)
    End If

End Sub
You can customise the dialog by changing the Title, Filters and AllowMultiSelect in the UserSelectWorkbook function.
Using ThisWorkbook
There is an easier way to access the current workbook than using Workbooks(). You can use the keyword ThisWorkbook. It refers to the current workbook i.e. the workbook that contains the VBA code.
If our code is in a workbook call MyVBA.xlsm then ThisWorkbook and Workbooks(“MyVBA.xlsm”) refer to the same workbook.
Using ThisWorkbook is more useful than using Workbooks(). With ThisWorkbook we do not need to worry about the name of the file. This gives us two advantages:
- Changing the file name will not affect the code
- Copying the code to another workbook will not require a code change
These may seem like very small advantages. The reality is your filenames will change all the time. Using ThisWorkbook means your code will still work fine.
The following example shows two lines of code. One using ThisWorkbook and one using Workbooks(). The one using Workbooks will no longer work if the name of MyVBA.xlsm changes.
' https://excelmacromastery.com/
Public Sub WriteToCellUsingThis()

    ' Both lines do the same thing.
    Debug.Print ThisWorkbook.FullName
    Debug.Print Workbooks("MyVBA.xlsm").FullName

End Sub
Using the ActiveWorkbook
ActiveWorkbook refers to the workbook that is currently active. This is the one that the user last clicked on.
This can seem useful at first. The problem is that any workbook can become active by a simple mouse click. This means you could easily write data to the wrong workbook.
Using ActiveWorkbook also makes the code hard to read. It may not be obvious from the code which workbook should be the active one.
I hope I made it clear that you should avoid using ActiveWorkbook unless you really have to. If you must then be very careful.
Examples of the Accessing the Workbook
We’ve looked at all the ways of accessing a workbook. The following code shows examples of these ways
' https://excelmacromastery.com/
Public Sub WorkbooksUse()

    ' This is a workbook that is already open and called MyVBA.xlsm
    Debug.Print Workbooks("MyVBA.xlsm").FullName

    ' The workbook that contains this code
    Debug.Print ThisWorkbook.FullName

    ' The open workbook that was opened first
    Debug.Print Workbooks(1).FullName

    ' The open workbook that was opened last
    Debug.Print Workbooks(Workbooks.Count).FullName

    ' The workbook that is the currently active one
    Debug.Print ActiveWorkbook.FullName

    ' No workbook mentioned - the active one will be used
    Debug.Print Worksheets("Sheet1").Name

    ' A closed workbook called Book1.xlsm in folder C:Docs
    Workbooks.Open ("C:DocsBook1.xlsm")
    Debug.Print Workbooks("Book1.xlsm").FullName
    Workbooks("Book1.xlsm").Close

End Sub
Declaring a VBA Workbook variable
The reason for declaring a workbook variable is to make your code easier to read and understand. It is easier to see the advantage of using an example
' https://excelmacromastery.com/
Public Sub OpenWrkObjects()

    Dim wrk As Workbook
    Set wrk = Workbooks.Open("C:DocsBook1.xlsm")

    ' Print number of sheets in each book
    Debug.Print wrk.Worksheets.Count
    Debug.Print wrk.Name

    wrk.Close

End Sub
You can set a workbook variable with any of the access methods we have seen.
The following shows you the same code without a workbook variable
' https://excelmacromastery.com/
Public Sub OpenWrkNoObjects()

   Workbooks.Open ("C:DocsBook1.xlsm")

   Debug.Print Workbooks("Book2.xlsm").Worksheets.Count
   Debug.Print Workbooks("Book2.xlsm").Name

    Workbooks("Book2.xlsm").Close

End Sub
In these examples the difference is not major. However, when you have a lot of code, using a variable is useful particularly for worksheet and ranges where the names tend to be long e.g. thisWorkbook.Worksheets(“Sheet1”).Range(“A1”).
You can name the workbook variable to be something like wrkRead or wrkWrite. Then at a glance you can see what this workbook is being used for.
Create New Workbook
To create a new workbook you use the Workbooks Add function. This function creates a new blank workbook. It is the same as selecting New Workbook from the Excel File menu.
When you create a new workbook you will generally want to save it. The following code shows you how to do this.
' https://excelmacromastery.com/
Public Sub AddWordbook()

    Dim wrk As Workbook
    Set wrk = Workbooks.Add

    ' Save as xlsx. This is the default.
    wrk.SaveAs "C:TempExample.xlsx"

    ' Save as a Macro enabled workbook
    wrk.SaveAs "C:TempExample.xlsm", xlOpenXMLWorkbookMacroEnabled

End Sub
When you create a new workbook it normally contains three sheets. This is determined by the property Application.SheetsInNewWorkbook.
If you want to have a different number of sheets in a new workbook then you change this property before you create the new workbook. The following example shows you how to create a new workbook with seven sheets.
' https://excelmacromastery.com/
Public Sub AddWordbookMultiSheets()

    ' Store SheetsInNewWorkbook value so we can reset it later
    Dim sheetCnt As Long
    sheetCnt = Application.SheetsInNewWorkbook

    ' Set sheets in a new workbook to be 7
    Application.SheetsInNewWorkbook = 7

    ' Workbook will be created with 7 sheets
    Dim wrk As Workbook
    Set wrk = Workbooks.Add

    ' Display sheet count
    Debug.Print "number of sheets: " & CStr(wrk.Worksheets.Count)

    ' Reset to original value
    Application.SheetsInNewWorkbook = sheetCnt

End Sub
The With keyword and the Workbook
The With keyword makes reading and writing VBA code easier. Using With means you only need to mention the item once. With is used with Objects. These are items such as Workbooks, Worksheets and Ranges.
The following example has two Subs. The first is similar to code we have seen so far. The second uses the With keyword. You can see the code is much clearer in the second Sub. The keywords End With mark the finish of a section code using With.
' https://excelmacromastery.com/
' Not using the With keyword
Public Sub NoUsingWith()

   Debug.Print Workbooks("Book2.xlsm").Worksheets.Count
   Debug.Print Workbooks("Book2.xlsm").Name
   Debug.Print Workbooks("Book2.xlsm").Worksheets(1).Range("A1")
   Workbooks("Book2.xlsm").Close

End Sub

' Using With makes the code easier to read
Public Sub UsingWith()

    With Workbooks("Book2.xlsm")
        Debug.Print .Worksheets.Count
        Debug.Print .Name
        Debug.Print .Worksheets(1).Range("A1")
        .Close
    End With

End Sub
Summary
The following is a brief summary of the main points of this post
- To get the workbook containing the code use ThisWorkbook.
- To get any open workbook use Workbooks(“Example.xlsx”).
- To open a workbook use Set Wrk = Workbooks.Open(“C:FolderExample.xlsx”).
- Allow the user to select a file using the UserSelectWorkbook function provided above.
- To create a copy of an open workbook use the SaveAs property with a filename.
- To create a copy of a workbook without opening use the FileCopy function.
- To make your code easier to read and write use the With keyword.
- Another way to make your code clear is to use a Workbook variables
- To run through all open Workbooks use For Each wk in Workbooks where wk is a workbook variable.
- Try to avoid using ActiveWorkbook and Workbooks(Index) as their reference to a workbook is temporary.
You can see a quick guide to the topic at the top of this post
Conclusion
This was an in-depth post about a very important element of VBA – the Workbook. I hope you found it beneficial. Excel is great at providing many ways to perform similar actions but the downside is it can lead to confusion at times.
To get the most benefit from this post I recommend you try out the examples. Create some workbooks and play around with the code. Make changes to the code and see how the changes affect the outcome. Practice is the best way to learn VBA.
If you found this post useful then feel free to share it with others using the bar at the side.
What’s Next?
Free VBA Tutorial If you are new to VBA or you want to sharpen your existing VBA skills then why not try out the The Ultimate VBA Tutorial.
Related Training: Get full access to the Excel VBA training webinars and all the tutorials.
(NOTE: Planning to build or manage a VBA Application? Learn how to build 10 Excel VBA applications from scratch.)
В этом руководстве вы узнаете, как использовать VBA для открытия и закрытия книги Excel несколькими способами.
VBA позволяет открывать или закрывать файлы стандартными методами. .Открытым а также .Закрывать.
Если вы хотите узнать, как проверить, существует ли файл, прежде чем пытаться открыть файл, вы можете щелкнуть по этой ссылке: VBA File Exists
Открыть книгу из пути
Если вы знаете, какой файл хотите открыть, вы можете указать его полный путь в функции. Вот код:
| 1 | Рабочие книги. Откройте «C: VBA Folder Sample file 1.xlsx» |
Эта строка кода открывает файл «Образец файла 1» из «Папки VBA».
Открыть книгу — ActiveWorkbook
Когда вы открываете книгу, она автоматически становится ActiveWorkbook. Вы можете ссылаться на недавно открытую книгу следующим образом:
Когда вы ссылаетесь на лист или диапазон и опускаете имя книги, VBA предполагает, что вы имеете в виду ActiveWorkbook:
| 1 | Таблицы («Sheet1»). Name = «Input» |
Откройте книгу и назначьте переменной
Вы также можете открыть книгу и назначить ее непосредственно объектной переменной. Эта процедура откроет книгу для wb переменную, а затем сохраните книгу.
| 123456 | Подложка OpenWorkbookToVariable ()Dim wb As WorkbookУстановите wb = Workbooks.Open («C: VBA Folder Sample file 1.xlsx»)wb.SaveКонец подписки |
Назначение книг переменным при их открытии — лучший способ отслеживать ваши книги
Диалог открытия файла книги
Вы также можете вызвать диалоговое окно открытия файла книги. Это позволяет пользователю перейти к файлу и открыть его:
| 12345678 | Подложка OpenWorkbook ()Dim strFile As StringstrFile = Application.GetOpenFilename ()Workbooks.Open (strFile)Конец подписки |

Как вы можете видеть на изображении 1, при таком подходе пользователи могут выбирать, какой файл открыть. Диалоговое окно «Открыть файл» можно сильно настроить. Вы можете по умолчанию выбрать определенную папку, выбрать, какие типы файлов будут отображаться (например, только xlsx) и многое другое. Прочтите наше руководство по диалоговому окну «Открыть файл» для получения подробных примеров.
Открыть новую книгу
Эта строка кода откроет новую книгу:
| 1 | Рабочие тетради. Добавить |
Открыть новую книгу в переменной
Эта процедура откроет новую книгу, присвоив ее переменной wb:
| 1234 | Sub OpenNewWorkbook ()Dim wb As WorkbookУстановите wb = Workbooks.Add.Конец подписки |
Синтаксис открытой книги
Когда вы используете Workbooks.Open, вы можете заметить, что при открытии книги доступно множество опций:

Требуется имя файла. Все остальные аргументы необязательны — и вам, вероятно, не нужно знать большинство других аргументов. Вот два наиболее распространенных:
Открыть книгу только для чтения
Когда книга открыта только для чтения, вы не можете сохранить исходный файл. Это предотвращает редактирование файла пользователем.
| 1 | Книги. Откройте «C: VBA Folder Sample file 1.xlsx»,, True |
Открыть книгу, защищенную паролем
Книга может быть защищена паролем. Используйте этот код, чтобы открыть книгу, защищенную паролем:
| 1 | Рабочие книги. Откройте «C: VBA Folder Sample file 1.xlsx»,,, «пароль» |
Примечания к синтаксису Open Workbook
Обратите внимание, что на изображении выше мы включили круглую скобку «(», чтобы показать синтаксис. Если вы используете круглые скобки при работе с Workbooks.Open, вы должны назначить книгу переменной:
| 1234 | Sub OpenWB ()Dim wb As WorkbookУстановите wb = Workbooks.Open («C: VBA Folder Sample file 1.xlsx», True, True)Конец подписки |
Закройте книгу в VBA
Закрыть конкретную книгу
Как и при открытии книги, есть несколько способов закрыть файл. Если вы знаете, какой файл хотите закрыть, вы можете использовать следующий код:
| 1 | Workbooks.Close («C: VBA Folder Sample file 1.xlsx») |
Эта строка кода закрывает файл «Образец файла 1», если он открыт. В противном случае он вернет ошибку, поэтому вам следует позаботиться об обработке ошибок.
Закрыть активную книгу
Если вы хотите закрыть рабочую книгу, которая в настоящее время активна, эта строка кода позволит вам сделать это:
Закройте все открытые книги
Чтобы закрыть все открытые книги, вы можете просто использовать этот код:
Закрыть первую открытую книгу
Это закроет первую открытую / созданную книгу:
| 1 | Рабочие тетради (1) .Закрыть |
Замените 1 на 2, чтобы закрыть вторую открытую / созданную книгу и так далее.
Закрыть без сохранения
Это закроет книгу без сохранения и без отображения запроса на сохранение:
| 1 | ActiveWorkbook.Close savechanges: = False |
Сохранить и закрыть без запроса
Точно так же это сохранит и закроет книгу без отображения запроса на сохранение:
| 1 | ActiveWorkbook.Close savechanges: = True |
Примечание: Есть несколько других способов указать, сохранять или не сохранять рабочую книгу, а также показывать подсказки или нет. Более подробно это обсуждается здесь.
Другие примеры открытых книг
Открыть несколько новых книг
Эта процедура откроет несколько новых книг, назначив новые книги массиву:
| 12345678 | Sub OpenMultipleNewWorkbooks ()Dim arrWb (3) Как рабочая тетрадьDim i как целое числоДля i = от 1 до 3Установите arrWb (i) = Workbooks.AddДалее яКонец подписки |
Открыть все книги Excel в папке
Эта процедура откроет все книги Excel в папке с помощью средства выбора диалогового окна «Открыть файл».
| 12345678910111213141516 | Sub OpenMultipleWorkbooksInFolder ()Dim wb As WorkbookDim dlgFD как FileDialogDim strFolder как строкаDim strFileName As StringУстановите dlgFD = Application.FileDialog (msoFileDialogFolderPicker)Если dlgFD.Show = -1 ТогдаstrFolder = dlgFD.SelectedItems (1) и Application.PathSeparatorstrFileName = Dir (strFolder & «* .xls *»)Сделать пока strFileName «»Установите wb = Workbooks.Open (strFolder & strFileName)strFileName = DirПетляКонец, еслиКонец подписки |
Проверьте, открыта ли рабочая книга
Эта процедура проверяет, открыта ли книга:
| 1234567891011 | Sub TestByWorkbookName ()Dim wb As WorkbookДля каждого ББ в книгахЕсли wb.Name = «New Microsoft Excel Worksheet.xls», тоMsgBox «Нашел»Код вызова Exit Sub ‘здесь, мы просто выйдем сейчасКонец, еслиСледующийКонец подписки |
Workbook_Open Событие
События VBA — это «триггеры», которые говорят VBA выполнить определенный код. Вы можете настроить события книги для открытия, закрытия, до сохранения, после сохранения и т. Д.
Прочтите наше руководство по событию Workbook_Open, чтобы узнать больше об автоматическом запуске макросов при открытии книги.