“High aims form high characters, and great objects bring out great minds” – Tryon Edwards
A Quick Guide to VBA Objects
| Task | Examples |
|---|---|
| Declare and Create | Dim coll As New Collection Dim o As New Class1 |
| Declare Only | Dim coll As Collection Dim o As Class1 |
| Create at run time | Set coll = New Collection Set o = New Class1 |
| Assign to Excel Object | Dim wk As Workbook Set wk = Workbooks(«book1.xlsx») |
| Assign using CreateObject | Dim dict As Object Set dict = CreateObject(«Scripting.Dictionary») |
| Assign to existing object | Dim coll1 As New Collection Dim coll2 As Collection Set coll2 = coll1 |
| Return from Function | Function GetCollection() As Collection
Dim coll As New Collection End Function |
| Receive from Function | Dim coll As Collection Set coll = GetCollection |
The Webinar
If you are a member of the website, click on the image below to view the webinar for this post.
(Note: Website members have access to the full webinar archive.)

Introduction
If you are serious about learning VBA then it is important to understand VBA Objects. Using objects is not that difficult. In fact, they make your life much easier.
In this post, you will see how VBA makes brilliant use of objects. How objects such as Collections, Workbooks and Worksheets save you much complexity, time and effort.
In my next post, I will cover creating objects using Class Modules. However, before you create your own it is vital that you understand exactly what they are and why you need them.
So grab your favourite beverage and take a journey into the fascinating world of VBA objects.
What is a VBA Object?
To understand what an object is, we must first look at simple variables. In VBA we have basic data types such as string, integers, double and date.
We use these data types when we are creating a variable e.g.
Dim Score As Long, Price As Double
Dim Firstname As String, Startdate As Date

Score = 45
Price = 24.55
Firstname = "John"
Startdate = #12/12/2016#
Basic VBA variables have only one purpose. To store a value while our application is running. We either put a value in the variable or read a value from the variable.
Dim Marks As Long

' Store value in Marks
Marks = 90
Marks = 34 + 44
Marks = Range("A1")

' Read value from Marks
Range("B2") = Marks
Debug.Print Marks
In VBA we have a Collection which we use to store groups of items. The following code shows an example of using a Collection in VBA
' https://excelmacromastery.com/
Sub UseCollection()

    Dim collFruit As New Collection

    ' Add item to the collection
    collFruit.Add "Apple"
    collFruit.Add "Pear"

    ' Get the number of items in the collection
    Dim lTotal As Long
    lTotal = collFruit.Count

End Sub
The Collection is an example of an object. It is more than a variable. That is, it does more than storing a piece of data. We can add items, remove items and get the number of items.
Definition of a VBA Object: An object is a grouping of data and procedures(i.e. Functions and Subs). The procedures are used to perform some task related to the data.
In the Collection the data is the group of the items it stores. The procedures such as Add, Remove, Count then act on this data.
In the Worksheet object, the main data item is the worksheet and all the procedures perform actions related to the worksheet.

Why VBA Uses Objects
An object is used to represent real world or computer based items.
The major benefit of an object is that it hides the implementation details. Take the VBA Collection we looked at above. It is doing some complicated stuff. When an item is added it must allocate memory, add the item, update the item count and so on.
We don’t know how it is doing this and we don’t need to know. All that we need to know is when we use Add it will add the item, Remove will remove the item and Count will give the number of items.
Using objects allows us to build our applications as blocks. Building it this way means you can work on one part without affecting other parts of your application. It also makes it easier to add items to an application. For example, a Collection can be added to any VBA application. It is not affected in any way by the existing code and in turn it will not affect the existing code.
A Real World Analogy
Looking at a real-world example can often be a good way to understand concepts.
Take a car with a combustion engine. When you are driving your car, a lot of complex stuff is happening. For example, fuel gets injected, compressed and ignited leading to combustion. This then causes the wheels of your car to turn.

A nice looking combustion engine | © BigStockPhoto.com
The details of how this happens are hidden from you. All you expect is that turning the key will start the car, pressing the accelerator will speed it up and pressing the brake will slow it down and so on.
Think of how great your code would be if it was full of these type of objects. Self-contained and dedicated to performing one set of tasks really well. It would make building your applications so much easier.
Object Components
There are three main items that an object can have. These are
- Properties – These are used to set or retrieve a value.
- Methods – These are function or subs that perform some task on the objects data.
- Events – These are function or subs that are triggered when a given event occurs
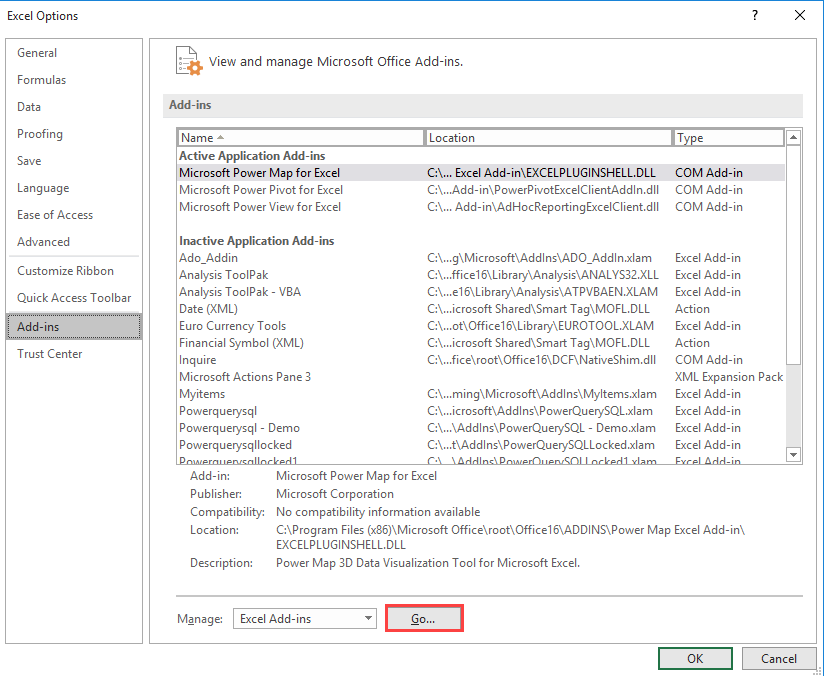
If you look in the Object Browser(F2) or use Intellisense you will notice different icons beside the members of an object. For example, the screenshot below shows the first three members of the Worksheet object
![]()
What these icons mean is as follows
![]()
Let’s take a look at the first three members of the worksheet.
It has an Activate method which we can use to make worksheet active.
It has an Activate event which is triggered when the worksheet is activated.
The Application property allows us to reference the application(i.e. Excel).
' Prints "Microsoft Excel"
Debug.Print Sheet1.Application.Name

' Prints the worksheet name
Debug.Print Sheet1.Name
In the next sections we will look at each of these components in more detail.
Object Properties
An object property allows us to read a value from the object or write a value to the object. We read and write to a property the same way we read and write to a variable.
' Set the name
sheet1.Name = "Accounts"

' Get the name
sName = sheet1.Name
A property can be read-only which means we can read the value but we cannot update the value.
In the VBA Range, Address is a read-only property
' The address property of range
Debug.Print Sheet1.Range("A1").Address
The workbook property Fullname is also a read-only property
' The Fullname property of the Workbook object
sFile = ThisWorkbook.Fullname
Properties can also Set and Get objects. For example, the Worksheet has a UsedRange property that return a Range object
Set rg = Sheet1.UsedRange
You will notice we used the Set keyword here. We will be looking at this in detail later in the post.
Object Methods
A method is a Sub or a Function. For example, Add is a method of the Collection
' Collection Add method
Coll.Add "Apple"
Methods are used to perform some action to do with the object data. With a Collection, the main data is the group of items we are storing. You can see that the Add, Remove and Count methods all perform some action relating to this data.
Another example of a method is the Workbook SaveAs method
Dim wk As Workbook
Set wk = Workbooks.Open "C:DocsAccounts.xlsx"
wk.SaveAs "C:DocsAccounts_Archived.xlsx"
and the Worksheets Protect and Copy methods
sheet1.Protect "MyPassword"
Sheet1.Copy Before:=Sheet2
Object Events
Visual Basic is an event-driven language. What this means is that the code runs when an event occurs. Common events are button clicks, workbook Open, worksheet Activate etc.
In the code below we display a message each time Sheet1 is activated by the user. This code must be placed in the worksheet module of Sheet1.
Private Sub Worksheet_Activate()
    MsgBox "Sheet1 has been activated."
End Sub
Now that we know the parts of the VBA object let’s look at how we use an object in our code.
Creating a VBA Object
In VBA, our code must “Create” an object before we can use it. We create an object using the New keyword.
If we try to use an object before it is created we will get an error. For example, take a look at the code below
Dim coll As Collection

coll.Add "Apple"
When we reach the Add line no Collection has been created.

If we try to run this line we get the following error

There are three steps to creating a VBA object
- Declare the variable.
- Create a new object.
- Assign the variable to the object.
We can perform these steps in one line using Dim and New together. Alternatively, we can declare the variable in one line and then create and assign the object in another line using Set.
Let’s take a look at both of these techniques.
Using Dim with New
When we use Dim and New together they declare, create and assign all in one line.
' Declare, Create and Assign
Dim coll As New Collection
Using code like does not provide much flexibility. It will always create exactly one Collection when we run our code.
In the next section we will look at Set. This allows us to create objects based on conditions and without having to declare a variable for each new object.
Using Set with New
We can declare an object variable in one line and then we can use Set to create and assign the object on another line. This provides us with a lot of flexibility.
In the code below we declare the object variable using Dim. We then create and assign it using the Set keyword.
' Declare
Dim coll As Collection
' Create and Assign
Set coll = New Collection
We use Set in this way when the number of objects can vary. Using Set allows us to create multiple objects. In other words, we can create objects as we need them. We can’t do this using Dim and New.
We can also use conditions to determine if we need to create an object e.g.
Dim coll As Collection

' Only create collection if cell has data
If Range("A1") <> "" Then
    Set coll = New Collection
End If
Later in this post we will see some examples of using Set to create objects.
Subtle Differences of Dim Versus Set
There are some subtle differences between using New with Set and using New with Dim.
When we use New with Dim, VBA does not create the object until the first time we use it.
In the following code, the collection will not be created until we reach the line that adds “Pear”.
Dim coll As New Collection

' Collection is created on this line
coll.Add "Pear"
If you put a breakpoint on the Add line and check the variable value you will see the following message
Object variable or With block variable not set
When the Add line runs, the Collection will be created and the variable will now show a Collection with one item.
The reason for this is as follows. A Dim statement is different to other VBA lines of code. When VBA reaches a Sub/Function it looks at the Dim statements first. It allocates memory based on the items in the Dim statements. It is not in a position to run any code at this point.
Creating an object requires more than just allocating memory. It can involve code being executed. So VBA must wait until the code in the Sub is running before it can create the object.
Using Set with New is different in this regard to using Dim with New. The Set line is used by VBA when the code is running so VBA creates the object as soon as we use Set and New e.g.
Dim coll As Collection

' Collection is created on this line
Set coll = New Collection

coll.Add "Pear"
There is another subtlety to keep in mind using New. If we set the object variable to Nothing and then use it again, VBA will automatically create a new object e.g.
' https://excelmacromastery.com/
Sub EmptyColl2()

    ' Create collection and add items
    Dim coll As New Collection

    ' add items here
    coll.Add "Apple"

    ' Empty collection
    Set coll = Nothing

    ' VBA automatically creates a new object
    coll.Add "Pear"

End Sub
If we used Set in the above code to create the new Collection then the “Add Pear” line would cause an error.
When New Is Not Required
You may have noticed some objects don’t use the New keyword.
Dim sh As Worksheet
Set sh = ThisWorkbook.Worksheets("Sheet1")
Dim wk As Workbook
Set wk = Workbooks.Open("C:DocsAccounts.xlsx")
When a workbook, is opened or created, VBA automatically creates the VBA object for it. It also creates the worksheet object for each worksheet in that workbook.
Conversely, when we close the workbook VBA will automatically delete the VBA objects associated with it.
This is great news. VBA is doing all the work for us. So when we use Workbooks.Open, VBA opens the file and creates the workbook object for the workbook.
An important point to remember is that there is only one object for each workbook. If you use different variables to reference the workbook they are all referring to the same object e.g.
Dim wk1 As Workbook
Set wk1 = Workbooks.Open("C:DocsAccounts.xlsx")

Dim wk2 As Workbook
Set wk2 = Workbooks("Accounts.xlsx")

Dim wk3 As Workbook
Set wk3 = wk2
We will look at this in more detail in the VBA Objects in Memory section below.
Using CreateObject
There are some very useful libaries that are not part of Excel VBA. These include the Dictionary, Database objects, Outlook VBA objects, Word VBA objects and so on.
These are written using COM interfaces. The beauty of COM is that we can easily use these libraries in our projects.
If we add a reference to the library we create the object in the normal way.
' Select Tools->References and place a check
' beside "Microsoft Scripting Runtime"
Dim dict As New Scripting.Dictionary
If we don’t use a reference we can create the object at run time using CreateObject.
Dim dict As Object
Set dict = CreateObject("Scripting.Dictionary")
The first method is referred to as Early Binding and the second is referred to as Late Binding(see Early versus Late Binding) for more details.
Assigning VBA Objects
We can assign basic variables using the Let keyword.
Dim sText As String, lValue As Long

Let sText = "Hello World"
Let lValue = 7
The Let keyword is optional so nobody actually uses it. However, it is important to understand what it is used for.
sText = "Hello World"
lValue = 7
When we assign a value to a property we are using the Let Property
' Both lines do the same thing
sheet1.Name = "Data"
Let sheet1.Name = "Data"
When we assign an object variable we use the Set keyword instead of the Let keyword. When I use “object variable” I mean any variable that isn’t a basic variable such as a string, long or double etc..
' wk is the object variable
Dim wk As Worksheet
Set wk = ThisWorkbook.Worksheets(1)

' coll1 is the object variable
Dim coll1 As New Collection
coll1.Add "Apple"

' coll2 is the object variable
Dim coll2 As Collection
Set coll2 = coll1
Using the Set keyword is mandatory. If we forget to use Set we will get the error below
coll2 = coll1

It may look like Let and Set are doing the same thing. But they are actually doing different things:
- Let stores a value
- Set stores an address
To understand more about this we need to take a peek(pun intended:-)) into memory.
VBA Objects in Memory
“Fools ignore complexity. Pragmatists suffer it. Some can avoid it. Geniuses remove it” – Alan Perlis
To understand what New and Set are doing we need to understand how variables are represented in memory.
When we declare variables, VBA creates a slot for them in memory. You can think of the slot as an Excel cell in memory.
Dim X As long, Y As Long

When we assign values to these variables, VBA places the new values in the appropriate slots.
X = 25
Y = 12

We saw the following line of code earlier in this post
Dim coll As New Collection
This line creates the object in memory. However, it doesn’t store this object in the variable. It
stores the address of the object
in the variable. In programming, this is known as a Pointer.

Because VBA handles this seamlessly it can seem as if the object variable and the object are the same thing. Once we understand they are different it is much easier to understand what Set is actually doing.
How Set Works
Take a look at the following code
Dim coll1 As New Collection
Dim coll2 As Collection

Set coll2 = coll1
Only one Collection has been created here. So coll1 and coll2 refer to the same Collection.
In this code, coll1 contains the address of the newly created Collection.
When we use Set we are copying the address from coll1 to coll2. So now they are both “pointing” to the same Collection in memory.

Earlier in the post we looked at Workbook variables. Let’s have a look at this code again
Dim wk1 As Workbook
Set wk1 = Workbooks.Open("C:DocsAccounts.xlsx")

Dim wk2 As Workbook
Set wk2 = Workbooks("Accounts.xlsx")

Dim wk3 As Workbook
Set wk3 = Workbooks(2)
When we open the workbook Accounts.xlsx, VBA creates an object for this workbook. When we assign the workbook variables in the code above, VBA places the address of the workbook object in the variable.
In this code example, the three variables are all referring to the same workbook object.

If we use code like the following
wk1.SaveAs "C:TempNewName.xlsx"
VBA uses the address in wk1 to determine the workbook object to use. It does this seamlessly so when we use a workbook variable it looks like we are referring directly to the object.
To sum up what we have learned in this section:
- Let writes a value to a basic variable
- Set writes an address to an object variable
Objects and Procedures
In VBA we can refer to Functions and Subs as procedures. When we pass an object to a procedure only the address passed.
When we pass an object from a Function(Subs cannot return anything) only the address of the object is passed back.
In the code below we have one collection. It is the address that gets passed to and from the function.
' https://excelmacromastery.com/
Sub TestProc()

    ' Create collection
    Dim coll1 As New Collection
    coll1.Add "Apple"
    coll1.Add "Orange"

    Dim coll2 As Collection
    ' UseCollection passes address back to coll2
    Set coll2 = UseCollection(coll1)

End Sub

' Address of collection passed to function
Function UseCollection(coll As Collection) _
                        As Collection
    Set UseCollection = coll
End Function
Using ByRef and ByVal
When we pass a simple variable to a procedure we can pass using ByRef or ByVal.
ByRef means we are passing the address of the variable. If the variable changes in the procedure the original will also be changed.
ByVal means we are creating a copy of the variable. If the variable changes in the procedure the original will not be changed.
' Pass by value
Sub PassByVal(ByVal val As Long)

' Pass by reference
Sub PassByRef(ByRef val As Long)
Sub PassByRef(val As Long)
Most of the time it is a good idea to use ByVal because it prevents the variable being accidentally changed in a procedure.
When we pass a Collection to a procedure, we are always passing the address of the Collection.
ByRef and ByVal only affect the object variable. They do not affect the object!
What this means is that if we change the object in the procedure it will be changed outside it – this is regardless of whether you use ByVal or ByRef.
For example, in the code below we have two procedures that change the Collection. One uses ByRef and one uses ByVal. In both cases the Collection has changed when we return to the TestProcs Sub
' https://excelmacromastery.com/
Sub TestProcs()
    Dim c As New Collection
    c.Add "Apple"

    PassByVal c
    ' Prints Pear
    Debug.Print c(1)

    PassByRef c
    ' Prints Plum
    Debug.Print c(1)

End Sub

' Pass by value
Sub PassByVal(ByVal coll As Collection)
    ' Remove current fruit and add Pear
    coll.Remove (1)
    coll.Add "Pear"
End Sub

' Pass by reference
Sub PassByRef(ByRef coll As Collection)
    ' Remove current fruit and add Plum
    coll.Remove (1)
    coll.Add "Plum"
End Sub
Let’s look at a second example. Here we are setting the object variable to “point” to a new Collection. In this example, we get different results from ByVal and ByRef.
In the PassByVal Sub, a copy of the original object variable is created. So it is this copy that points to the new Collection. So our original object variable is not affected.
In the PassByRef Sub we are using the same object variable so when we point to the New Collection, our original object variable is now pointing to the new collection.
' https://excelmacromastery.com/
Sub TestProcs()

    Dim c As New Collection
    c.Add "Apple"

    PassByVal c
    ' Prints Apple as c pointing to same collection
    Debug.Print c(1)

    PassByRef c
    ' Prints Plum as c pointing to new Collecton
    Debug.Print c(1)

End Sub

' Pass by value
Sub PassByVal(ByVal coll As Collection)
    Set coll = New Collection
    coll.Add "Orange"
End Sub

' Pass by reference
Sub PassByRef(ByRef coll As Collection)
    Set coll = New Collection
    coll.Add "Plum"
End Sub
Why VBA Uses Pointers
You may be wondering why VBA uses pointers. The reason is that it is much more efficient.
Imagine you had a Collection with 50000 entries. Think how inefficient it would be to create multiple copies of this Collection when your application was running.
Think of it like a library which is a real world collection of books. We can put the Library address in directories, newspapers etc. A person simply uses the address to go to the Library and add and remove books.
There is one Libary and the address is passed around to anyone who needs to use it.If we wanted a second library we would create a new library. It would have a different address which we could also pass around.

© BigStockPhoto.com
Running a Simple Memory Experiment
To demonstrate what we have been discussing, let’s look at a code example. The code below uses
- VarPtr to give the memory address of the variable
- ObjPtr to give the memory address of the object
The memory address is simply a long integer and it’s value is not important. But what is interesting is when we compare the addresses.
' https://excelmacromastery.com/
Sub Memory()

    Dim coll1 As New Collection
    Dim coll2 As Collection

    Set coll2 = coll1

    ' Get address of the variables Coll1 and Coll2
    Dim addrColl1 As Long, addrColl2 As Long
    addrColl1 = VarPtr(coll1)
    addrColl2 = VarPtr(coll2)

    Debug.Print "Address of the variable coll1 is " & addrColl1
    Debug.Print "Address of the variable coll2 is " & addrColl2

    ' Get address of the Collection they point to
    Dim addrCollection1 As Long, addrCollection2 As Long
    addrCollection1 = ObjPtr(coll1)
    addrCollection2 = ObjPtr(coll2)

    Debug.Print "Address coll1 collection is " & addrCollection1
    Debug.Print "Address coll2 collection is " & addrCollection2

End Sub
Note: Use LongPtr instead of Long if you are using a 64 bit version of Excel.
When you run the code you will get a result like this:
Address of the variable coll1 is 29356848
Address of the variable coll2 is 29356844
Address coll1 collection is 663634280
Address coll2 collection is 663634280
you will notice
- The memory addresses will be different each time you run.
- The address of the coll1 Collection and the coll2 Collection will always be the same.
- The address of the coll1 variable and the coll2 variable will always be different.
This shows that we have two different variables which contain the address of the same Collection.
Cleaning Up Memory
So what happens if we set a variable to a New object multiple times? In the code below we use Set and New twice for the variable coll
Dim coll As Collection

Set coll = New Collection
coll.Add "Apple"

' Create a new collection and point coll to it
Set coll = New Collection
In this example, we created two new Collections in memory. When we created the second collection we set coll to refer to it. This means it no longer refers to the first collection. In fact, nothing is referring to the first Collection and we have no way of accessing it.
In some languages(looking at you C++) this would be a memory leak. In VBA however, this memory will be cleaned up automatically. This is known as Garbage Collection.
Let me clarify this point. If an object has no variable referring to it, VBA will automatically delete the object in memory. In the above code, our Collection with “Apple” will be deleted when coll “points” to a new Collection.
Clean Up Example
If you want to see this for yourself then try the following.
Create a class module, call it clsCustomer and add the following code.
Public Firstname As String

Private Sub Class_Terminate()
    MsgBox "Customer " & Firstname & " is being deleted."
End Sub
Class_Terminate is called when an object is being deleted. By placing a message box in this event we can see exactly when it occurs.
Step through the following code using F8. When you pass the Set oCust = New clsCustomer line you will get a message saying the Jack was deleted.When you exit the function you will get the message saying Jill was deleted.
' https://excelmacromastery.com/
Sub TestCleanUp()

    Dim oCust As New clsCustomer
    oCust.Firstname = "Jack"

    ' Jack will be deleted after this line
    Set oCust = New clsCustomer
    oCust.Firstname = "Jill"

End Sub
VBA automatically deletes objects when they go out of scope. This means if you declare them in a Sub/Function they will go out of scope when the Function ends.
Setting Objects to Nothing
In code examples you may see code like
Set coll = Nothing
A question that is often asked is “Do we need to Set variables to Nothing when we are finished with them?”. The answer is most of the time you don’t need to.
As we have seen VBA will automatically delete the object as soon as we go out of scope. So in most cases setting the object to Nothing is not doing anything.
The only time you would set a variable to Nothing is if you needed to empty memory straight away and couldn’t wait for the variable to go out of scope. An example would be emptying a Collection.
Imagine the following project. You open a workbook and for each worksheet you read all the customer data to a collection and process it in some way. In this scenario, you would set the Collection to Nothing every time you finish with a worksheet’s data.
' https://excelmacromastery.com/
Sub SetToNothing()

    ' Create collection
    Dim coll As New Collection

    Dim sh As Worksheet
    ' Go through all the worksheets
    For Each sh In ThisWorkbook.Worksheets

        ' Add items to collection

        ' Do something with the collection data

        ' Empty collection
        Set coll = Nothing

    Next sh

End Sub
Memory Summary
To sum up what we have learned in this section:
- A new object is created in memory when we use the New keyword.
- The object variable contains only the memory address of the object.
- Using Set changes the address in the object variable.
- If an object is no longer referenced then VBA will automatically delete it.
- Setting an object to Nothing is not necessary in most cases.
Why Set Is Useful
Let’s look at two examples that show how useful Set can be.
First, we create a very simple class module called clsCustomer and add the following code
Public Firstname As String
Public Surname As String
Set Example 1
In our first scenario, we are reading from a list of customers from a worksheet. The number of customers can vary between 10 and 1000.
Obviously, declaring 1000 objects isn’t an option. Not only is it a lot of wasteful code, it also means we can only deal with maximum 1000 customers.
' Don't do this!!!
Dim oCustomer1 As New clsCustomer
Dim oCustomer2 As New clsCustomer
' .
' .
' .
Dim oCustomer1000 As New clsCustomer
What we do first is to get the count of rows with data. Then we create a customer object for each row and fill it with data. We then add this customer object to the collection.
' https://excelmacromastery.com/
Sub ReadCustomerData()

    ' We will always have one collection
    Dim coll As New Collection

    ' The number of customers can vary each time we read a sheet
    Dim lLastRow As Long
    lLastRow = Sheet1.Range("A" & Sheet1.Rows.Count).End(xlUp).Row

    Dim oCustomer As clsCustomer
    Dim i As Long
    ' Read through the list of customers
    For i = 1 To lLastRow

        ' Create a new clsCustomer for each row
        Set oCustomer = New clsCustomer

        ' Add data
        oCustomer.Firstname = Sheet1.Range("A" & i)
        oCustomer.Surname = Sheet1.Range("B" & i)

        ' Add the clsCustomer object to the collection
        coll.Add oCustomer

    Next i

End Sub
Each time we use Set we are assigning oCustomer to “point” to the newest object. We then add the customer to the Collection. What happens here is that VBA creates a copy of the object variable and places it in the collection.
Set Example 2
Let’s look at a second example where using Set is useful. Imagine we have a fixed number of customers but only want to read the ones whose name starts with the letter B. We only create a customer object when we find a valid one.
' https://excelmacromastery.com/
Sub ReadCustomerB()

    ' We will always have one collection
    Dim coll As New Collection

    Dim oCustomer As clsCustomer, sFirstname As String
    Dim i As Long
    ' Read through the list of customers
    For i = 1 To 100

        sFirstname = Sheet1.Range("A" & i)

        ' Only create customer if name begins with B
        If Left(sFirstname, 1) = "B" Then
            ' Create a new clsCustomer
            Set oCustomer = New clsCustomer

            ' Add data
            oCustomer.Firstname = sFirstname
            oCustomer.Surname = Sheet1.Range("B" & i)

            ' Add to collection
            coll.Add oCustomer
        End If

    Next i

End Sub
It doesn’t matter how many customer names start with B this code will create exactly one object for each one.
This concludes my post on VBA Objects. I hope you found it beneficial.In my next post I’ll be looking at how you can create your own objects in VBA using the Class Module.
If you have any questions or queries please feel free to add a comment or email me at Paul@ExcelMacroMastery.com.
What’s Next?
Free VBA Tutorial If you are new to VBA or you want to sharpen your existing VBA skills then why not try out the The Ultimate VBA Tutorial.
Related Training: Get full access to the Excel VBA training webinars and all the tutorials.
(NOTE: Planning to build or manage a VBA Application? Learn how to build 10 Excel VBA applications from scratch.)
Excel VBA Custom Classes & Objects, Class Modules, Custom Events
—————————————————————
Contents:
Custom Classes and Objects
Custom Class Events
—————————————————————
In vba you can create your own custom objects by defining classes & inserting class modules. You can also create your own custom class events, in addition to Excel’s own inbuilt event procedures. In this section we explain how to create custom objects by inserting a class module and how to create your own custom events in a class.
Custom Classes and Objects
In vba you can create your own custom objects by defining classes. Classes act as templates for new objects. The custom object is used to store, process and make data available. A Class contains data and code — data can be accessed with properties (viz. Name property) and the code is referred to as methods (which are defined as Subs and Functions in VBA). Classes are integral to the Object-Oriented Programming (OOP) language. A class is created by inserting a Class Module (in your VBA project) to which you give a name. A Class Module allows you to create your own objects having their own properties and methods much like other objects such as range, worksheet, chart, etc. The Class Module has its own set of vba code (which includes variables, constants and procedures), which defines its properties and methods. The properties of the class object are manipulated in a Class Module with Property procedures which use the Property Let, Property Get, and Property Set statements. To access the properties and methods of the class object from a procedure in a code module, you declare an object variable of the class’s type in that procedure.
You can do all vba programming without creating custom objects which do not really increase code functionality. However, using custom objects makes complex coding look simpler by having related code in one place, makes coding self-documenting with appropriately named classes, properties & methods, and this helps in debugging and reusing code.
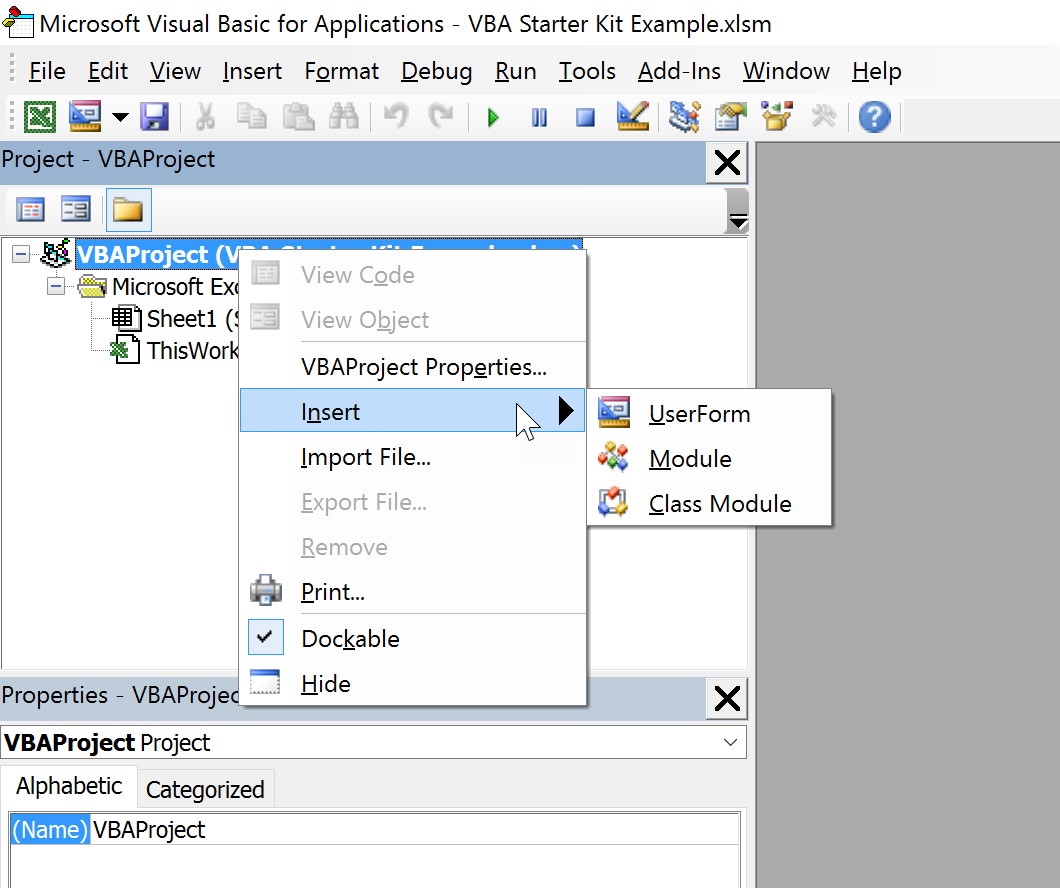
Insert a Class Module:
In Visual Basic Editor (VBE), click Insert in the menu bar and then click Class Module. Alternatively, in the Project Explorer in VBE, right click on the VBA Project name or any object or item under it, click Insert and then click Class Module. Or, on the Standard Tool bar in VBE, click the Insert button and then click Class Module. This creates a blank class with the name Class1. To remove or delete a Class Module, right click after selecting it in the Project Explorer in VBE, and then click on Remove.
Name a Class Module:
The name of the selected Class Module appears to the right of (Name) in the Properties Window in VBE, and can be changed therein.
Instancing Property of a Class Module:
The Instancing property of a Class Module is set to Private by default which does not allow an external project from working with and using instances of that class. Set the Instancing property to PublicNotCreatable to allow external projects, with a reference set to the project containing the defined class, to access and use instances of the defined class. Note that the setting of PublicNotCreatable still does not allow the external project to instantiate (ie. create or call into existence) the class object or an instance of the class, which can be instantiated only by the project which contains the definition of the class. Note that the external project can use an instance of the defined class if the referenced project has already created that instance.
Instantiate a Class Object:
As already mentioned, in vba you can create your own custom objects by defining classes. A class is created by inserting a Class Module. To access the properties and methods of the class object from a procedure in a code module, you need to create a new instance of the class object ie. instantiate (ie. create or call into existence) an instance of the class. Note that multiple number of instances of a class object can be created. There are two ways of doing this, one with a two-line code or alternatively with a single-line code.
Two-line code to instantiate an instance of a class:
Use the Dim statement to create a variable (iStudent) and define it as a reference to the class (clsStudent):
Dim iStudent As clsStudent
Create a new object reference by using the New keyword. Mention the name of the class (clsStudent) you want to instantiate, after the New keyword:
Set iStudent = New clsStudent
Alternate single-line code to instantiate an instance of a class:
In this case the clsStudent object gets instantiated only when the class method is first called ie. iStudent gets instantiated only when first used.
Dim iStudent As New clsStudent
Create Class Properties:
One way to create a class property is by declaring a Public Variable in the Class Module, and this property will be read-write. The other way to create a class property is by using Property Procedures ie. create a private variable to hold values and use property statements (viz. Property Let, Property Set and Property Get). Creating properties using a Public Variable, though simple, may not usually be preferable because it is not flexible. Using property statements will enable to set a read-only or write-only property in addition to read-write, whereas using a public variable will create only read-write properties. Further, using property statements you can execute code to calculate values as properties whereas using a public variable will not allow use of code to set or return the value of a property. For example, in case of an Area property, the area of a rectangle changes per its length-width and in case the length-width is dynamic it should not be stored as a fixed value.
Create methods in a Class Module: In addition to properties, objects can also have one or more methods. A method is defined as Subs and Functions in VBA and is created with Sub-routine and Function procedures. A method is a sub-procedure containing a set of codes which perform an action or an operation on the data within the class, or a function containing a set of codes which returns a value after performing an operation. In a Class Module, only if the method is declared Public can it be called from an instance of this class, else if a method is declared Private it can be called only from other methods within the class. Note, that by default a procedure is Public if the Private or Public keywords are not specified.
Using Property Procedures to Create Properties:
Property Procedure is a set of vba codes that creates and manipulates custom properties for a class module. A Property procedure is declared by a Property Let, Property Get or Property Set statement and ends with an End Property statement. Property Let (write-only property) is used to assign a value to a property and Property Get (read-only property — which can only be returned but not set) returns or retrieves the value of a property. Property Set (write-only property) is used to set a reference to an object. Property procedures are usually defined in pairs, Property Let and Property Get OR Property Set and Property Get. A Property Let procedure is created to allow the user to change or set the value of a property, whereas the user cannot set or change the value of a read-only property (viz. Property Get).
A property procedure can do whatever can be done within a vba procedure like performing an action or calculation on data. A Property Let (or Property Set) procedure is an independent procedure which can pass arguments, perform actions as per a set of codes and change the value of its arguments like a Property Get procedure or a Function but does not return a value like them. A Property Get procedure is also an independent procedure which can pass arguments, perform actions as per a set of codes and change the value of its arguments like a Property Let (or Property Set) procedure, and can be used similar to a Function to return the value of a property.
A Property Get declaration takes one argument less than in the associated Property Let or Property Set declaration and the Property Get declaration should be of the same data type as the data type of the last argument in the associated Property Let or Property Set declaration. The Property Get declaration will use the same property name as used in the associated Property Let or Property Set declaration.
A Property Let procedure can accept multiple arguments, and in this case the last argument contains the value to be assigned to the property. This last argument in the argument list is the property value set by the calling procedure. The name and data type of each argument in a Property Let procedure and its corresponding Property Get procedure should be the same, except for the last argument in the Property Let procedure which is additional. All arguments before the last argument are passed to the Property Let procedure. In the case of a Property Let procedure with a single argument (at least one argument is required to be defined), this argument contains the value to be assigned to the property and is the value set by the calling procedure. In this case the Property Get procedure will have no argument. It is not a usual practice to pass multiple arguments in property procedures and sub-procedures or Functions are used for this.
A Property Set procedure can accept multiple arguments, and in this case the last argument contains the actual object reference for the property. All arguments before the last argument are passed to the Property Set procedure. In the case of a Property Set procedure with a single argument (at least one argument is required to be defined), this argument contains the object reference for the property. The data type of the last argument or the single argument must be an Object type or a Variant.
The Property Set procedure is similar to and a variation of the Property Let procedure and both are used to set values. A Property Set procedure is used to create object properties which are actually pointers to other objects, whereas a Property Let procedure sets or assigns values to scalar properties like string, integer, date, etc. Using the Property Set statement enables Properties to be represented as objects.
Below is the syntax for the 3 property procedure declarations.
Property Get:
Property Get PropertyName(argument_1, argument_2, …, argument_n) As Type
Property Let:
Property Let PropertyName(argument_1, argument_2, …, argument_n+1)
Property Set:
Property Set PropertyName(argument_1, argument_2, …, argument_n+1)
Examples
Example 1 — Create Class Properties by using Property Procedures. Refer Images 1a & 1b. For live code, click to download excel file.
Insert Code in Class Module named clsStudent:
‘Example — Create Class Properties by using Property Procedures:
Private strStuName As String
Private dblStuMarks As Double
Public Property Let Name(strN As String)
‘declare the property procedure Public so that it can be called from an instance of this class in another module.
‘In the case of a Property Let procedure with a single argument (at least one argument is required to be defined), this argument contains the value to be assigned to the property and is the value set by the calling procedure. In this case the Property Get procedure will have no argument. A Property Let procedure is created to allow the user to change or set the value of a property, whereas the user cannot set or change the value of a read-only property (viz. Property Get).
strStuName = strN
End Property
Public Property Get Name() As String
‘returns the Name property
Name = strStuName
End Property
Public Property Let Marks(iMarks As Double)
‘assigns the Marks property
dblStuMarks = (iMarks / 80) * 100
End Property
Public Property Get Marks() As Double
‘returns the Marks property
Marks = dblStuMarks
End Property
Public Function Grade() As String
‘Create a Method within a Class — declare the method Public so that it can be called from an instance of this class in another module.
Dim strGrade As String
If dblStuMarks >= 80 Then
strGrade = «A»
ElseIf dblStuMarks >= 60 Then
strGrade = «B»
ElseIf dblStuMarks >= 40 Then
strGrade = «C»
Else
strGrade = «Fail»
End If
Grade = strGrade
End Function
Insert Code in a Standard Code Module:
Sub clsStudentRun()
‘this procedure instantiates an instance of a class, sets and calls class properties:
‘use the Dim statement to create a variable and define it as a reference to the class.
Dim iStudent As clsStudent
‘a new object reference is created by using the New keyword. Mention the name of the class you want to instantiate, after the New keyword.
‘following code line (together with the above Dim statement, it is a two-line code to instantiate an instance of a class), instantiates the clsStudent object:
Set iStudent = New clsStudent
‘alternate single-line code to instantiate an instance of a class, however in this case the clsStudent object gets instantiated only when the class method is first called, ie. iStudent gets instantiated only when first used:
‘Dim iStudent As New clsStudent
‘sets the Name property in the clsStudent object to be the string «Peter», and passes this data to the strN variable in the Name property:
iStudent.Name = «Peter»
‘call the Name property in the clsStudent object
MsgBox iStudent.Name
‘sets the Marks property in the clsStudent object to the value 45, and passes this data to the iMarks variable in the Marks property:
iStudent.Marks = 45
‘call the Marks property in the clsStudent object
MsgBox iStudent.Marks
‘call the Grade function from the clsStudent object:
MsgBox iStudent.Grade
MsgBox iStudent.Name & » has got » & iStudent.Marks & » percent marks with a Grade » & iStudent.Grade
End Sub


————————————————————————————————————————
Example 2 — Create Class Properties by using Property Procedures, Property Let procedure accepting multiple arguments. For live code, click to download excel file.
Insert Code in Class Module named clsRectangle:
‘Example — Create Class Properties by using Property Procedures, Property Let procedure accepting multiple arguments.
Private dblA As Double
Public Property Let Area(lngth As Double, wdth As Double, ar As Double)
‘A Property Let procedure can accept multiple arguments, and in this case the last argument contains the value to be assigned to the property. This last argument in the argument list is the property value set by the calling procedure. The name and data type of each argument in a Property Let procedure and its corresponding Property Get procedure should be the same, except for the last argument in the Property Let procedure which is additional. All arguments before the last argument are passed to the Property Let (& Property Get) procedure.
‘In the case of a Property Let procedure with a single argument (at least one argument is required to be defined), this argument contains the value to be assigned to the property and is the value set by the calling procedure. In this case the Property Get procedure will have no argument.
‘It is not a usual practice to pass multiple arguments in property procedures and sub-procedures or Functions are used for this.
dblA = ar
MsgBox «Arguments received — lngth: » & lngth & «, wdth: » & wdth & «, ar: » & ar
End Property
Public Property Get Area(lngth As Double, wdth As Double) As Double
Area = dblA
End Property
Insert Code in a Standard Code Module:
Sub clsRectangleRun()
‘This procedure instantiates an instance of a class, sets and calls class properties, passing multiple arguments to Property Let procedure:
Dim l As Double
Dim w As Double
Dim rect As New clsRectangle
l = InputBox(«Enter Length of rectangle»)
w = InputBox(«Enter Width of rectangle»)
‘setting the property value — passes this data to the ar variable in the Area property:
rect.Area(l, w) = l * w
‘accessing the Area property:
a = rect.Area(l, w)
MsgBox «Area of Rectangle with length » & l & «, width » & w & «, is » & a
End Sub
——————————————————————————————————————
Example 3 — Create Read-Only Class Property with only the PropertyGet_EndProperty block. For live code, click to download excel file.
Insert Code in Class Module named clsRectArea:
‘Example — Create Read-Only Class Property with only the PropertyGet_EndProperty block.
Private dRectL As Double
Private dRectW As Double
Public Property Let Length(l As Double)
dRectL = l
End Property
Public Property Get Length() As Double
Length = dRectL
End Property
Public Property Let Width(w As Double)
dRectW = w
End Property
Public Property Get Width() As Double
Width = dRectW
End Property
Public Property Get rArea() As Double
‘Read-Only property with only the PropertyGet_EndProperty block and no PropertyLet_EndProperty (or PropertySet_EndProperty) block.
rArea = Length * Width
End Property
Insert Code in a Standard Code Module:
Sub clsRectAreaRun()
‘This procedure instantiates an instance of a class, sets and calls class properties.
Dim a As Double
Dim b As Double
Dim areaRect As New clsRectArea
a = InputBox(«Enter Length of rectangle»)
b = InputBox(«Enter Width of rectangle»)
areaRect.Length = a
areaRect.Width = b
MsgBox areaRect.rArea
End Sub
————————————————————————————————————
Example 4 — Using Property Set statement to set a reference to an object.
A Property Set procedure is used to create object properties which are actually pointers to other objects. Refer Images 2a, 2b & 2c. For live code, click to download excel file.
Insert Code in Class Module named clsCar:
‘Example — Using Property Set statement to set a reference to an object. A Property Set procedure is used to create object properties which are actually pointers to other objects.
‘declare a private variable (ie. varCar) to store a reference to the clsMotorCars object:
Private varCar As clsMotorCars
Public Property Set Car(objCar As clsMotorCars)
‘The Property Set statement sets a reference to an object, and assigns Car to an object.
‘create an object variable (ie. varCar) and point it to the clsMotorCars object passed to the procedure:
Set varCar = objCar
End Property
Public Property Get Car() As clsMotorCars
‘return the object variable (ie. varCar) created by the Property Set procedure:
Set Car = varCar
End Property
Insert Code in Class Module named clsMotorCars:
‘Create Class Properties by using Property Procedures:
Private strColor As String
Private strName As String
Private dMG As Double
Property Let Color(clr As String)
strColor = clr
End Property
Property Get Color() As String
Color = strColor
End Property
Property Let Name(nm As String)
strName = nm
End Property
Property Get Name() As String
Name = strName
End Property
Property Let Mileage(milesGallon As Double)
dMG = milesGallon
End Property
Property Get Mileage() As Double
Mileage = dMG
End Property
Function FuelBudget(FuelCost As Double, Distance As Double) As Double
FuelBudget = (Distance / Mileage) * FuelCost
End Function
Insert Code in a Standard Code Module:
Sub propSetCars()
‘Using Property Set statement to set a reference to an object. A Property Set procedure is used to create object properties which are actually pointers to other objects.
Dim dDist As Double
Dim dCost As Double
‘instantiate as a clsCar object ie. create a new instance of the clsCar object. A new object reference is created by using the New keyword.
Dim ownCar As clsCar
Set ownCar = New clsCar
‘Car has been instantiated as a clsMotorCars object (note that Car is a property of the ownCar object). See below how to access the properties & methods of clsMotorCars object:
Set ownCar.Car = New clsMotorCars
‘enter property values:
ownCar.Car.Color = «Yellow»
ownCar.Car.Name = «Ford»
ownCar.Car.Mileage = 50
dDist = InputBox(«Enter Distance in miles, covered by car in a month»)
dCost = InputBox(«Enter Cost of Fuel per gallon»)
‘return values from properties & methods of clsMotorCars object:
MsgBox «Car Color is » & ownCar.Car.Color
MsgBox «Car Model is » & ownCar.Car.Name
MsgBox «Gives a Mileage of » & ownCar.Car.Mileage & » miles per gallon»
‘call the FuelBudget function:
MsgBox «$» & ownCar.Car.FuelBudget(dDist, dCost) & » is the monthly cost of fuel»
End Sub


————————————————————————————————————————
Example 5 — Using Property Set statement to set a reference to a Range object. For live code, click to download excel file.
Insert Code in Class Module named clsSetRange:
‘Example — Using Property Set statement to set a reference to a Range object:
Private intColor As Integer
Private strName As String
‘declare a private variable (ie. rngV) to store a reference to the Range object:
Private rngV As Range
Public Property Set activeRange(oRng As Range)
‘create an object variable (ie. rngV) and point it to the Range object passed to the procedure:
Set rngV = oRng
End Property
Public Property Get activeRange() As Range
Set activeRange = rngV
End Property
Property Let Name(nam As String)
strName = nam
End Property
Property Get Name() As String
Name = strName
End Property
Property Let Color(clr As Integer)
intColor = clr
End Property
Property Get Color() As Integer
Color = intColor
End Property
Sub methodColor()
activeRange.Interior.ColorIndex = Color
End Sub
Insert Code in a Standard Code Module:
Sub clsSetRangeRun()
‘Example — Using Property Set statement to set a reference to a Range object.:
‘Instantiate as a clsRange object ie. create a new instance of the clsSetRange object. A new object reference is created by using the New keyword.
Dim rngActive As clsSetRange
Set rngActive = New clsSetRange
‘Set activeRange property (which is an object property) of clsSetRange object to ActiveCell, and pass this data to the oRng variable in the activeRange property:
Set rngActive.activeRange = ActiveCell
‘enter ColorIndex, value 1 to 56:
‘3 for red, 4 for green & 5 for blue, ….
rngActive.Color = 5
If rngActive.Color < 1 Or rngActive.Color > 56 Then
MsgBox «Error! Enter a value for ColorIndex between 1 and 56»
Exit Sub
End If
‘call sub-procedure named methodColor:
rngActive.methodColor
MsgBox «Interior color, ColorIndex » & rngActive.Color & «, entered in cell » & rngActive.activeRange.Address
End Sub
Custom Class Events
You can create your own class events also. Events are actions performed, or occurences, which trigger a VBA macro. A VBA code is triggered when an event occurs such as, clicking on a button, opening the workbook, selecting a cell or changing cell selection in a worksheet, and so on. Excel also has its own Event Procedures which are triggered by a predefined event and are installed within Excel having a standard & predetermined name viz. like the Worksheet change procedure is installed with the worksheet as «Private Sub Worksheet_Change(ByVal Target As Range)». When content of a worksheet cell changes, VBA calls the Worksheet_Change event procedure and runs the code it contains. Here we explain how to create your own custom events in a class.
Define a Custom Event:
The first step is to declare the event in the declaration section of the class. Use the Event keyword to define a custom event in a class module. It can have any number of arguments, and the event declaration should be Public to make it visible outside the object module. Note that you can declare and raise Events only within object modules (viz. ThisWorkbook module, Sheet modules — worksheets and chart sheets, UserForm modules and Class modules), and not from a standard code module.
Raise an Event:
After declaring an event, use a RaiseEvent Statement to trigger the declared event. The event procedure runs when an event is raised or triggered. The event is raised in a public procedure within the class module where it is declared, using the Event keyword. The RaiseEvent statement passes values for the event’s arguments, which also get passed to the event procedure that runs on raising the event.
External Code to Raise the Event:
However we need an external code to call the public procedure in the class module, which raises the event. This external code determines when the event will be raised by which the event procedure runs.
Create an Event Procedure:
Use the WithEvents keyword to declare an object variable of the custom class (in which the custom event is defined) type. By declaring this object variable, the instance of the custom class which this object variable points to will respond to the event by adding the object to the events list in the Code window. Only variables declared at module level can be used with the WithEvents keyword. Also variables can be declared using the WithEvents keyword only in object modules and not a standard code module. After the object variable declaration, the event procedure stub can be created similar to standard vba procedures — the object variable will be displayed in the Object drop-down list and all its events are listed in the Procedure drop-down list.
Examples
Example 6 — Create a Custom Event:- use a Worksheet_Change procedure to trigger the custom event. Refer Images 3a & 3b. For live code, click to download excel file.
Insert Code in Class Module named clsRange:
‘Example of Creating a Custom Event — use a Worksheet_Change procedure to trigger the custom event:
Private rngVar As Range
Private intColor As Integer
Private strName As String
‘Event declaration: Use the Event keyword to define a custom event (ie. CellSelect event) in a class module (ie. clsRange class). It can have any number of arguments, and the event declaration should be Public to make it visible outside the object module.
Public Event CellSelect(cell As Range)
Public Property Set selectedRange(objRng As Range)
Set rngVar = objRng
‘Trigger the event: the RaiseEvent statement executes & raises the CellSelect event and passes values for its arguments. Note that using the RaiseEvent keyword is similar to using the Call keyword used to call & execute a procedure in vba.
RaiseEvent CellSelect(rngVar)
End Property
Public Property Get selectedRange() As Range
Set selectedRange = rngVar
End Property
Property Let Name(nm As String)
strName = nm
End Property
Property Get Name() As String
Name = strName
End Property
Property Let Color(clr As Integer)
intColor = clr
End Property
Property Get Color() As Integer
Color = intColor
End Property
Sub methodColor()
selectedRange.Interior.ColorIndex = Color
End Sub
Insert Code in a Worksheet (sheet named ‘Sheet1’) Module:
‘Use the WithEvents keyword to declare an object variable (rng) of type clsRange. By declaring this object variable, the instance of the clsRange class which this object variable points to will respond to the event by adding the object to the events list in the Code window. Only variables declared at module level can be used with the WithEvents keyword.
‘After the variable declaration, the event procedure stub can be created similar to standard vba procedures — rng will be displayed in the Object drop-down list and all its events are listed in the Procedure drop-down list.
Private WithEvents rng As clsRange
Private Sub rng_CellSelect(cell As Range)
‘this is an event procedure, consisting of a set of codes, which runs on raising the CellSelect event.
‘enter ColorIndex, value 1 to 56:
‘3 for red, 4 for green & 5 for blue, ….
rng.Color = 4
If rng.Color < 1 Or rng.Color > 56 Then
MsgBox «Error! Enter a value for ColorIndex between 1 and 56»
Exit Sub
End If
rng.Name = «FirstCell»
‘call sub-procedure called methodColor:
rng.methodColor
‘note that rng.selectedRange & rng.Color values have been assigned, because they will lose values while executing below code:
Dim i As Integer
i = rng.Color
rng.selectedRange.Select
Selection.Offset(0, 1).Value = «Cell Name: « & rng.Name
Selection.Offset(0, 2).Value = «Cell Address: « & Selection.Address
Selection.Offset(0, 3).Value = «Cell Interior ColorIndex: « & i
Selection.Offset(0, 4).Value = «Cell Content: « & Selection.Value
End Sub
Private Sub Worksheet_Change(ByVal Target As Range)
‘this worksheet change procedure calls the selectedRange public procedure of the clsRange object.
On Error GoTo ErrorHandler ‘Enable error-handling routine for any run-time error
‘Instantiate as a clsRange object ie. create a new instance of the clsRange object. A new object reference is created by using the New keyword.
Set rng = New clsRange
‘CHANGE CONTENTS OF CELL A1 IN SHEET1 TO RUN THIS PROCEDURE:
‘Set selectedRange property (which is an object property) of clsRange object to ActiveCell, and pass this data to the objRng variable in the selectedRange property:
If Target.Address = Range(«A1»).Address Then
Set rng.selectedRange = Target
Else
Exit Sub
End If
ErrorHandler:
Application.EnableEvents = True ‘EnableEvents is changed back to True on any error
End Sub


————————————————————————————————————————
Example 7 — Create a Custom Event:- initialization of the UserForm triggers the custom event. Refer Images 4a, 4b & 4c. For live code, click to download excel file.
Insert Code in Class Module named clsTextBox:
‘Example of Creating a Custom Event — initialization of the UserForm triggers the custom event:
Private tb As MSForms.TextBox
Private strSeq As String
‘Event declaration: Use the Event keyword to define a custom event (ie. eTxtBx event) in a class module (ie. clsTextBox class). It can have any number of arguments, and the event declaration should be Public to make it visible outside the object module.
Public Event eTxtBx(objTxtBx As MSForms.TextBox)
Public Property Set setTxtBx(objTxtBx As MSForms.TextBox)
Set tb = objTxtBx
‘Trigger the event: the RaiseEvent statement executes & raises the eTxtBx event and passes values (TextBox object) for its arguments (objTxtBx). Note that using the RaiseEvent keyword is similar to using the Call keyword used to call & execute a procedure in vba.
RaiseEvent eTxtBx(tb)
End Property
Public Property Get setTxtBx() As MSForms.TextBox
Set setTxtBx = tb
End Property
Property Let Sequence(tbSeq As String)
strSeq = tbSeq
End Property
Property Get Sequence() As String
Sequence = strSeq
End Property
Insert a UserForm, insert 2 textBox (TextBox1 & TextBox2) and a CommandButton (CommandButton1) within the Form. Insert Code in the UserForm Module:
‘Use the WithEvents keyword to declare an object variable (tx) of type clsTextBox. By declaring this object variable, the instance of the clsTextBox class which this object variable points to will respond to the event by adding the object to the events list in the Code window. Only variables declared at module level can be used with the WithEvents keyword.
‘After the variable declaration, the event procedure stub can be created similar to standard vba procedures — tx will be displayed in the Object drop-down list and all its events are listed in the Procedure drop-down list.
Private WithEvents tx As clsTextBox
Private sq1 As String, sq2 As String
Private Sub CommandButton1_Click()
‘using the excel built-in event Click: procedure runs on clicking the command button:
‘copying the contents of TextBox1 to all other TextBoxes and changing the BackColor of these TextBoxes to red:
Dim objControl As Control
For Each objControl In Me.Controls
If TypeName(objControl) = «TextBox» Then
If Not objControl.Name = «TextBox1» Then
objControl.Value = «copied: « & tx.setTxtBx.Value
objControl.BackColor = vbRed
End If
End If
Next
MsgBox «text copied from the » & sq1 & » to the » & sq2
End Sub
Private Sub TextBox1_Change()
‘using the excel built-in event Change: procedure runs on change in TextBox contents:
If tx.setTxtBx.Value = «» Then
tx.setTxtBx.BackColor = vbYellow
Else
tx.setTxtBx.BackColor = vbGreen
End If
End Sub
Private Sub tx_eTxtBx(objTxtBx As MSForms.TextBox)
‘this is an event procedure, consisting of a set of codes, which runs on raising the eTxtBx event.
tx.setTxtBx.BackColor = vbYellow
With Me.TextBox1
tx.Sequence = «First TextBox»
sq1 = tx.Sequence
End With
With Me.TextBox2
tx.Sequence = «Second TextBox»
sq2 = tx.Sequence
End With
End Sub
Private Sub UserForm_Initialize()
‘initialization of the userform calls the setTxtBx public procedure of the clsTextBox object.
‘Instantiate as a clsTextBox object ie. create a new instance of the clsTextBox object. A new object reference is created by using the New keyword.
Set tx = New clsTextBox
‘Set setTxtBx object property of clsTextBox object, and pass the TextBox object (Me.TextBox1) to the objTxtBx variable in the setTxtBx property:
Set tx.setTxtBx = Me.TextBox1
End Sub


—————————————————————————————————————
Example 8 — Create a Custom Event:- use the WithEvents keyword, within the class module, to declare an object variable (Initialize UserForm to start).
For live code, click to download excel file.
Insert Code in Class Module named clsComboBox:
‘Example of Creating a Custom Event — use the WithEvents keyword, within the class module, to declare an object variable:
‘Use the WithEvents keyword to declare an object variable (cBox) of type MSForms.ComboBox. By declaring this object variable here, the excel built-in events associated with this object variable will respond, by adding the object to the events list in the Code window.
Public WithEvents cBox As MSForms.ComboBox
Public Sub setComboBox(objCbx As MSForms.ComboBox)
‘On userform initialization, the ComboBox object (objCbx) is passed to this procedure. This procedure is declared public to make it accessible from outside the class module.
‘ComboBox object (objCbx) is assigned to the object variable (cBox):
Set cBox = objCbx
End Sub
Public Sub cBox_AddItem(strItem As String, Cancel As Boolean)
‘This procedure is declared public to make it accessible from outside the class module. Clicking the command button passes the value for strItem argument, and runs this procedure.
‘adds item to ComboBox list, unless AddItem event is cancelled:
If Cancel = False Then
cBox.AddItem strItem
End If
‘changes BackColor of ComboBox after adding an item:
If strItem <> «» Then
cBox.BackColor = vbGreen
End If
End Sub
Private Sub cBox_Change()
‘using the excel built-in event of Change, this procedure runs when the ComboBox text changes.
‘if ComboBox is blank, its BackColor will change to white:
If cBox.Value = «» Then
cBox.BackColor = vbWhite
End If
End Sub
Insert a UserForm, insert a ComboBox (ComboBox1) and a CommandButton (CommandButton1) within the Form. Insert Code in the UserForm Module:
‘instantiate an instance (cB) of the class object (clsComboBox):
Private cB As New clsComboBox
Private Sub CommandButton1_Click()
‘enter item in the text area of the ComboBox, which you want to add in ComboBox:
Dim strTxt As String
strTxt = cB.cBox.Text
Dim Cancel As Boolean
c = MsgBox(«Do you confirm adding the item in ComboBox?», vbYesNo)
If c = vbNo Then
Cancel = True
End If
‘call the class method cB.cBox_AddItem and pass value and Boolean variable:
Call cB.cBox_AddItem(strTxt, Cancel)
End Sub
Private Sub UserForm_Initialize()
‘call the class method (setComboBox) and pass ComboBox object for its argument’s (objCbx) value:
cB.setComboBox Me.ComboBox1
End Sub
Excel Objects, Modules, Class Modules, and Forms
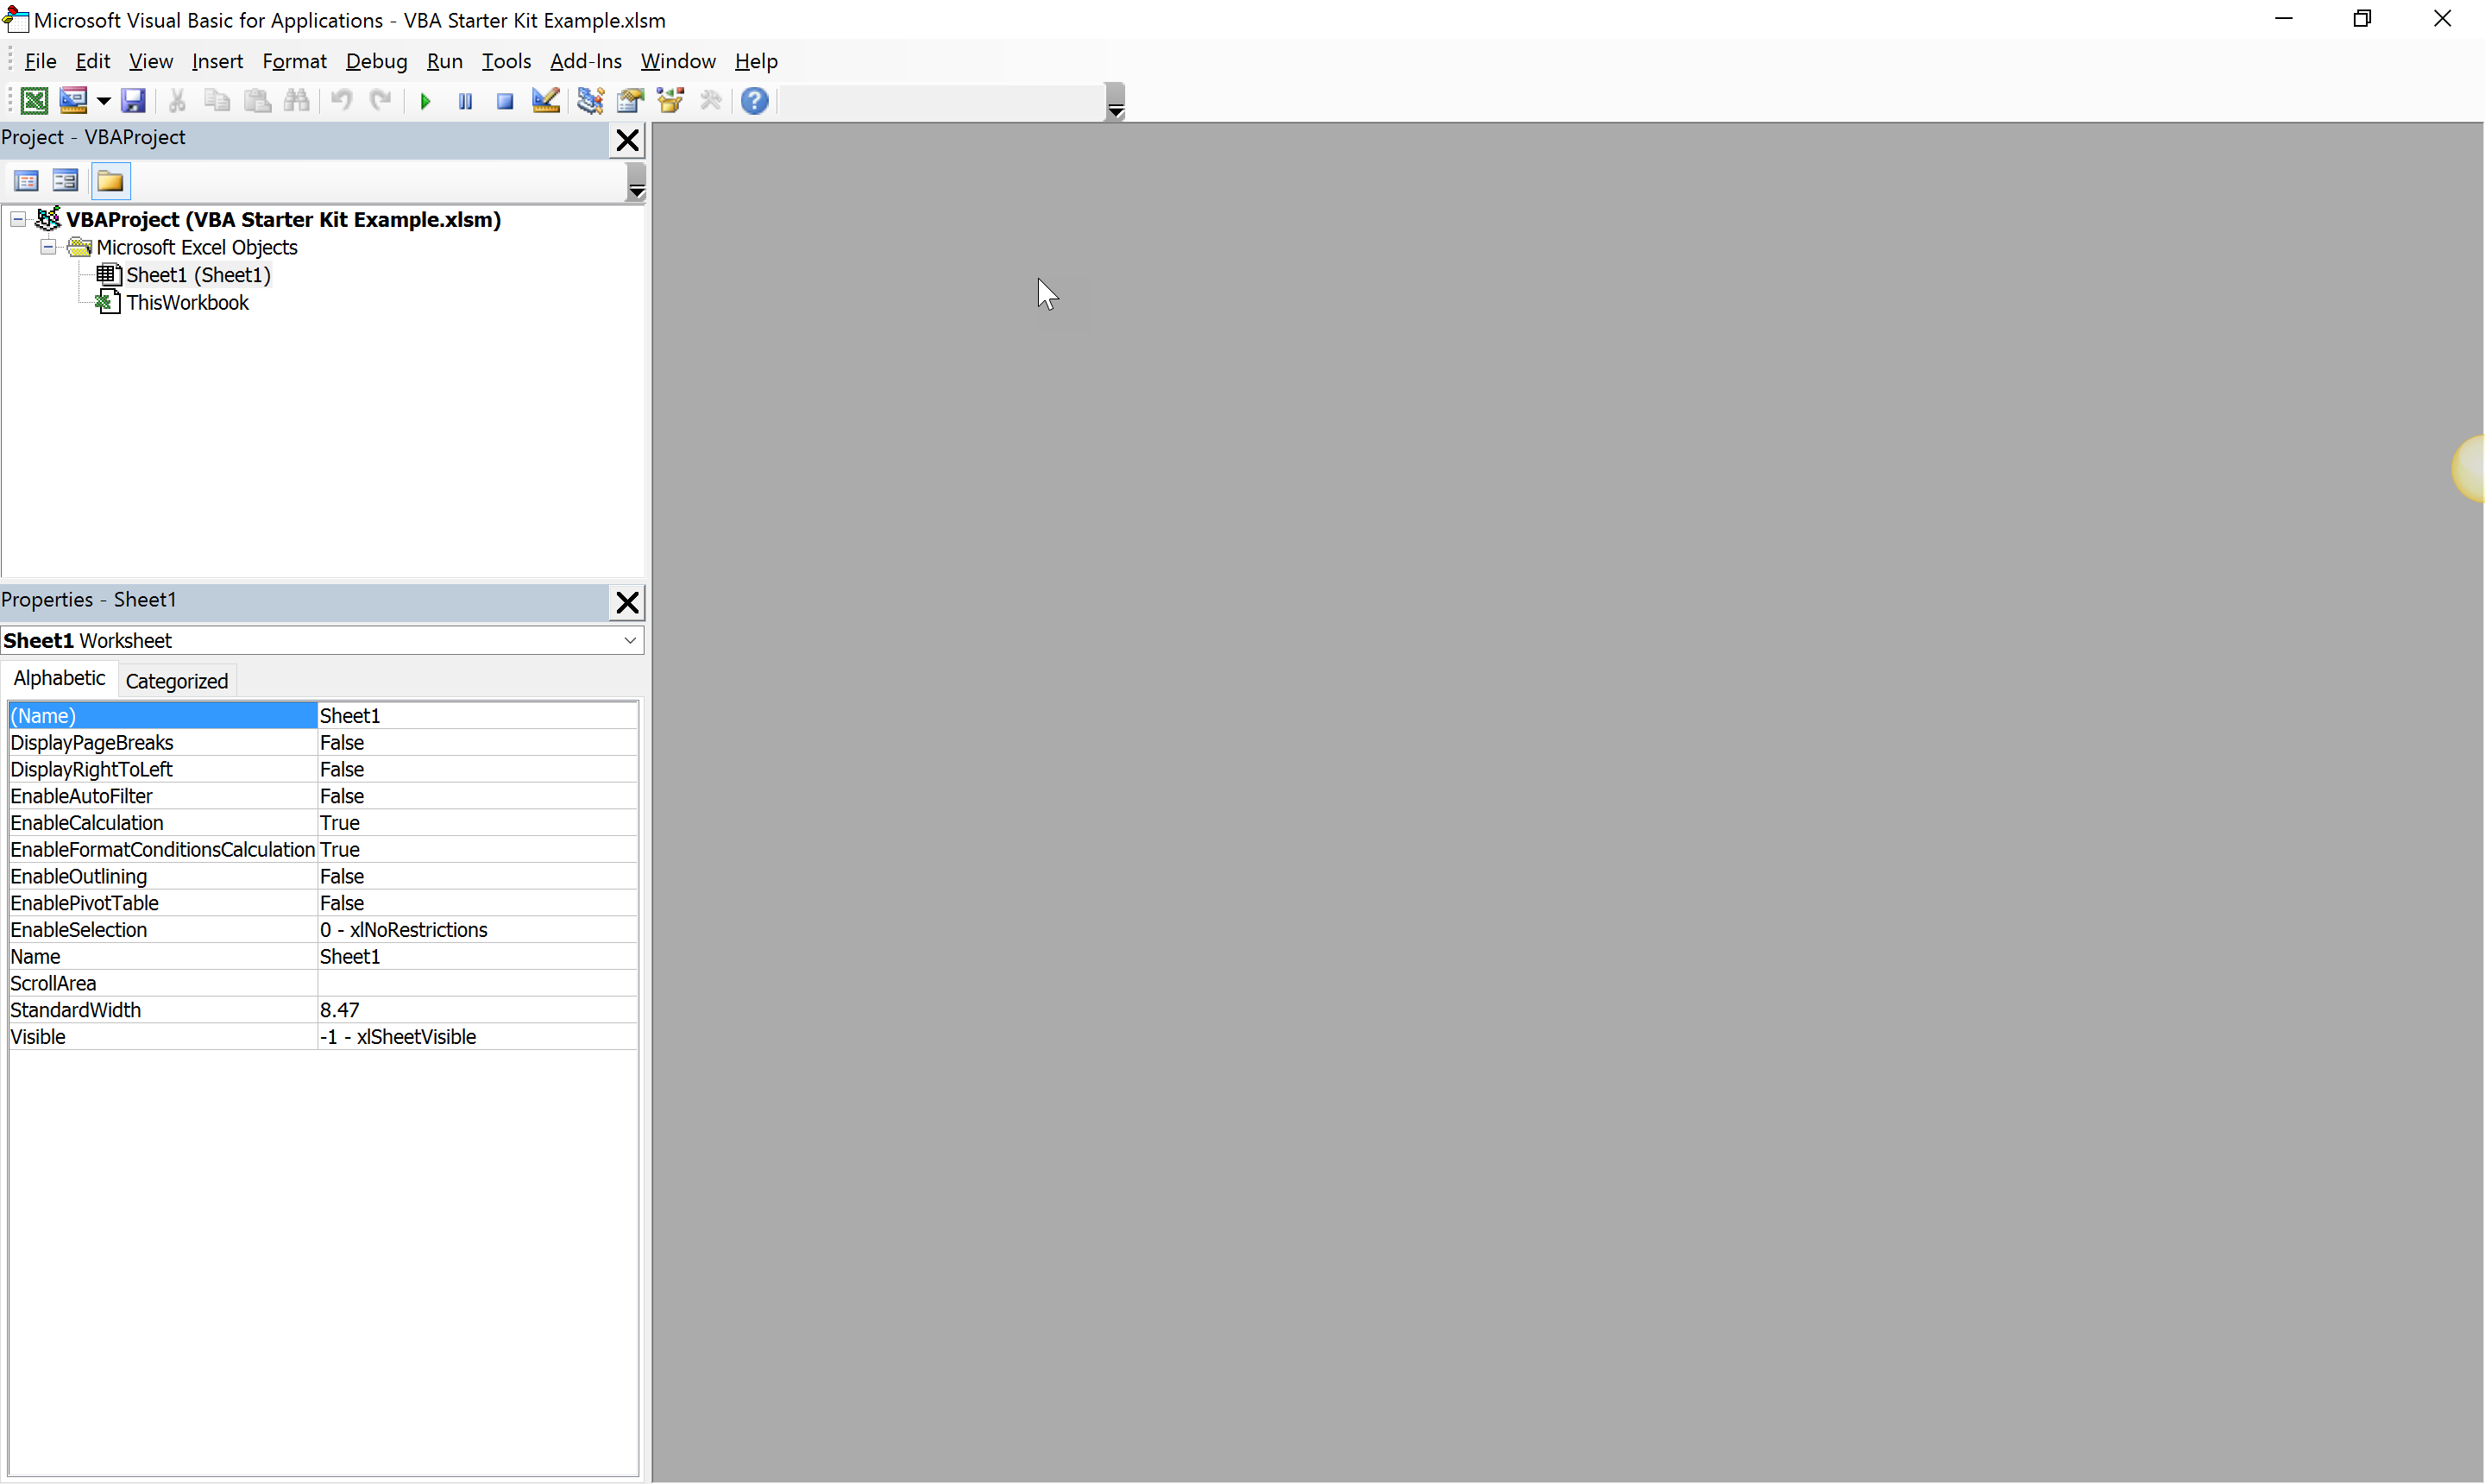
When you open the VBA code editor from within Microsoft Excel (alt + F11), you’ll see a new window that’s just gray space with a pane on the left. In this pane on the left, there are two sections. One is labeled “Project – VBA Project” and you’ll see the name of the workbook you opened the editor from there (in the example screenshot, this is “VBA Starter Kit Example.xlsm”). This is the project level for VBA. All the code you write under this project will be contained in the workbook file you save.
You’ll also see any other open workbooks and all the sheets that are currently in each workbook as well as a “ThisWorkbook” object. These are under the folder Microsoft Excel Objects. Each of these is considered an object. You can reference them by coding in the object name which we will example later.
More important than the code you write, is knowing where you need to place your code to achieve the desired result. You can write code within any Excel Object in your project by double clicking the object you want to interact with in the left-hand pane. Something very important to note is that code you write in the Sheet1 object, cannot reference data directly from Sheet2. You are operating within the Sheet1 object and your scope is limited to the data contained there. If you’re writing code to manipulate data on a single tab, this is fine to write it there. However, if you need to reference other tabs of data, you need to write code elsewhere.
One option is the “ThisWorkbook” object. When you write code in this section, you can reference any of the sheet objects in the workbook and can access all the data stored there.
Writing code in both locations is fine when working only within the scope of the workbook. Often, developers only use these sections to handle events that occur there. For example, you might write code that initiates when a user changes the value of a cell, double-clicks a cell, or otherwise interacts with a certain sheet. This is done at the sheet object level. If your code starts there, but shouldn’t be written there, where should you write it? This is where Modules, Forms, & Class Modules come in.
Often, you will be writing your code within modules only. Modules can interact with the workbook they’re stored in, all the sheets within that workbook, any other workbook and collection of sheets, as well as other Microsoft Office applications (check out this post for an example of referencing outside workbooks through a module). They can do more, but this is an introductory course. Suffice it to say that you can become a very good VBA developer if you only wrote code in modules.
Forms are great tools when you need to have the user interact with your code. For example, you might to have a user select a date range for your program to select data from that date range and then perform some action with it. A user might need to select a name from a dropdown list to generate a report for a specific employee. These actions are all possible using forms within your code.
Lastly, we come to Class Modules. As a beginner, you probably will not use class modules ever. I was writing code for several years before I found the need to use a class module. A class serves as the rules for how you interact with objects. If you were creating a tool to manage an employee roster, you could use a class to define how you interact with the new employee object you’re creating. You might set properties that, when someone inputs a new employee name, the name can’t be a number. Setting classes can get complex and as such we won’t cover it in this article.
На чтение 24 мин. Просмотров 22.7k.

Председатель Мао
Классовая борьба, одни классы побеждают, другие исключаются. Такова история
Содержание
- Краткое руководство по VBA Class Module
- Введение
- Почему мы используем объекты
- Преимущества использования объектов
- Недостатки использования объектов
- Создание простого Class Module
- Class Module VBA против обычных модулей VBA
- Части Class Module
- События Class Module
- Class Module. Пример 1
- Class Module. Пример 2
- Заключение
Краткое руководство по VBA Class Module
| Пункт | Пояснение |
| Class Module | Позволяет пользователю создавать свои собственные объекты. |
| Метод | Открытая функция или подпрограмма в Class Module . |
| Переменная | Переменная, объявленная в Class Module. |
| Свойство | Специальная функция / подпрограммы, которые ведут себя как переменные при использовании |
| Типы свойств | Get, Let и Set. |
| Событие — инициализация | Sub, который автоматически запускается при создании объекта Class Module. |
| Событие — завершение | Sub, который автоматически запускается при удалении объекта Class Module. |
| Объявление и создание — статический |
Dim o As New Class1 |
| Объявление и создание — динамический |
Dim o As Class1 Set o = New Class1 |
| Вызов подпрограммы Class Module |
o.WriteValues Total |
| Вызов функции Class Module | Amount = o.Calculate() |
| Использование свойства Class Module |
o.Amount = 1 Total = o.Amount |
Введение
Class Module VBA позволяют пользователю создавать свои собственные объекты. Если вы не знакомы с объектами, я настоятельно рекомендую вам сначала ознакомиться с моей статьей Все об объектах VBA Objects.
В таких языках, как C # и Java, классы используются для создания объектов. Class Module являются VBA-эквивалентом этих классов. Основное отличие состоит в том, что Class Module VBA имеют очень ограниченный тип наследования * по сравнению с классами на других языках. В VBA наследование работает аналогично интерфейсам ** в C # Java.
В VBA у нас есть встроенные объекты, такие как Collection, Workbook, Worksheet и так далее. Целью Class Module VBA является предоставление нам возможности создавать собственные объекты.
Давайте начнем эту статью с рассмотрения того, почему мы используем объекты в первую очередь.
*Наследование использует существующий класс для создания нового класса.
**Интерфейсы — это форма наследования, которая заставляет класс реализовывать специфические процедуры или свойства.
Почему мы используем объекты
Использование объектов позволяет нам создавать наши приложения так же, как мы используем строительные блоки.
Идея состоит в том, что код каждого объекта является автономным. Он полностью независим от любого другого кода в нашем приложении.
Это похоже на то, как все строится с использованием кирпичей Lego. Существует много различных типов компонентов Lego. Например, блок, руль и лазер — это разные вещи. Они ведут себя совершенно независимо друг от друга. Но мы можем соединить их вместе, чтобы создать здание, транспортное средство, космическую станцию и так далее.
Если вам все еще неясно, не волнуйтесь. В остальной части этой статьи мы разберем все это на простые термины.
Преимущества использования объектов
Рассматривая части нашего кода как блоки, мы получаем много больших преимуществ.
- Это позволяет нам создавать приложения по одному блоку за раз.
- Намного проще протестировать отдельные части приложения.
- Обновление кода не вызовет проблем в других частях приложения.
- Легко добавлять объекты между приложениями.

Недостатки использования объектов
У большинства вещей в жизни есть свои плюсы и минусы. Использование Class Module VBA ничем не отличается. Ниже приведены недостатки использования Class Module для создания объектов.
- Первоначально для создания приложений требуется больше времени *.
- Не всегда легко четко определить, что такое объект.
- Люди, плохо знакомые с классами и предметами, могут сначала найти их трудными для понимания.
*Если вы создаете приложение с использованием объектов, на его создание уйдет больше времени, поскольку вам придется тратить больше времени на планирование и проектирование. Однако в долгосрочной перспективе это сэкономит вам огромное количество времени. Вашим кодом будет легче управлять, обновлять и использовать повторно.
Создание простого Class Module
Давайте рассмотрим очень простой пример создания Class Module и использования его в нашем коде.
Чтобы создать Class Module, мы щелкаем правой кнопкой мыши в окне Project и затем выбираем Insert и Class Module.

Наш новый класс называется Class1. Мы можем изменить имя в окне свойств, как показано на следующем скриншоте.

Давайте изменим имя модуля класса на clsCustomer. Затем мы добавим переменную в Class Module следующим образом.

Теперь мы можем использовать этот Class Module в любом модуле (стандартном или классе) в нашей рабочей книге. Например:
' Создать объект из Class Module
Dim oCustomer As New clsCustomer

' Установите имя клиента
oCustomer.Name = "Иван"

' Напечатайте имя в Immediate Window(Ctrl + G)
Debug.Print oCustomer.Name
Class Module против Объектов
Люди, которые плохо знакомы с использованием классов и модулей классов VBA, часто путаются между тем, что такое класс и что является объектом.
Давайте посмотрим на пример из реального мира. Думайте о предмете массового производства как кофейная кружка. Дизайн кружки создается в первую очередь. Затем тысячи кофейных кружек создаются из этого дизайна.
Это похоже на работу Class Module и объектов.
Class Module можно рассматривать как дизайн.
Объект можно рассматривать как элемент, созданный из дизайна.
Ключевое слово New в VBA — это то, что мы используем для создания объекта из Class Module. Например:
' Создание объектов с использованием New
Dim oItem As New Class1
Dim oCustomer1 As New clsCustomer
Dim coll As New Collection
Примечание. Мы не используем New для таких элементов, как Workbooks и Worksheets. См. Когда New не требуется для получения дополнительной информации.
Class Module VBA против обычных модулей VBA
Написание кода в Class Module почти такое же, как написание кода в обычном модуле. Мы можем использовать тот же код, который мы используем в обычных модулях. То, как этот код используется, сильно отличается.
Давайте посмотрим на два основных различия между классом и обычным модулем. Это часто вызывает путаницу у новых пользователей.
Разница 1 — Как используются модули
Если вы хотите использовать подпрограмму / функцию и т.д. Из
Class Module, вы должны сначала создать объект.
Например, представьте, что у нас есть два идентичных Sub PrintCustomer. Один находится в Class Module, а другой — в обычном модуле…
' CLASS MODULE Код - clsCustomer
Public Sub PrintCustomer()
    Debug.Print "Пример вывода"
End Sub
' Код обычного модуля
Public Sub PrintCustomer()
    Debug.Print "Пример вывода"
End Sub
Вы заметите, что коды абсолютно одинаковые.
Чтобы использовать подпрограмму PrintCustomer из Class Module, вы должны сначала создать объект этого типа
' Другой модуль
Sub UseCustomer()

    Dim oCust As New clsCustomer
    oCust.PrintCustomer

End Sub
Чтобы использовать PrintCustomer из обычного модуля, вы можете вызвать его напрямую
' Другой модуль
Sub UseCustomer()

    PrintCustomer

End Sub
Разница 2 — Количество копий
Когда вы создаете переменную в обычном модуле, существует только одна ее копия. Для Class Module существует одна копия переменной для каждого создаваемого вами объекта.
Например, представьте, что мы создаем переменную StudentName как в классе, так и в обычном модуле.
' Обычный модуль
Public StudentName As String
' CLASS MODULE
Public StudentName As String
Для обычной переменной модуля в нашем приложении будет только одна копия этой переменной.
Для Class Module новая копия переменной StudentName создается каждый раз, когда создается новый объект.
Dim student1 As New clsStudent
Dim student2 As New clsStudent

student1.StudentName = "Петр"
student2.StudentName = "Василий"
Когда вы полностью поймете Class Module VBA, эти различия будут казаться очевидными.
Части Class Module
В Class Module есть четыре разных предмета. Это:
- Методы — функции / подводные лодки.
- Переменные-члены — переменные.
- Свойства — типы функций / подпрограмм, которые ведут себя как переменные.
- События — подводные лодки, которые запускаются событием
Вы можете видеть, что они все или функции, подпрограммы или переменные.
Давайте кратко рассмотрим некоторые примеры, прежде чем разбираться с ними по очереди.
' CLASS MODULE Код

' Переменная
Private dBalance As Double

' Свойства
Property Get Balance() As Double
    Balance = dBalance
End Property

Property Let Balance(dValue As Double)
    dBalance = dValue
End Property

' Событие - срабатывает при создании класса
Private Sub Class_Initialize()
    dBalance = 100
End Sub

' Методы
Public Sub Withdraw(dAmount As Double)
    dBalance = dBalance - dAmount
End Sub

Public Sub Deposit(dAmount As Double)
    dBalance = dBalance + dAmount
End Sub
Теперь, когда мы увидели примеры, давайте рассмотрим каждый из них по очереди.
Методы Class Module
Методы относятся к процедурам класса. В VBA есть процедуры и функции. Как и переменные-члены, они могут быть Public или Private.
Давайте посмотрим на пример:
' CLASS MODULE Код

' Имя класса: clsSimple

' Публичные процедуры могут быть вызваны извне объекта
Public Sub PrintText(sText As String)
    Debug.Print sText
End Sub

Public Function Calculate(dAmount As Double) As Double
    Calculate = dAmount - GetDeduction
End Function

' частные процедуры могут быть вызваны только из Class Module
Private Function GetDeduction() As Double
    GetDeduction = 2.78
End Function
Мы можем использовать Class Module clsSimple следующим образом
Sub ClassMembers()

    Dim oSimple As New clsSimple

    oSimple.PrintText "Hello"

    Dim dTotal As Double
    dTotal = oSimple.Calculate(22.44)

    Debug.Print dTotal

End Sub
Переменные-члены Class Module
Переменная-член очень похожа на обычную переменную, которую мы используем в VBA. Разница в том, что мы используем Public или Private вместо Dim.
' CLASS MODULE Код

Private Balance As Double
Public AccountID As String
Примечание: Dim и Private делают одно и то же, но соглашение заключается в том, чтобы использовать Dim в sub / functions и использовать Private за пределами sub / functions.
Ключевое слово Public означает, что переменная может быть доступна вне Class Module. Например:
Dim oAccount As New clsAccount

' Действительный - AccountID открыт
oAccount.AccountID = "499789"

' Ошибка - Баланс является частным
oAccount.Balance = 678.90
В приведенном выше примере мы не можем получить доступ к Балансу, потому что он объявлен, как Частный. Мы можем использовать только приватную переменную внутри Class Module. Мы можем использовать функцию / подпрограмму в Class Module, например:
' CLASS MODULE Код
Private Balance As Double

Public Sub SetBalance()
    Balance = 100
    Debug.Print Balance
End Sub
Считается плохой практикой иметь публичные переменные-члены. Это потому, что вы позволяете коду вне объекта мешать работе класса. Цель использования классов состоит в том, чтобы скрыть происходящее от вызывающего.
Чтобы пользователь не общался напрямую с нашими переменными-членами, мы используем Свойства.
Свойства Class Module
- Get — возвращает объект или значение из класса
- Let — устанавливает значение в классе
- Set — устанавливает объект в классе
Формат свойств VBA
Обычный формат для свойств выглядит следующим образом:
Public Property Get () As Type
End Property

Public Property Let (varname As Type )
End Property

Public Property Set (varname As Type )
End Property
Мы уже видели, что свойство это просто тип sub. Назначение свойства — позволить вызывающей стороне получать и устанавливать значения.
Почему мы используем свойства
Почему мы не можем просто сделать переменные общедоступными и использовать их напрямую?
Давайте объясним с некоторыми примерами. Представьте, что у нас есть класс, который ведет список стран. Мы могли бы сохранить список в виде массива:
' Использовать массив для хранения стран
Public arrCountries As Variant

' Установить размер массива при инициализации класса
Private Sub Class_Initialize()
    ReDim arrCountries(1 To 1000)
End Sub
Когда пользователь хочет получить количество стран в списке, он может сделать это:
' Код обычного модуля
Dim oCountry As New clsCountry

' Получить количество элементов
NumCountries = UBound(oCountry.arrCountries) + 1
С приведенным выше кодом есть две основные проблемы
- Чтобы узнать количество стран, вам необходимо знать, как хранится список, например, Массив.
- Если мы изменим массив на коллекцию, нам нужно будет изменить весь код, который напрямую ссылается на массив
Для решения этих проблем мы можем создать функцию, возвращающую количество стран:
' CLASS MODULE Код - clsCountryList
' Массив
Private arrCountries() As String

Public Function Count() As Long
    Count = UBound(arrCountries) + 1
End Function
Затем мы используем это так
' Код модуля
Dim oCountries As New clsCountries

Debug.Print "Количество стран " & oCountries.Count
Этот код решает две проблемы, которые мы перечислили выше. Мы можем изменить наш массив на коллекцию, и код вызывающего абонента все равно будет работать. Например:
' CLASS MODULE Код
' Коллекция
Private collCountries() As Collection

Public Function Count() As Long
    Count = collCountries.Count
End Function
Вызывающий не замечает, как хранятся страны. Все, что нужно знать вызывающему — это то, что функция Count будет возвращать количество стран.
Как мы только что видели, подпрограмма или функция обеспечивает решение вышеуказанных проблем. Однако использование свойства может обеспечить более элегантное решение.
Использование свойства вместо Function/Sub
Вместо создания функции Count мы можем создать свойство Count. Как вы можете видеть ниже, они очень похожи:
' Замени это
Public Function Count() As Long
    Count = UBound(arrCountries) + 1
End Function

' На это
Property Get Count() As Long
    Count = UBound(arrCountries) + 1
End Function
В этом сценарии нет большой разницы между использованием свойства и использованием функции. Тем не менее, есть различия. Обычно мы создаем свойство Get и Let так:
' CLASS MODULE Код - clsAccount
Private dTotalCost As Double

Property Get TotalCost() As Long
     TotalCost= dTotalCost
End Property

Property Let TotalCost(dValue As Long)
     dTotalCost = dValue
End Property
Использование Let позволяет нам рассматривать свойство, как переменную. Таким образом, мы можем сделать это:
Второе отличие состоит в том, что использование Let и Get позволяет нам использовать одно и то же имя при обращении к свойству Get или Let. Таким образом, мы можем использовать свойство, как переменную. Это цель использования свойств над подпрограммой и функцией.
oAccount.TotalCost = 6
dValue = oAccount.TotalCost
Если мы использовали функцию и подпрограмму, то мы не можем получить поведение переменной. Вместо этого мы должны вызвать две разные процедуры, например:
oAccount.SetTotalCost 6
dValue = oAccount.GetTotalCost
Вы также можете видеть, что когда мы использовали Let, мы можем присвоить значение, как переменную. Когда мы используем SetTotalCost, мы должны были передать его в качестве параметра.
О Свойствах в двух словах
- Свойство скрывает детали реализации от вызывающей стороны.
- Свойство позволяет нам обеспечивать то же поведение, что и переменная.
Типы свойств VBA
Есть три типа свойств. Мы уже видели Get и Let. Но мы еще не рассмотрели Set.
Set похож на Let, но он используется для объекта (подробнее об этом см. Назначение объектов VBA).
Первоначально в Visual Basic ключевое слово Let использовалось для назначения переменной. На самом деле, мы можем использовать его, как захотим.
' Эти строки эквивалентны
Let a = 7
a = 7
Поэтому мы используем Let, чтобы присвоить значение переменной, и мы используем Set, чтобы назначить объект переменной объекта.
' Используем Let
Dim a As Long
Let a = 7

' Используем Set
Dim coll1 As Collection, coll2 As Collection
Set coll1 = New Collection
Set coll2 = coll1
- Let используется для присвоения значения базовому типу переменной.
- Set используется для назначения объекта переменной объекта
В следующем примере мы используем свойства Get и Let для строковой переменной
' CLASS MODULE Код

' Свойства SET/LET для переменной
Private m_sName As String

' свойства Get/Let
Property Get Name() As String
    Name = m_sName
End Property

Property Let Name(sName As String)
    m_sName = sName
End Property
Затем мы можем использовать свойства Name так:
Sub TestLetSet()

    Dim sName As String
    Dim coll As New Collection
    Dim oCurrency As New clsCurrency

    ' Свойство Let
    oCurrency.Name = "USD"

    ' Свойство Get
    sName = oCurrency.Name

End Sub
В следующем примере мы используем свойства Get и Set для переменной объекта
' CLASS MODULE Код

Private m_collPrices As Collection

' Свойства Get/Set
Property Get Prices() As Collection
    Set Prices = m_collPrices
End Property

Property Set Prices(collPrices As Collection)
    Set m_collPrices = collPrices
End Property
Затем мы можем использовать свойства так:
Sub TestLetSet()

    Dim coll1 As New Collection
    Dim oCurrency As New clsCurrency

    ' Свойство Set
    Set oCurrency.Prices = coll1

    ' Свойство Get
    Dim coll2 As Collection
    Set Coll2 = oCurrency.Prices

End Sub
Мы используем свойство Get, чтобы вернуть значения для обоих элементов. Обратите внимание, что даже если мы используем свойство Get для возврата коллекции, нам все равно нужно использовать ключевое слово Set для его назначения.
События Class Module
Class Module имеет два события:
- Инициализировать — происходит при создании нового объекта класса.
- Завершить — происходит, когда объект класса удален.
В объектно-ориентированных языках, таких как C ++, эти события называются Конструктором и Деструктором. В большинстве языков вы можете передавать параметры конструктору, но не в VBA. Мы можем использовать Class Factory, чтобы обойти эту проблему, как показано ниже.
Инициализация
Давайте создадим очень простой Class Module с именем clsSimple с событиями Initialize и Terminate.
' CLASS MODULE Код
Private Sub Class_Initialize()
    MsgBox "Класс инициализируется"
End Sub

Private Sub Class_Terminate()
    MsgBox "Класс прекращается"
End Sub

Public Sub PrintHello()
    Debug.Print "Привет"
End Sub
В следующем примере мы используем Dim и New для создания объекта.
В этом случае oSimple не создается, пока мы не ссылаемся на него в первый раз, например:
Sub ClassEventsInit2()

    Dim oSimple As New clsSimple

    ' Инициализация происходит здесь
    oSimple.PrintHello

End Sub
Когда мы используем Set и New вместе, поведение отличается. В этом случае объект создается при использовании Set, например:
Sub ClassEventsInit()

    Dim oSimple As clsSimple

    ' Инициализация происходит здесь
    Set oSimple = New clsSimple

    oSimple.PrintHello

End Sub
Примечание: Для получения дополнительной информации о различиях между использованием New с Dim и использованием New с Set см. Тонкие различия Dim и Set
Как я уже говорил ранее, вы не можете передать параметр в Initialize. Если вам нужно сделать это, вам нужна функция, чтобы сначала создать объект.
' CLASS MODULE - clsSimple
Public Sub Init(Price As Double)

End Sub

' обычный модуль
Public Sub Test()

    ' использование функции CreateSimpleObject
    Dim oSimple As clsSimple
    Set oSimple = CreateSimpleObject(199.99)

End Sub

Public Function CreateSimpleObject(Price As Double) As clsSimple

    Dim oSimple As New clsSimple
    oSimple.Init Price

    Set CreateSimpleObject = oSimple

End Function
Мы расширим CreateSimpleObject в Примере 2, чтобы создать фабрику классов.
Завершение
Событие Terminate наступает при удалении класса. Это происходит, когда мы устанавливаем значение Nothing.
Sub ClassEventsTerm()

    Dim oSimple As clsSimple
    Set oSimple = New clsSimple

    ' Завершение происходит здесь
    Set oSimple = Nothing

End Sub
Если мы не установим объект в Nothing, VBA автоматически удалит его, когда он выйдет из области видимости.
Это означает, что если мы создадим объект в процедуре, когда эта процедура завершится, VBA удалит все созданные объекты.
Sub ClassEventsTerm2()

    Dim oSimple As New clsSimple

    ' Инициализация происходит здесь
    oSimple.PrintHello

   ' oSimple удаляется, когда мы выходим из этого Sub-вызова Terminate
End Sub
Class Module. Пример 1
В этом примере мы рассмотрим очень распространенное использование Class Module.
Представьте, что у нас есть следующие данные:

Мы хотим читать альбомы по разным годам, а затем создавать различные отчеты.
Мы могли бы использовать для этого 2D-массив или коллекцию коллекций, например:
For i = 2 To rg.Rows.Count

    Year = rg.Cells(i, 3)
    If startYear <= Year And endYear >= Year Then

        ' Создать новую коллекцию для каждой строки
        Set rowColl = New Collect

        ' Добавить исполнителя
        rowColl.Add rg.Cells(i, 1).Value
        ' Добавить заголовок
        rowColl.Add rg.Cells(i, 2).Value

        ' и так далее

        ' Добавить коллекцию строк в основную коллекцию
        coll.Add rowColl

    End If

Next i
Как вы можете себе представить, этот код очень быстро запутался.

К счастью для нас, у нас есть Class Module VBA, чтобы сделать нашу жизнь проще. Мы можем создать Class Module для хранения элементов.
' clsAlbum class module
Private m_sArtist As String
Private m_sTitle As String
Private m_sYear As String
Private m_sGenre As String
Private m_sSales As String

' Свойства
Public Property Get Artist() As String
    Artist = m_sArtist
End Property
Public Property Let Artist(ByVal sArtist As String)
    m_sArtist = sArtist
End Property

' и т.д.
Каждый раз, когда мы хотим добавить запись, мы можем сделать это следующим образом:
' Объявить переменную
Dim oAlbum As clsAlbum

' Создать новый альбом
Set oAlbum = New clsAlbum

' Добавить детали
oAlbum.Artist = rg.Cells(i, 1)
oAlbum.Title = rg.Cells(i, 2)
oAlbum.Year = rg.Cells(i, 3)
oAlbum.Genre = rg.Cells(i, 4)
oAlbum.Sales = rg.Cells(i, 5)

' Добавить объект альбома в коллекцию
coll.Add oAlbum
Как видите, это делает наш код более читабельным. Понятно, для чего используются Artist, Title и т.д.
Затем мы можем легко использовать эти данные для создания отчетов, записи в файлы и т.д.
Sub PrintAlbum(coll As Collection)

    Dim oAlbum As clsAlbum

    For Each oAlbum In coll
        ' Распечатайте название и исполнителя для каждого альбома
        Debug.Print oAlbum.Title, oAlbum.Artist
    Next

End Sub
Ниже приведен полный код для этого примера
Sub CreateReport()

    Dim coll As Collection
    ' читать данные
    Set coll = ReadAlbums(1990, 2001)

    ' Распечатать информацию об альбоме
    PrintAlbum coll

    ' Распечатать общий объем продаж
    PrintTotalSales coll

End Sub

Function ReadAlbums(startYear As Long, endYear As Long) _
              As Collection

    Dim rg As Range
    Set rg = Sheet1.Range("A1").CurrentRegion

    ' Создать коллекцию для хранения альбомов
    Dim coll As New Collection
    Dim oAlbum As clsAlbum

    Dim i As Long, Year As Long
    For i = 2 To rg.Rows.Count

        Year = rg.Cells(i, 3)
        If startYear <= Year And endYear >= Year Then
            ' Создать новый альбом
            Set oAlbum = New clsAlbum
            ' Добавить детали
            oAlbum.Artist = rg.Cells(i, 1)
            oAlbum.Title = rg.Cells(i, 2)
            oAlbum.Year = Year
            oAlbum.Genre = rg.Cells(i, 4)
            oAlbum.sales = rg.Cells(i, 5)
            ' Добавить объект альбома в коллекцию
            coll.Add oAlbum
        End If

    Next i

    Set ReadAlbums = coll

End Function

Sub PrintAlbum(coll As Collection)

    Dim oAlbum As clsAlbum
    For Each oAlbum In coll
        Debug.Print oAlbum.Title, oAlbum.Artist
    Next

End Sub

Sub PrintTotalSales(coll As Collection)

    Dim oAlbum As clsAlbum, sales As Double
    For Each oAlbum In coll
        sales = sales + oAlbum.sales
    Next

    Debug.Print "Общее количество продаж составляет " & sales

End Sub
Class Module. Пример 2
В этом примере мы пойдем дальше. Мы собираемся взглянуть на некоторые хитрые приемы при использовании объектов.
Представьте, что у вас есть список продуктов, как на картинке ниже.

Продукты имеют разные поля, поэтому нам нужно использовать разные модули классов для каждого типа продуктов. Один тип для строки Книги, один тип для строки Фильмы.
Сначала мы создадим наши модули классов. Они очень похожи для обоих типов продуктов.
' CLASS MODULE - clsBook
' Переменные
Private m_Title As String
Private m_Year As Long

' Свойства
Property Get ItemType() As String
    ItemType = "Book"
End Property
Property Get Title() As String
    Title = m_Title
End Property
Property Get Year() As Long
    Year = m_Year
End Property

' Методы
Public Sub Init(rg As Range)
    m_Title = rg.Cells(1, 2)
    m_Year = CLng(rg.Cells(1, 4))
End Sub

Public Sub PrintToImmediate()
    Debug.Print ItemType, m_Title, m_Year
End Sub
' CLASS MODULE - clsFilm
' Переменные
Private m_Title As String
Private m_Year As Long

' Свойства
Property Get ItemType() As String
    ItemType = "Film"
End Property
Property Get Title() As String
    Title = m_Title
End Property
Property Get Year() As Long
    Year = m_Year
End Property

' Методы
Sub Init(rg As Range)
    m_Title = rg.Cells(1, 2)
    m_Year = CLng(rg.Cells(1, 5))
End Sub

Public Sub PrintToImmediate()
    Debug.Print ItemType, m_Title, m_Year
End Sub
Как видите, единственная реальная разница — это инициализация.
Когда мы читаем каждую запись, нам нужно определить, книга это или фильм. Затем мы создаем соответствующий объект. Представьте, что нам нужно создать переменную для каждого типа, например:
' Для каждого типа требуется одна переменная
Dim oBook As clsBook
Dim oFilm As clsFilm

' Если Книга сделать это
Set oBook = New clsBook

' Если фильм сделать это
Set oFilm = New clsFilm
Если бы у нас было много разных типов, это было бы действительно очень грязно. Хорошей новостью является то, что нам нужно использовать только одну переменную!
В VBA мы можем объявить переменную как вариант. Когда мы используем Variant, мы, по сути, говорим: «Мы определим тип переменной во время выполнения кода».
Это очень полезно при работе с объектами и позволяет нам избежать использования одной переменной, например:
' Требуется только одна переменная
Dim oItem As Variant

' Если книга, указать тип clsBook
Set oItem = New clsBook

' Если фильм, указать тип clsFilm
Set oItem = New clsFilm
Это действительно полезно, так как нам нужна только одна переменная, независимо от того, сколько у нас объектов.
Второе преимущество использования Variant заключается в следующем. Если у каждого Class Module есть подпрограмма / функция с одинаковым именем и параметрами, мы можем использовать одну и ту же переменную для ее вызова.
Представьте, что в clsBook есть функция InitBook, а в clsFilm есть функция InitFilm. Нам нужно сделать это:
' Если clsBook
If Type = "Book" Then
    oItem.InitBook
ElseIf Type = "Film" Then
    oItem.InitFilm
Однако, если они имеют одинаковое имя, например, Init, мы можем заменить строки кода If ElseIf одной строкой:
  ' это вызовет подпрограмму Init любого типа oItem, установленного в
    oItem.Init
Теперь мы можем создать функцию для создания соответствующего объекта. В объектно-ориентированном программировании мы имеем то, что называется фабрикой классов. Это просто функция, которая создает объект на основе заданного типа.
Ранее мы видели, что событие Initialize не принимает параметры. Мы можем позвонить в Init на фабрике классов, чтобы обойти эту проблему.
Полный код для функции ClassFactory здесь:
Function ClassFactory(rg As Range) As Variant

    ' Получить тип продукта
    Dim sType As String
    sType = rg.Cells(1, 1)

    ' Создать объект на основе типа
    Dim oItem As Variant
    Select Case sType

        Case "Book":
            Set oItem = New clsBook
        Case "Film":
            Set oItem = New clsFilm
        Case Else
            MsgBox "Invalid type"

    End Select

    ' Разобрать поля на правильные переменные класса
    oItem.Init rg

    ' Вернуть объект продукта
    Set ClassFactory = oItem

End Function
Это следующее наше начало. В этом разделе мы читаем таблицу и передаем диапазон в ClassFactory.
Создает объект, передает диапазон в метод Parse объекта. Затем он возвращает объект, который мы добавляем в нашу коллекцию.
Sub ReadProducts()

    ' Создать коллекцию
    Dim coll As New Collection
    Dim product As Variant

    Dim rg As Range


    ' Читайте продукты с листа
    Dim i As Long
    For i = 1 To 2
        Set rg = Sheet1.Range("A" & i & ":E" & i)
        Set product = ClassFactory(rg)
        coll.Add product
    Next

    ' Распечатать информацию о продукте в Immediate Window(Ctrl + G)
    PrintCollection coll

End Sub
Мы также можем использовать вариант объекта для печати элементов. Пока оба объекта имеют подпрограмму с одинаковым именем и параметрами (например, PrintToImmediate), мы можем вызывать ее, используя тип Variant.
Public Sub PrintCollection(ByRef coll As Collection)

    Dim v As Variant
    For Each v In coll
        ' Печать элементов
        v.PrintToImmediate
    Next

End Sub
Заключение
На этом я заканчиваю свою статью о Class Module VBA. В этой статье мы рассмотрели части Class Module VBA и два примера, в которых вы могли бы их использовать.
Важно понимать, что классы и объекты — это обширная тема. Существует множество типов объектов, которые вы можете создавать, и способы их использования.
Если вы планируете использовать Class Module, то я советую начать с основ и ознакомиться с тем, как создать простой. Как только вы освоите основы, вам будет намного легче переходить к более сложным сценариям.
In this Article
- VBA Class Modules – Introduction
- Class Modules vs. Modules
- Advantages of Using Class Modules
- Disadvantages of Using Class Modules
- Inserting a Class Module
- Creating an Object Item
- Creating a Collection
- Using Your New Object
- Summary of Creating an Object Using a Class Module
- Using a Class Module to Create a Variable Repository
- Turning Your Object into an Add-In
This tutorial will teach you about Class Modules in VBA. You’ll learn what they are and how to use them.
VBA Class Modules – Introduction
When you insert modules into the Visual Basic Editor (VBE) in order to enter your code, you may have noticed that you can also insert what is called a ‘Class Module’.
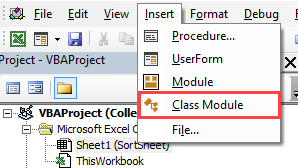
Class Modules vs. Modules
The class modules work in a very different way to the ordinary modules in that they facilitate creating a Component Object Model (COM) which can then be used within your normal VBA code
Effectively, you create an object which works in the same way as a built in Excel object such as ‘Worksheets’. In the Worksheets Object, you have a number of properties and methods which allow you to get the number of worksheets within a workbook or each individual name of a worksheet, or numerous other information
When you create a new Object in this way, you are creating a building block which can be used anywhere within VBA. The Object has a number of properties and methods that can be accessed by your VBA code from anywhere within the workbook without having to keep re-writing the code over again.
As well as referring to your new object from a standard VBA module, you can also use it in the code behind a UserForm that is part of your custom application
You can also use it where you have placed Active X controls onto a worksheet, such as a command button or a drop down. These controls all use VBA, and your new object can easily be incorporated into the event code for these controls.
You can also turn your object into an Excel add-in. Your object will automatically be available to other users who have that add-in loaded. This adds your own multi-tier architecture to your Excel application
Excel is a multi-tiered application. There is the client services layer, which drives the actual worksheet window that that the user is familiar with. The Excel object model is the next layer underneath. Press F2 in a VBA module and you will be able to see the huge number of objects and members of those objects that are the engine of Excel. Note that your new object will also be displayed here.
Finally, underneath all of this, you have the data services layer which holds all the data that you have entered into the worksheets and cells. Excel accesses this using the Excel Object model.

Creating a Class Module allows you to extend the Excel Object Module with your own custom objects and members
This article explains to you how you to create a simple hierarchy of objects using Class Modules.
Advantages of Using Class Modules
- You can develop a robust building block which can be used in any number of different Excel applications
- Once it is thoroughly tested, then is can be relied on to always produce the correct results in the same way as the built-in Excel objects
- If updates are made to code elsewhere in the application, the new object will still continue to work in the same way
- You can use your new object in other Excel applications as an add-in
- The objects can be re-used in other applications and helps in debugging
Disadvantages of Using Class Modules
- They can be difficult to create and understand.
- Naming conventions are very important because this is what you will see when use your object within a normal module.
- If you have not created a class module before, they can be difficult to understand and there is a steep learning curve
- Impossible to make changes at run-time – you have to re-set the project.
- If Properties and Private Variables have the same name then infinite loops can occur resulting in errors
Inserting a Class Module
Select Insert | Class Module from the VBE (Visual Basic Editor) menu. The new Class Module will automatically be called ‘Class 1’, but this needs to be changed immediately to the name that you are going to use for your object
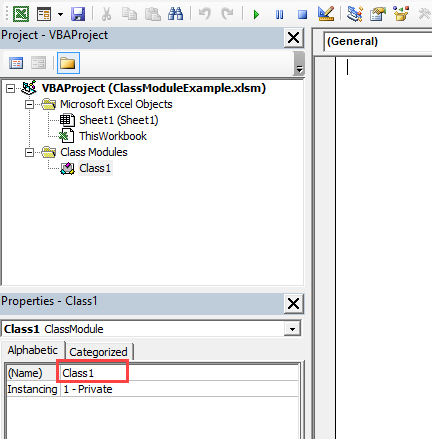
You change the name in the Properties window where the arrow is pointing. You simply type in your new name, and this will change in the Class Modules collection
If the Properties window is not visible, then select View | Properties on the VBE menu or press F4
Call your new class module ‘MyItem’ and double click the name in the tree-view in the Project Explorer to display the code window for it.
Creating an Object Item
This example will create a top-level object called ‘MyItems’ with a member object below it called ‘MyItem’ which will hold the individual data for each item. Once created it will work in the same way as a built in Excel Object. For example, there is an object called ‘Worksheets’ which is a collection of each worksheet within your workbook. There is also an object called ‘Sheet’ which represents each individual worksheet within your workbook, and holds all the properties and methods for each worksheet. This object relates to the ‘Worksheets’ collection object.
You can iterate through the ‘Worksheets’ collection, viewing each ‘Sheet’ in turn. In the same way you will be able to iterate through the ‘MyItems’ collection viewing the properties that you created in the ‘Myitem’ member.
The first thing to do is to create the sub object for the member level which will hold the actual items within the collection of the top-level object. This is the equivalent of the members (e.g. name, visible, count) within the ‘Sheet’ object in Excel. This code is entered into the class module called ‘MyItem’
Class modules have Properties and Methods. Properties are effectively like variables, in that they hold values of data like variables, and Methods are like sub routines or functions.
In the sub object we are going to create two properties for the object – Item and Detail
Initially two string variables need to be declared to hold the values for the properties:
Private mItem As String
Private mDetail As String
These need to be declared in the Declarations section at the top of the code for the class module so that they can be used in all sub routines throughout the module
They need to be given unique names to make them different from the properties that we are going to create, so an ‘m’ (for member) has been put in front of each name.
The variables are declared as Private so they cannot be seen by anyone using the object. They are working variables for use within the object code and are not there as part of the final object.
The next step is to set up code to give access to the two properties. You do this by means of a Property Let and a Property Get statement for each property. These must be Public otherwise the top-level object will not have any visible properties
Public Property Let Item(vdata As String)
      mItem = vdata
End Property

Public Property Get Item () As String
      Item = mItem
End Property

Public Property Let Detail (vdata As String)
      mDetail = vdata
End Property

Public Property Get Detail () As String
      Detail = mDetail
End Property
This code creates the means to read and write values to the two properties (Item and Detail) using the two private variables that were defined in the declarations section of the module.
The ‘vdata’ parameter is used to pass data to the property concerned.
It is important that each property has a ‘Let’ and ‘Get’ statement and that the property name is the same in each case. You could end up with two different properties if miss-spelt – one that you can read from and one that you can write to!
To help with creating this code, you can use Insert | Procedure on the VBE menu to create a code skeleton which will create the initial code for the ‘Get’ and ‘Let’ properties for a given property name
This will display a pop-up window where you type the property name in and select ‘Property’ on the radio buttons:

Click ‘OK’ and the skeleton code will be added into the class module:
Public Property Get MyProperty() As Variant

End Property

Public Property Let MyProperty(ByVal vNewValue As Variant)

End Property
This prevents any mistakes over names of properties. You simply add your code in between the ‘Public Property’ and ‘End Property’ statements.
You now have an object called ‘MyItem’ which will hold all the data for this exercise.
VBA Coding Made Easy
Stop searching for VBA code online. Learn more about AutoMacro — A VBA Code Builder that allows beginners to code procedures from scratch with minimal coding knowledge and with many time-saving features for all users!

Learn More
Creating a Collection
The next stage is to create a top-level object as a Collection object to give access to the properties that you have set up in the ‘MyItem’ object
Again, you need to define a working object to act as the collection object in the same way that you defined the two string variables in the ‘MyItem’ object.
Private mItems As CollectionAgain, this this has to have a unique name which is why there is an ‘m’ (member object) in front of the name, and it is also declared as ‘Private’ so that it does not appear when the new object is being used
Next, you need to populate the Class_Initialize code. This runs when you first use the object within your code, and it determines what values will be loaded into the object
You can access this sub routine by selecting ‘Class’ in the first drop down and ‘Initialize’ in the second drop down of the module window
Private Sub Class_Initialize()
Dim objItem As MyItem
Set mItems = New Collection
For n = 1 To 3
       Set objItem = New MyItem
       objItem.Item = Worksheets("Sheet1").Range("a" & n).Value
    objItem.Detail = Worksheets("Sheet1").Range("b" & n).Value
       mItems.Add objItem
Next n
End Sub
The code sets up an object called ‘objItem’ using the definition of ‘MyItem’ which we built as a class module earlier on.
It then creates a new Collection based on the ‘mItems’ object defined earlier
It iterates through values held on Sheet1 of the workbook and puts them into the properties that we created for the ‘MyItem’ object. Note that when you use ‘objitem’, a drop down appears showing the two properties, exactly as if you were using a built-in Excel object.
The item object is then added into the collection object which now holds all the data in the property values.
The input data does not have to be taken from a worksheet. It could be static values, or it could come from a connection to a database such as Microsoft Access or SQL Server, or it could come from another worksheet.
You then need to add a public function called ‘Item’
Public Function Item(index As Integer) As MyItem
      Set Item = mItems.Item(index)
End Function
This allows you to refer to individual objects within the collection object by their index number. This function provides a ‘mirror’ of what is going on in the ‘mMyItems’ collection in the background.
You will also need to add a property called ‘Count’ so that your code can establish how many ‘MyItem’ objects are in the ‘MyItems’ collection, should you wish to iterate through it.
Public Property Get Count() As Long
      Count = mItems.Count
End Property
In this case you only need a ‘Get’ property because it is read-only. It uses the mItems collection because this already has a count property built into it.
You now have an object (MyItems) with a full hierarchy defined by the object ‘MyItem’
To make the whole thing work, you now need to populate a worksheet (Sheet1) with data so that the Class Initialize routine can collect this into the object
Your spreadsheet should look like this:

Using Your New Object
You can now use your Collection object (MyItems) within a standard Excel VBA module. Enter the following code:
Sub test_object()
Dim MyClass As New MyItems, n As Integer
MsgBox MyClass.Count
For n = 1 To MyClass.Count
    MsgBox MyClass.Item(n).Item
    MsgBox MyClass.Item(n).Detail
Next n
End Sub
This code creates an object called ‘MyClass’ based on the collection object that you created called ‘MyItems’. This fire off the ‘Initialize’ routine that extracts all the data from the worksheet into the object.
It displays the number of items in the collection and then iterates through the collection showing the ‘Item’ text and the ‘Detail’ text. You will notice that when you refer to the ‘MyClass’ object in your code, you will see a list of the two member properties which helps in adding the correct property.
If you change the value of a cell in the input data on the spreadsheet, this will automatically be updated in the collection when you run the above code again, since when you dimension the object, the initialize routine runs and picks up all the new data
If you use the word ‘Static’ instead of ‘Dim’ the initialise routine does not run and the old values are kept, so long as the code is continuously running. If the data on the spreadsheet changes this will not be reflected in the object
Sub Test_Static()
Static Myclass As New MyItems, n As Integer
For n = 1 To Myclass.Count
       MsgBox Myclass.Item(n).Item
    MsgBox Myclass.Item(n).Detail
Next n
End Sub
Summary of Creating an Object Using a Class Module
As you have seen, creating a hierarchy of class modules to use as an object is quite a complicated business, even for a structure as simple as the example provided here. The scope for making mistakes is enormous!
However, it does have huge advantages in making your code more elegant and easier to read. It is also easier to share with other Excel applications and developers by turning it into an Add-In.
In this example of how to create an object to hold data, it would be a normal approach to create a multi-dimensional array to hold the multi-column spreadsheet data, and you would write a line of code to update or read each element in the array. This would probably end up being quite messy, and mistakes could easily be made in addressing the various elements.
With your new object, you can simply refer to it and the members that you have created below it to hold the data.
Also, if the data changes in the spreadsheet (or in a linked database if you have used this as a data source within your class module) whenever you use the ‘Dim’ statement the initialize routine will be called and the data will be instantly updated. No need to write code to re-populate your array.
VBA Programming | Code Generator does work for you!
Using a Class Module to Create a Variable Repository
When you write VBA code you use variables all over the place, all with different scopes. Some may only be defined for a particular procedure, some for a particular module, and some may be global variables that can be used all over the application
You can create a class module that will hold a large number of variables, and because it is an object, it can be used anywhere within your code, even on a user form or in an Active X control that you have placed on a worksheet.
The added advantage is that when you refer to your variable object, you will see a list of all the variable names held in the object sorted into ascending order.
To create a repository, you need to insert a new class module. You do this by using Insert | Class Module from the VB Editor menu
Change the name to ‘MyVariables’ using the same methodology as previously discussed in this article.
Enter the following code:
Private mV As Variant
Public Property Get Variable1() As Variant
Variable1 = mV
End Property

Public Property Let Variable1(ByVal vNewValue As Variant)
mV = vNewValue
End Property

Public Property Get Variable2() As Variant
Variable1 = mV
End Property

Public Property Let Variable2(ByVal vNewValue As Variant)
mV = vNewValue
End Property
This code sets up ‘Let’ and ‘Get’ properties for two variables (‘Variable1’ and ‘Variable2’). The Let and Get properties are required for each of your variables so that they are read / write
You can use your own names for the variables instead of the sample ones in this code, and you can add further variables, making sure that each new variable has a ‘Let’ and ‘Get’ statement.
The private declaration of the variable ‘mV’ is to create a working variable that is only used within the class module to transfer values.
To use the variable repository, enter the following code into a standard module:
Global VarRepo As New MyVariables
Sub TestVariableRepository()
MsgBox VarRepo.Variable1
VarRepo.Variable1 = 10
MsgBox VarRepo.Variable1
End Sub
This code creates a global instance of your ‘MyVariables’ object that you created. You only need to do this declaration once from anywhere within your code.
The code first displays the value of ‘Variable1’ to show that it is empty.
A value of 10 is assigned to ‘Variable1’ and the new value within the object is then displayed to show that this property now holds this value.
Because the instance of the ‘MyVariables’ object has been defined globally, you can refer to any of the defined variables within the object from anywhere within your code.
This has a huge advantage in that if you want to use your variables anywhere in your code, you only need to define one global variable, and from that instance, all the variables can be freely accessed and modified throughout your code.
Turning Your Object into an Add-In
So far, the code for the object creation is within your workbook application. However, if you want to be able to share your object with other developers or in other Excel applications of your own, you can turn it into an Add-In
To do this, all that needs to happen is to save the file as an Add-In. Select File | Save As and a browser window will appear
Select the file type as Add-In (.xlam) from the file type drop down and click OK. The file will be saved to the Add-In folder by default, but you can change the location.
You can then incorporate the add-in file into your Excel applications, giving you the flexibility to make use of your new object
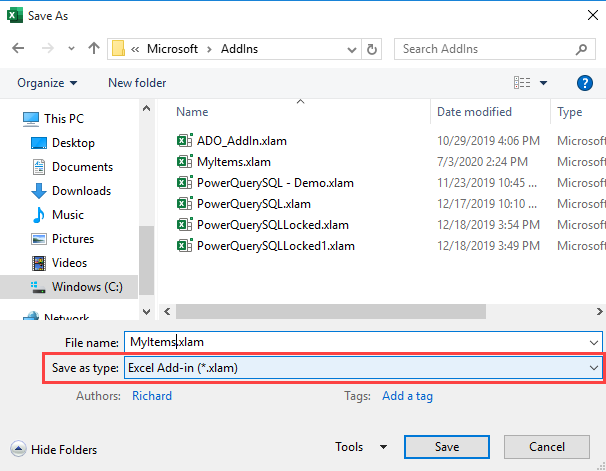
To include your new Add-In into Excel, click on File on the Excel ribbon, and then click on Options at the bottom of the left-hand pane
Click on ‘Add-Ins’ in the left-hand pane in the pop-up window that appears. At the bottom of the window is a button marked ‘Go’
Click on this and an ‘Add-In’ pop-up window will appear. Click on ‘Browse’ and then locate your Add-In file. You will then be able to refer to your object in your code.