
VBA Listnames of Range Excel
VBA Listnames of range object will list the names in the workbook. It will list all the available named ranges and their corresponding definitions. If no names are defined in the workbook, it results nothing. This will be very useful if you have lot of named ranges in your workbook and see the all definitions at one glance. Particularly when you are moving the worksheets or deleting the worksheets, some of the named definitions will be corrupted(lost the refereces), In this case you can list all the available names in the workbook and see if they are missing any references.

VBA ListNames of Range – Syntax
Here is the syntax to find listnames in Excel range object. It will list all the available named ranges and their corresponding definitions.
Range(“YourRange”).ListNames
VBA ListNames of Range – Example
Below is the Excel VBA Macro or code to list all the available named ranges in the range “A1” and their corresponding definitions in the range “B1”
Sub Range_ListNaames()
    Range("A1").ListNames
End Sub
VBA ListNames of Range – Instructions
Please follow the below step by step instructions to execute the above mentioned VBA macros or codes:
- Open an Excel Workbook from your start menu or type Excel in your run command
- Add or define few names in your workbook to test the ListNames macro.
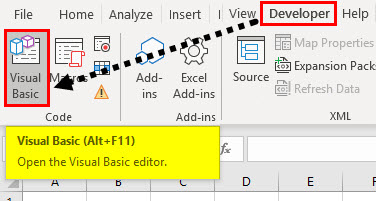
- Press Alt+F11 to Open VBA Editor or you can go to Developer Tab from Excel Ribbon and click on the Visual Basic Command to launch the VBA Editor
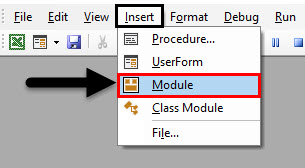
- Insert a Module from Insert Menu of VBA
- Copy the above code (for copying a range using VBA) and Paste in the code window(VBA Editor)
- Save the file as Macro Enabled Workbook (i.e; .xlsm file format)
- Press ‘F5′ to run it or Keep Pressing ‘F8′ to debug the code line by line.
Now, it will list all the available named ranges in the range “A1” and their corresponding definitions in the range “B1”. If no names are defined in the workbook, it results nothing. It is always a better practice to list the names in the workbook and check their definitions.
A Powerful & Multi-purpose Templates for project management. Now seamlessly manage your projects, tasks, meetings, presentations, teams, customers, stakeholders and time. This page describes all the amazing new features and options that come with our premium templates.
Save Up to 85% LIMITED TIME OFFER

All-in-One Pack
120+ Project Management Templates
Essential Pack
50+ Project Management Templates
Excel Pack
50+ Excel PM Templates
PowerPoint Pack
50+ Excel PM Templates
MS Word Pack
25+ Word PM Templates
Ultimate Project Management Template
Ultimate Resource Management Template
Project Portfolio Management Templates
VBA Reference
Effortlessly
Manage Your Projects
120+ Project Management Templates
Seamlessly manage your projects with our powerful & multi-purpose templates for project management.
120+ PM Templates Includes:
One Comment
-
John Christensen
April 25, 2016 at 7:47 AM — ReplyI’m confused – How is “B1” specified in the code example above? If I had this in the first row of a spreadsheet:
pi 3.1415
Then when I went to assign named ranges, the named range would be B1, not A1, right? The naming method (Alt-ShiftF4, if I remember) just uses the A1 cell to name the named range?
Isn’t Range(“A1”).ListNames just going to only look in A1, not A1 and B1?
thanks,
John
Effectively Manage Your
Projects and Resources
ANALYSISTABS.COM provides free and premium project management tools, templates and dashboards for effectively managing the projects and analyzing the data.
We’re a crew of professionals expertise in Excel VBA, Business Analysis, Project Management. We’re Sharing our map to Project success with innovative tools, templates, tutorials and tips.
Project Management
Excel VBA
Download Free Excel 2007, 2010, 2013 Add-in for Creating Innovative Dashboards, Tools for Data Mining, Analysis, Visualization. Learn VBA for MS Excel, Word, PowerPoint, Access, Outlook to develop applications for retail, insurance, banking, finance, telecom, healthcare domains.
Page load link
Go to Top
Overview on Excel VBA Named Range
In excel we learned how to name a range and use it. Now we will learn how to use this name range in VBA and in addition to that we will also learn how to name a range from VBA. Range is a crucial part of a worksheet as it contains the data for us. Specifically giving names to ranges help us to identify which part of the range contains which data.
Let us begin with how can we name a range in excel and then use it in VBA. In order to name a group of ranges in excel, we simply select the ranges as follows,
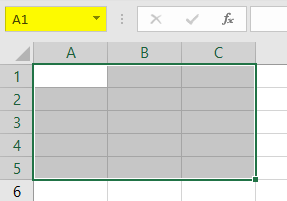
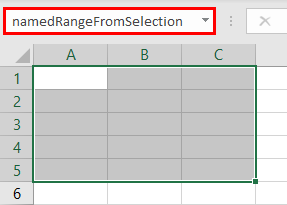
Now there is a box where it is mentioned as A1 we click on it and give it a name.
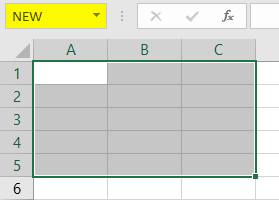
The box is called a name box and we use it to give a name to our range. For the current example, I have given it as a named range. Now once we have given the range name how do we use it in VBA. Suppose we had to change the interior color of the above range previously in VBA what we did in VBA is we referred to the range as follows,
Worksheets(“Sheet1”).Range(“A1:B5”).Interior.Color = Some Color code
Now since we have given the range a name we can now do the following to change the color of the range as follows,
Worksheets(“Sheet1”).Range(“NEW”).Interior.Color = Some Color code
NEW is the range name we have given to cell selection A1:B5. This is how we use name ranges in VBA once we have named them.
Now we can also name the ranges using VBA too well it is a bit lengthy process than above but let us go through it.
To name a range in a worksheet by VBA we use the following code as follows,
Set myWorksheet = ThisWorkbook.Worksheets("Named Range")
Set myNamedRangeWorksheet = myWorksheet.Range("Range Value”)
How to Use Named Range in Excel VBA?
There are two methods to use the Named Range in Excel VBA:
- First is that we name a range in excel and then use it in VBA.
- The second method is we make a named range in VBA itself and use its properties.
Below are the different examples to use the Named Range in Excel:
You can download this VBA Named Range Excel Template here – VBA Named Range Excel Template
Example #1
For the first example let us use the name range we used above by making it in excel worksheet. Follow the below steps:
Step 1: Select the range which we want to name first as follows,
Step 2: There is a name box above the range we use that to give a name to the range, for this example, I have named the ranged as New.
Step 3: Now let us go to VBA, click on Developer’s tab to click on Visual Basic to get into VBA.
Step 4: Once we are in VBA we need to insert a module so that we can write code in it. Do as follows,
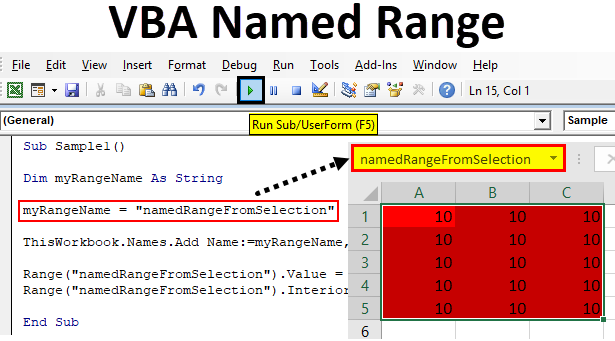
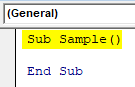
Step 5: Now let us start writing the code, to do that we need to name the macro first as follows,
Code:
Sub Sample()

End Sub
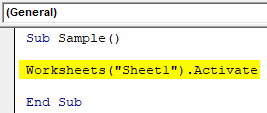
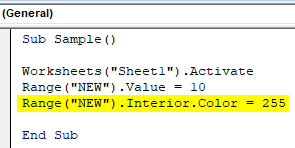
Step 6: Write the following code to activate the worksheet first in order to use the name range.
Code:
Sub Sample()

Worksheets("Sheet1").Activate

End Sub
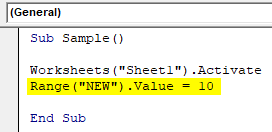
Step 7: Now let us use our name range as follows,
Code:
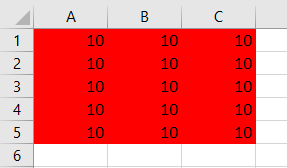
Sub Sample()

Worksheets("Sheet1").Activate
Range("NEW").Value = 10

End Sub
Step 8: Once we run the above code we can see that every cell in our name range has the same value as follows,
Step 9: Let us also check if we can change the properties of the cell, Let us change the color of the range by using the name range as follows,
Code:
Sub Sample()

Worksheets("Sheet1").Activate
Range("NEW").Value = 10
Range("NEW").Interior.Color = 255

End Sub
Step 10: Run the above code by pressing F5 or from the run button and see the following result,
Example #2
We will first create a named range by using VBA and the use the properties of the name range in VBA itself. Follow the below steps:
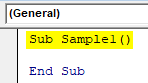
Step 1: Now let us start writing the code, to do that we need to name the macro first as follows,
Code:
Sub Sample1()

End Sub
Step 2: Declare a variable which will store the name of the name range as follows,
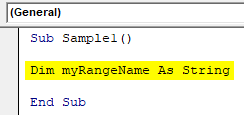
Code:
Sub Sample1()

Dim myRangeName As String

End Sub
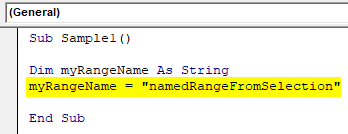
Step 3: Now let us set the name range as follows, in this example whatever we have selected as the range will be our named range,
Code:
Sub Sample1()

Dim myRangeName As String
myRangeName = "namedRangeFromSelection"

End Sub
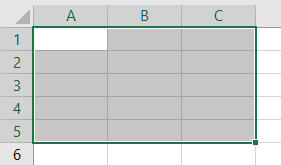
This is what I have in selection for named range cell range A1:C5 in worksheet 2,
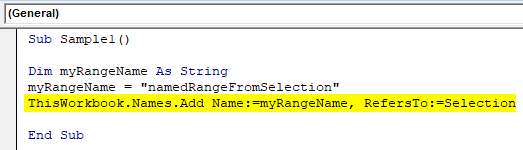
Step 4: Now let us name the range by the following code,
Code:
Sub Sample1()

Dim myRangeName As String
myRangeName = "namedRangeFromSelection"
ThisWorkbook.Names.Add Name:=myRangeName, RefersTo:=Selection

End Sub
Step 5: Run the above code we can see that we have created the name range in worksheet 2 by the name of namedrangefromselection,
Step 6: Now let us use this name ranged as we used in the earlier example as follows,
Code:
Sub Sample1()

Dim myRangeName As String
myRangeName = "namedRangeFromSelection"
ThisWorkbook.Names.Add Name:=myRangeName, RefersTo:=Selection
Range("namedRangeFromSelection").Value = 10
Range("namedRangeFromSelection").Interior.Color = 255

End Sub
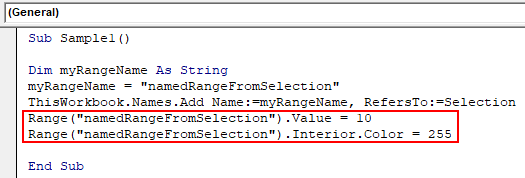
Step 7: Run the above code from the F5 button and see the result as follows,
Things to Remember
- Named Ranges are the name given for a group or range of cells.
- Named range is used to refer to the specific range of cells which needs to be accessed later on.
- We can name a range in both excel or VBA.
- While making a named range in VBA we need to use Add name function in VBA.
Recommended Articles
This is a guide to VBA Named Range. Here we discuss how to use Named Range in Excel VBA along with practical examples and downloadable excel template. You can also go through our other suggested articles –
- Step by Step Guide to VBA Value
- How to Edit Drop Down List in Excel?
- VBA Subscript out of Range
- Import Data into Excel
November 15, 2015/
Chris Newman
What Is A Named Range?
Creating a named range allows you to refer to a cell or group of cells with a custom name instead of the usual column/row reference. The HUGE benefit to using Named Ranges is it adds the ability to describe the data inside your cells. Let’s look at a quick example:
Can you tell if shipping costs are charged with the product price?
-
= (B7 + B5 * C4) * (1 + A3)
-
=(ShippingCharge + ProductPrice * Quantity) * (1 + TaxRate)
Hopefully, you can clearly see option number TWO gives you immediate insight to whether the cost of the products includes shipping costs. This allows the user to easily understand how the formula is calculating without having to waste time searching through cells to figure out what is what.
How Do I Use Named Ranges?
As a financial analyst, I play around with a bunch of rates. Examples could be anything from a tax rate to an estimated inflation rate. I use named ranges to organize my variables that either are changed infrequently (ie Month or Year) or something that will be static for a good amount of time (ie inflation rate). Here are a list of common names I use on a regular basis:
-
ReportDate
-
Year
-
Month
-
FcstID
-
TaxRate
-
RawData
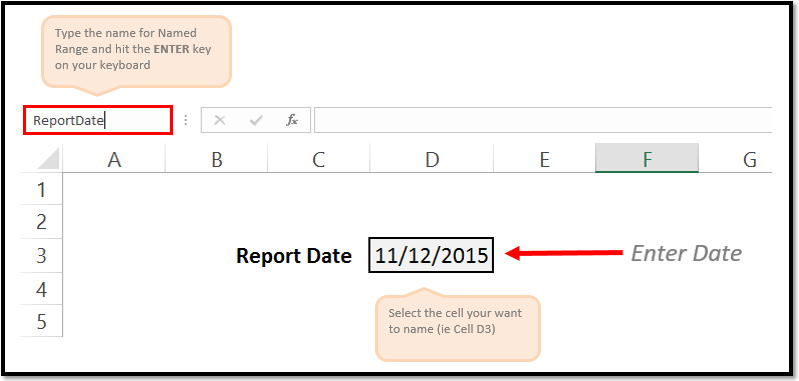
Creating Unique Names On The Fly
It is super easy to create a Named Range. All you have to do is highlight the cell(s) you want to reference and give it a name in the Name Box. You name cannot have any spaces in it, so if you need to separate words you can either capitalize the beginning of each new word or use an underscore (_). Make sure you hit the ENTER key after you have finished typing the name to confirm the creation of the Named Range.
As a side note, any Named Range created with the Name Box has a Workbook scope. This means the named range can be accessed by any worksheet in your Excel file.
Creating Names With The «Name Manager»
If you want to customize your named ranges even more, you can open up the Name Manager (Formulas tab > Defined Names group > Name Manager button) to edit and create new named ranges.
I won’t go into great detail in this article, but know that with the Name Manager you can
-
Change the name of an existing Named Range
-
Change the reference formula
-
Specify the scope (what worksheets the name can be accessed from)

On To The VBA
Now that you have had a brief overview on Named Ranges, lets dig into some VBA macros you can use to help automate the use of Named Ranges.
Add A Named Range
The below VBA code shows ways you can create various types of named ranges.
Sub NameRange_Add()
‘PURPOSE: Various ways to create a Named Range
‘SOURCE: www.TheSpreadsheetGuru.com
Dim cell As Range
Dim rng As Range
Dim RangeName As String
Dim CellName As String
‘Single Cell Reference (Workbook Scope)
RangeName = «Price»
CellName = «D7»
Set cell = Worksheets(«Sheet1»).Range(CellName)
ThisWorkbook.Names.Add Name:=RangeName, RefersTo:=cell
‘Single Cell Reference (Worksheet Scope)
RangeName = «Year»
CellName = «A2»
Set cell = Worksheets(«Sheet1»).Range(CellName)
Worksheets(«Sheet1»).Names.Add Name:=RangeName, RefersTo:=cell
‘Range of Cells Reference (Workbook Scope)
RangeName = «myData»
CellName = «F9:J18»
Set cell = Worksheets(«Sheet1»).Range(CellName)
ThisWorkbook.Names.Add Name:=RangeName, RefersTo:=cell
‘Secret Named Range (doesn’t show up in Name Manager)
RangeName = «Username»
CellName = «L45»
Set cell = Worksheets(«Sheet1»).Range(CellName)
ThisWorkbook.Names.Add Name:=RangeName, RefersTo:=cell, Visible:=False
End Sub
Loop Through Named Ranges
This VBA macro code shows how you can cycle through the named ranges within your spreadsheet.
Sub NamedRange_Loop()
‘PURPOSE: Delete all Named Ranges in the Active Workbook
‘SOURCE: www.TheSpreadsheetGuru.com
Dim nm As Name
‘Loop through each named range in workbook
For Each nm In ActiveWorkbook.Names
Debug.Print nm.Name, nm.RefersTo
Next nm
‘Loop through each named range scoped to a specific worksheet
For Each nm In Worksheets(«Sheet1»).Names
Debug.Print nm.Name, nm.RefersTo
Next nm
End Sub
Delete All Named Ranges
If you need to clean up a bunch of junk named ranges, this VBA code will let you do it.
Sub NamedRange_DeleteAll()
‘PURPOSE: Delete all Named Ranges in the ActiveWorkbook (Print Areas optional)
‘SOURCE: www.TheSpreadsheetGuru.com
Dim nm As Name
Dim DeleteCount As Long
‘Delete PrintAreas as well?
UserAnswer = MsgBox(«Do you want to skip over Print Areas?», vbYesNoCancel)
If UserAnswer = vbYes Then SkipPrintAreas = True
If UserAnswer = vbCancel Then Exit Sub
‘Error Handler in case Delete Function Errors out
On Error GoTo Skip
‘Loop through each name and delete
For Each nm In ActiveWorkbook.Names
If SkipPrintAreas = True And Right(nm.Name, 10) = «Print_Area» Then GoTo Skip
‘Error Handler in case Delete Function Errors out
On Error GoTo Skip
‘Delete Named Range
nm.Delete
DeleteCount = DeleteCount + 1
Skip:
‘Reset Error Handler
On Error GoTo 0
Next
‘Report Result
If DeleteCount = 1 Then
MsgBox «[1] name was removed from this workbook.»
Else
MsgBox «[» & DeleteCount & «] names were removed from this workbook.»
End If
End Sub
Delete Named Ranges with Error References
This VBA code will delete only Named Ranges with errors in them. These errors can be caused by worksheets being deleted or rows/columns being deleted.
Sub NamedRange_DeleteErrors()
‘PURPOSE: Delete all Named Ranges with #REF error in the ActiveWorkbook
‘SOURCE: www.TheSpreadsheetGuru.com
Dim nm As Name
Dim DeleteCount As Long
‘Loop through each name and delete
For Each nm In ActiveWorkbook.Names
If InStr(1, nm.RefersTo, «#REF!») > 0 Then
‘Error Handler in case Delete Function Errors out
On Error GoTo Skip
‘Delete Named Range
nm.Delete
DeleteCount = DeleteCount + 1
End If
Skip:
‘Reset Error Handler
On Error GoTo 0
Next
‘Report Result
If DeleteCount = 1 Then
MsgBox «[1] errorant name was removed from this workbook.»
Else
MsgBox «[» & DeleteCount & «] errorant names were removed from this workbook.»
End If
End Sub
Anything Missing From This Guide?
Let me know if you have any ideas for other useful VBA macros concerning Named Ranges. Or better yet, share with me your own macros and I can add them to the article for everyone else to see! I look forward to reading your comments below.
About The Author
Hey there! I’m Chris and I run TheSpreadsheetGuru website in my spare time. By day, I’m actually a finance professional who relies on Microsoft Excel quite heavily in the corporate world. I love taking the things I learn in the “real world” and sharing them with everyone here on this site so that you too can become a spreadsheet guru at your company.
Through my years in the corporate world, I’ve been able to pick up on opportunities to make working with Excel better and have built a variety of Excel add-ins, from inserting tickmark symbols to automating copy/pasting from Excel to PowerPoint. If you’d like to keep up to date with the latest Excel news and directly get emailed the most meaningful Excel tips I’ve learned over the years, you can sign up for my free newsletters. I hope I was able to provide you with some value today and I hope to see you back here soon!
— Chris
Founder, TheSpreadsheetGuru.com
![]()
AndresHernando
asked on 10/15/2011
How can I get the named range of the selected cells?
Something like
nmTxtString = Selection.NamedRange
Thanks, —Andres
Microsoft Excel

This should give you the named ranges and the cell they refer to in a workbook
For Each nm In ActiveWorkbook.Names
CelRef =nm.RefersToRange.Address
NamedRange = nm.Name
Next nm
CelRef returns the Cell Refrence
NamedRange returns the Name of the range
gowflow
Actually to answer precisely your question
——————————
For Each nm In ActiveWorkbook.Names
if ActiveCell = nm.RefersToRange.Address then
nmTxtString = nm.Name
Exit For
End if
Next nm
———————————
gowflow
Active cell will only give you the active cell in the selection. If you want it to work for the whole selection you need to use Selection.Address instead of ActiveCell
Patrick Matthews
10/15/2011
gowflow,
With respect, I do not see how even your revised code answers the question.
I would try something like this. Be advised that it is untested. And note that it checks for Names scoped for both workbook and worksheet.
It also checks to see if the current selection intersects with more than one named range.
Sub CheckForName()

    Dim nm As Name
    Dim Result As String
    Dim rng As Range
    Dim Hits As Long

    Set rng = Selection
    For Each nm In ThisWorkbook.Names
        If Not Intersect(rng, nm.RefersToRange) Is Nothing Then
            Result = vbCrLf & Result
            Hits = Hits + 1
        End If
    Next
    For Each nm In ActiveSheet.Names
        If Not Intersect(rng, nm.RefersToRange) Is Nothing Then
            Result = vbCrLf & Result
            Hits = Hits + 1
        End If
    Next

    If Hits > 0 Then
        MsgBox "Current selection intersects following named ranges:" & vbCrLf & Result
    Else
        MsgBox "Current selection intersects no named ranges"
    End If

End Sub
Open in new window
Patrick
gowflow’s (with my edit) will work if the selection exactly matches the named range.
matthewspatrick’s will tell you all the named ranges that contain any of the cells in the selection.
Are either of those what you are looking for or do you want all the named ranges that contain the entire selection?
goflow, Tommy:
thanks for the help. This code works fine on a single worksheet. However, I have multiple worksheets with thousands of named ranges which makes the code bug out because the Selection.Address can be in a different worksheet.
Is there a way to restrict the scope to the names for the current range’s workbook ?
Change ActiveWorkbook to ThisWorkbook
Actually, check if
ThisWorkbook.Names(«bob»).RefersTo = «‘» & Selection.Worksheet.Name & «‘!» & Selection.Address
hi Andres,
I like the use of intersect in Patrick’s answer, however, I’m a fan of flexibility & not «reinventing the wheel» so…
Here is a link to The JKP Name Manager, is a very useful and free excel addin, collaboratively created by Jan Karel Pieterse (JKP), Charles Williams, ( www.decisionmodels.com ) and Matthew Henson ( mhenson@mac.com ) and can be downloaded from: http://www.jkp-ads.com/OfficeMarketPlaceNM-EN.asp?AllComments=True
I use it in my work almost every day and it is regularly updated as bugs or optimisations are identified so I occasionally compare the latest Build number on the website (currently it is #630) with the version on my machine.
hth
Rob
So the whole code would look like
For Each nm In ThisWorkbook.Names
       If "='" & Selection.Worksheet.Name & "'!" & Selection.Address = nm.RefersTo Then
             nmTxtString = nm.Name
             Exit For
       End If
Next nm
Open in new window
Still trying to make it work… The last code gives blanks for names.
My last comment should have read «worksheet» not «workbook». I need to restrict the scope to the worksheet. The last line should have read:
«Is there a way to restrict the scope to the names for the current range’s worksheet ? «
If I could just restrict the «.Names» scope to the worksheet, your code would work great.
For Each nm In Activesheet.Names
CelRef =nm.RefersToRange.Address
NamedRange = nm.Name
Next nm
gowflow
THIS SOLUTION ONLY AVAILABLE TO MEMBERS.
View this solution by signing up for a free trial.
Members can start a
7-Day free trial
and enjoy unlimited access to the platform.
Oops sorry for the last post
this code is tested
put the below code in a module and call it this way in the worksheet selection change event
————————-
Private Sub Worksheet_SelectionChange(ByVal Target As Range)
Dim nm
Application.EnableEvents = False
Range(«A1») = NamedRange
Application.EnableEvents = True
End Sub
It will put in A1 the named range of any cell you clik on that has a named range.
gowflow
Function NamedRange() As String
Dim nm
For Each nm In ActiveWorkbook.Names
       If ActiveCell.Offset(0, 0).Address = nm.RefersToRange.Offset(0, 0).Address Then
             NamedRange = nm.Name
             Exit For
       End If
Next nm

End Function
Open in new window
boro183,
as coincidence would have it, I installed JKP Name Manager a few days ago but haven’t used it because I can’t find where to call it (!?). It shows in the Add In Manager with a checkbox, so it’s installed. Is it hidden in some menu I’m not finding? I assume it’s in the VBA editor menus.
Thanks, —Andres
gowflow, same problem… It will get the range name of the wrong sheet. See your code, attached in the last entry.
hi Andres,
I don’t think it’s much of a coincidence — I didn’t realise until after posting, but I’m pretty sure it was me who suggested it to you 
Sorry for the delayed response I’m wandering to & from my computer at the moment.
If it is showing with a tick, then the default shortcut key combination to open the interface is [ctrl + shift + N]. Alternatively, I’m using excel 2007 and I can see the icon at the right-hand end of the Formula Ribbon.
Or, in Excel 97…2003: a menu item called “Name Manager” is added at the bottom of the Tools menu.
This and more is explained in the «Name Manager Manual 42.doc» Word document which is part of the download.
hth
Rob
btw, the options are in the main excel screen (not in the VBE screen).
hth
Rob
THIS SOLUTION ONLY AVAILABLE TO MEMBERS.
View this solution by signing up for a free trial.
Members can start a
7-Day free trial
and enjoy unlimited access to the platform.
THIS SOLUTION ONLY AVAILABLE TO MEMBERS.
View this solution by signing up for a free trial.
Members can start a
7-Day free trial
and enjoy unlimited access to the platform.
tks for the grade
gowflow
 What is the first thing that comes to your mind when thinking about Excel?
In my case, it’s probably cells. After all, most of the time we spend working with Excel, we’re working with cells. Therefore, it makes sense that, when using Visual Basic for Applications for purposes of becoming more efficient users of Excel, one of the topics we must learn is how to work with cells within the VBA environment.
This VBA tutorial provides a basic explanation of how to work with cells using Visual Basic for Applications. More precisely, in this particular post I explain all the basic details you need to know to work with Excel’s VBA Range object. Range is the object that you use for purposes of referencing and working with cells within VBA.
However, the importance of Excel’s VBA Range object doesn’t end with the above. A substantial amount of the work you carry out with Excel involves the Range object. The Range object is one of the most commonly used objects in Excel VBA.
Despite the importance of Excel’s VBA Range, creating references to objects is generally one of the most confusing topics for users who are beginning to work with macros and Visual Basic for Applications. In the case of cell ranges, this is (to a certain extent) understandable, since VBA allows you to refer to ranges in many different ways.
The fact remains that, regardless of how confusing the topic of Excel’s VBA Range object may be, you must master it in order to become a macro and VBA expert. My main purpose with this VBA tutorial is to help you understand the basic matters surrounding this topic and illustrate the most common ways in which you can refer to Excel’s VBA Range object using Visual Basic for Applications.
More precisely, in this post you’ll learn about the following topics related to Excel’s VBA Range object:
Let’s start by taking a more detailed look at…
What Is Excel’s VBA Range Object
Excel’s VBA Range is an object. Objects are what is manipulated by Visual Basic for Applications.
More precisely, you can use the Range object to represent a range within a worksheet. This means that, by using Excel’s VBA Range object, you can refer to:
- A single cell.
- A row or a column of cells.
- A selection of cells, regardless of whether they’re contiguous or not.
- A 3-D range.
As you can see from the above, the size of Excel’s VBA Range objects can vary widely. At the most basic level, you can be making reference to a single (1) cell. On the other extreme, you have the possibility of referencing all of the cells in an Excel worksheet.
Despite this flexibility when referring to cells within a particular Excel worksheet, Excel’s VBA Range object does have some limitations. The most relevant is that you can only use it to refer to a single Excel worksheet at a time. Therefore, in order to refer to ranges of cells in different worksheets, you must use separate references for each of the worksheets.
How To Refer To Excel’s VBA Range Object
One of the first things you’ll have to learn in order to master Excel’s VBA Range object is how to refer to it. The following sections explain the most relevant rules you need to know in order to craft appropriate references.
The first few sections cover the most basic way of referring to Excel’s VBA Range object: the Range property. This is also how the macro recorder generally refers to the Range object.
However, further down, you’ll find some additional methods to create object references, such as using the Cells or Offset properties.
These are, however, not the only ways to refer to Excel’s VBA Range objects. There are a few more advanced methods, such as using the Application.Union method, which I don’t cover in this beginners VBA tutorial.
You may be wondering, which way is the best for purposes of referring to Excel’s VBA Range object?
Generally, the best method to use in order to craft a reference to Excel’s VBA Range object depends on the context and your specific needs.
Introduction To Referencing Excel’s VBA Range Object And The Object Qualifier
In order to be able to work appropriately with Range objects, you must understand how to work with the 2 main parts of a reference to Excel’s VBA Range object:
- The object qualifier. This makes reference, more generally, to the general rules to creating object references. I cover this topic thoroughly here.
- The relevant property or method that you’re using for purposes of returning a Range object. This makes reference, more generally, to the specific rules that apply to referring to Excel’s VBA Range object.
This VBA tutorial focuses on the second element above: the main properties you can use in order to refer to Excel’s VBA Range object.
Nonetheless, I explain a few key points regarding object referencing below. If you’re interested in learning more about the general rules that apply to object references, please refer to Excel VBA Object Model And Object References: The Essential Guide, which you can find in the Archives.
Introduction To Fully Qualified VBA Object References
Objects are capable of acting as containers for other objects.
At a basic level, when referencing a particular object, you tell Excel what the object is by referencing all of its parents. In other words, you go through Excel’s VBA object hierarchy.
You move through Excel’s object hierarchy by using the dot(.) operator to connect the objects at each of the different levels.
These types of specific references are known as fully qualified references.
How does a fully qualified reference look in the case of Excel’s VBA Range object?
The object at the top of the Excel VBA object hierarchy is Application. Application itself contains other objects.
Excel’s VBA Range object is contained within the Worksheet object. More precisely:
- The Worksheet object has a Range property (Worksheet.Range).
- The Worksheet.Range property returns a Range object.
The parent object of Worksheets is the Workbook object. Workbooks itself is contained within the Application object.
The hierarchical relationship between these different objects looks as follows:

Therefore, the basic structure you must use to refer to Excel’s VBA Range object is the following:
Application.Workbooks.Worksheets.RangeYou’ll notice that a few things within the basic structure described above are ambiguous. In particular, you’ll notice that this doesn’t specify the particular Excel workbook or worksheet that you’re referring to. In order to do this, you must understand…
How To Refer To An Object From A Collection
Within Visual Basic for Applications, an object collection is a group of related objects.
Both Workbooks and Worksheets, which are used to create a fully qualified reference to Excel’s VBA Range object, are examples of collections. There are 2 basic ways to refer to a particular object within a collection:
- Use the VBA object name. In this case, the syntax is “Collection_name(“Object_name”)”.
- Use an index number instead of the object name. If you choose this option, the basic syntax is “Collection_name(Index_number)”.
Notice how, in the first method you must use quotations (“”) within the parentheses. If you use the second method, you don’t have to surround the Index_number with quotes.
Let’s assume, then, that you want to work with the Worksheet named “Sheet1” within the Workbook “Book1.xlsm”. Depending on which of the 2 methods to refer to an object within a collection you use, the reference looks different.
If you create the reference using the VBA object name, the reference looks as follows:
Application.Workbooks("Book1.xlsm").Worksheets("Sheet1").RangeWhereas if you decide to use an index number, the reference is the following:
Application.Workbooks(1).Worksheets(1).RangeI usually use the first option when working with Visual Basic for Applications. Therefore, this is the method that I use in the examples throughout this VBA tutorial.
Simplifying Fully Qualified Object References
Excel’s VBA object model contains some default objects. These are assumed unless you enter something different.
You can simplify fully qualified object references by relying on these default VBA objects. I don’t generally suggest doing this blindly, as it involves some dangers.
There are 2 main types of default objects that you can use for purposes of simplifying fully qualified object references:
- The Application object.
- The active Workbook and Worksheet objects.
The Application object is always assumed. In other words, Visual Basic for Applications always assumes that you’re working with Excel itself. Therefore, you can simplify your fully qualified object references by omitting the Application. For example, in the cases that I use as an example above, the simplified references are as follows:
Workbooks("Book1.xlsm").Worksheets("Sheet1").Range Workbooks(1).Worksheets(1).RangeAdditionally, VBA assumes that you’re working with the current active workbook and active worksheet. This simplification is trickier than the previous one because it relies on you correctly identifying the active workbook and worksheet. As you’ll imagine, this is slightly more difficult than identifying the Excel application itself 😉 .
However, you can also use these 2 default objects for creating even simpler VBA object references. Continuing with the same examples above, these become:
RangeThis brings us to the end of the introduction to the general rules to creating VBA object references. This summary has explained how to create fully qualified references and simplify them for purposes of creating the object qualifier that you use when crafting references to Excel’s VBA Range object.
The following sections focus on the specific rules that you can apply for purposes of referring to Excel’s VBA Range object. These are the most commonly used properties for returning a Range object.
How To Refer To Excel’s VBA Range Object Using The Range Property
The sections above explain, to a certain extent, the basic rules that you can apply to refer to Excel’s VBA Range object. Let’s start by recalling the 2 methods you can use to create a fully qualified reference if you’re working with the worksheet called “Sheet1” within the workbook named “Book1.xlsm”.
Application.Workbooks("Book1.xlsm").Worksheets("Sheet1").Range Application.Workbooks(1).Worksheets(1).RangeYou need to specify the particular range you want to work with. In other words, just using “Range” as it still appears in the examples above, isn’t enough.
Perhaps the most basic way to refer to Excel’s VBA Range object is by using the Range property. When applied, this property returns a Range object which represents a cell or range of cells.
There are 2 versions of the Range property: the Worksheet.Range property and the Range.Range property. The logic behind both of them is the substantially the same. The main difference is to which object they’re applied:
- In the case of the Worksheet.Range property, the Range property is applied to a worksheet.
- When using the Range.Range property, Range is applied to a range.
In other words, the Range property can be applied to 2 different types of objects:
- Worksheet objects.
- Range objects.
In the sections above, I explain how to create fully qualified object references. You’ve probably noticed that, in all of the examples above, the parent of Excel’s VBA Range object is the Worksheet object. In other words, in these cases, the Range property is applied to a Worksheet object.
However, you can also apply the Range property to a Range object. If you do this, the object returned by the Range property changes.
The reason for this, as explained by Microsoft, is that the Range.Range property acts in relation to the object to which it is applied to. Therefore, if you apply the Range.Range property, the property acts relative to the Range object, not the worksheet.
This means that you can apply the Range.Range property for purposes of referencing a range in relation to another range. I provide examples of how such a reference works below.
Basic Syntax Of The Range Property
The basic syntax that you can use to refer to Excel’s VBA Range object is “expression.Range(“Cell_Range”)”. You’ll notice that this syntax follow the general rules that I explain above for other VBA objects such as Workbooks and Worksheets. In particular, you’ll notice that there are 4 basic elements:
- Element #1: The keyword “Range”.
- Element #2: Parentheses that follow the keyword.
- Element #3: The relevant cell range. I explain different ways in which you can define the range below.
- Element #4: Quotations. The Cell_Range to which you’re making reference is generally within quotations (“”).
In this particular case, “expression” is simply a variable representing a Worksheet object (in the case of the Worksheet.Range property) or a Range object (for the Range.Range object).
Perhaps the most interesting item in the syntax of the Range property is the Cell_Range.
Let’s take a look at some of its characteristics…
In very broad terms, you can usually make reference to Cell_Range in a similar way to the one you use when writing a regular Excel formula. This means using A1-style references. However, there are a few important particularities, which I introduce in this section.
Don’t worry if everything seems a little bit confusing at first. I show some sample references in the following sections in order to make everything clear.
You can use 2 different syntaxes to define the range you want to work with:
Syntax #1: (“Cell1”)
This is the minimum you must include for purposes of defining the relevant cell range. As a general rule, when you use this syntax, the argument (Cell1) must be either of the following:
- A string expressing the cell range address.
- The name of a named cell range.
When naming a range, you can use any of the following 3 operators:
- Colon (:): This is the operator you use to set up arrays. In the context of referring to cell ranges, you can use to refer to entire columns or rows, ranges of contiguous cells or ranges of noncontiguous cells.
- Space ( ): This is the intersection operator. As shown below, you can use the intersection operator for purposes of referring to cells that are common to 2 separate ranges.
- Comma (,): This is the union operator, which you can use to combine several ranges. As shown in the example below, you can use this operator when working with ranges of noncontiguous cells.
Syntax #2: “(Cell1, Cell2)”
If you choose to use this syntax, you’re basically delineating the relevant range by naming the cells in 2 of its corners:
- “Cell1” is the cell in the upper-left corner of the range.
- “Cell2” is the cell in the lower-right corner of the range.
However, this syntax isn’t as restrictive as it may seem at first glance. In this case, arguments can include:
- Range objects;
- Cell range addresses;
- Named cell range names; or
- A combination of the above items.
Let’s take a look at some specific applications of the Range property:
How To Refer To A Single Cell Using The Worksheet.Range Property
If the Excel VBA Range object you want to refer to is a single cell, the syntax is simply “Range(“Cell”)”. For example, if you want to make reference to a single cell, such as A1, type “Range(“A1″)”.

We can take it a step further and create a fully qualified reference for this single cell, assuming that we continue to work with Sheet1 within Book1.xlsm:
Application.Workbooks("Book1.xlsm").Worksheets("Sheet1").Range("A1")You’ve probably noticed something very important:
There is no such thing as a Cell object. Cell is not an object by itself. Cells are contained within the Range object.
Perhaps even more accurately, cells are a property. Properties are the characteristics that you can use to describe an object. I cover the topic of object properties here.
You can actually use this property (Cells) to refer to a range. I explain how you can do this below.
The example above applies the Range property to a Worksheet object. In other words, it is an example of the Worksheet.Range property.
Now let’s take a look at what happens if the Range property is applied to a Range object:
How To Refer To A Single Cell In Relation To Another Range Using The Range.Range Property
Let’s assume, that instead of specifying a fully qualified reference as above, you simply use the Selection object as follows:
Selection.Range("A1")Further, let’s assume that the current selection is the cell range between C3 and D5 (cells C3, C4, C5, D3, D4 and D5) of the active Excel worksheet. This selection is a Range object.
Since the Selection object represents the current selected area in the document, the reference above returns cell C3. It doesn’t return cell A1, as the previous fully qualified reference.
The reason for the different behavior of the 2 sample references above is because the Range property behaves relative to the object to which it is applied. In other words, when the Range property is applied to a Range object, it behaves relative to that Range (more precisely, its upper-left corner). When it is applied to a Worksheet object, it behaves relative to the Worksheet.
Creating references by applying the Range property to a Range object is not very straightforward. I personally find it a little confusing and counterintuitive.
However, the ability to refer to cells in relation to other range has several advantages. This allows you to (for example) refer to a cell without knowing its address beforehand.
Fortunately, there are alternatives for purposes of referring to a particular cell in relation to a range. The main one is the Range.Offset property, which I explain below.
How To Refer To An Entire Column Or Row Using The Worksheet.Range Property
Excel’s VBA Range objects can consist of complete rows or columns. You can refer to an entire row or column as follows:


- Row: “Range(“Row_Number:Row_Number”)”.
- Column: “Range(“Column_Letter:Column_Letter”)”.
For example, if you want to refer to the first row (Row 1) of a particular Excel worksheet, the syntax is “Range(“1:1″)”.

If, on the other hand, you want to refer to the first column (Column A), you type “Range(“A:A”).

Assuming that you’re working with Sheet 1 within Book1.xlsm, the fully qualified references are as follows:
Application.Workbooks("Book1.xlsm").Worksheets("Sheet1").Range("1:1") Application.Workbooks("Book1.xlsm").Worksheets("Sheet1").Range("A:A")How To Refer To A Range Of Contiguous Cells Using The Worksheet.Range Property
You can refer to a range of cells by using the following syntax: “Range(“Cell_Range”). I describe how you can use 2 different syntaxes for purposes of referring to these type of ranges above:
- By identifying the full range.
- By delineating the range, naming the cells in its upper-left and lower-right corners.
Let’s take a look at how both of these look like in practice:
If you want to make reference to a range of cells between cells A1 and B5 (A1, A2, A3, A4, A5, B1, B2, B3, B4 and B5), one appropriate syntax is “Range(“A1:B5″)”. Continuing to work with Sheet1 within Book1.xlsm, the fully qualified reference is as follows:
Application.Workbooks("Book1.xlsm").Worksheets("Sheet1").Range("A1:B5")
However, if you choose to apply the second syntax, where you delineate the relevant range, the appropriate syntax is “Range(“A1”, “B5″)”. In this case, the fully qualified reference looks as follows:
Application.Workbooks("Book1.xlsm").Worksheets("Sheet1").Range("A1", "B5")How To Refer To A Range Of NonContiguous Cells Using The Worksheet.Range Property
The syntax for purposes of referring to a range of noncontiguous cells in Excel is very similar to that used to refer to a range of contiguous cells. You simply separate the different areas by using a comma (,). Therefore, the basic syntax is “Range(“Cell_Range_1,Cell_Range_#,…”)”.
Let’s assume that you want to refer to the following ranges of noncontiguous cells:

- Cells A1 to B5 (A1, A2, A3, A4, A5, B1, B2, B3, B4 and B5).
- Cells D1 to D5 (D1, D2, D3, D4 and D5).
You refer to such range by typing “Range(“A1:B5,D1:D5″)”. In this case, the fully qualified reference looks as follows:
Application.Workbooks("Book1.xlsm").Worksheets("Sheet1").Range("A1:B5,D1:D5")

However, when working with ranges of noncontiguous cells, you may want to process each of the different areas separately. The reason for this is that some methods/properties have issues when working with such noncontiguous cell ranges.
You can handle the separate processing with a loop.
How To Refer To The Intersection Of 2 Ranges Using The Worksheet.Range Property
I describe how, when using the Range property, you can use 3 operators for purposes of identifying the relevant Range above. We’ve already gone through examples that use the colon (:) and comma (,) operators. These were used in the previous sections for purposes of referring to ranges of contiguous or noncontiguous cells.
The third operator, space ( ), is useful when you want to refer to the intersection of 2 ranges. The reason for this is clear:
The space ( ) operator is, precisely, the intersection operator.
Let’s assume that you want to refer to the intersection of the following 2 ranges:

- Cells B1 to B10 (B1, B2, B3, B4, B5, B6, B7, B8, B9 and B10).
- Cells A5 to C5 (A5, B5 and C5).

In this case, the appropriate syntax is “Range(“B1:B10 A5:C5″)”. When working with Sheet1 of Book1.xlsm, a fully qualified reference can be constructed as follows:
Application.Workbooks("Book1.xlsm").Worksheets("Sheet1").Range("B1:B10 A5:C5")Such a reference returns the cells that are common to the 2 ranges. In this particular case, the only cell that is common to both ranges is B5.
How To Refer To A Named VBA Range Using The Worksheet.Range Property
If you’re referring to a VBA Range that has a name, the syntax is very similar to the basic case of referring to a single cell. You simply replace the address that you use to refer to the range with the appropriate name.
For example, if you want to create a reference to a VBA Range named “Excel_Tutorial_Example”, the appropriate syntax is “Range(“Excel_Tutorial_Example”)”. In this case, a fully qualified reference looks as follows:
Application.Workbooks("Book1.xlsm").Worksheets("Sheet1").Range("Excel_Tutorial_Example")
Remember to use quotation marks (“”) around the name of the range. If you don’t use quotes, Visual Basic for Applications interprets it as a variable.
How To Refer To Merged Cells Using The Worksheet.Range Property
In general, working with merged cells isn’t that straightforward. In the case of macros this is no exception. The following are some of the (potential) challenges you may face when working with a range that contains merged cells:


- The macro behaving differently from what you expected.
- Issues with sorting.
I may cover the topic of working with merged cells in future tutorials. For the moment, I explain how to refer to merged cells using the Range property. This should help you avoid some of the most common pitfalls when working with merged cells.
The first thing to consider when referring to merged cells is that you can reference them in either of the following 2 ways:
- By referring to the entire merged cell range.
- By referring only to the upper-left cell of the merged range.
Let’s assume that you’re working on an Excel spreadsheet where the cell range from A1 to C5 is merged. This includes cells A1, A2, A3, A4, A5, B1, B2, B3, B4, B5, C1, C2, C3, C4 and C5. In this case, the appropriate syntax is either of the following:
- If you refer to the entire merged range, “Range(“A1:C5″)”. In this case, the fully qualified reference is “Application.Workbooks(“Book1.xlsm”).Worksheets(“Sheet1”).Range(“A1:C5″)”.
- If you refer only to the upper-left cell of the merged range, “Range(“A1″)”. The fully qualified reference under this method is “Application.Workbooks(“Book1.xlsm”).Worksheets(“Sheet1”).Range(“A1″)”.
In both cases, the result is the same.

You should be particularly careful when trying to assign values to merged cells. Generally, you can only carry this operation by assigning the value to the upper-left cell of the range (cell A1 in the example above). Otherwise, Excel VBA (usually) doesn’t:
- Carry out the value assignment; and
- Return an error.
How To Refer To A VBA Range Object Using Shortcuts For The Range Property
References to Excel’s VBA Range object using the Range property can be made shorter using square brackets ([ ]).
You can use this shortcut as follows:
- Don’t use the keyword “Range”.
- Surround the relevant property arguments with square brackets ([ ]) instead of using parentheses and double quotes (“”).
Let’s take a look at how this looks in practice by applying the shortcut to the different cases and examples shown and explained in the sections above.
Shortcut #1: Referring To A Single Cell
Instead of typing “Range(“Cell”)” as explained above, type “[Cell]”.
For example if you’re making reference to cell A1, use “[A1]”. The fully qualified reference for cell A1 in Sheet1 of Book1.xlsm looks as follows:
Application.Workbooks("Book1.xlsm").Worksheets("Sheet1").[A1]

Shortcut #2: Referring To An Entire Row Or Column
In this case, the usual syntax is either “Range(“Row_Number:Row_Number”)” or “Range(“Column_Letter:Column_Letter”)”. I explain this above.
By applying square brackets, you can shorten the references to the following:

- Row: “[Row_Number:Row_Number]”.
- Column: “[Column_Letter:Column_Letter]”.
For example, if you’re referring to the first row (Row 1) or the first column (Column A) of an Excel worksheet, the syntax is as follows:
And the fully qualified references, assuming you’re working with Sheet1 of Book1.xlsm are the following:
Application.Workbooks("Book1.xlsm").Worksheets("Sheet1").[1:1] Application.Workbooks("Book1.xlsm").Worksheets("Sheet1").[A:A]Shortcut #3: Referring To A Range Of Contiguous Cells
Generally, you refer to a range of cells by using the syntax “Range(“Cell_Range”)”. If you’re identifying the full range by using the colon (:) operator, as I explain above, you usually structure the reference as “Range(“Top_Left_Cell:Right_Bottom_Cell”)”.
You can shorten the reference to a range of contiguous cells by using square brackets as follows: “[Top_Left_Cell:Right_Bottom_Cell]”.
For example in order to refer to a range of cells between cells A1 and B5 (A1, A2, A3, A4, A5, B1, B2, B3, B4 and B5), you can type “[A1:B5]”. Alternatively, if you’re using a fully qualified reference and are working with Sheet1 of Book1.xlsm, the syntax is as follows:
Application.Workbooks("Book1.xlsm").Worksheets("Sheet1").[A1:B5]
Shortcut #4: Referring To A Range Of NonContiguous Cells
This case is fairly similar to the previous one, in which we made reference to a range of contiguous cells. However, in order to separate the different areas, you use the comma (,) operator, as explained previously. In other words, the basic syntax is usually “Range(“Cell_Range_1,Cell_Range_#,…”)”.
When using square brackets, you can simplify the reference above to “[Cell_Range_1,Cell_Range_#,…]”.
If you want to refer to the following ranges of noncontiguous cells:

- Cells A1 to B5 (A1, A2, A3, A4, A5, B1, B2, B3, B4 and B5).
- Cells D1 to D5 (D1, D2, D3, D4 and D5).
The syntax of a reference using square brackets is “[A1:B5,D1:D5]”. The fully qualified reference looks as follows:
Application.Workbooks("Book1.xlsm").Worksheets("Sheet1").[A1:B5,D1:D5]

Shortcut #5: Referring To The Intersection Of 2 Ranges
Generally, the syntax for referring to the intersection of 2 ranges uses the space operator and is “Range(“Cell_Range_1 Cell_Range_2″)”. When using square brackets, this becomes “[Cell_Range_1 Cell_Range_2]”.
Let’s go back to the example I use above and assume that you want to refer to the intersection of the following 2 ranges:

- Cells B1 to B10 (B1, B2, B3, B4, B5, B6, B7, B8, B9 and B10).
- Cells A5 to C5 (A5, B5 and C5).
You can create a reference using square brackets as follows: “[B1:B10 A5:C5]”. When working with Sheet1 of Book1.xlsm, the fully qualified reference is:
Application.Workbooks("Book1.xlsm").Worksheets("Sheet1").[B1:B10 A5:C5]And this returns the only cell common to both ranges: B5.
Shortcut #6: Referring To A Named VBA Range
As explained above, when referring to a VBA Range that has a name, you replace the address of the range with the relevant name. Therefore, the basic syntax is “Range(“Range_Name”)”.
When using square brackets, the logic is the same. Therefore, you can refer to a named range by typing “[Range_Name]”.
For example, when referring to a VBA Range named “Excel_Tutorial_Example”, the reference can be structures as “[Excel_Tutorial_Example]”. When using a fully qualified reference, it looks as follows:
Application.Workbooks("Book1.xlsm").Worksheets("Sheet1").[Excel_Tutorial_Example]
How To Refer To A VBA Range Object Using The Cells Property
There is no Cell object within Visual Basic for Applications. There is a Worksheet.Cells property and a Range.Cells property. You can use the Cells property to return a Range object representing the cells.
The main difference between both Cells properties is in connection with the object to which the property is applied to:


- When using the Worksheet.Cells property, you’re applying the property to a Worksheet object.
- When using the Range.Cells property, that property is applied to a Range object.
This is important because, depending on the context, the properties may return different cells. More precisely, when applying the Cells property to a Range object, you’re referring to a cell in relation to another range.
This probably sounds confusing, I agree. Don’t worry, as the explanation and examples below make this topic clear. The most important thing to remember is that the Cells property allows you to refer to a cell range.
Since the basic logic behind both properties (Worksheet.Cells and Range.Cells) is similar, I cover both at the same time.
There are several ways in which you can use the Cells property to refer to a Range object. I explain the main methods of doing this in the following sections.
Syntax Of The Cells Property
The basic syntax of the Cells property is “expression.Cells(Row_Number, Column_Number)”, where:
- “expression” is a variable representing a VBA object. This VBA object can be either a worksheet (in the case of the Worksheet.Cells property) or a range (for the Range.Cells property).
- “Row_Number” and “Column_Number” are the numbers of both the row and the column.
- Is common to use numbers in both cases.
- When using this syntax, you can also use a letter to refer to the column. In this case, wrap the letter in double quotes (“”). Other than the quotations (“”) (surrounding the letter), you don’t need to use other quotations in the same way as you do when using the Range property.
One of the main differences between the Range and the Cells properties is that the Cells property takes row and column numbers as arguments. You can see this reflected in the syntax described above.
There are additional possible ways to implement the Cells property. However, they’re secondary and I explain them below.
The Range object has a property called the Range.Item property, which I explain below. The reason why you can specify the Row_Number and Column_Number arguments immediately after the Cells keyword is that the Range.Item property is the default property of the Range object. This is the same reason why, as explained above, you can also use a letter wrapped in double quotes (“”) to refer to the column. If you’re interested in understanding the relationship between the Range.Item property and the Cells property, please refer to the relevant section below.
For the moment, let’s go back to some of the VBA Ranges that have appeared in previous examples and see how to refer to them using the Cells property.
How To Refer To A Single Cell Using The Worksheet.Cells Property
The most basic use case of the Cells property is referring to a single cell.
The fact that the Cells property can only be used (usually) for purposes of returning a range of 1 cell is one of the main characteristics that distinguishes the Cells from the Range property.
There is actually a way to use the Cells property for purposes of referring to larger cell ranges. However, this involves combining the Range and Cells properties. I explain this method below.
Referring to a single cell using the Cells property is relatively simple. For example, if you want to refer to cell A1 within Sheet1 of Book1.xlsm, the fully qualified reference is pretty much what you’d expect considering the basic syntax shown in the previous section:
Application.Workbooks("Book1.xlsm").Worksheets("Sheet1").Cells(1, 1)
Application.Workbooks("Book1.xlsm").Worksheets("Sheet1").Cells(1, "A")

There is, however, a second way to create references to a single cell when using the Worksheet.Cells property. Let’s take a look at this…
Alternative Syntax For Referring To A Single Cell Using The Worksheet.Cells Property
The syntax of the Cells property that I describe above is probably the one that you’ll use the most in practice.
The following alternative is substantially the same as the syntax that I have explained above. It also starts with “expression.Cells”. The difference lies in the arguments that appear within the parentheses.
This alternative syntax is “expression.Cells(Cell_Index)”. In this particular case, there is only 1 argument: the index of the relevant cell.
The main question, then, is how does Visual Basic for Applications determine the index of a cell?
For these purposes, each and every cell is assigned a number. Cells are numbered from left to right and from top to bottom. In other words:

- Numbering begins with the first row:
- Cell A1 is assigned the number 1.
- Cell B1 is assigned the number 2.
- Cell C1 is assigned the number 3.
- The process continues with each of the subsequence cells, until…
- Cell XFD1 (the last cell in the first row) is assigned the number 16,384.
- Once all the cells in the first row have been assigned a number, the process continues with the second row:
- Cell A2 is assigned the number 16,385.
- Cell B2 is assigned the number 16,386.
- Cell C2 is assigned the number 16,387.
- The number assignment continues until…
- Cell XFD2 (the last cell in the second row) is assigned the number 32,768.
- The process continues with the third row.
- Then the fourth row.
- And so on, until…
- It reaches row 1,048,576.
- And…
- The last cell in an Excel worksheet (cell XFD1048676) is assigned the number 17,179,869,184.
The following screenshot gives you an idea of how this number assignment goes:

For example, if you want to refer to cell A2 using this syntax, the appropriate reference is “Cells(16385)”. A fully qualified reference for cell A2 in Sheet1 of Book1.xlsm is as follows:
Application.Workbooks("Book1.xlsm").Worksheets("Sheet1").Cells(16385)
The initial 2 examples of the Cells property, show how it is applied to a Worksheet object. However, you can also use this syntax to apply the property to a Range object. This allows you to refer to a cell relative to another range.
How To Refer To A Single Cell In Relation To A Range Using The Range.Cells Property
Assume that the current selection is a range covering cells C3 through D5 (cells C3, C4, C5, D3, D4 and D5) of the active Excel worksheet. You already know that this is a Range object.
We can use the Selection property to create the following reference:
Selection.Cells(1, 1)This reference returns cell C3 itself.
This is different from what the previous example (a fully qualified reference) returned (cell A1).
The reason for the different behaviors seen in the examples above is that the Range property behaves relative to the object to which it is applied (a worksheet or a range). In the case of cell ranges (such as the example above), the Range property behaves in relation to the upper-left corner of the range. The logic is the same that explains the different behaviors when applying the Range property to a Worksheet object or a Range object.
Similarly, you can create references to a single cell in relation to a range using the alternative syntax of the Cells property that I described above. Let’s take a look at this case:
Alternative Syntax For Referring To A Single Cell In Relation To A Range Using The Range.Cells Property
To recall, the alternative syntax is “expression.Cells(Cell_Index)”.
In such case:


- Each of the cells within the range is assigned a number.
- The assignment is carried out following the same pattern described above for the whole worksheet. From left to right and from top to bottom.
For example, let’s assume that you are working with the cell range from A1 to B10 and want to select cell A5.

In this case, the reference is “Range(“A1:B10″).Cells(9)”. The following screenshot shows the way the Cell_Index numbers are assigned to the cells within the relevant range:

A fully qualified reference, when working with Sheet1 of Book1.xlsm is as follows:
Application.Workbooks("Book1.xlsm").Worksheets("Sheet1").Range("A1:B10").Cells(9)
An interesting aspect of applying this syntax of the Cells property to a Range object is that the argument for the Cells property is not limited by the number of cells in the referenced range. If you use a number that is larger than the amount of cells in the relevant range, Visual Basic for Applications continues counting as if the range was taller (extending to the bottom) than it’s in reality. In other words: The Range object returned by the Cells property doesn’t have to be inside the original/source cell range.
In the case of the range described in the example above (A1:B10), the Cell_Index assignment continues as shown in the following screenshot:
For example, the cell range from A1 to B10 contains 20 cells. Let’s assume that you type “21” as an argument for the Cells property. The resulting reference is “Range(“A1:B10″).Cells(21)”. The fully qualified reference is:
Application.Workbooks("Book1.xlsm").Worksheets("Sheet1").Range("A1:B10").Cells(21)This statement makes reference to cell A11 which is outside the originally referenced range (A1:B10).
How To Refer To A Cell Range Using The Range And Cells Properties
As anticipated above, you can combine the Range and Cells properties to refer to cell ranges. Perhaps the easiest way to do this is to use the Cells property as a parameter of the Range property.
For these purposes, use the following syntax: “Range(Cells(Row_Number_First_Cell, Column_Number_First_cell), Cells(Row_Number_Last_Cell, Column_Number_Last_Cell))”.
For example, if you want to refer to a range covering cells A1 to B5 (A1, A2, A3, A4, A5, B1, B2, B3, B4 and B5) in Sheet1 of Book1.xlsm using the Cells property, you’d type “Range(Cells(1, 1), Cells(5, 2)). The corresponding fully qualified reference is as follows:
Application.Workbooks("Book1.xlsm").Worksheets("Sheet1").Range(Cells(1, 1), Cells(5, 2))
This technique is useful (for example) when you use variables to specify the parameters of the Cells property. This can happen, for example, when looping.
How To Refer To All The Cells In A Worksheet Using The Worksheet.Cells Property
This is probably the simplest, but also most limited, way to implement the Cells property. The statement “expression.Cells” returns absolutely all of the cells in the relevant Excel worksheet.
For example, the following statement returns absolutely all of the cells of Sheet1 in Book1.xlsm:
Application.Workbooks("Book1.xlsm").Worksheets("Sheet1").CellsThis method doesn’t allow you to reference a single cell.
Why You Should Learn To Use The Cells Property To Refer To Excel’s VBA Range Object
Using the Cells property may seem like a slightly more complicated way to refer to Excel’s VBA Range object than using the Range property. However there are some scenarios where using the Cells property may be more appropriate.
Perhaps the most important scenario in which the Cells property shows its usefulness is when you’re using variables instead of the actual numbers as the arguments for the Cells property. In practice, you’re likely to find yourself in this situation (using variables instead of hardcoded numbers as arguments of the Cells property) often.
The Cells property and the ability to use variables as arguments is helpful when carrying out certain activities with Visual Basic for Applications. A common case of such an activity is looping (a topic I cover here).
How To Refer To A VBA Range Object Using The Range.Offset Property
Just as the previously explained properties, the Range.Offset property also returns a Range object.
However, in the case of the Range.Offset property, the Range object returned is that located a certain number of rows and columns from a specified range.
In other words, the returned Range object is determined by the following factors:


- A base range, which is going to be the base of the offset.
- The number of rows by which the base range is to be offset.
- The number of columns by which the base range is to be offset.
The syntax of the Range.Offset property reflects these 3 elements. This syntax is “expression.Offset(Row_Offset, Column_Offset)”, where:
- “expression” is a variable representing a VBA Range object.
- “Row_Offset” is the number of rows by which the range is to be offset. This value can be either positive (offset is done downwards) or negative (offset is done upwards).
- “Column_Offset” is the number of columns by which the range is to be offset. In the case of positive values, the offset is made to the right. When using negative values, the offset is made to the left.
Both the Row_Offset and the Column_Offset arguments carry the offset from the upper-left cell of the VBA Range object represented by “expression”.
The way the Offset property works means that it can only be applied to a Range object. In other words, there is no Worksheet.Offset property. This means that this property is a great alternative for purposes of referring to a particular cell in relation to a range without using the more complicated methods that I explain above, namely applying the Range or the Cells properties to a Range object.
Let’s look at a few examples of how to use the Range.Offset property to refer to a VBA Range object:
How To Refer To A Single Cell Using The Range.Offset Property
In the simplest case, you can use Range.Offset for referring to a single cell as follows:
Application.Workbooks("Book1.xlsm").Worksheets("Sheet1").Range("A1").Offset(RowOffset:=1, ColumnOffset:=1)You can simplify this statement by omitting the keywords “RowOffset” and “ColumnOffset”. The resulting reference is the following:
Application.Workbooks("Book1.xlsm").Worksheets("Sheet1").Range("A1").Offset(1, 1)In this particular case, Visual Basic for Applications returns a cell that is 1 row below and 1 column to the right of cell A1. In other words, the base range is cell A1.
And, from there, VBA moves 1 row down and 1 column to the right. Therefore, the above reference, refers to cell B2.
In certain cases, you may want to create a relative reference in which the Range.Offset property only needs to move a certain number of rows or columns (but not both) to find the cell it should return. In these cases, you can simply omit the irrelevant argument.
For example, the following statements refer to a cell one row below the cell A1. In other words, it refers to cell A2:
Application.Workbooks("Book1.xlsm").Worksheets("Sheet1").Range("A1").Offset(RowOffset:=1) Application.Workbooks("Book1.xlsm").Worksheets("Sheet1").Range("A1").Offset(1)
Similarly, the following statements refer to cell B1, which is one column to the right of cell A1:
Application.Workbooks("Book1.xlsm").Worksheets("Sheet1").Range("A1").Offset(ColumnOffset:=1) Application.Workbooks("Book1.xlsm").Worksheets("Sheet1").Range("A1").Offset(, 1)
Let’s take a look at a different way to refer to the base range. The following statement also refers to a single cell. However, notice the difference in the way the base cell for the offset is expressed.
ActiveCell.Offset(1, 1)In this case, instead of using “Range”, I use the Application.ActiveCell property. This property returns a Range object that represents the current active cell.
Therefore, Visual Basic for Applications returns a cell that is 1 row below and 1 column to the right of the current active cell. For example, if the current active cell is A1, the statement above returns cell B2.
The Range.Offset property generates an error if it is used for trying to return a cell that doesn’t exist. This may happen, for example, if the current active cell is A1 and you use the following reference:
ActiveCell.Offset(-1, -1)The statement above is asking Visual Basic for Applications to return the cell that is 1 row above and 1 column to the left of cell A1. Since no such cell exists, an error is generated.
How To Refer To A Range Of Cells Using The Range.Offset Property
You already know the different operators that you can use for purposes of referring to a range of cells using Visual Basic for Applications. Particularly important is the colon (:) operator, which you can use to set up arrays and create references to ranges of contiguous cells.
If you want to refer to a range of cells using the Range.Offset property, you can simply use the same colon operator in order to define the cell range that is the base of the offset.
The logic of the offset continues to be the same.
Take a look, for example, at the following VBA Range object reference:
Application.Workbooks("Book1.xlsm").Worksheets("Sheet1").Range("A1:B5").Offset(3, 3)This statement proceeds as follows:


- It sets as base range that containing cells A1 through B5 (A1, A2, A3, A4, A5, B1, B2, B3, B4 and B5).

- It moves the range 3 cells to the right and 3 cells down.

As a consequence of the above, the statement returns the range from cells D4 to E8 (D4, D5, D6, D7, D8, E4, E5, E6, E7 and E8).

Why You Should Learn To Use The Range.Offset Property To Refer To Excel’s VBA Range Object
The Range.Offset property is (usually) most useful when:
- You’re working with variables instead of actual numbers as arguments; and
- In looping procedures.
The Range.Offset property is also commonly used by the macro recorder when you use relative references while recording a macro. Therefore, you can expect to encounter this type of reference structure constantly when working with macros and Visual Basic for Applications.
How To Refer To A VBA Range Object Using The Range.Item Property
For reasons that I explain at the end of this section, you may not end up using the Range.Item property too much in your day-to-day Excel work. However, you may still need to use this property from time to time. Additionally, having a good understanding of the Range.Item property is helpful for purposes of becoming a better user of the Cells property which I describe above and understanding its syntax.
Just as some of the other properties discussed throughout this VBA tutorial, the Range.Item property returns an object. The object is a range.
In this particular case, the range is determined by starting with a particular specified range. The Range.Item property then accesses a particular cell in that range, based on the arguments you use.
The syntax of the Range.Item property is very similar to those of the other properties covered by this VBA tutorial: “expression.Item(Row_Index,Column_Index)”. In this case, “expression” is a variable representing a Range object.
Notice, however, that in the case of the Range.Item property, I refer to “Row_Index” and “Column_Index”. In the case of most of the other properties covered in this VBA tutorial, the arguments made reference to either numbers (for example “Row_Number”) or letters (such as “Column_Letter”).
The only other time I use the word index for purposes of describing a property’s arguments is when explaining an alternative syntax for purposes of referring to a single cell with the Cells property. The reason why the Range.Item property uses index in order to identify both the row and column is because the behavior of the Row_Index argument is very similar to that of the Cell_Index argument in that use case of the Cells property.
Let’s take a closer look at this Row_Index argument. The main characteristics of this argument are the following:
- It is required.
- It must be a number.
- It determines the cell that you access within the relevant range. For these purposes, there are 2 options.
- If the only argument you’re using is Row_Index, cells are numbered from left to right and from top to bottom. I explain, in detail, how this works above.
- If you’re using both Row_Index and Column_Index, Row_Index determines the row of the cell you access within the applicable range.
The other argument of the Range.Item property (Column_Index) behaves slightly different. The following are its main characteristics:
- It’s optional.
- It can be a number or a string. As a consequence of this characteristic you can use both the column number or the column letter (wrapped in quotations) to refer to a particular column. I show you how this works below.
- It determines the column of the cell you access within the relevant range.
Both arguments are relative offsets. Visual Basic for Applications uses those arguments to determine how many rows and columns to move away from the originally specified range.
I explain (above) how, when applied to a Range object, the Cells property is not limited by the number of cells in the specified range. In other words, you can use the Cells property to refer to cells outside that range. The same thing happens with the Range.Item property.
After reading about the other properties above, you probably have a good idea about what the Range.Item property does. Nonetheless, let’s take a look at a couple of examples.
For example, the following statements all return cell A1 of Sheet1 in Book1.xlsm:
Application.Workbooks("Book1.xlsm").Worksheets("Sheet1").Range("A1:D10").Cells.Item(1) Application.Workbooks("Book1.xlsm").Worksheets("Sheet1").Range("A1:D10").Cells.Item(1, 1) Application.Workbooks("Book1.xlsm").Worksheets("Sheet1").Range("A1:D10").Cells.Item(1, "A")
However, let’s assume that you want to refer to cell B8. For these purposes, you can use either of the following references:
Application.Workbooks("Book1.xlsm").Worksheets("Sheet1").Range("A1:D10").Cells.Item(30) Application.Workbooks("Book1.xlsm").Worksheets("Sheet1").Range("A1:D10").Cells.Item(8, 2) Application.Workbooks("Book1.xlsm").Worksheets("Sheet1").Range("A1:D10").Cells.Item(8, "B")
Part of the importance of the Range.Item property is that it allows you to refer to a specific cell in relation to a range.
However, perhaps even more important for purposes of this VBA tutorial, the Item property is the default property for the Range object. You can generally omit the Item keyword before specifying the Row_Index and Column_Index arguments. In the case of the last example above, this results in the following shortened references:
Application.Workbooks("Book1.xlsm").Worksheets("Sheet1").Range("A1:D10").Cells(30) Application.Workbooks("Book1.xlsm").Worksheets("Sheet1").Range("A1:D10").Cells(8, 2) Application.Workbooks("Book1.xlsm").Worksheets("Sheet1").Range("A1:D10").Cells(8, "B")The structure used in these references probably looks quite familiar by now. The reason for this is that this structure is substantially the same as that which I describe above when explaining the Cells property.
Due mainly to this reason, you’ll probably won’t use the Range.Item property too often. Instead, you’ll likely resort to the Cells property.
However, now you know that, if required for your purposes, you can use the Range.Item property for purposes of referring to Excel’s VBA Range objects.
Furthermore, having a good knowledge about the Range.Item property is helpful for, among others purposes:


- Having a better understanding of the Cells property.
- Crafting better references to Excel’s VBA Range objects with the Cells property.
Conclusion
The Range object is one of the most important and frequently used Excel VBA objects.
Unfortunately, the topic of Excel’s VBA Range object can sometimes be confusing for certain users. One of the main reasons for this is the fact that there are several different ways to refer to the Range object.
This VBA tutorial provides a brief introduction to the topic of Excel’s VBA Range object. Perhaps more importantly, this post explains and illustrates some of the most common methods for purposes of creating appropriate references to the Range object.
Now that you’ve read this post, you probably have a good understanding of Excel’s VBA Range object and won’t be confused by the different alternatives you can use to reference it. In particular, you’re probably now an expert when it comes to creating references to Range objects using any of the following properties:
- Range.
- Cells.
- Offset.
- Item.
There are still some other ways to refer to and manipulate Excel’s VBA Range objects. Some of these are the Application.Union method and the Range.Areas property.
When we work with a large amount of data to avoid referring to a particular cell or cell range, we usually create named ranges. It allows us to refer to the required cell range through the named range. In VBA, to create a named range, we have Add Name Funct
We can select a cell or range of cells and name it. Then, after naming the cells, we can refer to those cells by entering those defined names instead of the usual row or column references.
Table of contents
- Excel VBA Named Range
- How to Create Named Ranges?
- How to Create Named Ranges using VBA Code?
- Example #1
- Example #2
- Recommended Articles
You can download this VBA Named Range Excel Template here – VBA Named Range Excel Template
How to Create Named Ranges?
It is a walk-in-the-park job to create named ranges. The first thing we need to do is to identify the cells we want to create a name range in excelName range in Excel is a name given to a range for the future reference. To name a range, first select the range of data and then insert a table to the range, then put a name to the range from the name box on the left-hand side of the window.read more.
Look at the below image.

To arrive at the profit in the B4 cell, we have applied the formula B2 – B3.
It is a common thing everybody does. But, how about creating the names and applying the formula like “Sales– Cost.”
Place a cursor on cell B2 > Go to the Name boxIn Excel, the name box is located on the left side of the window and is used to give a name to a table or a cell. The name is usually the row character followed by the column number, such as cell A1.read more and call it “Sales”.

Place a cursor on the B3 cell and call it Cost.

Now, in the “Profit” column, we can refer to these names instead of cell references.
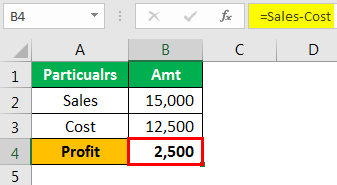
It is the basic thing about Named ranges.
How to Create Named Ranges using VBA Code?
Example #1
Have you ever thought of creating a named range using VBA CodeVBA code refers to a set of instructions written by the user in the Visual Basic Applications programming language on a Visual Basic Editor (VBE) to perform a specific task.read more?
Then, follow the below steps to create a named range.
Step 1: Define the variable as “Range.”
Code:
Sub NamedRanges_Example()

  Dim Rng As Range

End Sub

Step 2: Now, set the variable “Rng” to specific cells you wish to name.
Code:
Sub NamedRanges_Example()

  Dim Rng As Range

  Set Rng = Range("A2:A7")

End Sub

Step 3: Access the Names property using the “ThisWorkbook” object.

We have so many parameters with Names.Add method. Below are the explanations.
[Name]: Name is nothing, but what is the range name we would like to give? We specify.
While naming the cell, it should not contain any special characters except the underscore (_) symbol, and it should not contain space characters as well. In addition, it should not start with numerical values.
[Refers to]: This is nothing but what is the range of cells we are referring to.
We think these two parameters are good enough to start the proceedings.
Step 4: In the name, the argument enters the name you wish to give. For example, we have named it “SalesNumbers.”
Code:
Sub NamedRanges_Example()

  Dim Rng As Range

  Set Rng = Range("A2:A7")

  ThisWorkbook.Names.Add Name:="SalesNumbers"

End Sub
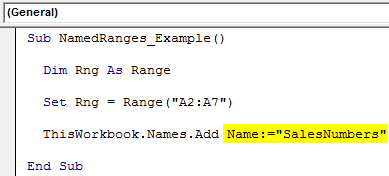
Step 5: In refers to an argument, enter the range of cells we wish to create. For example, in the name of the “Rng” variable, we have already assigned the range of cells as A2 to A7. So, supply the argument as “Rng.”
Code:
Sub NamedRanges_Example()

  Dim Rng As Range

  Set Rng = Range("A2:A7")

  ThisWorkbook.Names.Add Name:="SalesNumbers", RefersTo:=Rng

End Sub

This code will create a named range for cells from A2 to A7.
Now in the worksheet, we have created some numbers from A2 to A7.

In the A8 cell, we want to have the total of the above cell numbers. Then, we will create a SUM of these numbers using the Named range.
Code:
Sub NamedRanges_Example()

  Dim Rng As Range

  Set Rng = Range("A2:A7")

  ThisWorkbook.Names.Add Name:="SalesNumbers", RefersTo:=Rng

    Range("A8").Value = WorksheetFunction.Sum(Range("SalesNumbers"))

End Sub
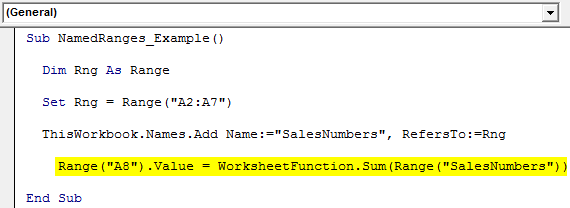
Suppose you run this code manually or by pressing the F5 key. Then, we will get the total of a named range in cell A8.

These are the basic must-know facts about “Named Ranges.”
Example #2
In vba, we can refer to the cells using the RANGE objectRange is a property in VBA that helps specify a particular cell, a range of cells, a row, a column, or a three-dimensional range. In the context of the Excel worksheet, the VBA range object includes a single cell or multiple cells spread across various rows and columns.read more. Similarly, we can also refer to those cells by using named ranges.
For example, in the above example, we have named the cell B2 as “Sales” and B3 as “Cost.”
By using actual cell references, we refer to those cells like this.
Code:
Sub NamedRanges()

 Range("B2").Select
 'This will select the B2 cell

 Range("B3").Select
 'This will select the B3 cell

End Sub

Since we already created these cells, we can refer to them using those names below.
Code:
Sub NamedRanges()

 Range("Sales").Select
 'This will select cell named as "Sales" i.e. B2 cell

 Range("Cost").Select
 'This will select cell named as "Cost" i.e. B3 cell

End Sub

Like this, using Named ranges, we can use those cells. For example, using these names, we can calculate the profit amount in cell B4. So for this first name, cell B4 is “Profit.”
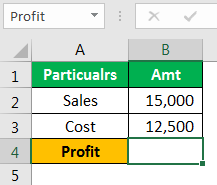
Now in the VBA editorThe Visual Basic for Applications Editor is a scripting interface. These scripts are primarily responsible for the creation and execution of macros in Microsoft software.read more, apply this code.
Code:
Sub NamedRanges_Example1()

    Range("Profit").Value = Range("Sales") - Range("Cost")

End Sub

It will calculate the profit amount in the cell named “Profit.”

Recommended Articles
This article has been a guide to VBA Named Range. Here, we discuss how to create and use VBA Named ranges to select cells or range of cells in Excel, along with practical examples and a downloadable template. Below you can find some useful Excel VBA articles: –
- VBA DoEvents
- Get ASCII Code using VBA
- UsedRange in VBA
- VBA Subscript Out of Range Error
|
PavelKs Пользователь Сообщений: 350 |
Добрый день, |
|
nilem Пользователь Сообщений: 837 |
Так попробуйте: Sub RangeName() |
|
PavelKs Пользователь Сообщений: 350 |
nilem, спасибо работает. НО хотел имя диапазона УЗНАТЬ, а не сравнить ячейку с конкретным именем (Диапазонов на листе много). |
|
слэн  Пользователь Сообщений: 5192 |
Function arnm(cell As Range) As String ибо может быть несколько именованных диапазонов, содержащих данную ячейку |
|
PavelKs Пользователь Сообщений: 350 |
слэн, спасибо, отлично работает. |
|
слэн Пользователь Сообщений: 5192 |
тут несколько раньше надо начать: |
|
PavelKs Пользователь Сообщений: 350 |
слэн, спасибо разобрался, но (x.RefersToRange, cell): |
|
слэн Пользователь Сообщений: 5192 |
это свойство объекта name у меня объекты name перечисляются в переменной x, поэтому x.referstorange если хотите непосредственно по имени обратиться, то будет: names(«qwer»).referstorange |
|
PavelKs Пользователь Сообщений: 350 |
#9 29.04.2010 13:22:54 слэн, спасибо. |
There are times where you may have a large number of named ranges in a workbook. I like to have a general rule when creating a workbook. No more than half a dozen named ranges. Formula auditing turns into a nightmare if there are too many named ranges. You may well know what CapitalExpense refers to when you create the named range but as your file gets 20-30 tabs and a dozen other named ranges, finding CapitalExpense can prove time consuming if you have to go to the name manager continually to tell you the location of the named range. The following is a simple piece of code which will identify all of the named ranges in a file and show what range the named ranges refer to.
Option Explicit
Sub WkbNames() ‘Show all named Ranges in Sheet1.
Dim sh As Worksheet
Dim nm As Name
Set sh=Sheet1 ‘Ensure you change the sheet reference if applicable
On Error Resume Next
For Each nm In Names ‘Loop through all sheet names.
sh.Range(«A» & Rows.Count).End(xlUp)(2)=nm.Name
sh.Range(«B» & Rows.Count).End(xlUp)(2)=»‘» & nm.RefersTo
Next nm
On Error GoTo 0
End Sub