
Return to VBA Code Examples
In this Article
- For Each Item in Array
- For Next Loop
- Loop Through Part of Array
- Loop Through Entire Array
This tutorial will teach you how to loop through Arrays in VBA.
There are two primary ways to loop through Arrays using VBA:
- For Each Loop – The For Each Loop will loop through each item in the array.
- For Next Loop – The For Next Loop will loop through specified start and end positions of the array (We can use the UBound and LBound Functions to loop through the entire array).
For Each Item in Array
The For Each Loop enables you to loop through each element of the array.
Sub LoopForArrayStatic()
'declare a variant array
Dim strNames(1 To 4) As String
'populate the array
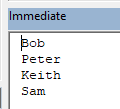
strNames(1) = "Bob"
strNames(2) = "Peter"
strNames(3) = "Keith"
strNames(4) = "Sam"
'declare a variant to hold the array element
Dim item as variant
'loop through the entire array
For Each item in strNames
'show the element in the debug window.
Debug.Print item
Next item
End SubThe above procedure will loop through all the names in the array.
For Next Loop
The For Next Loop will loop through each item at a specified start and end position of the array.
Loop Through Part of Array
You can manually specify the start and end positions for your loop. This may be appropriate if you know your array size and/or you only want to loop through part of an array.
Sub LoopForNextStatic()
'declare a variant array
Dim strNames(1 To 4) As String
'populate the array
strNames(1) = "Bob"
strNames(2) = "Peter"
strNames(3) = "Keith"
strNames(4) = "Sam"
'declare an integer
Dim i As Integer
'loop from position 2 to position 3 of the array
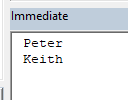
For i = 2 To 3
'show the name in the immediate window
Debug.Print strNames(i)
Next i
End SubIn the example above, we have looped through positions 2 and 3 of the array. The immediate window would return the names as follows.
Loop Through Entire Array
Next, we will use the UBound and LBound Functions to loop through an entire array. This is extremely useful if the start and end positions of the array might change (ex. a Dynamic Array):
Sub LoopForNextDynamic()
'declare a variant array
   Dim strNames() As String
'initialize the array
   ReDim strNames(1 to 4)
'populate the array
   strNames(1) = "Bob"
   strNames(2) = "Peter"
   strNames(3) = "Keith"
   strNames(4) = "Sam"
'declare an integer
   Dim i As Integer
'loop from the lower bound of the array to the upper bound of the array - the entire array
   For i = LBound(strNames) To UBound(strNames)
'show the name in the immediate window
      Debug.Print strNames(i)
   Next i
End Sub
VBA Coding Made Easy
Stop searching for VBA code online. Learn more about AutoMacro — A VBA Code Builder that allows beginners to code procedures from scratch with minimal coding knowledge and with many time-saving features for all users!

Learn More!
Цикл For Each… Next в VBA Excel, его синтаксис и описание отдельных компонентов. Примеры использования цикла For Each… Next.
Цикл For Each… Next в VBA Excel предназначен для выполнения блока операторов по отношению к каждому элементу из группы элементов (диапазон, массив, коллекция). Этот замечательный цикл применяется, когда неизвестно количество элементов в группе и их индексация, в противном случае, более предпочтительным считается использование цикла For…Next.
|
For Each element In group [ statements ] [ Exit For ] [ statements ] Next [ element ] |
В квадратных скобках указаны необязательные атрибуты цикла For Each… Next.
Компоненты цикла For Each… Next
| Компонент | Описание |
|---|---|
| element | Обязательный атрибут в операторе For Each, необязательный атрибут в операторе Next. Представляет из себя переменную, используемую для циклического прохода элементов группы (диапазон, массив, коллекция), которая предварительно должна быть объявлена с соответствующим типом данных*. |
| group | Обязательный атрибут. Группа элементов (диапазон, массив, коллекция), по каждому элементу которой последовательно проходит цикл For Each… Next. |
| statements | Необязательный** атрибут. Операторы вашего кода. |
| Exit For | Необязательный атрибут. Оператор выхода из цикла до его окончания. |
*Если цикл For Each… Next используется в VBA Excel для прохождения элементов коллекции (объект Collection) или массива, тогда переменная element должна быть объявлена с типом данных Variant, иначе цикл работать не будет.
**Если не использовать в цикле свой код, смысл применения цикла теряется.
Примеры циклов For Each… Next
Цикл для диапазона ячеек
На активном листе рабочей книги Excel выделите диапазон ячеек и запустите на выполнение следующую процедуру:
|
Sub test1() Dim element As Range, a As String a = «Данные, полученные с помощью цикла For Each… Next:» For Each element In Selection a = a & vbNewLine & «Ячейка « & element.Address & _ » содержит значение: « & CStr(element.Value) Next MsgBox a End Sub |
Информационное окно MsgBox выведет адреса выделенных ячеек и их содержимое, если оно есть. Если будет выбрано много ячеек, то полностью информация по всем ячейкам выведена не будет, так как максимальная длина параметра Prompt функции MsgBox составляет примерно 1024 знака.
Цикл для коллекции листов
Скопируйте следующую процедуру VBA в стандартный модуль книги Excel:
|
Sub test2() Dim element As Worksheet, a As String a = «Список листов, содержащихся в этой книге:» For Each element In Worksheets a = a & vbNewLine & element.Index _ & «) « & element.Name Next MsgBox a End Sub |
Информационное окно MsgBox выведет список наименований всех листов рабочей книги Excel по порядковому номеру их ярлычков, соответствующих их индексам.
Цикл для массива
Присвоим массиву список наименований животных и в цикле For Each… Next запишем их в переменную a. Информационное окно MsgBox выведет список наименований животных из переменной a.
|
Sub test3() Dim element As Variant, a As String, group As Variant group = Array(«бегемот», «слон», «кенгуру», «тигр», «мышь») ‘или можно присвоить массиву значения диапазона ячеек ‘рабочего листа, например, выбранного: group = Selection a = «Массив содержит следующие значения:» & vbNewLine For Each element In group a = a & vbNewLine & element Next MsgBox a End Sub |
Повторим ту же процедуру VBA, но всем элементам массива в цикле For Each… Next присвоим значение «Попугай». Информационное окно MsgBox выведет список наименований животных, состоящий только из попугаев, что доказывает возможность редактирования значений элементов массива в цикле For Each… Next.
|
Sub test4() Dim element As Variant, a As String, group As Variant group = Array(«бегемот», «слон», «кенгуру», «тигр», «мышь») ‘или можно присвоить массиву значения диапазона ячеек ‘рабочего листа, например, выделенного: group = Selection a = «Массив содержит следующие значения:» & vbNewLine For Each element In group element = «Попугай» a = a & vbNewLine & element Next MsgBox a End Sub |
Этот код, как и все остальные в этой статье, тестировался в Excel 2016.
Цикл для коллекции подкаталогов и выход из цикла
В этом примере мы будем добавлять в переменную a названия подкаталогов на диске C вашего компьютера. Когда цикл дойдет до папки Program Files, он добавит в переменную a ее название и сообщение: «Хватит, дальше читать не буду! С уважением, Ваш цикл For Each… Next.».
|
1 2 3 4 5 6 7 8 9 10 11 12 13 14 15 16 17 18 19 20 21 22 |
Sub test5() Dim FSO As Object, myFolders As Object, myFolder As Object, a As String ‘Создаем новый FileSystemObject и присваиваем его переменной «FSO» Set FSO = CreateObject(«Scripting.FileSystemObject») ‘Извлекаем список подкаталогов на диске «C» и присваиваем ‘его переменной «myFolders» Set myFolders = FSO.GetFolder(«C:») a = «Папки на диске C:» & vbNewLine ‘Проходим циклом по списку подкаталогов и добавляем в переменную «a« ‘их имена, дойдя до папки «Program Files«, выходим из цикла For Each myFolder In myFolders.SubFolders a = a & vbNewLine & myFolder.Name If myFolder.Name = «Program Files» Then a = a & vbNewLine & vbNewLine & «Хватит, дальше читать не буду!» _ & vbNewLine & vbNewLine & «С уважением,» & vbNewLine & _ «Ваш цикл For Each... Next.« Exit For End If Next Set FSO = Nothing MsgBox a End Sub |
Информационное окно MsgBox выведет список наименований подкаталогов на диске C вашего компьютера до папки Program Files включительно и сообщение цикла о прекращении своей работы.
В результате работы программы будут выведены не только наименования подкаталогов, видимых при переходе в проводнике к диску C, но и скрытые и служебные папки. Для просмотра списка всех подкаталогов на диске C, закомментируйте участок кода от If до End If включительно и запустите выполнение процедуры в редакторе VBA Excel.
Home / VBA / Arrays / VBA Loop Through an Array
In VBA, to loop through an array you can use the For Loop (For Next). And to write this loop code you need to know the size of the array (upper and lower bound) so that you can use both as the counter for the loop. Basically, for loop will start from the first element of the array and loop up to the last.
You have the following array with five elements from 1 to 5 and in these elements, you have numbers. So, the idea is to write a code that can loop through all these five elements and then multiply it with 2.

- First, you need to know the upper and lower bounds of the array and for this, you need to use the UBOUND and LBOUND functions.

- After that, you need to use these bounds to create a counter for the loop.

- Next, you need to write a line code to multiply the element’s value with the 2. This line of code will take value from the element itself and then multiply it.

- In the end, use the “Next” keyword to close the loop code.


Here’s the full code.
Option Base 1
Sub vba_array_loop()

Dim myArray(5) As Integer
myArray(1) = 10
myArray(2) = 20
myArray(3) = 30
myArray(4) = 40
myArray(5) = 50

Dim uB As Integer, lB As Integer
uB = UBound(myArray)
lB = LBound(myArray)

For i = lB To uB
    myArray(i) = myArray(i) * 2
Next i

End Sub
This post provides a complete guide to the standard VBA For Loop and the VBA For Each Loop.
If you are looking for information about the VBA While and VBA Do Loop then go here.
If you want some quick info about the For loops then check out the Quick Guide table in the section below.
If you are looking for information on a particular topic then check out the Table of Contents below.
“History is about loops and continuums” – Mike Bidlo.
Related Links for the VBA For Loop
The Complete Guide to Ranges in Excel VBA.
The Complete Guide to Copying Data in Excel VBA.
VBA Do While Loop.
A Quick Guide to the VBA For Loop
| Loop format | Description | Example |
|---|---|---|
| For … Next | Run 10 times | For i = 1 To 10 Next |
| For … Next | Run 5 times. i=2,4, 6 etc. | For i = 2 To 10 Step 2 Next |
| For … Next | Run in reverse order | For i = 10 To 1 Step -1 Debug.Print i Next |
| For … Next | Go through Collection | For i = 1 To coll.Count Debug.Print coll(i) Next |
| For … Next | Go through array | For i = LBound(arr) To UBound(arr) Debug.Print arr(i) Next i |
| For … Next | Go through 2D array | For i = LBound(arr) To UBound(arr) For j = LBound(arr,2) To UBound(arr,2) Debug.Print arr(i, j) Next j Next i |
| For Each … Next | Go through Collection | Dim item As Variant For Each item In coll Debug.Print item Next item |
| For Each … Next | Go through array | Dim item As Variant For Each item In arr Debug.Print item Next item |
| For Each … Next | Go through 2D array | Dim item As Variant For Each item In arr Debug.Print item Next item |
| For Each … Next | Go through Dictionary | Dim key As Variant For Each key In dict.Keys Debug.Print key, dict(key) Next key |
| Both types | Exit Loop | For i = 1 To 10 If Cells(i,1) = «found» Then Exit For End If Next i |
The VBA For Loop Webinar
If you are a member of the website, click on the image below to view the webinar for this post.
(Note: Website members have access to the full webinar archive.)

Introduction to the VBA For Loop
Loops are by far the most powerful component of VBA. They are the rocket fuel of your Macros. They can perform tasks in milliseconds that would take humans hours. They also dramatically reduce the lines of code your applications need.
For Loops have been part of all major programming languages since they were first used with Fortan in 1957.
If you have never used loops before then this post is a great place to start. It provides an in-depth guide to loops, written in plain English without the jargon.
Let’s start with a very important question – what are loops and why do we need them?
What are VBA For Loops?
A loop is simply a way of running the same lines of code a number of times. Obviously running the same code over and over would give the same result.
So what is important to understand is that the lines of code normally contain a variable that changes slightly each time the loop runs.
For example, a loop could write to cell A1, then cell A2, A3 and so on. The slight change each time is the row.
Let’s look at a simple example.
VBA For Loop Example 1
The following code prints the values 1 to 5 in the Immediate Window(Ctrl + G to view).
Debug.Print 1
Debug.Print 2
Debug.Print 3
Debug.Print 4
Debug.Print 5
The Immediate Window
If you have not used the Immediate Window before then this section will get you up to speed quickly.
The function Debug.Print writes values to the Immediate Window. To view this window select View->Immediate Window from the menu( the shortcut is Ctrl + G)


VBA For Loop Example 2
Now imagine we want to print out the numbers 1 to 20. We would need to add 15 more lines to the example above.
However, using a loop we only need to write Debug.Print once.
    For i = 1 To 20
        Debug.Print i
    Next i
The output is:

Output
If we needed print the numbers 1 to 1000 then we only need to change the 20 to 1000.
Normally when we write code we would use a variable instead of a number like 20 or 1000. This gives you greater flexibility. It allows you to decide the number of times you wish to run the loop when the code is running. The following example explains this.
VBA For Loop Example 3
A common task in Excel is read all the rows with with data.
The way you approach this task is as follows
- Find the last row with data
- Store the value in variable
- Use the variable to determine how many times the loop runs
Using a variable in the loop makes your code very flexible. Your will work no matter how many rows there are.
Let’s have a look at an example. Imagine you receive a sheet with a list of fruit types and their daily sales. You want to count the number of Oranges sold and this list will vary in size depending on sales.
The following screenshot shows an example of this list

Sample Data of Fruit Sales
We can use the code to count the oranges
' https://excelmacromastery.com/
Sub CountFruit()

    ' Get the last row with text
    Dim LastRow As Long
    LastRow = Sheet1.Cells(Sheet1.Rows.Count, 1).End(xlUp).Row

    Dim i As Long, Total As Long
    ' Use LastRow in loop
    For i = 2 To LastRow
        ' Check if cell has text "Orange"
        If Sheet1.Cells(i, 1).Value = "Oranges" Then
            ' Add value in column B to total
            Total = Total + Sheet1.Cells(i, 2).Value
        End If
    Next i

    ' Print total
    Debug.Print "Total oranges sold was:"; Total

End Sub
You can try this code for yourself. Change the number of fruit items and you will see that the code still works fine.
If you were to increase the number fruit items to a large value like 10,000 then you will hardly notice the difference in the time it takes to run – almost instantly.
Loops are super fast. This is what makes them so powerful. Imagine performing a manual task on 10,000 cells. It would take a considerable amount of time.
Advantages of the VBA For Loop
4To conclude this section we will list the major advantages of using loops
- They reduce the lines code you need
- They are flexible
- They are fast
In the next sections we will look at the different types of loops and how to use them.
The Standard VBA For Loop
The VBA For loop is the most common loop you will use in Excel VBA. The For Loop is used when you can determine the number of times it will be run. For example, if you want to repeat something twenty times.
YouTube Video For Loop
Check out this YouTube Video of the For Loop:
Get the workbook and code for this video here
Format of the Standard VBA For Loop
The Standard VBA For Loop has the following format:
For <variable> = <start value> to <end value>
Next <variable>
The start and end values can be variables. Also the variable after Next is optional but it is useful and it makes it clear which for loop it belongs to.
How a For Loop Works
Let’s look at a simple for loop that prints the numbers 1 to 3
    Dim i As Long
    For i = 1 To 3
        Debug.Print i
    Next i
How this code works is as follows
i is set to 1
The value of i(now 1) is printed
i is set to 2
The value of i(now 2) is printed
i is set to 3
The value of i(now 3) is printed
If we did not use a loop then the equivalent code would be
    Dim i As Long
    i = i + 1
    Debug.Print i
    i = i + 1
    Debug.Print i
    i = i + 1
    Debug.Print i
The i = i + 1 line is used to add 1 to i and is a common way in programming to update a counter.
Using Step with the VBA For Loop
You can see that i is increased by one each time. This is the default. You can specify this interval using Step keyword.
The next example shows you how to do this:
    ' Prints the even numbers i.e. 2,4,6,8 ... 20
    For i = 2 To 20 Step 2
        Debug.Print i
    Next i
You can use a negative number with Step which will count in reverse
    ' Prints the even numbers in reverse i.e. 20,18,16,14 ... 2
    For i = 20 To 2 Step -2
        Debug.Print i
    Next i
Note: if Step is positive then your starting number must be lower than you ending number. The following loop will not run because the starting number 20 is greater than 10. VBA therefore, thinks it has already reached the target value 10.
    ' Will not run as starting number already greater than 10
    For i = 20 To 10 Step 1
        Debug.Print i
    Next i
If Step is negative then the start number must be greater than the end number.
Exit the For Loop
Sometimes you may want to leave the loop earlier if a certain condition occurs. For example if you read bad data.
You can use Exit For to automatically leave the loop as shown in the following code
    For i = 1 To 1000

        ' If cell is blank then exit for
        If Cells(i, 1) = "" Then
            MsgBox "Blank Cell found - Data error"
            Exit For
        End If

    Next i
Using the VBA For Loop with a Collection
The For loop can also be used to read items in a Collection.
In the following example, we display the name of all the open workbooks
    Dim i As Long
    For i = 1 To Workbooks.Count
        Debug.Print Workbooks(i).FullName
    Next i
Using Nested For Loops
Sometimes you may want to use a loop within a loop. An example of this would be where you want to print the names of the worksheets of each open workbook.
The first loop would go through each workbook. Each time this loop runs it would use a second loop to go through all the worksheets of that workbook. It is actually much easier to do than it sounds.
The following code shows how:
' https://excelmacromastery.com/
Sub ListWorksheets()

    Dim i As Long, j As Long
    ' First Loop goes through all workbooks
    For i = 1 To Workbooks.Count

        ' Second loop goes through all the worksheets of workbook(i)
        For j = 1 To Workbooks(i).Worksheets.Count
            Debug.Print Workbooks(i).Name + ":" + Worksheets(j).Name
        Next j

    Next i

End Sub
This works as follows:
The first loop sets i to 1
The second loop then uses the workbook at 1 to go through the worksheets.
The first loop sets i to 2
The second loop then uses the workbook at 2 to go through the worksheets.
and so on
It the next section we will use a For Each loop to perform the same task. You will find the For Each version much easier to read.
The VBA For Each Loop
The VBA For Each loop is used to read items from a collection or an array. We can use the For Each loop to access all the open workbooks. This is because Application.Workbooks is a collection of open workbooks.
This is a simple example of using the For Each Loop
    Dim wk As Workbook
    For Each wk In Workbooks
        Debug.Print wk.FullName
    Next wk
Format of the VBA For Each Loop
You can see the format of the VBA for each loop here(See Microsoft For Each Next documentation):
For Each <variable> in <collection>
Next <variable>
To create a For Each loop we need a variable of the same type that the collection holds. In the example here we created a variable of type Workbook.
If the collection has different types of items we can declare the variable as a variant.
VBA contains a collection called Sheets. This is a collection of sheets of type Worksheet(normal) and Chart(when you move a chart to be a full sheet). To go through this collection you would declare the variable as a Variant.
The following code uses For Each to print out the name of all the sheets in the current workbook
    Dim sh As Variant
    For Each sh In ThisWorkbook.Sheets
        Debug.Print sh.Name
    Next sh
Order of Items in the For Loop
For Each goes through items in one way only.
For example, if you go through all the worksheets in a workbook it will always go through from left to right. If you go through a range it will start at the lowest cell e.g. Range(“A1:A10”) will return A1,A2,A3 etc.
This means if you want any other order then you need to use the For loop.
Both loops in the following example will read the worksheets from left to right:
    ' Both loops read the worksheets from left to right
    Dim wk As Worksheet
    For Each wk In ThisWorkbook.Worksheets
        Debug.Print wk.Name
    Next

    Dim i As Long
    For i = 1 To ThisWorkbook.Worksheets.Count
        Debug.Print ThisWorkbook.Worksheets(i).Name
    Next
As you can see the For Each loop is neater to write. However if you want to read the sheets in any other order e.g. right to left then you have to use the for loop:
    ' Reading the worksheets from right to left
    Dim i As Long
    For i = ThisWorkbook.Worksheets.Count To 1 Step -1
        Debug.Print ThisWorkbook.Worksheets(i).Name
    Next
Using the VBA For Each Loop With Arrays
One thing to keep in my is that the For Each loop is that it is read-only when you use it with arrays.
The following example demonstrates this:
' https://excelmacromastery.com/
Sub UseForEach()

    ' Create array and add three values
    Dim arr() As Variant
    arr = Array("A", "B", "C")

    Dim s As Variant
    For Each s In arr
        ' Changes what s is referring to - not value of array item
        s = "Z"
    Next

    ' Print items to show the array has remained unchanged
    For Each s In arr
        Debug.Print s
    Next

End Sub
In the first loop we try to assign s to “Z”. When happens is that s is now referring the string “Z” and no longer to the item in the array.
In the second loop we print out the array and you can see that none of the values have changed.
When we use the For Loop we can change the array item. If we change the previous code to use the For Loop you it will change all the array values to “Z”
' https://excelmacromastery.com/
Sub UsingForWithArray()

    ' Create array and add three values
    Dim arr() As Variant
    arr = Array("A", "B", "C")

    Dim i As Long
    For i = LBound(arr) To UBound(arr)
        ' Changes value at position to Z
        arr(i) = "Z"
    Next

    ' Print items to show the array values have change
    For i = LBound(arr) To UBound(arr)
        Debug.Print arr(i)
    Next

End Sub
If your Collection is storing Objects the you can change the items using a For Each loop.
Using Nested For Each Loops
We saw already that you can have a loop inside other loops. Here is the example from above:
' https://excelmacromastery.com/
Sub ListWorksheets()

    Dim i As Long, j As Long
    ' First Loop goes through all workbooks
    For i = 1 To Workbooks.Count

        ' Second loop goes through all the worksheets of workbook(i)
        For j = 1 To Workbooks(i).Worksheets.Count
            Debug.Print Workbooks(i).Name + ":" + Worksheets(j).Name
        Next j

    Next i

End Sub
This time we will use the For Each loop to perform the same task:
' https://excelmacromastery.com/
Sub ReadAllWorksheets()

    Dim wk As Workbook, sh As Worksheet
    ' Read each workbook
    For Each wk In Workbooks

        ' Read each worksheet in the wk workbook
        For Each sh In wk.Worksheets
            ' Print workbook name and worksheet name
            Debug.Print wk.Name + ": " + sh.Name
        Next sh

    Next wk

End Sub
As you can see this is a neater way of performing this task than using the For Loop:
This code run as follows:
- Get the first Workbook from the Workbooks collection
- Go through all the worksheets in this workbook
- Print the workbook/worksheet details
- Get the next workbooks in the collection
- Repeat steps 2 to 3
- Continue until no more workbooks are left in the collection
How to Loop Through a Range
In Excel VBA, the most common use of a For Loop is to read through a range.
Imagine we have the data set in the screenshot below. Our task is to write code that will read through the data and copy the amounts to the column J. We are only going to copy amounts that are greater than 200,000.

The following example shows how we do it:
' Read through an Excel Range using the VBA For Loop
' https://excelmacromastery.com/
Sub ForLoopThroughRange()

    ' Get the worksheet
    Dim sh As Worksheet
    Set sh = ThisWorkbook.Worksheets("Sheet1")

    ' Get the Range
    Dim rg As Range
    Set rg = sh.Range("A1").CurrentRegion

    ' Delete existing output
    sh.Range("J1").CurrentRegion.ClearContents

    ' Set the first output row
    Dim row As Long
    row = 1

    ' Read through all the rows using the For Loop
    Dim i As Long
    For i = 2 To rg.Rows.Count

        ' Check if amount is greater than 200000
        If rg.Cells(i, 4).Value > 200000 Then

            ' Copy amount to column m
            sh.Cells(row, "J").Value = rg.Cells(i, 4).Value

            ' Move to next output row
            row = row + 1

        End If

    Next i

End Sub
This is a very basic example of copying data using Excel VBA. If you want a complete guide to copying data using Excel VBA then check out this post
Summary of the VBA For Loops
The Standard VBA For Loop
- The For loop is slower than the For Each loop.
- The For loop can go through a selection of items e.g. 5 to 10.
- The For loop can read items in reverse e.g. 10 to 1.
- The For loop is not as neat to write as the For Each Loop especially with nested loops.
- To exit a For loop use Exit For.
The VBA For Each Loop
- The For Each loop is faster than the For loop.
- The For Each loop goes through all items in the collectionarray.
- The For Each loop can go through items in one order only.
- The For Each loop is neater to write than a For Loop especially for nested loops.
- To exit a For Each loop use Exit For.
What’s Next?
Free VBA Tutorial If you are new to VBA or you want to sharpen your existing VBA skills then why not try out the The Ultimate VBA Tutorial.
Related Training: Get full access to the Excel VBA training webinars.
(NOTE: Planning to build or manage a VBA Application? Learn how to build 10 Excel VBA applications from scratch.)
A For Each loop is used to execute a statement or a set of statements for each element in an array or collection.
Syntax:
For Each element In group
[ statements ]
[ Exit For ]
[ statements ]
Next [ element ]
The For…Each…Next statement syntax has the following three parts:
| Part | Description |
|---|---|
| element | Required (Must be mentioned). Variable is used to iterate through the elements of the collection or array. For collections, the element can only be a Variant variable, a generic object variable, or any specific object variable. For arrays, the element can only be a Variant variable. |
| group | Required(Must be mentioned). Name of an object collection or array (except an array of user-defined types). |
| statement | Optional (May or may not be mentioned). One or more statements are executed on each item in the group. |
There are 4 basic steps to writing a For Each Next Loop in VBA:
- Declare a variable.
- Write the For Each Line with the variable and collection references.
- Add line(s) of code to repeat for each item in the collection.
- Write the Next line to terminate the loop.
The For…Each block is entered if there is at least one element in the group. Upon entering the loop, all the statements in the loop are executed for each element. When there are no more elements in the group, the loop is exited and execution continues with the statement following the Next statement. The next statement line terminates the loop.
Any number of Exit For statements may be placed anywhere in the loop as an alternative way to exit. Exit For is often used after evaluating some condition, for example, If…Then, and transfers control to the statement immediately following Next.
You can also nest For…Each…Next loops by placing one For…Each…Next loop within another. However, each loop element must be unique in its way.
NOTE
- Execution continues as if element is included, if you omit element in a Next statement.
- An error occurs, If a Next statement is encountered before its corresponding For statement,
You can’t use the For…Each…Next statement with an array of user-defined types because a Variant can’t contain a user-defined type.
Example 1
Private Sub Demo_Loop()
students is an array
students = Array(“Akshit”, “Nikita”, “Ritesh”) //Initialising Array-> students
Dim studentnames As Variant // Variable is assigned
‘iterating using For each loop.
For Each Item In students
studentnames =studentnames & Item & Chr(10)
Next
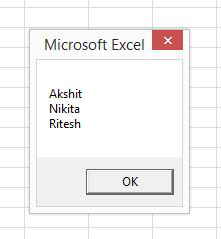
MsgBox studentnames
End Sub
It would look somewhat like below:
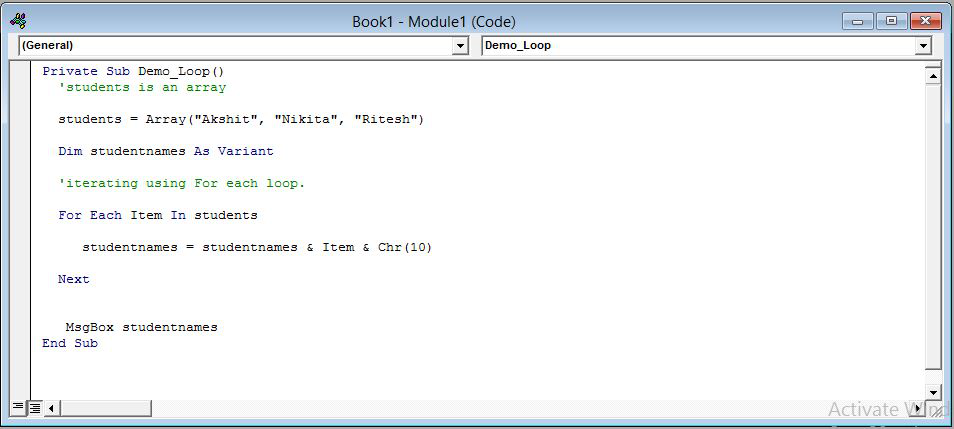
When the above code is executed, it prints all the student names with one item in each line.
I’ll show you how to loop through an array in VBA and macros in Excel. This is a fairly simple concept but it can be a little tricky.
First, I’m assuming you already know what an array is and how to create and array in VBA [LINK to Article]. Now, that you know that, let’s get to looping though arrays.
There are two main ways to loop through all of the elements of an array in VBA and both of those will be covered below.
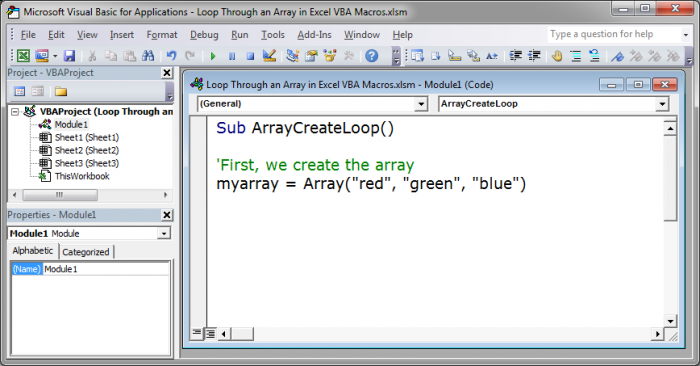
Create the Array
First, we need to create an array, and then we can loop through it.
myarray = Array("red", "green", "blue")
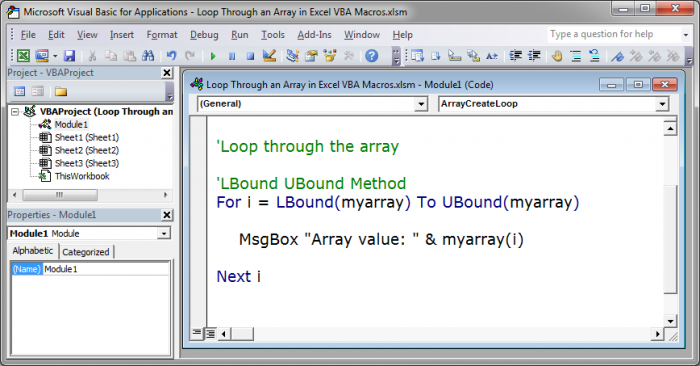
Loop through Array Method 1 — LBound and UBound Method
We use this code to loop though the array:
For i = LBound(myarray) To UBound(myarray)
MsgBox "Array value: " & myarray(i)
Next i
The MsgBox part of this code is simply what creates output so that we can see that this loop is working.
The actual loop is just this part:
For i = LBound(myarray) To UBound(myarray)
'inside the loop
Next i
To get this loop to work with your array, you simply need to replace myarray with the name of your array. If you want a more detailed explanation of everything, continue reading.
There are a few things going on here, so let’s start first with LBound and UBound.
LBound is a function in VBA that will find the lowest point of the array. This generates a number equal to the lowest index key for the array. The array that you want this to work on is put within this function, in this case, myarray.
UBound is a function in VBA that will find the highest point of the array. It outputs a number equal to the highest index key for the array. The array that you want this to work on is put within this function, in this case, myarray.
Now, we use these two functions within a basic For Next loop.
The For Next loop does this:
It sets a variable, in this case i (but it could be any name you want), equal to the LBound function’s output. Then, it says that this loop should continue running up to when it gets to the number provided by the UBound function, which will be the last index number in the array.
You need to close the loop with Next and then the variable i so that it will continue the loop, adding 1 each time.
Accessing Data from the Array within the Loop
You need to be able to get the data from the array variable and here is how you do it using this method:
While inside the loop, you put the name of your array and then inside parenthesis you put i or whichever variable you used in the loop in place of i; this will get the output from the array within the loop.
Download the accompanying workbook and test out the loop to see how it works. The result of running this loop is that three message boxes will open and show you the data that is stored in the array variable. This loop is contained in the macro titled ArrayCreateLoop_1.
Loop through Array Method 2 — For Each …Next Loop Method
Using the For Each …Next method, we use this code to loop through the array:
For Each element In myarray
MsgBox "Array value: " & element
Next element
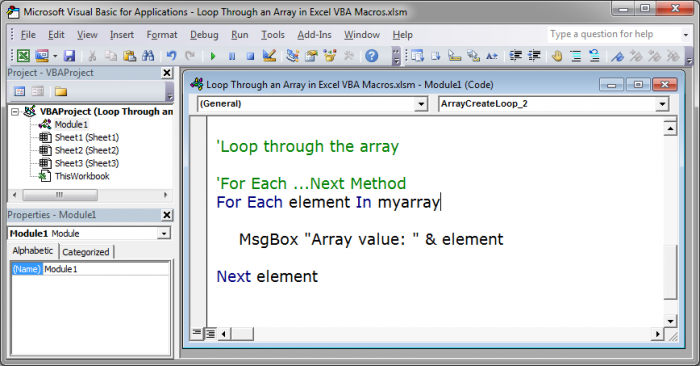
The name of the array is myarray and, in the middle of the loop, we have a line that starts with MsgBox that will output the contents of the array into a message box.
All you need to do to make this loop work for you is to change myarray to the name of your array variable.
If you want to learn more about the loop, keep reading.
This is the actual loop:
For Each element In myarray
'inside the loop
Next element
This loop will go through every part of the array and put it into a variable that we supply, in this case, the element variable.
You can name this variable whatever you want, you don’t have to call it «element». If you rename this, make sure to rename it in both paces, after where it says «For Each» and after «Next» — the «Next» part of the loop is what makes this a loop and tells the code to keep going through the variable until it is finished.
Accessing Data from the Array within the Loop
This is very easy to do using this method, simply use the variable that we used in the For Each loop, in this case element.
Anywhere you put this in the loop, the contents of the array will appear. You can see above how this was used in the line that starts with Msgbox.
Download the accompanying workbook and test out the loop to see how it works. The result of running this loop is that three message boxes will open and show you the data that is stored in the array variable. This loop is contained in the macro titled ArrayCreateLoop_2.
Notes
Both of these methods will work just fine for looping though a basic one dimensional array. For basic arrays, I would use the For Each loop since its syntax is quite a bit easier to understand and use.
However, don’t forget the LBound UBound method because you will often come across it when working with macros in Excel and it works great with more complex array functions.
Also, don’t forget to download the accompanying workbook so you can look at the code and play with it.
Similar Content on TeachExcel
Loop through All Worksheets in Excel using VBA and Macros
Tutorial: Ill show you how to loop through all of the worksheets in a workbook in Excel using VBA an…
Excel VBA — Create an Array — 3 ways
Tutorial: Ill show you three different ways to create an array in Excel VBA and Macros and how to ge…
How to Add a New Line to a Message Box (MsgBox) in Excel VBA Macros
Tutorial: I’ll show you how to create a message box popup window in Excel that contains text on mult…
Loop through a Range of Cells in Excel VBA/Macros
Tutorial: How to use VBA/Macros to iterate through each cell in a range, either a row, a column, or …
Data Validation List with Dynamic Arrays in Excel
Tutorial:
How to make a drop down menu list using data validation and dynamic arrays in Excel 365.
…
Select Cells in Excel using Macros and VBA
Tutorial: This is actually a very easy thing to do and only requires a couple lines of code. Below I…
Subscribe for Weekly Tutorials
BONUS: subscribe now to download our Top Tutorials Ebook!
На чтение 14 мин. Просмотров 18.5k.
Итог: циклы For Next — одни из самых мощных методов VBA для автоматизации общих задач в Excel. В этой статье объясняется, как работает цикл, повторяющий действия над коллекцией элементов, что экономит нам массу времени.
Уровень мастерства: Средний

Содержание
- Сила циклов VBA
- Как работает цикл For Next?
- Два типа циклов For Next
- The For Each Next Loop: цикл по коллекции элементов
- В каком порядке работает цикл For Each?
- Предметы / объекты НЕ выбираются в цикле
- The Next Loop: циклы через набор чисел
- Обратный цикл
- Как остановить цикл раньше
- Переменная не требуется после ключевого слова Next
- Примеры макросов VBA для циклов
- Какую задачу хотите зациклить вы?
Сила циклов VBA
В Excel мы тратим много времени на повторяющиеся простые задачи. Например, как: форматирование нескольких диапазонов, отображение нескольких листов, копирование и вставка в несколько рабочих книг, применение фильтров к нескольким таблицам или сводным таблицам, замена значений, обновление формул и т.д.
Можете ли вы вспомнить несколько задач, в которых вам
приходилось повторять один и тот же процесс снова и снова?
Эти задачи чрезвычайно трудоемкие и скучные!

К счастью, выход есть. Мы можем использовать циклы в наших
макросах VBA, чтобы очень быстро повторять действия. Задачи, выполнение которых
вручную может занять несколько часов, могут быть выполнены за несколько секунд
с помощью цикла.
Цикл For Next — это наиболее распространенный тип цикла,
который помогает нам выполнять эти повторяющиеся задания. В этой статье мы
рассмотрим два типа For Next Loops.
Загрузите файл примера
Загрузите бесплатный файл Excel, содержащий примеры макросов
с помощью цикла For Next.
![]() For Next Loop VBA Macro Examples.xlsm (79.0 KB)
For Next Loop VBA Macro Examples.xlsm (79.0 KB)
Скачать PDF версию статьи на английском для печати.
Как работает цикл For Next?
Цикл For Next позволяет нам просматривать коллекцию, элементами которой могут быть объекты или списки чисел.
Примеры коллекций:
- Клетки в ассортименте.
- Рабочие листы в рабочей тетради.
- Открытые рабочие тетради на компьютере.
- Сводные таблицы на листе.
- Сводные поля в сводной таблице.
- Формы на листе.
- И любой другой объект, с которым вы взаимодействуете в Excel.
Задача цикла For Next Loop состоит в том, чтобы выполнять
одинаковые действия (строки кода) для каждого элемента в коллекции.

В приведенном ниже примере содержится цикл For Next, который
проходит по каждому листу в книге и отображает каждый лист. Цикл начинается с
первого элемента в коллекции (первый лист в рабочей книге) и выполняет строку
кода между строками For и Next для каждого элемента в коллекции (каждый лист в
рабочей книге).
Sub Unhide_Multiple_Sheets()

Dim ws As Worksheet

    For Each ws In ActiveWorkbook.Worksheets
        ws.Visible = xlSheetVisible
    Next ws

End Sub
Конечно, мы можем использовать логические операторы, такие как операторы If, для проверки свойств и условий перед выполнением действий.
Следующий макрос отображает только те листы, которые имеют фразу «ABC Global Co.» в ячейке A1 каждого листа, и скрывает все остальные листы.
Sub Unhide_Report_Sheets()

Dim ws As Worksheet

    For Each ws In ActiveWorkbook.Worksheets
        If ws.Range("A1").Value = "ABC Global Co." Then
            ws.Visible = xlSheetVisible
        Else
            ws.Visible = xlSheetHidden
        End If
    Next ws

End Sub
Два типа циклов For Next
Действительно, существуют два типа For Next Loops.
- For Each Next
Loops циклически просматривает коллекцию элементов. - For Next Loops
цикл через набор чисел.
Давайте посмотрим, как работает
каждый.
The For Each Next Loop: цикл по коллекции элементов
Как мы видели выше, цикл «The For Each Next Loop» позволяет нам перебирать коллекцию предметов или объектов. Это, наверное, самый распространенный цикл, который мы используем в Excel, потому что мы работаем с коллекциями объектов. Опять же, эти коллекции представляют собой ячейки в диапазоне, рабочие таблицы в рабочей книге, сводные таблицы в рабочей таблице и т.д.

Мы будем использовать пример написания цикла «For Each Next Loop», чтобы просмотреть все рабочие листы в рабочей книге.

Существует четыре основных шага для написания цикла For Each Next в VBA:
- Объявите переменную для объекта.
- Напишите для каждой строки переменную и коллекцию
ссылок. - Добавьте строку (и) кода для повтора для каждого
элемента в коллекции. - Напишите следующую строку, чтобы закрыть цикл.
Давайте рассмотрим каждый из этих шагов подробно.
Шаг 1 — объявить переменную для объекта
Сначала нам нужно объявить переменную, которая будет
временно хранить ссылку на объект.
Строка Dim в верхней части макроса объявляет переменную, как объект. В этом случае объект является рабочим листом. Мы можем создать любое имя переменной, если захотим, если оно не совпадает с другой ссылкой в VBA. «Ws» — наиболее распространенное имя переменной для объекта листа, но вы можете изменить его.
Шаг 2 — Для каждой строки
Далее мы напишем оператор For Each. Это первая строка кода в цикле.
For Each ws In ActiveWorkbook.Worksheets
Первые два слова For Each. Затем мы вводим имя переменной, за которым следует слово In. Наконец, мы указываем, где располагается коллекция. В этом случае мы хотим просмотреть все рабочие листы в ActiveWorkbook. Итак, мы набираем ActiveWorkbook.Worksheets. Эта строка ссылается на все рабочие листы в ActiveWorkbook.
Если вы хотите пройтись по рабочим листам определенной
рабочей книги, вы можете использовать свойство Рабочие книги для ссылки на эту
рабочую книгу по имени.
For Each ws In Workbooks("Book2.xlsx").Worksheets
Просто помните, что рабочая книга, на которую вы ссылаетесь,
должна быть открыта до запуска строки кода For Next. Конечно, мы можем
использовать метод Workbooks.Open, чтобы открыть рабочую книгу.
Шаг 3 — Добавить код для повторения для каждой итерации
После строки «For Each» мы добавляем строку(и) кода, которая будет выполняться на каждом листе. В этом примере у нас есть только одна строка кода, которая показывает лист.
ws.Visible = xlSheetVisible
В этой строке кода мы используем переменную ws для ссылки на
текущий рабочий лист в цикле. Когда цикл выполняется, он устанавливает
временную ссылку на переменную ws для каждой итерации в цикле.
Это так же, как если бы мы установили переменную ws для определенного листа, используя следующую строку кода.
Однако нам НЕ нужна эта строка с циклом For Each Next. Цикл
заботится о настройке переменной для нас для каждой итерации в цикле.
Для первой итерации в цикле ws установлен на Worksheets (1).
На следующей итерации ws устанавливается в Worksheets (2). Это продолжается,
пока цикл перебирает все листы в рабочей книге. Это очень мощно, потому что мы
можем повторно использовать переменную для ссылки на лист в цикле несколько
раз.
Шаг 4 — Next закрывает цикл
Последняя строка кода в цикле — Next.
Когда макрос попадает в эту строку кода, он делает две вещи:
- Во-первых, он изменяет ссылку на переменную на следующий элемент коллекции. В этом примере переменная ws изменяется для ссылки на следующий лист в рабочей книге.
- Во-вторых, он возвращается к выполнению строки кода непосредственно под строкой For Each. Затем он выполняет все строки кода между строками For Each и Next в порядке сверху вниз.

Когда будет достигнут последний элемент в коллекции (рабочий лист в рабочей книге), цикл останавливается, и макрос переходит к следующей строке кода ниже строки Next.
В каком порядке работает цикл For Each?
Цикл For Each Loop всегда начинается с первого элемента в коллекции и переходит к последнему элементу в том порядке, в котором они отображаются в Excel. Это основано на номере индекса предметов в коллекции. Вот несколько примеров порядка выполнения цикла для общих объектов.
- Рабочие листы. Начинается с первой вкладки листа в рабочей книге и возвращается к последней в том порядке, в котором вкладки отображаются в рабочей книге.
- Рабочие книги. Начинается с первой открытой книги и циклически повторяется в порядке открытия рабочих книг. Рабочим книгам присваивается порядковый номер по мере их открытия.
- Клетки: циклы слева направо, затем вниз. Начинается с первой ячейки в диапазоне и возвращается к следующему столбцу в той же строке, затем переходит к следующей строке.
- Таблицы и сводные таблицы. Начинается с первого объекта, созданного на листе, и циклически повторяется в порядке создания объектов. Этот же принцип действует и для других объектов, которые вы создаете на листах, таких как фигуры, диаграммы, слайсеры и т.д.
Предметы / объекты НЕ выбираются в цикле
Важно отметить, что когда мы перебираем коллекцию объектов, каждый объект НЕ выделяется в Excel.

Цикл создает ссылку на элемент/объект с помощью переменной. Переменная временно установлена на ссылку на объект. Объект НЕ выбран и НЕ обязательно становится активным объектом. Для выбора объекта мы можем использовать методы Select или Activate. Вы также должны убедиться, что объекты родительского объекта выбраны первыми. Ознакомьтесь с моей статьей об объектной модели Excel и иерархии объектов в VBA, чтобы узнать больше об этом.
The Next Loop: циклы через набор чисел
Также можно использовать цикл For Next Loop для просмотра набора чисел. Это может быть полезно, когда мы перебираем элементы управления пользовательской формы, массивы или если мы хотим перебрать коллекцию в обратном направлении.

Основная операция цикла For Next такая же, как и для цикла
For Each. Разница заключается в формате строки For.
Шаг 1 — Объявление переменной для числа
Чтобы перебрать набор чисел, мы сначала должны объявить переменную для целого числа типа данных. Мы можем использовать Integer или Long integer.
Переменная называется счетчиком, потому что она увеличивается или уменьшается вверх/вниз для каждой итерации в цикле.
Дополнительное примечание к Long: тип данных Long (целое число) содержит большее число, чем Integer. Это занимает больше памяти, но для современного компьютера это не проблема. Мы можем использовать длинные переменные все время. Буква L выглядит как цифра 1 в VBA, поэтому я теперь использую i в качестве имени переменной, хотя я использую Long в качестве типа данных. Это все зависит от личных предпочтений, и вы можете назвать переменную как хотите.
Шаг 2 — Напишите строку For
Далее мы пишем строку For. Базовая конструкция — это ключевое слово For, за которым следует имя переменной (counter), затем знак равенства, начальное значение To end value.
Начальные и конечные значения могут быть указаны как числа, или мы можем использовать целочисленные / длинные переменные вместо них.
For i = 1 To ActiveWorkbook.Worksheets.Count
Эта строка кода возвращает количество листов в активной книге. Тем не менее, он не проходит по каждому листу. Цикл просто перебирает набор чисел. Мы должны создать ссылку на лист с переменной счетчика (i) в качестве номера индекса свойства Worksheets. Шаг 3 показывает эту ссылку.
Шаг 3 — Добавить код, который повторяется для каждой итерации
Остальная часть цикла работает так же, как цикл For Each. Мы можем добавить строки между строками For и Next, которые будут выполняться для каждой итерации цикла. Переменная counter может быть использована несколько раз в этих строках кода.
Worksheets(i).Visible = True
Шаг 4 — Строка Next закрывает цикл
Наконец, мы добавляем строку Next внизу.
Когда макрос запускается, он устанавливает переменную, равную первому числу в строке For. Когда макрос попадает в следующую строку, он добавляет 1 к значению переменной или увеличивает счет. Итак, я = 2 во второй итерации цикла. Он продолжает цикл, пока не будет достигнут последний номер в цикле.
По умолчанию 1 добавляется к счетчику переменных для каждой итерации в цикле. Это называется значением шага, и мы можем контролировать значение каждого шага в счетчике. Значение Step добавляется в конец строки For. Следующая строка добавит 2 к счетчику для каждой итерации в цикле.
Если вы хотите заштриховать все остальные строки на листе, вы можете использовать такой цикл.
Обратный цикл
Мы также можем использовать значение шага для обратной петли, указав отрицательное число.
Обратите внимание, что начальное значение теперь больше, а конечное значение меньше. Циклы начинаются с 100 (начальное значение) и вычитают 1 из переменной счетчика (шаг -1) для каждой итерации в цикле, пока не дойдут до 1 (конечное значение).
Ключевое слово Step не является обязательным. Если вы не укажете его, тогда VBA примет значение шага 1.
Цикл в обратном направлении — это хорошо, если вы удаляете элементы.
Я напишу отдельный пост об этом, но общая идея заключается в том, что когда мы перебираем коллекцию и удаляем элементы, размер коллекции уменьшается при удалении элементов. Цикл обычно выдает ошибку, как только достигает 10-го элемента, когда в коллекции теперь только 9 элементов. Цикл в обратном направлении предотвращает эту потенциальную ошибку.
Как остановить цикл раньше
Обычно цикл перебирает все элементы в коллекции, а затем переходит к следующей строке кода ниже следующей строки. Однако мы можем остановить цикл раньше с помощью оператора Exit For.
В следующем макросе оператор Exit For используется для выхода из цикла после того, как первый лист, начинающийся со слова «Отчет», будет найден скрытым.
Sub Unhide_First_Sheet_Exit_For()
' Отображает первый лист, который содержит определенную фразу
' в имени листа, затем выходит из цикла.

Dim ws As Worksheet

    For Each ws In ActiveWorkbook.Worksheets

        ' Найдите лист, который начинается со слова «Отчет»
        If Left(ws.Name, 6) = "Report" Then

            ws.Visible = xlSheetVisible

            ' Выход из цикла после того, как первый лист найден
            Exit For

        End If
    Next ws

End Sub
Переменная ws сохраняет ссылку на рабочий лист после
преждевременного выхода из цикла и может быть снова использована в коде под
циклом.

Переменная не требуется после ключевого слова Next
Возможно, вы заметили, что я добавил переменную после ключевого слова Next в нижней части цикла в приведенных выше примерах.
Это НЕ обязательно, и вы можете не увидеть его в других примерах, которые вы найдете в Интернете. Однако мне нравится включать переменную после Next по двум причинам.
- Мы можем использовать его при отладке кода,
чтобы увидеть значение переменной, наведя указатель мыши на переменную, когда
код остановлен. - Это облегчает понимание того, к какой строке For
подключена следующая строка. Это особенно верно, когда у вас есть несколько циклов
или вложенных циклов в ваших макросах.

Поэтому я рекомендую добавить переменную после ключевого слова Next в качестве лучшей практики. Немного дополнительной работы заранее сэкономит время и головную боль в будущем. Доверьтесь мне!
Примеры макросов VBA для циклов
Вот дополнительные статьи с макросами, в которых используется хотя бы один цикл For Next Loop.
3 способа показать несколько листов в учебнике по Excel + VBA
Автоматическое форматирование чисел по умолчанию в сводных таблицах Excel
3 совета, как сохранить и закрыть все открытые файлы книги Excel + макрос
Макрос метрики SUBTOTAL — создание сводной таблицы всех
типов функций
Как добавить оглавление Галерея изображений в файлы Excel
Скрыть и отобразить (отфильтровать) столбцы с помощью
слайсера или раскрывающегося меню фильтра
Фильтрация сводной таблицы или среза по самой последней дате или периоду
Как изменить размер панелей Excel для разных размеров экрана
Преобразование сводной таблицы в формулы SUMIFS + бесплатный макрос VBA
Макрос VBA, чтобы скрыть все столбцы, которые содержат
значение в ячейке
Как повторять задачи с помощью кода VBA — Looping — Отличная статья с большим количеством примеров от моего друга Криса Ньюмана из The Spreadsheet Guru.
Какую задачу хотите зациклить вы?
Я надеюсь, что эта статья поможет вам начать работу с циклами. Не забудьте скачать бесплатный файл Excel, содержащий примеры кода.
![]() For Next Loop VBA Macro Examples.xlsm (79.0 KB)
For Next Loop VBA Macro Examples.xlsm (79.0 KB)
Циклы, безусловно, являются промежуточной техникой кодирования, которая вынуждает нас выйти за рамки MacroRecorder. К сожалению, записанный макрос не может создавать петли. Тем не менее, это навык, который вы сможете использовать снова и снова на протяжении всей своей карьеры для автоматизации простых и сложных задач. Понимание того, как использовать циклы, даст вам волшебную силу с Excel.
Пожалуйста, оставьте комментарий ниже с задачей, которую вы хотите автоматизировать с помощью цикла. Спасибо!