Home / VBA / VBA Close Workbook (Excel File)
To close an Excel file, you need to use the “Close” method. With this method you can, specify if you want to save the changes or not. And, if you want to save and close a file that is not saved yet you can specify the path where you want to save it before closing.
The following is the syntax for the close method.
Workbook.Close (SaveChanges, FileName, RouteWorkbook)
Steps to Close a Workbook
- Specify the workbook that you want to close.
- Use the close method with that workbook.
- In the code method, specify if you want to save the file or not.
- In the end, mention the location path where you want to save the file before closing.
In this tutorial, we will look at different ways that you can use to close a workbook in Excel using VBA.
Helpful Links: Run a Macro – Macro Recorder – Visual Basic Editor – Personal Macro Workbook
Close a Workbook without Saving
If you want to save the active workbook without saving you need to use code like the following.
ActiveWorkbook.Close SaveChanges:=FalseIn this code, I have specified the “False” for the “SaveChanges” argument. So VBA will ignore if there are any changes in the workbook which are not saved. And if you want to close a specific workbook you can use the name of that workbook. Just like the following code.
Workbooks("book1").Close SaveChanges:=FalseIf you have data in the workbook and you skip the “SaveChanges” argument, then Excel will show a dialog box to confirm if you want to save the workbook or not. The point is: It is better to specify the “SaveChanges” argument even if it’s optional.
Close a Workbook after Saving
As you have seen, there’s an argument in the CLOSE method to specify the path location. Let’s say if you wish to save the “Book6” to the folder on the desktop. Here’s the code that you need to use.
Workbooks("Book6").Close _
SaveChanges:=True, _
Filename:="C:UsersDellDesktopmyFoldermyFile.xlsx"
This code is going to save the workbook “Book6” into the folder that is saved on my desktop with the name “myFIle.xlsx”. But here’s one thing that you need to take care of: IF you already have a workbook with the same name then it will replace that file with the new one.
Don’t worry, there’s a solution that you can use. The following code checks if there’s any file exists with the name that you want to use
Sub vba_close_workbook()
Dim wbCheck As String
wbCheck = Dir("C:UsersDellDesktopmyFoldermyFile.xlsx")
If wbCheck = "" Then
    Workbooks("Book6").Close _
    SaveChanges:=True, _
    Filename:="C:UsersDellDesktopmyFoldermyFile.xlsx"
Else
    MsgBox "Error! Name already used."
End If
End Sub
More on VBA Workbooks
VBA Save Workbook | VBA Delete Workbook | VBA ThisWorkbook | VBA Rename Workbook | VBA Activate Workbook | VBA Combine Workbook | VBA Protect Workbook (Unprotect) | VBA Check IF a Workbook is Open | VBA Open Workbook | VBA Check IF an Excel Workbook Exists in a Folder| VBA Create New Workbook (Excel File)
- VBA Workbook
-
#2
GetSaveAsFileName gets you a file name but doesn’t save anything. You have to write that code too (note that you should handle cases where the user hits cancel, which might happen if they get confused and don’t enter a file name):
Code:
[COLOR="Navy"]Sub[/COLOR] foo()
[COLOR="Navy"]Dim[/COLOR] sFName [COLOR="Navy"]As[/COLOR] [COLOR="Navy"]String[/COLOR]

    sFName = Application.GetSaveAsFilename("upload", "Excel files (*.xls), *.xls")

    [COLOR="Navy"]If[/COLOR] sFName <> "False" [COLOR="Navy"]Then[/COLOR]
        ActiveWorkbook.SaveAs sFName, 56
    [COLOR="Navy"]Else[/COLOR]
        [COLOR="SeaGreen"]'//Do something - user cancelled[/COLOR]
    [COLOR="Navy"]End[/COLOR] [COLOR="Navy"]If[/COLOR]

[COLOR="Navy"]End Sub[/COLOR]
Possibly a simpler way to go would be to use the same file name with an .xls extension and file type? Or assign the file name automatically if it has a standard name that should be used?
Last edited: Oct 10, 2011
-
#3
GetSaveAsFilename only returns a string — it doesn’t actually execute the SaveAs command. So you have the sFName, then you just need to execute SaveAs:
Code:
If sFName<>"False" Then ActiveWorkbook.SaveAs sFName|
manah1 Пользователь Сообщений: 99 |
#1 24.01.2017 17:22:26 Доброго времени суток. Проблема в том что появляется ошибка в макросе при отказе или отмене сохранения файла. Подскажите пожалуйста как и что добавить или исправить.
Прикрепленные файлы
|
||
|
Karataev Пользователь Сообщений: 2306 |
#2 24.01.2017 17:31:15 Если сделать так, то не будет сообщения, если файл с таким именем существует, существующий файл будет заменяться новым:
|
||
|
manah1 Пользователь Сообщений: 99 |
Karataev, спасибо что уделили внимание. В этом то и вся соль. Это сообщение нужно как предупреждение во избежание перезаписи файла. |
|
Ігор Гончаренко Пользователь Сообщений: 13746 |
#4 24.01.2017 17:42:29
Программисты — это люди, решающие проблемы, о существовании которых Вы не подозревали, методами, которых Вы не понимаете! |
||
|
manah1 Пользователь Сообщений: 99 |
Ігор Гончаренко, спасибо помогло. |
|
Karataev Пользователь Сообщений: 2306 |
#6 24.01.2017 17:52:09 В варианте поста #4 есть неточность. Если пользователь выбирает «Нет», то должен оставаться существующий файл и должен сохраняться новый файл, но к нему добавляется порядковый номер.
PS. Путь я указал свой, т.к. у меня не сохраняется на диске C. Путь указывается в строке 4. Изменено: Karataev — 24.01.2017 17:53:27 |
|
|
Karataev Пользователь Сообщений: 2306 |
#7 24.01.2017 18:04:58 Или если не нужно оставлять существующий файл и создавать новый (то есть добавлять порядковый номер) (это предложено в посте #4), то правильнее так:
Изменено: Karataev — 24.01.2017 18:05:49 |
|
|
manah1 Пользователь Сообщений: 99 |
#8 25.01.2017 15:08:06 Karataev, спасибо за предложенные варианты. |
Сохранение файла рабочей книги Excel, существующего или нового, с помощью кода VBA. Методы Save и SaveAs объекта Workbook, параметр SaveChanges метода Close.
Сохранение существующего файла
Сохранить существующий открытый файл рабочей книги Excel из кода VBA можно несколькими способами. В примерах используется выражение ActiveWorkbook, которое может быть заменено на ThisWorkbook, Workbooks(«ИмяКниги.xlsx»), Workbooks(myFile.Name), где myFile — объектная переменная с присвоенной ссылкой на рабочую книгу Excel.
Простое сохранение файла после внесенных кодом VBA Excel изменений:
Сохранение файла под другим именем (исходная рабочая книга будет автоматически закрыта без сохранения внесенных изменений):
|
ActiveWorkbook.SaveAs Filename:=«C:ТестоваяНоваяКнига.xlsx» |
Сохранить файл рабочей книги можно перед закрытием, используя параметр SaveChanges метода Close со значением True:
|
ActiveWorkbook.Close SaveChanges:=True |
Чтобы закрыть файл без сохранения, используйте параметр SaveChanges метода Close со значением False:
|
ActiveWorkbook.Close SaveChanges:=False |
Сохранение файла под другим именем при закрытии рабочей книги:
|
ActiveWorkbook.Close SaveChanges:=True, Filename:=«C:ТестоваяНоваяКнига.xlsx» |
Если в примерах с методом Close параметр SaveChanges пропустить, будет открыто диалоговое окно с запросом о сохранении файла.
Новая книга сохраняется с указанием полного имени:
|
Workbooks.Add ActiveWorkbook.SaveAs Filename:=«C:ТестоваяНоваяКнига.xlsx» |
После этого к новой книге можно обращаться по имени: Workbooks ("НоваяКнига.xlsx").
Если не указать полное имя для сохраняемого файла:
|
Workbooks.Add ActiveWorkbook.Save |
тогда новая книга будет сохранена с именем и в папке по умолчанию, например: Книга1.xlsx, Книга2.xlsx, Книга3.xlsx и т.д. в папке «Документы».
Often when creating a macro, we may need to know the save status a file we are working with. This post explores some of the options available for understanding and controlling this important aspect of file control.
Using the .saved property
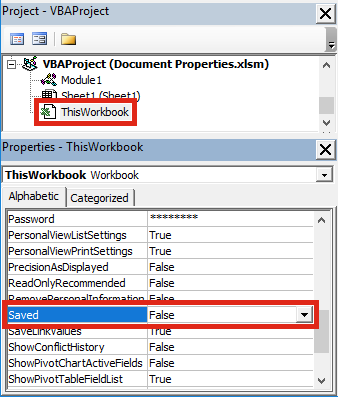
Within the Visual Basic Editor we can view the Saved property of a workbook.
If you save a workbook it will change to True, but once you make a single change it will revert back to False.
Effectively, this property displays whether the current file has changed from the previously saved version.
Sub saveStatus()

If ActiveWorkbook.Saved = False Then
    MsgBox "The file has changed since it was last saved"
Else
    MsgBox "The file has not changed since it was last saved"
End If

End Sub
Even though it seems like this should be a read-only property, it is possible to change this it with VBA. This will trick Excel into thinking that the current file has or has not been changed.
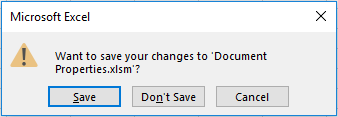
It is this property which Excel uses to know whether to show the following message when closing the workbook.
There are two ways to avoid this message:
Method 1 – setting DisplayAlerts = False
Using the code below will not result in the “want to save your changes” message box appearing and the file will not be saved.
Application.DisplayAlerts = False
ActiveWorkbook.Close
Application.DisplayAlerts = True
Method 2 – use .saved = true
Just like method 1, using the code below will not result in the “want to save your changes” message box appearing and the file will not be saved.
ActiveWorkbook.Saved = True
ActiveWorkbook.Close
Has a file ever been saved?
We have established what the .saved property can do. But, it is missing one a piece of information . . . it doesn’t tell us if the file has ever been saved.
If you create a new document in Excel it’s saved status displays as True. But once a change is made it to the workbook, it changes to False. So, the True/False status of the saved property does not help us to know if a file has ever been saved. But, we also have a number of options here.
Method 1 – Test the file path
A workbook which has never been saved will have a blank value for the File Path.
If ActiveWorkbook.Path = "" Then MsgBox "Not saved"
Method 2 – Use FILEDATETIME function
The FILEDATETIME function in VBA takes just one argument, a full File Path, and it returns the last time the file was modified.
Debug.Print FileDateTime(ActiveWorkbook.Name)
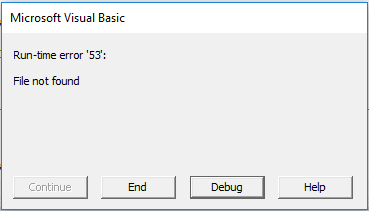
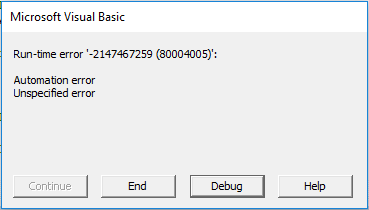
If the file has been saved, a date and time will be returned to the Immediate Window, if not, an error will be returned.
By catching the error you will know if the file has ever been saved.
On Error Resume Next
Debug.Print FileDateTime(ActiveWorkbook.Name)
If Err.Number <> 0 Then
    MsgBox "The file has never been saved"
End If
On Error GoTo 0
Method 3 – Use BuiltinDocumentProperties
This approach is similar to the FILEDATETIME function.
Debug.Print ActiveWorkbook.BuiltinDocumentProperties("Last save time")
If the file has been saved a date and time will be returned to the Immediate Window, if not an error will be returned.
Just like the FILEDATETIME function you can catch the error if the file has never been saved.
Conclusion
When writing VBA code there are various options and settings we can use to understand and control how and if a file is saved. In a number of applications this is crucial to ensure the macro will run smoothly.
About the author
Hey, I’m Mark, and I run Excel Off The Grid.
My parents tell me that at the age of 7 I declared I was going to become a qualified accountant. I was either psychic or had no imagination, as that is exactly what happened. However, it wasn’t until I was 35 that my journey really began.
In 2015, I started a new job, for which I was regularly working after 10pm. As a result, I rarely saw my children during the week. So, I started searching for the secrets to automating Excel. I discovered that by building a small number of simple tools, I could combine them together in different ways to automate nearly all my regular tasks. This meant I could work less hours (and I got pay raises!). Today, I teach these techniques to other professionals in our training program so they too can spend less time at work (and more time with their children and doing the things they love).
Do you need help adapting this post to your needs?
I’m guessing the examples in this post don’t exactly match your situation. We all use Excel differently, so it’s impossible to write a post that will meet everybody’s needs. By taking the time to understand the techniques and principles in this post (and elsewhere on this site), you should be able to adapt it to your needs.
But, if you’re still struggling you should:
- Read other blogs, or watch YouTube videos on the same topic. You will benefit much more by discovering your own solutions.
- Ask the ‘Excel Ninja’ in your office. It’s amazing what things other people know.
- Ask a question in a forum like Mr Excel, or the Microsoft Answers Community. Remember, the people on these forums are generally giving their time for free. So take care to craft your question, make sure it’s clear and concise. List all the things you’ve tried, and provide screenshots, code segments and example workbooks.
- Use Excel Rescue, who are my consultancy partner. They help by providing solutions to smaller Excel problems.
What next?
Don’t go yet, there is plenty more to learn on Excel Off The Grid. Check out the latest posts:


