
Изменение размера ячейки в VBA Excel. Высота строки, ширина столбца, автоподбор ширины ячейки. Свойства RowHeight и ColumnWidth объекта Range.
Размер ячейки
Размер ячейки по высоте и ширине определяется высотой строки и шириной столбца, на пересечении которых она находится. Если, в вашем случае, нежелательно изменять размеры всей строки или всего столбца, используйте объединенные ячейки нужной величины.
Обратите внимание, что высота строки задается в пунктах, а ширина столбца в символах, поэтому их числовые значения не соответствуют друг другу по фактическому размеру.

Высота строки и ширина столбца в Excel
Программно, без дополнительных макросов, можно изменять высоту строки только в пунктах, а ширину столбца только в символах.
На сайте поддержки офисных приложений Microsoft так написано об этих величинах:
- высота строки может принимать значение от 0 до 409 пунктов, причем 1 пункт приблизительно равен 1/72 дюйма или 0,035 см;
- ширина столбца может принимать значение от 0 до 255, причем это значение соответствует количеству символов, которые могут быть отображены в ячейке.
Смотрите, как сделать все ячейки рабочего листа квадратными.
Высота строки
Для изменения высоты строки используйте свойство RowHeight объекта Range. И не важно, будет объект Range представлять из себя выделенный произвольный диапазон, отдельную ячейку, целую строку или целый столбец — высота всех строк, пересекающихся с объектом Range будет изменена после присвоения свойству RowHeight этого объекта нового значения.
Примеры изменения высоты строк:
Пример 1
Изменение высоты отдельной ячейки:
|
ActiveCell.RowHeight = 10 |
в результате, строка, в которой находится активная ячейка, приобретает высоту, равную 10 пунктам.
Пример 2
Изменение высоты строки:
в результате, третья строка рабочего листа приобретает высоту, равную 30 пунктам.
Пример 3
Изменение высоты ячеек заданного диапазона:
|
Range(«A1:D6»).RowHeight = 20 |
в результате, каждой из первых шести строк рабочего листа будет задана высота, равная 20 пунктам.
Пример 4
Изменение высоты ячеек целого столбца:
|
Columns(5).RowHeight = 15 |
в результате, всем строкам рабочего листа будет назначена высота, равная 15 пунктам.
Ширина столбца
Для изменения ширины столбца используйте свойство ColumnWidth объекта Range. Как и в случае с высотой строки, не важно, будет объект Range представлять из себя выделенный произвольный диапазон, отдельную ячейку, целую строку или целый столбец — ширина всех столбцов, пересекающихся с объектом Range будет изменена после присвоения свойству ColumnWidth этого объекта нового значения.
Примеры изменения ширины столбцов:
Пример 1
Изменение ширины отдельной ячейки:
|
ActiveCell.ColumnWidth = 15 |
в результате, столбец, в котором находится активная ячейка, приобретает ширину, равную 15 символам.
Пример 2
Изменение ширины столбца:
|
Columns(3).ColumnWidth = 50 |
в результате, третий столбец рабочего листа (столбец «C») приобретает ширину, равную 50 символам.
Пример 3
Изменение ширины ячеек заданного диапазона:
|
Range(«A1:D6»).ColumnWidth = 25 |
в результате, каждому из первых четырех столбцов рабочего листа будет задана ширина, равная 25 символам.
Пример 4
Изменение ширины ячеек целой строки:
в результате, всем столбцам рабочего листа будет назначена ширина, равная 35 символам.
Автоподбор ширины
Для автоподбора ширины ячейки в соответствие с размером ее содержимого используйте следующий код:
|
‘запишем для примера в любую ячейку рабочего ‘листа какой-нибудь текст, например, такой: Cells(5, 5) = «Автоподбор ширины ячейки» ‘теперь подгоним ширину ячейки, а точнее ‘столбца, в котором эта ячейка находится: Cells(5, 5).EntireColumn.AutoFit |
Имейте в виду, что ширина столбца будет подогнана по расположенной в этом столбце ячейке с самым длинным содержимым. Например, если длина содержимого ячейки Cells(7, 5) будет превышать длину содержимого ячейки Cells(5, 5), то автоподбор ширины пятого столбца произойдет по содержимому ячейки Cells(7, 5), несмотря на то, что в строке кода указана другая ячейка.
Как осуществить автоподбор ширины объединенной ячейки, в которой метод AutoFit не работает, смотрите в следующей статье.
Asked
9 years, 1 month ago
Viewed
71k times
I have some VBA and batch Scripts that read the Mac Address Table out of some switches and import it into Excel to format it.
But the text is too long for the default cell width.
Is it possible to change the displayed cell width?
(When saying displayed cell width I mean: this)
![]()
Teamothy
1,9903 gold badges15 silver badges24 bronze badges
asked Mar 11, 2014 at 10:11
![]()
2
Use this:
Range("A1").ColumnWidth = ...
The units for this value are as following:
One unit of column width is equal to the width of one character in the Normal style. For proportional fonts, the width of the character 0 (zero) is used.
For example, the column width for freshly opened Excel file with default styles is 8.43 which is equal to 64 pixels.
…or this to autofit width:
Range("A1").EntireColumn.AutoFit
answered Mar 11, 2014 at 10:13
![]()
ttaaoossuuuuttaaoossuuuu
7,7563 gold badges28 silver badges56 bronze badges
2
Another method would be:
.Columns("A").ColumnWidth = 20 (or whatever value you need)
I didn’t compare it speedwise but why my guess would be that it’s more efficient to just use Columns() instead of Range().
For more info on the ColumnWidth-Value -> MSDN Doc for the columnwidth-property
answered Aug 7, 2018 at 17:18
![]()
In this Article
- Ranges and Cells in VBA
- Cell Address
- Range of Cells
- Writing to Cells
- Reading from Cells
- Non Contiguous Cells
- Intersection of Cells
- Offset from a Cell or Range
- Setting Reference to a Range
- Resize a Range
- OFFSET vs Resize
- All Cells in Sheet
- UsedRange
- CurrentRegion
- Range Properties
- Last Cell in Sheet
- Last Used Row Number in a Column
- Last Used Column Number in a Row
- Cell Properties
- Copy and Paste
- AutoFit Contents
- More Range Examples
- For Each
- Sort
- Find
- Range Address
- Range to Array
- Array to Range
- Sum Range
- Count Range
Ranges and Cells in VBA
Excel spreadsheets store data in Cells. Cells are arranged into Rows and Columns. Each cell can be identified by the intersection point of it’s row and column (Exs. B3 or R3C2).
An Excel Range refers to one or more cells (ex. A3:B4)
Cell Address
A1 Notation
In A1 notation, a cell is referred to by it’s column letter (from A to XFD) followed by it’s row number(from 1 to 1,048,576). This is called a cell address.
In VBA you can refer to any cell using the Range Object.
' Refer to cell B4 on the currently active sheet
MsgBox Range("B4")

' Refer to cell B4 on the sheet named 'Data'
MsgBox Worksheets("Data").Range("B4")

' Refer to cell B4 on the sheet named 'Data' in another OPEN workbook
' named 'My Data'
MsgBox Workbooks("My Data").Worksheets("Data").Range("B4")
R1C1 Notation
In R1C1 Notation a cell is referred by R followed by Row Number then letter ‘C’ followed by the Column Number. eg B4 in R1C1 notation will be referred by R4C2. In VBA you use the Cells Object to use R1C1 notation:
' Refer to cell R[6]C[4] i.e D6
Cells(6, 4) = "D6"
Range of Cells
A1 Notation
To refer to a more than one cell use a “:” between the starting cell address and last cell address. The following will refer to all the cells from A1 to D10:
Range("A1:D10")
R1C1 Notation
To refer to a more than one cell use a “,” between the starting cell address and last cell address. The following will refer to all the cells from A1 to D10:
Range(Cells(1, 1), Cells(10, 4))Writing to Cells
To write values to a cell or contiguous group of cells, simple refer to the range, put an = sign and then write the value to be stored:
' Store F5 in cell with Address F6
Range("F6") = "F6"

' Store E6 in cell with Address R[6]C[5] i.e E6
Cells(6, 5) = "E6"

' Store A1:D10 in the range A1:D10
Range("A1:D10") = "A1:D10"
' or
Range(Cells(1, 1), Cells(10, 4)) = "A1:D10"
Reading from Cells
To read values from cells, simple refer to the variable to store the values, put an = sign and then refer to the range to be read:
Dim val1
Dim val2

' Read from cell F6
val1 = Range("F6")

' Read from cell E6
val2 = Cells(6, 5)

MsgBox val1
Msgbox val2
Note: To store values from a range of cells, you need to use an Array instead of a simple variable.
Non Contiguous Cells
To refer to non contiguous cells use a comma between the cell addresses:
' Store 10 in cells A1, A3, and A5
Range("A1,A3,A5") = 10


' Store 10 in cells A1:A3 and D1:D3)
Range("A1:A3, D1:D3") = 10
VBA Coding Made Easy
Stop searching for VBA code online. Learn more about AutoMacro — A VBA Code Builder that allows beginners to code procedures from scratch with minimal coding knowledge and with many time-saving features for all users!

Learn More
Intersection of Cells
To refer to non contiguous cells use a space between the cell addresses:
' Store 'Col D' in D1:D10
' which is Common between A1:D10 and D1:F10
Range("A1:D10 D1:G10") = "Col D"
Offset from a Cell or Range
Using the Offset function, you can move the reference from a given Range (cell or group of cells) by the specified number_of_rows, and number_of_columns.
Offset Syntax
Range.Offset(number_of_rows, number_of_columns)
Offset from a cell
' OFFSET from a cell A1
' Refer to cell itself
' Move 0 rows and 0 columns
Range("A1").Offset(0, 0) = "A1"

' Move 1 rows and 0 columns
Range("A1").Offset(1, 0) = "A2"

' Move 0 rows and 1 columns
Range("A1").Offset(0, 1) = "B1"

' Move 1 rows and 1 columns
Range("A1").Offset(1, 1) = "B2"

' Move 10 rows and 5 columns
Range("A1").Offset(10, 5) = "F11"
Offset from a Range
' Move Reference to Range A1:D4 by 4 rows and 4 columns
' New Reference is E5:H8
Range("A1:D4").Offset(4,4) = "E5:H8"
Setting Reference to a Range
To assign a range to a range variable: declare a variable of type Range then use the Set command to set it to a range. Please note that you must use the SET command as RANGE is an object:
' Declare a Range variable
Dim myRange as Range

' Set the variable to the range A1:D4
Set myRange = Range("A1:D4")

' Prints $A$1:$D$4
MsgBox myRange.Address
VBA Programming | Code Generator does work for you!
Resize a Range
Resize method of Range object changes the dimension of the reference range:
Dim myRange As Range

' Range to Resize
Set myRange = Range("A1:F4")

' Prints $A$1:$E$10
Debug.Print myRange.Resize(10, 5).Address
Top-left cell of the Resized range is same as the top-left cell of the original range
Resize Syntax
Range.Resize(number_of_rows, number_of_columns)
OFFSET vs Resize
Offset does not change the dimensions of the range but moves it by the specified number of rows and columns. Resize does not change the position of the original range but changes the dimensions to the specified number of rows and columns.
All Cells in Sheet
The Cells object refers to all the cells in the sheet (1048576 rows and 16384 columns).
' Clear All Cells in Worksheets
Cells.Clear
UsedRange
UsedRange property gives you the rectangular range from the top-left cell used cell to the right-bottom used cell of the active sheet.
Dim ws As Worksheet
Set ws = ActiveSheet

' $B$2:$L$14 if L2 is the first cell with any value
' and L14 is the last cell with any value on the
' active sheet
Debug.Print ws.UsedRange.Address
CurrentRegion
CurrentRegion property gives you the contiguous rectangular range from the top-left cell to the right-bottom used cell containing the referenced cell/range.
Dim myRange As Range

Set myRange = Range("D4:F6")

' Prints $B$2:$L$14
' If there is a filled path from D4:F16 to B2 AND L14
Debug.Print myRange.CurrentRegion.Address

' You can refer to a single starting cell also

Set myRange = Range("D4") ' Prints $B$2:$L$14
AutoMacro | Ultimate VBA Add-in | Click for Free Trial!
Range Properties
You can get Address, row/column number of a cell, and number of rows/columns in a range as given below:
Dim myRange As Range

Set myRange = Range("A1:F10")

' Prints $A$1:$F$10
Debug.Print myRange.Address

Set myRange = Range("F10")

' Prints 10 for Row 10
Debug.Print myRange.Row

' Prints 6 for Column F
Debug.Print myRange.Column

Set myRange = Range("E1:F5")
' Prints 5 for number of Rows in range
Debug.Print myRange.Rows.Count

' Prints 2 for number of Columns in range
Debug.Print myRange.Columns.Count
Last Cell in Sheet
You can use Rows.Count and Columns.Count properties with Cells object to get the last cell on the sheet:
' Print the last row number
' Prints 1048576
Debug.Print "Rows in the sheet: " & Rows.Count

' Print the last column number
' Prints 16384
Debug.Print "Columns in the sheet: " & Columns.Count

' Print the address of the last cell
' Prints $XFD$1048576
Debug.Print "Address of Last Cell in the sheet: " & Cells(Rows.Count, Columns.Count)
Last Used Row Number in a Column
END property takes you the last cell in the range, and End(xlUp) takes you up to the first used cell from that cell.
Dim lastRow As Long

lastRow = Cells(Rows.Count, "A").End(xlUp).Row
Last Used Column Number in a Row
Dim lastCol As Long

lastCol = Cells(1, Columns.Count).End(xlToLeft).Column
END property takes you the last cell in the range, and End(xlToLeft) takes you left to the first used cell from that cell.
You can also use xlDown and xlToRight properties to navigate to the first bottom or right used cells of the current cell.
AutoMacro | Ultimate VBA Add-in | Click for Free Trial!
Cell Properties
Common Properties
Here is code to display commonly used Cell Properties
Dim cell As Range
Set cell = Range("A1")

cell.Activate
Debug.Print cell.Address
' Print $A$1

Debug.Print cell.Value
' Prints 456
' Address

Debug.Print cell.Formula
' Prints =SUM(C2:C3)

' Comment
Debug.Print cell.Comment.Text

' Style
Debug.Print cell.Style

' Cell Format
Debug.Print cell.DisplayFormat.NumberFormat
Cell Font
Cell.Font object contains properties of the Cell Font:
Dim cell As Range

Set cell = Range("A1")

' Regular, Italic, Bold, and Bold Italic
cell.Font.FontStyle = "Bold Italic"
' Same as
cell.Font.Bold = True
cell.Font.Italic = True

' Set font to Courier
cell.Font.FontStyle = "Courier"

' Set Font Color
cell.Font.Color = vbBlue
' or
cell.Font.Color = RGB(255, 0, 0)

' Set Font Size
cell.Font.Size = 20
Copy and Paste
Paste All
Ranges/Cells can be copied and pasted from one location to another. The following code copies all the properties of source range to destination range (equivalent to CTRL-C and CTRL-V)
'Simple Copy
Range("A1:D20").Copy
Worksheets("Sheet2").Range("B10").Paste

'or
' Copy from Current Sheet to sheet named 'Sheet2'
Range("A1:D20").Copy destination:=Worksheets("Sheet2").Range("B10")
Paste Special
Selected properties of the source range can be copied to the destination by using PASTESPECIAL option:
' Paste the range as Values only
Range("A1:D20").Copy
Worksheets("Sheet2").Range("B10").PasteSpecial Paste:=xlPasteValues
Here are the possible options for the Paste option:
' Paste Special Types
xlPasteAll
xlPasteAllExceptBorders
xlPasteAllMergingConditionalFormats
xlPasteAllUsingSourceTheme
xlPasteColumnWidths
xlPasteComments
xlPasteFormats
xlPasteFormulas
xlPasteFormulasAndNumberFormats
xlPasteValidation
xlPasteValues
xlPasteValuesAndNumberFormats
AutoFit Contents
Size of rows and columns can be changed to fit the contents using AutoFit:
' Change size of rows 1 to 5 to fit contents
Rows("1:5").AutoFit

' Change size of Columns A to B to fit contents
Columns("A:B").AutoFit
More Range Examples
It is recommended that you use Macro Recorder while performing the required action through the GUI. It will help you understand the various options available and how to use them.
AutoMacro | Ultimate VBA Add-in | Click for Free Trial!
For Each
It is easy to loop through a range using For Each construct as show below:
For Each cell In Range("A1:B100")
    ' Do something with the cell
Next cell
At each iteration of the loop one cell in the range is assigned to the variable cell and statements in the For loop are executed for that cell. Loop exits when all the cells are processed.
Sort
Sort is a method of Range object. You can sort a range by specifying options for sorting to Range.Sort. The code below will sort the columns A:C based on key in cell C2. Sort Order can be xlAscending or xlDescending. Header:= xlYes should be used if first row is the header row.
   Columns("A:C").Sort key1:=Range("C2"), _
      order1:=xlAscending, Header:=xlYes
Find
Find is also a method of Range Object. It find the first cell having content matching the search criteria and returns the cell as a Range object. It return Nothing if there is no match.
Use FindNext method (or FindPrevious) to find next(previous) occurrence.
Following code will change the font to “Arial Black” for all cells in the range which start with “John”:
For Each c In Range("A1:A100")
    If c Like "John*" Then
        c.Font.Name = "Arial Black"
    End If
Next c
Following code will replace all occurrences of “To Test” to “Passed” in the range specified:
With Range("a1:a500")
    Set c = .Find("To Test", LookIn:=xlValues)
    If Not c Is Nothing Then
        firstaddress = c.Address
        Do
            c.Value = "Passed"
            Set c = .FindNext(c)
        Loop While Not c Is Nothing And c.Address <> firstaddress
    End If
End With
It is important to note that you must specify a range to use FindNext. Also you must provide a stopping condition otherwise the loop will execute forever. Normally address of the first cell which is found is stored in a variable and loop is stopped when you reach that cell again. You must also check for the case when nothing is found to stop the loop.
Range Address
Use Range.Address to get the address in A1 Style
MsgBox Range("A1:D10").Address
' or
Debug.Print Range("A1:D10").Address
Use xlReferenceStyle (default is xlA1) to get addres in R1C1 style
MsgBox Range("A1:D10").Address(ReferenceStyle:=xlR1C1)
' or
Debug.Print Range("A1:D10").Address(ReferenceStyle:=xlR1C1)
This is useful when you deal with ranges stored in variables and want to process for certain addresses only.
AutoMacro | Ultimate VBA Add-in | Click for Free Trial!
Range to Array
It is faster and easier to transfer a range to an array and then process the values. You should declare the array as Variant to avoid calculating the size required to populate the range in the array. Array’s dimensions are set to match number of values in the range.
Dim DirArray As Variant
' Store the values in the range to the Array

DirArray = Range("a1:a5").Value

' Loop to process the values
For Each c In DirArray
    Debug.Print c
Next
Array to Range
After processing you can write the Array back to a Range. To write the Array in the example above to a Range you must specify a Range whose size matches the number of elements in the Array.
Use the code below to write the Array to the range D1:D5:
Range("D1:D5").Value = DirArray

Range("D1:H1").Value = Application.Transpose(DirArray)
Please note that you must Transpose the Array if you write it to a row.
Sum Range
SumOfRange = Application.WorksheetFunction.Sum(Range("A1:A10"))
Debug.Print SumOfRange
You can use many functions available in Excel in your VBA code by specifying Application.WorkSheetFunction. before the Function Name as in the example above.
Count Range
' Count Number of Cells with Numbers in the Range
CountOfCells = Application.WorksheetFunction.Count(Range("A1:A10"))
Debug.Print CountOfCells

' Count Number of Non Blank Cells in the Range
CountOfNonBlankCells = Application.WorksheetFunction.CountA(Range("A1:A10"))
Debug.Print CountOfNonBlankCells
Written by: Vinamra Chandra
Excel VBA Resize
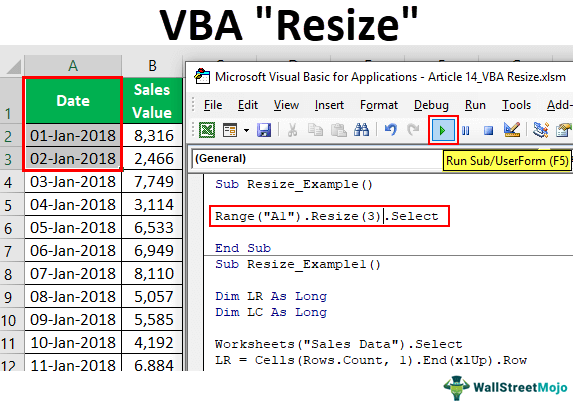
Resize is a property available in VBA to change or resize the range of cells from the active cell as needed. For example, assume you are in cell B5. If you want to select 3 rows and two columns from this cell, we can change the range size by using the RESIZE property of VBA.
Table of contents
- Excel VBA Resize
- Syntax of VBA Resize Property
- Examples of using Resize in VBA
- Example #1
- Example #2
- Example #3
- Things to Remember
- Recommended Articles
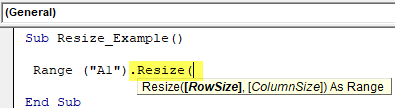
Syntax of VBA Resize Property
Below is the syntax of the VBA RESIZE property.
Range().Resize([Row Size], [Column Size])
First, we need to supply from which cell we need to resize using the Range object.
Then use the Excel VBA Resize property. In this property, we need to supply row and column size limits. Based on the provided row numbers and column numbers, it will resize them.
Examples of using Resize in VBA
Below are examples of using resize in Excel VBA.
You can download this VBA Resize Excel Template here – VBA Resize Excel Template
Example #1
Assume you have data from A1 to B14 cells. For example, from the A1 cell, if you want to select 3 rows down and two columns left range, we can do this by using the RESIZE property in Excel VBA.
Below is the data we are using for this example.

First, we must supply the first cell referenceCell reference in excel is referring the other cells to a cell to use its values or properties. For instance, if we have data in cell A2 and want to use that in cell A1, use =A2 in cell A1, and this will copy the A2 value in A1.read more or starting point using the RANGE object. In this example, the starting point is the A1 cell.
Code:
Sub Resize_Example()

 Range ("A1").

End Sub

For this range, use RESIZE property.
Code:
Sub Resize_Example()

 Range ("A1").Resize(

End Sub
The first argument of RESIZE is Row Size, so we need to select 3 rows of the data and supply the numerical value of 3.
Code:
Sub Resize_Example()

Range ("A1").Resize(3,

End Sub

The next argument is Column Size. For this, enter how columns you need to select. For example, we will enter 3 columns.
Code:
Sub Resize_Example()

 Range ("A1").Resize(3,3)

End Sub

Once the resizing is complete, we need to supply what we need to do with this range. We will choose the “Select” method to start.
Code:
Sub Resize_Example()

 Range("A1").Resize(3, 3).Select

End Sub
Run the code and see how many rows and columns it would select.
As you can see above from the A1 cell, it has selected three rows down and three columns to the right.
Example #2
Now, take a look at the below VBA codeVBA code refers to a set of instructions written by the user in the Visual Basic Applications programming language on a Visual Basic Editor (VBE) to perform a specific task.read more.
In the above code for Row Size, we have supplied blank cells. For Column Size, we have supplied 3.
Code:
Sub Resize_Example()

 Range("A1").Resize(0, 3).Select

End Sub
Run the code and see how many rows and columns it would select.
As you can see, it has selected only the active cell row, i.e., 1st row and three columns. It is because, for Row Size, we have supplied blank cells, and for Column Size, we have supplied 3. Accordingly, it has selected the data range.
Now, look at the code below.
Code:
Sub Resize_Example()

  Range("A1").Resize(3).Select

End Sub
What this code will do is it will select only three rows, including the active cell row but no extra columns.
Example #3
Use resize to select unknown ranges. Resize is best utilized when you want to select an unknown range of cells. For example, look at the below image of the data range.

It has data from column A to column P. So, we have up until the 700th row.
Assume you know your data will keep changing. You want to select the data range now and then by manually changing the row and column number. However, we can do this easily by using the VBA RESIZE property.
Look at the below code.
Code:
Sub Resize_Example1()

  Dim LR As Long
  Dim LC As Long

  Worksheets("Sales Data").Select

  LR = Cells(Rows.Count, 1).End(xlUp).Row
  LC = Cells(1, Columns.Count).End(xlToLeft).Column

  Cells(1, 1).Resize(LR, LC).Select

End Sub
First, we have declared two variables to find the last used row (LR) and the last used column (LC).
Dim LR As Long
Dim LC As Long
Since our data is in the “Sales Data” worksheet, we choose this worksheet using the code below.
Worksheets(“Sales Data”).Select
The code below will find the last used row and last used column.
LR = Cells(Rows.Count, 1).End(xlUp).Row
LC = Cells(1, Columns.Count).End(xlToLeft).Column
Now, from the first cell, we are resizing the range from the last used row to the last used column and selecting the method used. So, now it does not matter how big your data is. It will dynamically select the data by finding the last used row and last used column.

Things to Remember
- The Resize property in VBA will change the range size from the active cell (including the active cell).
- We must provide how many rows and columns to resize from the active cell in VBA.
- We cannot use negative row and column numbers for RESIZE property.
Recommended Articles
This article has been a guide to VBA Resize. Here, we discuss examples of resizing in Excel VBA using the RESIZE property of VBA and downloadable Excel templates. Below are some useful articles related to VBA: –
- VBA CLng
- CDBL VBA
- VBA Delete Sheet
- VBA UnProtect Sheet
- VBA Format Date
Change Row Height and Column Width using Excel VBA
4 Comments
-
Koert penne
March 29, 2016 at 2:35 PM — ReplyI wanted the row height for content of one column, regardsless what was in the other columns. I did it as follows:
Sub rowheight_one_column()
Column = InputBox(“Hoeveelste kolom?”) + 0
Rows(20).Delete
For x = 4 To 13
Cells(20, Column) = Cells(x, Column)
Rows(20).AutoFit
hoogte = Cells(20, Column).RowHeight
Rows(x).RowHeight = hoogte
Next xRows(20).Delete
End Sub
-
Sathish
October 26, 2016 at 11:39 AM — ReplyPlease help me for auto fit the entire sheet1
-
Jack
February 21, 2017 at 7:43 PM — Replywhere have you declared your Variables, It does confuse people when your code is not neat and is exposed on the Internet where everybody does search and get stuck.
-
dskar
April 13, 2017 at 7:10 AM — Replythe difference between writing the code in code window and a module?
Effectively Manage Your
Projects and Resources
ANALYSISTABS.COM provides free and premium project management tools, templates and dashboards for effectively managing the projects and analyzing the data.
We’re a crew of professionals expertise in Excel VBA, Business Analysis, Project Management. We’re Sharing our map to Project success with innovative tools, templates, tutorials and tips.
Project Management
Excel VBA
Download Free Excel 2007, 2010, 2013 Add-in for Creating Innovative Dashboards, Tools for Data Mining, Analysis, Visualization. Learn VBA for MS Excel, Word, PowerPoint, Access, Outlook to develop applications for retail, insurance, banking, finance, telecom, healthcare domains.
Page load link
Go to Top
 In this VBA Tutorial, you learn how to use Excel VBA to set or autofit the width of columns in a variety of circumstances.
This VBA Tutorial is accompanied by Excel workbooks containing the data and macros I use in the examples below. You can get immediate free access to these example workbooks by subscribing to the Power Spreadsheets Newsletter.
Use the following Table of Contents to navigate to the section you’re interested in.
Related VBA and Macro Tutorials
The following VBA and Macro Tutorials may help you better understand and implement the contents below:
- General VBA constructs and structures:
- Learn about using variables here.
- Learn about VBA data types here.
- Learn about R1C1 and A1 style references here.
- Practical VBA applications and macro examples:
- Learn how to work with worksheets here.
- Learn how to delete columns here.
- Learn how to hide or unhide rows and columns here.
You can find additional VBA and Macro Tutorials in the Archives.
#1: Set Column Width
VBA Code to Set Column Width
To set the width of a column with VBA, use a statement with the following structure:
Worksheet.Range("A1CellReference").ColumnWidth = ColumnWidthUnits
Process Followed by VBA Code
 Specify column width in units” width=”316″ height=”102″>
VBA Statement Explanation
- Item: Worksheet.
- VBA Construct: Workbook.Worksheets property.
- Description: Returns a Worksheet object representing the worksheet you work with.
- Item: Range(“A1CellReference”).
- VBA Construct: Worksheet.Range property.
- Description: Returns a Range object representing a cell within the column whose width you set. You specify the cell using an A1-style cell reference (A1CellReference) enclosed within quotations (“”).
- Item: ColumnWidth.
- VBA Construct: Range.ColumnWidth property.
- Description: Sets the width of the column containing the Range object returned by item #2 above.
- Item: ColumnWidthUnits.
- VBA Construct: New value of the Range.ColumnWidth property.
- Description: Specifies the width, in units, of the column containing the Range object returned by item #2 above.
- Column width isn’t measured in points, centimeters or inches. Excel measures column width units based on the size (width) of the font you use in the Normal style (for example, Calibri 11).
- Therefore, 1 unit of column width is equal to 1 character of the Normal style font. Consider the following:
- If your Normal style font is a fixed-width font, such as Courier New or Consolas, all characters have the same width.
- If your Normal style font is a proportional font, Excel considers the width of the character “0” (the number zero).
- If you explicitly declare a variable to represent ColumnWidthUnits, use a numeric data type that can handle the value you use to specify the column width in the appropriate units.
Macro Example
The following macro sets the width of column A of the worksheet named “Column width” to 15 units.
Sub columnWidth()

    'Source: https://powerspreadsheets.com/
    'For further information: https://powerspreadsheets.com/excel-vba-column-width/

    Worksheets("Column width").Range("A5").columnWidth = 15

End Sub
Effects of Executing Macro Example
The following GIF illustrates the results of executing this macro example. As expected, VBA sets the width of column A to 15 units.

#2: Set Column Width for Multiple Contiguous Columns
VBA Code to Set Column Width for Multiple Contiguous Columns
To set the width of multiple contiguous columns with VBA, use a statement with the following structure:
Worksheet.Range("FirstColumnLetter:LastColumnLetter").ColumnWidth = ColumnWidthUnits
Process Followed by VBA Code
 Specify column width in units” width=”312″ height=”105″>
VBA Statement Explanation
- Item: Worksheet.
- VBA Construct: Workbook.Worksheets property.
- Description: Returns a Worksheet object representing the worksheet you work with.
- Item: Range(“FirstColumnLetter:LastColumnLetter”).
- VBA Construct: Worksheet.Range property.
- Description: Returns a Range object representing the columns whose width you set. Under this syntax:
- You identify columns by the letters of their headers (FirstColumnLetter and LastColumnLetter).
- The column letters are:
- Separated by a colon (:), which allows you to set up an array.
- Enclosed within quotations (“”).
- Item: ColumnWidth.
- VBA Construct: Range.ColumnWidth property.
- Description: Sets the width of the columns returned by item #2 above.
- Item: ColumnWidthUnits.
- VBA Construct: New value of the Range.ColumnWidth property.
- Description: Specifies the width, in units, of the columns returned by item #2 above.
- Column width isn’t measured in points, centimeters or inches. Excel measures column width units based on the size (width) of the font you use in the Normal style (for example, Calibri 11).
- Therefore, 1 unit of column width is equal to 1 character of the Normal style font. Consider the following:
- If your Normal style font is a fixed-width font, such as Courier New or Consolas, all characters have the same width.
- If your Normal style font is a proportional font, Excel considers the width of the character “0” (the number zero).
- If you explicitly declare a variable to represent ColumnWidthUnits, use a numeric data type that can handle the value you use to specify the column width in the appropriate units.
Macro Example
The following macro sets the width of columns C through E (C, D and E) of the worksheet named “Column width” to 10 units.
Sub columnWidthMultipleColumns()

    'Source: https://powerspreadsheets.com/
    'For further information: https://powerspreadsheets.com/excel-vba-column-width/

    Worksheets("Column width").Range("C:E").columnWidth = 10

End Sub
Effects of Executing Macro Example
The following GIF illustrates the results of executing this macro example. As expected, VBA sets the width of columns C through E to 10 units.

#3: Set Column Width for Multiple Non-Contiguous Columns
VBA Code to Set Column Width for Multiple Non-Contiguous Columns
To set the width of multiple non-contiguous columns with VBA, use a statement with the following structure:
Worksheet.Range("Column1Area1Letter:ColumnLastArea1Letter,Column1Area2Letter:ColumnLastArea2Letter, ... , Column1AreaLastLetter:ColumnLastAreaLastLetter").ColumnWidth = ColumnWidthUnits
Process Followed by VBA Code
 Specify column width in units” width=”312″ height=”105″>
VBA Statement Explanation
- Item: Worksheet.
- VBA Construct: Workbook.Worksheets property.
- Description: Returns a Worksheet object representing the worksheet you work with.
- Item: Range(“Column1Area1Letter:ColumnLastArea1Letter,Column1Area2Letter:ColumnLastArea2Letter, … , Column1AreaLastLetter:ColumnLastAreaLastLetter”).
- VBA Construct: Worksheet.Range property.
- Description: Returns a Range object representing the columns whose width you set. Under this syntax:
- You identify columns by the letters of their headers (Column1Area1Letter, ColumnLastArea1Letter, Column1Area2Letter, ColumnLastArea2Letter, … , Column1AreaLastLetter and ColumnLastAreaLastLetter”).
- The column letters identifying contiguous columns (within the same data area) are separated by a colon (:), which allows you to set up an array. If you’re only referring to a single column (for example, column B), include the letter reference twice and separate them with a colon (:) (for example “B:B”).
- The column letters identifying non-contiguous columns (in separate data areas) are separated by the union operator, a comma (,).
- The complete column reference is enclosed within quotations (“”).
- Item: ColumnWidth.
- VBA Construct: Range.ColumnWidth property.
- Description: Sets the width of the columns returned by item #2 above.
- Item: ColumnWidthUnits.
- VBA Construct: New value of the Range.ColumnWidth property.
- Description: Specifies the width, in units, of the columns returned by item #2 above.
- Column width isn’t measured in points, centimeters or inches. Excel measures column width units based on the size (width) of the font you use in the Normal style (for example, Calibri 11).
- Therefore, 1 unit of column width is equal to 1 character of the Normal style font. Consider the following:
- If your Normal style font is a fixed-width font, such as Courier New or Consolas, all characters have the same width.
- If your Normal style font is a proportional font, Excel considers the width of the character “0” (the number zero).
- If you explicitly declare a variable to represent ColumnWidthUnits, use a numeric data type that can handle the value you use to specify the column width in the appropriate units.
Macro Example
The following macro sets the width of columns B, F and H of the worksheet named “Column width” to 20 units.
Sub columnWidthMultipleNonAdjacentColumns()

    'Source: https://powerspreadsheets.com/
    'For further information: https://powerspreadsheets.com/excel-vba-column-width/

    Worksheets("Column width").Range("B:B,F:F,H:H").columnWidth = 20

End Sub
Effects of Executing Macro Example
The following GIF illustrates the results of executing this macro example. As expected, VBA sets the width of columns B, F and H to 20 units.

#4: AutoFit Column Width Based on Entire Column
VBA Code to AutoFit Column Width Based on Entire Column
To autofit the width of a column with VBA, considering the contents of the entire column, use a statement with the following structure:
Worksheet.Range("A1CellReference").EntireColumn.AutoFit
Process Followed by VBA Code
 return entire column > autofit entire column width” width=”497″ height=”107″>
VBA Statement Explanation
- Item: Worksheet.
- VBA Construct: Workbook.Worksheets property.
- Description: Returns a Worksheet object representing the worksheet you work with.
- Item: Range(“A1CellReference”).
- VBA Construct: Worksheet.Range property.
- Description: Returns a Range object representing a cell within the column you autofit. You specify the cell using an A1-style cell reference (A1CellReference) enclosed within quotations (“”).
- Item: EntireColumn.
- VBA Construct: Range.EntireColumn property.
- Description: Returns a Range object representing the entire column containing the Range object returned by item #2 above.
- Item: AutoFit.
- VBA Construct: Range.AutoFit method.
- Description: Modifies the width of the column represented by the Range object returned by item #3 above to achieve the best fit (autofits).
Macro Example
The following macro autofits the width of column G of the worksheet named “Column width” based on the contents of all the cells in the entire column.
Sub columnWidthAutoFitEntireColumn()

    'Source: https://powerspreadsheets.com/
    'For further information: https://powerspreadsheets.com/excel-vba-column-width/

    Worksheets("Column width").Range("G5").EntireColumn.AutoFit

End Sub
Effects of Executing Macro Example
The following GIF illustrates the results of executing this macro example. As expected, VBA autofits the width of column G based on the contents of all the cells in the entire column. Notice the contents in cell G10 (Autofit based on entire column), which are used as the basis for the autofitting operation.

#5: AutoFit Column Width Based on Specific Cell
VBA Code to AutoFit Column Width Based on Specific Cell
To autofit the width of a column with VBA, considering the contents of a specific cell or row, use a statement with the following structure:
Worksheet.Range("A1CellReference").Columns.AutoFit
Process Followed by VBA Code
 return column > autofit entire column width to contents of cell” width=”493″ height=”105″>
VBA Statement Explanation
- Item: Worksheet.
- VBA Construct: Workbook.Worksheets property.
- Description: Returns a Worksheet object representing the worksheet you work with.
- Item: Range(“A1CellReference”).
- VBA Construct: Worksheet.Range property.
- Description: Returns a Range object representing a cell.
- This cell:
- Is within the column you autofit.
- Is the cell whose contents Excel considers for purposes of achieving the best fit (autofitting).
- You specify the cell using an A1-style cell reference (A1CellReference) enclosed within quotations (“”).
- This cell:
- Item: Columns.
- VBA Construct: Range.Columns property.
- Description: Returns a Range object representing the column containing the Range object returned by item #2 above.
- Item: AutoFit.
- VBA Construct: Range.AutoFit method.
- Description: Modifies the width of the column represented by the Range object returned by item #3 above to achieve the best fit (autofits) based on the contents within the cell represented by the Range object returned by item #2 above.
Macro Example
The following macro autofits the width of column I of the worksheet named “Column width” based on the contents of cell I5.
Sub columnWidthAutoFitRow()

    'Source: https://powerspreadsheets.com/
    'For further information: https://powerspreadsheets.com/excel-vba-column-width/

    Worksheets("Column width").Range("I5").Columns.AutoFit

End Sub
Effects of Executing Macro Example
The following GIF illustrates the results of executing this macro example. As expected, VBA sets autofits the width of column I based on the contents of cell I5. Notice the contents in cell I10 (Autofit based on specific cell), which aren’t used as the basis for the autofitting operation.

#6: Set Column Width in Points
VBA Code to Set Column Width in Points
To set the width of a column in points with VBA, use a macro with the following statement structure:
With Worksheet.Range("A1CellReference")
    For Counter = 1 To 3
        .ColumnWidth = ColumnWidthPoints * (.ColumnWidth / .Width)
    Next Counter
End With
Process Followed by VBA Code
 specify column width in points 3 times” width=”689″ height=”192″>
VBA Statement Explanation
Lines #1 and #5: With Worksheet.Range(“A1CellReference”) | End With
- Item: With… End With.
- VBA Construct: With… End With statement.
- Description: Statements within the With… End With statement (lines # through #4 below) are executed on the Range object returned by item #3 below.
- Item: Worksheet.
- VBA Construct: Workbook.Worksheets property.
- Description: Returns a Worksheet object representing the worksheet you work with.
- Item: Range(“A1CellReference”).
- VBA Construct: Worksheet.Range property.
- Description: Returns a Range object representing a cell within the column whose width you set. You specify the cell using an A1-style cell reference (A1CellReference) enclosed within quotations (“”).
Lines #2 and #4: For Counter = 1 To 3 | Next Counter
- Item: For… Next Counter.
- VBA Construct: For… Next statement.
- Description: Repeats the statement within the loop (line #3 below) 3 times, as required by item #3 below.
- Item: Counter.
- VBA Construct: Counter of For… Next statement.
- Description: Loop counter. If you explicitly declare a variable to represent the loop counter, use the Long data type.
- Item: 1 To 3.
- VBA Construct: Counter Start (1) and Counter End (3) of For… Next statement.
- Description: The statement within the loop (line #3 below) is executed 3 times (1 To 3).
- Theoretically, line #3 below should be enough to set the column width in points without requiring the loop specified by these lines #2 and #4. In practice, this may not be the case. Some tests suggest that repeating line #3 below (or similar) 3 times generally gets you the closest to the specified column width.
Line #3: .ColumnWidth = ColumnWidthPoints * (.ColumnWidth / .Width)
- Item: .ColumnWidth.
- VBA Construct: Range.ColumnWidth property.
- Description:
- Sets the width of the column containing the Range object within the opening statement of the With… End With block (line #1, item #3 above).
- .ColumnWidth is included twice in the statement. In this first mention, (.ColumnWidth = …), ColumnWidth is the property to which a value is assigned. The value assigned to the ColumnWidth property is the value returned by the other items within this statement.
- Item: ColumnWidthPoints.
- VBA Construct: Numeric (for example, Double) variable.
- Description: Specifies the width (in points) of the columns containing the Range object within the opening statement of the With… End With block (line #1, item #3 above).
- If you explicitly declare a variable to represent ColumnWidthPoints, use a numeric data type that can handle the value you use to specify the column width in points.
- Item: .ColumnWidth.
- VBA Construct: Range.ColumnWidth property.
- Description:
- Returns the width of the column containing the Range object within the opening statement of the With… End With block (line #1, item #3 above).
- .ColumnWidth is included twice in the statement. In this second mention, (.ColumnWidth), ColumnWidth returns the current value of the property.
- The ColumnWidth property returns the column width in units based on the size (width) of the font you use in the Normal style (for example, Calibri 11). Therefore, 1 unit of column width is equal to 1 character of the Normal style font. If your Normal style font is a proportional (not fixed-width) font, Excel considers the width of the character “0” (the number zero).
- Item: .Width.
- VBA Construct: Range.Width property.
- Description:
- Returns the width of the column containing the Range object within the opening statement of the With… End With block (line #1, item #3 above).
- The Width property returns the column width in points.
- Item: (.ColumnWidth / .Width).
- VBA Construct: Numeric expression.
- Description:
- Both ColumnWidth (item #3 above) and Width (item #4 above) return the width of the column containing the Range object within the opening statement of the With… End With block (line #1, item #3 above).
- The units in which ColumnWidth and Width return the column width differ.
- ColumnWidth expresses the column width in units based on the size (width) of the font you use in the Normal style.
- Width expresses the column width in points.
- ColumnWidth divided by Width (.ColumnWidth / .Width) returns the factor by which you must multiply the desired column width expressed in points (item #2 above) to obtain the appropriate column width in units based on the size (width) of the font you use in the Normal style. In other words, this expression converts ColumnWidthPoints from points to the units required by the ColumnWidth property.
Macro Example
The following macro sets the width of column J of the worksheet named “Column width” to 80 points.
Sub columnWidthPoints()

    'Source: https://powerspreadsheets.com/
    'For further information: https://powerspreadsheets.com/excel-vba-column-width/

    Dim iCounter As Long

    With Worksheets("Column width").Range("J5")
        For iCounter = 1 To 3
            .columnWidth = 80 * (.columnWidth / .Width)
        Next iCounter
    End With

End Sub
Effects of Executing Macro Example
The following GIF illustrates the results of executing this macro example. As expected, VBA sets the width of column J to 80 points.

#7: Set Column Width in Inches
VBA Code to Set Column Width in Inches
To set the width of a column in inches with VBA, use a macro with the following statement structure:
With Worksheet.Range("A1CellReference")
    For Counter = 1 To 3
        .ColumnWidth = Application.InchesToPoints(ColumnWidthInches) * (.ColumnWidth / .Width)
    Next Counter
End With
Process Followed by VBA Code
 specify column width in inches 3 times” width=”686″ height=”191″>
VBA Statement Explanation
Lines #1 and #5: With Worksheet.Range(“A1CellReference”) | End With
- Item: With… End With.
- VBA Construct: With… End With statement.
- Description: Statements within the With… End With statement (lines # through #4 below) are executed on the Range object returned by item #3 below.
- Item: Worksheet.
- VBA Construct: Workbook.Worksheets property.
- Description: Returns a Worksheet object representing the worksheet you work with.
- Item: Range(“A1CellReference”).
- VBA Construct: Worksheet.Range property.
- Description: Returns a Range object representing a cell within the column whose width you set. You specify the cell using an A1-style cell reference (A1CellReference) enclosed within quotations (“”).
Lines #2 and #4: For Counter = 1 To 3 | Next Counter
- Item: For… Next Counter.
- VBA Construct: For… Next statement.
- Description: Repeats the statement within the loop (line #3 below) 3 times, as required by item #3 below.
- Item: Counter.
- VBA Construct: Counter of For… Next statement.
- Description: Loop counter. If you explicitly declare a variable to represent the loop counter, use the Long data type.
- Item: 1 To 3.
- VBA Construct: Counter Start (1) and Counter End (3) of For… Next statement.
- Description: The statement within the loop (line #3 below) is executed 3 times (1 To 3).
- Theoretically, line #3 below should be enough to set the column width in inches without requiring the loop specified by these lines #2 and #4. In practice, this may not be the case. Some tests suggest that repeating line #3 below (or similar) 3 times generally gets you the closest to the specified column width.
Line #3: .ColumnWidth = Application.InchesToPoints(ColumnWidthInches) * (.ColumnWidth / .Width)
- Item: .ColumnWidth.
- VBA Construct: Range.ColumnWidth property.
- Description:
- Sets the width of the column containing the Range object within the opening statement of the With… End With block (line #1, item #3 above).
- .ColumnWidth is included twice in the statement. In this first mention, (.ColumnWidth = …), ColumnWidth is the property to which a value is assigned. The value assigned to the ColumnWidth property is the value returned by the other items within this statement.
- Item: Application.InchesToPoints.
- VBA Construct: Application.InchesToPoints method.
- Description: Converts the measurement specified by item #3 below from inches to points.
- Item: ColumnWidthInches.
- VBA Construct: Inches parameter of Application.InchesToPoints method.
- Description: Specifies the width (in inches) of the columns containing the Range object within the opening statement of the With… End With block (line #1, item #3 above).
- If you explicitly declare a variable to represent ColumnWidthInches, use a numeric data type that can handle the value you use to specify the column width in inches.
- Item: .ColumnWidth.
- VBA Construct: Range.ColumnWidth property.
- Description:
- Returns the width of the column containing the Range object within the opening statement of the With… End With block (line #1, item #3 above).
- .ColumnWidth is included twice in the statement. In this second mention, (.ColumnWidth), ColumnWidth returns the current value of the property.
- The ColumnWidth property returns the column width in units based on the size (width) of the font you use in the Normal style (for example, Calibri 11). Therefore, 1 unit of column width is equal to 1 character of the Normal style font. If your Normal style font is a proportional (not fixed-width) font, Excel considers the width of the character “0” (the number zero).
- Item: .Width.
- VBA Construct: Range.Width property.
- Description:
- Returns the width of the column containing the Range object within the opening statement of the With… End With block (line #1, item #3 above).
- The Width property returns the column width in points.
- Item: (.ColumnWidth / .Width).
- VBA Construct: Numeric expression.
- Description:
- Both ColumnWidth (item #4 above) and Width (item #5 above) return the width of the column containing the Range object within the opening statement of the With… End With block (line #1, item #3 above).
- The units in which ColumnWidth and Width return the column width differ.
- ColumnWidth expresses the column width in units based on the size (width) of the font you use in the Normal style.
- Width expresses the column width in points.
- ColumnWidth divided by Width (.ColumnWidth / .Width) returns the factor by which you must multiply the desired column width expressed in inches/points (items #2 and #3 above) to obtain the appropriate column width in units based on the size (width) of the font you use in the Normal style. In other words, this expression converts Application.InchesToPoints(ColumnWidthInches) from points to the units required by the ColumnWidth property.
Macro Example
The following macro sets the width of column K of the worksheet named “Column width” to 1 inch.
Sub columnWidthInches()

    'Source: https://powerspreadsheets.com/
    'For further information: https://powerspreadsheets.com/excel-vba-column-width/

    Dim iCounter As Long

    With Worksheets("Column width").Range("K5")
        For iCounter = 1 To 3
            .columnWidth = Application.InchesToPoints(1) * (.columnWidth / .Width)
        Next iCounter
    End With

End Sub
Effects of Executing Macro Example
The following GIF illustrates the results of executing this macro example. As expected, VBA sets the width of column K to 1 inch.

#8: Set Column Width in Centimeters
VBA Code to Set Column Width in Centimeters
To set the width of a column in centimeters with VBA, use a macro with the following statement structure:
With Worksheet.Range("A1CellReference")
    For Counter = 1 To 3
        .ColumnWidth = Application.CentimetersToPoints(ColumnWidthCentimeters) * (.ColumnWidth / .Width)
    Next Counter
End With
Process Followed by VBA Code
 specify column width in centimeters 3 times” width=”683″ height=”192″>
VBA Statement Explanation
Lines #1 and #5: With Worksheet.Range(“A1CellReference”) | End With
- Item: With… End With.
- VBA Construct: With… End With statement.
- Description: Statements within the With… End With statement (lines # through #4 below) are executed on the Range object returned by item #3 below.
- Item: Worksheet.
- VBA Construct: Workbook.Worksheets property.
- Description: Returns a Worksheet object representing the worksheet you work with.
- Item: Range(“A1CellReference”).
- VBA Construct: Worksheet.Range property.
- Description: Returns a Range object representing a cell within the column whose width you set. You specify the cell using an A1-style cell reference (A1CellReference) enclosed within quotations (“”).
Lines #2 and #4: For Counter = 1 To 3 | Next Counter
- Item: For… Next Counter.
- VBA Construct: For… Next statement.
- Description: Repeats the statement within the loop (line #3 below) 3 times, as required by item #3 below.
- Item: Counter.
- VBA Construct: Counter of For… Next statement.
- Description: Loop counter. If you explicitly declare a variable to represent the loop counter, use the Long data type.
- Item: 1 To 3.
- VBA Construct: Counter Start (1) and Counter End (3) of For… Next statement.
- Description: The statement within the loop (line #3 below) is executed 3 times (1 To 3).
- Theoretically, line #3 below should be enough to set the column width in centimeters without requiring the loop specified by these lines #2 and #4. In practice, this may not be the case. Some tests suggest that repeating line #3 below (or similar) 3 times generally gets you the closest to the specified column width.
Line #3: .ColumnWidth = Application.CentimetersToPoints(ColumnWidthCentimeters) * (.ColumnWidth / .Width)
- Item: .ColumnWidth.
- VBA Construct: Range.ColumnWidth property.
- Description:
- Sets the width of the column containing the Range object within the opening statement of the With… End With block (line #1, item #3 above).
- .ColumnWidth is included twice in the statement. In this first mention, (.ColumnWidth = …), ColumnWidth is the property to which a value is assigned. The value assigned to the ColumnWidth property is the value returned by the other items within this statement.
- Item: Application.CentimetersToPoints.
- VBA Construct: Application.CentimetersToPoints method.
- Description: Converts the measurement specified by item #3 below from centimeters to points.
- Item: ColumnWidthCentimeters.
- VBA Construct: Centimeters parameter of Application.CentimetersToPoints method.
- Description: Specifies the width (in centimeters) of the columns containing the Range object within the opening statement of the With… End With block (line #1, item #3 above).
- If you explicitly declare a variable to represent ColumnWidthCentimeters, use a numeric data type that can handle the value you use to specify the column width in centimeters.
- Item: .ColumnWidth.
- VBA Construct: Range.ColumnWidth property.
- Description:
- Returns the width of the column containing the Range object within the opening statement of the With… End With block (line #1, item #3 above).
- .ColumnWidth is included twice in the statement. In this second mention, (.ColumnWidth), ColumnWidth returns the current value of the property.
- The ColumnWidth property returns the column width in units based on the size (width) of the font you use in the Normal style (for example, Calibri 11). Therefore, 1 unit of column width is equal to 1 character of the Normal style font. If your Normal style font is a proportional (not fixed-width) font, Excel considers the width of the character “0” (the number zero).
- Item: .Width.
- VBA Construct: Range.Width property.
- Description:
- Returns the width of the column containing the Range object within the opening statement of the With… End With block (line #1, item #3 above).
- The Width property returns the column width in points.
- Item: (.ColumnWidth / .Width).
- VBA Construct: Numeric expression.
- Description:
- Both ColumnWidth (item #4 above) and Width (item #5 above) return the width of the column containing the Range object within the opening statement of the With… End With block (line #1, item #3 above).
- The units in which ColumnWidth and Width return the column width differ.
- ColumnWidth expresses the column width in units based on the size (width) of the font you use in the Normal style.
- Width expresses the column width in points.
- ColumnWidth divided by Width (.ColumnWidth / .Width) returns the factor by which you must multiply the desired column width expressed in centimeters/points (items #2 and #3 above) to obtain the appropriate column width in units based on the size (width) of the font you use in the Normal style. In other words, this expression converts Application.CentimetersToPoints(ColumnWidthCentimeters) from points to the units required by the ColumnWidth property.
Macro Example
The following macro sets the width of column L of the worksheet named “Column width” to 1 centimeter.
Sub columnWidthCentimeters()

    'Source: https://powerspreadsheets.com/
    'For further information: https://powerspreadsheets.com/excel-vba-column-width/

    Dim iCounter As Long

    With Worksheets("Column width").Range("L5")
        For iCounter = 1 To 3
            .columnWidth = Application.CentimetersToPoints(1) * (.columnWidth / .Width)
        Next iCounter
    End With

End Sub
Effects of Executing Macro Example
The following GIF illustrates the results of executing this macro example. As expected, VBA sets the width of column L to 1 centimeter.

“It is a capital mistake to theorize before one has data”- Sir Arthur Conan Doyle
This post covers everything you need to know about using Cells and Ranges in VBA. You can read it from start to finish as it is laid out in a logical order. If you prefer you can use the table of contents below to go to a section of your choice.
Topics covered include Offset property, reading values between cells, reading values to arrays and formatting cells.
A Quick Guide to Ranges and Cells
| Function | Takes | Returns | Example | Gives |
|---|---|---|---|---|
|
Range |
cell address | multiple cells | .Range(«A1:A4») | $A$1:$A$4 |
| Cells | row, column | one cell | .Cells(1,5) | $E$1 |
| Offset | row, column | multiple cells | Range(«A1:A2») .Offset(1,2) |
$C$2:$C$3 |
| Rows | row(s) | one or more rows | .Rows(4) .Rows(«2:4») |
$4:$4 $2:$4 |
| Columns | column(s) | one or more columns | .Columns(4) .Columns(«B:D») |
$D:$D $B:$D |
Download the Code
The Webinar
If you are a member of the VBA Vault, then click on the image below to access the webinar and the associated source code.
(Note: Website members have access to the full webinar archive.)

Introduction
This is the third post dealing with the three main elements of VBA. These three elements are the Workbooks, Worksheets and Ranges/Cells. Cells are by far the most important part of Excel. Almost everything you do in Excel starts and ends with Cells.
Generally speaking, you do three main things with Cells
- Read from a cell.
- Write to a cell.
- Change the format of a cell.
Excel has a number of methods for accessing cells such as Range, Cells and Offset.These can cause confusion as they do similar things and can lead to confusion
In this post I will tackle each one, explain why you need it and when you should use it.
Let’s start with the simplest method of accessing cells – using the Range property of the worksheet.
Important Notes
I have recently updated this article so that is uses Value2.
You may be wondering what is the difference between Value, Value2 and the default:
' Value2
Range("A1").Value2 = 56

' Value
Range("A1").Value = 56

' Default uses value
Range("A1") = 56
Using Value may truncate number if the cell is formatted as currency. If you don’t use any property then the default is Value.
It is better to use Value2 as it will always return the actual cell value(see this article from Charle Williams.)
The Range Property
The worksheet has a Range property which you can use to access cells in VBA. The Range property takes the same argument that most Excel Worksheet functions take e.g. “A1”, “A3:C6” etc.
The following example shows you how to place a value in a cell using the Range property.
' https://excelmacromastery.com/
Public Sub WriteToCell()

    ' Write number to cell A1 in sheet1 of this workbook
    ThisWorkbook.Worksheets("Sheet1").Range("A1").Value2 = 67

    ' Write text to cell A2 in sheet1 of this workbook
    ThisWorkbook.Worksheets("Sheet1").Range("A2").Value2 = "John Smith"

    ' Write date to cell A3 in sheet1 of this workbook
    ThisWorkbook.Worksheets("Sheet1").Range("A3").Value2 = #11/21/2017#

End Sub
As you can see Range is a member of the worksheet which in turn is a member of the Workbook. This follows the same hierarchy as in Excel so should be easy to understand. To do something with Range you must first specify the workbook and worksheet it belongs to.
For the rest of this post I will use the code name to reference the worksheet.

The following code shows the above example using the code name of the worksheet i.e. Sheet1 instead of ThisWorkbook.Worksheets(“Sheet1”).
' https://excelmacromastery.com/
Public Sub UsingCodeName()

    ' Write number to cell A1 in sheet1 of this workbook
    Sheet1.Range("A1").Value2 = 67

    ' Write text to cell A2 in sheet1 of this workbook
    Sheet1.Range("A2").Value2 = "John Smith"

    ' Write date to cell A3 in sheet1 of this workbook
    Sheet1.Range("A3").Value2 = #11/21/2017#

End Sub
You can also write to multiple cells using the Range property
' https://excelmacromastery.com/
Public Sub WriteToMulti()

    ' Write number to a range of cells
    Sheet1.Range("A1:A10").Value2 = 67

    ' Write text to multiple ranges of cells
    Sheet1.Range("B2:B5,B7:B9").Value2 = "John Smith"

End Sub
You can download working examples of all the code from this post from the top of this article.
The Cells Property of the Worksheet
The worksheet object has another property called Cells which is very similar to range. There are two differences
- Cells returns a range of one cell only.
- Cells takes row and column as arguments.
The example below shows you how to write values to cells using both the Range and Cells property
' https://excelmacromastery.com/
Public Sub UsingCells()

    ' Write to A1
    Sheet1.Range("A1").Value2 = 10
    Sheet1.Cells(1, 1).Value2  = 10

    ' Write to A10
    Sheet1.Range("A10").Value2 = 10
    Sheet1.Cells(10, 1).Value2  = 10

    ' Write to E1
    Sheet1.Range("E1").Value2 = 10
    Sheet1.Cells(1, 5).Value2  = 10

End Sub
You may be wondering when you should use Cells and when you should use Range. Using Range is useful for accessing the same cells each time the Macro runs.
For example, if you were using a Macro to calculate a total and write it to cell A10 every time then Range would be suitable for this task.
Using the Cells property is useful if you are accessing a cell based on a number that may vary. It is easier to explain this with an example.
In the following code, we ask the user to specify the column number. Using Cells gives us the flexibility to use a variable number for the column.
' https://excelmacromastery.com/
Public Sub WriteToColumn()

    Dim UserCol As Integer

    ' Get the column number from the user
    UserCol = Application.InputBox(" Please enter the column...", Type:=1)

    ' Write text to user selected column
    Sheet1.Cells(1, UserCol).Value2 = "John Smith"

End Sub
In the above example, we are using a number for the column rather than a letter.
To use Range here would require us to convert these values to the letter/number cell reference e.g. “C1”. Using the Cells property allows us to provide a row and a column number to access a cell.
Sometimes you may want to return more than one cell using row and column numbers. The next section shows you how to do this.
Using Cells and Range together
As you have seen you can only access one cell using the Cells property. If you want to return a range of cells then you can use Cells with Ranges as follows
' https://excelmacromastery.com/
Public Sub UsingCellsWithRange()

    With Sheet1
        ' Write 5 to Range A1:A10 using Cells property
        .Range(.Cells(1, 1), .Cells(10, 1)).Value2 = 5

        ' Format Range B1:Z1 to be bold
        .Range(.Cells(1, 2), .Cells(1, 26)).Font.Bold = True

    End With

End Sub
As you can see, you provide the start and end cell of the Range. Sometimes it can be tricky to see which range you are dealing with when the value are all numbers. Range has a property called Address which displays the letter/ number cell reference of any range. This can come in very handy when you are debugging or writing code for the first time.
In the following example we print out the address of the ranges we are using:
' https://excelmacromastery.com/
Public Sub ShowRangeAddress()

    ' Note: Using underscore allows you to split up lines of code
    With Sheet1

        ' Write 5 to Range A1:A10 using Cells property
        .Range(.Cells(1, 1), .Cells(10, 1)).Value2 = 5
        Debug.Print "First address is : " _
            + .Range(.Cells(1, 1), .Cells(10, 1)).Address

        ' Format Range B1:Z1 to be bold
        .Range(.Cells(1, 2), .Cells(1, 26)).Font.Bold = True
        Debug.Print "Second address is : " _
            + .Range(.Cells(1, 2), .Cells(1, 26)).Address

    End With

End Sub
In the example I used Debug.Print to print to the Immediate Window. To view this window select View->Immediate Window(or Ctrl G)


You can download all the code for this post from the top of this article.
The Offset Property of Range
Range has a property called Offset. The term Offset refers to a count from the original position. It is used a lot in certain areas of programming. With the Offset property you can get a Range of cells the same size and a certain distance from the current range. The reason this is useful is that sometimes you may want to select a Range based on a certain condition. For example in the screenshot below there is a column for each day of the week. Given the day number(i.e. Monday=1, Tuesday=2 etc.) we need to write the value to the correct column.

We will first attempt to do this without using Offset.
' https://excelmacromastery.com/
' This sub tests with different values
Public Sub TestSelect()

    ' Monday
    SetValueSelect 1, 111.21
    ' Wednesday
    SetValueSelect 3, 456.99
    ' Friday
    SetValueSelect 5, 432.25
    ' Sunday
    SetValueSelect 7, 710.17

End Sub

' Writes the value to a column based on the day
Public Sub SetValueSelect(lDay As Long, lValue As Currency)

    Select Case lDay
        Case 1: Sheet1.Range("H3").Value2 = lValue
        Case 2: Sheet1.Range("I3").Value2 = lValue
        Case 3: Sheet1.Range("J3").Value2 = lValue
        Case 4: Sheet1.Range("K3").Value2 = lValue
        Case 5: Sheet1.Range("L3").Value2 = lValue
        Case 6: Sheet1.Range("M3").Value2 = lValue
        Case 7: Sheet1.Range("N3").Value2 = lValue
    End Select

End Sub
As you can see in the example, we need to add a line for each possible option. This is not an ideal situation. Using the Offset Property provides a much cleaner solution
' https://excelmacromastery.com/
' This sub tests with different values
Public Sub TestOffset()

    DayOffSet 1, 111.01
    DayOffSet 3, 456.99
    DayOffSet 5, 432.25
    DayOffSet 7, 710.17

End Sub

Public Sub DayOffSet(lDay As Long, lValue As Currency)

    ' We use the day value with offset specify the correct column
    Sheet1.Range("G3").Offset(, lDay).Value2 = lValue

End Sub
As you can see this solution is much better. If the number of days in increased then we do not need to add any more code. For Offset to be useful there needs to be some kind of relationship between the positions of the cells. If the Day columns in the above example were random then we could not use Offset. We would have to use the first solution.
One thing to keep in mind is that Offset retains the size of the range. So .Range(“A1:A3”).Offset(1,1) returns the range B2:B4. Below are some more examples of using Offset
' https://excelmacromastery.com/
Public Sub UsingOffset()

    ' Write to B2 - no offset
    Sheet1.Range("B2").Offset().Value2 = "Cell B2"

    ' Write to C2 - 1 column to the right
    Sheet1.Range("B2").Offset(, 1).Value2 = "Cell C2"

    ' Write to B3 - 1 row down
    Sheet1.Range("B2").Offset(1).Value2 = "Cell B3"

    ' Write to C3 - 1 column right and 1 row down
    Sheet1.Range("B2").Offset(1, 1).Value2 = "Cell C3"

    ' Write to A1 - 1 column left and 1 row up
    Sheet1.Range("B2").Offset(-1, -1).Value2 = "Cell A1"

    ' Write to range E3:G13 - 1 column right and 1 row down
    Sheet1.Range("D2:F12").Offset(1, 1).Value2 = "Cells E3:G13"

End Sub
Using the Range CurrentRegion
CurrentRegion returns a range of all the adjacent cells to the given range.
In the screenshot below you can see the two current regions. I have added borders to make the current regions clear.

A row or column of blank cells signifies the end of a current region.
You can manually check the CurrentRegion in Excel by selecting a range and pressing Ctrl + Shift + *.
If we take any range of cells within the border and apply CurrentRegion, we will get back the range of cells in the entire area.
For example
Range(“B3”).CurrentRegion will return the range B3:D14
Range(“D14”).CurrentRegion will return the range B3:D14
Range(“C8:C9”).CurrentRegion will return the range B3:D14
and so on
How to Use
We get the CurrentRegion as follows
' Current region will return B3:D14 from above example
Dim rg As Range
Set rg = Sheet1.Range("B3").CurrentRegion
Read Data Rows Only
Read through the range from the second row i.e.skipping the header row
' Current region will return B3:D14 from above example
Dim rg As Range
Set rg = Sheet1.Range("B3").CurrentRegion

' Start at row 2 - row after header
Dim i As Long
For i = 2 To rg.Rows.Count
    ' current row, column 1 of range
    Debug.Print rg.Cells(i, 1).Value2
Next i
Remove Header
Remove header row(i.e. first row) from the range. For example if range is A1:D4 this will return A2:D4
' Current region will return B3:D14 from above example
Dim rg As Range
Set rg = Sheet1.Range("B3").CurrentRegion

' Remove Header
Set rg = rg.Resize(rg.Rows.Count - 1).Offset(1)

' Start at row 1 as no header row
Dim i As Long
For i = 1 To rg.Rows.Count
    ' current row, column 1 of range
    Debug.Print rg.Cells(i, 1).Value2
Next i
Using Rows and Columns as Ranges
If you want to do something with an entire Row or Column you can use the Rows or Columns property of the Worksheet. They both take one parameter which is the row or column number you wish to access
' https://excelmacromastery.com/
Public Sub UseRowAndColumns()

    ' Set the font size of column B to 9
    Sheet1.Columns(2).Font.Size = 9

    ' Set the width of columns D to F
    Sheet1.Columns("D:F").ColumnWidth = 4

    ' Set the font size of row 5 to 18
    Sheet1.Rows(5).Font.Size = 18

End Sub
Using Range in place of Worksheet
You can also use Cells, Rows and Columns as part of a Range rather than part of a Worksheet. You may have a specific need to do this but otherwise I would avoid the practice. It makes the code more complex. Simple code is your friend. It reduces the possibility of errors.
The code below will set the second column of the range to bold. As the range has only two rows the entire column is considered B1:B2
' https://excelmacromastery.com/
Public Sub UseColumnsInRange()

    ' This will set B1 and B2 to be bold
    Sheet1.Range("A1:C2").Columns(2).Font.Bold = True

End Sub
You can download all the code for this post from the top of this article.
Reading Values from one Cell to another
In most of the examples so far we have written values to a cell. We do this by placing the range on the left of the equals sign and the value to place in the cell on the right. To write data from one cell to another we do the same. The destination range goes on the left and the source range goes on the right.
The following example shows you how to do this:
' https://excelmacromastery.com/
Public Sub ReadValues()

    ' Place value from B1 in A1
    Sheet1.Range("A1").Value2 = Sheet1.Range("B1").Value2

    ' Place value from B3 in sheet2 to cell A1
    Sheet1.Range("A1").Value2 = Sheet2.Range("B3").Value2

    ' Place value from B1 in cells A1 to A5
    Sheet1.Range("A1:A5").Value2 = Sheet1.Range("B1").Value2

    ' You need to use the "Value" property to read multiple cells
    Sheet1.Range("A1:A5").Value2 = Sheet1.Range("B1:B5").Value2

End Sub
As you can see from this example it is not possible to read from multiple cells. If you want to do this you can use the Copy function of Range with the Destination parameter
' https://excelmacromastery.com/
Public Sub CopyValues()

    ' Store the copy range in a variable
    Dim rgCopy As Range
    Set rgCopy = Sheet1.Range("B1:B5")

    ' Use this to copy from more than one cell
    rgCopy.Copy Destination:=Sheet1.Range("A1:A5")

    ' You can paste to multiple destinations
    rgCopy.Copy Destination:=Sheet1.Range("A1:A5,C2:C6")

End Sub
The Copy function copies everything including the format of the cells. It is the same result as manually copying and pasting a selection. You can see more about it in the Copying and Pasting Cells section.
Using the Range.Resize Method
When copying from one range to another using assignment(i.e. the equals sign), the destination range must be the same size as the source range.
Using the Resize function allows us to resize a range to a given number of rows and columns.
For example:
' https://excelmacromastery.com/
Sub ResizeExamples()

    ' Prints A1
    Debug.Print Sheet1.Range("A1").Address

    ' Prints A1:A2
    Debug.Print Sheet1.Range("A1").Resize(2, 1).Address

    ' Prints A1:A5
    Debug.Print Sheet1.Range("A1").Resize(5, 1).Address

    ' Prints A1:D1
    Debug.Print Sheet1.Range("A1").Resize(1, 4).Address

    ' Prints A1:C3
    Debug.Print Sheet1.Range("A1").Resize(3, 3).Address

End Sub
When we want to resize our destination range we can simply use the source range size.
In other words, we use the row and column count of the source range as the parameters for resizing:
' https://excelmacromastery.com/
Sub Resize()

    Dim rgSrc As Range, rgDest As Range

    ' Get all the data in the current region
    Set rgSrc = Sheet1.Range("A1").CurrentRegion

      ' Get the range destination
    Set rgDest = Sheet2.Range("A1")
    Set rgDest = rgDest.Resize(rgSrc.Rows.Count, rgSrc.Columns.Count)

    rgDest.Value2 = rgSrc.Value2

End Sub
We can do the resize in one line if we prefer:
' https://excelmacromastery.com/
Sub ResizeOneLine()

    Dim rgSrc As Range

    ' Get all the data in the current region
    Set rgSrc = Sheet1.Range("A1").CurrentRegion

    With rgSrc
        Sheet2.Range("A1").Resize(.Rows.Count, .Columns.Count).Value2 = .Value2
    End With

End Sub
Reading Values to variables
We looked at how to read from one cell to another. You can also read from a cell to a variable. A variable is used to store values while a Macro is running. You normally do this when you want to manipulate the data before writing it somewhere. The following is a simple example using a variable. As you can see the value of the item to the right of the equals is written to the item to the left of the equals.
' https://excelmacromastery.com/
Public Sub UseVariables()

    ' Create
    Dim number As Long

    ' Read number from cell
    number = Sheet1.Range("A1").Value2

    ' Add 1 to value
    number = number + 1

    ' Write new value to cell
    Sheet1.Range("A2").Value2 = number

End Sub
To read text to a variable you use a variable of type String:
' https://excelmacromastery.com/
Public Sub UseVariableText()

    ' Declare a variable of type string
    Dim text As String

    ' Read value from cell
    text = Sheet1.Range("A1").Value2

    ' Write value to cell
    Sheet1.Range("A2").Value2 = text

End Sub
You can write a variable to a range of cells. You just specify the range on the left and the value will be written to all cells in the range.
' https://excelmacromastery.com/
Public Sub VarToMulti()

    ' Read value from cell
    Sheet1.Range("A1:B10").Value2 = 66

End Sub
You cannot read from multiple cells to a variable. However you can read to an array which is a collection of variables. We will look at doing this in the next section.
How to Copy and Paste Cells
If you want to copy and paste a range of cells then you do not need to select them. This is a common error made by new VBA users.
Note: We normally use Range.Copy when we want to copy formats, formulas, validation. If we want to copy values it is not the most efficient method.
I have written a complete guide to copying data in Excel VBA here.
You can simply copy a range of cells like this:
Range("A1:B4").Copy Destination:=Range("C5")
Using this method copies everything – values, formats, formulas and so on. If you want to copy individual items you can use the PasteSpecial property of range.
It works like this
Range("A1:B4").Copy
Range("F3").PasteSpecial Paste:=xlPasteValues
Range("F3").PasteSpecial Paste:=xlPasteFormats
Range("F3").PasteSpecial Paste:=xlPasteFormulas
The following table shows a full list of all the paste types
| Paste Type |
|---|
| xlPasteAll |
| xlPasteAllExceptBorders |
| xlPasteAllMergingConditionalFormats |
| xlPasteAllUsingSourceTheme |
| xlPasteColumnWidths |
| xlPasteComments |
| xlPasteFormats |
| xlPasteFormulas |
| xlPasteFormulasAndNumberFormats |
| xlPasteValidation |
| xlPasteValues |
| xlPasteValuesAndNumberFormats |
Reading a Range of Cells to an Array
You can also copy values by assigning the value of one range to another.
Range("A3:Z3").Value2 = Range("A1:Z1").Value2
The value of range in this example is considered to be a variant array. What this means is that you can easily read from a range of cells to an array. You can also write from an array to a range of cells. If you are not familiar with arrays you can check them out in this post.
The following code shows an example of using an array with a range:
' https://excelmacromastery.com/
Public Sub ReadToArray()

    ' Create dynamic array
    Dim StudentMarks() As Variant

    ' Read 26 values into array from the first row
    StudentMarks = Range("A1:Z1").Value2

    ' Do something with array here

    ' Write the 26 values to the third row
    Range("A3:Z3").Value2 = StudentMarks

End Sub
Keep in mind that the array created by the read is a 2 dimensional array. This is because a spreadsheet stores values in two dimensions i.e. rows and columns
Going through all the cells in a Range
Sometimes you may want to go through each cell one at a time to check value.
You can do this using a For Each loop shown in the following code
' https://excelmacromastery.com/
Public Sub TraversingCells()

    ' Go through each cells in the range
    Dim rg As Range
    For Each rg In Sheet1.Range("A1:A10,A20")
        ' Print address of cells that are negative
        If rg.Value < 0 Then
            Debug.Print rg.Address + " is negative."
        End If
    Next

End Sub
You can also go through consecutive Cells using the Cells property and a standard For loop.
The standard loop is more flexible about the order you use but it is slower than a For Each loop.
' https://excelmacromastery.com/
Public Sub TraverseCells()

    ' Go through cells from A1 to A10
    Dim i As Long
    For i = 1 To 10
        ' Print address of cells that are negative
        If Range("A" & i).Value < 0 Then
            Debug.Print Range("A" & i).Address + " is negative."
        End If
    Next

    ' Go through cells in reverse i.e. from A10 to A1
    For i = 10 To 1 Step -1
        ' Print address of cells that are negative
        If Range("A" & i) < 0 Then
            Debug.Print Range("A" & i).Address + " is negative."
        End If
    Next

End Sub
Formatting Cells
Sometimes you will need to format the cells the in spreadsheet. This is actually very straightforward. The following example shows you various formatting you can add to any range of cells
' https://excelmacromastery.com/
Public Sub FormattingCells()

    With Sheet1

        ' Format the font
        .Range("A1").Font.Bold = True
        .Range("A1").Font.Underline = True
        .Range("A1").Font.Color = rgbNavy

        ' Set the number format to 2 decimal places
        .Range("B2").NumberFormat = "0.00"
        ' Set the number format to a date
        .Range("C2").NumberFormat = "dd/mm/yyyy"
        ' Set the number format to general
        .Range("C3").NumberFormat = "General"
        ' Set the number format to text
        .Range("C4").NumberFormat = "Text"

        ' Set the fill color of the cell
        .Range("B3").Interior.Color = rgbSandyBrown

        ' Format the borders
        .Range("B4").Borders.LineStyle = xlDash
        .Range("B4").Borders.Color = rgbBlueViolet

    End With

End Sub
Main Points
The following is a summary of the main points
- Range returns a range of cells
- Cells returns one cells only
- You can read from one cell to another
- You can read from a range of cells to another range of cells.
- You can read values from cells to variables and vice versa.
- You can read values from ranges to arrays and vice versa
- You can use a For Each or For loop to run through every cell in a range.
- The properties Rows and Columns allow you to access a range of cells of these types
What’s Next?
Free VBA Tutorial If you are new to VBA or you want to sharpen your existing VBA skills then why not try out the The Ultimate VBA Tutorial.
Related Training: Get full access to the Excel VBA training webinars and all the tutorials.
(NOTE: Planning to build or manage a VBA Application? Learn how to build 10 Excel VBA applications from scratch.)
Resizing VBA Range
To create a Range of cells from parameters or another Range of cells, it is required knowledge of resizing and/or displacement commands. The main ones being Resize and Offset.
VBA Offset
Offset is a command for moving, either horizontally or vertically, a Range of cells.
    Range("B2").Offset(RowOffSet:=1, ColumnOffset:=1).Select
    'The above command is the same as Range ("B2"). Offset (1, 1) .Select
The above code will select cell «C3».
- RowOffSet: integer that shifts rows downwards as it value increases
- ColumnOffset: integer the shifts columns to the right as its value increases
It is not necessary to use the terms: RowOffSet and ColumnOffSet. Just as in a function, you can use only the numbers as parameters (in the order RowOffSet and then ColumnOffset), making the parameterization implicit.
Range("B2").Offset(-1, -1).SelectThe above code will select cell «A1», since negative numbers mean retreating rows or columns.
The advantage of explicit parameterization (using the RowOffSet and ColumnOffSet terms) is that it allows you to change the order in which the parameters are written.
  Range("B2").Offset(2, 3).Select
  Range("B2").Offset(ColumnOffset:=3, RowOffSet:=2).Select
  'Both of the above commands perform the same action
A Range can contain more than one cell, and this range can be shifted with Offset.
Range("B2:D4").Offset(1, 1).Select
The above code will select the cells from «C3» to «E5», starting from the reference range from «B2» to «D4».
Resize is a command for creating a new Range starting from the lowest-row cell and the lowest-column of the reference Range (even if it has only one cell).
    Range("A1").Resize(RowSize:=2, ColumnSize:=2).Select
    'The above command is the same as Range ("A1"). Resize (2, 2) .Select
The above code will select the cells from «A1» to «B2».
- RowSize: integer that determines the amount of rows to expand from the lowest row and column cell to form a Range (expanding from top to bottom).
- ColumnSize: integer that determines the amount of columns to expand from the lowest row and column cell to form a Range (expanding from left to right).
In the same way as the Offset command, you can omit the parameters name (RowSize, ColumnSize).
Range("B2").Resize(3, 3).SelectThe above code will select the cells from «B2» to «D4».
The Resize property will always use the lower-line and lower-column cell as the starting point. The size of the Range reference is irrelevant:
Range("A1:J20").Resize(2, 2).SelectIn this selection the lower-line and lower-column cell will be «A1». Thus, the code will then select the cells from «A1» to «B2».

Unlike the Offset command, Resize does not accept negative values.
VBA Resize along with VBA Offset
You can use the Resize and the Offset commands together in a single line of code:
    Range("A2:B3").Select
    Range("A2:B3").Resize(1, 2).Offset(-1, 1).Select
    Range("A2:B3").Offset(-1, 1).Resize(1, 2).Select 'Alternative to the previous line
Although in this case the final Range is the same, the order of execution resolves from left to right.
    Range("A2:B3").Resize(1, 2).Offset(-1, 1).Select
    'Execution order: First Range("A2:B3").Resize(1, 2) and then .Offset(-1, 1) for later .Select
Consolidating Your Learning
Suggested Exercises
SuperExcelVBA.com is learning website. Examples might be simplified to improve reading and basic understanding. Tutorials, references, and examples are constantly reviewed to avoid errors, but we cannot warrant full correctness of all content. All Rights Reserved.
Excel ® is a registered trademark of the Microsoft Corporation.
© 2023 SuperExcelVBA | ABOUT
![]()
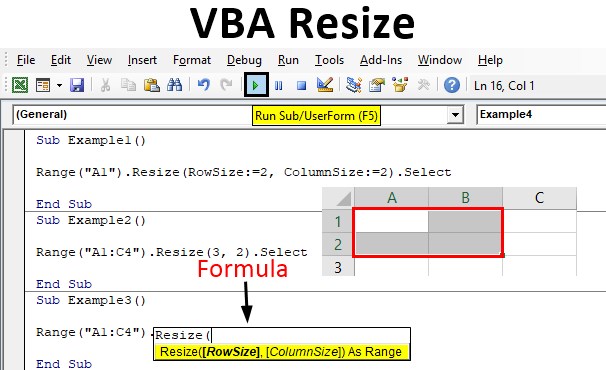
Excel VBA Resize
VBA Resize is a method where we use it to highlight the cells by changing their size for visualization. The important thing which needs to be noted is that this method is used only for illustration purposes. Resize is a property that is used with the range property method to display the selection of rows and columns provided as an argument with a reference to a given range.
Syntax of VBA Resize:
The syntax for this property is as follows:
![]()
Row size is the number of rows we want to select or highlight and column size is the number of columns we want to select and highlight. This property needs a reference to a range. If one of the arguments from row size or column size is not provided with this function selects the entire row or the column from the range. The methods to use Resize property in VBA is as follows:
- First, we need to provide a range for reference.
- Next step is to provide the arguments for the rows and size for resize property.
- To illustrate it we need to use the select property method.
Using the Resize Property in Excel VBA
The following examples will teach us how to use Resize Property in Excel by using the VBA Code.
You can download this VBA Resize Excel Template here – VBA Resize Excel Template
Example #1
Let us first begin with the basic resize property. In this example, we will see how to use the resize the property and how we need to provide the inputs for this resize function in general. For this, follow the below steps:
Step 1: Insert a new module inside Visual Basic Editor (VBE). Click on Insert tab > select Module.
Step 2: Now write the subprocedure for VBA Resize.
Code:
Sub Example1()

End Sub
Step 3: Resize is a range property of VBA let us select a range.
Code:
Sub Example1()

Range("A1")

End Sub

Step 4: After that, we can use the dot operator and use the resize method to select the number of columns and rows.
Code:
Sub Example1()

Range("A1").Resize(RowSize:=2, ColumnSize:=2)

End Sub
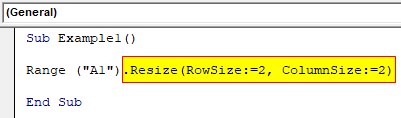
Step 5: Then we can use the select method property for illustration purposes.
Code:
Sub Example1()

Range("A1").Resize(RowSize:=2, ColumnSize:=2).Select

End Sub
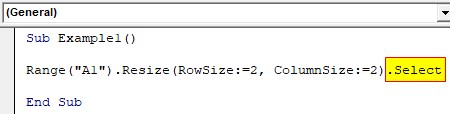
Step 6: Run the Code by hitting F5 or the Run button. and see the result in worksheet 1.
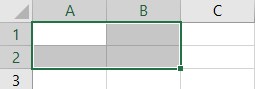
We have selected two rows and two columns to the range.
Example #2
In the above example, we have used the same number of rows and columns for the range. Let us try a different approach and use different selection such as row size to be 3 and column size to be 2. For this, follow the below steps:
Step 1: We can use the same module and begin with our subprocedure for the second example.
Code:
Sub Example2()

End Sub
Step 2: Now as this is a range property we will use the range method to reference a cell.
Code:
Sub Example2()

Range("A1:C4")

End Sub
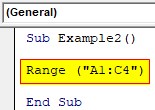
Step 3: Then we will use the resize method and select the row and column size for the arguments.
Code:
Sub Example2()

Range("A1:C4").Resize(3, 2)

End Sub
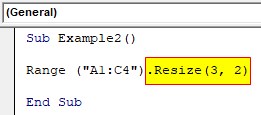
Step 4: And the final step is to use the Select property method for the illustration.
Code:
Sub Example2()

Range("A1:C4").Resize(3, 2).Select

End Sub
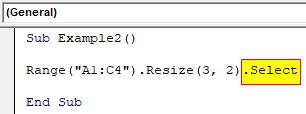
Step 5: Now when we execute the above code by hitting F5 .we can see the following result in sheet 1.
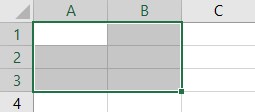
Out of the range A1:C4 this code has selected three rows and two columns.
Example #3
So in the above examples, we saw how to resize property works if there is same number of rows and columns or a different number of rows and columns as the argument. Now let us see what happens when we do not provide one of the arguments to the function. For this, follow the below steps:
Step 1: Declare another Subprocedure.
Code:
Sub Example3()

End Sub
Step 2: Now we can select any random range.
Code:
Sub Example3()

Range("A1:C4")

End Sub

Step 3: Now we will use the resize property but we will remove the row specification from the code.
Code:
Sub Example3()

Range("A1:C4").Resize(, 1)

End Sub
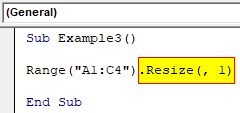
Step 4: Now we will use the select method.
Code:
Sub Example3()

Range("A1:C4").Resize(, 1).Select

End Sub
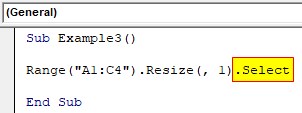
Step 5: Run the Code by hitting F5 or the Run button.
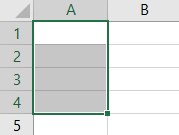
It selected one column but the entire four rows.
Example #4
Now let us use this resize property in a dynamic example. For this example, we will first select some range which will have some number of rows and columns and we will use this resize property to select 2 extra rows and column from the selection. For this, follow the below steps:
Step 1: In the same module let us begin with a subprocedure.
Code:
Sub Example4()

End Sub

Step 2: First let us activate sheet 1 first using the worksheet property method.
Code:
Sub Example4()

Worksheets("Sheet1").Activate

End Sub
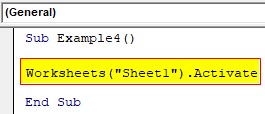
Step 3: Now let us provide the selection with the number of rows and number of columns using the selection property method as shown below.
Code:
Sub Example4()

Worksheets("Sheet1").Activate
numRows = Selection.Rows.Count
numColumns = Selection.Columns.Count

End Sub
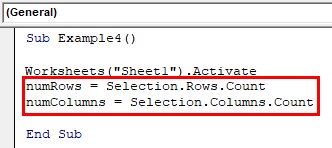
Step 4: Now we can use the resize property to increase the selection by two rows and two columns.
Code:
Sub Example4()

Worksheets("Sheet1").Activate
numRows = Selection.Rows.Count
numColumns = Selection.Columns.Count
Selection.Resize(numRows + 2, numColumns + 2).Select

End Sub
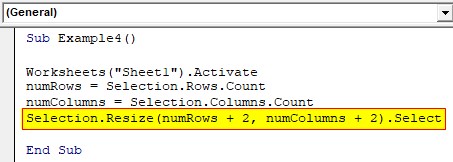
Step 5: So here is our selection before the execution of the code.
Code:
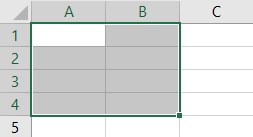
Step 6: When we execute the code.
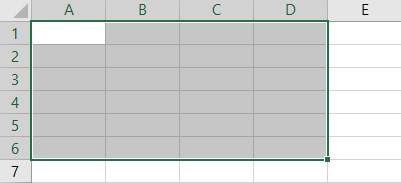
The following code extended the selection by two rows and two columns.
Things to Remember
There are few things which we need to remember about VBA Resize:
- This is a range property method.
- It is used to illustrate the selection of rows and columns from a given range.
- The first argument in this function is a row reference and the second argument is a range reference.
- If one of the arguments from row size or column size is not provided this function selects the entire row or the column from the range.
Recommended Articles
This is a guide to the VBA Resize. Here we discuss how to use the Resize property in Excel VBA along with practical examples and downloadable excel template. You can also go through our other suggested articles –
- VBA SubString
- VBA Dynamic Array
- VBA Login
- VBA Month