
You can use Object Linking and Embedding (OLE) to include content from other programs, such as Word or Excel.
OLE is supported by many different programs, and OLE is used to make content that is created in one program available in another program. For example, you can insert an Office Word document in an Office Excel workbook. To see what types of content that you can insert, click Object in the Text group on the Insert tab. Only programs that are installed on your computer and that support OLE objects appear in the Object type box.
If you copy information between Excel or any program that supports OLE, such as Word, you can copy the information as either a linked object or an embedded object. The main differences between linked objects and embedded objects are where the data is stored and how the object is updated after you place it in the destination file. Embedded objects are stored in the workbook that they are inserted in, and they are not updated. Linked objects remain as separate files, and they can be updated.
Linked and embedded objects in a document
1. An embedded object has no connection to the source file.
2. A linked object is linked to the source file.
3. The source file updates the linked object.
When to use linked objects
If you want the information in your destination file to be updated when the data in the source file changes, use linked objects.
With a linked object, the original information remains stored in the source file. The destination file displays a representation of the linked information but stores only the location of the original data (and the size if the object is an Excel chart object). The source file must remain available on your computer or network to maintain the link to the original data.
The linked information can be updated automatically if you change the original data in the source file. For example, if you select a paragraph in a Word document and then paste the paragraph as a linked object in an Excel workbook, the information can be updated in Excel if you change the information in your Word document.
When to use embedded objects
If you don’t want to update the copied data when it changes in the source file, use an embedded object. The version of the source is embedded entirely in the workbook. If you copy information as an embedded object, the destination file requires more disk space than if you link the information.
When a user opens the file on another computer, he can view the embedded object without having access to the original data. Because an embedded object has no links to the source file, the object is not updated if you change the original data. To change an embedded object, double-click the object to open and edit it in the source program. The source program (or another program capable of editing the object) must be installed on your computer.
Changing the way that an OLE object is displayed
You can display a linked object or embedded object in a workbook exactly as it appears in the source program or as an icon. If the workbook will be viewed online, and you don’t intend to print the workbook, you can display the object as an icon. This minimizes the amount of display space that the object occupies. Viewers who want to display the information can double-click the icon.
Embed an object in a worksheet
-
Click inside the cell of the spreadsheet where you want to insert the object.
-
On the Insert tab, in the Text group, click Object
 .
. -
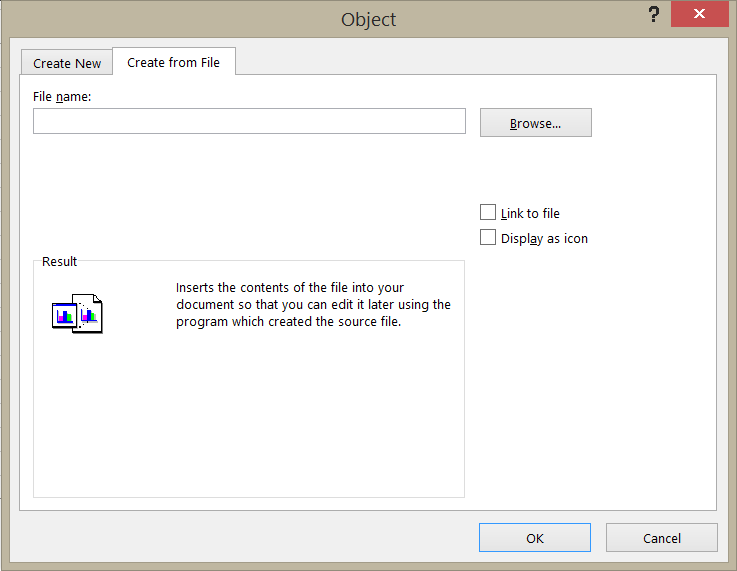
In the Object dialog box, click the Create from File tab.
-
Click Browse, and select the file you want to insert.
-
If you want to insert an icon into the spreadsheet instead of show the contents of the file, select the Display as icon check box. If you don’t select any check boxes, Excel shows the first page of the file. In both cases, the complete file opens with a double click. Click OK.
Note: After you add the icon or file, you can drag and drop it anywhere on the worksheet. You can also resize the icon or file by using the resizing handles. To find the handles, click the file or icon one time.
 .
.
Insert a link to a file
You might want to just add a link to the object rather than fully embedding it. You can do that if your workbook and the object you want to add are both stored on a SharePoint site, a shared network drive, or a similar location, and if the location of the files will remain the same. This is handy if the linked object undergoes changes because the link always opens the most up-to-date document.
Note: If you move the linked file to another location, the link won’t work anymore.
-
Click inside the cell of the spreadsheet where you want to insert the object.
-
On the Insert tab, in the Text group, click Object
. -
Click the Create from File tab.
-
Click Browse, and then select the file you want to link.
-
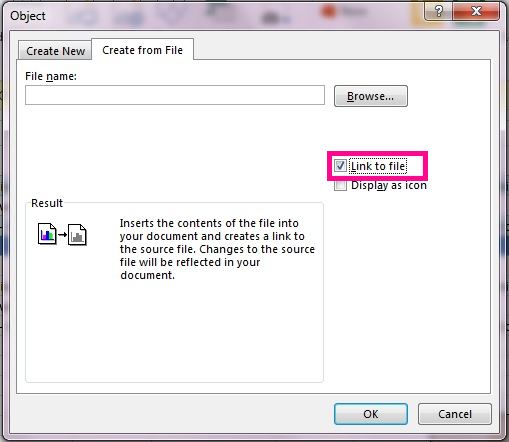
Select the Link to file check box, and click OK.
Create a new object from inside Excel
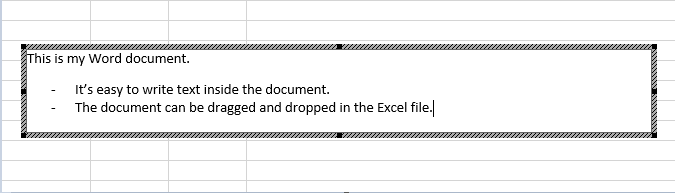
You can create an entirely new object based on another program without leaving your workbook. For example, if you want to add a more detailed explanation to your chart or table, you can create an embedded document, such as a Word or PowerPoint file, in Excel. You can either set your object to be displayed right in a worksheet or add an icon that opens the file.
-
Click inside the cell of the spreadsheet where you want to insert the object.
-
On the Insert tab, in the Text group, click Object
. -
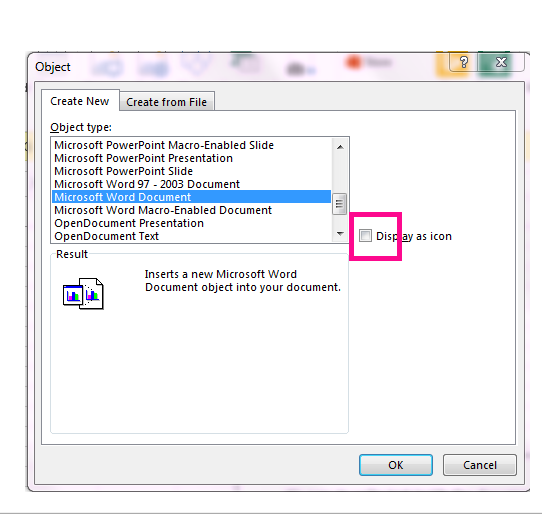
On the Create New tab, select the type of object you want to insert from the list presented. If you want to insert an icon into the spreadsheet instead of the object itself, select the Display as icon check box.
-
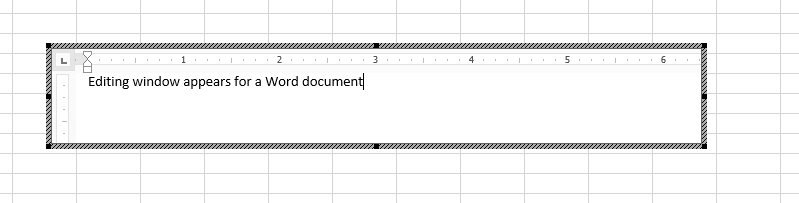
Click OK. Depending on the type of file you are inserting, either a new program window opens or an editing window appears within Excel.
-
Create the new object you want to insert.
When you’re done, if Excel opened a new program window in which you created the object, you can work directly within it.
When you’re done with your work in the window, you can do other tasks without saving the embedded object. When you close the workbook your new objects will be saved automatically.
Note: After you add the object, you can drag and drop it anywhere on your Excel worksheet. You can also resize the object by using the resizing handles. To find the handles, click the object one time.
Embed an object in a worksheet
-
Click inside the cell of the spreadsheet where you want to insert the object.
-
On the Insert tab, in the Text group, click Object.
-
Click the Create from File tab.
-
Click Browse, and select the file you want to insert.
-
If you want to insert an icon into the spreadsheet instead of show the contents of the file, select the Display as icon check box. If you don’t select any check boxes, Excel shows the first page of the file. In both cases, the complete file opens with a double click. Click OK.
Note: After you add the icon or file, you can drag and drop it anywhere on the worksheet. You can also resize the icon or file by using the resizing handles. To find the handles, click the file or icon one time.
Insert a link to a file
You might want to just add a link to the object rather than fully embedding it. You can do that if your workbook and the object you want to add are both stored on a SharePoint site, a shared network drive, or a similar location, and if the location of the files will remain the same. This is handy if the linked object undergoes changes because the link always opens the most up-to-date document.
Note: If you move the linked file to another location, the link won’t work anymore.
-
Click inside the cell of the spreadsheet where you want to insert the object.
-
On the Insert tab, in the Text group, click Object.
-
Click the Create from File tab.
-
Click Browse, and then select the file you want to link.
-
Select the Link to file check box, and click OK.
Create a new object from inside Excel
You can create an entirely new object based on another program without leaving your workbook. For example, if you want to add a more detailed explanation to your chart or table, you can create an embedded document, such as a Word or PowerPoint file, in Excel. You can either set your object to be displayed right in a worksheet or add an icon that opens the file.
-
Click inside the cell of the spreadsheet where you want to insert the object.
-
On the Insert tab, in the Text group, click Object.
-
On the Create New tab, select the type of object you want to insert from the list presented. If you want to insert an icon into the spreadsheet instead of the object itself, select the Display as icon check box.
-
Click OK. Depending on the type of file you are inserting, either a new program window opens or an editing window appears within Excel.
-
Create the new object you want to insert.
When you’re done, if Excel opened a new program window in which you created the object, you can work directly within it.
When you’re done with your work in the window, you can do other tasks without saving the embedded object. When you close the workbook your new objects will be saved automatically.
Note: After you add the object, you can drag and drop it anywhere on your Excel worksheet. You can also resize the object by using the resizing handles. To find the handles, click the object one time.
Link or embed content from another program by using OLE
You can link or embed all or part of the content from another program.
Create a link to content from another program
-
Click in the worksheet where you want to place the linked object.
-
On the Insert tab, in the Text group, click Object.
-
Click the Create from File tab.
-
In the File name box, type the name of the file, or click Browse to select from a list.
-
Select the Link to file check box.
-
Do one of the following:
-
To display the content, clear the Display as icon check box.
-
To display an icon, select the Display as icon check box. Optionally, to change the default icon image or label, click Change Icon, and then click the icon that you want from the Icon list, or type a label in the Caption box.
Note: You cannot use the Object command to insert graphics and certain types of files. To insert a graphic or file, on the Insert tab, in the Illustrations group, click Picture.
-
Embed content from another program
-
Click in the worksheet where you want to place the embedded object.
-
On the Insert tab, in the Text group, click Object.
-
If the document does not already exist, click the Create New tab. In the Object type box, click the type of object that you want to create.
If the document already exists, click the Create from File tab. In the File name box, type the name of the file, or click Browse to select from a list.
-
Clear the Link to file check box.
-
Do one of the following:
-
To display the content, clear the Display as icon check box.
-
To display an icon, select the Display as icon check box. To change the default icon image or label, click Change Icon, and then click the icon that you want from the Icon list, or type a label in the Caption box.
-
Link or embed partial content from another program
-
From a program other than Excel, select the information that you want to copy as a linked or embedded object.
-
On the Home tab, in the Clipboard group, click Copy.
-
Switch to the worksheet that you want to place the information in, and then click where you want the information to appear.
-
On the Home tab, in the Clipboard group, click the arrow below Paste, and then click Paste Special.
-
Do one of the following:
-
To paste the information as a linked object, click Paste link.
-
To paste the information as an embedded object, click Paste. In the As box, click the entry with the word «object» in its name. For example, if you copied the information from a Word document, click Microsoft Word Document Object.
-

Change the way that an OLE object is displayed
-
Right-click the icon or object, point to object typeObject (for example, Document Object), and then click Convert.
-
Do one of the following:
-
To display the content, clear the Display as icon check box.
-
To display an icon, select the Display as icon check box. Optionally, you can change the default icon image or label. To do that, click Change Icon, and then click the icon that you want from the Icon list, or type a label in the Caption box.
-
Control updates to linked objects
You can set links to other programs to be updated in the following ways: automatically, when you open the destination file; manually, when you want to see the previous data before updating with the new data from the source file; or when you specifically request the update, regardless of whether automatic or manual updating is turned on.
Set a link to another program to be updated manually
-
On the Data tab, in the Connections group, click Edit Links.
Note: The Edit Links command is unavailable if your file does not contain links to other files.
-
In the Source list, click the linked object that you want to update. An A in the Update column means that the link is automatic, and an M in the Update column means that the link is set to Manual update.
Tip: To select multiple linked objects, hold down CTRL and click each linked object. To select all linked objects, press CTRL+A.
-
To update a linked object only when you click Update Values, click Manual.
Set a link to another program to be updated automatically
-
On the Data tab, in the Connections group, click Edit Links.
Note: The Edit Links command is unavailable if your file does not contain links to other files.
-
In the Source list, click the linked object that you want to update. An A in the Update column means that the link will update automatically, and an M in the Update column means that the link must be updated manually.
Tip: To select multiple linked objects, hold down CTRL and click each linked object. To select all linked objects, press CTRL+A.
-
Click OK.
Issue: I can’t update the automatic links on my worksheet
The Automatic option can be overridden by the Update links to other documents Excel option.
To ensure that automatic links to OLE objects can be automatically updated:
-
Click the Microsoft Office Button
, click Excel Options, and then click the Advanced category. -
Under When calculating this workbook, make sure that the Update links to other documents check box is selected.
 , click Excel Options, and then click the Advanced category.
Update a link to another program now
-
On the Data tab, in the Connections group, click Edit Links.
Note: The Edit Links command is unavailable if your file does not contain linked information.
-
In the Source list, click the linked object that you want to update.
Tip: To select multiple linked objects, hold down CTRL and click each linked object. To select all linked objects, press CTRL+A.
-
Click Update Values.
Edit content from an OLE program
While you are in Excel, you can change the content linked or embedded from another program.
Edit a linked object in the source program
-
On the Data tab, in the Connections group, click Edit Links.
Note: The Edit Links command is unavailable if your file does not contain linked information.
-
In the Source file list, click the source for the linked object, and then click Open Source.
-
Make the changes that you want to the linked object.
-
Exit the source program to return to the destination file.
Edit an embedded object in the source program
-
Double-click the embedded object to open it.
-
Make the changes that you want to the object.
-
If you are editing the object in place within the open program, click anywhere outside of the object to return to the destination file.
If you edit the embedded object in the source program in a separate window, exit the source program to return to the destination file.
Note: Double-clicking certain embedded objects, such as video and sound clips, plays the object instead of opening a program. To edit one of these embedded objects, right-click the icon or object, point to object typeObject (for example, Media Clip Object), and then click Edit.
Edit an embedded object in a program other than the source program
-
Select the embedded object that you want to edit.
-
Right-click the icon or object, point to object typeObject (for example, Document Object), and then click Convert.
-
Do one of the following:
-
To convert the embedded object to the type that you specify in the list, click Convert to.
-
To open the embedded object as the type that you specify in the list without changing the embedded object type, click Activate.
-
Select an OLE object by using the keyboard
-
Press CTRL+G to display the Go To dialog box.
-
Click Special, select Objects, and then click OK.
-
Press TAB until the object that you want is selected.
-
Press SHIFT+F10.
-
Point to Object or Chart Object, and then click Edit.
Issue: When I double-click a linked or embedded object, a «cannot edit» message appears
This message appears when the source file or source program can’t be opened.
Make sure that the source program is available If the source program is not installed on your computer, convert the object to the file format of a program that you do have installed.
Ensure that memory is adequate Make sure that you have enough memory to run the source program. Close other programs to free up memory, if necessary.
Close all dialog boxes If the source program is running, make sure that it doesn’t have any open dialog boxes. Switch to the source program, and close any open dialog boxes.
Close the source file If the source file is a linked object, make sure that another user doesn’t have it open.
Ensure that the source file name has not changed If the source file that you want to edit is a linked object, make sure that it has the same name as it did when you created the link and that it has not been moved. Select the linked object, and then click the Edit Links command in the Connections group on the Data tab to see the name of the source file. If the source file has been renamed or moved, use the Change Source button in the Edit Links dialog box to locate the source file and reconnect the link.
Need more help?
You can always ask an expert in the Excel Tech Community or get support in the Answers community.
![]()
Download Article
![]()
Download Article
- Inserting a File
- Inserting an Image
|
Microsoft Excel allows you to include other files, such as Word documents and PDFs, into a spreadsheet. This wikiHow will show you how to insert a file as an object into an Excel project using OLE (object linking and embedding).
-
1
Open your project in Excel. You can open your project within Excel by clicking Open from the File tab, or you can right-click on the file in a file browser and click Open With and Excel.
- This method works for newer versions of Excel on either PC or Mac.
-
2
Click the cell in which you want to insert the object. Whenever people view this cell, they will find the embedded document.
Advertisement
-
3
Click the Insert tab. You’ll find this in the ribbon above the document editor or at the top of your screen.
-
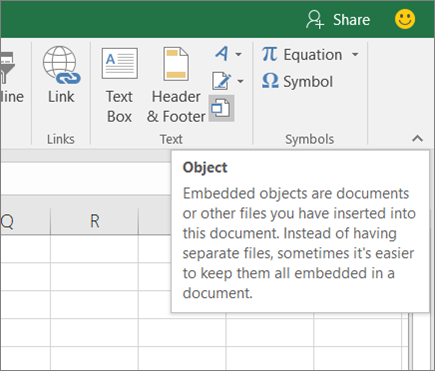
4
Click the icon that looks like a program window on a sheet of paper. This is the «Object» icon and can be found in the «Text» group. A box will pop up.
-
5
Click the Create from File tab. The tab will switch from «Create New.»
-
6
Click Browse. Your file browser will open.
-
7
Navigate to and double-click your file. Only compatible files will show up in the browser, like PowerPoints, PDFs, and Word documents.
-
8
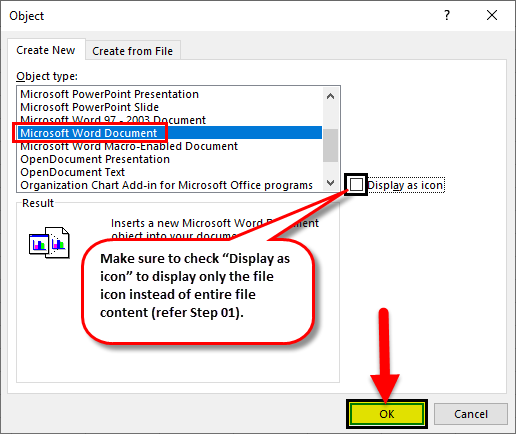
Choose to select «Display as icon.« If you select «Display as icon,» you’ll see the icon of the document appear in the cell; if you don’t choose «Display as icon,» the full first page of the document will appear. Regardless of your choice, both embedded documents will link to the full document.
-
9
Click OK. You’ll see this at the bottom right of the pop-up window. The document you selected will appear in the cell either as the full first-page document or icon.[1]


Advertisement
-
1
Open your project in Excel. You can open your project within Excel by clicking Open from the File tab, or you can right-click on the file in a file browser and click Open With and Excel.
- This method works for newer versions of Excel on either PC or Mac.
-
2
Click the cell you want to insert the object.
-
3
Click the Insert tab. You’ll find this in the ribbon above the document editor or at the top of your screen.
-
4
Click the Pictures icon. You’ll find this in the «Illustrations» group. A file browser will pop up.
-
5
Navigate to and double-click on your image. The list of compatible file types is long, but all the common file types are accepted like GIF, JPG, and PNG.
- The image is inserted into your document. You can edit the image using the Picture Tools tab.[2]
- The image is inserted into your document. You can edit the image using the Picture Tools tab.[2]


Advertisement
Ask a Question
200 characters left
Include your email address to get a message when this question is answered.
Submit
Advertisement
Thanks for submitting a tip for review!
References
About This Article
Article SummaryX
1. Open your project in Excel.
2. Click the cell you want to insert the object.
3. Click the Object icon in the Insert tab.
4. Click the Create from File tab.
5. Click Browse and navigate to and double-click the file.
6. Choose to «Display as icon» or not.
7. Click OK.
Did this summary help you?
Thanks to all authors for creating a page that has been read 28,976 times.
Is this article up to date?
Термин Объекты Excel (понимаемый в широком смысле, как объектная модель Excel) включает в себя элементы, из которых состоит любая рабочая книга Excel. Это, например, рабочие листы (Worksheets), строки (Rows), столбцы (Columns), диапазоны ячеек (Ranges) и сама рабочая книга Excel (Workbook) в том числе. Каждый объект Excel имеет набор свойств, которые являются его неотъемлемой частью.
Например, объект Worksheet (рабочий лист) имеет свойства Name (имя), Protection (защита), Visible (видимость), Scroll Area (область прокрутки) и так далее. Таким образом, если в процессе выполнения макроса требуется скрыть рабочий лист, то достаточно изменить свойство Visible этого листа.
В Excel VBA существует особый тип объектов – коллекция. Как можно догадаться из названия, коллекция ссылается на группу (или коллекцию) объектов Excel. Например, коллекция Rows – это объект, содержащий все строки рабочего листа.
Доступ ко всем основным объектам Excel может быть осуществлён (прямо или косвенно) через объект Workbooks, который является коллекцией всех открытых в данный момент рабочих книг. Каждая рабочая книга содержит объект Sheets – коллекция, которая включает в себя все рабочие листы и листы с диаграммами рабочей книги. Каждый объект Worksheet состоит из коллекции Rows – в неё входят все строки рабочего листа, и коллекции Columns – все столбцы рабочего листа, и так далее.
В следующей таблице перечислены некоторые наиболее часто используемые объекты Excel. Полный перечень объектов Excel VBA можно найти на сайте Microsoft Office Developer (на английском).
| Объект | Описание |
|---|---|
| Application | Приложение Excel. |
| Workbooks | Коллекция всех открытых в данный момент рабочих книг в текущем приложении Excel. Доступ к какой-то конкретной рабочей книге может быть осуществлён через объект Workbooks при помощи числового индекса рабочей книги или её имени, например, Workbooks(1) или Workbooks(«Книга1»). |
| Workbook | Объект Workbook – это рабочая книга. Доступ к ней может быть выполнен через коллекцию Workbooks при помощи числового индекса или имени рабочей книги (см. выше). Для доступа к активной в данный момент рабочей книге можно использовать ActiveWorkbook.
Из объекта Workbook можно получить доступ к объекту Sheets, который является коллекцией всех листов рабочей книги (рабочие листы и диаграммы), а также к объекту Worksheets, который представляет из себя коллекцию всех рабочих листов книги Excel. |
| Sheets | Объект Sheets– это коллекция всех листов рабочей книги. Это могут быть как рабочие листы, так и диаграммы на отдельном листе. Доступ к отдельному листу из коллекции Sheets можно получить при помощи числового индекса листа или его имени, например, Sheets(1) или Sheets(«Лист1»). |
| Worksheets | Объект Worksheets – это коллекция всех рабочих листов в рабочей книге (то есть, все листы, кроме диаграмм на отдельном листе). Доступ к отдельному рабочему листу из коллекции Worksheets можно получить при помощи числового индекса рабочего листа или его имени, например, Worksheets(1) или Worksheets(«Лист1»). |
| Worksheet | Объект Worksheet – это отдельный рабочий лист книги Excel. Доступ к нему можно получить при помощи числового индекса рабочего листа или его имени (см. выше).
Кроме этого Вы можете использовать ActiveSheet для доступа к активному в данный момент рабочему листу. Из объекта Worksheet можно получить доступ к объектам Rows и Columns, которые являются коллекцией объектов Range, ссылающихся на строки и столбцы рабочего листа. А также можно получить доступ к отдельной ячейке или к любому диапазону смежных ячеек на рабочем листе. |
| Rows | Объект Rows – это коллекция всех строк рабочего листа. Объект Range, состоящий из отдельной строки рабочего листа, может быть доступен по номеру этой строки, например, Rows(1). |
| Columns | Объект Columns – это коллекция всех столбцов рабочего листа. Объект Range, состоящий из отдельного столбца рабочего листа, может быть доступен по номеру этого столбца, например, Columns(1). |
| Range | Объект Range – это любое количество смежных ячеек на рабочем листе. Это может быть одна ячейка или все ячейки листа.
Доступ к диапазону, состоящему из единственной ячейки, может быть осуществлён через объект Worksheet при помощи свойства Cells, например, Worksheet.Cells(1,1). По-другому ссылку на диапазон можно записать, указав адреса начальной и конечной ячеек. Их можно записать через двоеточие или через запятую. Например, Worksheet.Range(«A1:B10») или Worksheet.Range(«A1», «B10») или Worksheet.Range(Cells(1,1), Cells(10,2)). Обратите внимание, если в адресе Range вторая ячейка не указана (например, Worksheet.Range(«A1») или Worksheet.Range(Cells(1,1)), то будет выбран диапазон, состоящий из единственной ячейки. |
Приведённая выше таблица показывает, как выполняется доступ к объектам Excel через родительские объекты. Например, ссылку на диапазон ячеек можно записать вот так:
Workbooks("Книга1").Worksheets("Лист1").Range("A1:B10")
Содержание
- Присваивание объекта переменной
- Активный объект
- Смена активного объекта
- Свойства объектов
- Методы объектов
- Рассмотрим несколько примеров
- Пример 1
- Пример 2
- Пример 3
Присваивание объекта переменной
В Excel VBA объект может быть присвоен переменной при помощи ключевого слова Set:
Dim DataWb As Workbook
Set DataWb = Workbooks("Книга1.xlsx")
Активный объект
В любой момент времени в Excel есть активный объект Workbook – это рабочая книга, открытая в этот момент. Точно так же существует активный объект Worksheet, активный объект Range и так далее.
Сослаться на активный объект Workbook или Sheet в коде VBA можно как на ActiveWorkbook или ActiveSheet, а на активный объект Range – как на Selection.
Если в коде VBA записана ссылка на рабочий лист, без указания к какой именно рабочей книге он относится, то Excel по умолчанию обращается к активной рабочей книге. Точно так же, если сослаться на диапазон, не указывая определённую рабочую книгу или лист, то Excel по умолчанию обратится к активному рабочему листу в активной рабочей книге.
Таким образом, чтобы сослаться на диапазон A1:B10 на активном рабочем листе активной книги, можно записать просто:
Смена активного объекта
Если в процессе выполнения программы требуется сделать активной другую рабочую книгу, другой рабочий лист, диапазон и так далее, то для этого нужно использовать методы Activate или Select вот таким образом:
Sub ActivateAndSelect()

   Workbooks("Книга2").Activate
   Worksheets("Лист2").Select
   Worksheets("Лист2").Range("A1:B10").Select
   Worksheets("Лист2").Range("A5").Activate

End Sub
Методы объектов, в том числе использованные только что методы Activate или Select, далее будут рассмотрены более подробно.
Свойства объектов
Каждый объект VBA имеет заданные для него свойства. Например, объект Workbook имеет свойства Name (имя), RevisionNumber (количество сохранений), Sheets (листы) и множество других. Чтобы получить доступ к свойствам объекта, нужно записать имя объекта, затем точку и далее имя свойства. Например, имя активной рабочей книги может быть доступно вот так: ActiveWorkbook.Name. Таким образом, чтобы присвоить переменной wbName имя активной рабочей книги, можно использовать вот такой код:
Dim wbName As String
wbName = ActiveWorkbook.Name
Ранее мы показали, как объект Workbook может быть использован для доступа к объекту Worksheet при помощи такой команды:
Workbooks("Книга1").Worksheets("Лист1")
Это возможно потому, что коллекция Worksheets является свойством объекта Workbook.
Некоторые свойства объекта доступны только для чтения, то есть их значения пользователь изменять не может. В то же время существуют свойства, которым можно присваивать различные значения. Например, чтобы изменить название активного листа на «Мой рабочий лист«, достаточно присвоить это имя свойству Name активного листа, вот так:
ActiveSheet.Name = "Мой рабочий лист"
Методы объектов
Объекты VBA имеют методы для выполнения определённых действий. Методы объекта – это процедуры, привязанные к объектам определённого типа. Например, объект Workbook имеет методы Activate, Close, Save и ещё множество других.
Для того, чтобы вызвать метод объекта, нужно записать имя объекта, точку и имя метода. Например, чтобы сохранить активную рабочую книгу, можно использовать вот такую строку кода:
Как и другие процедуры, методы могут иметь аргументы, которые передаются методу при его вызове. Например, метод Close объекта Workbook имеет три необязательных аргумента, которые определяют, должна ли быть сохранена рабочая книга перед закрытием и тому подобное.
Чтобы передать методу аргументы, необходимо записать после вызова метода значения этих аргументов через запятую. Например, если нужно сохранить активную рабочую книгу как файл .csv с именем «Книга2», то нужно вызвать метод SaveAs объекта Workbook и передать аргументу Filename значение Книга2, а аргументу FileFormat – значение xlCSV:
ActiveWorkbook.SaveAs "Книга2", xlCSV
Чтобы сделать код более читаемым, при вызове метода можно использовать именованные аргументы. В этом случае сначала записывают имя аргумента, затем оператор присваивания «:=» и после него указывают значение. Таким образом, приведённый выше пример вызова метода SaveAs объекта Workbook можно записать по-другому:
ActiveWorkbook.SaveAs Filename:="Книга2", [FileFormat]:=xlCSV
В окне Object Browser редактора Visual Basic показан список всех доступных объектов, их свойств и методов. Чтобы открыть этот список, запустите редактор Visual Basic и нажмите F2.
Рассмотрим несколько примеров
Пример 1
Этот отрывок кода VBA может служить иллюстрацией использования цикла For Each. В данном случае мы обратимся к нему, чтобы продемонстрировать ссылки на объект Worksheets (который по умолчанию берётся из активной рабочей книги) и ссылки на каждый объект Worksheet отдельно. Обратите внимание, что для вывода на экран имени каждого рабочего листа использовано свойство Name объекта Worksheet.
'Пролистываем поочерёдно все рабочие листы активной рабочей книги
'и выводим окно сообщения с именем каждого рабочего листа

Dim wSheet As Worksheet

For Each wSheet in Worksheets
   MsgBox "Найден рабочий лист: " & wSheet.Name
Next wSheet
Пример 2
В этом примере кода VBA показано, как можно получать доступ к рабочим листам и диапазонам ячеек из других рабочих книг. Кроме этого, Вы убедитесь, что если не указана ссылка на какой-то определённый объект, то по умолчанию используются активные объекты Excel. Данный пример демонстрирует использование ключевого слова Set для присваивания объекта переменной.
В коде, приведённом ниже, для объекта Range вызывается метод PasteSpecial. Этот метод передаёт аргументу Paste значение xlPasteValues.
'Копируем диапазон ячеек из листа "Лист1" другой рабочей книги (с именем Data.xlsx)
'и вставляем только значения на лист "Результаты" текущей рабочей книги (с именем CurrWb.xlsm)

Dim dataWb As Workbook

Set dataWb = Workbooks.Open("C:Data")

'Обратите внимание, что DataWb – это активная рабочая книга.
'Следовательно, следующее действие выполняется с объектом Sheets в DataWb.

Sheets("Лист1").Range("A1:B10").Copy

'Вставляем значения, скопированные из диапазона ячеек, на рабочий лист "Результаты"
'текущей рабочей книги. Обратите внимание, что рабочая книга CurrWb.xlsm не является
'активной, поэтому должна быть указана в ссылке.

Workbooks("CurrWb").Sheets("Результаты").Range("A1").PasteSpecial Paste:=xlPasteValues
Пример 3
Следующий отрывок кода VBA показывает пример объекта (коллекции) Columns и демонстрирует, как доступ к нему осуществляется из объекта Worksheet. Кроме этого, Вы увидите, что, ссылаясь на ячейку или диапазон ячеек на активном рабочем листе, можно не указывать этот лист в ссылке. Вновь встречаем ключевое слово Set, при помощи которого объект Range присваивается переменной Col.
Данный код VBA показывает также пример доступа к свойству Value объекта Range и изменение его значения.
'С помощью цикла просматриваем значения в столбце A на листе "Лист2",
'выполняем с каждым из них арифметические операции и записываем результат
'в столбец A активного рабочего листа (Лист1)

Dim i As Integer
Dim Col As Range
Dim dVal As Double

'Присваиваем переменной Col столбец A рабочего листа "Лист2"

Set Col = Sheets("Лист2").Columns("A")
i = 1

'Просматриваем последовательно все ячейки столбца Col до тех пор
'пока не встретится пустая ячейка

Do Until IsEmpty(Col.Cells(i))

   'Выполняем арифметические операции со значением текущей ячейки

   dVal = Col.Cells(i).Value * 3 - 1

   'Следующая команда записывает результат в столбец A
   'активного листа. Нет необходимости указывать в ссылке имя листа,
   'так как это активный лист рабочей книги.

   Cells(i, 1).Value = dVal
   i = i + 1

Loop
Оцените качество статьи. Нам важно ваше мнение:
In Microsoft Excel, the “Object Insert” option allows a user to insert an external object into a worksheet. Embedding generally means inserting an object from another software (Word, PDF, etc.) into an Excel worksheet. This option is useful for direct access to files related to your worksheet data from within your worksheet space. In addition, the inserted object works as a ready information source or reference for a dataset in an Excel worksheet.
Table of contents
- Insert and Embed an Object in Excel
- How to Insert (Embed) an Object in Excel?
- #1 – Insert (Embed) a New Object in Excel
- #2 – Embedding (inserting) an Existing Object in Excel
- #3 – Link to Object vs. Embedded Object
- Why we need Embedded Object in Excel?
- Things to Remember about Inserting Object in Excel
- Recommended Articles
- How to Insert (Embed) an Object in Excel?
How to Insert (Embed) an Object in Excel?
Here, we will discuss how to embed a new object in Excel.
You can download this Embed File Excel Template here – Embed File Excel Template
#1 – Insert (Embed) a New Object in Excel
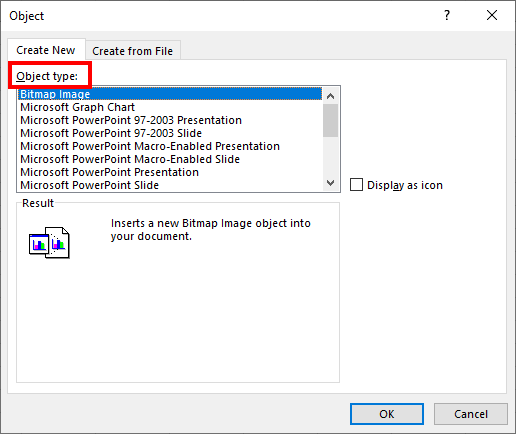
- We must first select “Text” from the “Insert” tab and then click “Object.”

- Then, select “Create New” to embed a new blank file. Remember, only file types are shown in “Object type” that can be embedded in the Excel worksheet.

- Now, choose a file type to embed. For example, we have selected a “Microsoft Word Document,” now click “OK.”
#2 – Embedding (inserting) an Existing Object in Excel
Step 1: Select “Text” from the “Insert” tab and click “Object.”
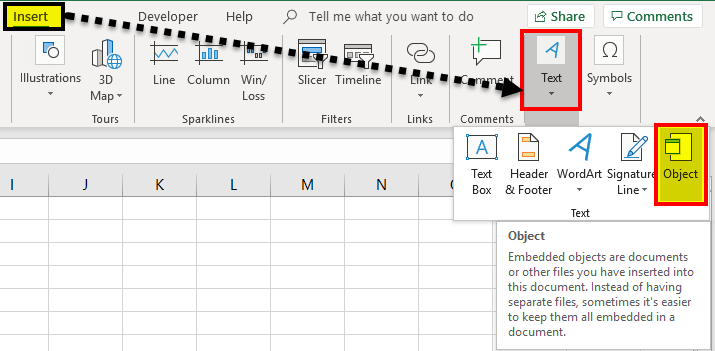
Step 2: Select “Create from File” and click “Browse” to embed an existing file into the worksheet. Remember, only file types are shown in “Object Type” that can be embedded in the Excel worksheet.

Step 3: Now click “OK.” The file icon will be displayed on the worksheet.
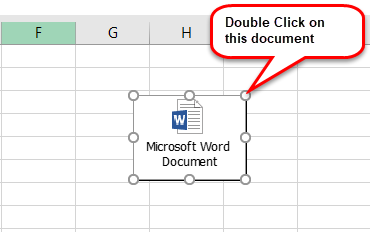
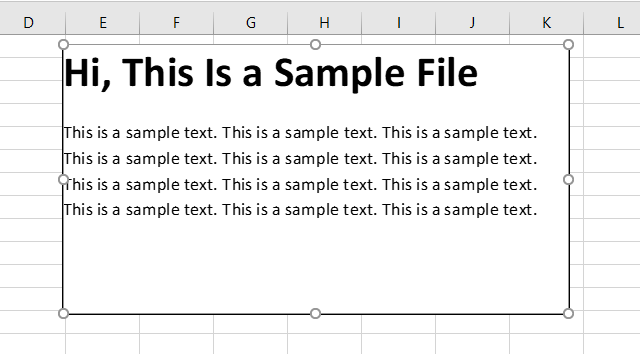
NOTE: If we do not check the “Display as icon” option, it will show the embedded file’s content instead of the icon. We can double-click on the embedded file icon or content to edit the content of the embedded file.
#3 – Link to Object vs. Embedded Object
When you insert an object into an Excel worksheet, the object becomes part of the Excel file. Therefore, any changes made to the source file do not impact the embedded file. However, we may want to keep the file separate from the Excel file. In that case, we need to check the “Link to file” option.
A linked file is just a link to the source file, which we can edit only by editing the source file. When we double-click the link, the source file will open.
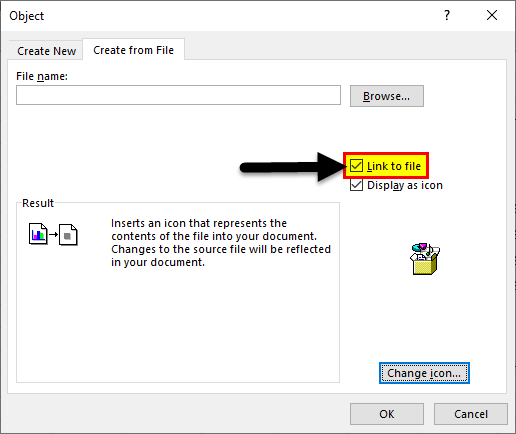
NOTE: If we change the location/ path of the source file, the link to the file in the worksheet will not work.
Why do we need Embedded Objects in Excel?
- When we want to add large comments or notes to a dataset in Excel Worksheet, we can embed a Word or text file instead of writing text in worksheet cells.
- Excel is generally used for data tables/ charts. Suppose we want to use big text bodies to explain the data tables in a worksheet. In that case, we can create a separate embedded file within the worksheet instead of creating a particular file or writing a large amount of text in an Excel worksheet.
- Embedded files keep the worksheet presentation limited to required data only. We can keep any additional comments, notes, or information within the embedded file, allowing users to focus on the key information. Other data can be seen only by accessing the embedded file.
4. Embedded files are the preferred option compared to the link to file option when we need to send the worksheet to someone working on a different computer/ laptop since the link to file will only work if the source file is saved on the same device as the worksheet itself since embedded files are saved within the Excel file.
Things to Remember about Inserting Object in Excel
- We can only embed certain file types into an Excel worksheet. We can see the list of file types accepted by going to “Insert” > “Text” > “Object” > “Create New” > “Object type.”
- Select the “Display as icon” checkbox to display only the embedded file’s icon. Otherwise, it will show the file content in the worksheet, which takes more space and is not recommended for presentation purposes.
NOTE: If we intend to print the worksheet, then it is recommended to display the content of the embedded file as it will not publish the embedded file’s content if the only icon is displayed.
- As soon as we insert an object in Excel, its connection to the source file is lost, so make sure to make all required changes to the original file before embedding it. However, you can also update the embedded file’s content by double-clicking the file icon or embedded content.
- When sending an embedded file to someone else, ensure that the recipient’s computer/ laptop has the required software installed, supporting the embedded file type to view or change its content.
- Inserting an object in Excel increases the source Excel file size. If we do not want to make the Excel file heavy, we can use the “Link to file” option. However, the “Link to file” option only works if we use the same device where the linked source file is stored, and the source file’s location/ path is not changed.
Recommended Articles
This article is a guide to Embed and Insert Object in Excel. We discuss inserting an object in an Excel worksheet, practical examples, and a downloadable excel template. You may learn more about Excel from the following articles:-
- VBA Insert RowTo insert rows we use worksheet method with the insert command to insert a row, we also provide a row reference where we want to insert another row similar to the columns.read more
- Insert Button in ExcelButtons in excel are single-click commands inserted to perform specific tasks. Buttons are used in macros and can be inserted by enabling the developer’s tab; in the insert form, we can find a button to insert and draw it to the worksheet.read more
- Insert Comment in ExcelIn Excel, Insert Comment is a feature used to share tips or details with different users working within the same spreadsheet. You can either right-click on the required cell, click on “Insert Comment” & type the comment, use the shortcut key, i.e., Shift+F2, or click on the Review Tab & select “New Comment”. read more
- Insert Hyperlinks in ExcelTo insert a hyperlink, right-click on the cell, click on hyperlink, and then choose the last option, which will open a wizard box to insert a hyperlink. Then, in the field for an address, type the hyperlink’s URL.read more
- Themes in ExcelThemes in Excel are used to format the entire document or workbook; we can use the themes provided by Excel or customize it to our likingread more
Reader Interactions
“High aims form high characters, and great objects bring out great minds” – Tryon Edwards
A Quick Guide to VBA Objects
| Task | Examples |
|---|---|
| Declare and Create | Dim coll As New Collection Dim o As New Class1 |
| Declare Only | Dim coll As Collection Dim o As Class1 |
| Create at run time | Set coll = New Collection Set o = New Class1 |
| Assign to Excel Object | Dim wk As Workbook Set wk = Workbooks(«book1.xlsx») |
| Assign using CreateObject | Dim dict As Object Set dict = CreateObject(«Scripting.Dictionary») |
| Assign to existing object | Dim coll1 As New Collection Dim coll2 As Collection Set coll2 = coll1 |
| Return from Function | Function GetCollection() As Collection
Dim coll As New Collection End Function |
| Receive from Function | Dim coll As Collection Set coll = GetCollection |
The Webinar
If you are a member of the website, click on the image below to view the webinar for this post.
(Note: Website members have access to the full webinar archive.)

Introduction
If you are serious about learning VBA then it is important to understand VBA Objects. Using objects is not that difficult. In fact, they make your life much easier.
In this post, you will see how VBA makes brilliant use of objects. How objects such as Collections, Workbooks and Worksheets save you much complexity, time and effort.
In my next post, I will cover creating objects using Class Modules. However, before you create your own it is vital that you understand exactly what they are and why you need them.
So grab your favourite beverage and take a journey into the fascinating world of VBA objects.
What is a VBA Object?
To understand what an object is, we must first look at simple variables. In VBA we have basic data types such as string, integers, double and date.
We use these data types when we are creating a variable e.g.
Dim Score As Long, Price As Double
Dim Firstname As String, Startdate As Date

Score = 45
Price = 24.55
Firstname = "John"
Startdate = #12/12/2016#
Basic VBA variables have only one purpose. To store a value while our application is running. We either put a value in the variable or read a value from the variable.
Dim Marks As Long

' Store value in Marks
Marks = 90
Marks = 34 + 44
Marks = Range("A1")

' Read value from Marks
Range("B2") = Marks
Debug.Print Marks
In VBA we have a Collection which we use to store groups of items. The following code shows an example of using a Collection in VBA
' https://excelmacromastery.com/
Sub UseCollection()

    Dim collFruit As New Collection

    ' Add item to the collection
    collFruit.Add "Apple"
    collFruit.Add "Pear"

    ' Get the number of items in the collection
    Dim lTotal As Long
    lTotal = collFruit.Count

End Sub
The Collection is an example of an object. It is more than a variable. That is, it does more than storing a piece of data. We can add items, remove items and get the number of items.
Definition of a VBA Object: An object is a grouping of data and procedures(i.e. Functions and Subs). The procedures are used to perform some task related to the data.
In the Collection the data is the group of the items it stores. The procedures such as Add, Remove, Count then act on this data.
In the Worksheet object, the main data item is the worksheet and all the procedures perform actions related to the worksheet.

Why VBA Uses Objects
An object is used to represent real world or computer based items.
The major benefit of an object is that it hides the implementation details. Take the VBA Collection we looked at above. It is doing some complicated stuff. When an item is added it must allocate memory, add the item, update the item count and so on.
We don’t know how it is doing this and we don’t need to know. All that we need to know is when we use Add it will add the item, Remove will remove the item and Count will give the number of items.
Using objects allows us to build our applications as blocks. Building it this way means you can work on one part without affecting other parts of your application. It also makes it easier to add items to an application. For example, a Collection can be added to any VBA application. It is not affected in any way by the existing code and in turn it will not affect the existing code.
A Real World Analogy
Looking at a real-world example can often be a good way to understand concepts.
Take a car with a combustion engine. When you are driving your car, a lot of complex stuff is happening. For example, fuel gets injected, compressed and ignited leading to combustion. This then causes the wheels of your car to turn.

A nice looking combustion engine | © BigStockPhoto.com
The details of how this happens are hidden from you. All you expect is that turning the key will start the car, pressing the accelerator will speed it up and pressing the brake will slow it down and so on.
Think of how great your code would be if it was full of these type of objects. Self-contained and dedicated to performing one set of tasks really well. It would make building your applications so much easier.
Object Components
There are three main items that an object can have. These are
- Properties – These are used to set or retrieve a value.
- Methods – These are function or subs that perform some task on the objects data.
- Events – These are function or subs that are triggered when a given event occurs
If you look in the Object Browser(F2) or use Intellisense you will notice different icons beside the members of an object. For example, the screenshot below shows the first three members of the Worksheet object
![]()
What these icons mean is as follows
![]()
Let’s take a look at the first three members of the worksheet.
It has an Activate method which we can use to make worksheet active.
It has an Activate event which is triggered when the worksheet is activated.
The Application property allows us to reference the application(i.e. Excel).
' Prints "Microsoft Excel"
Debug.Print Sheet1.Application.Name

' Prints the worksheet name
Debug.Print Sheet1.Name
In the next sections we will look at each of these components in more detail.
Object Properties
An object property allows us to read a value from the object or write a value to the object. We read and write to a property the same way we read and write to a variable.
' Set the name
sheet1.Name = "Accounts"

' Get the name
sName = sheet1.Name
A property can be read-only which means we can read the value but we cannot update the value.
In the VBA Range, Address is a read-only property
' The address property of range
Debug.Print Sheet1.Range("A1").Address
The workbook property Fullname is also a read-only property
' The Fullname property of the Workbook object
sFile = ThisWorkbook.Fullname
Properties can also Set and Get objects. For example, the Worksheet has a UsedRange property that return a Range object
Set rg = Sheet1.UsedRange
You will notice we used the Set keyword here. We will be looking at this in detail later in the post.
Object Methods
A method is a Sub or a Function. For example, Add is a method of the Collection
' Collection Add method
Coll.Add "Apple"
Methods are used to perform some action to do with the object data. With a Collection, the main data is the group of items we are storing. You can see that the Add, Remove and Count methods all perform some action relating to this data.
Another example of a method is the Workbook SaveAs method
Dim wk As Workbook
Set wk = Workbooks.Open "C:DocsAccounts.xlsx"
wk.SaveAs "C:DocsAccounts_Archived.xlsx"
and the Worksheets Protect and Copy methods
sheet1.Protect "MyPassword"
Sheet1.Copy Before:=Sheet2
Object Events
Visual Basic is an event-driven language. What this means is that the code runs when an event occurs. Common events are button clicks, workbook Open, worksheet Activate etc.
In the code below we display a message each time Sheet1 is activated by the user. This code must be placed in the worksheet module of Sheet1.
Private Sub Worksheet_Activate()
    MsgBox "Sheet1 has been activated."
End Sub
Now that we know the parts of the VBA object let’s look at how we use an object in our code.
Creating a VBA Object
In VBA, our code must “Create” an object before we can use it. We create an object using the New keyword.
If we try to use an object before it is created we will get an error. For example, take a look at the code below
Dim coll As Collection

coll.Add "Apple"
When we reach the Add line no Collection has been created.

If we try to run this line we get the following error

There are three steps to creating a VBA object
- Declare the variable.
- Create a new object.
- Assign the variable to the object.
We can perform these steps in one line using Dim and New together. Alternatively, we can declare the variable in one line and then create and assign the object in another line using Set.
Let’s take a look at both of these techniques.
Using Dim with New
When we use Dim and New together they declare, create and assign all in one line.
' Declare, Create and Assign
Dim coll As New Collection
Using code like does not provide much flexibility. It will always create exactly one Collection when we run our code.
In the next section we will look at Set. This allows us to create objects based on conditions and without having to declare a variable for each new object.
Using Set with New
We can declare an object variable in one line and then we can use Set to create and assign the object on another line. This provides us with a lot of flexibility.
In the code below we declare the object variable using Dim. We then create and assign it using the Set keyword.
' Declare
Dim coll As Collection
' Create and Assign
Set coll = New Collection
We use Set in this way when the number of objects can vary. Using Set allows us to create multiple objects. In other words, we can create objects as we need them. We can’t do this using Dim and New.
We can also use conditions to determine if we need to create an object e.g.
Dim coll As Collection

' Only create collection if cell has data
If Range("A1") <> "" Then
    Set coll = New Collection
End If
Later in this post we will see some examples of using Set to create objects.
Subtle Differences of Dim Versus Set
There are some subtle differences between using New with Set and using New with Dim.
When we use New with Dim, VBA does not create the object until the first time we use it.
In the following code, the collection will not be created until we reach the line that adds “Pear”.
Dim coll As New Collection

' Collection is created on this line
coll.Add "Pear"
If you put a breakpoint on the Add line and check the variable value you will see the following message
Object variable or With block variable not set
When the Add line runs, the Collection will be created and the variable will now show a Collection with one item.
The reason for this is as follows. A Dim statement is different to other VBA lines of code. When VBA reaches a Sub/Function it looks at the Dim statements first. It allocates memory based on the items in the Dim statements. It is not in a position to run any code at this point.
Creating an object requires more than just allocating memory. It can involve code being executed. So VBA must wait until the code in the Sub is running before it can create the object.
Using Set with New is different in this regard to using Dim with New. The Set line is used by VBA when the code is running so VBA creates the object as soon as we use Set and New e.g.
Dim coll As Collection

' Collection is created on this line
Set coll = New Collection

coll.Add "Pear"
There is another subtlety to keep in mind using New. If we set the object variable to Nothing and then use it again, VBA will automatically create a new object e.g.
' https://excelmacromastery.com/
Sub EmptyColl2()

    ' Create collection and add items
    Dim coll As New Collection

    ' add items here
    coll.Add "Apple"

    ' Empty collection
    Set coll = Nothing

    ' VBA automatically creates a new object
    coll.Add "Pear"

End Sub
If we used Set in the above code to create the new Collection then the “Add Pear” line would cause an error.
When New Is Not Required
You may have noticed some objects don’t use the New keyword.
Dim sh As Worksheet
Set sh = ThisWorkbook.Worksheets("Sheet1")
Dim wk As Workbook
Set wk = Workbooks.Open("C:DocsAccounts.xlsx")
When a workbook, is opened or created, VBA automatically creates the VBA object for it. It also creates the worksheet object for each worksheet in that workbook.
Conversely, when we close the workbook VBA will automatically delete the VBA objects associated with it.
This is great news. VBA is doing all the work for us. So when we use Workbooks.Open, VBA opens the file and creates the workbook object for the workbook.
An important point to remember is that there is only one object for each workbook. If you use different variables to reference the workbook they are all referring to the same object e.g.
Dim wk1 As Workbook
Set wk1 = Workbooks.Open("C:DocsAccounts.xlsx")

Dim wk2 As Workbook
Set wk2 = Workbooks("Accounts.xlsx")

Dim wk3 As Workbook
Set wk3 = wk2
We will look at this in more detail in the VBA Objects in Memory section below.
Using CreateObject
There are some very useful libaries that are not part of Excel VBA. These include the Dictionary, Database objects, Outlook VBA objects, Word VBA objects and so on.
These are written using COM interfaces. The beauty of COM is that we can easily use these libraries in our projects.
If we add a reference to the library we create the object in the normal way.
' Select Tools->References and place a check
' beside "Microsoft Scripting Runtime"
Dim dict As New Scripting.Dictionary
If we don’t use a reference we can create the object at run time using CreateObject.
Dim dict As Object
Set dict = CreateObject("Scripting.Dictionary")
The first method is referred to as Early Binding and the second is referred to as Late Binding(see Early versus Late Binding) for more details.
Assigning VBA Objects
We can assign basic variables using the Let keyword.
Dim sText As String, lValue As Long

Let sText = "Hello World"
Let lValue = 7
The Let keyword is optional so nobody actually uses it. However, it is important to understand what it is used for.
sText = "Hello World"
lValue = 7
When we assign a value to a property we are using the Let Property
' Both lines do the same thing
sheet1.Name = "Data"
Let sheet1.Name = "Data"
When we assign an object variable we use the Set keyword instead of the Let keyword. When I use “object variable” I mean any variable that isn’t a basic variable such as a string, long or double etc..
' wk is the object variable
Dim wk As Worksheet
Set wk = ThisWorkbook.Worksheets(1)

' coll1 is the object variable
Dim coll1 As New Collection
coll1.Add "Apple"

' coll2 is the object variable
Dim coll2 As Collection
Set coll2 = coll1
Using the Set keyword is mandatory. If we forget to use Set we will get the error below
coll2 = coll1

It may look like Let and Set are doing the same thing. But they are actually doing different things:
- Let stores a value
- Set stores an address
To understand more about this we need to take a peek(pun intended:-)) into memory.
VBA Objects in Memory
“Fools ignore complexity. Pragmatists suffer it. Some can avoid it. Geniuses remove it” – Alan Perlis
To understand what New and Set are doing we need to understand how variables are represented in memory.
When we declare variables, VBA creates a slot for them in memory. You can think of the slot as an Excel cell in memory.
Dim X As long, Y As Long

When we assign values to these variables, VBA places the new values in the appropriate slots.
X = 25
Y = 12

We saw the following line of code earlier in this post
Dim coll As New Collection
This line creates the object in memory. However, it doesn’t store this object in the variable. It
stores the address of the object
in the variable. In programming, this is known as a Pointer.

Because VBA handles this seamlessly it can seem as if the object variable and the object are the same thing. Once we understand they are different it is much easier to understand what Set is actually doing.
How Set Works
Take a look at the following code
Dim coll1 As New Collection
Dim coll2 As Collection

Set coll2 = coll1
Only one Collection has been created here. So coll1 and coll2 refer to the same Collection.
In this code, coll1 contains the address of the newly created Collection.
When we use Set we are copying the address from coll1 to coll2. So now they are both “pointing” to the same Collection in memory.

Earlier in the post we looked at Workbook variables. Let’s have a look at this code again
Dim wk1 As Workbook
Set wk1 = Workbooks.Open("C:DocsAccounts.xlsx")

Dim wk2 As Workbook
Set wk2 = Workbooks("Accounts.xlsx")

Dim wk3 As Workbook
Set wk3 = Workbooks(2)
When we open the workbook Accounts.xlsx, VBA creates an object for this workbook. When we assign the workbook variables in the code above, VBA places the address of the workbook object in the variable.
In this code example, the three variables are all referring to the same workbook object.

If we use code like the following
wk1.SaveAs "C:TempNewName.xlsx"
VBA uses the address in wk1 to determine the workbook object to use. It does this seamlessly so when we use a workbook variable it looks like we are referring directly to the object.
To sum up what we have learned in this section:
- Let writes a value to a basic variable
- Set writes an address to an object variable
Objects and Procedures
In VBA we can refer to Functions and Subs as procedures. When we pass an object to a procedure only the address passed.
When we pass an object from a Function(Subs cannot return anything) only the address of the object is passed back.
In the code below we have one collection. It is the address that gets passed to and from the function.
' https://excelmacromastery.com/
Sub TestProc()

    ' Create collection
    Dim coll1 As New Collection
    coll1.Add "Apple"
    coll1.Add "Orange"

    Dim coll2 As Collection
    ' UseCollection passes address back to coll2
    Set coll2 = UseCollection(coll1)

End Sub

' Address of collection passed to function
Function UseCollection(coll As Collection) _
                        As Collection
    Set UseCollection = coll
End Function
Using ByRef and ByVal
When we pass a simple variable to a procedure we can pass using ByRef or ByVal.
ByRef means we are passing the address of the variable. If the variable changes in the procedure the original will also be changed.
ByVal means we are creating a copy of the variable. If the variable changes in the procedure the original will not be changed.
' Pass by value
Sub PassByVal(ByVal val As Long)

' Pass by reference
Sub PassByRef(ByRef val As Long)
Sub PassByRef(val As Long)
Most of the time it is a good idea to use ByVal because it prevents the variable being accidentally changed in a procedure.
When we pass a Collection to a procedure, we are always passing the address of the Collection.
ByRef and ByVal only affect the object variable. They do not affect the object!
What this means is that if we change the object in the procedure it will be changed outside it – this is regardless of whether you use ByVal or ByRef.
For example, in the code below we have two procedures that change the Collection. One uses ByRef and one uses ByVal. In both cases the Collection has changed when we return to the TestProcs Sub
' https://excelmacromastery.com/
Sub TestProcs()
    Dim c As New Collection
    c.Add "Apple"

    PassByVal c
    ' Prints Pear
    Debug.Print c(1)

    PassByRef c
    ' Prints Plum
    Debug.Print c(1)

End Sub

' Pass by value
Sub PassByVal(ByVal coll As Collection)
    ' Remove current fruit and add Pear
    coll.Remove (1)
    coll.Add "Pear"
End Sub

' Pass by reference
Sub PassByRef(ByRef coll As Collection)
    ' Remove current fruit and add Plum
    coll.Remove (1)
    coll.Add "Plum"
End Sub
Let’s look at a second example. Here we are setting the object variable to “point” to a new Collection. In this example, we get different results from ByVal and ByRef.
In the PassByVal Sub, a copy of the original object variable is created. So it is this copy that points to the new Collection. So our original object variable is not affected.
In the PassByRef Sub we are using the same object variable so when we point to the New Collection, our original object variable is now pointing to the new collection.
' https://excelmacromastery.com/
Sub TestProcs()

    Dim c As New Collection
    c.Add "Apple"

    PassByVal c
    ' Prints Apple as c pointing to same collection
    Debug.Print c(1)

    PassByRef c
    ' Prints Plum as c pointing to new Collecton
    Debug.Print c(1)

End Sub

' Pass by value
Sub PassByVal(ByVal coll As Collection)
    Set coll = New Collection
    coll.Add "Orange"
End Sub

' Pass by reference
Sub PassByRef(ByRef coll As Collection)
    Set coll = New Collection
    coll.Add "Plum"
End Sub
Why VBA Uses Pointers
You may be wondering why VBA uses pointers. The reason is that it is much more efficient.
Imagine you had a Collection with 50000 entries. Think how inefficient it would be to create multiple copies of this Collection when your application was running.
Think of it like a library which is a real world collection of books. We can put the Library address in directories, newspapers etc. A person simply uses the address to go to the Library and add and remove books.
There is one Libary and the address is passed around to anyone who needs to use it.If we wanted a second library we would create a new library. It would have a different address which we could also pass around.

© BigStockPhoto.com
Running a Simple Memory Experiment
To demonstrate what we have been discussing, let’s look at a code example. The code below uses
- VarPtr to give the memory address of the variable
- ObjPtr to give the memory address of the object
The memory address is simply a long integer and it’s value is not important. But what is interesting is when we compare the addresses.
' https://excelmacromastery.com/
Sub Memory()

    Dim coll1 As New Collection
    Dim coll2 As Collection

    Set coll2 = coll1

    ' Get address of the variables Coll1 and Coll2
    Dim addrColl1 As Long, addrColl2 As Long
    addrColl1 = VarPtr(coll1)
    addrColl2 = VarPtr(coll2)

    Debug.Print "Address of the variable coll1 is " & addrColl1
    Debug.Print "Address of the variable coll2 is " & addrColl2

    ' Get address of the Collection they point to
    Dim addrCollection1 As Long, addrCollection2 As Long
    addrCollection1 = ObjPtr(coll1)
    addrCollection2 = ObjPtr(coll2)

    Debug.Print "Address coll1 collection is " & addrCollection1
    Debug.Print "Address coll2 collection is " & addrCollection2

End Sub
Note: Use LongPtr instead of Long if you are using a 64 bit version of Excel.
When you run the code you will get a result like this:
Address of the variable coll1 is 29356848
Address of the variable coll2 is 29356844
Address coll1 collection is 663634280
Address coll2 collection is 663634280
you will notice
- The memory addresses will be different each time you run.
- The address of the coll1 Collection and the coll2 Collection will always be the same.
- The address of the coll1 variable and the coll2 variable will always be different.
This shows that we have two different variables which contain the address of the same Collection.
Cleaning Up Memory
So what happens if we set a variable to a New object multiple times? In the code below we use Set and New twice for the variable coll
Dim coll As Collection

Set coll = New Collection
coll.Add "Apple"

' Create a new collection and point coll to it
Set coll = New Collection
In this example, we created two new Collections in memory. When we created the second collection we set coll to refer to it. This means it no longer refers to the first collection. In fact, nothing is referring to the first Collection and we have no way of accessing it.
In some languages(looking at you C++) this would be a memory leak. In VBA however, this memory will be cleaned up automatically. This is known as Garbage Collection.
Let me clarify this point. If an object has no variable referring to it, VBA will automatically delete the object in memory. In the above code, our Collection with “Apple” will be deleted when coll “points” to a new Collection.
Clean Up Example
If you want to see this for yourself then try the following.
Create a class module, call it clsCustomer and add the following code.
Public Firstname As String

Private Sub Class_Terminate()
    MsgBox "Customer " & Firstname & " is being deleted."
End Sub
Class_Terminate is called when an object is being deleted. By placing a message box in this event we can see exactly when it occurs.
Step through the following code using F8. When you pass the Set oCust = New clsCustomer line you will get a message saying the Jack was deleted.When you exit the function you will get the message saying Jill was deleted.
' https://excelmacromastery.com/
Sub TestCleanUp()

    Dim oCust As New clsCustomer
    oCust.Firstname = "Jack"

    ' Jack will be deleted after this line
    Set oCust = New clsCustomer
    oCust.Firstname = "Jill"

End Sub
VBA automatically deletes objects when they go out of scope. This means if you declare them in a Sub/Function they will go out of scope when the Function ends.
Setting Objects to Nothing
In code examples you may see code like
Set coll = Nothing
A question that is often asked is “Do we need to Set variables to Nothing when we are finished with them?”. The answer is most of the time you don’t need to.
As we have seen VBA will automatically delete the object as soon as we go out of scope. So in most cases setting the object to Nothing is not doing anything.
The only time you would set a variable to Nothing is if you needed to empty memory straight away and couldn’t wait for the variable to go out of scope. An example would be emptying a Collection.
Imagine the following project. You open a workbook and for each worksheet you read all the customer data to a collection and process it in some way. In this scenario, you would set the Collection to Nothing every time you finish with a worksheet’s data.
' https://excelmacromastery.com/
Sub SetToNothing()

    ' Create collection
    Dim coll As New Collection

    Dim sh As Worksheet
    ' Go through all the worksheets
    For Each sh In ThisWorkbook.Worksheets

        ' Add items to collection

        ' Do something with the collection data

        ' Empty collection
        Set coll = Nothing

    Next sh

End Sub
Memory Summary
To sum up what we have learned in this section:
- A new object is created in memory when we use the New keyword.
- The object variable contains only the memory address of the object.
- Using Set changes the address in the object variable.
- If an object is no longer referenced then VBA will automatically delete it.
- Setting an object to Nothing is not necessary in most cases.
Why Set Is Useful
Let’s look at two examples that show how useful Set can be.
First, we create a very simple class module called clsCustomer and add the following code
Public Firstname As String
Public Surname As String
Set Example 1
In our first scenario, we are reading from a list of customers from a worksheet. The number of customers can vary between 10 and 1000.
Obviously, declaring 1000 objects isn’t an option. Not only is it a lot of wasteful code, it also means we can only deal with maximum 1000 customers.
' Don't do this!!!
Dim oCustomer1 As New clsCustomer
Dim oCustomer2 As New clsCustomer
' .
' .
' .
Dim oCustomer1000 As New clsCustomer
What we do first is to get the count of rows with data. Then we create a customer object for each row and fill it with data. We then add this customer object to the collection.
' https://excelmacromastery.com/
Sub ReadCustomerData()

    ' We will always have one collection
    Dim coll As New Collection

    ' The number of customers can vary each time we read a sheet
    Dim lLastRow As Long
    lLastRow = Sheet1.Range("A" & Sheet1.Rows.Count).End(xlUp).Row

    Dim oCustomer As clsCustomer
    Dim i As Long
    ' Read through the list of customers
    For i = 1 To lLastRow

        ' Create a new clsCustomer for each row
        Set oCustomer = New clsCustomer

        ' Add data
        oCustomer.Firstname = Sheet1.Range("A" & i)
        oCustomer.Surname = Sheet1.Range("B" & i)

        ' Add the clsCustomer object to the collection
        coll.Add oCustomer

    Next i

End Sub
Each time we use Set we are assigning oCustomer to “point” to the newest object. We then add the customer to the Collection. What happens here is that VBA creates a copy of the object variable and places it in the collection.
Set Example 2
Let’s look at a second example where using Set is useful. Imagine we have a fixed number of customers but only want to read the ones whose name starts with the letter B. We only create a customer object when we find a valid one.
' https://excelmacromastery.com/
Sub ReadCustomerB()

    ' We will always have one collection
    Dim coll As New Collection

    Dim oCustomer As clsCustomer, sFirstname As String
    Dim i As Long
    ' Read through the list of customers
    For i = 1 To 100

        sFirstname = Sheet1.Range("A" & i)

        ' Only create customer if name begins with B
        If Left(sFirstname, 1) = "B" Then
            ' Create a new clsCustomer
            Set oCustomer = New clsCustomer

            ' Add data
            oCustomer.Firstname = sFirstname
            oCustomer.Surname = Sheet1.Range("B" & i)

            ' Add to collection
            coll.Add oCustomer
        End If

    Next i

End Sub
It doesn’t matter how many customer names start with B this code will create exactly one object for each one.
This concludes my post on VBA Objects. I hope you found it beneficial.In my next post I’ll be looking at how you can create your own objects in VBA using the Class Module.
If you have any questions or queries please feel free to add a comment or email me at Paul@ExcelMacroMastery.com.
What’s Next?
Free VBA Tutorial If you are new to VBA or you want to sharpen your existing VBA skills then why not try out the The Ultimate VBA Tutorial.
Related Training: Get full access to the Excel VBA training webinars and all the tutorials.
(NOTE: Planning to build or manage a VBA Application? Learn how to build 10 Excel VBA applications from scratch.)