
Содержание
- Embed your Excel workbook on your web page or blog from SharePoint or OneDrive for Business
- Set workbook permissions
- Get the URL to the public workbook
- Specify additional parameters
- Set the frame size
- Test the published workbook
- Linked objects and embedded objects
- Understand the differences between linked objects and embedded objects
- Linked objects
- Embedded objects
- Insert (Embed) an Object in Excel
- Insert and Embed an Object in Excel
- How to Insert (Embed) an Object in Excel?
- #1 – Insert (Embed) a New Object in Excel
- #2 – Embedding (inserting) an Existing Object in Excel
- #3 – Link to Object vs. Embedded Object
- Why do we need Embedded Objects in Excel?
- Things to Remember about Inserting Object in Excel
- Recommended Articles
Embed your Excel workbook on your web page or blog from SharePoint or OneDrive for Business
Sharing from OneDrive? Go here.
Because embedded Excel for the web workbooks are now enabled on SharePoint Online, you can use them in your web page or blog, where other people can view and interact with them without having to log into SharePoint Online. You can get a URL for Microsoft 365-hosted workbooks, and use it to embed them directly in your web page or blog by setting the SRC attribute of an element on the web page.
Follow the instructions below to embed your SharePoint Online-hosted Excel for the web BI Workbooks in your web page or blog.
Set workbook permissions
Before you embed a workbook in your web page or blog, make sure it’s shared with all relevant people. For example, if you run a public blog, you’ll want to share the workbook with everyone, including people who aren’t part of your organization. Here’s how you share a workbook:
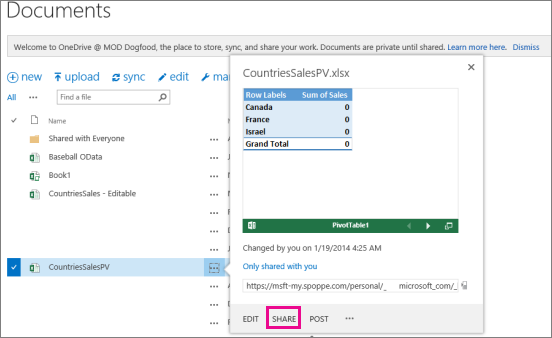
In SharePoint Online, select the More menu (. ) next to the workbook you want to share, and click Share.
In the Invite people box, select Everyone, and pick Can view.
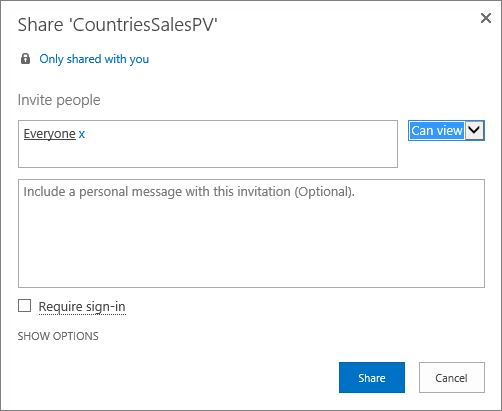
It’s possible that a SharePoint admin will block the option to invite Everyone to view a workbook. In that case, select Everyone except external users instead or consult with your admin.
The Require Sign-in box should be unchecked regardless of the above selection for public anonymous access.
It’s possible that a SharePoint admin will block anonymous access by removing the Require Sign-in box and defaulting it to True. In that case, please consult with your admin.
You can’t edit an embedded Excel for the web workbook, but people with the right permission may be able to open the embedded workbook in Excel, where they can edit the data.
To enable sharing the workbook with guests, uncheck the Require sign-in box and click Share.
Get the URL to the public workbook
Select the More menu (. ) next to the workbook again and click a guest link.
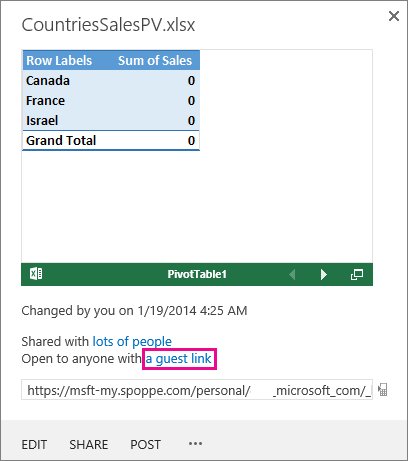
Select the guest link URL, copy it, and then paste it into Notepad.
To enable the embedded workbook, change the URL as follows:
To present the workbook as an embedded workbook, add the URL parameter action=embedview at the end of the URL string.
To allow interactivity with filters and Pivot tables in the workbook, add the URL parameter wdAllowInteractivity=True.
To have BI features such as Power View visualizations, PivotTables, and Data Model-based slicers work in the embedded workbook, add the string &wdbipreview=True.
The final URL should be similar to this one:
Specify additional parameters
Additional URL parameters can change the way the embedded workbook is presented.
Here’s an example of a URL with additional parameters:
The following table shows the parameters we used in this example URL and briefly describes their effect on the presentation of the workbook. And here’s a list of the default parameter settings:
Hides the sheet tabs that are displayed at the bottom of all sheets in a workbook.
Lets you interact with the data if your workbook has a table or PivotTable that can be sorted and filtered.
Displays a specific item. If your workbook includes a chart, table, PivotTable, or named range, and you want to display only one of the items in your web page, use the Item parameter to specify that item. For information about named ranges and named items in Excel workbooks see Define and use names in formulas.
Specifies the active (selected) cell in the embedded workbook when the web page opens. You can specify the active cell by cell reference (such as A1) or by name.
You can also use this parameter to define the active sheet by selecting a cell in that sheet. If you want to select a Power View sheet as active, set this parameter to A1, even though there is no grid on a Power View sheet.
If you don’t specify the active cell, the last saved view will be shown.
The last saved view will be shown.
Hides worksheet gridlines for a cleaner look.
Hides the column and row headers.
Includes the Download button so viewers can download their own copy of the workbook.
Set the frame size
You can resize the frame that displays the workbook on your web page by using standard HTML iframe properties. Look for width and height values (in pixels) inside the iframe tag, and change the values to get the frame size you want.
width=»201″ height=»173″ frameborder=»0″ scrolling=»no»
Test the published workbook
As a blogger, you’ll want to test that the embedded workbook you published is accessible to anonymous people. Here are some considerations to think about:
Power View full support requires Silverlight. HTML5 might limit some of Power View features.
A license plan that gives the iframe creator or file owner privileged access that other people might not have. To make sure that public viewers can view the embedded workbook, run an unauthenticated test by opening the browser in a private mode and accessing the embedded workbook. Here’s how:
Open a browser in a private mode. For example, click Start in private browsing in IE or New incognito window in Chrome.
Navigate to the published blog.
View and interact with the embedded workbook.
Источник
Linked objects and embedded objects
When you insert content as an object, you create a dynamic link between the content that you insert and the content that was created in another Microsoft Office program. Unlike when you paste content (such as by pressing CTRL+V), when you insert it as a linked or embedded object, you can work with it in the original program.
For example, if you insert worksheet cells into the document as an Excel object, Microsoft Office Word runs Excel when you double-click the cells, and you can use Excel commands to work with the worksheet content.
Understand the differences between linked objects and embedded objects
The main differences between linked objects and embedded objects are where the data is stored and how you update the data after you place it in the Word file.
You place either a link to the object or a copy of the object in the document. You can insert objects this way from any program that supports the technology of linking and embedding objects (object linking and embedding, or OLE).
For example, a monthly status report may contain information that is separately maintained in an Excel worksheet. If you link the report to the worksheet, the data in the report can be updated whenever the source file is updated. If you embed the worksheet in the report, your report contains a static copy of the data.
1. Embedded object
2. Linked object
Linked objects
When an object is linked, information can be updated if the source file is modified. Linked data is stored in the source file. The Word file, or destination file, stores only the location of the source file, and it displays a representation of the linked data. Use linked objects if file size is a consideration.
Linking is also useful when you want to include information that is maintained independently, such as data collected by a different department, and when you need to keep that information up-to-date in a Word document.
Embedded objects
When you embed an Excel object, information in the Word file doesn’t change if you modify the source Excel file. Embedded objects become part of the Word file and, after they are inserted, they are no longer part of the source file.
Because the information is totally contained in one Word document, embedding is useful when you don’t want the information to reflect changes in the source file, or when you don’t want the document recipients to be concerned with updating the linked information.
Источник
Insert (Embed) an Object in Excel


Insert and Embed an Object in Excel
In Microsoft Excel, the “Object Insert” option allows a user to insert an external object into a worksheet. Embedding generally means inserting an object from another software (Word, PDF, etc.) into an Excel worksheet. This option is useful for direct access to files related to your worksheet data from within your worksheet space. In addition, the inserted object works as a ready information source or reference for a dataset in an Excel worksheet.
Table of contents
How to Insert (Embed) an Object in Excel?
Here, we will discuss how to embed a new object in Excel.
#1 – Insert (Embed) a New Object in Excel
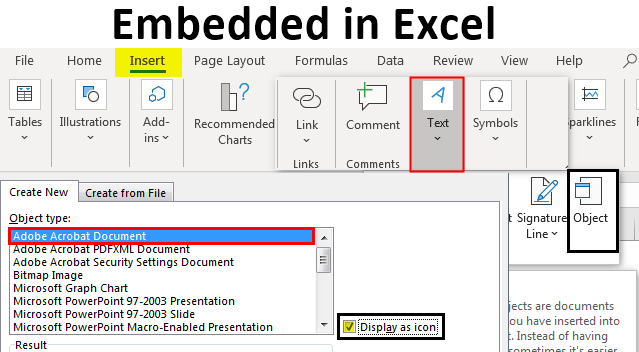
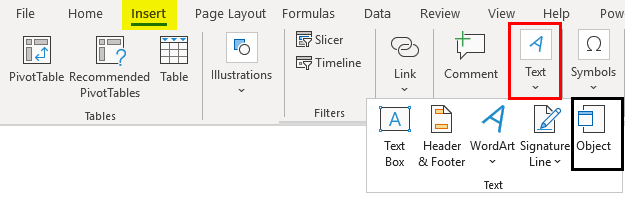
- We must first select “Text” from the “Insert” tab and then click “Object.”
Then, select “Create New” to embed a new blank file. Remember, only file types are shown in “Object type” that can be embedded in the Excel worksheet.
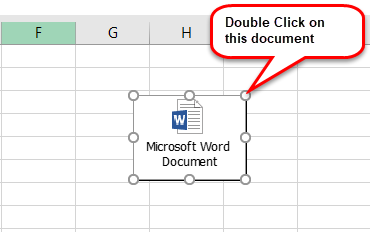
Now, choose a file type to embed. For example, we have selected a “Microsoft Word Document,” now click “OK.”
#2 – Embedding (inserting) an Existing Object in Excel
Step 1: Select “Text” from the “Insert” tab and click “Object.”
Step 2: Select “Create from File” and click “Browse” to embed an existing file into the worksheet. Remember, only file types are shown in “Object Type” that can be embedded in the Excel worksheet.

Step 3: Now click “OK.” The file icon will be displayed on the worksheet.
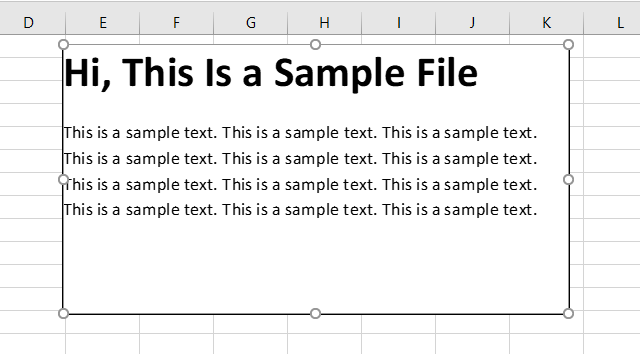
NOTE: If we do not check the “Display as icon” option, it will show the embedded file’s content instead of the icon. We can double-click on the embedded file icon or content to edit the content of the embedded file.
#3 – Link to Object vs. Embedded Object
When you insert an object into an Excel worksheet, the object becomes part of the Excel file. Therefore, any changes made to the source file do not impact the embedded file. However, we may want to keep the file separate from the Excel file. In that case, we need to check the “Link to file” option.
A linked file is just a link to the source file, which we can edit only by editing the source file. When we double-click the link, the source file will open.
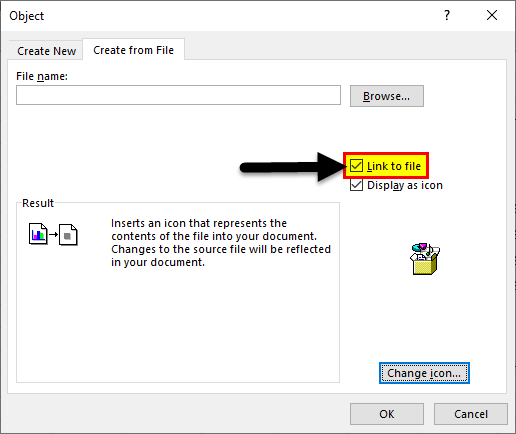
NOTE: If we change the location/ path of the source file, the link to the file in the worksheet will not work.
Why do we need Embedded Objects in Excel?
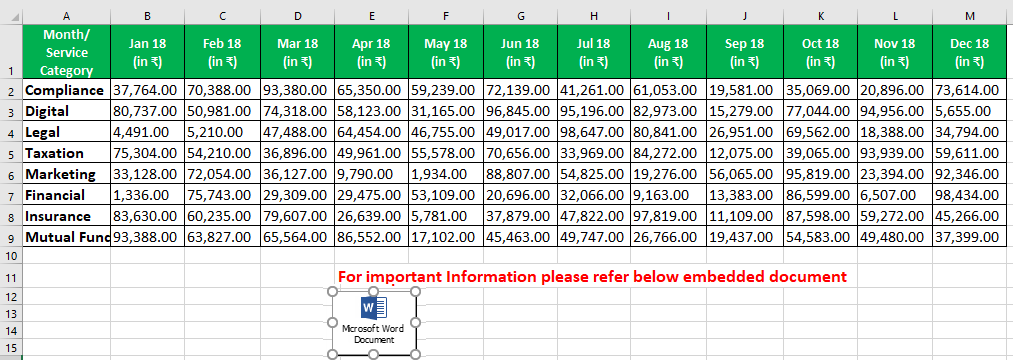
- When we want to add large comments or notes to a dataset in Excel Worksheet, we can embed a Word or text file instead of writing text in worksheet cells.
- Excel is generally used for data tables/ charts. Suppose we want to use big text bodies to explain the data tables in a worksheet. In that case, we can create a separate embedded file within the worksheet instead of creating a particular file or writing a large amount of text in an Excel worksheet.
- Embedded files keep the worksheet presentation limited to required data only. We can keep any additional comments, notes, or information within the embedded file, allowing users to focus on the key information. Other data can be seen only by accessing the embedded file.
4. Embedded files are the preferred option compared to the link to file option when we need to send the worksheet to someone working on a different computer/ laptop since the link to file will only work if the source file is saved on the same device as the worksheet itself since embedded files are saved within the Excel file.
Things to Remember about Inserting Object in Excel
- We can only embed certain file types into an Excel worksheet. We can see the list of file types accepted by going to “Insert” >“Text” >“Object” >“Create New” > “Object type.”
- Select the “Display as icon” checkbox to display only the embedded file’s icon. Otherwise, it will show the file content in the worksheet, which takes more space and is not recommended for presentation purposes.
NOTE: If we intend to print the worksheet, then it is recommended to display the content of the embedded file as it will not publish the embedded file’s content if the only icon is displayed.
- As soon as we insert an object in Excel, its connection to the source file is lost, so make sure to make all required changes to the original file before embedding it. However, you can also update the embedded file’s content by double-clicking the file icon or embedded content.
- When sending an embedded file to someone else, ensure that the recipient’s computer/ laptop has the required software installed, supporting the embedded file type to view or change its content.
- Inserting an object in Excel increases the source Excel file size. If we do not want to make the Excel file heavy, we can use the “Link to file” option. However, the “Link to file” option only works if we use the same device where the linked source file is stored, and the source file’s location/ path is not changed.
Recommended Articles
This article is a guide to Embed and Insert Object in Excel. We discuss inserting an object in an Excel worksheet, practical examples, and a downloadable excel template. You may learn more about Excel from the following articles:-
Источник
Embedded in Excel (Table of Contents)
- How to Enable or Add Embedded Objects in Excel?
Introduction to Embedded in Excel
With the help of Embed in Excel, we can link a table of excel with the data in a Word file. If there are any changes made in the Excel table, it will automatically be applied to the Word file only if the files are in the same location or folder. To use Embed in Excel, go to Insert menu ribbon and select Object under the Text section. Now browse and select the file which we want to link with Excel. Once we do that, we will be able to see the changes getting reflected in the Word file if we do anything in the Excel file.
It is a technique to insert data files from one Programme into another. It also provides an option to insert outside media for design customization. When you click on the Insert tab in the toolbar, under the Text group, select or click on Object.
When & Where to Use Embedded Objects?
If you don’t want to update the copied data when it changes in the source file, you can use an embedded object. Below mentioned objects can be added. i.e. Images, clipart, pictures, audio file, Word document, PDF, PPT, Excel spreadsheet & HTML document. The embedded object plays an important role during a meeting or to share more comprehensive information when you send the spreadsheet to a co-worker.
How to Enable or Add Embedded Objects in Excel?
Let’s check out the various file types or an embedded object that can be added in excel.
You can download this Embedded Excel Template here – Embedded Excel Template
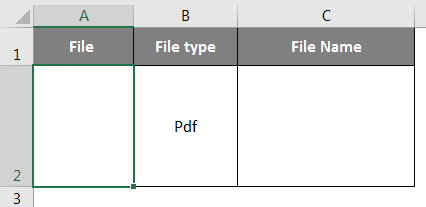
In the below-mentioned example, I have an excel file named as “Embedded”, in that I have selected the cell “A2”, where I need to insert a pdf file as an embedded object. I need to select a cell “A6” in a spreadsheet where I want to insert the object & and increase the row size, i.e. row height & column width, for better visibility.
Once you select cell “A2” under the excel toolbar, select the “Insert” tab; in that, click “Object” in the Text group to open the Object dialog box.
Now the object window will appear. In that object window, you will see two options.
Create New – It will create a new file and embed it in the worksheet.
Create from File – It will embed an existing file in the worksheet.
You need to select the “Create from File” tab. As we add a PDF file, you need to select “Adobe Acrobat Document” under the object type. Check or tick the box of the display as Icon.
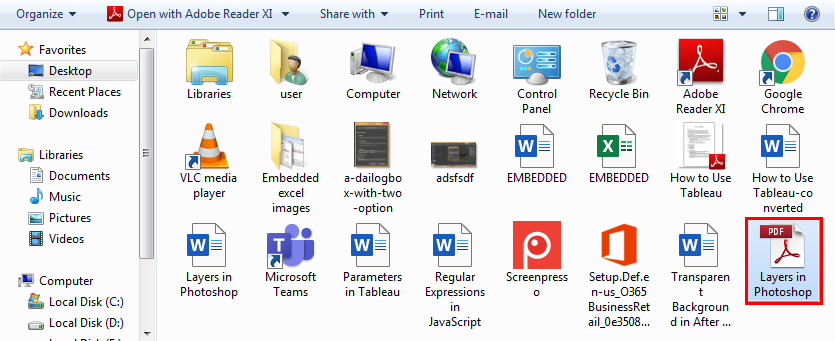
The file name window appears where you need to locate the file, which you want to attach. Click the file to select it and click the “Insert” button.

Select the PDF file that you want to embed and click on Open (PDF File Name: Layers in Photoshop); this step will insert a PDF file in the worksheet. As soon as the PDF is inserted into the worksheet, the PDF also opens by default. You can close the PDF file and continue to work with Excel.
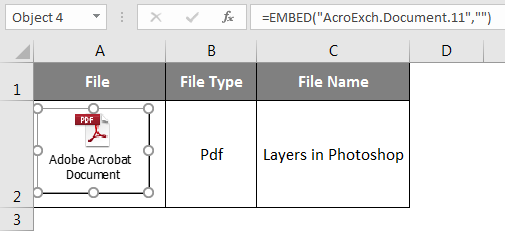
PDF appears in cell “A2” as an “Embedded” object (just like shapes or charts), and you can resize it based on your choice and place it anywhere in the worksheet.

Now, at last, if you double click on the pdf object, that PDF file will get opened. Simultaneously you can insert multiple PDFs or other files by following the above-mentioned steps.
How to Insert the Embedded PDF File Object?
Let’s look at how to insert an embedded PDF file object or icon in a cell.
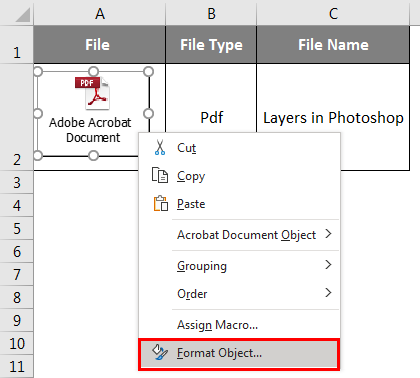
AN embedded PDF file in Excel is inserted as an object sometimes, sits above the worksheet cells. The position of the object remains stagnant when you increase the column width or if you move a cursor of a mouse down to other cells. To fix this, right-click on the PDF object icon and select Format Object. (If you have multiple other PDF or word files embedded, you can simultaneously select all and then right-click and select the Format Object option.).
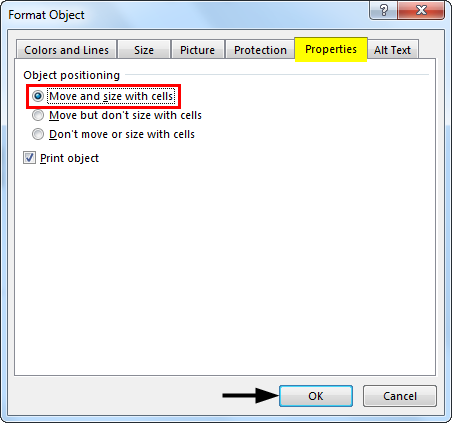
Once you select the Format Object option, the Format Object dialog box appears; in that, select Properties tab and under the object positioning, select the option ‘Move and size with cells.
When you embed a PDF file in Excel, it gets a generic name such as “Adobe Acrobat Document”. You have an option to change the PDF name for a better appearance. The below-mentioned steps can change the name of the PDF object:
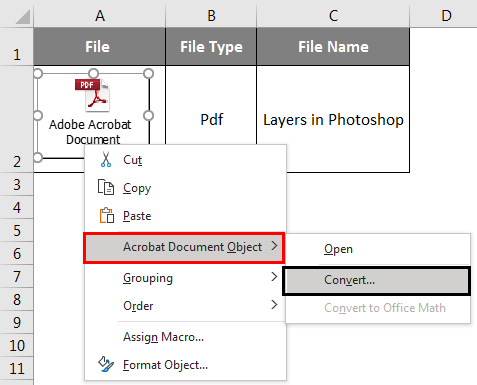
Select the PDF object, right-click on the PDF object and select the Convert to option in the Acrobat Document Object.
![]()
In the Convert dialog box, click on the Change Icon button, change icon button dialog box appears; under that browse file type, select that PDF file which is represented as an object.
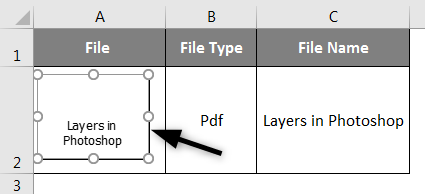
Change the caption to the name of your choice for the embedded PDF document, i.e. I have changed to Layers in Photoshop. Now, click OK; this will automatically change the name of the embedded PDF file.
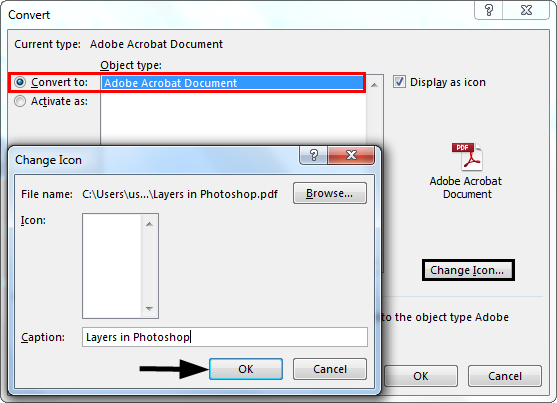
Change Icon feature is also available to change the appearance of an icon OR object that represents the embedded file. There is a various list of options that appears in the ICON dropdown under the Change Icon window.
Difference between Linked and Embedded Objects
- Linked objects will be present as separate files, and they can be updated, linked object is linked to the source file, The source file updates the linked object.
- Whereas Embedded objects are stored in the workbook where they are inserted in, they cannot update.
Things to Remember About Embedded Objects in Excel
- Embedded files in excel can also be displayed as links or icons.
- With the help of go to a special feature in Excel, you can find & select all the embedded object in a worksheet.
- Select the specified worksheet where you need to find out all embedded objects.
Recommended Articles
This is a guide to Embedded in Excel. Here we discuss How to insert Embedded Objects in Excel along with practical examples and a downloadable excel template. You can also go through our other suggested articles –
- Protect Sheet in Excel
- Worksheets in Excel
- Insert New Worksheet In Excel
- VBA Worksheets
When you insert content as an object, you create a dynamic link between the content that you insert and the content that was created in another Microsoft Office program. Unlike when you paste content (such as by pressing CTRL+V), when you insert it as a linked or embedded object, you can work with it in the original program.
For example, if you insert worksheet cells into the document as an Excel object, Microsoft Office Word runs Excel when you double-click the cells, and you can use Excel commands to work with the worksheet content.
Understand the differences between linked objects and embedded objects
The main differences between linked objects and embedded objects are where the data is stored and how you update the data after you place it in the Word file.
You place either a link to the object or a copy of the object in the document. You can insert objects this way from any program that supports the technology of linking and embedding objects (object linking and embedding, or OLE).
For example, a monthly status report may contain information that is separately maintained in an Excel worksheet. If you link the report to the worksheet, the data in the report can be updated whenever the source file is updated. If you embed the worksheet in the report, your report contains a static copy of the data.
1. Embedded object
2. Linked object
3. Source file
Linked objects
When an object is linked, information can be updated if the source file is modified. Linked data is stored in the source file. The Word file, or destination file, stores only the location of the source file, and it displays a representation of the linked data. Use linked objects if file size is a consideration.
Linking is also useful when you want to include information that is maintained independently, such as data collected by a different department, and when you need to keep that information up-to-date in a Word document.
Embedded objects
When you embed an Excel object, information in the Word file doesn’t change if you modify the source Excel file. Embedded objects become part of the Word file and, after they are inserted, they are no longer part of the source file.
Because the information is totally contained in one Word document, embedding is useful when you don’t want the information to reflect changes in the source file, or when you don’t want the document recipients to be concerned with updating the linked information.
Need more help?
Want more options?
Explore subscription benefits, browse training courses, learn how to secure your device, and more.
Communities help you ask and answer questions, give feedback, and hear from experts with rich knowledge.
In Microsoft Excel, the “Object Insert” option allows a user to insert an external object into a worksheet. Embedding generally means inserting an object from another software (Word, PDF, etc.) into an Excel worksheet. This option is useful for direct access to files related to your worksheet data from within your worksheet space. In addition, the inserted object works as a ready information source or reference for a dataset in an Excel worksheet.
Table of contents
- Insert and Embed an Object in Excel
- How to Insert (Embed) an Object in Excel?
- #1 – Insert (Embed) a New Object in Excel
- #2 – Embedding (inserting) an Existing Object in Excel
- #3 – Link to Object vs. Embedded Object
- Why we need Embedded Object in Excel?
- Things to Remember about Inserting Object in Excel
- Recommended Articles
- How to Insert (Embed) an Object in Excel?
How to Insert (Embed) an Object in Excel?
Here, we will discuss how to embed a new object in Excel.
You can download this Embed File Excel Template here – Embed File Excel Template
#1 – Insert (Embed) a New Object in Excel
- We must first select “Text” from the “Insert” tab and then click “Object.”

- Then, select “Create New” to embed a new blank file. Remember, only file types are shown in “Object type” that can be embedded in the Excel worksheet.

- Now, choose a file type to embed. For example, we have selected a “Microsoft Word Document,” now click “OK.”
#2 – Embedding (inserting) an Existing Object in Excel
Step 1: Select “Text” from the “Insert” tab and click “Object.”
Step 2: Select “Create from File” and click “Browse” to embed an existing file into the worksheet. Remember, only file types are shown in “Object Type” that can be embedded in the Excel worksheet.
Step 3: Now click “OK.” The file icon will be displayed on the worksheet.
NOTE: If we do not check the “Display as icon” option, it will show the embedded file’s content instead of the icon. We can double-click on the embedded file icon or content to edit the content of the embedded file.
#3 – Link to Object vs. Embedded Object
When you insert an object into an Excel worksheet, the object becomes part of the Excel file. Therefore, any changes made to the source file do not impact the embedded file. However, we may want to keep the file separate from the Excel file. In that case, we need to check the “Link to file” option.
A linked file is just a link to the source file, which we can edit only by editing the source file. When we double-click the link, the source file will open.
NOTE: If we change the location/ path of the source file, the link to the file in the worksheet will not work.
Why do we need Embedded Objects in Excel?
- When we want to add large comments or notes to a dataset in Excel Worksheet, we can embed a Word or text file instead of writing text in worksheet cells.
- Excel is generally used for data tables/ charts. Suppose we want to use big text bodies to explain the data tables in a worksheet. In that case, we can create a separate embedded file within the worksheet instead of creating a particular file or writing a large amount of text in an Excel worksheet.
- Embedded files keep the worksheet presentation limited to required data only. We can keep any additional comments, notes, or information within the embedded file, allowing users to focus on the key information. Other data can be seen only by accessing the embedded file.
4. Embedded files are the preferred option compared to the link to file option when we need to send the worksheet to someone working on a different computer/ laptop since the link to file will only work if the source file is saved on the same device as the worksheet itself since embedded files are saved within the Excel file.
Things to Remember about Inserting Object in Excel
- We can only embed certain file types into an Excel worksheet. We can see the list of file types accepted by going to “Insert” > “Text” > “Object” > “Create New” > “Object type.”
- Select the “Display as icon” checkbox to display only the embedded file’s icon. Otherwise, it will show the file content in the worksheet, which takes more space and is not recommended for presentation purposes.
NOTE: If we intend to print the worksheet, then it is recommended to display the content of the embedded file as it will not publish the embedded file’s content if the only icon is displayed.
- As soon as we insert an object in Excel, its connection to the source file is lost, so make sure to make all required changes to the original file before embedding it. However, you can also update the embedded file’s content by double-clicking the file icon or embedded content.
- When sending an embedded file to someone else, ensure that the recipient’s computer/ laptop has the required software installed, supporting the embedded file type to view or change its content.
- Inserting an object in Excel increases the source Excel file size. If we do not want to make the Excel file heavy, we can use the “Link to file” option. However, the “Link to file” option only works if we use the same device where the linked source file is stored, and the source file’s location/ path is not changed.
Recommended Articles
This article is a guide to Embed and Insert Object in Excel. We discuss inserting an object in an Excel worksheet, practical examples, and a downloadable excel template. You may learn more about Excel from the following articles:-
- VBA Insert RowTo insert rows we use worksheet method with the insert command to insert a row, we also provide a row reference where we want to insert another row similar to the columns.read more
- Insert Button in ExcelButtons in excel are single-click commands inserted to perform specific tasks. Buttons are used in macros and can be inserted by enabling the developer’s tab; in the insert form, we can find a button to insert and draw it to the worksheet.read more
- Insert Comment in ExcelIn Excel, Insert Comment is a feature used to share tips or details with different users working within the same spreadsheet. You can either right-click on the required cell, click on “Insert Comment” & type the comment, use the shortcut key, i.e., Shift+F2, or click on the Review Tab & select “New Comment”. read more
- Insert Hyperlinks in ExcelTo insert a hyperlink, right-click on the cell, click on hyperlink, and then choose the last option, which will open a wizard box to insert a hyperlink. Then, in the field for an address, type the hyperlink’s URL.read more
- Themes in ExcelThemes in Excel are used to format the entire document or workbook; we can use the themes provided by Excel or customize it to our likingread more
Reader Interactions
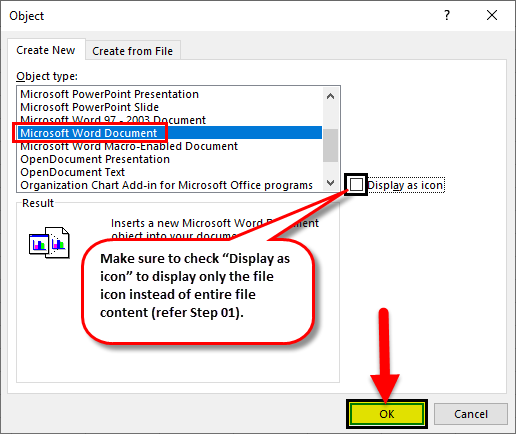
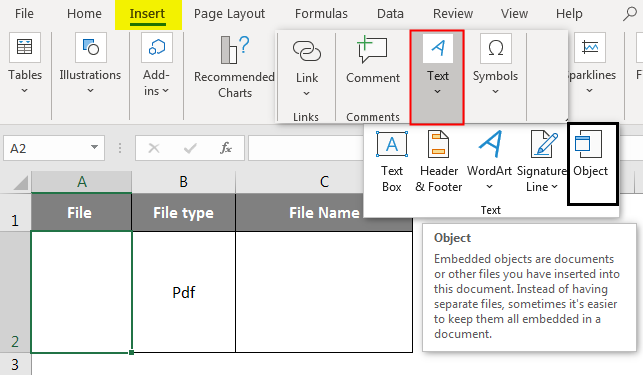
I am adding a button in an existing Excel file. I noticed that the existing buttons has the EMBED formula specified to it. What does the function mean?
=EMBED("Forms.CommandButton.1","")
![]()
ZygD
21k39 gold badges77 silver badges98 bronze badges
asked Feb 21, 2012 at 6:48
![]()
Honestly there really is not much documentation available on this «function». It is one of those things which are exposed unnecessarily when it really shouldn’t have been. We are not supposed to enter this manually.
When you select a CommandButton and place it in Excel, you will see
=EMBED("Forms.CommandButton.1","")
in the Formula Bar. This text is necessary and should not be deleted. It is Excel’s way of telling itself that an object has been inserted.
![]()
Cody Gray♦
237k50 gold badges488 silver badges570 bronze badges
answered Feb 21, 2012 at 6:55
![]()
Siddharth RoutSiddharth Rout
146k17 gold badges206 silver badges250 bronze badges
3