
When importing and copying tables in Excel, empty strings and cells can be formed. They always district and interfere with the work.
Some formulas may not work correctly. It is impossible to use a number of tools for an incompletely filled range. We will learn how to quickly delete empty cells at the end or middle of a table. We will use simple tools available to the user of any level.
How to remove empty rows in the Excel table?
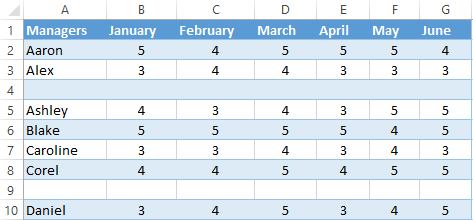
To show you how to delete extra lines, to illustrate the order of actions, take a table with conditional data:
Example 1: Sorting data in a table. Select the entire table. Open the «DATA» tab — «Sort and Filter» tool — press the «Sort» button. Another way is to right-click on the selected range and do the sorting «A to Z».
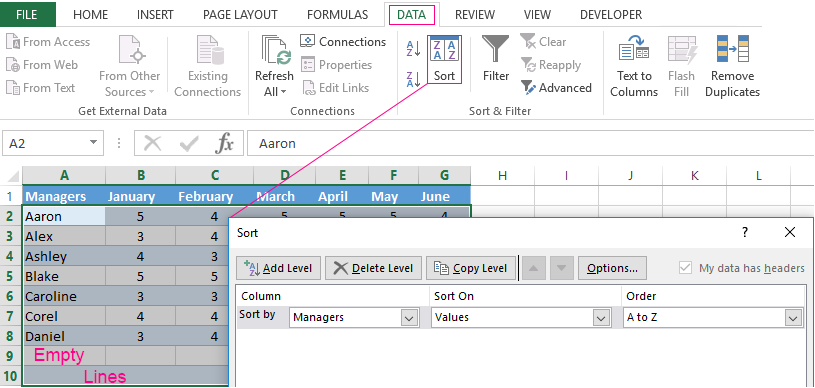
Empty rows after sorting in ascending order are at the bottom of the range.
If the order of the values is important, then before the sorting, you need to insert an empty column, make a through numbering. After sorting and deleting blank lines, sort the data by the inserted column with the numbering again.
Example 2: Filter. The range must be formatted as a table with headers. We select the «cap». On the «DATA» tab, we click the «Filter» button («Sort and Filter»). A down arrow appears to the right of each column name. Push — opens the filtering window. Remove the selection in front of the name «Empty».
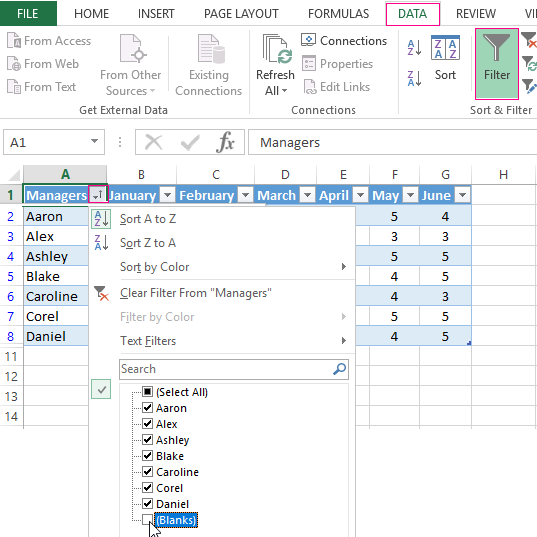
You can delete empty cells in the Excel line the same way. Select the required column and filter its data.
Example 3: Selecting a group of cells. Select the entire table. In the main menu on the «Edit» tab we click the button «Find and Select». Select the «Go To Special» tool. In the window that opens, select the «Blanks».
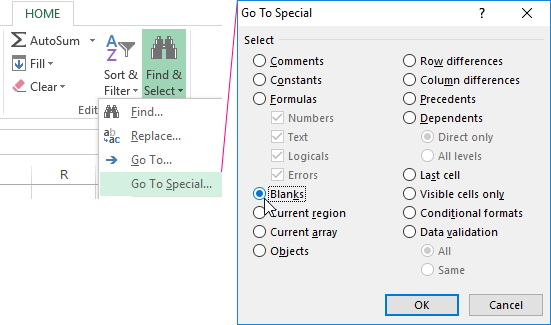
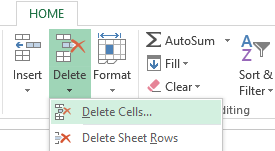
The program marks empty cells. On the main page we find the «HOME»-«Delete»-«Delete Cells».
The result is a filled range of «no voids».
Attention! After the removal, some of the cells jump upwards — the data can be messed up. Therefore, for the overlapping ranges, the instrument is not suitable.
Helpful advice! The shortcut to delete the selected row in Excel is CTRL + «-«. And for its selection, you can press the hotkey combination SHIFT + SPACEBAR.
How to remove repeated rows in Excel?
To remove the same rows in Excel, select the entire table. Go to the tab «DATA»-«Data Tool»-«Delete Duplicates».
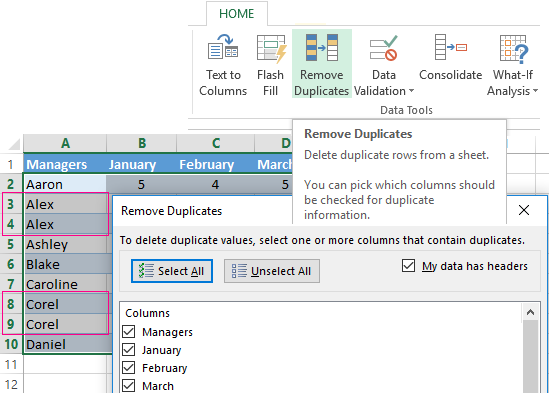
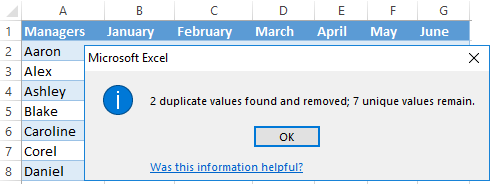
In the window that opens, select those columns that contain duplicate values. Since you need to delete duplicate rows, all columns should be highlighted. After clicking OK Excel creates a mini-report of the form:
How to remove each second line in Excel?
You can use the macro to break the table. For example, this:
Sub Delete_Every_Other_Row()
' Dimension variables.
Y = False  ' Change this to True if you want to
' delete rows 1, 3, 5, and so on.
I = 1
Set xRng = Selection
' Loop once for every row in the selection.
For xCounter = 1 To xRng.Rows.Count
' If Y is True, then...
If Y = True Then
' ...delete an entire row of cells.
xRng.Cells(I).EntireRow.Delete
' Otherwise...
Else
' ...increment I by one so we can cycle through range.
I = I + 1
End If
' If Y is True, make it False; if Y is False, make it True.
Y = Not Y
Next xCounter
End Sub
And you can do it by hand. We offer a simple way, accessible to each user.
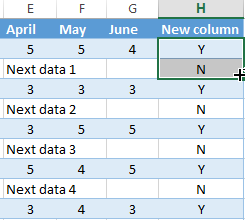
- At the end of the table, make an auxiliary column. Fill with alternate data. For example, «N Y N Y», etc. We enter values in the first four cells. Then select them. «We catch» for the black cross in the lower right corner and copy the letters to the end of the range.
- Install the «Filter». Filter the last column by the value of «Y».
- Select all that is left after filtering and delete.
- We remove the filter — only cells with «N» will remain.
The auxiliary column can be eliminated and operated with a «decimated table».
How to delete hidden rows in Excel?
When the user had hidden some information in the rows he was not distracted from his work. I thought that later the data would be needed. It is not needed — hidden rows can be deleted: they affect the formulas, interfere.
In the training table are hidden rows 5, 6, 7:
We will remove them.
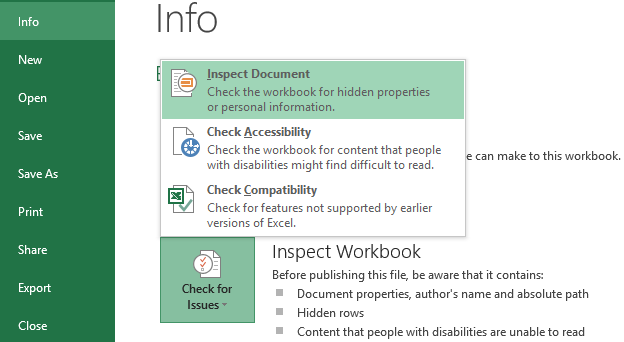
- Go to «FILE»-«Info»-«Check for Issues» the tool «Inspect Document».
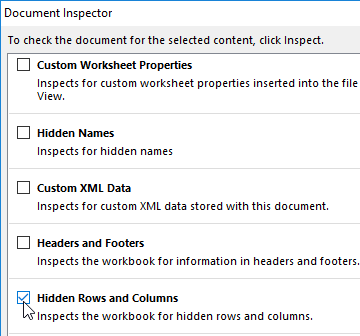
- In the opened window, put a tick in front of the «Hidden Rows and Columns». Click «Inspect».
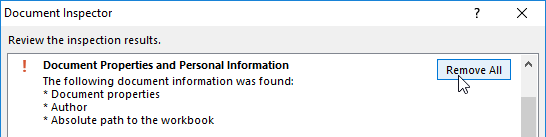
- After a few seconds, the program displays the result of the test.
- Click «Remove All». A corresponding notification will appear on the screen.
As a result of the work done, the hidden cells are deleted, the numbering is restored.
Thus, remove the empty, repeating or hidden cells of the table using the built-in functionality of the Excel program.
When cleaning up data for analysis, we are required to have all the cells in each of the columns filled with data. If some rows have empty cells, then we should delete those rows. But you need to learn how to delete rows if cell is empty. In this post, we shall look at how to delete empty rows in VBA.
Delete rows with empty cells
There are many ways that we can use to delete a row if cell is blank. One of the most used involves Find & Select> Go To Special > Blanks. This method is most useful if you have data that is listed in only one column.
Procedure of getting rid of rows with blank cells.
Step 1: Click on the Go To Special command
The first thing you need to do is to locate and click on the Go To Special command. To do this, just head to the Home tab and click on the Find & Select. You will then be able to see Go To Special.
 Figure 1: Using Go To Special to delete rows with empty cells
Step 2: Check the blanks option
Once you have opened the Go To Special dialog box, you will be able to see many special options. Among these options, we have the “Blanks” option. Check it and click Ok. This will select all the blank cells in the column.
 Figure 2: Go to special options
Step 3: Right-click and delete
Now that you have selected all the blank cells in the column of the worksheet that you want to delete rows with blank cells, the next thing you need to do is right-click on any of the selected cells. Then click on delete.
 Figure 3: Click Delete
Step 4: Check Entire row
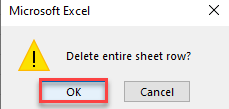
You will be presented with a Delete dialog box when you click on delete. In this dialog box, you need to check the Entire row option. Then click OK.
 Figure 4: Delete window
Now go back and check. You will notice that all the rows with empty cells have been deleted.
Deleting rows with empty cells with VBA Macro
We can also use VBA macro to delete blank rows. Using VBA to delete rows works in a more similar way with the Go To Special command, with the exception that this uses a code to delete rows in.
In order for us to delete entire row with VBA, we can proceed as follows;
Step 1: Open Microsoft Visual Basic
You first need to open the Microsoft Visual basic on your in your Excel in order to perform a macro delete row. To do this, you simply need to press Alt + F11 keys simultaneously. This will open the Microsoft Visual basic window.
Step 2: Insert a module
The next thing you need to do is to insert a module. To do this, simply click on the Insert then on Module. Once there, paste the VBA Macro into that module;
|
1 2 3 4 5 6 7 8 9 10 11 12 |
|
Step 3: Run the VBA Macro
You now have to run the VBA macro to delete entire row with empty cells. This can simply be done by pressing the F5 key. Alternatively, you can click the Run button.
You will see a Kutools Excel dialog box. In this box, you need to select and specify the column from which you want to delete entire rows if cells are blank. Then click Ok.
 Figure 5: Kutools window
Once you click Ok, all the rows that have empty cells in the specified column will be deleted at once.
Instant Connection to an Expert through our Excelchat Service
Most of the time, the problem you will need to solve will be more complex than a simple application of a formula or function. If you want to save hours of research and frustration, try our live Excelchat service! Our Excel Experts are available 24/7 to answer any Excel question you may have. We guarantee a connection within 30 seconds and a customized solution within 20 minutes.
See all How-To Articles
This tutorial demonstrates how to delete rows with blank cells in Excel and Google Sheets.
Delete Rows With Blanks
Say you have a data range that contains rows with blanks, and you want to delete those rows. There are a few ways to do this, including using Excel features like Find & Select or Filter.
Find & Select
To delete rows with blanks using the Find & Select feature in Excel, use Go To Special.
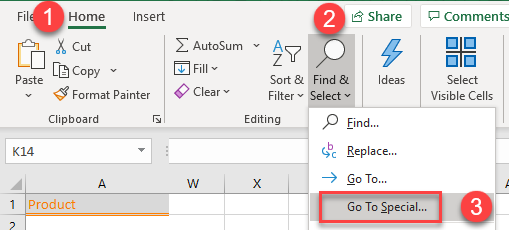
- In the Ribbon, go to Home > Find & Select > Go To Special.
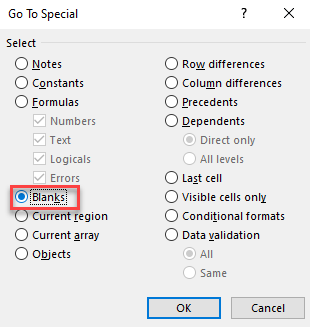
- In the Go To Special dialog box, select Blanks and click OK.
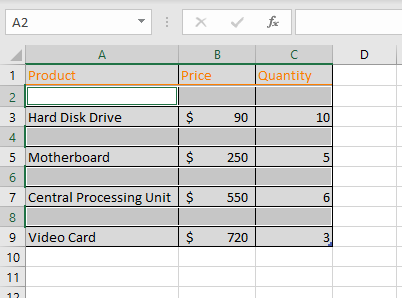
- Now, all the blank cells in that range are selected.
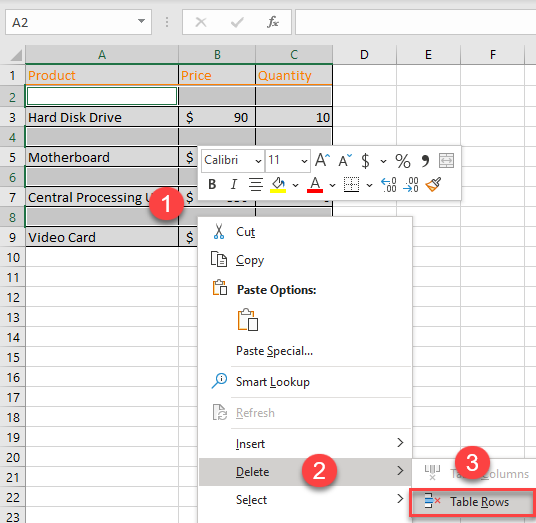
- To delete these blank cells, right-click anywhere in the selected range. Then, in the drop-down menu, click Delete and choose Table Rows.
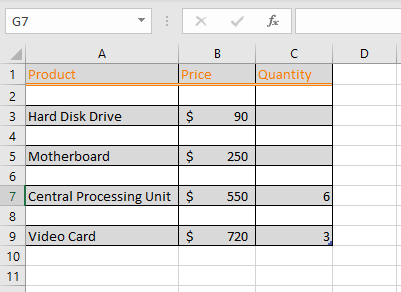
As a result, the rows with blanks are deleted.
Possible Issue With Find & Select
This method is only good to use on small tables and where there are no blank cells in a row with data, because if a row with data contains just one blank cell, the entire row is deleted. If you have a larger table, it’s not easy to see the potential data loss.
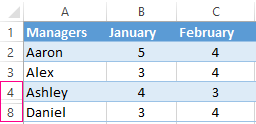
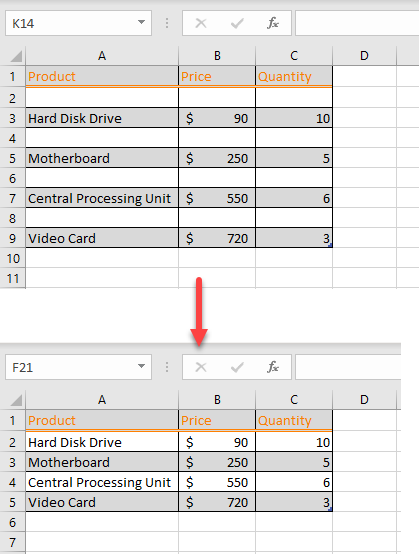
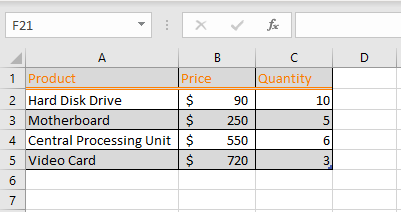
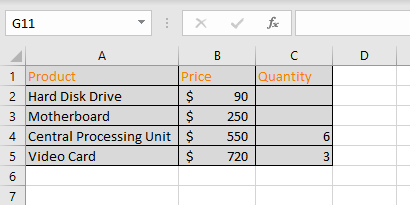
Say you have this table of products, and you want to delete Rows 4, 6, and 8 because they are empty.
If you applied Steps 1–4 above, Rows 3 and 5 would also be deleted, because these rows contain both data and blanks.

See also
- Display Go To Dialog Box
- Jump to Cell
- Using Find and Replace in Excel VBA
- Go To Cell, Row, or Column Shortcuts
Filter for Blanks
A safer way to delete rows with blanks is to use filters.
- First, select the data. Then in the Ribbon, go to Data > Filter.
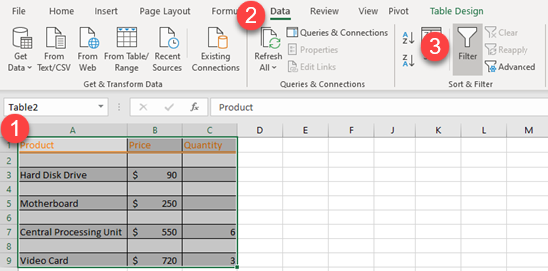
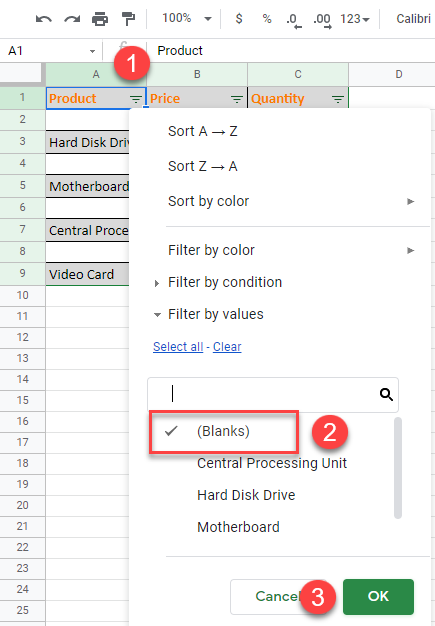
- Click on the arrow in the column header (the Product column) and check the Blanks box. Click OK.

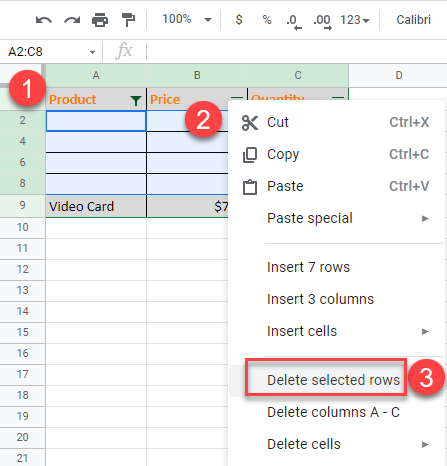
- Select all the filtered rows by pressing CTRL + HOME on the keyboard. Then press the (↓) down arrow key to go to the first data row and press CTRL + SHIFT + END. Right-click anywhere within the selected range and from the drop-down menu, choose Delete row.
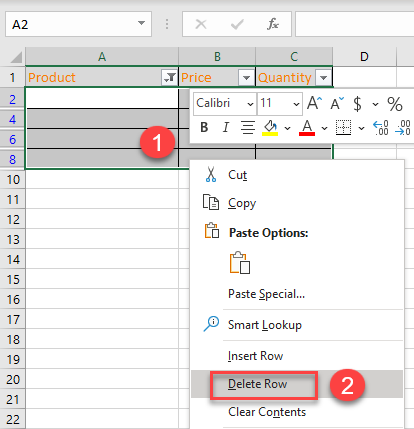
- Click OK to confirm deletion of the entire row.
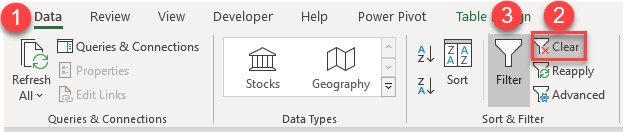
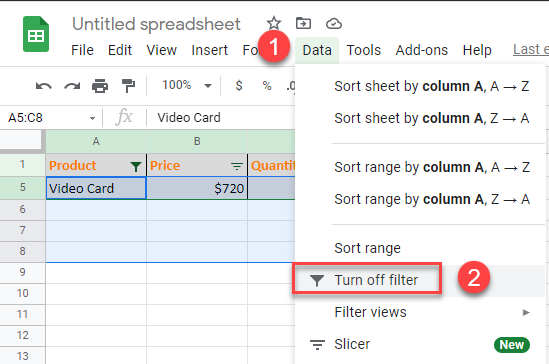
- To clear the filter, in the Ribbon go to Data > (2) Clear.
To turn off the filter altogether, click on (3) Filter.
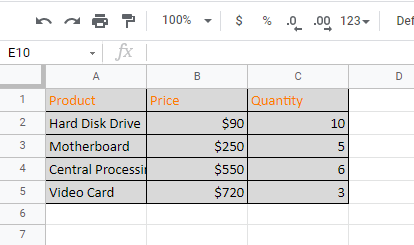
As a result, the blank rows are deleted.
Note: You can also use VBA code to remove blank rows.
Delete Rows With Blanks in Google Sheets
To delete rows with blanks in Google Sheets, follow these steps:
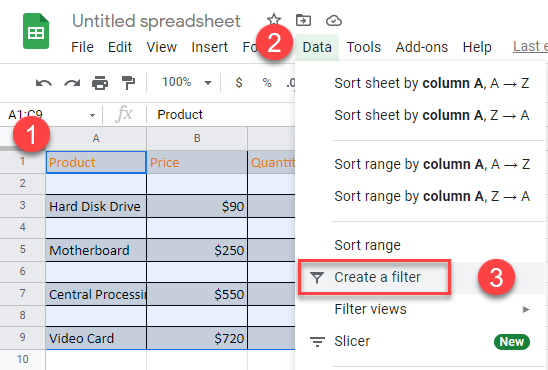
- First, select the range. Then, in the Menu, go to Data > Create a filter.
- Click on the filter icon and in the drop-down menu, check Blanks. Click OK.
- Now, select the first cell in the range (A2). Then press the SHIFT key and click on the last cell of the range (C9). This selects the entire range. Right-click somewhere within that range, and from the drop-down menu, choose Delete selected rows.
- In the Menu, go to Data > Turn off filter.
The rows with blanks are deleted.
This example teaches you how to delete blank rows or rows that contain blank cells.
1. On the Home tab, in the Editing group, click Find & Select.

2. Click Go To Special.

3. Select Blanks and click OK.

Excel selects the blank cells.

4. On the Home tab, in the Cells group, click Delete.

5. Click Delete Sheet Rows.

Result:

The following awesome trick only removes rows that are completely empty and leaves rows with a few empty cells.
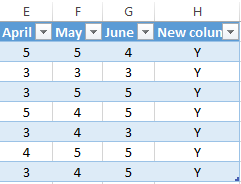
6. Add a Blanks column and insert the COUNTA function.

7. Click on the lower right corner of cell H2 and drag it down to cell H10.

If the COUNTA function returns a 0, the row is «completely empty». To filter these empty rows, execute the following steps.
8. Select cell H1.
9. On the Data tab, in the Sort & Filter group, click Filter.

Arrows in the column headers appear.

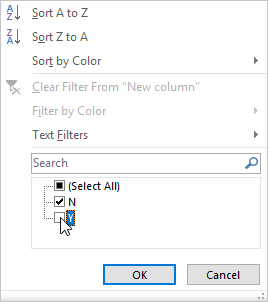
10. Click the arrow next to Blanks.
11. Click on Select All to clear all the check boxes, and click the check box next to 0.

12. Click OK.
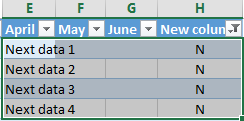
Result. Excel only displays the rows that are completely empty.

13. Delete these rows.
14. Click Filter again to remove the filter.
15. Delete the Blanks column.
Result:

Blank rows of data can be a big annoyance.
They’ll make certain things like navigating around our data much more difficult.
But the good news is there are lots of ways to get rid of these unwanted rows and it can be pretty easy to do it.
In this post, we’re going to take a look at 9 ways to remove blank rows from our Excel data.
Delete Blank Rows Manually
The first method is the manual way.
Don’t worry, we’ll get to the easier methods after. But if we only have a couple rows then the manual way can be quicker.
![]()
Select the blank rows we want to delete. Hold Ctrl key and click on a row to select it.
When the rows we want to delete are selected then we can right click and choose Delete from the menu.
We can also delete rows using a ribbon command. Go to the Home tab ➜ click on the Delete command ➜ then choose Delete Sheet Rows.
There is also a very handy keyboard shortcut to delete rows (columns or cells). Press Ctrl + – on the keyboard.
That’s it! Our blank rows are gone now.
Delete Blank Rows Using Go To Special
Selecting and deleting rows manually is OK if we only have a couple rows to delete.
What if there are many blank rows spread across our data? Manual selection would be a pain!
Don’t worry, there is a command in Excel to select all the blank cells for us.
First, we need to select a column of our data including all the blank rows. The easiest way to do this will be to select the first cell (A1 in this example) then hold the Shift key and select the last cell (A14 in this example).
Now we can use the Go To Special command to select only the blank cells. Go to the Home tab ➜ press the Find & Select command ➜ choose Go To Special from the menu.
There’s also a handy keyboard shortcut for the Go To menu. Press Ctrl + G to open up the Go To menu then click on the Special button to open up the Go To Special menu.
Whether we open up the Go To menu then click Special or we go directly to the Go To Special menu, we will arrive at the same Go To Special menu.
Now all we need to do is select Blanks from the options and press the OK button. This will select only the blank cells from our initial column selection.
Now we need to delete those selected rows.
- Use any delete rows method from the Delete Blank Rows Manually section.
- Right click ➜ Delete
- Home tab ➜ Delete ➜ Delete Sheet Rows
- Ctrl + – keyboard shortcut
- In the Delete menu select Entire row and press the OK button.
Like magic, we can find and delete hundreds of blank rows in our data within a few seconds. This is especially nice when we have a lot of blank rows scattered across a long set of data.
Delete Blank Rows Using Find Command
This method is going to be very similar to the above Delete Blank Rows Using Go To Special method. The only difference is we will select our blank cells using the Find command.
Just like before, we need to select a column in our data.
Go to the Home tab ➜ press the Find & Select command ➜ choose Find from the menu.
There is also a keyboard shortcut we can use to open the Find menu. Press Ctrl + F on the keyboard.
Either way, this will open up the Find & Replace menu for us.
- Expand the Advanced options in the Find menu.
- Leave the Find what input box blank.
- Select the Match entire cell contents option.
- Search Within the Sheet.
- Look in the Values.
- Press the Find All button to return all the blank cells.
This will bring up a list of all the blank cells found in the selected range at the bottom of the Find menu.
We can select them all by pressing Ctrl + A. Then we can close the Find menu by pressing the Close button. Now we can delete all the blank cells like before.
Delete Blank Rows Using Filters
We can also use filters to find blank rows and delete them from our data.
First, we need to add filters to our data.
- Select the entire range of data including the blank rows.
- Go to the Data tab.
- Press the Filter button in the Sort & Filter section.
We can also add filters to a range by using the Ctrl + Shift + L keyboard shortcut.
This will add sort and filter toggles to each of the column headings and we can now use these to filter out the blank.
- Click on the filter toggle on one of the columns.
- Use the Select All toggle to de-select all items.
- Check the Blanks.
- Press the OK button.
When our data is filtered, the row numbers appear in blue and filtered rows are numbers are missing.
We can now select these blank rows with the blue row numbering and delete them using any of the manual methods.
We can then press the OK button when Excel asks us if we want to Delete entire sheet row.
When we clear the filters, all our data will still be there but without the blank rows!
We can use filters in a slightly different way to get rid of the blank rows. This time we will filter out the blanks. Click on the filter toggle on one of the columns ➜ uncheck the Blanks ➜ press the OK button.
Now all our blank rows are hidden and we can copy and paste our data to a new location without all the blank rows.
Delete Blank Rows Using Advanced Filters
Similar to filter method, we can use the Advanced Filters option to get a copy of our data minus any blank rows.
To use the Advanced Filters feature, we’re going to need to do a bit of setup work.
- We need to set up a filter criteria range. We are only going to filter based on one column, so we need one column heading from our data (in F1 in this example). Below the column heading we need our criteria (in F2 in this example), we need to enter
=""into this cell as our criteria. - Select the range of data to filter.
- Go to the Data tab.
- Select Advanced in the Sort & Filter section.
Now we need to configure the Advanced Filter menu.
- Select Copy to another location.
- Select the range of data to be filtered. This should already be populated if the range was selected before opening the advanced filters menu.
- Add the criteria to the Criteria range (F1:F2 in this example).
- Select where in the sheet to copy the filtered data.
- Press the OK button.
We now get a copy of our data in its new location without the blanks.
Delete Blank Rows Using The Filter Function
If we are using Excel online or Excel for Office 365, then we can use one of the new dynamic array functions to filter out our blank rows.
In fact, there is a dynamic array FILTER function we can use.
FILTER Function Syntax
= FILTER ( Array, Include, [Empty] )- Array is the range of data to filter.
- Include is a logical expression indicating what to include in the filtered results.
- Empty is the results to display if no results based on the Include argument are found.
FILTER Function To Filter Blanks
= FILTER ( CarData, CarData[Make]<>"" )The above function needs to be entered in only one cell and the results will spill into the remaining cells as needed. The function will filter the CarData on the Make column and filter out any blanks.
It’s easy and the great part is it’s dynamic. Because our data is in an Excel table, when we add new data into the CarData table, it will appear in our filtered results.
Delete Blank Rows By Sorting
In addition to all the filtering techniques, we can sort our data to get all the blank rows.
- Select the range of data.
- Go to the Data tab.
- Press the sort command. Either the ascending or descending order will work.
Now all our blank rows will appear at the bottom and we can ignore them.
If we need the original sort order of our data, we can add an index column before sorting. Then we can sort to get the blank rows at the bottom and delete them. Then we sort our data back to the original order based on the index column.
Delete Blank Rows Using Power Query
Power can easily remove blank rows in our data.
This is great is we keep getting updated data with blanks in it and need to include this in our data preparation steps.
Once our data is inside the power query editor, we can easily remove our blank data. Notice, these appear as null values inside the editor.
- Go to the Home tab in the power query editor.
- Press the Remove Rows button.
- Select the Remove Blank Rows option from the menu.
= Table.SelectRows(#"Changed Type", each not List.IsEmpty(List.RemoveMatchingItems(Record.FieldValues(_), {"", null})))This will generate the above M code using the Table.SelectRows function to select the non-null rows. This will only remove rows where the entire record has null values.
We could also get the same result by filtering out the null values in our data. Right click on any of the sort and filter toggles then uncheck the null value and press the OK button.
Power query will again generate a step with the Table.SelectRows function, returning non-null values in a specific column.
Delete Blank Rows Using Power Automate
This one might not be as quick, easy and practical as the other methods but it can be done.
We can use Power Automate to delete blank rows in our Excel tables.
In order to do this with Power Automate, we will need to have our data in an Excel table and it will need an ID column that uniquely identifies each row.
We can set up a small Flow automation to do this.
- We will use a manual button to trigger our flow, but we could use any number of triggers.
- We then need to List rows present in a table to get all the rows of data from our Excel table. The best option would also be to use the Odata filters in the Show advanced options section to filter on the blank rows, but this is currently not possible to filter on blanks.
- Because we can’t filter on the blank values with Odata filters, we need to use a Filter array data operation action to do this. We can filter on the values from the List rows present in a table action and set the condition as Make is equal to blank (leave the value empty). This will get us all the rows with blank cells.
- We can now use the Delete a row action to delete these blank rows. We can select our ID column as the Key Column and then add the ID field from the Filter array action. This should wrap the action in an Apply to each step to delete all the blanks.
When this automation runs, it will delete any blank rows the table has.
Conclusions
Blank rows in our data can be a nuisance.
Removing them is easy and we have lots of options.
My favourite way is probably the Go To keyboard shortcut method. It’s quick, easy and does the job.
Did I miss any methods? Let me know in the comments below!
About the Author
John is a Microsoft MVP and qualified actuary with over 15 years of experience. He has worked in a variety of industries, including insurance, ad tech, and most recently Power Platform consulting. He is a keen problem solver and has a passion for using technology to make businesses more efficient.