
- Интернет
- Рассылка почты
Пример макроса, отправляющего письма со вложениями из Excel через почтовый клиент Outlook:
Sub Отправить_Письмо_из_Outlook()

    'отправляем письмо без вложений
    res = SendEmailUsingOutlook("name@domain.ru", "Текст письма 1", "Тема письма 1")
    If res Then Debug.Print "Письмо 1 отправлено успешно" Else Debug.Print "Ошибка отправки"


    'отправляем письмо с 1 вложением
    attach$ = ThisWorkbook.FullName    ' прикрепляем текущий файл Excel
    res = SendEmailUsingOutlook("name@domain.ru", "Текст письма 2", "Тема письма 2", attach$)
    If res Then Debug.Print "Письмо 2 отправлено успешно" Else Debug.Print "Ошибка отправки"


    'отправляем письмо с несколькими вложениями
    Dim coll As New Collection    ' заносим в коллекцию список прикрепляемых файлов
    coll.Add "C:Documents and SettingsAdminРабочий столTyres.jpg"
    coll.Add "C:Documents and SettingsAdminРабочий столcalc.xls"
    coll.Add ThisWorkbook.FullName    ' прикрепляем текущий файл Excel

    res = SendEmailUsingOutlook("name@domain.ru", "Текст письма 3", "Тема письма 3", coll)
    If res Then Debug.Print "Письмо 3 отправлено успешно" Else Debug.Print "Ошибка отправки"
End Sub
Макрос использует функцию SendEmailUsingOutlook, которая:
- принимает в качестве параметров адрес получателя письма, тему и текст письма, список вложений
- запускает Outlook, формирует письмо, и отправляет его
- возвращает TRUE, если отправка прошла успешно, или FALSE, если с отправкой почты вызникли проблемы
Код функции SendEmailUsingOutlook:
Function SendEmailUsingOutlook(ByVal Email$, ByVal MailText$, Optional ByVal Subject$ = "", _
                               Optional ByVal AttachFilename As Variant) As Boolean
    ' функция производит отправку письма с заданной темой и текстом на адрес Email
    ' с почтового ящика, настроенного в Outlook для отправки писем "по-умолчанию"
    ' Если задан параметр AttachFilename, к отправляемому письму прикрепляется файл (файлы)

    On Error Resume Next: Err.Clear
    Dim OA As Object: Set OA = CreateObject("Outlook.Application")
    If OA Is Nothing Then MsgBox "Не удалось запустить OUTLOOK для отправки почты", vbCritical: Exit Function

    With OA.CreateItem(0)   'создаем новое сообщение
        .To = Email$: .Subject = Subject$: .Body = MailText$
        If VarType(AttachFilename) = vbString Then .Attachments.Add AttachFilename
        If VarType(AttachFilename) = vbObject Then    ' AttachFilename as Collection
            For Each file In AttachFilename: .Attachments.Add file: Next
        End If
        For i = 1 To 100000: DoEvents: Next    ' без паузы не отправляются письма без вложений
        Err.Clear: .Send
        SendEmailUsingOutlook = Err = 0
    End With
    Set OutApp = Nothing
End Function
Пример макроса, с получением параметров письма из ячеек листа Excel:
Sub Отправить_Письмо_из_Outlook()
    ' адрес получателя - в ячейке A1, текст письма - в ячейке A2
    res = SendEmailUsingOutlook(Cells(1, 1), Range("a2"), "Тема письма 1")
    If res Then Debug.Print "Письмо 1 отправлено успешно" Else Debug.Print "Ошибка отправки"
End Sub
- 176076 просмотров
Не получается применить макрос? Не удаётся изменить код под свои нужды?
Оформите заказ у нас на сайте, не забыв прикрепить примеры файлов, и описать, что и как должно работать.
Отправка книги или листа по электронной почте
Если вам часто приходится рассылать определенные книги или листы по электронной почте, то вы должны были заметить, что процедуру эту быстрой не назовешь. Если делать ее «классически», то надо:
- открыть почтовую программу (например Outlook)
- создать новое сообщение
- вбить туда адрес, тему и текст
- прикрепить к сообщению файл (не забыть!)
- нажать кнопку Отправить
На самом деле почту можно легко отправлять прямо из Excel кучей разных способов. Поехали…
Способ 1. Встроенная отправка
Если у вас еще старый добрый Excel 2003, то все просто. Открываете нужную книгу/лист и выбираете в меню Файл — Отправить — Сообщение (File — Send To — Mail Recipient). Откроется окошко, в котором можно выбрать один из двух вариантов отправки:

В первом случае текущая книга будет добавлена в сообщение как вложение, во втором — содержимое текущего листа попадет прямо в текст сообщения как текстовая таблица (без формул).
Кроме этого в меню Файл — Отправить (File — Send To) есть еще несколько более экзотических вариантов отправки:

- Сообщение (для ознакомления) (Mail Recipient for Review) — отправляется вся книга целиком и при этом для нее включается отслеживание изменений, т.е. начинает явно фиксироваться — кто, когда и в каких ячейках какие изменения производил. Отобразить внесенные изменения потом можно в меню Сервис — Исправления — Выделить исправления (Tools — Track changes — Highlight changes) или на вкладке Рецензирование — Исправления (Reveiw — Track Changes) Выглядеть это будет примерно так:

Цветные рамочки помечают изменения, внесенные в документ (для каждого пользователя — свой цвет). При наведении мыши всплывает похожее на примечание окошко с подробным описанием кто, что и когда изменил в этой ячейке. Весьма удобно для рецензирования документов, когда, например, вы правите отчет своих подчиненных или шеф правит ваш.
- По маршруту (Routing Recipient) — сообщение, куда будет вложена ваша книга, отправится по цепочке получателей, каждый из которых автоматически будет пересылать его дальше, как эстафетную палочку. При желании можно задать, чтобы в конце цепочки сообщение вернулось к вам обратно. Можно включить режим отслеживания изменений, чтобы видеть правки, внесенный каждым человеком в цепочке.

В новых Excel 2007/2010 ситуация немного другая. В этих версиях для отправки книги по почте нужно выбрать кнопку Офис (Office Button) или вкладку Файл (File) и команду Отправить (Send). Далее, пользователю предлагается набор вариантов отправки:

Обратите внимание на то, что в новых версиях исчезла возможность отправки отдельного листа книги, вставленного в тело письма — как это было в Excel 2003 и старше. Осталась только возможность отправить весь файл целиком. Зато появилась полезная возможность отправлять в известном формате PDF и менее известном XPS (аналог PDF, но не требует Acrobat Reader для чтения — открывается прямо в Internet Explorer). Команду отправки книги для ознакомления можно вытащить как дополнительную кнопку на панель быстрого доступа через Файл — Параметры — Панель быстрого доступа — Все команды — Отправить на проверку (File — Options — Quick Access Toolbar — All Comands — Send for Review).
Способ 2. Простые макросы для отправки
Отправка макросом гораздо проще. Открываем редактор Visual Basic через меню Сервис — Макрос — Редактор Visual Basic (Tools — Macro — Visual Basic Editor), вставляем новый модуль в меню Insert — Module и копируем туда текст этих двух макросов:
Sub SendWorkbook()
    ActiveWorkbook.SendMail Recipients:="vasya@pupkin.com", Subject:="Лови файлик"
End Sub

Sub SendSheet()
    ThisWorkbook.Sheets("Лист1").Copy
    With ActiveWorkbook
        .SendMail Recipients:="vasya@pupkin.com", Subject:="Лови файлик"
        .Close SaveChanges:=False
    End With
End Sub
После этого скопированные макросы можно запустить в меню Сервис — Макрос — Макросы (Tools — Macro — Macros). SendWorkbook отправляет на заданный адрес всю текущую книгу, а SendSheet — Лист1 как вложение.
При запуске макроса Excel будет обращаться к Outlook, что вызовет появление вот такого сообщения безопасности на экране:

Дождитесь, пока кнопка Разрешить станет активной и нажмите ее, чтобы подтвердить свою отправку. После этого созданные автоматически сообщения будут помещены в папку Исходящие и отправятся получателям при первом запуске Outlook или, если он у вас запущен, непосредственно сразу же.
Способ 3. Универсальный макрос
А если хочется отправлять не текущую книгу, а любой другой файл? И текст сообщения тоже неплохо было бы задать! Предыдущие макросы здесь не помогут, поскольку ограничены возможностями самого Excel, но можно создать макрос, который будет из Excel’я управлять Outlook’ом — создавать и заполнять окно нового сообщения и отправлять его. Макрос выглядит так:
Sub SendMail()
    Dim OutApp As Object
    Dim OutMail As Object
    Dim cell As Range

    Application.ScreenUpdating = False
    Set OutApp = CreateObject("Outlook.Application")   'запускаем Outlook в скрытом режиме
    OutApp.Session.Logon
    On Error GoTo cleanup  'если не запустился - выходим
    Set OutMail = OutApp.CreateItem(0)   'создаем новое сообщение
    On Error Resume Next
    'заполняем поля сообщения
    With OutMail
        .To = Range("A1").Value
        .Subject = Range("A2").Value
        .Body = Range("A3").Value
        .Attachments.Add Range("A4").Value
        'команду Send можно заменить на Display, чтобы посмотреть сообщение перед отправкой
        .Send
    End With

    On Error GoTo 0
    Set OutMail = Nothing

cleanup:
    Set OutApp = Nothing
    Application.ScreenUpdating = True
End Sub
Адрес, тема, текст сообщения и путь к вложенному файлу должны быть в ячейках A1:A4 текущего листа.
Ссылки по теме
- Групповая рассылка почтовых сообщений из Excel с помощью надстройки PLEX
- Макросы для отправки почты из Excel через Lotus Notes от Dennis Wallentin
- Что такое макросы, куда вставлять код макроса на Visual Basic
- Создание писем с помощью функции ГИПЕРССЫЛКА
- Информация о материале
- Категория: Макросы Outlook
-
Опубликовано: 01 июня 2013
Если в макросе, написанном для Microsoft Outlook, требуется обратиться к данным, хранящимся в файле какого-либо другого приложения, например Excel, или наоборот, передать данные из Outlook в такой файл, то возникнет необходимость запуска того приложения, в формате которого сохранен файл. Ниже приведены программные коды макросов VBA для Microsoft Outlook, запускающие приложение Excel.
Если для передачи данных из Outlook в Excel нужна новая рабочая книга, можно воспользоваться примером кода, приведенного ниже.
Sub Zapusk_Excel_iz_Outlook1()
Dim objXls As Object
    Set objXls = CreateObject("Excel.Application")
    objXls.Workbooks.Add
    objXls.Application.Visible = True
    Set objXls = Nothing
End Sub
Для того, чтобы перенести этот программный код на свой компьютер, наведите курсор мыши на поле с программным кодом, нажмите на одну из двух кнопкок ![]() в правом верхнем углу этого поля, скопируйте программный код и вставьте его в модуль проекта на своем компьютере (подробнее о том, как сохранить программный код макроса).
в правом верхнем углу этого поля, скопируйте программный код и вставьте его в модуль проекта на своем компьютере (подробнее о том, как сохранить программный код макроса).
Макрос, запускающий Excel и открывающий заданный файл
Если же для передачи данных из Outlook в Excel, или наоборот, требуется открытие какого-либо определенного файла, то можно использовать следующий код:
Sub Zapusk_Excel_iz_Outlook2()
    Dim objXls As Object
    Set objXls = CreateObject("Excel.Application")
    objXls.Workbooks.Open "C:Test.xlsx" 'укажите путь и имя существующего файла
    objXls.Application.Visible = True
    Set objXls = Nothing
End Sub
При копировании этого кода на свой компьютер, не забудьте изменить путь к файлу. Запуск приложения можно сделать и невидимым, если в коде изменить True на False.
Другие материалы по теме:
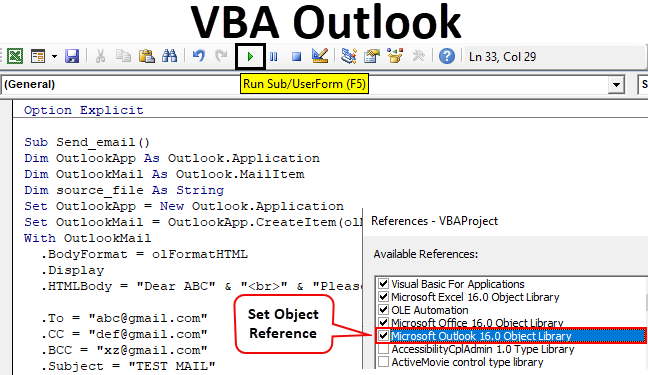
Excel VBA Outlook Function
We work on lots & lots of Excel files on a daily basis and we send to many users on a daily basis. We write the same Message in the email daily and send that excel file. This gives us the scope of the automation of this task. You heard it right. This task of writing an email and sending the file can be automated with the help of VBA. The reason is that VBA can use a reference with different Microsoft Objects like outlook, word, PowerPoint, paint, etc.
So we can send the email with the help of VBA. Now I am sure you all will be excited to know how we can send an email with the help of VBA.
We will learn in this article on how to use the Outlook as Microsoft object from excel using VBA coding and how we can send an email including an attachment with the help of VBA.
How to Use Excel VBA Outlook Function?
To use VBA Outlook function, we need to do two things.
You can download this VBA Outlook Excel Template here – VBA Outlook Excel Template
- Reference Microsoft Outlook Object from Object Library in VBA.
- Write VBA code to send emails in the VBA module.
#1 – Reference of Outlook from Excel
As you know Outlook is an object and we need to provide a reference to Outlook object. So there is an Object reference library in VBA which we need to use for reference.
Follow the below steps to use the Object Reference Library.
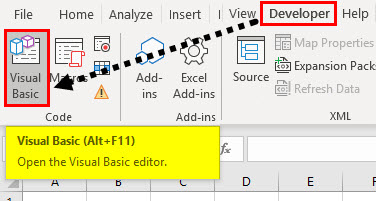
Step 1: In the Developer Tab click on Visual Basic to open the VB Editor.
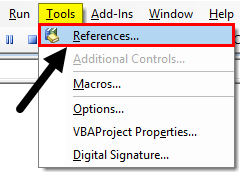
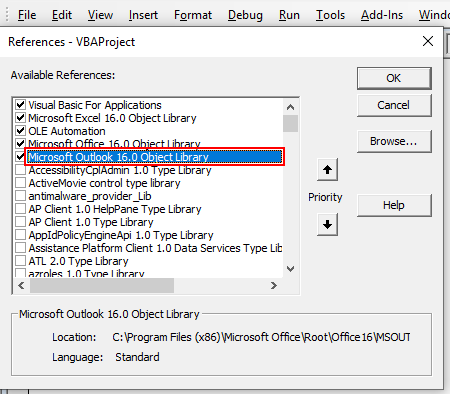
Step 2: Go to Tools and then select References as shown in the below screenshot.
Step 3: Scroll down in the Reference Object library and select “Microsoft Outlook 16.0 Object Library” to make it available for Excel VBA.
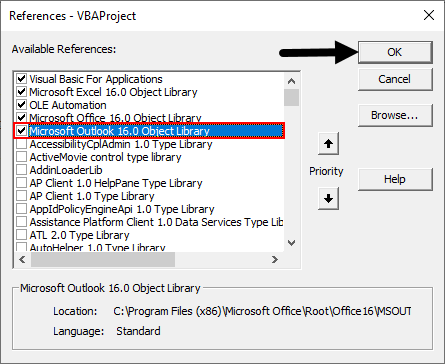
Depending on the Microsoft office, the Outlook version may be different. In our case, it is 16.0. You can use “Microsoft Outlook 14.0 Object Library” if that is the version shown in your computer.
Check the box of Microsoft Outlook as shown in the above screenshot. Now we can use the Microsoft Outlook object in Excel VBA.
This process of setting the reference to “MICROSOFT OUTLOOK 16.0 OBJECT LIBRARY” is known as Early Binding. Without setting the object library as “MICROSOFT OUTLOOK 16.0 OBJECT LIBRARY” we cannot use the IntelliSense properties and methods of VBA which makes writing the code difficult.
#2 – Write a Code to Send Emails from VBA Outlook from Excel
Follow the below steps to write the VBA code to send email from outlook from Excel.
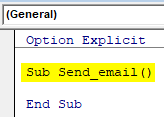
Step 1: Create a Sub Procedure by naming the macro. We will name macro as “send_email” as shown in the below screenshot.
Code:
Option Explicit

Sub Send_email()

End Sub
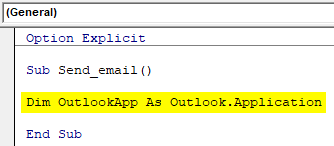
Step 2: Define the variable as Outlook. Application as shown in the below screenshot. This is the reference to the VBA Outlook Application.
Code:
Option Explicit

Sub Send_email()

Dim OutlookApp As Outlook.Application

End Sub
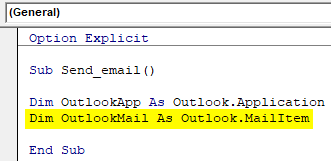
Step 3: We need to send an email in Outlook so define another variable as “Outlook.Mailitem” as shown in the below screenshot.
Code:
Option Explicit

Sub Send_email()

Dim OutlookApp As Outlook.Application
Dim OutlookMail As Outlook.MailItem

End Sub
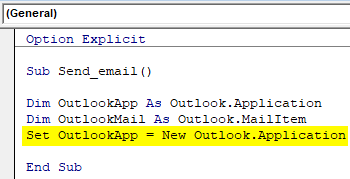
Step 4: In the previous steps we have defined the variable now we need to set them.
Now set the first variable “Outlook Application” as “New Outlook.Application” as shown in the below screenshot.
Code:
Option Explicit

Sub Send_email()

Dim OutlookApp As Outlook.Application
Dim OutlookMail As Outlook.MailItem
Set OutlookApp = New Outlook.Application

End Sub
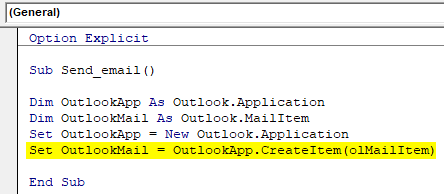
Step 5: Now set the Second Variable “Outlook Mail” with the below code.
Code:
Option Explicit

Sub Send_email()

Dim OutlookApp As Outlook.Application
Dim OutlookMail As Outlook.MailItem
Set OutlookApp = New Outlook.Application
Set OutlookMail = OutlookApp.CreateItem(olMailItem)

End Sub
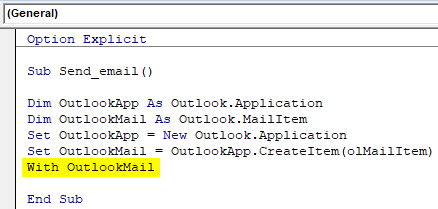
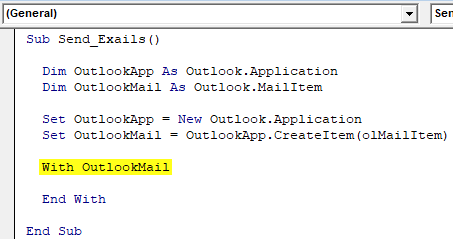
Step 6: We can now use the VBA Outlook using the “With” statement as shown in the below screenshot.
Code:
Option Explicit

Sub Send_email()

Dim OutlookApp As Outlook.Application
Dim OutlookMail As Outlook.MailItem
Set OutlookApp = New Outlook.Application
Set OutlookMail = OutlookApp.CreateItem(olMailItem)
With OutlookMail

End Sub
We now have all the access to Email items like “To”, “CC”, “BCC”, “subject”, ” Body of the email” and Many more items.
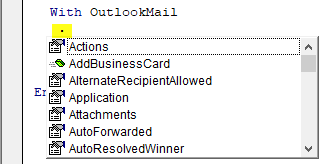
Step 7: Inside the “With” statement, we can see a list by putting a dot which is known as “Intellisense List”.
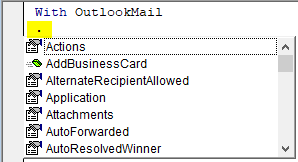
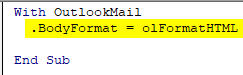
Step 8: First select the body format as olFormatHtml as shown in the below screenshot.
Code:
With OutlookMail
  .BodyFormat = olFormatHTML

End Sub
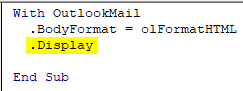
Step 9: Select “.Display” to display the mail as shown in the below screenshot.
Code:
With OutlookMail
  .BodyFormat = olFormatHTML
  .Display

End Sub
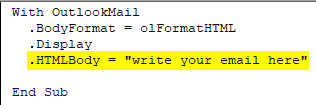
Step 10: Select “.HTMLbody” to write the email as shown in the below screenshot.
Code:
With OutlookMail
  .BodyFormat = olFormatHTML
  .Display
  .HTMLBody = "write your email here"

End Sub
We need to remember a few things while writing the email in VBA code.
“<br>” is used to include line breakup between two lines. To add signature in the email, you need to enter “& .HTMLbody”
See below example on how to write the mail in VBA.
Code:
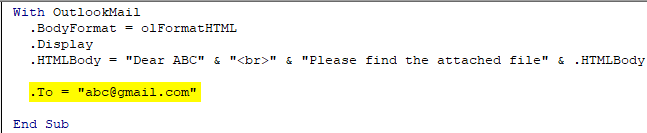
With OutlookMail
  .BodyFormat = olFormatHTML
  .Display
  .HTMLBody = "Dear ABC" & "<br>" & "Please find the attached file" & .HTMLBody

End Sub

Step 11: Now we need to add the receiver of the email. For this, you need to use “.To”.
Code:
.To = "[email protected].com"
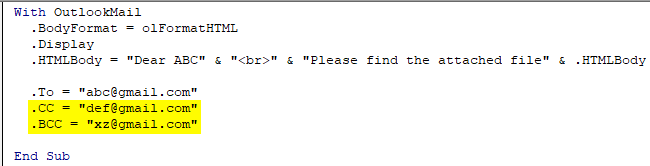
Step 12: If you want to add someone in “CC” & “BCC”, you can use “.CC” and “.BCC” as shown in the below screenshot.
Code:
.CC = "[email protected]"
.BCC = "[email protected]"
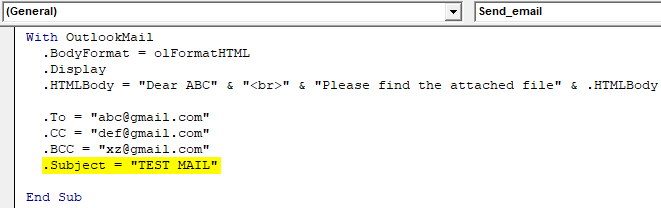
Step 13: To add a subject for the email that we are sending, we can use “.Subject” as shown in the below screenshot.
Code:
.Subject = "TEST MAIL"
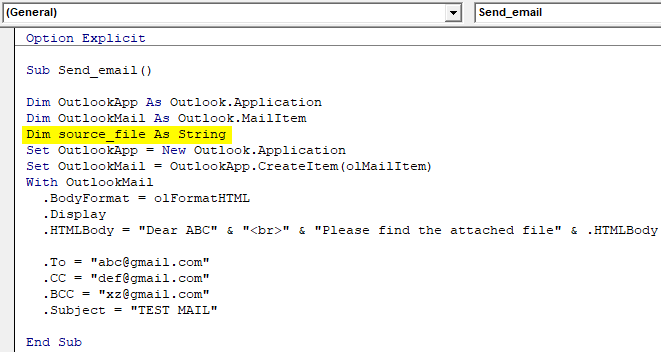
Step 14: We can add our current workbook as an attachment in the email with the help of “.Attachment” Property. To do that first declare a variable Source as a string.
Code:
Dim source_file As String
Then use the following code to attach the file in the email.
Code:
source_file = ThisWorkbook.FullName
.Attachments.Add source_file
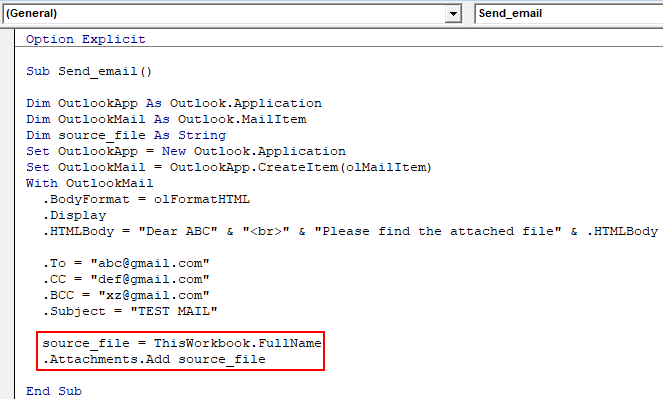
Here ThisWorkbook is used for the current workbook and .FullName is used to get the full name of the worksheet.
Step 15: Now the last code is to finally send the email for which we can use “.send”. But make sure to close the With and Sub procedure by “End with” and “End Sub” as shown in the below screenshot.
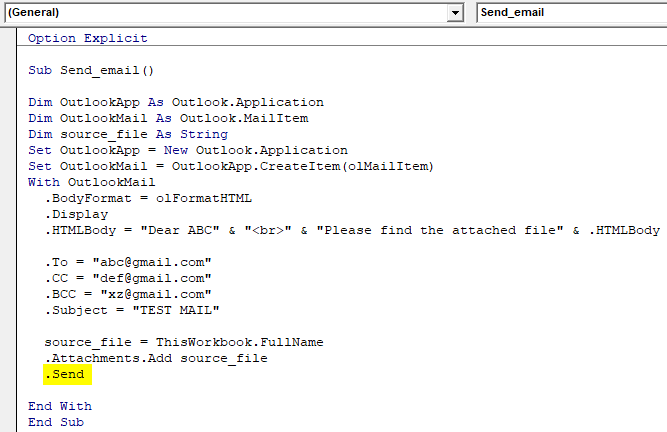
So the code is finally ready to send an email. We need to just run the macro now.
Step 16: Run the code by hitting F5 or Run button and see the output.
Final Full code
So below is the final code on how to send an email with the help of VBA Outlook.
Code:
Option Explicit

Sub Send_email()

Dim OutlookApp As Outlook.Application
Dim OutlookMail As Outlook.MailItem
Dim source_file As String
Set OutlookApp = New Outlook.Application
Set OutlookMail = OutlookApp.CreateItem(olMailItem)
With OutlookMail
  .BodyFormat = olFormatHTML
  .Display
  .HTMLBody = "Dear ABC" & "<br>" & "Please find the attached file" & .HTMLBody

  .To = "[email protected]"
  .CC = "[email protected]"
  .BCC = "[email protected]"
  .Subject = "TEST MAIL"

  source_file = ThisWorkbook.FullName
  .Attachments.Add source_file
  .Send

End With
End Sub
Example of VBA Outlook Function
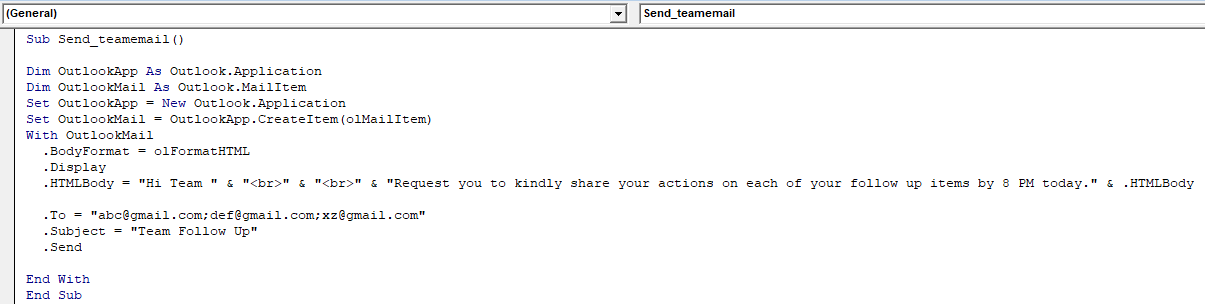
Suppose there is a Team Leader and he wants to send a daily email for follow up of each member’s activity. The email will be like this.
“Hi Team,
Request you to kindly share your actions on each of your follow up items by 11 AM today.
Thanks & Regards,
Unknown
“
Follow the steps mentioned above for referencing the Microsoft Object and writing the VBA coding or you can just modify the code accordingly.
So with all the code remaining same, we need to change few things in the code be like Email ID of the receiver, Subject, Body of the email and there will be no attachment in the email.
Below is the modified code we are using to write this email.
Code:
Sub Send_teamemail()

Dim OutlookApp As Outlook.Application
Dim OutlookMail As Outlook.MailItem
Set OutlookApp = New Outlook.Application
Set OutlookMail = OutlookApp.CreateItem(olMailItem)
With OutlookMail
.BodyFormat = olFormatHTML
.Display
.HTMLBody = "Hi Team " & "<br>" & "<br>" & "Request you to kindly share
your actions on each of your follow up items by 8 PM today." & .HTMLBody

.To = "[email protected];[email protected];[email protected]"
.Subject = "Team Follow Up"
.Send

End With
End Sub
After running the macro, you will see the mail has been sent automatically from your outlook.
Things to Remember
- First, make sure you have installed Microsoft Outlook in your computer and you have login into your account.
- Make sure that the box for Microsoft Outlook in Object Library reference is always checked. The code will not run and throw an error if it is not checked.
- Defining variables and setting variables in very important in VBA coding. Without Variables, a code will not work.
- Make sure that if you want to add signature in the mail, first you should have at least one signature already created in outlook.
- Always use “<br>” to enter line gaps in the mail.
Recommended Articles
This is a guide to VBA Outlook. Here we discuss how to send emails from Outlook using VBA codes in excel along with an example and downloadable excel template. Below are some useful excel articles related to VBA –
- VBA OverFlow Error
- VBA Named Range
- VBA CLng
- VBA Option Explicit
We have seen VBA in Excel and how we automate our tasks in Excel by creating macros. In Microsoft Outlook, we also have a reference for VBA and can control Outlook using VBA. It makes our repeated tasks in Outlook easier to automate. Like Excel, we need to enable the Developer feature to use VBA in Outlook.
The beauty of VBA is we can reference other Microsoft objects like PowerPoint, Word, and Outlook. We can create beautiful presentations. We can work with Microsoft word documents. Finally, we can send the emails as well. Yes, you heard it right. We can send emails from Excel. It sounds awkward but, at the same time, puts a smile on our faces as well. This article will show you how to work with Microsoft Outlook objects from excel using VBA codingVBA code refers to a set of instructions written by the user in the Visual Basic Applications programming language on a Visual Basic Editor (VBE) to perform a specific task.read more. Read on.
Table of contents
- VBA Outlook
- How do we Reference Outlook from Excel?
- Write a Code to Send Emails from VBA Outlook from Excel
- Recommended Articles
How do we Reference Outlook from Excel?
Remember, Outlook is an object. Therefore, we need to set the reference to this in the object reference library. To set the Outlook object to reference, follow the below steps.
Step 1: Go to Visual Basic Editor.
Step 2: Go to Tools > Reference.

Step 3: In the below references, object library, scroll down, and select “MICROSOFT OUTLOOK 14.0 OBJECT LIBRARY.”
Check the “MICROSOFT OUTLOOK 14.0 OBJECT LIBRARY” box to make it available for Excel VBA.
Now, we can access the VBA Outlook object from Excel.
Write a Code to Send Emails from VBA Outlook from Excel
We can send the emails from excel through the outlook app. For this, we need to write VBA codes. Then, follow the below steps to send the emails from Outlook.
You can download this VBA Outlook to Excel Template here – VBA Outlook to Excel Template
Step 1: Create a sub procedure.
Code:
Option ExplicitVBA option explicitly makes a user mandatory to declare all the variables before using them; any undefined variable will throw an error while coding execution. We can enable it for all codes from options to require variable declaration.read more

Sub Send_Exails()

End Sub

Step 2: Define the variable as VBA Outlook.Application.
Code:
Option Explicit

Sub Send_Exails()

  Dim OutlookApp As Outlook.Application

End Sub

Step 3: The above variable reference the VBA Outlook application. In Outlook, we need to send emails, so define another variable as Outlook.MailItem.
Code:
Option Explicit

Sub Send_Exails()

  Dim OutlookApp As Outlook.Application
  Dim OutlookMail As Outlook.MailItem

End Sub

Step 4: Now, both variables are object variables. We need to set them. First, set the variable “OutlookApp” as New Outlook.Application.
Code:
Sub Send_Exails()

  Dim OutlookApp As Outlook.Application
  Dim OutlookMail As Outlook.MailItem

  Set OutlookApp = New Outlook.Application

End Sub

Step 5: Now, set the second variable, “OutlookMail,” as below.
Set OutlookMail=OutlookApp.CreateItem(olMailItem)
Code:
Sub Send_Exails()

  Dim OutlookApp As Outlook.Application
  Dim OutlookMail As Outlook.MailItem

  Set OutlookApp = New Outlook.Application
  Set OutlookMail = OutlookApp.CreateItem(olMailItem)

End Sub

Step 6: Now, using With statement access VBA Outlook Mail.
Code:
Sub Send_Exails()

  Dim OutlookApp As Outlook.Application
  Dim OutlookMail As Outlook.MailItem

  Set OutlookApp = New Outlook.Application
  Set OutlookMail = OutlookApp.CreateItem(olMailItem)

  With OutlookMail

  End With

End Sub
Now, we can access all the items available with email items like “Body of the email,” “To,” “CC,” “BCC,” “Subject,” and many more things.
Step 7: Inside the statement, we can see the IntelliSense list by putting a dot.
Step 8: First, select the body format as olFormatHtml.
Code:
With OutlookMail
    .BodyFormat = olFormatHTML

End With

Step 9: Now display the email.
Code:
With OutlookMail
  .BodyFormat = olFormatHTML
  .Display
End With

Step 10: We need to write the email in the body of the email. For this, select HtmlBody.
Code:
With OutlookMail
  .BodyFormat = olFormatHTML
  .Display
  .HTMLBody = "Write your email here"
End With

Below is the example of the body of the email writing.

Step 11: We need to mention the receiver’s email ID after writing the email. For this access, “To.“

Step 12: Next, mention for whom you want to CC the email.

Step 13: Now, mention the BCC email ids,

Step 14: Next, we need to mention the subject of the email we are sending.

Step 15: Now, add attachments. If you want to send the current workbook as an attachment, then use the attachment as This workbook.

Step 16: Finally, send the email by using the Send method.

Now, this code will send the email from your VBA outlook mail. Use the below VBA code to send emailsWe can use VBA to automate our mailing feature in Excel to send emails to multiple users at once. To use Outlook features, we must first enable outlook scripting in VBA, and then use the application method.read more from your outlook.
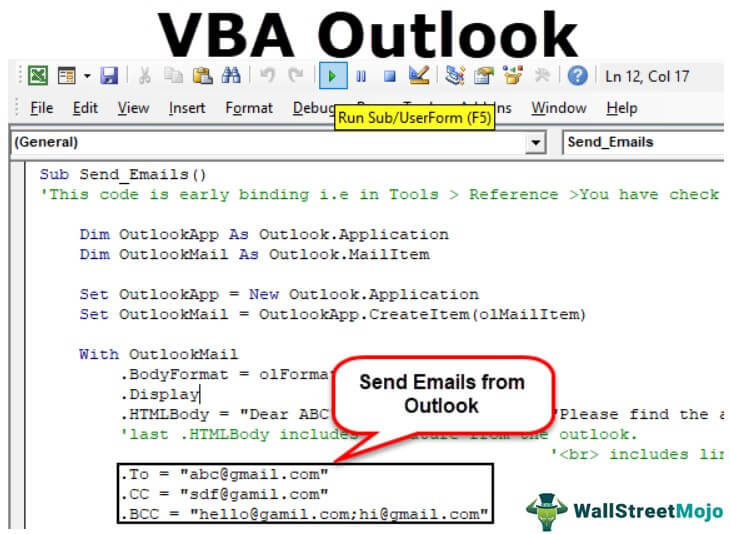
To use the below code, you must set the object reference to “MICROSOFT OUTLOOK 14.0 OBJECT LIBRARY” under the object library of Excel VBA.
The library is called early binding by setting the reference to the object. We need to set the reference to the object library because without setting the object library as “MICROSOFT OUTLOOK 14.0 OBJECT LIBRARY.“ We cannot access the IntelliSense list of VBA properties and methods. It makes writing code difficult because you need to be sure of what you are writing in terms of technique and spelling.
Sub Send_Emails()
'This code is early binding i.e in Tools >
Reference >You have check "MICROSOFT OUTLOOK 14.0 OBJECT LIBRARY"

  Dim OutlookApp As Outlook.Application
  Dim OutlookMail As Outlook.MailItem

  Set OutlookApp = New Outlook.Application
  Set OutlookMail = OutlookApp.CreateItem(olMailItem)

  With OutlookMail
    .BodyFormat = olFormatHTML
    .Display
    .HTMLBody = "Dear ABC" & "<br>" & "<br>" & "Please find the attached file" &
    .HTMLBody
    'last .HTMLBody includes signature from the outlook.
''<br> includes line breaksLine break in excel means inserting a new line in any cell value. To insert a line break, press ALT + Enter. As we insert a line break, the cell's height also increases as it represents the data.read more b/w two lines
    .To = "[email protected]"
    .CC = "[email protected]"
    .BCC = "[email protected];[email protected]"
    .Subject = "Test mail"
    .Attachments = ThisWorkbook
    .Send
  End With

End Sub
Recommended Articles
This article has been a guide to VBA Outlook. Here, we learn how to send emails from Outlook using VBA codes, examples, and a downloadable template. Below are some useful Excel articles related to VBA: –
- Excel VBA ThisWorkbook
- VBA ArrayList
- VBA For Next Loop
- List of String Functions in VBA
- VBA Write Text File
![]() Данный материал является переводом оригинальной статьи «EasyTweaks : How to write useful macros in Outlook 2016 and 2019 messages».
Данный материал является переводом оригинальной статьи «EasyTweaks : How to write useful macros in Outlook 2016 and 2019 messages».
В Microsoft Office мы используем возможности Visual Basic for Application (VBA) для создания пользовательских программ, которые расширяют базовую функциональность Office и помогают экономить время за счет автоматизации повторяющихся задач. Мы называем эти небольшие программы VBA-макросами.
В этом руководстве мы хотели бы представить примеры разработки макросов для Outlook. Мы сосредоточимся на изучении основ Outlook VBA для начинающих, научимся создавать простые макросы и рассмотрим некоторые полезные идеи использования макросов. После изучения этого руководства вы сможете разрабатывать и запускать простые макросы VBA для Outlook.
- Сначала основы: мы узнаем, как вставить и сохранить простой настраиваемый макрос VBA в активный сеанс Outlook.
- Затем мы настроим среду разработки макросов.
- Мы рассмотрим самые простые примеры Outlook VBA. Это поможет вам понять основы разработки макросов и позволит писать простые макросы.
- Затем мы определим ярлык для нашего макроса на панели быстрого доступа. Это позволит нам легко запускать макрос.
- И закончим, включив макросы Outlook и обработав их настройки безопасности, чтобы гарантировать, что код действительно будет запускаться при появлении запроса на наших компьютерах.
Можно ли записать макрос в Outlook?
В отличие от других приложений Office, Outlook не предлагает простого Macro recorder для захвата действий пользователя и автогенерации создаваемого кода VBA в фоне. Поэтому, если мы хотим добавить в Outlook свои собственные функции, нам нужно научиться писать простые программы VBA и включать их в сеанс Outlook.
Если вам интересно узнать, как на самом деле работает средство записи макросов Office, рекомендуем изучить MS Word Macros и Excel VBA Macro tutorials.
Написание макроса VBA в Outlook
- Прежде всего откройте Microsoft Outlook.
- Теперь нажмите Alt + F11.
- Откроется интегрированная среда разработки (IDE) разработчика VBA.
- Разверните дерево проекта до узла ThisOutlookSession.
- Щелкните правой кнопкой мыши ThisOutlookSession и нажмите «Вставить».
- Теперь вы вставите модуль Visual Basic. Для этого выберите Module.
- Вставьте свой код VBA в окно модуля.
- Нажмите «File«, затем выберите «Save«.
- Далее, закройте среду разработчика. Это вернет вас в пользовательский интерфейс Outlook.

Прочтите несколько простых примеров кода, которые помогут вам начать работу с VBA. Никогда неосознанно не копируйте код VBA из неизвестных ресурсов!
Как настроить вкладку разработчика в Outlook?
Если вы часто разрабатываете макросы Outlook, вы можете настроить среду разработки Office. Звучит фантастически, не правда ли? На самом деле это довольно простая процедура. Читайте подробности:
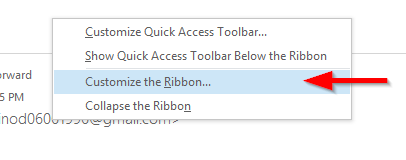
Откройте Outlook, правой кнопкой мыши щелкните на верхней части Ленты (Ribbon) и выберите Customize the Ribbon.
Отметьте пункт Developer и нажмите OK.
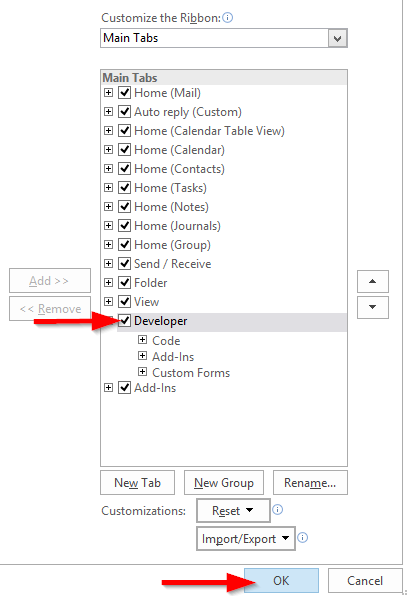
Теперь вы найдете меню Developer на Ленте.
Полезные примеры Outlook VBA
Создание электронного сообщения
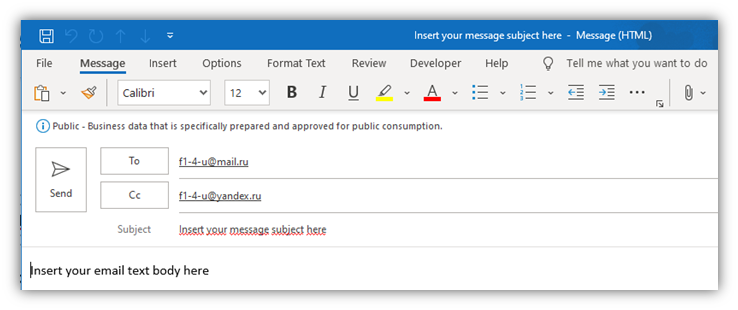
Этот простой фрагмент кода программно создает новый элемент сообщения электронной почты..
Сценарий начинается с создания почтового элемента Outlook, затем он устанавливает поля «Кому» (To), «Тема» (Subject), «Основной текст» (Body) и «Копия» (CC). Наконец, он отображает сообщение в Outlook, чтобы вы могли просмотреть и отправить его вручную.
Public Sub CreateMail()
Dim MyEmail As MailItem
' Create a new Outlook message item programatically
Set MyEmail = Application.CreateItem(olMailItem)
'Set your new message to, subject, body text and cc fields.
With MyEmail
'Кому
.To = "f1-4-u@mail.ru"
'Тема
.Subject = "Insert your message subject here"
'Текст
.Body = "Insert your email text body here"
'Копия
.CC = "f1-4-u@yandex.ru"
End With
MyEmail.Display
End Sub
Вы можете использовать предопределенные шаблоны Outlook при определении новых писем с помощью VBA. Для этого вам нужно использовать метод CreateItemFromTemplate и указать расположение файла шаблона Outlook (*.oft).
Отправка электронного письма программно
Если вы хотите, чтобы Outlook отправлял только что созданное электронное письмо автоматически, вы можете добавить следующую строку в код, опубликованный выше. Вставьте следующую строку прямо перед оператором End Sub предыдущего фрагмента:
MyEmail.Send
Прикрепление файла к электронному письму
Во многих случаях вы хотели бы автоматизировать отправку электронного письма с прикрепленным к нему файлом. Это может быть документ Word, электронная таблица Excel, презентация PowerPoint, документы PDF и т.д.
Если вы хотите программно отправить электронное письмо с вложениями, используйте такой код:
Public Sub CreateMailWAttach()
' VBA Code
Dim MyEmail As MailItem
' Create a new Outlook message item programatically
Set MyEmail = Application.CreateItem(olMailItem)   'Define your attachment folder path and file name - modify this part as needed
Dim AttachFolder, AttachFile As String
AttachFolder = "C:temp"
AttachFile = "Dummy.zip"   'Set your new message to, subject, body text and cc fields.
With MyEmail   .To = "f1-4-u@mail.ru; f1-4-u@yandex.ru"
.Subject = "This is your message subject"
.Body = "Insert your email text body here"
.CC = "cc@my_server.com"
.Attachments.Add AttachFolder & AttachFile   End With   MyEmail.Display
' MyEmail.Send
End Sub
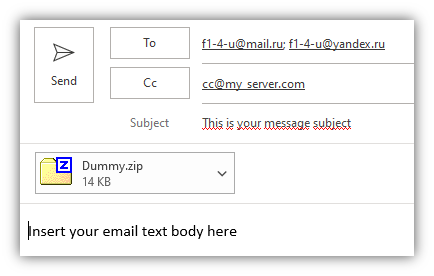
Убедитесь, что вы указали правильный путь и имя файла вложения во фрагменте.
В этом примере установлены несколько получателей для электронного письма, при необходимости измените настройки.
Создание задачи через VBA
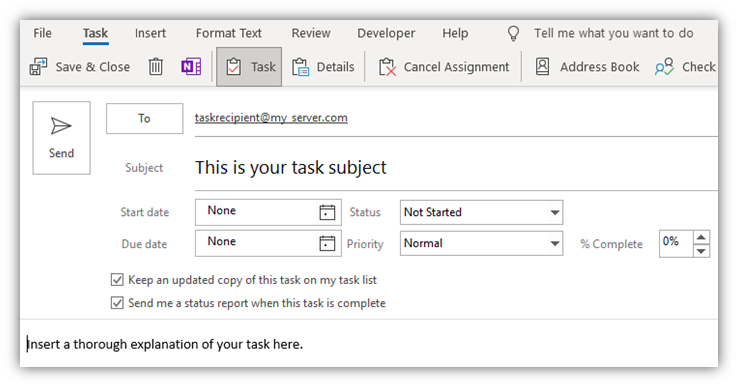
Следующий фрагмент кода создает задачу Outlook, назначает ее другому лицу и устанавливает тему задачи и основной текст.
Public Sub CreateTask()   Dim MyTask As TaskItem
' Create a new Outlook task
Set MyTask = Application.CreateItem(olTaskItem)   'Set your new task recipients and information fields
With MyTask
.Assign
.Recipients.Add "taskrecipient@my_server.com"
.Subject = "This is your task subject"
.Body = "Insert a thorough explanation of your task here."   End With   MyTask.Display   End Sub
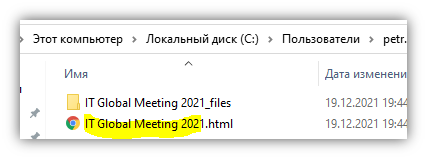
Сохранение в формате HTML
Некоторые читатели спрашивали, как автоматизировать сохранение писем в HTML. Приведенный ниже код выполняет именно это.
Public Sub SaveAsHTML()
On Error Resume Next
Dim MyWindow As Outlook.Inspector
Dim MyItem As MailItem
Dim FilePath As String
FilePath = Environ("HOMEPATH") & "Documents" & ""
Dim ItemName As String
Set MyWindow = Application.ActiveInspector
If TypeName(MyWindow) = "Nothing" Then
MsgBox ("Kindly open an email to save")
Else
Set MyItem = MyWindow.CurrentItem
ItemName = MyItem.Subject ' File name will be identical to the message subject!
With MyItem
.SaveAs FilePath & ItemName & ".html", olHTML
End With
End If
End Sub
Убедитесь, что вы запускаете этот код только в электронных письмах, открытых в Outlook (не в представлении «Входящие»/»Проводник»)!
Вопросы по макросам Outlook
Где в Outlook хранятся макросы?
Вы можете не знать, где именно хранится используемый вами макрос. В отличие от, например, Excel, который позволяет хранить макросы в файле personal.xlb или в определенных электронных таблицах, все макросы Microsoft Outlook хранятся в одном глобальном файле, который называется VBAProject.otm. Файл можно найти по адресу:
C:users<your_user_name>AppDataRoamingMicrosoftOutlook.
Кнопка быстрого доступа для макросов Outlook
Наш следующий шаг — вставить небольшую кнопку быстрого доступа, которая позволит нам легко запустить макрос. Для простоты вставим эту кнопку на панель быстрого доступа.
Откройте Microsoft Outlook, если ещё не открыли.
Щёлкните правой кнопкой мыши на Ленте Outlook и выберите пункт Customize the Quick Access Toolbar.

Примечание: Аналогичную процедуру можно использовать для размещения значка на самой ленте, а не на панели быстрого доступа.
Нажмите Choose commands from комбо-бокс и выберите Macros.
Выберите макрос, который вы создали и нажмите Add.
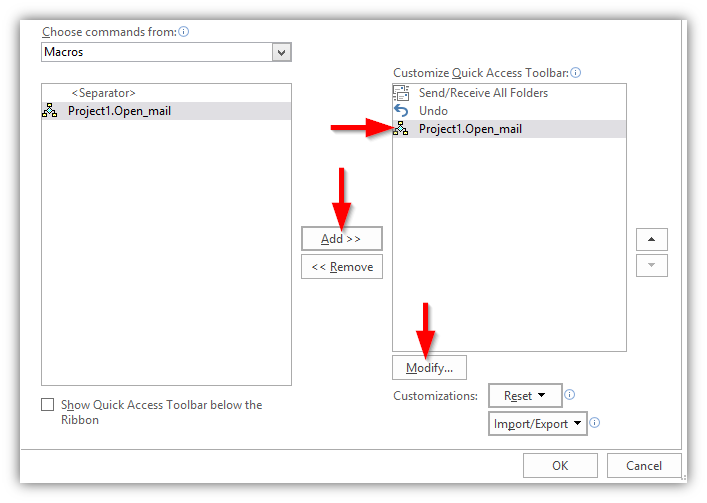
Нажмите Modify для выбора иконки для вашей кнопки Панели Быстрого Доступа.
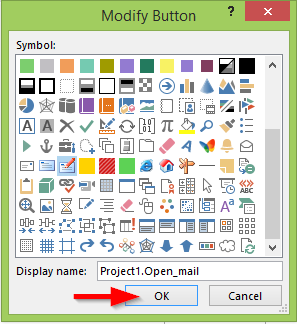
По завершении, нажмите OK.
Как разрешить выполнение макросов в Outlook?
Этот шаг не является обязательным, и его следует выполнять только в том случае, если вы получаете сообщение об ошибке при запуске вновь созданного макроса.
Сперва, нужно разрешить Outlook запускать наш макрос VBA. По умолчанию Microsoft Office отключает макросы и не разрешает их выполнение. Поэтому нам нужно будет определить надлежащую безопасность макросов, чтобы разрешить запуск вашего настраиваемого макроса Outlook.
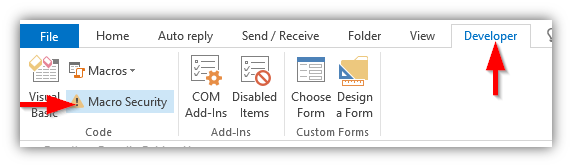
В Outlook 2016/2019, щелкните Developer на Ленте и выберите Macro security.
Выберите Настройки безопасности макросов.
- Для Outlook 2016 выберите вариант «Notifications for only digitally signed macros, all other disabled или Notifications for all macros«.
- Для Outlook 2019 выберите вариант «Disable All Macros with Notification«. Это задействует появление предупреждающего сообщения, требующего одобрения пользователя перед запуском макроса.
После настройки безопасности макросов, нажмите OK.
Ваши текущие настройки безопасности могут препятствовать запуску макросов в Outlook. Вот руководство о том, как действовать, если макросы отключены в вашем проекте Макросов Outlook.
Как использовать макрос Outlook?
И последнее, но не менее важное: теперь пора запустить только что созданный макрос.
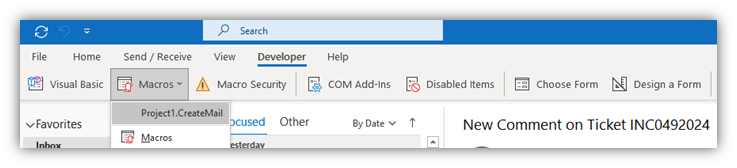
Перейдите на панель быстрого доступа (верхняя левая часть экрана — немного выше основного меню).
Нажмите значок, который вы назначили для своего макроса.
Вуаля, вы только что завершили и запустили свой (первый) макрос Outlook VBA!