
The business report itself, and its contents, needs a lot of work and organization. But what about the report’s design? It’s important to present professional content in a professional manner. If your report looks lackluster or even messy, it’s not going to make a strong impression.
Check out this list of free and premium Word report templates you can download now. We’ll also look at some tips and tracks for professional report templates and designs. The premium templates are great for design inspiration.
Best Premium Professional Report Templates on Envato Elements (With Unlimited Use)
Love the idea of working with premium, high-quality content, but you’re wary about the price tag? Well, thankfully, there are some amazing options out there for cost-conscious projects. Envato Elements is a great example: one, low price gets you access to a giant library of content.
Choose from thousands of professional report templates and download. With unlimited downloads, you don’t have to worry about the tab. Not sure which template is best for your project? Download them both!
Browse Microsoft Word Templates Now


There are no limitations and no extra fees with Envato Elements. A monthly fee gets you unlimited access to a huge library of content. This includes thousands of Microsoft Word report templates.
Top 5 Premium Word Report Templates on Envato Elements
Curious about some of the premium options out there? Check out these awesome designs. Consider downloading one today or enjoy the design inspiration.
1. Annual Business Report Template Word & Adobe InDesign


This beautifully designed business report template includes files for both Microsoft Word and Adobe InDesign. You get twenty different layouts to choose from. Mix, match, and customize them any way you like. This download also includes a help file, to help you customize the template.
2. Professional Report Templates for Microsoft Word


Here’s another collection of beautiful layouts you can use in Microsoft Word. This one also includes InDesign files, for your convenience. There are 28 custom pages to choose from, so there’s plenty of content to work with.
3. Business Microsoft Word Report Templates


Choose from 24 included pages in this awesome business report template. It includes files for Microsoft Word, as well as PDF and InDesign files too. It also uses free fonts that you can easily download and use within the template (and elsewhere!).
4. Annual Report


If you need to impress your clients, this is the perfect template for you. This template features modern-looking graphics and a dark background. Showcase your business report in style with this complete business report template.
5. Annual Report


This premium business report template for is divided into two parts. The first part has a narrative and photos, and the second part has all the financial details. Detailed graphs and charts are included so you visual represent your businesses financial situation.
Here are the main features for this premium Word report template:
- A4 & US letter size
- organized layers
- CMYK 300 DPI
- easy to edit
Let’s now go over some free Word report templates that you can download today.
20 Top Free Professional Microsoft Word Business Report Templates to Download (2023)
Premium Word report templates are best. But if you can’t afford even a small fee for a professionally designed template, you may need something to hold you over until you can get a good template.
Let’s talk about report templates for Word free downloads now. Did you know you can also grab some awesome free downloads, right here at Envato?


If you’re a bargain hunter, you may want to check it out. They change up every month, so it’s worth taking a look regularly. They’re completely free too, no cost and no obligation.
- Download 12 Free Files on Envato Elements every month. All you need is to sign up for a free account to download the monthly selection of free content.
Now, let’s look at some other free Word report templates that you can download today:
1. Clean Report Template Word Free Download


This free report template Word document is a great place to start your project. It includes six pages to work with. Expand on them in any way you need.
2. Simple Free Report Template Word
If you’re looking for a simple and free starting point, check out this professional report template Word free download. It’s a good start if you’re looking for pre-laid out structure.
3. Annual Report MS Word Report Templates Free Download
This resource is not great. It offers some valuable insights to consider as you put together your report. Check it out.
4. Clean Free Word Report Templates with Photo Placeholders


Here’s a template with space for your photos, as well as your content. It also has three different variant headers that you can mix and match as you create new pages in your document.
5. Starter Business Report (Free Report Template Word)
The report template Word is a simple and basic solution. It’s got many placeholders. These include a table of contents, graphs, and more to get you started.
6. Bold Color Free Report Template Word Document
This free report template uses large, bold text. Customize the colors to suit your project or professional branding. It includes many interior pages you can mix and match too.
7. MS Word Report Templates Free Download (Annual Reports, Business Reports, and More)


This free report template word is a great choice. It also includes some instructional text to help lead you through the process. Give this one a download and start customizing it today.
8. Budget Planning Report Template Word Free Download
Is your business report’s focus on budget planning? Then this professional report template Word free download could be a great fit for you. Check out the extra guidance at this resource too.
9. Simple Free General Business Report Template
Looking for structure but not necessarily bells and whistles? This free template is simple and clean. It’s structured to help you lay out your content in a clear and organized way.
10. Free Graphic Design Business Report Template for Word


This free template has a graphic design in mind. There’s space for your logo, imagery, and much more. Check out the interiors in this free template too.
11. Annual Sales Report Template Word Free Download
This free resource comes with some bonus insights to help guide you. These insights could be really helpful if you’re a first timer to business reports.
12. Project Scope Free Business Report Template for Word
Focusing on a new project within your business? If your report is discussing plans for a future project, then this free template could be a great starting point.
13. Business Abstract Free Word Report Templates


Prefer an abstract or geometric style? Give this free report template Word document a try. The interior has some interesting design options too.
14. Free Business Report Template for Word
Looking for a simple template to get you started? This one has a cover page and a simple interior page. If you’re looking for initial structure, get started with this one.
15. Simple Business Report Plan or Proposal for Communications
Keep things simple with this basic business report template for Word. Or use it as a starting point and add even more content to make the design fuller and more detailed.
16. Proposal Collection MS Word Report Templates Free Download
Is your report proposal focused? Then check out this collection of free proposal templates. This resource also includes step-by-step questions and considerations to help you create the perfect proposal.
17. Free Photo Business Report MS Word Template


Here’s a free template that’s got a blocky aesthetic. It’s a good choice if you’re looking for a simple starting point. This template is also great if you aren’t looking for a complicated design.
18. Free Business Report MS Word Template
Choose from nine different pages in this free report template Word download. It’s got a cover with plenty of space for custom imagery, and then interior pages with a consistent header.
19. Business Proposal Free Word Report Templates Collection
This resource has fifteen different MS Word report templates, free download files, and insights. Check out this link for free downloads and some extra guidance for your project.
20. Free Business Report Outline MS Word Template


Prefer to work in an outline format? It can still have a professional look and feel, like we see in this free template. Download it today and customize it for your project’s needs.
How to Make a Great Looking Business Report Template
Now that you’ve got a premium business report template for Word, it’s time to customize it. In this next section, we’ll go over how you can customize the report to fit your business report.
For this tutorial, we’ll be using the premium template, Company Report.


Company Report consists of twenty-four pages of unique and modern designs. The template is fully editable and is print-ready. Let’s get started on the customization:
1. Delete Unwanted Pages
Before you can begin filling out the template, you need to decide what pages you’ll want to use. Not every page in the report will be used for your report.
To delete pages in MS Word, remove a section or page break.
To do this, display all page breaks by going to the hide/show button under the Home tab. Then select the section or page break you want to remove by highlighting it. Click on either Delete or Backspace.


2. Add Your Company’s Information
Most templates have multiple spots for your to add your company’s information. This can be your company’s website, logo, name, etc. In our template, every page has a placeholder to add a business website.
To edit this, double-click the text placeholder and add in your company’s web address.


3. Add in Your Content
Now it’s time to add in the report content. There are placeholders all over the template where we can add in text. Simply double-click the placeholder where you want to add text and paste in your text.


4. Add In Images
Now it’s time to add in images. Like the text, there are many image placeholders on the template pages. To add in images, choose the Insert main menu tab. Then select the Pictures > Picture from File… option. From there you can select the images you want to add.


5. Change the Color Scheme
Chances are the color scheme doesn’t fit your company’s brand. To change the color scheme, go to the Design tab. Next select the Colors drop-down menu. From there select the colors that work for your company’s color scheme.


Let’s now go over some free MS Word Business Report tips that you can use right now.
5 Quick Tips To Make Better Business Reports in Word for 2023
Not sure how to make the best report for your business? Take a look at these five quick tips and tricks. You can use theme to make a better business report for your professional ventures this year.
1. Don’t Overwhelm Your Audience
It might be tempting to share as much information as you can on the page, but it’s good to practice some restraint. Just like any presentation, we don’t want to overwhelm the audience.
This also applies from a design perspective. Be careful about putting way too much content on one page. Instead, keep some of your pages «empty», without any content at all. Consider it breathing room.


It’s also a good idea to think about each page’s objective. This can be a great way to sort through and organize your content. Keep things to the point, and if there’s too much content there, create another page. Or consider a two-page spread for continuous content that’s longer in length.
2. Stay Visually Consistent and True to Your Branding
Visual consistency is really important. It helps link your pages to one another.
You’ll want to include your brands colors on your design so it looks more cohesive. If the colors changed from page to page, things might start to look independent or even chaotic.


Uniformed elements can push this even further. Think of things like repeating footer elements. We would want to see the page numbers in the same place so you can find them easily.
3. Consistency Doesn’t Mean Repetitive or Boring
Keep in mind that consistency doesn’t mean your report should look boring. Imagine a report, for example, where every page was exactly the same, visually. It would get pretty boring, pretty quickly.
Repetition is a great way to create continuity. But variety is a great way to create interest. Find a balance between the two.
The design below, for example, is a great example of layouts that vary but still look related. Note that the color scheme remains consistent. We also see similar use of shapes, like the circles here. The font choices are also consistent, while the layouts themselves mix things up.


4. Efficiently Organize and Refine Your Content
Organization is very important, both in terms of content and design. Take some time to look at the flow of your business report. Does the progression of your content make sense? Or does the content jump in a way that feels jarring or illogical?
Refinement is often a big part of the design process (even seasoned designers have plenty of revisions in their projects!). But it’s an important part of working with content. Remember to spell and grammar check. Also, refine the way your content itself is arranged and presented.
5. Use Visuals to Reinforce Your Content and Data
Visual content can be very communicative, and you can use this to your advantage. If you’re sharing data with your audience, try representing it visually. This will make more of an impact.
For example, let’s say you’re sharing sales data, where there’s been significant growth. Saying this with text is a great idea. Showing it with imagery can really help reinforce the amount of growth.


Top 5 Design Trends for Business Reports 2023
Having a great design is a must if you want your business report to stand out. In this section, we’ll cover the top five design trends that you can implement into your reports today:
Using a single color in your theme helps give your design a more unified look. Be sure to use a color that’s in the same color as your business’s color scheme.
Adding a variety of graphs and charts helps gives your presentation a more visual appeal. Be sure to only include graphs and charts that help detail relevant information for your report.
Black and white photos are still in style. They add a bit of class to your designs and are great for adding visual interest.
Nothing is worse than a crowded design. Include space around the elements in your design for a more modern and impactful look.
When icons are used sparingly in your design, they work wonders for your business report. Many reports are stale and contain poor designs. When applicable, add icons to your report pages.
Let’s know talk about why you would want to use a premium business report template for your next report.
Why Use a Premium Business Report Template for Word?
We’re not all professional designers, and there’s nothing wrong with needing some help. That’s why a business report template Word document can be such a handy solution. Microsoft Word can be a user friendly option.


If you’re considering working with free Word report templates:
- «Free» doesn’t necessarily mean free of copyright or free for all commercial use. Note any attribution requirements or limitations when working with a free file.
- A free template will likely have limited options or design elements. Make sure you allot extra time for editing and customization, as the file will likely need it.
- It’s unlikely to find exactly what you need, so prepare to compromise and edit. Free options are limited, so you may have to work with a template that’s outside of your exact scope. This is fine. But make sure to set time aside for customizing and editing this content to meet your needs.
Free is everyone’s favorite price tag. But remember, your time is valuable too. If you’re looking for a complete solution with high-end design qualities, you may want to consider a premium template. A beautifully designed report can really make your content shine.


Discover More Top Microsoft Word Template Designs
Looking for even more professional Microsoft Word templates? Check out these collections for even more inspiration, free downloads, and other resources to help you with your next project.
Common Word Business Report Questions Answered (FAQ)
Let’s go over a few common Word Business Report questions and answers to them:
1. How Should I Structure My Business Report?
Your reports may vary from two pages to one hundred. But the structure will be similar. A business report structure should include the following:
- front information
- background of the topic
- key findings
- conclusion
- references
2. Should I Get Feedback on My Report?
Absolutely. You should try and get feedback on your report from as many people as possible. This will help you to see if there are any errors that you made.
3. Do I Need to Plan the Report Before I Write It?
This can really help. And it’s necessary to write down your goal for the report before you start. This will help you write the best report possible.
4. Do You Need a Table of Contents?
If your report is longer than three pages, then it’s best to include a table of contents at the beginning of the report.
5. Should I Include an Introduction?
Yes, you should. This section details the purpose of the report. It cues in the reader to what the rest of the report is about and shouldn’t be skipped.
Looking to learn more about Microsoft Word? Check out the next section for even more information about using business report templates in Word and other Word templates!
Learn More About Making Great Word Documents in 2023
There’s plenty to learn about Microsoft Word on Envato Tuts+. Check out these free tutorials today. Learn more about how you can make your own templates, reports, and more in Microsoft Word.
Which Microsoft Word Report Templates Work for Your Business?
What kind of professional report templates are perfect for your business? If you’re looking for high-quality downloads at a bargain price, check out Envato Elements. It’s an awesome choice for Microsoft Word report templates.
Download several with unlimited downloads. Test them out, combine them, and edit them. With unlimited downloads, you can experiment with any template.
So, why not start your business report in Microsoft Word today? Good luck with your project, and happy designing!
Editorial Note: This post has been updated with contributions from Daniel Strongin. Daniel is a freelance instructor for Envato Tuts+.
Several analysts in the industry don’t see the significance of gaining professional learning from studying continuing education in their fields. They have this perspective that they don’t need to learn how to be an analyst because they will just learn it while on the job. But, actually obtaining more knowledge and insight from training and conferences at work can be helpful. Also, it is well-recommended to develop organizational and interpersonal skills, which includes time management, establishing an information hub, and efficiently influencing other analysts. Are you a novice research or business analyst? Working on best practices will help you to identify the critical aspects and information sources which are vital for improved forecasting. In this article, we are glad to assist you in creating a clear and systematic analytical report. We will discuss the types, benefits, basic components, and steps in preparing an effective analysis report for your work, plus we have various downloadable examples of analytical report templates for you to use. Keep on reading!
18+ Sample Analytical Reports
What is an Analytical Report?
An analytical report is a significant document that has an aim of providing in-depth, systematic explanations of a particular research matter according to the original perceptions, experiences, or behaviors of different individuals or groups. As an efficient research analyst, you become aware concerning the quality and dimensions of those perceptions, experiences, or behaviors for a research project while doing some interviews, focus groups, participant observation, and/or reviewing their written documents.
Many organizations continue to find ways to improve efficiency and control costs in their businesses. Based on the U.S. Bureau of Labor Statistics, there is a projected idea that employment of management analysts will potentially grow 11% from 2019 to 2029, which appears to be much quicker compared to the average for all types of occupations. Thus, all kinds of analysts must be skilled in creating an effective analytical report for their company and organization, as well as having strategic reasoning tactics, experience getting support from others, and strong emphasis on data and research.
The Main Types of an Analytical Report
Many professionals and people working in creating tables or charts for data analysis typically select a wide array of reporting tools such as Excel, QlikView, Tableau and many others. To assist you in improving business efficiency, we will introduce and explain to you about the main types of analytical reports below:
1. General Reports
These reports appear to be most common in various business firms and organizations. Professionals and other people use general reports for chart design, data entry, parameter query, and many others. Also, general reports can be separated into column report, crosstab report, detail report, grouped report, and many other kinds of reports.
2. Aggregate Reports
Consisting of numerous modules, aggregate reports can be comparable to charts and reports. If you are making complex reports due to a large workload in a particular project, you can use aggregation reports as these reports are able to solve issues in having irregular enormous reports. As the expansion, column width, and row height in the middle of the blocks do not disturb each other, the flexible space for tabulation in the report immensely improves.
3. Dashboard Reports
When it comes to solving decision-making issues in various business firms and organizations, dashboard reports can be your best friend. With the use of simple drag and drop operation, you can set up a comprehensive management data thanks to its canvas-like operation interface. In order to accomplish muli-dimensional data analysis in your work, you can demonstrate different types of business indicators in the same page.
4. Progress Reports
After you gather some data and other details based on your research about a particular trend, business project, assessment, or other kinds of work, this information can be used in creating progress reports. These reports are made for various purposes and mainly for monitoring, evaluation, and comparison of ongoing or completed activities, tasks, and many others, as well as in analyzing the development of particular areas being observed.
Benefits of an Analytical Report
There are countless benefits that every business firm, corporate groups, institutions, and other organizations can get from writing an analytical report. Apart from keeping track of the data and statistics, it can also help the office teams and departments to gain sufficient knowledge, and understanding of the enormous amount of information concerning the research or business project.
Brian Balfour, the founder and CEO of Reforge and former VP of growth at Hubspot once said: “As you gain fresh insight from your data, it opens the door to new questions. As you have new questions, you need to update your instrumentation and analysis. Saying the process is “done” is saying you understand everything there is to know about your users, product, and channels.” Below are some of the benefits of using a structured analytical report:
1. Effective Productivity
Developing an analytical report is a method that will provide you a bird’s eye perspective of your internal processes in the business or research work. This process may help in setting order in improficient processes that still exist, as well as in encouraging your team members to concentrate on doing strategic methods and tasks. Thus, it can facilitate development in the project planning and processes of the company or organization.
2. Better Communication and Team Collaboration
Conducting effective analysis can help your business and team members to gain meaningful visual insights and much needed information which will assist in their better performance and support clear communication inside the workplace. This will also avoid any possible interdepartmental conflicts and misunderstandings because of data inaccuracy. Plus, all of the members in the team or department will be constantly on the same page which can elevate team collaboration at its finest.
3. Support New Developments and Changes
Because we are living in an IT generation, digital technology continues to change and is on the rise in various sectors and industries around the world. Today’s technology may possibly not work over the next few years and decades. That’s why being up-to-date and sailing along with the current changes is very integral to continue thriving. This also applies in analysis reporting because it gives 24/7 access to historical data, real-time data with the help of reporting automation, and predictive features. By responding to continual change, this will help your business to cut down operational costs and preserve staff engagement.
4. Become the Leading Edge
Using a wide selection of valuable key performance indicators (KPI), you can obtain dynamic data visualizations which are made to offer deep insights into your work or organization’s most crucial functions and processes. In this way, you will have the skills and expertise in pinpointing weaknesses, capitalize on trends, reveal insights, or patterns which seemed to be non-existent and develop accurate predictions. Then, your business can have continuous growth and become the leading edge in the industry.
Basic Components of an Analytical Report
In this section, you will learn how to craft a well-written and logical analytical report if you want to display the growth, and development of your business to the management, executives, investors, and many others. However, an analytical report has different components. Include the following elements for you to create an outstanding document:
Title Page: One of the primary integral components of an analytical report is the title page. It is a powerful section of the document which contains the main topic, or purpose of the report. Table of Contents: Specify the major topics that are being discussed and explained in the analytical report in a logical or chronological order. Place some designated numbers of the sections, headings, subheadings, and other parts of the report with the page numbers. Body or Content: Indicate the specific methods being executed for research and data analysis work. Then, write the content of your report. Break down the topics into organized sections, heading, subheadings, and the body. Conclusion, Recommendations and Bibliography: Write your final analysis based on the results and collected data and other information in the report. Provide your recommendations. Also, you may add other sections for bibliography or appendices if necessary in your work. Professionalism:While preparing your analytical report, you need to uphold and keep up the professional tone of the document, and avoid making it sound casual and laid-back. Keep a friendly tone with an appropriate balance of business formality. Also, avoid the use of ambiguous words. Rather use terms and overall language related to data analysis. Be considerate, sensible, and decent.
How to Create an Analytical Report
Creating analytical reports and assessments need to focus on the form, not the substance because you will use your documents to share with others and help them understand the main topics of concern, as well as completing the tasks assigned. Aside from developing crucial decisions in analytical report writing, an analytical report can effectively outline your definite ideas and solutions according to evidence like reliable data.
Douglas Cohen, who spent many years as an analyst, said: “Good analysts always challenge what they have been told or given.” So, you need to work hard in determining and measuring various data so that you are able to come up with great decisions. Prioritize your time and avoid looking for quick shortcuts because actually they don’t really work. Look for worthwhile opportunities in your work. Below are some easy-to-follow tips that indicate how to design and create a comprehensive analytical report:
Step 1: Research The Problem
Sunday Adelaja said: “Maximize the time you have through hard work, concentration and research.” So, take your time and focus on researching the problem of your analysis work. In this method, you will know where to start in your analysis and concentrate on your main goals and objectives for your analytical report. Describe the problem by writing about its origin.
Step 2: Interpret Methods and Techniques
Use several data research tools such as searching and reading previous studies based on your main topic, interviewing different individuals and participants involved in your research problem, and many more. Then, list the techniques being applied to solve the problem, and interpret the efficiency from the solutions.
Step 3: Develop a Thorough Analysis
Then, develop a thorough analysis of your work according to the research methods you conducted earlier. So, look carefully on the success or failures of the solutions generated during the process. Make some clear assessments and comparisons based on the proposed solutions. Additionally, you can use some charts, graphs, tables, and other visual diagrams to demonstrate and clarify your analysis.
Step 4: Create Recommendations
Include some noteworthy recommendations and place these components at the last section of your analytical report. Adding this part will make your report trustworthy because it is based on data analysis, not from guessing or assumptions.
Step 5: Prepare the Final Draft
Draft your final analysis that provides systematic information about your report. You may also attach any supporting documents. Create a schedule for a meeting with your members along with the management, committee, investors, or corporate executives who will receive your analytical report.
Step 6: Edit or Revise the Report
The last important step of writing an analytical report is performing some necessary edits or revisions of your report. Ask your work colleagues and other professionals in your field concerning the quality and content of your analytical report so that you can submit your report in flying colors.
FAQs
Why is using an analytical report template essential?
Using a template for an analytical report is essential because it is an ultimate time-saving tool for your work. You don’t need to concentrate plenty of hours in structuring the layout, draft, and overall design of your report. It is actually a very no-hassle method as you can simply copy and paste the report template and customize it depending on your needs, preferences, and the guidelines from your boss or management.
What are the fundamental elements of the analytical report?
When preparing your analytical report, you need to consider these fundamental elements such as a short thesis statement for the introduction, main discussion about the analysis, tangible evidence from various texts, data, facts or published journals to supplement the analysis, and citations and examples.
How to write an effective analysis report?
Include comments and criticism from others, especially from the experts in your field. Begin your report with the most comprehensive details and dig deeper on the significant content. Also, you need to be ready to discern the perspective of your readers. And you need to develop a flexible outline.
What are some examples of data analysis?
Some examples of data analysis are text, descriptive, inferential, diagnostic, predictive, and prescriptive analysis. Descriptive analysis is the simplest form of analysis that makes a brief summary of the historical data with the use of dashboards. Diagnostic analysis is all about digging deeper and making detailed data. While predictive analysis is about applying the preceding data to make forecasts or predictions for the future.
What are the three steps of data analysis?
The three steps of the data analysis process are evaluate, refine, and summarize.
“Numbers have an important story to tell. They rely on you to give them a clear and convincing voice.” These words by Stephen Few can bring motivation and determination for you and other analysts so that all of you tell your stories in order to convey your data analysis and interpretations effectively. Usually, decisions are greatly influenced by emotion. However, when you use data which is based on logic and reasoning with the addition of emotion, it can create a powerful synergistic effect that can stimulate action according to your insights. So, writing a clear and in-depth analytical report for your business or research work is an effective tool in attaining your goals and aspirations as an analyst. By explaining all the fundamental points of your analysis, you fully communicate your vision to the management, executives and others in a systematic way. Before you let the sweet smell of success get in your head, please follow the aforementioned tips and steps here so that you are able to craft an excellently written analytical report. Plus, we recommend that you download our free analytical reports samples here right now!
Общая структура доклада
Доклад состоит из трёх частей: вступление, основная часть и заключение. Основная часть делится, в свою очередь, еще на несколько частей (как правило, 2–3). При этом и сам доклад, и все его части должны иметь заголовки. Также можно включить дату, расположив её под заголовком доклада. Например:
Subject: Changing Compliment Patterns in Disney Movies
Date: 18th January 2017
Purpose
(под этим заголовком располагается вступление)
Changes (вместо слова ‘changes’ нужно подставить свой заголовок)
(под этим заголовком располагается первая половина основной части)
Reasons (вместо слова ‘reasons’ нужно подставить свой заголовок)
(под этим заголовком располагается вторая половина основной части)
Conclusion
(под этим заголовком располагается заключение)
Примечания: вместо слова ‘purpose’ можно писать ‘introduction’. Вместо слова ‘conclusion’ можно писать ‘recommendation’, если вы пишете доклад-рекомендацию. На олимпиадах писать дату обычно не требуется. Можно переходить ко вступлению сразу после строки, на которой написана тема. Также не обязательно писать в теме слово Subject. Можно просто написать саму тему.
Вступление
Главная задача вступления в докладе — дать читателю понять, о чём будет доклад и с какой целью он написан. Если вы собираетесь описывать какие-нибудь меняющиеся показатели и объяснять причины изменений, то так и говорите во вступлении: «Цель доклада — обозначить изменения и объяснить их причины». Говорить нужно максимально по делу, без абстрактных рассуждений.
Разберем пример. Вам дали табличку, в которой представлены результаты некоего опроса о местном ресторане, и нужно написать по ней доклад. Неправильное вступление в формате report будет звучать так:
- Eating out is a very popular way of spending free time. Many people in our district often visit a local restaurant — the Ivy, which provides them with both food and pleasant atmosphere.
Это вступление является неподходящим, потому что мы уходим в абстрактные рассуждения (они годятся для эссе) и описания (они годятся для статей). Подходящее для формата report вступление будет звучать так:
- The aim of this report is to analyse the results of a survey in which 250 residents were questioned about the local Ivy restaurant. Basing on this analysis, the report provides recommendations on how to improve the service at the restaurant.
В этом вступлении мы сразу переходим к делу и явным образом указываем, о чем будет доклад.
Основная часть
В основной части вы выполняете изложенные в задании требования. Если нужно сравнить данные двух таблиц — сравниваете, если нужно объяснить причины изменений — объясняете, если нужно проанализировать диаграммы — анализируете. При этом необходимо не просто перечислять факты один за другим, а структурировать, группировать информацию. Структурирование и группирование делает информацию проще для восприятия и благотворно влияет на баллы как за содержательную, так и за организационную часть.
Информация без группирования и анализа (просто перечислили цифры из табличек с заданием, потеряли баллы за организацию и содержание):
- In 2000 60% of schoolchildren traveled for tourist purposes, 25% did that to attend summer language courses, and only 15% had higher education among their travelling goals. In 2014 about 28% became interested in higher education, 38% wanted to attend summer language courses and only 34% travelled for pleasure.
Группированная информация с анализом (не просто перечислили цифры, а подумали, как связаны между собой 2000 и 2014 год, что и обобщили в тексте):
- While in 2000 the principal reason for going abroad was tourism (at 60%), its role plummeted to only 34% in 2014. In contrast, educational purposes significance rose by approximately 10%, reaching 28% for higher education and 38% for summer language courses.
Заключение
Задача заключения — подвести итоги, суммировать всю изложенную информацию. В зависимости от того, какой у вас доклад, может также потребоваться выразить своё мнение или дать рекомендацию. Не пишите одно и то же шаблонное заключение к разным докладам — оно во многих случаях просто не выполнит своей функции. Как и в случае со вступлением, нужно писать по делу, не уходя в отвлеченные рассуждения.
Такое заключение не подойдет по формату (потому что содержит не относящиеся к делу общие рассуждения):
- To sum it all up, restaurants are an integral part of our life and the Ivy restaurant is not an exception. Although not everyone is satisfied with it, it still remains an attractive way to spend an evening with a friend.
А такое подойдет (потому что в нем все по делу):
- All points considered, some improvements evidently need to be made if clients are to be fully satisfied with the service provided by the restaurant.
Стиль
Доклад пишется в формальном стиле. Следует заменять простые структуры более сложными, использовать продвинутую лексику, страдательный залог, подходящие средства логической связи. Не должно быть разговорных выражений и сокращений.
- The service there is so cool! The waiters are very polite.
- The majority of those surveyed find the service at the restaurant excellent and note the politeness of the waiters.
Пример работы в формате report
Напишем ответ на такое задание:
Imagine that you are a linguist doing research into the dialogues in children’s animated films. You have collected some data on the ways female characters are complimented (see the charts below). Write a brief report describing the changes you have noticed comparing Disney movies over the years.
Write 220–250 words.
Use the following plan:
- make an opening statement;
- give some general information outlining the trend, analyze the information given in the charts;
- suggest possible reasons for the changes happening;
- make a conclusion.
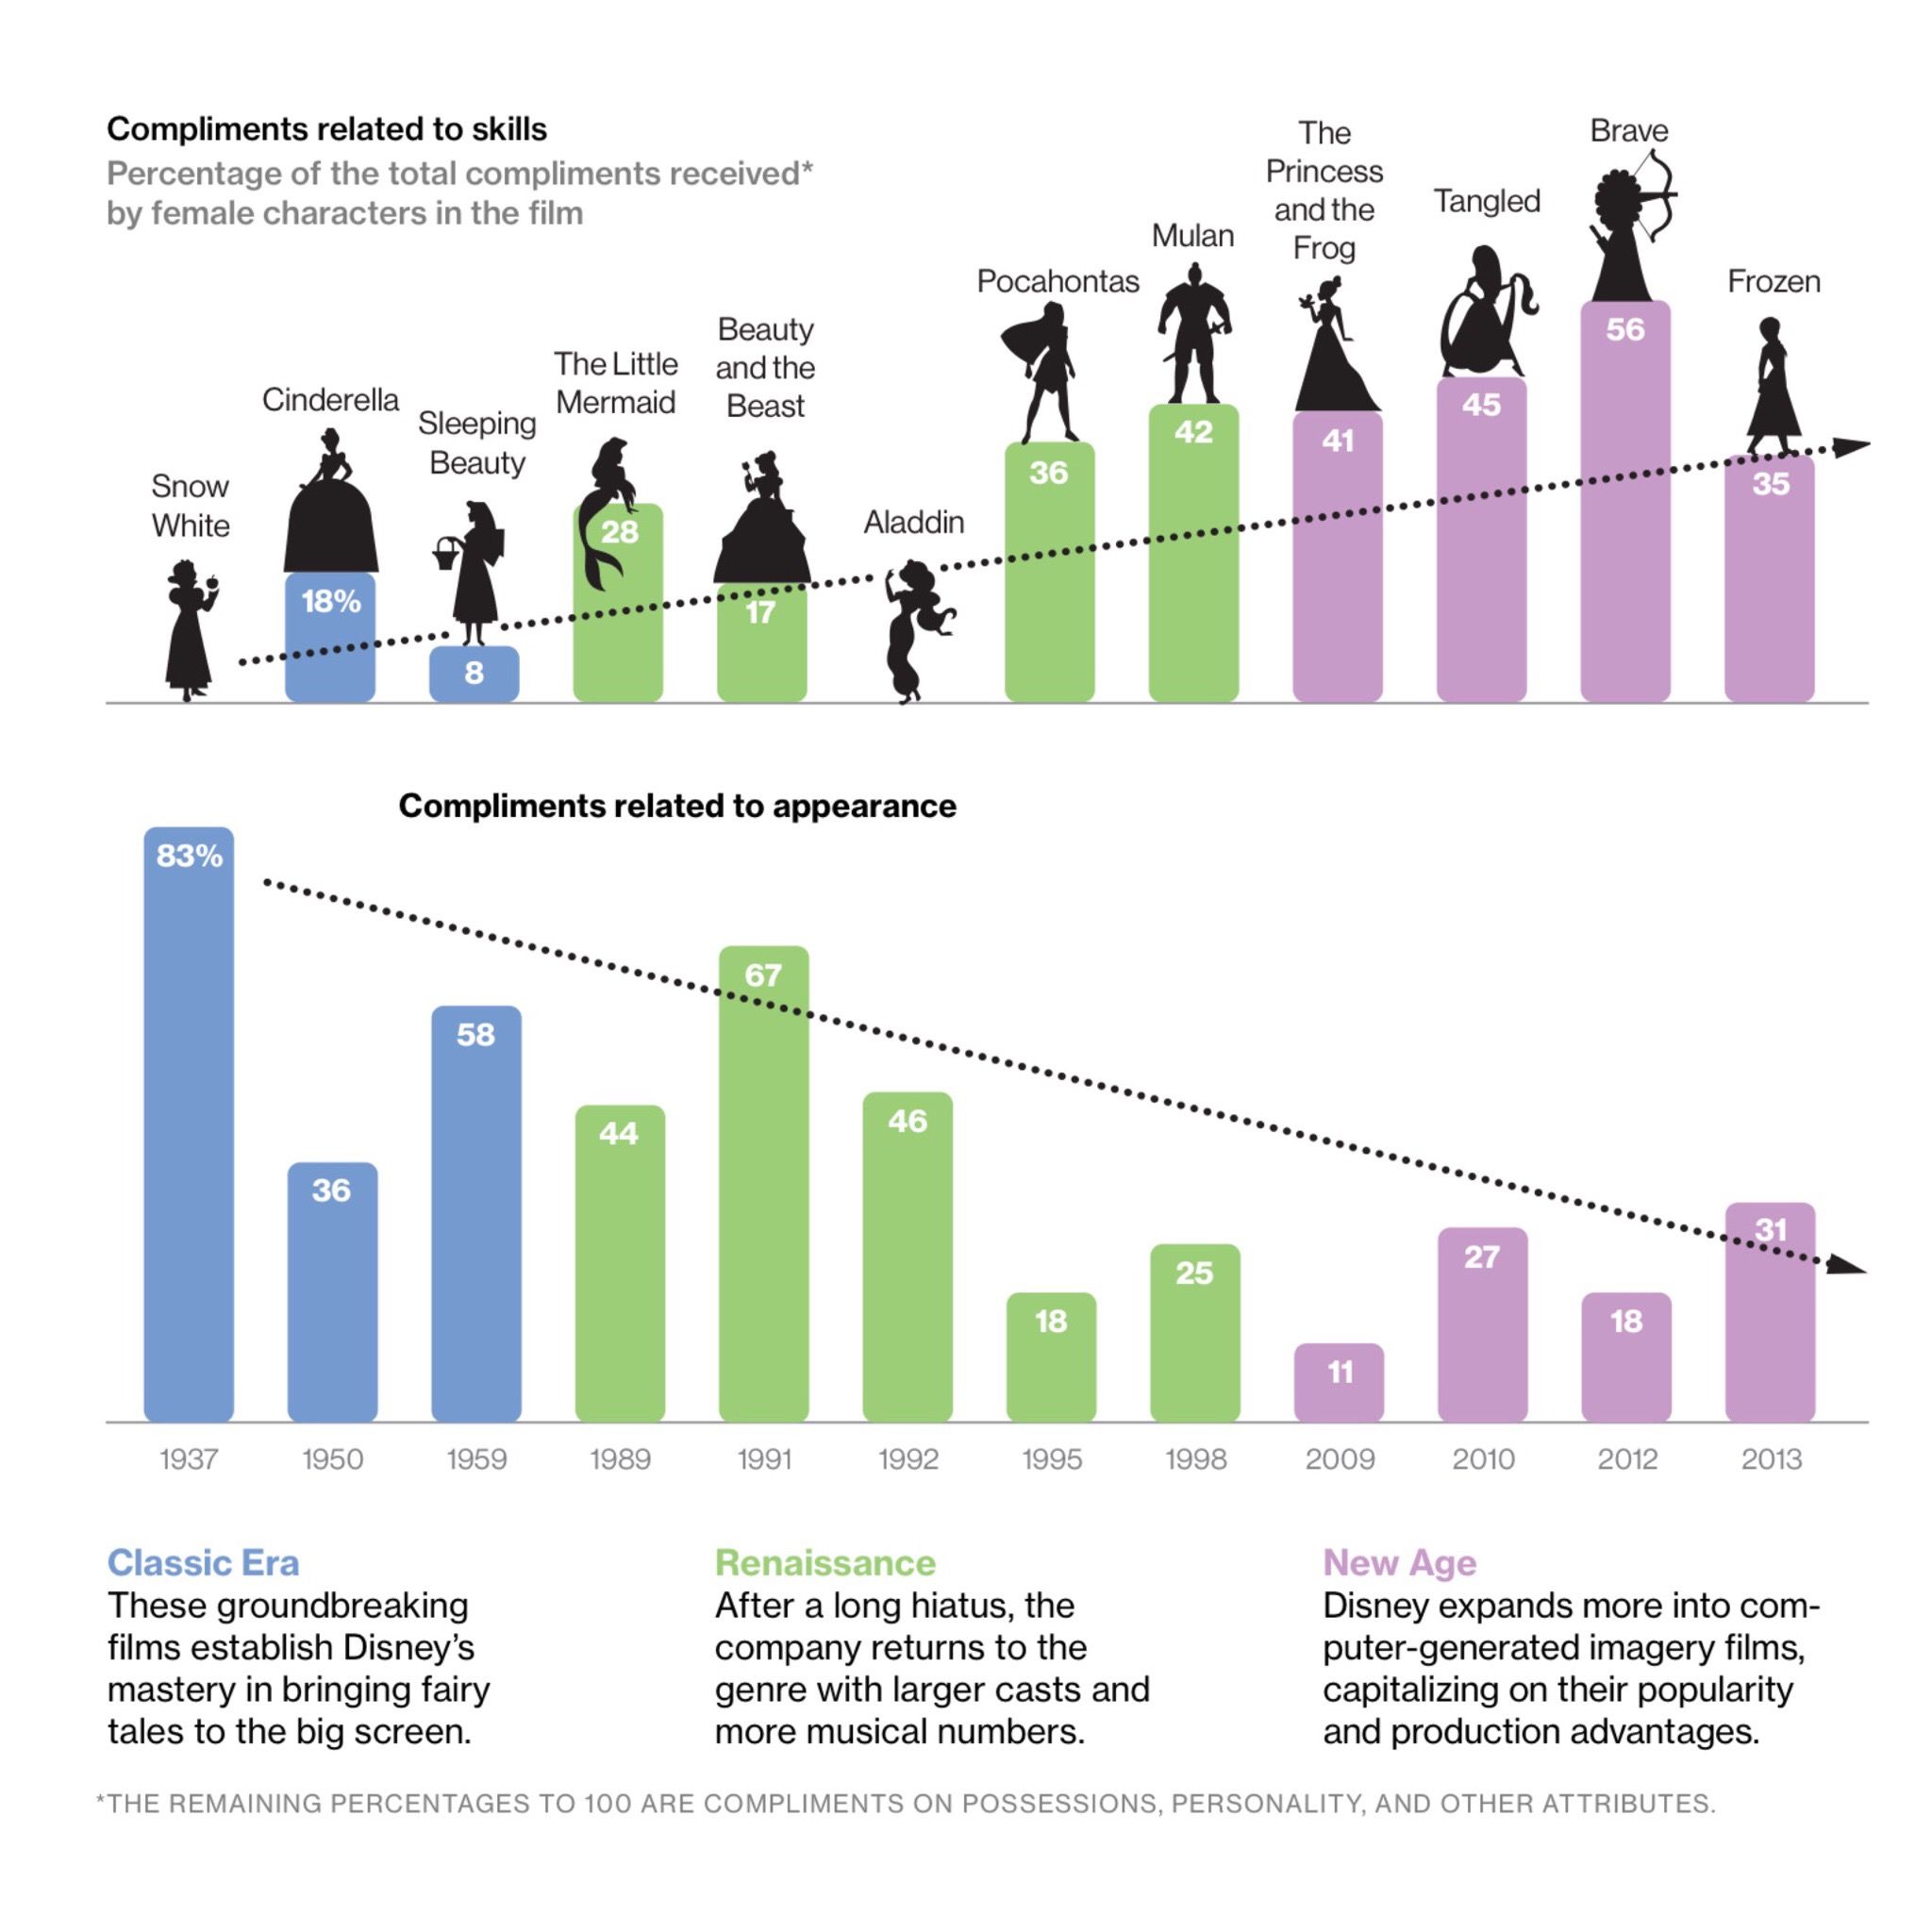
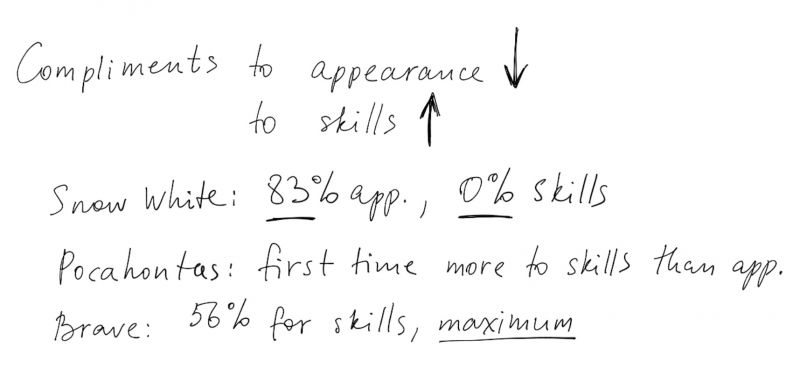
Первое, что необходимо сделать — внимательно рассмотреть графики. Как только мы это сделаем, так сразу поймём, что есть две четко прослеживающиеся тенденции: комплиментов о внешности становится всё меньше, комплиментов о навыках и умениях — всё больше.
Уловив общее направление, найдем заметные, отличающиеся от остальных точки. Например, Snow White — ни одного комплимента, касающегося умений, зато 83% — о внешности. Pocahontas — первый женский персонаж в истории Диснея, у которого комплиментов о внешности меньше, чем комплиментов о талантах. Brave — максимальное количество комплиментов об умениях и навыках за всю историю. В общем, отмечаем для себя всё то, что сразу бросается в глаза. Причём отмечаем не в голове, а на бумаге:
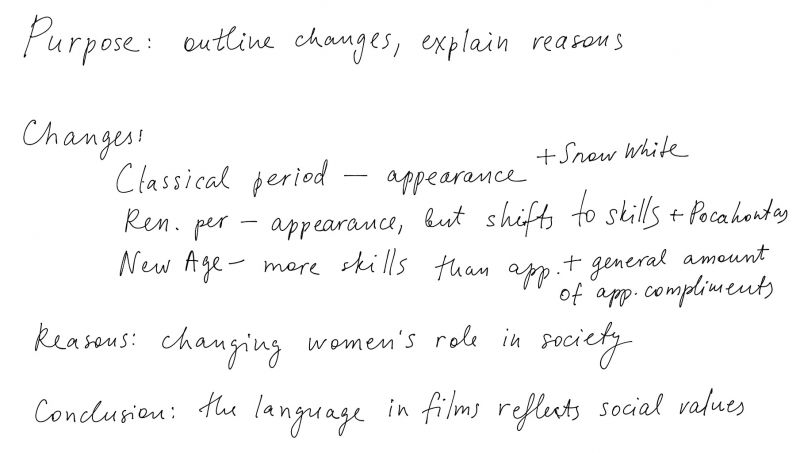
Дальше мы видим, что временная шкала разделена на три периода: Classic Era, Renaissance, New Age. Эти периоды помогут в структурировании информации о комплиментах, так что берем их на заметку.
Проведя таким образом первичный анализ графиков, мы переходим к составлению плана (подробно о составлении плана можно почитать в статье «Как составить план?»). Для составления плана нам нужно понять, как группировать информацию. Разумеется, в отдельные абзацы выйдут вступление и заключение. Также отдельным абзацем будут причины изменений. Что касается описания самих изменений, тут единственно верного варианта нет, организовывать можно по-разному. Например, разбить описание на два абзаца: skills compliments, appearance compliments. Можно разбить на три, в соответствии с периодами: Classic Era, Renaissance, New Age. Можно вообще не разбивать.
Выбирая способ группировки, нужно помнить о лимите на количество слов. В данном задании мы ограничены 250 словами. Из них около 80 уйдёт на вступление с заключением. Останется примерно 170 слов на основную часть. Если мы выберем вариант описания по периодам, то абзацев в основной части будет четыре: три для периодов и один для описания причин изменений. То есть, в одном абзаце получится всего лишь около 40 слов. Писать такие короткие, но при этом логически безупречные и информативные абзацы весьма непросто. Поэтому целесообразнее будет не дробить на мелкие кусочки, а остановиться на более крупных частях.
Я выберу вариант разделения основной части всего на два абзаца: изменения и их причины. Плюс такого способа я вижу в том, что расположение всех изменений в одном абзаце даст мне возможность активно сравнивать их между собой.
Отражаем все наши мысли в базовом плане:
Когда базовый план готов, можно писать черновик, если на это хватает времени. Если времени мало, лучше детализировать план и, используя этот план, писать работу сразу начисто.
Напишем вступление. Во вступлении нужно обозначить цели и содержание доклада. Также нужно обозначить, откуда взялись данные, которые мы будем описывать.
The linguistic analysis of the dialogues from 12 Disney movies appearing over the period 1937–2013 has revealed certain alterations in the nature of the compliments paid to female characters. This report aims at outlining the discovered changes and explaining the reasons behind them.
Теперь напишем об изменениях. Для этого будем действовать по схеме обобщения и детализации. Как написано у нас в плане, в классических мультфильмах большинство комплиментов относится ко внешности. Примером служит Sleeping Beauty. Так и пишем:
In classic Disney animated films female characters receive several times the amount of praise for their appearance as for their skills and abilities. For instance, Snow White and Sleeping Beauty have respectively 83% and 58% compliments related to the way they look.
Проделываем аналогичную операцию со следующим периодом. Сначала обобщенно говорим о тенденции, потом даём пример:
The same trend generally remains during the renaissance Disney period, although it must be noted that it is then that a character appears (namely Pocahontas, 1995), who is given credit for her skills rather than attractiveness.
С последним периодом поступаем точно так же.
In most recent films the role of beauty-related compliments is noticeably lower — 20% on average, while showing respect for competence has risen in frequency, making up almost half of the total compliments in every film since 2009.
Обратите внимание, что хотя общая схема одинакова, при описании мы используем разные языковые структуры: several times the amount, respectively, the same trend remains, noticeably lower, on average, has risen in frequency. Чем они разнообразнее, тем выше будет оценена работа.
Также необходимо всеми силами избегать повторов. Например, чтобы не писать всё время ‘compliments on appearance’, мы используем синонимы: praise for their appearance, compliments related to the way they look, given credit, attractiveness, beauty-related compliments.
Следующий пункт — описание причин изменений. Это принципиально другой по своей сути текст. В отличие от предыдущего абзаца, он не просто передаёт объективные факты, взятые из графиков, а отражает личное мнение автора. Однако несмотря на это, он должен быть максимально обезличен в соответствии с особенностями формата report.
Differing compliment patterns might have been caused by the changing perception of women’s role in society. When a woman was primarily regarded as wife and mother, her value was mostly based on appearance. A shift towards engagement in activities other than household and motherhood was, in its turn, naturally followed by the increase in ability-related compliments.
Пассивные конструкции ‘might have been caused’, ‘was naturally followed’ позволяют добиться этого обезличивания.
Осталось написать заключение. Подведем итоги всему вышесказанному, кратко обозначив, что изменилось и почему.
To conclude, the quality of the compliments given to female characters in Disney movies has significantly altered, reflecting the ways the societal values have transformed over the past 76 years.
Наш report готов. Не забываем писать заголовки к каждому абзацу, а также к самому докладу.
Subject: Changing Compliments Patterns in Disney Movies
Purpose
The linguistic analysis of the dialogues from 12 Disney movies appearing over the period 1937–2013 has revealed certain alterations in the nature of the compliments paid to female characters. This report aims at outlining the discovered changes and explaining the reasons behind them.
Changes
In classic Disney animated films female characters receive several times the amount of praise for their appearance as for their skills and abilities. For instance, Snow White and Sleeping Beauty have respectively 83% and 58% compliments related to the way they look. The same trend generally remains during the renaissance Disney period, although it must be noted that it is then that a character appears (namely Pocahontas, 1995), who is given credit for her skills rather than attractiveness. In most recent films the role of beauty-related compliments is noticeably lower — 20% on average, while showing respect for competence has risen in frequency, making up almost half of the total compliments in every film since 2009.
Reasons
Differing compliment patterns might have been caused by the changing perception of women’s role in society. When a woman was primarily regarded as wife and mother, her value was mostly based on appearance. A shift towards engagement in activities other than household and motherhood was, in its turn, naturally followed by the increase in ability-related compliments.
Conclusion
To conclude, the quality of the compliments given to female characters in Disney movies has significantly altered, reflecting the ways the societal values have transformed over the past 76 years.
Подводные камни
Очень распространённая ошибка при написании доклада — несоответствие стиля. Использование личных местоимений (I think, I consider), сокращений (it’s, hasn’t), слишком простых предложений и разговорной лексики пагубно отражается на качестве доклада и на количестве получаемых за него баллов.
If Microsoft Office had been a country, it would have been the third most populous country in the world. 1.2 billion people using a single suite of apps is mind-boggling. And, they «speak» 107 languages!
But right now, you and I are speaking in English and we are going to talk about the most popular tool in the Microsoft Office arsenal — Microsoft Word 2016.
This document editor is used for writing a variety of documents. From a simple application to the necessary resume. From a plain bucket list to an office memo. We think we can work with Word. But it is when we sit down to write a serious professional report, we discover an important fact.
Professional report writing needs a different set of skills.
So, ask yourself this — can you make the leap from a single document to a lengthy report? Do you know all the Microsoft Word features that will help manage this large scale document project? Can you collaborate on the work with other team members?
You may be a student, a small business owner, or an office worker…you will need to create a report or a professionally formatted document of some kind. This MakeUseOf guide will help you update your techniques and sharpen your design approach.
In this guide:
Writing a Report — Introduction | The Report Checklist
Useful Microsoft Word Tools — Paste Special | Researcher | Freeze Parts of Your Document
Work on the Layout & Design — Intro | Cover Page | Table of Contents | Header and Footer | Page Numbers | Font Styling | Paragraph Styling | Page Breaks | Styles and Themes | Captions | Quick Parts | Page Borders
References and Collaboration — Index | Bibliographies | Cross-Referencing | Comments
Finalize Your report — Signatures | Watermarks | Read Only | Print to PDF
The Next Step — Conclusion
Writing a Report
Report writing involves research and then publishing the outcome of that analysis. In the professional world, the «look» or appearance of what you publish is paramount. The eye-pleasing final result could burnish your reputation and enhance your personal brand.
The steps below will handhold you through the expert features in Microsoft Word 2016. Spend a lot of time on a plan. Start with these guidelines…
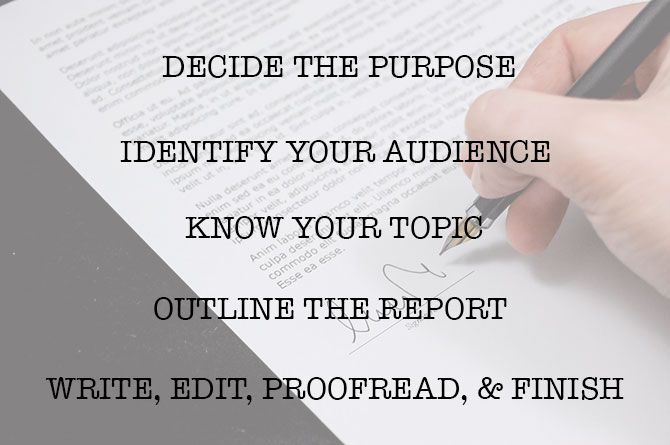
Step 1: Decide the Purpose
Before you begin the report, you must first know why you are writing it in the first place. Reports are of many kinds but they are either meant to inform or persuade. It can be meant for describing a technical process, sharing background information, or demonstrate progress on a project.
Ask yourself – What and Why. This will help you distill the purpose to the one main point and stick to it instead of rambling on with unnecessary details.
Step 2: Identify Your Audience
The second important consideration is to evaluate your audience. Will they be able to understand what you are talking about? Are there different levels of readers who will read the report? The reader’s knowledge of the subject will greatly influence the information that you need to include.
Decide on the primary audience and then script the report at the adequate technical level. The secondary audience can be supported with supplemental information at the end of the report.
Step 3: Know Your Topic
You must know what you are talking about. So, research the topic, and include all the relevant information to prove your point. Make sure that you come to a conclusion based on facts and not personal opinion. The information must be correct, current, and well-referenced.
Also use a variety of resources such as journals, newspaper articles, books, websites, brochures, raw data, annual reports, and speeches to help support your point. Just don’t stick to Wikipedia.
Step 4: Outline the Report
You have done the research. There’s a ton of information that is waiting to be typed and printed. But wait! Don’t drown before you enter the water. Prepare the final outline of the report which will be the chart of waypoints to help you navigate from start to finish. The outline is the blueprint. It will give you a bird’s eye view of the land and also show you where you need to fill in the details.
The structure of an idea report can include the following elements:
- Title Page
- Executive Summary
- Table of Contents
- Introduction
- The Body of the Report
- Conclusion
- Recommendations
- Appendix
- Bibliography and References
Microsoft Word’s Document Outline is a powerful feature that can help you organize a document even before you start filling it with research. Take advantage of brainstorming and mind-mapping templates too.
Step 5: Write, Edit, Proofread, and Finish
Once you have structured your report, it is time to fill out the headers with content. I personally find it best to tackle a little bit of each section, and then bulk it up with information. You can do that if you want, or finish each section as you go down the report structure. Make sure you focus on presenting your ideas and using supportive evidence rather than spelling and grammar first. Outline your argument and write a few sentences that cast your main ideas. If you find something worth quoting, quote it.
Once the majority of your text is written, it is now time to read through it and make sure it flows well. Make sure you guide the reader’s understanding with transition words such as «This information shows…», «In other words…», «Similarly…» and do highlight relevant and key points.
Finally, spend time to proofread, check for grammar and spelling, and double-check all relevant information and its logical flow. It is best to leave at least one day to check and proofread your work. Don’t try to edit it straight after you think you have finished, as you will tend to miss read what you have written. Get some sleep, and proofread it the next day.
The Report Checklist
Before you go and submit or hand in your report that you have worked so hard on, make sure you have done the following:
- Completed the title page with the Title, Your Name, Date, Who the report is for, and a possible description of what the report is about.
- The contents page has appropriate headings and pages numbers are correct.
- Make sure the introduction covers key points, the scope of the report, and the objective it wants to meet.
- You have added captions above tables and below images/graphs.
- Does the content of the report present the information in a clear way, logical, factual, stay on topic, is to the point?
- Does the conclusion state the results, restate main idea’s, and does not include any new information?
- Are the headings and sub headings clearly labeled?
- Are quotes relevant, up-to-date, and correctly referenced?
- Have you used page breaks where appropriate?
Now, let’s launch Microsoft Word and take you through the features that will help piece together the draft of your report and present it as a professional document.
Useful Microsoft Word Features for Report Writing
Take these as bite-sized tips and master them one by one.
Microsoft Word is a big howitzer with many nuts and bolts. Let’s focus on the key skill sets and the tools you will need to plan, prepare, and present the professional report. The Microsoft Word features we will cover below are also productivity shortcuts that will make your job easier.
Tip: Use Microsoft Word 2016’s «Tell Me» assistant to learn more about new features in the Office suite.
Let’s start with three preliminary tools…
Use Paste Special
For most of us, when we need to copy text or an image into Word, the CTRL+V shortcut does just fine. But sometimes we might want to paste the copied data into another format, such as Excel data as an image. With the Paste Special command you can discard or specify the format when you paste a picture, presentation data, table, or object from any other program into Word.
You will work a lot with Excel tables and charts in a professional document.
If you just copy what you want and click paste, you will notice that it will insert the data as tables. But, if it is a large area of cells you want to paste, and you do not want to edit it, you may want to paste it as an image, with the extra option to edit it.
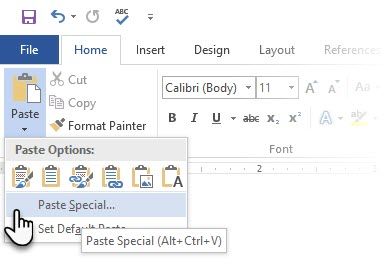
In Microsoft Excel: Select and highlight the cells that you want to copy > Press CTRL+C.
In Microsoft Word: Go to Home > Paste > Paste Special. Select Paste Special and from the dialog select Microsoft Office Excel Worksheet Object.
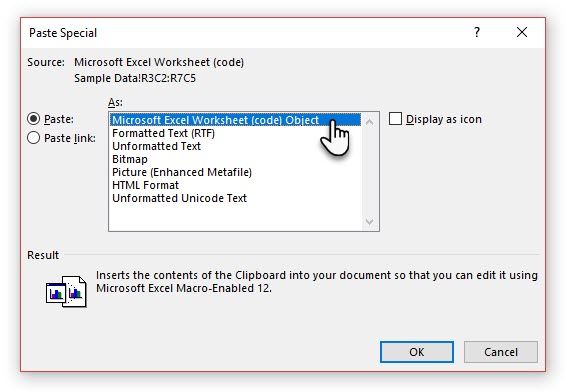
You can resize the data as it was an image, and if you double click, you will be able to edit the values. You can change the table or chart and redesign it. And, if you update the data in the chart or table in Excel, you can automatically refresh the chart in Word.
Try the right-click context menu too. The Paste Special menu pops up:
There are more options to import data from Excel into Word. The Microsoft Office Support page also describes them in detail.
Use the Researcher
Yes, there is Google and Wikipedia. But constantly switching from Word to your browser can hamper your productivity. Office 2016 brings in powerful research integration to this grunt work. The Researcher can not only help you find content from within Microsoft Word but also help you quickly add citations. It uses the Bing Knowledge Graph to find the right content to support your document.
Go to Ribbon > References tab and c Choose Researcher. A pane will open on the right with the search options.
Type a keyword for the topic want to search for and press Enter.
The Results pane shows a list of sources you can use in your document. Choose a topic to explore in detail.
Add the topic to your Microsoft Word document with a click on the plus sign on the top-right. You can also click the plus sign on any result to cite the source in your research document. The cite source helps you support your research with web sources and books.
As we will see later, an annotated bibliography is one of the toughest parts of a document. The Researcher is an intelligent assistant who steps in.
Freeze Part of Your Word Document
Let’s take for granted that your professional report will be a long and complex work. You can split the Word window into two panes so that you can view two different parts of a document at the same time. It is a valuable time saver when you want to copy and paste parts from one place to another or refer to one part of the document while working in another.
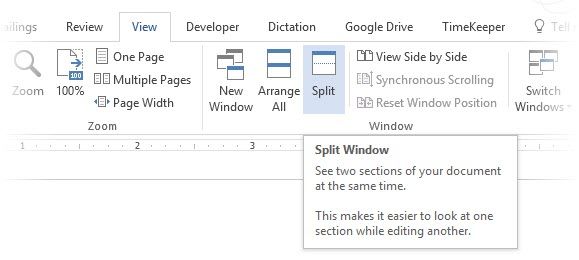
Go to Ribbon > View tab > Split.
To remove the split, click on Remove Split in the same tab.
The Windows group gives you several options to change the way you work with two or more documents. The features are self-explanatory.
To scroll both documents at the same time, click Synchronous Scrolling in the Window group on the View tab. You can also click on View Side by Side to put two parts of the document next to each other.
Tip: Use Split View to display two different layouts – for instance, Print and Outline. Set the split. Then, click in the pane that you want to change, and then select a different layout on the View tab.
Work on the Layout & Design
The presentation of a report is what gets someone to read a report in the first place, and that is why it is crucial that your report is well presented. If you had the choice of four reports to read, what will you choose?
- A hand written report.
- A document printed in black and white.
- A report printed on normal A4 paper in color.
- A report printed in color, with a catchy title page, neatly bounded, and slick?
You will pick up the fourth report because it will pull you towards it by the visual appearance alone.
The front cover is not the only reason. A well-designed report is easier to read. It is also easier to scan when you don’t have time to read. That is why you need to spend some time on your headers and footers, and the different styles and themes. In short – the formatting of every element in the report.
Formatting may seem like a difficult chore, but it is a fun exercise that will exercise all your creative muscles. The key takeaways will be the skills you can apply to anything in Microsoft Office going forward. And the time you will save with all the productivity tips learned here.
Microsoft Word 2016 has a wealthy set of features. These are only some of the ways that your report design can stand out from the rest and be professional. So, let’s break down the layout and design skills.
This section will cover these features step-by-step:
- Start with a Cover Page
- Make a Table of Contents
- Create Your Header and Footer
- Add Page Numbers
(Format the Content)
- Pick the Right Fonts
- Style the Paragraphs
- Control Page Breaks
- Use Styles and Themes
- Captions
- Use Quick Parts
- Decorate with Page Borders
1. Start With a Cover Page
The first page is the first point of contact with your reader. It is also your opportunity to make a favorable impression. Don’t let your lack of artistic skills be an excuse because Word takes up the job with its in-built gallery of title pages. All you have to do is marry one to the theme of the report.
Microsoft Word 2016 offers you 16 pre-formatted templates and three more on Office.com.
Go to Insert > Pages Group > Cover Page.
The cover page appears at the beginning of the document by default.
As there are only 16 «official» templates on offer, you may find that all your other peers have the same cover page. So, why not customize it, and make it a bit more unique.
You can design a title page (or cover page) in Microsoft Word that can be an original in the stack. Save it as a template or easily change the design on the fly.
2. Make a Table of Contents
Casual readers scan. Good readers scan first and then dive deep. A table of contents provides the waypoints that help both. When it is a long and complicated document, wouldn’t you rather check the lay of the land before you head to the section that interests you?
Consider a Table of Contents (TOC) if your document is more than 10 pages long. You should first make sure you don’t need to rearrange any pages in your document before creating the TOC.
In Microsoft Word, you don’t have to write the entire TOC by hand. There’s a Table of Contents automatic tool under the References tab which takes your outline and designs it for you. Also, you can easily keep it updated when you want to change something.
There are also templates you can download and fit it around the nature of the content. For instance, a TOC for a thesis will look different from that of a company’s annual report.
We have a complete tutorial on how to create a table of contents page in Word.
The gist of it is this:
Create the outline and use heading styles to organize the hierarchy. Apply the automatic TOC tool to the heading styles. Word 2016 searches for those headings and then inserts the table of contents into your document. Then you can automatically update your TOC if you make changes in your document.
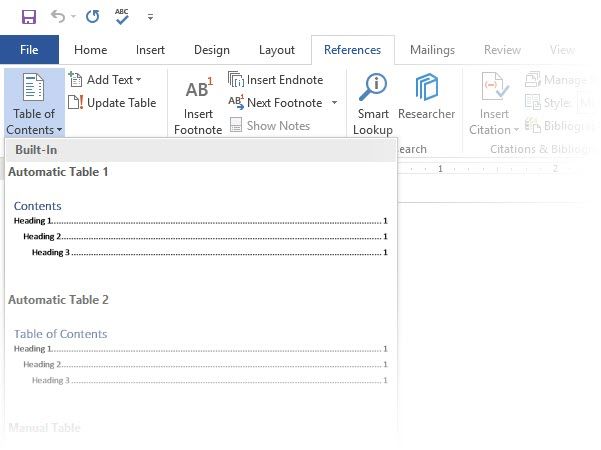
For more hands-on control, you can also use the Manual Table of Contents style. Word inserts placeholder text and you have to insert and format each content in the list.
3. Create Your Header and Footer
Headers and Footers are important in reports as the main purpose is to provide information about the report on every page. They are the common display areas for page numbers. The header of the document should contain the title of the report, and possibly the name of who created it. The title of the current section is helpful.
The footer, on the other hand, should include the page numbers, date of publication, and other administrative information that is required. Do note that some style guides have special guidelines for headers and footers.
Let’s start with the header in your document and give it a unique look.
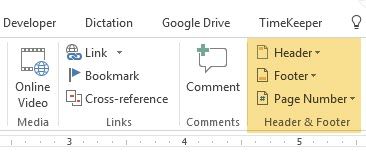
Select Insert, then select either Header or Footer from the group. The built-in gallery shows you several options you can choose from.
The header and footer space is inserted in your document with placeholder text or table. The Header & Footer Tools opens on the Ribbon for other formatting work like the date, time, or picture.
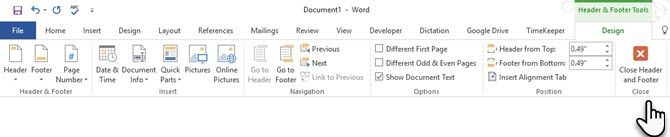
Enter your text and then select Close Header and Footer.
You can start with a blank header and footer. If you have the design skills, use the Header & Footer Tools to design your own. Master the header and footer space if you want to create custom letterheads for your organization. You can use brand elements like company or organization logos at the top and neatly formatted footnotes at the bottom
Let’s try with and modify one of the inbuilt headers. I selected Facet from the gallery.
The final look took two minutes to put together with simple text effects and an icon sourced from the Microsoft Office icon gallery.

The header and footer are in place. But, how do you know where you are in the document? Insert page numbers as the next important signpost.
4. Add Page Numbers
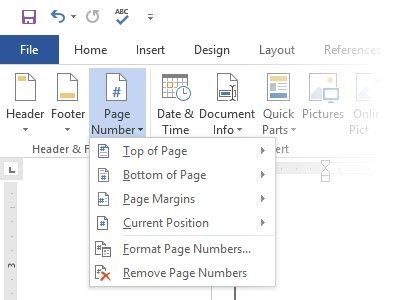
Page numbers look best in the footer (unlike in the header as in the image above). You can add a basic page number from the Insert > Page Number button on the Ribbon. You can also add it from the Design tab that appears when you add the header and the footer.
You have a lot of control over page numbers. Choose from a wide range of number formats and customize them to your needs. In this case, we are adding the number to the footer, but you can put them at the top or even at the margins. In this example, I have placed the page number at the bottom left. But, I would like to change the default look and the format.
For example: Using a «Page X of XXX» makes for a better indicator on a long document.
Select the page number. Go to Insert > Quick Parts. From the drop-down menu, select Field. You can also reach the Field dialog from the Header and Footer Design tab.
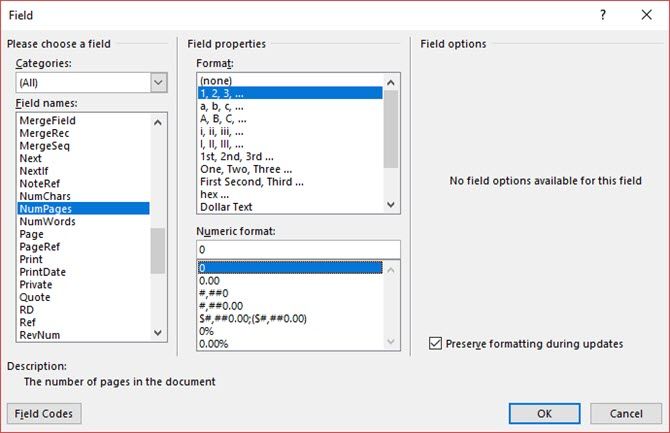
Choose NumPages from the long list of field names. From the box on the right, you can pick a specific format. I selected the usual 1, 2, 3. Click OK, and the number of the number of pages will appear. Now all you have to do is add your text such as Page X of XXX, and change the look of the numbers with the usual text formatting tools available from the Home tab.
It now looks like this:
Design the look on any page number in your document and Word updates all the remaining automatically. Page numbers are the most common elements in a footer, but it can also hold any other information like the header. From the options in the Insert group, you can add the date and time, document info, pictures, and more to your header or footer.
Next, we’re heading into formatting the content.
The visual draw of your professional report comes together with the «beautification» you apply to the content. Formatting is also an essential step for a document that flows well. So, you must focus a lot of energy on picking the right font, paragraph space, and the colors.
Don’t worry. Even, the artistically challenged will find this part easy because Microsoft Word comes packaged with default themes and visual styles. Let’s start with the most basic element of a document.
5. Pick and Style the Right Font
Your choice of font in a professional Word report not only determines how the text stands out but also how it is printed. You want both for maximum impact.
You can apply a typeface (i.e. the visual look of the font) to either an entire document or to specific parts of a document. All font choices are available from the Home tab. Go to Home > Font.
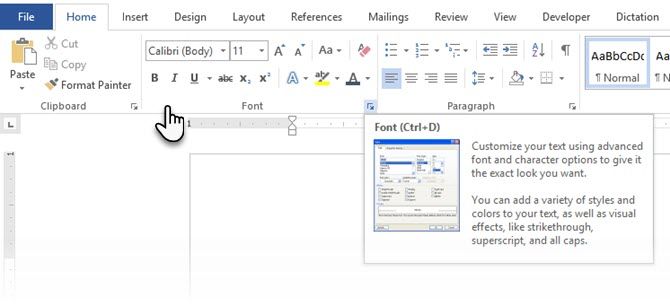
The default font in Microsoft Word 2016 is Calibri. Look beyond that as you have lots of others to choose from. If you choose Times New Roman, you may be considered lazy, if you choose Windings, well… I don’t think I need to explain that. So make sure you choose a font that is easy to read and suits the report. To play it safe, pick from one of these professional-looking Google fonts; they’re available for free.
Tip: Baskerville and Georgia are good alternatives to the over-used Times New Roman
Try different font pairing for the body text and Headings (and Subheadings). Several websites like FontJoy and TypeWolf will help you experiment with font pairings. You can download and use custom fonts too. But remember the thumb-rule — never use more than three different typefaces in a document.
For that extra bit of pizazz, try a drop cap to enhance your text.
6. Style the Paragraphs
If you want to have your lines double spaced, or single spaced, you need to change the format of the paragraphs. By changing the spacing, you can make a document easier to read or give the impression that it is longer and that you have put more work into it.
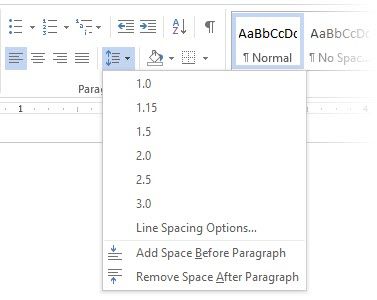
To change the paragraph for the whole document, it is best that you select each block of text; otherwise, if you are using headers in your report, they will change too. Another better option is if you customize the particular style you are using to format the paragraph.
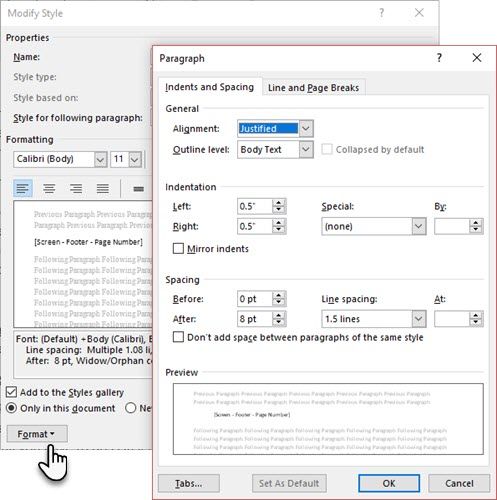
To do this, go to Home > Styles. Right click on the style you want to change and select Modify. Click on Format > Paragraph which is at the bottom of the dialog box. Now, change the spacing, indentation, and alignment for the paragraph. Click OK to close the dialogs.
When you want to change a smaller portion of the document, select what you want to change. Right click on the highlighted text and select Paragraph. The same dialog box as above will appear.
7. Control Page Breaks
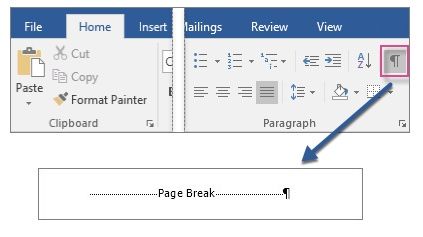
A page break — by its very name — splits a continuous block of text across two pages. Page breaks are important structural elements for long documents. Word automatically inserts a page break at the end of the page. But in a long document, you can place page breaks where you want them.
To insert a manual page break, click Insert > Page Break. (Keyboard shortcut: CTRL + Enter)
A page break looks like this when you click on the Show/Hide command in the Paragraph group.
But what if you want to keep a bunch of lines together on a page or column and not have them separate because of a page break? The layout is in your control. Click the tiny arrow you see in the bottom right of the Paragraph group.
In the Paragraph box, click Line and Page Breaks. Select from these four pagination options:
- Widow/Orphan control places at least two lines of a paragraph at the top or bottom of a page.
- Keep with next prevents breaks between paragraphs you want to stay together.
- Keep lines together prevents page breaks in the middle of paragraphs.
- Page break before adds a page break before a specific paragraph.
We’ve also shown how to remove page breaks when necessary.
8. Use Styles and Themes
Styles and themes are perhaps two of the more underused features in Microsoft Word. But I think you should use them at every opportunity to save a lot of time.
But what is the difference between a theme and a style? Microsoft says:
Themes provide a quick way to change the overall color and fonts. If you want to change text formatting quickly, Word Styles are the most effective tools.
So, as themes control the general look with color, effects, and fonts – start with a good theme for your document first. Then, use Styles to dig into the specific portions you want to change the appearance for.
For Themes: Go to the Design tab. Pick a theme from the gallery. You can see previews of what the color combination is like.
For Styles: Select the part of the text you want to change. Go to the Styles group on the Home tab. You can see previews of what they look like. Choose the Style that is suitable for your content. For instance, choose a heading style for the headings in your document. Or, a particular style for any quotes. You can also modify an existing style and create new styles from scratch.
9. Captions
Every picture, chart, or illustration needs a caption to clearly describe it. It is a single line of text, usually located below a graphic. Captions are also an important reference when you need to mention them in another place. Many documents omit this small detail.
It is easy to add a caption. Right-click the illustration you want to add a caption to. Select Add Caption.

In the dialog box, add your caption text and configure the remaining options. Captions can be automatically referenced in Word.
10. Use Quick Parts
Professional documents can get repetitive. This is why you should start using Quick Parts for boilerplate content you reuse all the time. For instance, let’s say there is a contract clause you include with every document. Or, some introductory information. Instead of repeated copy-paste, save them as Quick Parts and re-use them again and again.
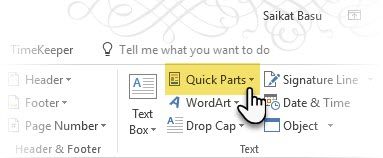
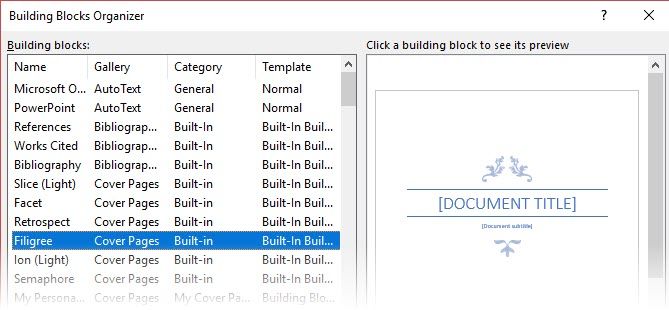
Quick Parts is also a type of building block. You can see the gallery of all reusable blocks of content in the Building Block Organizer.
Save and reuse your own Quick Parts in two steps:
- Select the phrase, sentence, or other portion of your document that you want to save to the gallery.
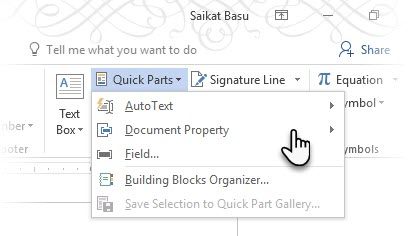
- Go to Insert > Text group > Quick Parts > Save Selection to Quick Part Gallery. Change the name and add a description if you like. Click OK.
Just as easily, you can re-use the saved snippet of content.
Place your cursor where you want to insert a selection from the Quick Parts Gallery. Go to Insert > Text group > Quick Parts. Then click the sentence, phrase, or other saved selection you want to reuse.
You will notice three other categories in the Quick Parts menu.
AutoText: Word 2016 has retained the old AutoText feature. It works like Quick Parts for any block of text that you use a great deal. Example: A note you want to use with every document.
Document Property: A set of constant properties that you can include with every document. Example: Company name or author.
Fields: These are predefined elements that update automatically. Example: Date, time, page numbers etc.
Remember, entries for document property can sometimes include information you wouldn’t want to share with everyone. So, keep a close eye on these fields and remove the hidden personal data whenever required.
11. Decorate With Page Borders
Page borders look good not only on flyers and invitations. If done right, they can add a touch of class to a document. A variety of line styles and widths and art borders are available from the Design menu on the Ribbon.
Go to Design > Page Borders.
In the Borders and Shading box, use the Page Border tab to design your border.
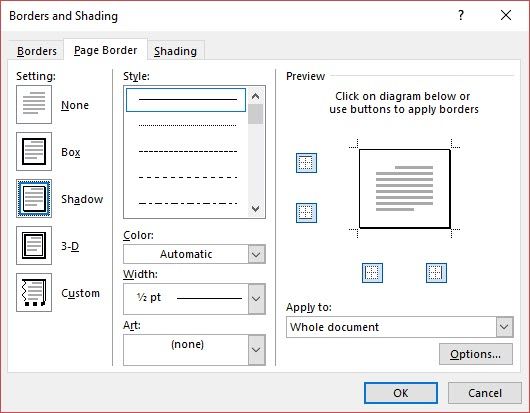
The settings are self-explanatory. Try Shadow or 3-D with the right colors to add a subtle but elegant border. The Art styles with their clip-art borders might be too garish for professional documents.
Use the four corner buttons in the Preview window to select the sides of the page to draw borders. Click these buttons to remove or add borders, as you wish.
Place the cursor on the first page of a document if you want to put a border around only the first page. You can also put borders around certain pages in a section. Place the cursor in the section — either in the first page of that section or in a subsequent page.
References and Collaboration
A Word report can seem like an unmanageable chore. It’s like organizing a million piles of hay into neat little stacks. The idea is to know precisely which stack has the pin you are looking for. These features are meant to make it easier.
1. Create an Index
When writing large documents such as a report that contains a lot of information, a contents page may not be enough. An Index should appear at the end of the document, with page numbers to keywords and information in the report. Create an index to help the reader reference the right information with just the page number.
Make an index if your document has more than 20 pages. Microsoft Word 2016 doesn’t let the process overwhelm you. It basically has two parts:
- Select the words or information you want to include in the index.
- Place the index at the right place in your document.
You can scroll through the finished document and mark the words or phrases you want to include in the index or mark them as you go along. Either way, select the text you’d like to use as an index entry or click where you want to insert the entry.
1. Click References > Mark Entry.
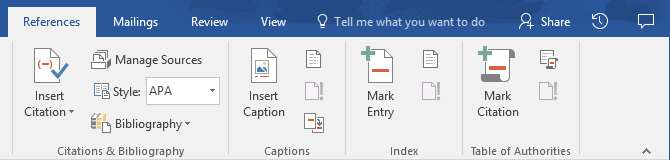
2. Edit the text in the Mark Index Entry dialog box. You can also add a sub-entry which further defines the main word you used in the index. You can add multiple levels and each appears indented under the main entry.
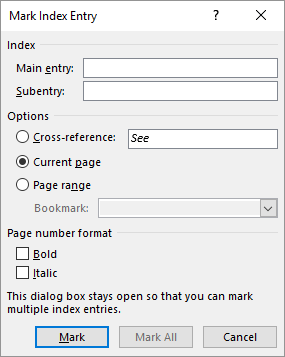
3. Under Options, you can also create a cross-reference to another main entry. A reader can use this to refer related information elsewhere in the same document.
4. Use the Page number format to decide on the appearance of the page numbers in the index.
5. Click Mark to mark the index entry. To mark this text everywhere it shows up in the document, click Mark All.
6. Repeat the process for all the words and phrases you want to include in the index.
You have now built your index. Insert it at the right place towards the end of the document.
1. Click on the page where you want to insert the index.
2. Click References > Insert Index.
3. The Index dialog box is displayed. Here you can choose to format the text entries, page numbers, tabs, and leader characters.
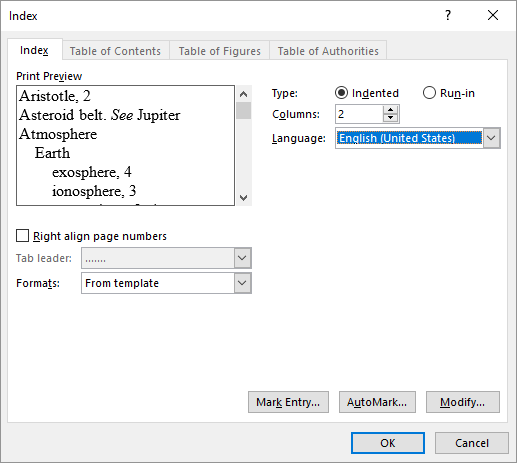
4. Choose the appearance from the different formats in the list and check the Preview window on the right. Remember, the Preview window doesn’t show you actual index. It is just a «simulation» of how it will look like.
5. Click OK. Your Index is now ready.
Sometimes, you may need to add more entries to the index after you have inserted it on the page. Mark the entry and go to References > Update index to include the new mentions.
Also, add a heading for the index because Word doesn’t do it automatically.
2. Creating Bibliographies
Your document is almost done. Now, you need to credit all the other research work and ideas which you have referenced in your document. It’s time for a bibliography.
A company report might not need a bibliography but an academic paper isn’t finished without one. The bibliography is one of the most painstaking jobs in an academic report. You need to have all your citations in order before you sit down to frame the bibliography. Also, decide on the citation style (typically MLA, APA, or Chicago-style) as per the guidelines of your subject.
Don’t hesitate to take advantage of third-party citation and bibliography generators for constructing this section.
But, Microsoft Word 2016 has a complete toolset to make this process as painless as possible. So, go to the point in the document where you would like to place the bibliography. It’s good if you have at least one citation to include, but even if you don’t, Word 2016 lets you use a placeholder citation and fill in the sources later.
Click References > Bibliography.
Word offers a few bibliography styles that differ only in their heading names. Choose the appropriate style and then insert citations from the button in the Citations & Bibliography group.
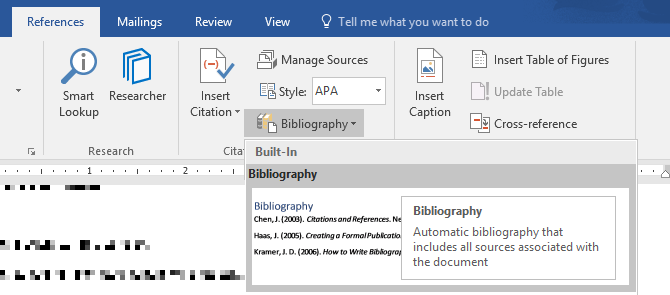
The bibliography tool has a few steps to it. For the sake of brevity, I will direct you to the excellent Microsoft Office help page which is a step-by-step guide.
Some academic papers will ask you to create an annotated bibliography. It is a more fleshed out version of a bibliography with a list of citations to journals, books, articles, and other documents followed by a brief paragraph. The paragraph is a description of the source and how it supports your paper.
3. Cross-Referencing
You can use a cross-reference to help the reader navigate through a long document. At any point in a document, you can tell the reader to refer back to a heading, page number, image, chart, footnote, endnote, and paragraph. A cross-reference link is a neat way to connect related information together. The reader just has to click on the link to go that snippet of information.
Here’s how you begin:
1. Select the place for the cross-reference and type the text that tells the reader about it. For instance: «Refer to Chart 3 for future trends.»
2. Go to Insert > Cross-reference.
3. In the Reference type box, click the drop-down list to select what you want to link to.
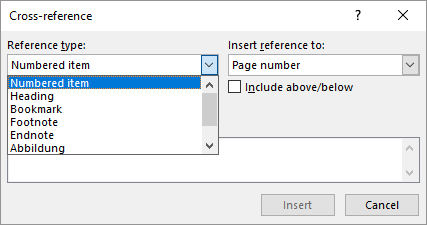
4. The options in the Insert Reference to drop-down will change according to your choice above.
5. In the For Which field, go through the choices and tell Word the exact information to link to.
6. Check the Insert as hyperlink box to create the hyperlink for the referenced information.
7. Click on Insert to include the cross-reference in the document.
Remember, our mention of captions? You can make cross-references to equations, figures, graphs, and tables if you used captions below them.
Word cannot create a cross-reference for something that does not exist. Word will let you know about these errors and also update the cross-references automatically when you change the page number or text of the referenced item.
A professional report can be a solitary job or you can take the help of a team to prepare the first draft. The humble Comment is one of the most underused tools of a Word document. It is displayed as a rectangular colored balloon in the margin or in the Reviewing Pane.
You can use comments as small «stickies» or self-notes. Leave little notes to yourself in the margins as you write, edit, and revise your way through a report or a manuscript. Be creative – add extra links to other resources, use them for tips and pointers, link to different parts of a document, or set up a feedback link for your readers. And when you finalize, you can easily remove all comments in Word.
Microsoft Word 2016 is also an enhanced collaborative writing tool. Comments play a huge role in communicating feedback across a team. Here’s how the comment system works…
1. Highlight the text you want to add a comment to or click at the end of a text block.
2. Go to Insert > Comment. Type your comment in the box. The comments appear in the markup area on the right. The Print Layout view is usually the best way to see the comments alongside the text.

3. Go to the Review tab and see more options for comments. This tab also shows all the controls for tracking changes and comments in a collaborative document. Use the Markup options to display or hide the comments. For instance: No Markup will hide the comments and the markup area on the right.

Finalize Your Report
Once the bulk of your report is completed and saved, it is time to finalize your report. When I say finalize, I don’t mean proofread it. That should be done too. Now, you have to take the security measures to protect the report from unauthorized changes and plagiarism.
These security measures will give an extra level of authenticity to your electronic file before you share it.
This section will cover:
- Signatures
- Insert watermarks
- Make the document ‘read only’
- Password protect your document
- Print your document to PDF
1. Signatures
You can add text signature for a personal touch to the report. But a simple text signature does not need any authentication. A digital signature is the better way to protect your document from unauthorized access. A digital signature confirms that the document came from the signer and hasn’t been tampered in any way.
Let’s create a signature line in Microsoft Word 2016.
In the document, place your cursor where you want to create a signature line.
1. Go to Insert > Text group > Signature Line and click Microsoft Office Signature Line.
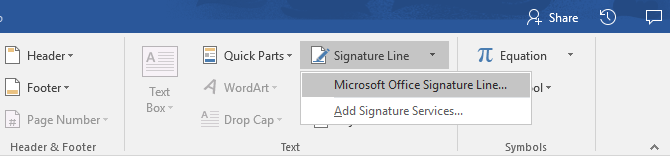
2. The Signature Setup dialog box is displayed. Fill the fields as indicated. If you are sending the document to someone else for signing, add instructions for the signer in the field reserved for it (Instructions to the signer). The signer can also add give the purpose for the signing if the Allow the signer to add comments in the Sign dialog box is checked.
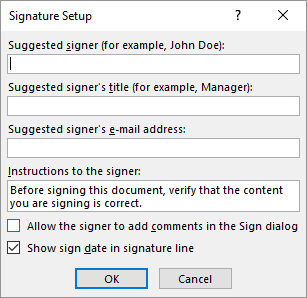
3. Click on OK and the document will now display a placeholder for the signature.

Enter a signature:
When you need to sign a document with a digital signature, go to the signature line and right-click on it.
You will be prompted to sign with a digital ID. If you don’t have one, Microsoft will tell you to get one from a signature service partner.
If you don’t have a digital ID, you can just insert a textual representation of a signature line. You can use a written signature or an image that doesn’t require authentication.
2. Insert Watermarks
A Microsoft Word watermark is a «fake» but still useful visual indicator for the status of the document. For instance, you can use a watermark that says «Drafts» to differentiate it from the final version of the document. Or, use the watermark to suggest the document is «Copyrighted» or «Confidential».
The «Draft» mark is the most common. But, Microsoft Word gives you several other watermarks to choose from.
1. Go to Design > Page Background and choose Watermark. The Watermark button will be enabled in the Print view only.
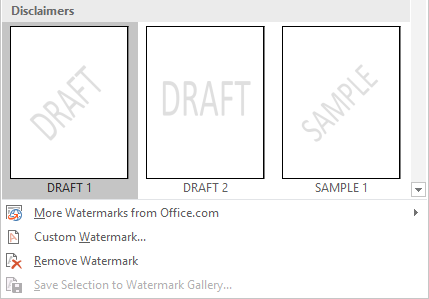
2. You can choose a picture or a text watermark from the gallery. Both horizontal and diagonal versions are available. The dialog box gives you all the customization options for the final look of the watermark. Try different fonts, layouts, sizes, and colors.
3. You can type your own text in the Text field to create your custom watermark.
4. Choose OK to apply the watermark to your document. Word automatically applies the watermark to every page except the title page.
3. Make Documents «Read Only»
A professional report by its nature should not need to be edited by its readers. Converting the document to a PDF is one way. But, you can also apply a few more restrictions in Microsoft Word and prevent accidental modification or omission of any kind.
There are three ways to protect a document.
First — Make your document «read only».
This ensures that your document can only be read or copied. It won’t prevent anyone from copying the file and making changes to the copy.
1. Go to the File tab > Info > Protect Document > Mark as Final.
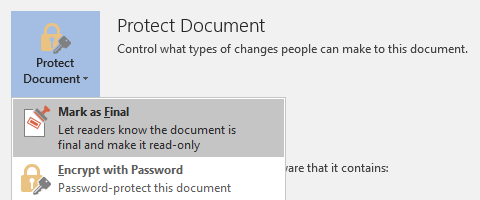
2. When readers open a document, a bar on top will prompt readers to treat this document as read only. But, they can click on «Edit Anyway» to open the document in Edit mode.
Second — Password Protect Your Document.
Protect your document from unwanted edits with a password barrier.
1. Under Protect Document, choose Encrypt with Password. Type a password and click OK.
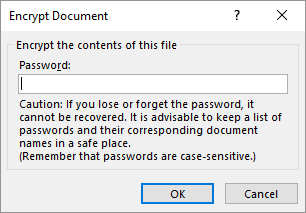
2. In the Confirm Password box, type the password again, and then click OK. The document will open with the reader prompted for a password.
Microsoft uses the AES (Advanced Encryption Standard), 128-bit key length, SHA1 (a cryptographic hashing algorithm which generates an almost unique 160-bit key to replace the plaintext), and CBC (cipher block chaining) to give a hacker a well-deserved headache.
Third — Restrict Editing.
This control feature helps you as the author decide which parts of the document others can edit and which will be locked out. Think of it as the bouncer who lets the VIPs in but otherwise bars the door for the common folk.
1. Go to Review > Restrict Editing.
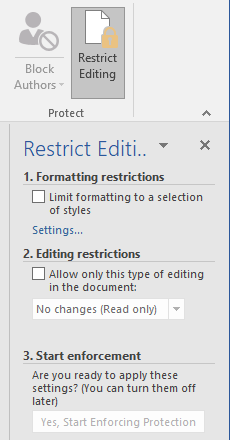
2. Under Editing restrictions, check Allow only this type of editing in the document, and make sure the list says No changes (Read only).
No changes (Read only) is the default restriction type. For a different restriction level for the document, click the menu and select from Tracked changes, Comments, or Filling in forms.
3. To free some sections from the editing blockade, select the sections for editing without restrictions. To select more than one area, click CTRL while selecting the area using the mouse.
4. You can check Everyone under Exceptions (optional) in the Restrict Editing panel. Or, click More users… and allow only specific users to modify the sections. The allowable areas will be marked with square brackets.
5. Click Yes, Start Enforcing Protection.
Now, type a unique password in the box that opens. You have to type it again to confirm it.
The password is optional. But it ensures that no one can just click Stop Protection and edit the document. If you are still paranoid, go ahead and encrypt your Microsoft Word document as we did in the second process above.
4. Print Your Report to PDF
The Portable Document Format comes with many advantages. Not least is its cross-platform compatibility across all computers. Your document is ready and now you need to share it or send it across to be printed. Many professional reports — for instance, a legal document — need to retain the format as intended.
Save or convert a copy to PDF. Microsoft Word 2016 does not need any third-party add-ins.
Go to File > Export > Create PDF/XPS.
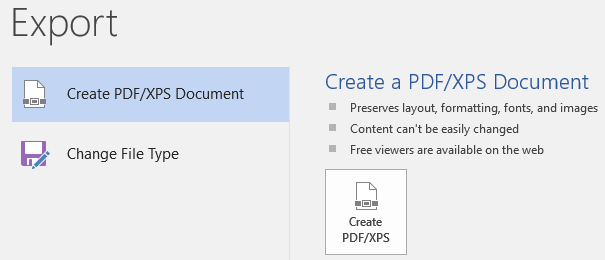
Remember, your Word document may contain sensitive information that you do not want to be included in the PDF. Remove it before you publish to PDF. In the Publish as PDF or XPS window, choose Options. Then select Document and clear Document properties. Set any other options you want and choose OK.
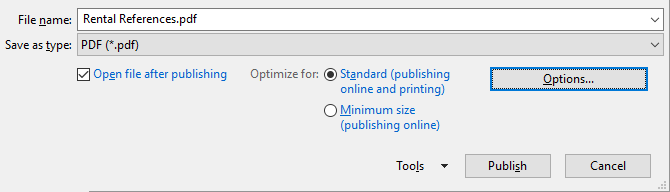
Browse to where you want to save the file and click on Publish.
The Next Step…
You are close to the finishing line. The report is ready to be handed over to your readers. But there’s one last job left.
Turn the pages and make sure (again) that your report is reader-friendly. Approach it with the eye of the reader. Have you organized your thoughts and written persuasively? Does the information flow well with the charts and illustrations? Can they skim through and find the information quickly? Is the text readable? Use the readability score to gauge the readability level of your documents as a final step.
You also might have noticed we didn’t cover some aspects of Microsoft Word. For instance, Microsoft Word Tables are an important tool for data display. Or, the power of lists in information management.
Microsoft Word is more than a quarter of a century old, and packed with little features. At MakeUseOf, we have covered every nook and cranny of this beast. So, do use our resources to learn more about this software for free. Each new feature of Microsoft Word learned will make your life easier.
Make Your Report Shine
As author Nathaniel Hawthorne said,
Easy reading is damn hard writing
Isn’t this true for professional report writing too? After all, if given a choice, no one may want to read it. Writing a business report and using it to communicate are two different things. Microsoft Word is just a tool — it’s your job to engage.
For some alternatives, check out the best online word processors. And for more help with professional writing, take a look at how to apologize in an email and mean it.
What are the best practices for writing professional business reports? Tell us in the comments.
Do you want to write meeting minutes in Word? If you are looking for a perfect meeting minutes example then you can use our free meeting report sample. You can make corporate meeting notes in editable Word doc by using this report format template. This is a modifiable report writing template in Microsoft Word with professional layout.
Using this executive summary template, you can easily write a properly formatted meeting summary in Word. Download and check this free meeting report template, you would certainly find this meeting report format well designed and easy to modify.
Formal report format for meeting minutes
We have formatted this meeting report sample in a formal and branded layout. Our template would be perfect for making formal meeting reports using Microsoft Word. Not everyone can design & write reports in Adobe InDesign, so if your goal is to write a simple meeting report for your organization then this report format sample would be helpful!
This meeting report design contains dummy text throughout the template. You can overwrite the sample text with your actual report content. It has 9 pages including a beautiful cover page and free pictures are also included in the template.
We are providing some of the Best Office Word templates in 2022 for free. If you need, you can also download and try our latest book and booklet formats on the following page:
Latest 2022 Microsoft Word book templates
Template features
- Free business report format in Word
- File format: Microsoft Word, Adobe PDF
- Paper: Letter
- Fonts used: Calibri
- Including cover design for report
- Minimal, clean & proper formatting
- Its FREE 🙂
This is for your personal use only! Please read our “Important Notes” on using our free resources. Any question? Share your thoughts below.