Remove the Click here to enter text in Microsoft Word

In this tutorial, I will show you how to remove or edit that annoying default text ‘Click here to enter text.’ that appears in your Microsoft Word editable form elements by default. For this tutorial, I will be using Microsoft Word 2013.
Note: The ‘Developer’ tab must be enabled to complete this tutorial. Click here to learn how to enable the Developer tab.
Remove or edit ‘Click here to enter text’ text
- Open up your editable form in Word.
- Click on the ‘Design Mode’ icon in the ‘Controls’ area.

- You will now be able to edit all of the default text that appears in your editable form fields.
- Click the ‘Design Mode’ icon again to toggle it off.

In this tutorial, we’ll discuss about Entering Text in MS Word. Here, we’ll be familiar with the features of Microsoft Word 2019 to enter text. Let’s have a look at how simple it is to type in a Word document.
Table of contents
- Entering Text in MS Word
- What is entering text in Microsoft Word?
- Purpose of Entering Text in MS-Word
- What Insertion of Point?
- Document Area
- Keys to Consider While Entering Text
- Entering Text in MS Word Using Dictation Features
- Summary
What is entering text in Microsoft Word?
Entering text in Microsoft Word is always done at the position of the cursor. This is the first step in creating a document. When you are working on a document, the blinking cursor indicates where you are at the moment. You can start typing at any point in a document by clicking anywhere within of it.
Purpose of Entering Text in MS-Word
The Purpose of Entering Text in MSWord is to let you type text and make it look nice so you can print it or send it to someone else to read. So, the first step in using Microsoft Word is to learn how to type text into a Word file, which is called a document.
Word shows a blinking cursor in every document that shows where your text will go if you type something. You can use the keyboard or the mouse to move the cursor.
What Insertion of Point?
The insertion point is the blinking vertical line in your document. It shows where on the page you can start entering text. There are many ways to use this insertion point.
Additionally , text insertion point also tells you where in the text you want to paste things you’ve cut or copied or, if you’re using the Text Editor, where you want to add files and templates.
Now, we’ll assume you already know how to open Word. The text insertion point we’ll show you automatically as it opens a new document, as shown below:
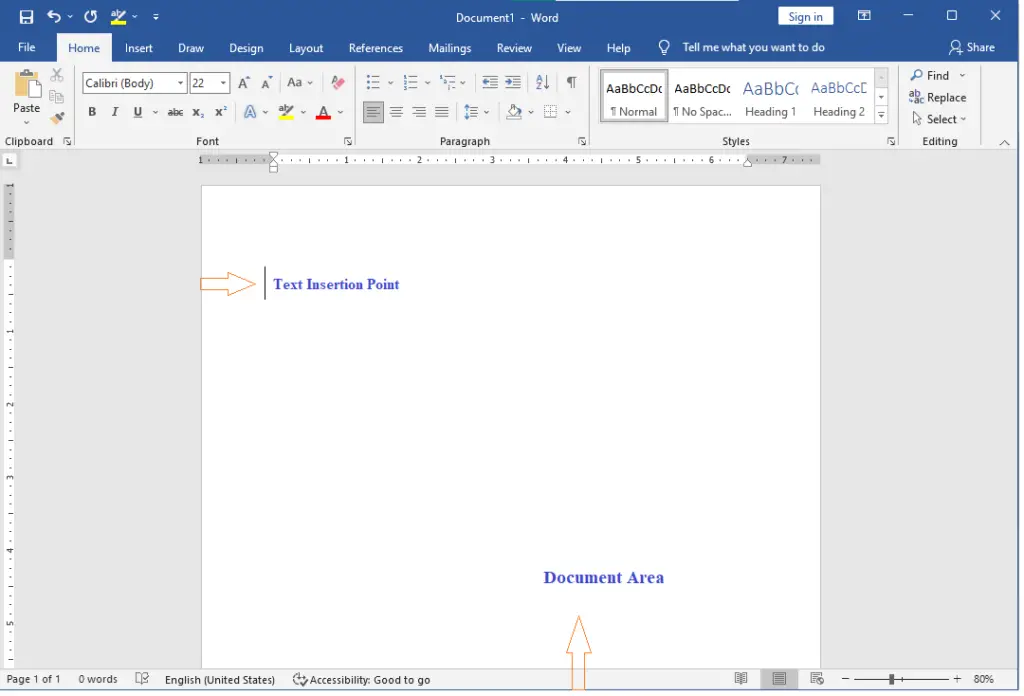
Document Area
The document area is the blank space in a MS Word for making documents where the user can create content. Furthermore, document area is the white space on the page. When you open a document, you can start typing and your words will show up in the document.
The vertical bar that flashes is called the insertion point as mention above, and it shows where the text will show up when you type. Keep the cursor where you want to type the text and start typing. As shown below, we only typed three words: “The Microsoft Word.” As you type, the text shows up to the left of the insertion point.

Keys to Consider While Entering Text
Here are the two key to consider and keep in mind while you are typing or entering text:
- The Enter key is not required to begin a new line. In Word, when the insertion point reaches the end of a line, Word automatically creates a new line. Press the Enter> key to begin a new paragraph.
- If you wish to create more than one space between each pair of words, you should use the Tab key rather than the spacebar. When lining up text in this manner, using fonts with proportional sizing can be an effective method.
Entering Text in MS Word Using Dictation Features
In Entering Text in MS Word Using Dictation Features lets you say words instead of typing them. People have been dictating into Word for a while now using the Windows Speech Recognition (or Speech Services) feature, but the new Dictation feature puts the activity in Word’s hands and gives it more features and options.
To use Dictation, open a document and move the insertion point to where you want the text to go. Then, on the Home tab, click Dictate. If you click the top part of the button, the feature turns on in the language you chose as your default. If you click the arrow at the bottom of the button, a menu will appear from which you can choose the language. From there, you can choose a language or click Dictate if the language is already right.

When the Dictate feature is on, a red dot will show up on the icon for it. As long as Dictate is on, whatever you say into the microphone will be turned into text in the document. You can also say things like periods, commas, and question marks, as well as line breaks and paragraph breaks.
As long as you don’t type anything, Dictate will stay on. When you start typing, Word 2019 turns off the feature.
Summary
In this guide, we learned different ways in entering text in MS Word. We discovered that it aids in the creation of new documents. We also talked about the various keys and features when typing in Word. Basically, these parts of Word will assist you as you go along and create your document.
PREVIOUS
NEXT
Table of Contents
- How do I delete a fillable box in Word?
- How do you make disappearing instruction text in fields in Word?
- How do I get rid of type here in Word?
- How do you delete a text box in Word without deleting the text?
- How do I get rid of text form?
- How do you add a ghost to text in Word?
- Why does my text box disappear in Word?
- How do I remove footer section 2 in Word?
4 Answers
How do I delete a fillable box in Word?
Removing Fields from Original Documents Press CTRL+A on your keyboard to select all the text within the document. Right-click, then click Toggle Field Codes. Press CTRL+SHIFT+F9 on your keyboard. This will remove the field codes, replacing them with the text they contained.
How do you make disappearing instruction text in fields in Word?
If you want the content control to disappear when someone types in their own content to replace your instructions in a Rich Text control or a Text control, click Properties in the Controls group , and then select the Remove content control when contents are edited check box.
How do I get rid of type here in Word?
Click Edit Header or Edit Footer, depending on which tool you clicked in step 3. Word displays the header or footer along with the Header & Footer tab of the ribbon (Design tab in older versions of Word). Select the contents of the header or footer. Press the Del key, or press Ctrl+X.
- Insert your content control.
- Click “Design Mode” (in the Controls section of the Developer ribbon)
- The default text (“Click here to enter text”) can now be edited in any way you want — with one exception: it must contain at least one character (but it can be a space).
How do you delete a text box in Word without deleting the text?
Method 1: Remove Text Box By Copying and Pasting
- Step 1: Open up a Word file. To get started, let’s open up an MS Word document.
- Step 2: Copy the text from the text box.
- Step 3: Paste the text on a space outside the text box.
- Step 4: Delete the text box.
How do I get rid of text form?
Use Alt+F9 to do that. Assuming the document is not protected, just select them and press Delete. If the document is protected, you’ll need to unprotect it first. If that requires a password, then you can remove the protection by inserting the file in to a new document using Insert | Text | Object | Text from File.
How do you add a ghost to text in Word?
Hiding text is as simple as it gets. Select the text you want to hide, switch to the “Home” tab on the Ribbon, and then click the arrow at the bottom right of the “Font” group. This opens up the Font window. Turn on the “Hidden” option and then click the “OK” button.
Why does my text box disappear in Word?
Provided you are still viewing the document in Print Layout view, you should be able to see any text boxes. If you still can’t see it, it could be possible that the text box is formatted for no line and no fill and that the text it contains is formatted as hidden (and you have the display of hidden text turned off).
Double-click the header or footer area to open the Header & Footer tab. Select Link to Previous to turn off the link between the sections. Select Header or Footer and do one of the following: Choose Remove Header or Remove Footer .
Background:
- We have a word 2010 and 2007 template which we have used Content Controls.
- Specifically «Text Fields»
- The form is distributed as «Filling in forms» under editing restrictions
Use Case:
A user will enter text into a «Text Field» without issue
And then decide to change that to no text — thus removing the text
The field then displays «Click here to enter text» in a font which we cannot control.
Issue:
These fields where the «Click here to enter text» is shifts the field by a carriage return thus affecting the amount of pages in the document.
Best Case/Practice:
We would like to REMOVE the «Click here to enter text»
Or
We would like th font to be small enough not to affect the aspect/size of the given area
asked Aug 10, 2012 at 17:04
![]()
You can do this, but there are drawbacks:
Method: (with formatting restrictions turned off)
- Insert your content control
- Click «Design Mode» (in the Controls section of the Developer ribbon)
- The default text («Click here to enter text») can now be edited in any way you want — with one exception: it must contain at least one character (but it can be a space). You can even change the font face and size.
- Click the «Design Mode» button again, to return to standard mode.
Drawbacks:
- if you remove all the text (save one character), it becomes slightly more challenging for a user to click in the form (a harder target for their mouse). Perhaps you could leave just a few characters, if that doesn’t impact your page count.
- if you only use space characters, the content control becomes invisible until you click in it, again, making it more challenging for the user to find it. (Although you can adjust Field Shading to help here)
For more details, refer to this documentation
answered Aug 10, 2012 at 19:05
![]()
kmotekmote
2,5323 gold badges22 silver badges28 bronze badges
3
You can modify the style associated with the default text of content controls. Doing this means you can change the formatting of the default text for all content controls.
The style itself is hidden but can be found using the following steps:
- On the main toolbar click Home and then the small arrow at the bottom right of the Styles toolbar.
- Click the Manage Styles button at the bottom (it looks like a pencil infront of two A’s)
- On the Edit tab choose to sort the list alphabetically (it’s easier) and find the Placeholder Text style. You will see the style is set as always hidden. If you want to change this click on the Recommended Tab and click Show.
- With the placeholder style selected click Modify and change the fontsizecolor to something that avoids the page structure from changing. You should see this formatting applied to all content controls which display default text.
This technique work for every content control in the the document and also for any new controls inserted.
answered Aug 13, 2012 at 6:05
![]()
AdamAdam
7,3032 gold badges25 silver badges41 bronze badges
You can select click the arrow on bottom right of the Font category in the Home tab , or hit CONTROL+D, select «hidden» and the ‘click here to type’ text will be hidden.
answered Sep 23, 2014 at 23:13
![]()
you have to add a Rich Text Content Control, click on the text when it is added, now right click and select Properties, add a title — enter text here. click ok
answered Jun 28, 2017 at 17:07
![]()
- Home
- »
- Office 2010
- »
- Word 2010
This article describe about Entering Text in Word 2010.
 2495
2495

Entering Text
In this topic I explain about how to enter text in word document, this is very simple. I hope you also aware about this when you open a new word document, then by default a blank word document give below, where you can enter your text.
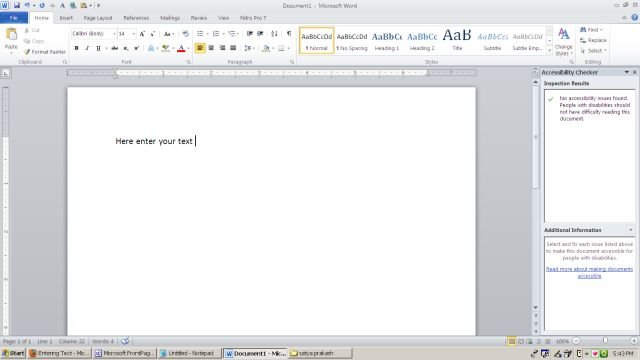
Where you enter your text that area is called document area. And there present a flashing vertical bar is called the insertion point, it represent the location where text will appear when you type from your keyboard.
So insert your mouse point in document area and start typing.
For example: In the above shown picture I have type only four word » Here enter your text».
Two important point keep in your mind when you type your text.
- You do not need press enter for new line because when insertion point reach the end of document it automatically start a new line. Only apply enter when you want a new paragraph.
- If you want add more than one space between the two word use Tab, instead of spacebar for this your document properly formatted.
Ask Your Question
Got a programming related question? You may want to post your question here
Programming Answers here
In this chapter, let us discuss how to enter text with Microsoft Word 2010. Let us see how easy it is to enter text in a Word document. We assume you know that when you start Word, it displays a new document by default as shown below −
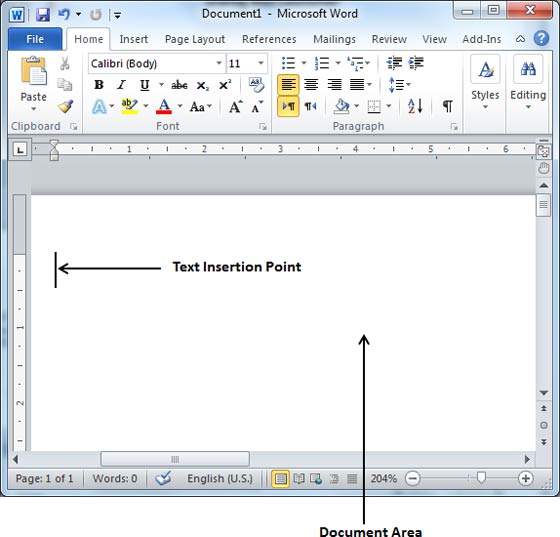
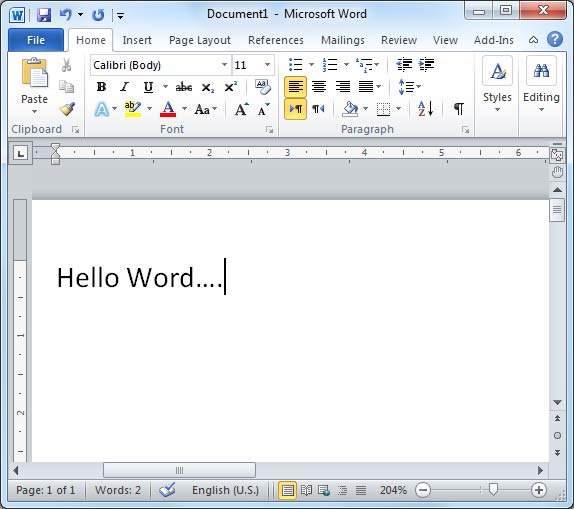
Document area is the area where you type your text. The flashing vertical bar is called the insertion point and it represents the location where the text will appear when you type. keep the cursor at the text insertion point and start typing the text. We typed only two words «Hello Word» as shown below. The text appears to the left of the insertion point as you type −
The following are the two important points that will help you while typing −
-
You do not need to press Enter to start a new line. As the insertion point reaches the end of the line, Word automatically starts a new one. You will need to press Enter, to add a new paragraph.
-
When you want to add more than one space between words, use the Tab key instead of the spacebar. This way you can properly align text by using the proportional fonts.
 Please Note:
This article is written for users of the following Microsoft Word versions: 2007 and 2010. If you are using an earlier version (Word 2003 or earlier), this tip may not work for you. For a version of this tip written specifically for earlier versions of Word, click here: Inserting Text with a Shortcut Key.
![]()
Written by Allen Wyatt (last updated December 24, 2020)
This tip applies to Word 2007 and 2010
Brendan would like to know if there is a way to assign a shortcut of my choosing, say Ctrl+J, to a sentence. This would mean every time he hits Ctrl+J it would paste that sentence. Brendan knows about AutoText, but he can’t see a way to assign a shortcut like Ctrl+J to a particular AutoText entry.
Actually, AutoText includes sort of a built-in shortcut key. Once you create the AutoText entry, you can type the mnemonic for the entry and press F3. Word expands the mnemonic to its longer form. If you want to have a special shortcut key for a particular AutoText entry, you can follow these steps:
- Define your AutoText entry as you normally would.
- Display the Word Options dialog box. (In Word 2007 click the Office button and then click Word Options. In Word 2010 display the File tab of the ribbon and then click Options.)
- At the left of the dialog box click Customize (Word 2007) or Quick Access Toolbar (Word 2010).
- Click the Customize button. Word displays the Customize Keyboard dialog box. (See Figure 1.)
- Position the insertion point in the Press New Shortcut Key text box.
- Press the shortcut key you want to use. For instance, if you want to use Ctrl+J, then press Ctrl+J. Just below the Current Keys text box you should see the name of any commands currently using this shortcut. (In this case, Ctrl+J is used to justify a paragraph so you may want to use a different shortcut.)
- In the Categories list scroll down and select AutoText. The defined AutoText entries appear at the right side of the dialog box.
- In the list of AutoText entries, select the one you defined in step 1.
- Click the Assign button to assign the shortcut.
- Click on Close to dismiss the Customize Keyboard dialog box.
- Click on Cancel to dismiss the Word Options dialog box.
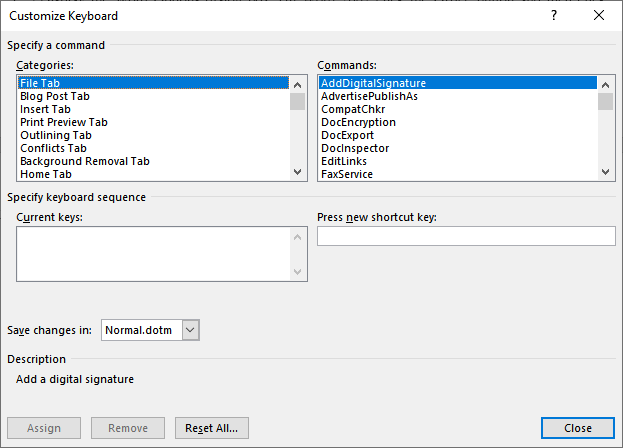
Figure 1. The Customize Keyboard dialog box.
There are other options besides using AutoText, however. You could, of course, record a macro of you typing the desired text. The macro could then be assigned to a shortcut key and would be replayed (again typing the text) anytime you invoke the shortcut key.
Perhaps the easiest alternative, however, is to create an AutoCorrect entry for your text. All you need to do is come up with a non-ambiguous series of keystrokes, such as cj, and then have Word replace that text with something else. In other words, the program can «correct» the characters cj, replacing them with the longer sentence. There is no shortcut key to remember in this instance, just the short text you want «corrected.» (How you create Autocorrect entries has been discussed in other issues of WordTips.)
WordTips is your source for cost-effective Microsoft Word training.
(Microsoft Word is the most popular word processing software in the world.)
This tip (6829) applies to Microsoft Word 2007 and 2010. You can find a version of this tip for the older menu interface of Word here: Inserting Text with a Shortcut Key.
Author Bio
With more than 50 non-fiction books and numerous magazine articles to his credit, Allen Wyatt is an internationally recognized author. He is president of Sharon Parq Associates, a computer and publishing services company. Learn more about Allen…
MORE FROM ALLEN
Eliminating «Before Spacing» at the Top of a Page
When formatting paragraphs in Word, you have several options to adjust the spacing before, within, and at the end of each …
Discover More
Understanding Compatibility Settings
Compatibility settings are parameters within executable images that allow or deny it to properly run under a given …
Discover More
Microsoft Word VBA Guidebook (Table of Contents)
Creating Word macros allows you to extend your productivity with Word. Visual Basic for Applications (VBA) is the …
Discover More
|
12-20-2013, 10:22 AM |
|||
|
|||
|
Remove «Click here to enter» How do I get rid of «Click here to enter text» in a Word 2010 fillable form? — Kim —
|


|
12-20-2013, 12:16 PM |
||||
|
||||
|
Is this a content control? If you click the Design Mode button on the Developer tab, you can then edit the placeholder text in content controls. (You can’t remove it completely, but you can replace the text with a space.)
__________________
|

|
12-24-2013, 04:04 AM |
|||
|
|||
|
Thanks — Kim —
|
 It seems to work just fine
 Word – Entering, Selecting, Editing & Deleting Text Tutorial – MS Word 2010 – Entering Text
Free Online Microsoft Word Tutorials
MS Word 2010 – Entering Text
* Entering Text
*
Selecting Text
*
Editing Text and Deleting Text
Entering text is as easy as typing. Editing or deleting text requires that text be selected first. Lean the quickest way to select text, sentences and paragraphs.
Test your MS Word skills with the corresponding FREE Online Multiple Choice
Entering, Selecting, Editing & Deleting Text Test
*
Entering Text
In order to enter the first lines of text, whether it is the award winning novel you are writing, a recipe for chocolate brownies or your letter of resignation to your boss from hell, you have to start with either an existing document or a blank document.
1. When you launch Microsoft Word, a blank document will automatically open. Depending on your computer screen size and your document zoom, it may look like this:
2. The white area that makes up the majority of the screen is a visual representation of a page. To add text to the first page, use your mouse to click on the page and start typing by using your keyboard to add text.
3. You will see a blinking short vertical line on your screen. This indicates where the next letter you type will appear.
4. To insert spaces between words, use the spacebar on your keyboard.
5. To insert a new paragraph, press the Enter key on your keyboard.
6. To add capital letters, hold down the Shift key on your keyboard whilst pressing the letter on your keyboard you wish to capitalize in your text.
7. You may notice that on your keyboard there are keys that have two or more characters on them. To insert the character located at the top of the key, hold down the Shift key whilst pressing the required key.
8. Pressing the Caps Lock key on your keyboard once and then typing will allow you to type in capital letters. To switch Caps Lock off and return to normal case, press the Caps Lock key again (only once).
* Selecting Text
The fundamentals of selecting text are often overlooked when a user learns Microsoft Word. This frequently leads to less effective use of the program and even frustration. Imagine you learnt how to make chocolate brownies, but you missed the lesson on how to use the mixer. You may still be manually mixing your ingredients whilst there is a more expedient way i.e.: using the mixer. Depending on your baking skills, your brownies will still come out perfect, but I’m sure you agree there is little benefit in mixing batter manually when it can be done quicker!
The ability to quickly select text in Word can make the difference between spending minutes or hours editing text. To select general sections of text, use your mouse by holding down the left mouse button and dragging through the text you wish to select.
1. To select a single word, use your mouse to move the cursor to the word you wish to select.
2. Double-click the word in quick succession using the left mouse button.
3. You will be able to observe the selected word by noting that it is highlighted or shaded in blue. Spot the selected word in the screenshot below:
4. To deselect a selected word,
use your mouse to left click anywhere in the document.
5. To select an entire line of text, move your mouse cursor to the left-hand margin of the page next to the line you wish to select. Hover and move your cursor until it changes into a right-pointing arrow.
6. Once your cursor changes to a right-pointing arrow, left-click once to select the entire line of text. Take note of the arrow position and selected text in the screenshot below:
7. You can select multiple adjacent lines after selecting a first line (as above). Hold down your left mouse button whilst dragging your cursor upwards or downwards to select lines.
8. Let go of the left mouse button once you have selected all the relevant lines. They will remain selected until you click in the document.
9. When editing text, it is often necessary to select an entire sentence. To do this, hold down the Ctrl key on your keyboard and click once in the sentence you wish to select.
10. To select a paragraph requires a “trigger-happy” finger as you need to triple click (left-mouse button) in the paragraph you wish to select.
11. To select specific lines/words or paragraphs that are dispersed throughout the document making it impossible to use the drag function described above. To select non-adjacent pieces of text (words, paragraphs or sentences), hold down the Ctrl key on your keyboard whilst making multiple selections.
12. Finally, you may need to select all the text contained in your document when you, for example, want to change the font of all text.
13. To select all, move your cursor to the left-hand side margin area of your document until it changes into a right-pointing arrow (as pictured in screenshot above). Once you see the right-pointing arrow, triple click to select the whole document.
QUICK TIP: Shortcuts that enable you to quickly select areas of text in your document using selected combinations of keys on your keyboard are:
1. To select characters in a word one by one: hold down the Shift key on your keyboard whilst using the left and right arrows to select a character at a time in either direction.
2. To select a word: hold down the Ctrl and Shift keys simultaneously and then press the right or left arrow to select an entire word. Note your cursor needs to be positioned at the beginning or end of the word you wish to select. Keep pressing the right key (or left key) to select multiple adjacent words).
3. To select a line of text: position your cursor at the beginning of the line by pressing Home on your keyboard. Hold down the Shift key whilst pressing End to select the line of text.
4. To select paragraphs: hold down the Ctrl and Shift keys whilst pressing the Up or Down arrows on your keyboard.
5. To quickly select the entire document: hold down the Ctrl key and press the A key on your keyboard.
* Editing and Deleting Text
When proofreading your masterpiece document you are bound to find areas you wish to modify, improve or delete.
1. To edit a section of text, position your cursor in the text you wish to change.
2. Use the Backspace button on your keyboard to delete characters, whole words or sentences and retype them.
3. To delete whole blocks of text, use the selection skills you learnt in the Selecting Text tutorial above to select the text you wish to remove. Press delete on your keyboard.
4. You can also select a line of text and simple start typing to replace it.
5. To move words or sentences in your text, select the word or sentence. With the word/sentence selected, left-click and hold down your left mouse button whilst dragging the word or sentence to its new position. When dragging the actual word won’t move until you release the left button, but your cursor will change into a left-upwards pointing arrow with a box below it (circled in the screenshot below):