
Create Calculations in Word Tables Using Formulas
by Avantix Learning Team | Updated October 9, 2021
Applies to: Microsoft® Word® 2013, 2016, 2019 or 365 (Windows)
You can insert formulas in Word tables to perform calculations. These formulas can include functions such as SUM or AVERAGE or basic operators. When you insert formulas in Word tables, you are really inserting fields so the fields will need to be updated if the data in the table changes. For more complex calculations, it’s usually best to create formulas in Excel where they will update automatically.
Formulas and functions in Word tables only work with numbers. You can’t perform text calculations or output text.
Recommended article: 3 Simple Ways to Copy or Import Excel Data into Word (Linked or Unlinked)
Note: Buttons and Ribbon tabs may display in a different way (with or without text) depending on your version of Word, the size of your screen and your Control Panel settings. For Word 365 users, Ribbon tabs may appear with different names. For example, the Table Tools Design tab may appear as Table Design.
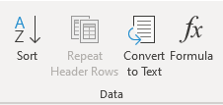
To insert a formula in a cell in a Word table, you’ll need to use the Function command on the Table Tools Layout or Table Layout tab in the Ribbon:
Do you want to learn more about Microsoft Word? Check out our virtual classroom or live classroom Word courses >
Understanding formula syntax
When you insert a table in Word, each column and row are identified like cells in Excel worksheets and each cell is assigned a cell reference. In a Word table, the first column would be column A and the first row would be row 1 so the first cell would be identified as A1. Therefore, you can create calculations that refer to cells (such as =A1+A2).
In Word and Excel, you can use the same basic operators:
- addition (+)
- subtraction (-)
- multiplication (*)
- division (/)
Typically, formulas in Word tables are created using common functions such as SUM, AVERAGE, MIN, MAX or COUNT and refer to a range. They must start with an equal sign (=).
You can refer to ranges of cells using ABOVE, LEFT, RIGHT or BELOW as the arguments for functions. If you’re trying to sum the cells at the bottom of a column, the formula would be =SUM(ABOVE). You can also combine these arguments. For example, you could enter a formula =SUM(ABOVE,LEFT) and it would sum all cells that are above and to the left of that cell. Functions can also refer to cell references such as =SUM(C1:C10). You can also refer to individual cells such =SUM(B1,C1,D5).
Word tables can also perform more complex calculations using the IF function with the syntax =IF(test,true,false). For example, =IF(A5>=1000,0,50) could be used to calculate a shipping cost of 50 if orders are less than 1000. You can also use the AND and OR functions with the IF function.
Inserting a formula in a table
To insert a formula in a table:
- Click in the cell where you want to enter a formula.
- Click the Table Tools Layout or Table Layout tab in the Ribbon.
- Select Function (fx) in the Data group. A dialog box appears. Word will typically insert a function and arguments in the Formula box.
- If you want to accept the suggested formula, click OK. If you want to change the formula, click in the Formula box and enter a formula (starting with =). You can also choose other functions from the Paste Function drop-down menu.
- If necessary, select a format from the Format drop-down menu.
- Click OK. Word inserts the formula as a field and displays the results.
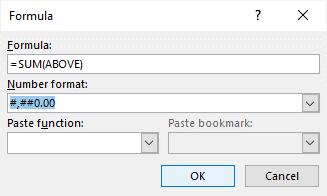
The Function dialog box appears as follows with a formula and a format selected:
Updating a formula
If the original data changes, you can right-click the Formula field and select Update from the drop-down menu or press F9. If you want to update all formulas in a table, select all of the cells in the table and press F9. To select the entire table, click the four arrows on the top left of the table.
Changing a formula
To change a formula in a table:
- Right-click the formula or error. A drop-down menu appears.
- Select Edit field.
- Make the desired changes.
- Click OK.
Updating all fields
To update all fields in all tables:
- Press Ctrl + A to select all.
- Press F9.
Formula fields are just one type of field you can use in Word. There are many other fields that can insert variable information in Word documents.
Subscribe to get more articles like this one
Did you find this article helpful? If you would like to receive new articles, join our email list.
More resources
4 Ways to Create a Table in Word
How to Insert Fields in Word (Built-in or Custom)
5 Ways to Insert the Division Symbol in Word (Type or Insert ÷)
How to Insert Reusable Text Snippets in Word with Quick Parts
10 Microsoft Word Tips, Tricks and Shortcuts for Selecting in Tables
Related courses
Microsoft Word: Intermediate / Advanced
Microsoft Excel: Intermediate / Advanced
Microsoft PowerPoint: Intermediate / Advanced
Microsoft Word: Long Documents Master Class
Microsoft Word: Styles, Templates and Tables of Contents
Microsoft Word: Designing Dynamic Word Documents Using Fields
VIEW MORE COURSES >
Our instructor-led courses are delivered in virtual classroom format or at our downtown Toronto location at 18 King Street East, Suite 1400, Toronto, Ontario, Canada (some in-person classroom courses may also be delivered at an alternate downtown Toronto location). Contact us at info@avantixlearning.ca if you’d like to arrange custom instructor-led virtual classroom or onsite training on a date that’s convenient for you.
Copyright 2023 Avantix® Learning
Microsoft, the Microsoft logo, Microsoft Office and related Microsoft applications and logos are registered trademarks of Microsoft Corporation in Canada, US and other countries. All other trademarks are the property of the registered owners.
Avantix Learning |18 King Street East, Suite 1400, Toronto, Ontario, Canada M5C 1C4 | Contact us at info@avantixlearning.ca
Word provides some simple formulas and functions without need to embed Excel tables. It is easy
to insert and use formulas:
- In a Word table:

- In a document body:

You can use simple formulas in Microsoft Word, such as addition (+), subtraction (-),
multiplication (*), or division (/). Also, you can calculate a power of (^):

See
How to reference a cell of a Word
table
for more details.
All functions you can see in the Paste function drop-down list of the
Formula dialog box:

| Function | Description |
|---|---|
| ABS () | Calculates the absolute value of the value inside the parentheses. |
| AND () | Evaluates whether the arguments inside the parentheses are all TRUE. |
| AVERAGE () | Calculates the average of the elements identified inside the parentheses. |
| COUNT () | Calculates the number of elements identified inside the parentheses. |
| DEFINED () | Evaluates whether the argument inside parentheses is defined. Returns 1 if the argument has been defined and evaluates without error, 0 if the argument has not been defined or returns an error. |
| FALSE | Always returns 0 |
| IF () | Evaluates the first argument. Returns the second argument if the first argument is true; returns the third argument if the first argument is false. Note: Requires exactly three arguments. |
| INT () | Rounds the value inside the parentheses down to the nearest integer. |
| MAX () | Returns the maximum value of the items identified inside the parentheses. |
| MIN () | Returns the minimum value of the items identified inside the parentheses. |
| MOD () | Takes two arguments (must be numbers or evaluate to numbers). Returns the remainder after the second argument is divided by the first. If the remainder is 0 (zero), returns 0.0. |
| NOT | Evaluates whether the argument is true. Returns 0 if the argument is true, 1 if the argument is false. Mostly used inside an IF formula. |
| OR () | Takes two arguments. If both are false, returns 0, else returns 1. Mostly used inside an IF formula. |
| PRODUCT () | Calculates the product of items identified inside the parentheses. |
| ROUND () | Rounds the first argument to the number of digits specified by the second argument. If the second argument is greater than zero (0), first argument is rounded down to the specified number of digits. If second argument is zero (0), first argument is rounded down to the nearest integer. If second argument is negative, first argument is rounded down to the left of the decimal. |
| SIGN () | Takes one argument that must either be a number or evaluate to a number. Evaluates whether the item identified inside the parentheses if greater than, equal to, or less than zero (0). Returns 1 if greater than zero, 0 if zero, -1 if less than zero. |
| SUM () | Calculates the sum of items identified inside the parentheses. |
| TRUE | Always returns 1. |
The arguments can be:
| Argument | Description |
|---|---|
| ABOVE | Cells above the current. For example, =SUM(ABOVE) |
| BELOW | Cells below the current. For example, =SUM(BELOW) |
| LEFT | Cells on left of the current. For example, =SUM(LEFT) |
| RIGHT | Cells on right of the current. For example, =SUM(RIGHT) |
See also this tip in French:
Fonctions et formules dans Word.
Please, disable AdBlock and reload the page to continue
Today, 30% of our visitors use Ad-Block to block ads.We understand your pain with ads, but without ads, we won’t be able to provide you with free content soon. If you need our content for work or study, please support our efforts and disable AdBlock for our site. As you will see, we have a lot of helpful information to share.
как в ворде поставить ентер после каждого слова?

Берешь и нажимаешь на кнопку «enter». Все очень просто.

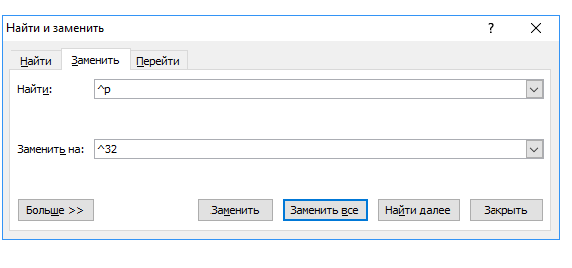
Меню «Замена. «, откроется окно, внизу выбрать Дополнительно, поставить курсор на поле Заменить на, внизу выбрать из списка символ абзаца, в поле Найти ввести один пробел. Справа нажать кнопку Заменить все. В результате все пробели заменяться на абзац (символ клавиши enter).
Как заменить перенос строки пробелом?
Гиперссылки в документе иногда действительно бывают абсолютно не нужны.
Для того, чтобы удалить все гиперссылки из документа Word, проще всего поступить так:
1) Выделить весь текст. Это можно сделать либо с помощью комбинации клавиш Ctrl + A, либо с помощью кнопки на панели инструментов «Выделить» -> «Выделить всё».
2) Нажать комбинацию клавиш Ctrl + Shift + F9.
После этого все гиперссылки в документе станут обычным текстом.
Это самый наиболее правильный способ.
Кроме того, есть и такие варианты:
1) Удалять каждую гиперссылку по отдельности (если их в вашем документе не очень много).
2) Переместить весть текст в «Блокнот» (где гиперссылки никак не выделяются), а затем вставить обратно в документ Ворд.
Как правило, никакой разницы между понятиям «документ Word» и «файл Word» нет. Хотя в программе Word можно готовить далеко не только документы, а также, письма, рассказы, схемы, фоторепортажи и т.п. — их все же принять условно называть документами, т.к. это самое распространенное применение программы. Документы Word хранятся в формате .DOC или .DOCX.
И все же Word может обрабатывать не только файлы с документами. В нем, например, можно готовит шаблоны документов (файлы с расширением .DOT), которые содержат описание стилей оформления документов. Это файлы являются файлами Word, но не называются документами.
Также Word может сохранять документы в форматах, отличных от .DOC и .DOCX, например, в .RTF. или .PDF. Это все равно документы, но их не вполне корректно называть «файлами Word» т.к. эти форматы разработаны не специально для него.
Есть такая возможность в самом Ворде. Если это ворд 2003 года, то вкладка сервис и там статистика. Выскакивает отдельное окно, и там будет указано количество символов с пробелами и без. Если ворд 2007 или 2010, то данная функция находится на вкладке рецензирование, в левой части, где написано правописание. Кнопка с цифрами 1, 2, 3 и первыми английскими буквами. Это очень удобно при выполнении заказов на биржах (если требуется определенное количество символов без пробелов).
Способ действительно один — нажать на кнопку Office в левом верхнем углу, выбрать пункт Параметры Word — Правописание — Параметры автозамены — Автоформат. И убрать галку около первого пункта раздела Заменять.
Этот способ позволит писать те кавычки, которые надо.
Подобная замена, при наличие галочки на пункте, будет работать. А вот метод с Найти и Заменить, где в верхней строчке пишешь одни кавычки, а в нижней — другие, в таком случае не сработает. Ибо после изменения сама программа будет автоматически менять все назад.
И кавычки придется писать или так, или и с использованием значков с таблицы символов.
Как цвет шрифта, так и заливку вокруг текста (будто подчеркнули маркером) можно изменить или убрать, перейдя на вкладку «главная». В подкатегории «абзац» имеются кнопки управления цветом шрифта и цветом фона. Выделив нужный участок, можно выбрать «нет заливки» и забыть о присутствии цвета.
Знаки абзацев и другие символы форматирования в Word 2010
Если вы хотите, чтобы Word красиво выравнивал текст и соблюдал интервалы между абзацами, то вы должны убедиться в том, что вы не ставили лишние пробелы между словами и в ячейках, что начало абзацев расположены правильно и отступы настроены так, что документ выглядит правильно оформленным.
Было бы очень трудоемко определить определенные пространства или места в документе, где использовалось случайное двойное нажатие TAB (ТАБУЛЯЦИЯ) вместо одного, если не было бы знаков форматирования. Эти знаки являются непечатающимися символами и показывают нам места, где были использованы клавиши SPACE (ПРОБЕЛ), TAB, ENTER (ВВОД), или где находится скрытый текст.
Без них было бы практически невозможно создать документ в правильном оформлении: это займет очень много времени, чтобы исправить ошибки, которые мешают правильному выравниванию текста и объектов.
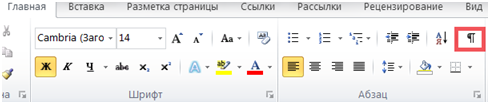
Как правило, знаки форматирования скрыты, пока вы не сделаете их видимыми нажатием ¶ на вкладке «Главная» в Word (рис. 1).
Кроме того, вы можете использовать сочетания клавиш Ctrl + * или Ctrl + Shift + 8 для переключения «ПоказатьСкрыть» символов форматирования. Переключение отображения символов форматирования имеет два положения:
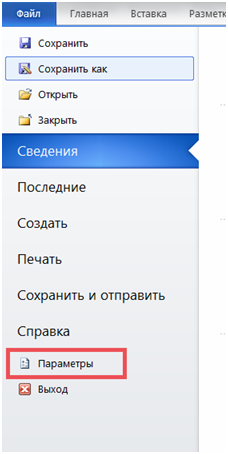
Нажмите вкладку « Файл » , а затем нажмите « Параметры » (рис. 2).
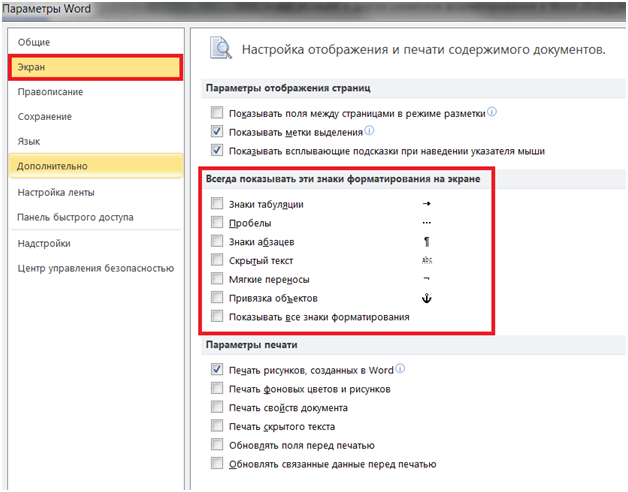
Нажмите «Экран» и с лева, под «Всегда показывать эти знаки форматирования» выберите какие знаки форматирования вы хотите сделать видимыми всегда, даже после отключения (рис. 3).
Существуют различные знаки форматирования, или иногда их называют непечатающимися символами, в Word. Рассмотрим основные из них.
Символ пробела
Точки это знаки форматирования пробелов между словами. Одно нажатие на пробел – одна точка (рис. 4).

Символ абзаца
Символ (¶) представляет собой конец абзаца. После этого символа Word начинает новый абзац и перемещает курсор на новую строку (рис. 5).

Знак абзаца помещается в документе при нажатии клавиши Enter на вашей клавиатуре. Текст между двумя этими символами определяется как абзац и имеет ряд свойств, которые можно регулировать независимо от остального текста (или абзацев), такие как выравнивание (по левому и правому краям, по центру и ширине), интервалы перед и после абзаца, интервалы между строками, нумерация и др.
Знак табуляции
Нажатие табуляции (TAB) отображается знаком стрелки, направленной вправо (рис. 6):

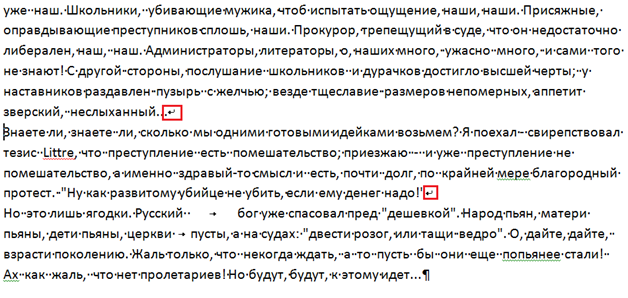
Перевод строки
Знак перевода строки или  представляет собой место, где строка обрывается и текст продолжается с новой строки. Вы можете вставить перевод строки, нажав Shift+Enter.
Функции знака перевода строки во многом схожи со знаком абзаца и имеет аналогичный эффект, за исключением, что при переводе строки не определяются новые абзацы (рис. 7).
Скрытый текст
Скрытый текст представляет собой пунктирную линию под текстом, который определен как скрытый (рис. 8).

Когда вы отключите знаки форматирования вышеуказанный текст будет выглядеть вот так (рис. 9):

Скрытый текст не печатается. НО! Как же скрыть текст? Это очень просто 😉
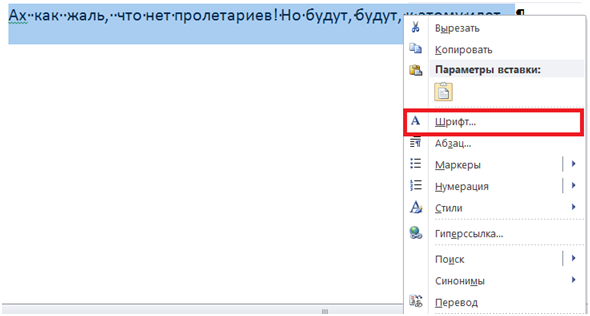
Нажмите на «Скрытый» (рис. 11)
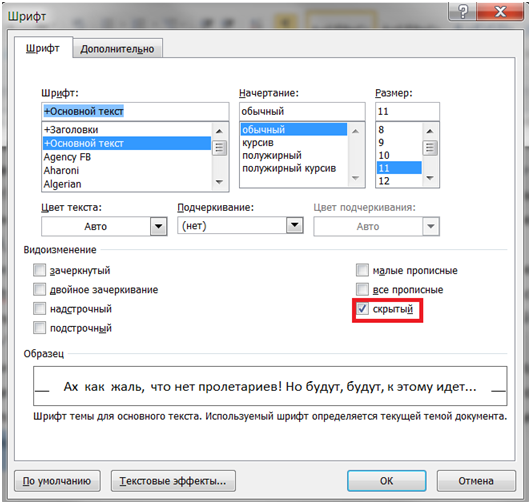
Зачем нам прятать текст? В первую очередь для настройки документа или шаблона текста, чтобы соответствовать специфическим требованиям. Вы также можете скрывать текст, если вы не хотите выводить его на печать в данный момент, но не хотите удалять.
Возвращаемся к знакам форматирования.
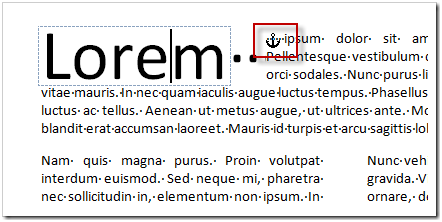
Якорь
Якорь представляет собой место в тексте, где некоторые объекты в документе были изменены и объект якоря оказывает влияние на поведение данного объекта в тексте. Другими словами, объект якоря, как крюк или кольцо, находится на обратной стороне картины, которые используются, чтобы повесить картину на стене.
Якорь представляет собой небольшую иконку в виде якоря корабля (рис. 12).
Конец ячейки
Установлено, что в ячейках данный знак означает собой конец последнего абзаца в ячейке или в ее конце. Она отражает форматирование ячейки (рис. 13).
Equation is an integral part of many technical manuscripts, including thesis and research papers. However, typing it in Ms Word is cumbersome and tiring task. To ease it, Microsoft Word has LaTeX type equation editor shortcut feature for typing equation. These equation editor shortcut as termed as Math AutoCorrect and are available in versions of Microsoft Word 2007 and above.
Equation editor shortcut has a potential to save a lot of time and effort. For e.g., to get Greek letter  , you can type alpha instead of going to Symbols in Insert Tab and searching for .
Enabling Math Autocorrect
Most version of Microsoft Word, Math AutoCorrect is enabled by default. To ensure you can visit, File Menu → Options → Proofing → Autocorrect Options → Math AutoCorrect and ensure box against “Replace text as you type” is checked. These shortcut work only inside Equation Editor. However, if you want to use it outside Equation Editor, then check “Use Math Autocorrect Rules outside of math regions“
Shortcut to get equation editor in Ms Word and Power Point is “Alt + =” (i.e. hold down Alt key while typing ‘=’). Although you can also click on “Equations” under the “Insert” Tab to get it.
Spaces is an important part of Math AutoCorrect shortcut. It tells Ms Word and Power Point when it is time to translate a part of equation into Mathematical Symbols/Operators. For clarity whenever necessary, space are shown as <sp> in Math AutoCorrect formula.
Subscript & Superscript
Equation editor shortcut for subscript and superscript is _ and ^. Anything after _ or ^ will get converted into subscript or superscript respectively, after hitting space. To include space in subscript or superscript, group them in () or parenthesis. These grouping parenthesis don’t appear after Math AutoCorrect. Grouping is also important as it distinguish between  and
and  . While adding pre-subscript or pre-superscript, use zwsp along with _ and ^ sign as shown below.
| Use | For | Use | For |
|---|---|---|---|
| A_circle<sp> |  |
r^2<sp> |  |
| A_(big circle)<sp> |  |
H^(2 square)<sp> |  |
| r^2_outer<sp> |  |
r^2_(outer circle) |  |
| zwsp<sp>_c<sp> |  |
zwsp<sp>^c<sp>R |  |
| zwsp<sp>_c^d<sp>R |  |
zwsp<sp>_c^d<sp>_e^f<sp> |  |
Letters
Blackboard Bold letters or Double letters:
Use doubleXX, where XX is the required uppercase letter for e.g. use doubleA for  and doubleR for
  .
.
Fraktur letters
Fraktur is a calligraphic hand of the Latin alphabet. We can easily write it in Ms Word using frakturXX where XX is an uppercase letter. For e.g. use Ms Word shortcut “frakturB” for “ “ and “frakturG” for “
 “.
“.
Greek letter
Greek letter has 24 different alphabets. There are four distinct ways of typing Greek alphabets in Microsoft Word. Of these, Math AutoCorrect method is the easiest to remember and the fastest of all four. This method of typing Greek letters is as easy as typing its spelling after (backslash). To get lower case Greek Alphabet, type name of Greek letter after in lower case (for e.g. alpha for ) and for upper case Greek Alphabet type name of Greek letter after in Title Case (e.g. Gamma for  ). You can also use Alt codes for typing Greek letters.
| Name of Greek letter | Uppecase | Shortcut | Lowercase | Shortcut |
|---|---|---|---|---|
| Alpha | A | Alpha | |
alpha |
| Beta | B | Beta |  |
beta |
| Gamma | |
Gamma |  |
gamma |
| Delta |  |
Delta |  |
delta |
| Epsilon | E | Epsilon |  |
epsilon |
| Zeta | Z | Zeta |  |
zeta |
| Eta | H | Eta |  |
eta |
| Theta |  |
Theta |  |
theta |
| Iota | I | Iota |  |
iota |
| Kappa | K | Kappa |  |
kappa |
| Lambda |  |
Lambda |  |
lambda |
| Mu | M | Mu |  |
mu |
| Nu | N | Nu |  |
nu |
| Xi |  |
Xi |  |
xi |
| Pi |  |
Pi |  |
pi |
| Rho | P | Rho |  |
rho |
| Sigma |  |
Sigma |  |
sigma |
| Tau | T | Tau |  |
tau |
| Upsilon |  |
Upsilon |  |
upsilon |
| Phi |  |
Phi |  |
phi |
| Chi | X | Chi |  |
chi |
| Psi |  |
Psi |  |
psi |
| Omega |  |
Omega |  |
omega |
Scientific and Mathematical Symbol Symbols
Equation editor shortcut for scientific and mathematical symbols like infinity, different arrows, operators (like partial, del and nabla), conditional symbols, dot, cross, mapsto, perpendicular, set symbols, for all, equivalent, congruent, angle, proportional etc are given in the following table.

| Symbol Name | Symbol | Ms Word Shortcut | Symbol Name | Symbol | Ms Word Shortcut |
|---|---|---|---|---|---|
| Infinity | ∞ | infty | Hbar | ℏ | hbar |
| Right Arrow | → | rightarrow, -> | Left Arrow | ← | leftarrow |
| Up Arrow | ↑ | uparrow | Down Arrow | ↓ | downarrow |
| North-east Arrow | ↗ | nearrow | North-west Arrow | ↖ | nwarrow |
| South-east Arrow | ↘ | searrow | South-west Arrow | ↙ | swarrow |
| Left Right arrow | ↔ | leftrightarrow | Up Down Arrow | ↕ | updownarrow |
| Rightwards Double Arrow | ⇒ | Rightarrow | Leftwards Double Arrow | ⇐ | Leftarrow |
| Upwards Double Arrow | ⇑ | Uparrow | Downwards Double Arrow | ⇓ | Downarrow |
| Partial | ∂ | partial | Nabla | ∇ | nabla |
| Less Than Equal To | ≤ | le | Greater Than Equal To | ≥ | ge |
| Double Less Than | ≪ | ll | Double Greater Than | ≫ | gg |
| Times | 𝑎 × 𝑏 | a times b | Tensor Product or O Times | 𝑓(𝑡) ⊗ 𝑔(𝑡) | f(t)otimes g(t) |
| Dot | 𝑎 ⋅ 𝑏 | acdot b | O Dot | 𝑎 ⊙ 𝑏 | aodot b |
| O Plus | 𝑥 ⊕ y | xoplus y | O Minus | 𝑥 ⊖ 𝑦 | aominus y |
| Maps To | 𝑎 ↦ | amapsto b | Right Arrow with Hook | ↪ | hookrightarrow |
| Dots | 𝑎 … 𝑏 | adots b | Center dots | 𝑎 ⋯ 𝑏 | acdots b |
| Perpendicular | 𝑎 ⊥ 𝑏 | a bot b | 𝑎 ⊤ 𝑏 | a top b | |
| Intersection | 𝐴⋂𝐵 | Abigcap B | Union | 𝐴⋃𝐵 | A bigcup B |
| Big Square Cup | 𝐴⨆𝐵 | Abigsqcup B | Big U with Plus | 𝐴⨄𝐵 | A biguplus B |
| Star | 𝑎 ⋆ 𝑏 | a star b | For All | ∀ | forall |
| In | ∈ | in | Exists | ∃ | exists |
| Big Wedge | ⋀ | bigwedge | Big Ve | ⋁ | bigvee |
| Equiv | ≡ | equiv | Congruent | ≅ | cong |
| Not Equal To | ≠ | ne | Approximately Equal | ≈ | approx |
| Similar | ∼ | sim | Similar To | ≃ | simeq |
| Natural Joint of Bowtie | ⋈ | bowtie | Box | □ | box |
| Subset | ⊂ | subset | Empty Set | ∅ | emptyset |
| Therefore | ∴ | therefore | Because | ∵ | because |
| Plus or minus | ± | pm or +- | Minus or plus | ∓ | mp |
| Angle | ∠ | angle | Proportional To | ∝ | proto |
| Degree C | 22 °C | 22 degc |
Accent
For various reasons you need to have an accent like bar, grave, tilde, dot (for denoting derivative) above symbol. We can easily achieve these using following word shortcut.
| Accent | For | Equation editor shortcut |
|---|---|---|
| Bar |  |
xbar<sp> |
| Double bar |  |
xBar<sp> |
| Under bar |  |
xubar<sp> |
| Double under bar |  |
xuBar<sp> |
| Acute |  |
xacute<sp> |
| Grave |  |
xgrave<sp> |
| Vector |  |
xvec<sp> |
| Hat |  |
xhat<sp> |
| Left-right arrow |  |
xtvec<sp> |
| Left harpoon |  |
xlhvec<sp> |
| Right harpoon |  |
xrhvec<sp> |
| Dot |  |
xdot<sp> |
| Double dot |  |
xddot<sp> |
| Triple dot |  |
xdddot<sp> |
| Four dot |  |
xddddot<sp> |
| Breve |  |
xbreve<sp> |
| Check |  |
xcheck<sp> |
| Tilde |  |
xtilde<sp> |
| Left vector (or left arrow) |  |
xlvec<sp> |
Grouping and brackets
Equation editor causes brackets (such as [], {} and ()) to grow to fit the size of expression within them. However, parenthesis used for grouping are not displayed in the final formatted expression. However, when parenthesis is required to be displayed, it must be doubled (one for grouping which will vanish in final formatted expression and other for displaying). Escape sequence ( followed by desired bracket is used to prevent bracket from being reformatted.
| To Display | Use | Comment |
|---|---|---|
 |
x/y | / is used for fraction |
![left[frac{x}{y} right ]](https://www.pickupbrain.com/wp-content/ql-cache/quicklatex.com-1d322bc4ca3e458bcdecd2b103f35c2d_l3.svg "Rendered by QuickLaTeX.com") |
[x/y] | [] bracket automatically expands to adjust fraction |
 |
{x/y} | |
 |
(x/y) | Parentheses displayed as they not used for grouping |
 |
a/(p+q) | Parentheses used for grouping (denominator here) are not displayed |
 |
a/((p+q)) | Parentheses used for grouping (denominator here) is not displayed |
 |
[ aatop b close y | |
 |
|(p|q|r)/(c+d)| | Again parentheses used for grouping are not displayed |
 |
|a|b|x/(a+b) | Grouping parentheses not displayed |
 |
norm a norm |
Square root, Cube root, and more
Equation editor shortcut for square root, cube root and higher roots are sqrt(), cbrt() and sqrt(n&x) respectively.
| Symbol | Equation Editor Shortcut |
|---|---|
 |
sqrt(x)<sp> |
![sqrt[3]{x+1}](https://www.pickupbrain.com/wp-content/ql-cache/quicklatex.com-a00f22f2e01abf18bbcfc30b206b8fb8_l3.svg "Rendered by QuickLaTeX.com") |
cbrt(x+1)<sp> |
![sqrt[n]{x + 1}](https://www.pickupbrain.com/wp-content/ql-cache/quicklatex.com-66ca71b118bffeb4855f0d9f21caf4b1_l3.svg "Rendered by QuickLaTeX.com") |
sqrt(n&x)<sp> |
For more shortcut and example on root sign, visit our blog on Shortcut for Square root, and higher order roots
Matrices
Empty Matrix
The basic equation editor shortcut for creating an empty matrix of custom size is matrix(@@&&&)<sp>. Matrix size decided by number of @ (for rows) and & (for columns) respectively. Number of @ and & symbol is one less than number of rows and columns, respectively.
Matrix with elements
You can also create matrix filled with elements using above shortcut. Using this method, we enter elements of the matrix row wise, starting with the top row. Use & to move to the next column and @ for the next row.
| Equation Editor Shortcut | Output Matrix |
|---|---|
| matrix(@@&) |  |
| pmatrix(@@&) or (matrix(@@&) |  |
| Vmatrix(@@&) |  |
| [matrix(1&2&[email protected]&5&[email protected]&8&9)] |  |
| pmatrix(1&[email protected]&[email protected]&6) |  |
For more details and example, visit our blog on different methods and equation editor shortcut for typing matrix in Ms Word.
Piece wise function
There are two ways to insert piece wise function in using Equation Editor shortcut in Ms Word. First one uses cases() method while the second one uses matrix(). In both the cases, desired piecewise functions are entered inside the parenthesis.
Like matrix, @ is used as a row separator. To get only the opening curly braces ‘{‘ which automatically extends the height of piecewise function, use close in place of closing ‘}’.
| Equation editor shortcut | Output | Note |
|---|---|---|
| f(x) = {cases(x,x>[email protected],x<0)close |  |
@ is used as row separator and close is required to ensure opening { expands vertically to cover all cases |
| f(x) = {matrix(x & x>[email protected] & x<0)close |  |
Similar to above, & is used as column separator |
| f(x) = {matrix(x & x>[email protected] & x<0) |  |
Without close, opening ‘{‘ doesn’t expands |
Integral, Sum and Product
Shortcut for integral sign, sum and product signs are int, sum and prod. You can use _ and ^ for inserting text below and above signs, respectively.
| Equation Editor Shortcut | Output | Note |
|---|---|---|
| int<sp>f(x)dx |  |
|
| int_x=0^1<sp>f(x)dx |  |
_ for lower limit and ^ for upper limit |
| iint<sp>f(x)dx |  |
iint for double integral |
| iintbelow(S)<sp>ds |  |
use below to put text below symbol |
| iiintabove(V)<sp><sp>dV |  |
use above to put text above symbol |
| oint<sp>f(x)dx |  |
oint for cyclic integral, similarly use oiint for cyclic double Sum, integral |
| sum_(i=1)^n<sp>A_i<sp> |  |
sum_(i=1)^n<sp>A_i<sp>sum for sum symbol and _ & ^ sign for getting text below and above sum. Parenthesis can be used for grouping text with spaces |
| prod_(n=0)^N<sp>x^n<sp> |  |
Similar to sum. |
Conclusion
Math Autocorrect shortcut provides useful shortcuts for typing most of the mathematical expression. They are often the fastest and efficient way of typing equation in Ms Word.

The function keys on keyboards don’t get the love they used to, but depending on the app you’re running, they can still be quite handy. Word, in particular, has some interesting features tucked away behind your function keys. Here’s what they do.
F1
- F1: Get help. How this works depends on what you’re looking at in the Word window. Press F1 in the regular document window, for example, to open Word’s Help pane. Sometimes, though, pressing F1 takes you to Microsoft’s support site and shows you more targeted articles about the feature you’re looking at. This is the case most of the time when you press F1 while a dialog box is open.
- Shift+F1: Open Word’s “Reveal Formatting” pane, where you can see the character and paragraph formatting of whatever text you have selected.
- Alt+F1: Jump to the next field if you’ve got fields in your document.
- Alt+Shift+F1: Jumps to the previous field in your document.
F2
- F2: Move text or objects. Select the text or object you want to move and then hit F2. Place your insertion point where you’d like to move the item and then hit Enter.
- Shift+F2: Copy selected text. It’s just like hitting Ctrl+C.
- Ctrl+F2: Open the Print window, where you can preview and print your document.
- Alt+Shift+F2: Save your document. If you haven’t saved your document previously, it opens the Save As window.
- Alt+Ctrl+F2: Pop up the Open window so you can open a document.
F3
- F3: Expand an AutoText entry. Type at least the first four letters in the name of your AutoText entry and then press F3 to expand it to the full text.
- Alt+F3: Create an AutoText entry from selected text.
- Shift+F3: Change the case of selected text. Pressing this combo repeatedly cycles through the following case styles: Initial Letter Case, ALL CAPS CASE, and lower case.
- Ctrl+F3: Cut selected text to the Spike. You can cut as much text as you want this way and it all accumulates on the Spike.
- Ctrl+Shift+F3: Insert the contents of the Spike. Performing this action also clears any text in the Spike.
F4
- F4: Repeat your last action.
- Shift+F4: Repeat the last “Find” action. This one’s handy because you can use it to browse search results without having the Find and Replace window or Navigation pane open.
- Ctrl+F4: Close the current document. You’ll be asked to save the document if you’ve made any changes.
- Alt+F4: Quit Microsoft Word. This closes all open documents (giving you the chance to save changes first) and exits Word.
F5
- F5: Open “Go To” tab on the Find and Replace window. You can use this to quickly jump to a page, section, bookmark, and so on.
- Shift+F5: Jump the previous edit you made in your document. Press it again go one more edit back. Word remembers your last two edits. This works even after saving and closing a document, letting you return to where you left off when you open the document again.
- Ctrl+Shift+F5: Open the Bookmark window so you can edit bookmarks. If your insertion point is in an existing bookmark, pressing this combo opens the Bookmark window and selects that bookmark.
F6
- F6: Go to the next pane or frame in your Word window. You can use this to navigate the window without using your mouse.
- Shift+F6: Go to the previous pane or frame.
- Ctrl+F6: Go to the next open document window.
- Ctrl+Shift+F6: Go to the previous open document window.
F7
- F7: Open the Editor pane and start a spelling and grammar check.
- Shift+F7: Open the thesaurus. If you have a word selected when you press this combo, Word opens the thesaurus and looks up the selected word.
- Alt+F7: Find the next spelling or grammar error in your document.
- Alt+Shift+F7: Open the Translation pane.
F8
- F8: Enter Word’s selection mode and expand a selection. While in this mode, you can use the arrow keys to extend your selection. You can also press F8 up to five times to extend the selection outward. The first press enters selection mode, the second press selects the word next to the insertion point, the third selects the whole sentence, the fourth all the characters in the paragraph, and the fifth the whole document.
- Shift+F8: Reduce a selection. This works the same way as expanding a selection, but backward.
- Ctrl+Shift+F8: Selects a column. Once the column is selected, you can use the left and right arrow keys to extend the selection to other columns.
F9
- F9: Update a field. This is the same as right-clicking a field and choosing the “Update Field” command.
- Shift+F9: Reveal a field’s code.
- Ctrl+F9: Insert new Empty Field {} braces.
- Ctrl+Shift+F9: Unlink a field.
- Alt+F9: Toggle the display of a field’s code.
F10
- F10: Show key tips. Pressing this combo reveals single letter shortcuts you can use to access Word’s menu commands.
- Shift+F10: Display a context menu. This works just like right-clicking.
- Ctrl+F10: Maximize document window.
- Alt+Shift+F10: Display a menu or window for an available selection.
F11
- F11: Jump to the next field in your document.
- Shift+F11: Jump to the previous field in your document.
- Ctrl+F11: Lock a field so it cannot be edited.
- Ctrl+Shift+F11: Unlock a field.
- Alt+Shift+F11: Start the Microsoft Script Editor.
F12
- F12: Open the Save As window.
- Shift+F12: Save your document.
- Ctrl+F12: Open the Open window.
- Ctrl+Shift+F12: Open the Print window.
Microsoft Word has loads of great keyboard shortcuts, and its support for the function keys on your keyboard is no exception.
RELATED: All of the Best Microsoft Word Keyboard Shortcuts
READ NEXT
- › BLUETTI Slashed Hundreds off Its Best Power Stations for Easter Sale
- › HoloLens Now Has Windows 11 and Incredible 3D Ink Features
- › Google Chrome Is Getting Faster
- › How to Adjust and Change Discord Fonts
- › This New Google TV Streaming Device Costs Just $20
- › The New NVIDIA GeForce RTX 4070 Is Like an RTX 3080 for $599
How-To Geek is where you turn when you want experts to explain technology. Since we launched in 2006, our articles have been read billions of times. Want to know more?
This article describes the keyboard shortcuts and function keys in Word for Windows.
Notes:
-
To quickly find a shortcut in this article, you can use Search. Press Ctrl+F, and then type your search words.
-
If an action that you use often does not have a shortcut key, you can record a macro to create one. For instructions, go to Create or run a macro or Use a screen reader to create a macro in Word.
-
If you are using Microsoft Word Starter, be aware that not all the features listed for Word are supported in Word Starter. For more information about the features available in Word Starter, go to Word features that are not fully supported in Word Starter.
-
Get these keyboard shortcuts in a Word document at this link: Word 2016 for Windows keyboard shortcuts.
In this topic
-
Frequently used shortcuts
-
Ribbon keyboard shortcuts
-
Navigate the document
-
Preview and print documents
-
Select text and graphics
-
Edit text and graphics
-
Work with web content
-
Work with tables
-
Review a document
-
Work with references, citations, and indexing
-
Work with mail merge and fields
-
Work with text in other languages
-
Work with document views
-
Use function key shortcuts
Frequently used shortcuts
This table shows the most frequently used shortcuts in Microsoft Word.
|
To do this |
Press |
|---|---|
|
Open a document. |
Ctrl+O |
|
Create a new document. |
Ctrl+N |
|
Save the document. |
Ctrl+S |
|
Close the document. |
Ctrl+W |
|
Cut the selected content to the Clipboard. |
Ctrl+X |
|
Copy the selected content to the Clipboard. |
Ctrl+C |
|
Paste the contents of the Clipboard. |
Ctrl+V |
|
Select all document content. |
Ctrl+A |
|
Apply bold formatting to text. |
Ctrl+B |
|
Apply italic formatting to text. |
Ctrl+I |
|
Apply underline formatting to text. |
Ctrl+U |
|
Decrease the font size by 1 point. |
Ctrl+Left bracket ([) |
|
Increase the font size by 1 point. |
Ctrl+Right bracket (]) |
|
Center the text. |
Ctrl+E |
|
Align the text to the left. |
Ctrl+L |
|
Align the text to the right. |
Ctrl+R |
|
Cancel a command. |
Esc |
|
Undo the previous action. |
Ctrl+Z |
|
Redo the previous action, if possible. |
Ctrl+Y |
|
Adjust the zoom magnification. |
Alt+W, Q, then use the Tab key in the Zoom dialog box to go to the value you want. |
|
Split the document window. |
Ctrl+Alt+S |
|
Remove the document window split. |
Alt+Shift+C or Ctrl+Alt+S |
Top of Page
Close a task pane
To close a task pane using the keyboard:
-
Press F6 until the task pane is selected.
-
Press Ctrl+Spacebar.
-
Use the arrow keys to select Close, and then press Enter.
Ribbon keyboard shortcuts
The ribbon groups related options on tabs. For example, on the Home tab, the Font group includes the Font Color option. Press the Alt key to display the ribbon shortcuts, called Key Tips, as letters in small images next to the tabs and options as shown in the image below.

Note: Add-ins and other programs can add new tabs to the ribbon and might provide access keys for those tabs.
You can combine the Key Tips letters with the Alt key to make shortcuts called Access Keys for the ribbon options. For example, press Alt+H to open the Home tab, and Alt+Q to move to the Tell Me or Search field. Press Alt again to see Key Tips for the options for the selected tab.
Depending on the version of Microsoft 365 you are using, the Search text field at the top of the app window might be called Tell Me instead. Both offer a largely similar experience, but some options and search results can vary.
In Office 2013 and Office 2010, most of the old Alt key menu shortcuts still work, too. However, you need to know the full shortcut. For example, press Alt, and then press one of the old menu keys E (Edit), V (View), I (Insert), and so on. A notification pops up saying you’re using an access key from an earlier version of Microsoft 365. If you know the entire key sequence, go ahead and use it. If you don’t know the sequence, press Esc and use Key Tips instead.
Use the Access Keys for ribbon tabs
To go directly to a tab on the ribbon, press one of the following access keys. Additional tabs might appear depending on your selection in the document.
|
To do this |
Press |
|---|---|
|
Move to the Tell Me or Search field on the Ribbon to search for assistance or Help content. |
Alt+Q, then enter the search term. |
|
Open the File page to use Backstage view. |
Alt+F |
|
Open the Home tab to use common formatting commands, paragraph styles, and the Find tool. |
Alt+H |
|
Open the Insert tab to insert tables, pictures and shapes, headers, or text boxes. |
Alt+N |
|
Open the Design tab to use themes, colors, and effects, such as page borders. |
Alt+G |
|
Open the Layout tab to work with page margins, page orientation, indentation, and spacing. |
Alt+P |
|
Open the References tab to add a table of contents, footnotes, or a table of citations. |
Alt+S |
|
Open the Mailings tab to manage Mail Merge tasks and to work with envelopes and labels. |
Alt+M |
|
Open the Review tab to use Spell Check, set proofing languages, and to track and review changes to your document. |
Alt+R |
|
Open the View tab to choose a document view or mode, such as Read Mode or Outline view. You can also set the zoom magnification and manage multiple document windows. |
Alt+W |
Top of Page
Work in the ribbon with the keyboard
|
To do this |
Press |
|---|---|
|
Select the active tab on the ribbon and activate the access keys. |
Alt or F10. To move to a different tab, use access keys or the arrow keys. |
|
Move the focus to commands on the ribbon. |
Tab key or Shift+Tab |
|
Move between command groupings on the ribbon. |
Ctrl+Left or Right arrow key |
|
Move among the items on the ribbon. |
Arrow keys |
|
Show the tooltip for the ribbon element currently in focus. |
Ctrl+Shift+F10 |
|
Activate the selected button. |
Spacebar or Enter |
|
Open the list for the selected command. |
Down arrow key |
|
Open the menu for the selected button. |
Alt+Down arrow key |
|
When a menu or submenu is open, move to the next command. |
Down arrow key |
|
Expand or collapse the ribbon. |
Ctrl+F1 |
|
Open the context menu. |
Shift+F10 Or, on a Windows keyboard, the Windows Menu key (between the right Alt and right Ctrl keys) |
|
Move to the submenu when a main menu is open or selected. |
Left arrow key |
Top of Page
Navigate the document
|
To do this |
Press |
|---|---|
|
Move the cursor one word to the left. |
Ctrl+Left arrow key |
|
Move the cursor one word to the right. |
Ctrl+Right arrow key |
|
Move the cursor up by one paragraph. |
Ctrl+Up arrow key |
|
Move the cursor down by one paragraph. |
Ctrl+Down arrow key |
|
Move the cursor to the end of the current line. |
End |
|
Move the cursor to the beginning the current line. |
Home |
|
Move the cursor to the top of the screen. |
Ctrl+Alt+Page up |
|
Move the cursor to the bottom of the screen. |
Ctrl+Alt+Page down |
|
Move the cursor by scrolling the document view up by one screen. |
Page up |
|
Move the cursor by scrolling the document view down by one screen. |
Page down |
|
Move the cursor to the top of the next page. |
Ctrl+Page down |
|
Move the cursor to the top of the previous page. |
Ctrl+Page up |
|
Move the cursor to the end of the document. |
Ctrl+End |
|
Move the cursor to the beginning of the document. |
Ctrl+Home |
|
Move the cursor to the location of the previous revision. |
Shift+F5 |
|
Move the cursor to the location of the last revision made before the document was last closed. |
Shift+F5, immediately after opening the document. |
|
Cycle through floating shapes, such as text boxes or images. |
Ctrl+Alt+5, and then the Tab key repeatedly |
|
Exit the floating shape navigation and return to the normal navigation. |
Esc |
|
Display the Navigation task pane, to search within the document content. |
Ctrl+F |
|
Display the Go To dialog box, to navigate to a specific page, bookmark, footnote, table, comment, graphic, or other location. |
Ctrl+G |
|
Cycle through the locations of the four previous changes made to the document. |
Ctrl+Alt+Z |
Top of Page
Navigate the document using the browse options in Word 2007 and 2010
In Word 2007 and 2010, you can browse the document by various types of objects, such as fields, footnotes, headings, and graphics.
|
To do this |
Press |
|---|---|
|
Open the list of browse options to define the type of object to browse by. |
Ctrl+Alt+Home |
|
Move to the previous object of the defined type. |
Ctrl+Page up |
|
Move to the next object of the defined type. |
Ctrl+Page down |
Top of Page
Preview and print documents
|
To do this |
Press |
|---|---|
|
Print the document. |
Ctrl+P |
|
Switch to print preview. |
Ctrl+Alt+I |
|
Move around the preview page when zoomed in. |
Arrow keys |
|
Move by one preview page when zoomed out. |
Page up or Page down |
|
Move to the first preview page when zoomed out. |
Ctrl+Home |
|
Move to the last preview page when zoomed out. |
Ctrl+End |
Top of Page
Select text and graphics
|
To do this |
Press |
|---|---|
|
Select text. |
Shift+Arrow keys |
|
Select the word to the left. |
Ctrl+Shift+Left arrow key |
|
Select the word to the right. |
Ctrl+Shift+Right arrow key |
|
Select from the current position to the beginning of the current line. |
Shift+Home |
|
Select from the current position to the end of the current line. |
Shift+End |
|
Select from the current position to the beginning of the current paragraph. |
Ctrl+Shift+Up arrow key |
|
Select from the current position to the end of the current paragraph. |
Ctrl+Shift+Down arrow key |
|
Select from the current position to the top of the screen. |
Shift+Page up |
|
Select from the current position to the bottom of the screen. |
Shift+Page down |
|
Select from the current position to the beginning of the document. |
Ctrl+Shift+Home |
|
Select from the current position to the end of the document. |
Ctrl+Shift+End |
|
Select from the current position to the bottom of the window. |
Ctrl+Alt+Shift+Page down |
|
Select all document content. |
Ctrl+A |
Top of Page
Extend a selection
|
To do this |
Press |
|---|---|
|
Start extending the selection. |
F8 In the extend selection mode, clicking a location in the document extends the current selection to that location. |
|
Select the nearest character to the left or right. |
F8, Left or Right arrow key |
|
Expand the selection. |
F8 repeatedly to expand the selection to the entire word, sentence, paragraph, section, and document. |
|
Reduce the selection. |
Shift+F8 |
|
Select a vertical block of text. |
Ctrl+Shift+F8, then press the arrow keys |
|
Stop extending the selection. |
Esc |
Top of Page
Edit text and graphics
|
To do this |
Press |
|---|---|
|
Delete one word to the left. |
Ctrl+Backspace |
|
Delete one word to the right. |
Ctrl+Delete |
|
Open the Clipboard task pane and enable the Office Clipboard, which allows you to copy and paste content between Microsoft 365 apps. |
Alt+H, F, O |
|
Cut the selected content to the Clipboard. |
Ctrl+X |
|
Copy the selected content to the Clipboard. |
Ctrl+C |
|
Paste the contents of the Clipboard. |
Ctrl+V |
|
Move the selected content to a specific location. |
F2, move the cursor to the destination, and then press Enter. |
|
Copy the selected content to a specific location. |
Shift+F2, move the cursor to the destination, and then press Enter. |
|
Define an AutoText block with the selected content. |
Alt+F3 |
|
Insert an AutoText block. |
The first few characters of the AutoText block, and then press Enter when the ScreenTip appears. |
|
Cut the selected content to the Spike. |
Ctrl+F3 |
|
Paste the contents of the Spike. |
Ctrl+Shift+F3 |
|
Copy the selected formatting. |
Ctrl+Shift+C |
|
Paste the selected formatting. |
Ctrl+Shift+V |
|
Copy the header or footer used in the previous section of the document. |
Alt+Shift+R |
|
Display the Replace dialog box, to find and replace text, specific formatting, or special items. |
Ctrl+H |
|
Display the Object dialog box, to insert a file object into the document. |
Alt+N, J, J |
|
Insert a SmartArt graphic. |
Alt+N, M |
|
Insert a WordArt graphic. |
Alt+N, W |
Top of Page
Align and format paragraphs
|
To do this |
Press |
|---|---|
|
Center the paragraph. |
Ctrl+E |
|
Justify the paragraph. |
Ctrl+J |
|
Align the paragraph to the left. |
Ctrl+L |
|
Align the paragraph to the right. |
Ctrl+R |
|
Indent the paragraph. |
Ctrl+M |
|
Remove a paragraph indent. |
Ctrl+Shift+M |
|
Create a hanging indent. |
Ctrl+T |
|
Remove a hanging indent. |
Ctrl+Shift+T |
|
Remove paragraph formatting. |
Ctrl+Q |
|
Apply single spacing to the paragraph. |
Ctrl+1 |
|
Apply double spacing to the paragraph. |
Ctrl+2 |
|
Apply 1.5-line spacing to the paragraph. |
Ctrl+5 |
|
Add or remove space before the paragraph. |
Ctrl+0 (zero) |
|
Enable AutoFormat. |
Ctrl+Alt+K |
|
Apply the Normal style. |
Ctrl+Shift+N |
|
Apply the Heading 1 style. |
Ctrl+Alt+1 |
|
Apply the Heading 2 style. |
Ctrl+Alt+2 |
|
Apply the Heading 3 style. |
Ctrl+Alt+3 |
|
Display the Apply Styles task pane. |
Ctrl+Shift+S |
|
Display the Styles task pane. |
Ctrl+Alt+Shift+S |
Top of Page
Format characters
|
To do this |
Press |
|---|---|
|
Display the Font dialog box. |
Ctrl+D or Ctrl+Shift+F |
|
Increase the font size. |
Ctrl+Shift+Right angle bracket (>) |
|
Decrease the font size. |
Ctrl+Shift+Left angle bracket (<) |
|
Increase the font size by 1 point. |
Ctrl+Right bracket (]) |
|
Decrease the font size by 1 point. |
Ctrl+Left bracket ([) |
|
Switch the text between upper case, lower case, and title case. |
Shift+F3 |
|
Change the text to all upper case. |
Ctrl+Shift+A |
|
Hide the selected text. |
Ctrl+Shift+H |
|
Apply bold formatting. |
Ctrl+B |
|
Add a bulleted list. |
Ctrl+Shift+L |
|
Apply underline formatting. |
Ctrl+U |
|
Apply underline formatting to the words, but not the spaces. |
Ctrl+Shift+W |
|
Apply double-underline formatting. |
Ctrl+Shift+D |
|
Apply italic formatting. |
Ctrl+I |
|
Apply small caps formatting. |
Ctrl+Shift+K |
|
Apply subscript formatting. |
Ctrl+Equal sign ( = ) |
|
Apply superscript formatting. |
Ctrl+Shift+Plus sign (+) |
|
Remove manual character formatting. |
Ctrl+Spacebar |
|
Change the selected text to the Symbol font. |
Ctrl+Shift+Q |
Top of Page
Manage text formatting
|
To do this |
Press |
|---|---|
|
Display all nonprinting characters. |
Ctrl+Shift+8 (do not use the numeric keypad) |
|
Display the Reveal Formatting task pane. |
Shift+F1 |
Top of Page
Insert special characters
|
To do this |
Press |
|---|---|
|
Insert a line break. |
Shift+Enter |
|
Insert a page break. |
Ctrl+Enter |
|
Insert a column break. |
Ctrl+Shift+Enter |
|
Insert an em dash (—). |
Ctrl+Alt+Minus sign (on the numeric keypad) |
|
Insert an en dash (–). |
Ctrl+Minus sign (on the numeric keypad) |
|
Insert an optional hyphen. |
Ctrl+Hyphen (-) |
|
Insert a nonbreaking hyphen. |
Ctrl+Shift+Hyphen (-) |
|
Insert a nonbreaking space. |
Ctrl+Shift+Spacebar |
|
Insert a copyright symbol (©). |
Ctrl+Alt+C |
|
Insert a registered trademark symbol (®). |
Ctrl+Alt+R |
|
Insert a trademark symbol (™). |
Ctrl+Alt+T |
|
Insert an ellipsis (…) |
Ctrl+Alt+Period (.) |
|
Insert the Unicode character for the specified Unicode (hexadecimal) character code. For example, to insert the euro currency symbol ( Tip: To find out the Unicode character code for a selected character, press Alt+X. |
The character code, then press Alt+X |
|
Insert the ANSI character for the specified ANSI (decimal) character code. For example, to insert the euro currency symbol, hold down Alt and press 0128 on the numeric keypad. |
Alt+the character code (on the numeric keypad) |
 ), type
 Top of Page
Work with web content
|
To do this |
Press |
|---|---|
|
Insert a hyperlink. |
Ctrl+K |
|
Go back one page. |
Alt+Left arrow key |
|
Go forward one page. |
Alt+Right arrow key |
|
Refresh the page. |
F9 |
Top of Page
Work with tables
Move around in a table
|
To do this |
Press |
|---|---|
|
Move to the next cell in the row and select its content. |
Tab key |
|
Move to the previous cell in the row and select its content. |
Shift+Tab |
|
Move to the first cell in the row. |
Alt+Home |
|
Move to the last cell in the row. |
Alt+End |
|
Move to the first cell in the column. |
Alt+Page up |
|
Move to the last cell in the column. |
Alt+Page down |
|
Move to the previous row. |
Up arrow key |
|
Move to the next row. |
Down arrow key |
|
Move one row up. |
Alt+Shift+Up arrow key |
|
Move one row down. |
Alt+Shift+Down arrow key |
Top of Page
Select table content
|
To do this |
Press |
|---|---|
|
Select the content in the next cell. |
Tab key |
|
Select the content in the previous cell. |
Shift+Tab |
|
Extend a selection to adjacent cells. |
Shift+Arrow keys |
|
Select a column. |
Select the top or bottom cell of the column, and then press Shift+Up or Down arrow key |
|
Select a row. |
Select the first or last cell in the row, and then press Shift+Alt+End or Home. |
|
Select the whole table. |
Alt+5 on the numeric keypad, with Num Lock switched off |
Top of Page
Insert paragraphs and tab characters in a table
|
To do this |
Press |
|---|---|
|
Insert a new paragraph in a cell. |
Enter |
|
Insert a tab character in a cell. |
Ctrl+Tab |
Top of Page
Review a document
|
To do this |
Press |
|---|---|
|
Insert a comment. |
Ctrl+Alt+M |
|
Turn change tracking on or off. |
Ctrl+Shift+E |
|
Close the Reviewing Pane. |
Alt+Shift+C |
Top of Page
Work with references, citations, and indexing
Use the following shortcuts to add references to your document, such as a table of contents, footnotes, and citations.
|
To do this |
Press |
|---|---|
|
Mark a table of contents entry. |
Alt+Shift+O |
|
Mark a table of authorities entry (citation). |
Alt+Shift+I |
|
Choose citation options. |
Alt+Shift+F12, Spacebar |
|
Mark an index entry. |
Alt+Shift+X |
|
Insert a footnote. |
Ctrl+Alt+F |
|
Insert an endnote. |
Ctrl+Alt+D |
|
Go to the next footnote. |
Alt+Shift+Right angle bracket (>) |
|
Go to the previous footnote. |
Alt+Shift+Left angle bracket (<) |
Top of Page
Work with mail merge and fields
To use the following keyboard shortcuts, the Mailings ribbon tab must be selected. To select the Mailings tab, press Alt+M.
Perform a mail merge
|
To do this |
Press |
|---|---|
|
Preview the mail merge. |
Alt+Shift+K |
|
Merge a document. |
Alt+Shift+N |
|
Print the merged document. |
Alt+Shift+M |
|
Edit a mail-merge data document. |
Alt+Shift+E |
|
Insert a merge field. |
Alt+Shift+F |
Top of Page
Work with fields
|
To do this |
Press |
|---|---|
|
Insert a DATE field. |
Alt+Shift+D |
|
Insert a LISTNUM field. |
Ctrl+Alt+L |
|
Insert a PAGE field. |
Alt+Shift+P |
|
Insert a TIME field. |
Alt+Shift+T |
|
Insert an empty field. |
Ctrl+F9 |
|
Update the linked information in a Word source document. |
Ctrl+Shift+F7 |
|
Update the selected fields. |
F9 |
|
Unlink a field. |
Ctrl+Shift+F9 |
|
Switch between a selected field code and its result. |
Shift+F9 |
|
Switch between all field codes and their results. |
Alt+F9 |
|
Run GOTOBUTTON or MACROBUTTON from a field displaying field results. |
Alt+Shift+F9 |
|
Go to the next field. |
F11 |
|
Go to the previous field. |
Shift+F11 |
|
Lock a field. |
Ctrl+F11 |
|
Unlock a field. |
Ctrl+Shift+F11 |
Top of Page
Work with text in other languages
Set the proofing language
Every document has a default language, typically the same default language as your computer’s operating system. If your document also contains words or phrases in a different language, it’s a good idea to set the proofing language for those words. This not only makes it possible to check spelling and grammar for those phrases, but it also enables assistive technologies like screen readers to handle them appropriately.
|
To do this |
Press |
|---|---|
|
Display the Language dialog box to set the proofing language. |
Alt+R, U, L |
|
Set default languages. |
Alt+R, L |
Top of Page
Insert international characters
To type a lowercase character by using a key combination that includes the Shift key, hold down the Ctrl+Shift+symbol keys simultaneously, and then release them before you type the letter.
Note: If you type extensively in another language, you might prefer to switch to a different keyboard instead.
|
To insert this |
Press |
|---|---|
|
à, è, ì, ò, ù, |
Ctrl+Grave accent (`), the letter |
|
á, é, í, ó, ú, ý |
Ctrl+Single quotation mark (‘), the letter |
|
â, ê, î, ô, û |
Ctrl+Shift+Caret (^), the letter |
|
ã, ñ, õ |
Ctrl+Shift+Tilde (~), the letter |
|
ä, ë, ï, ö, ü, ÿ, |
Ctrl+Shift+Colon (:), the letter |
|
å, Å |
Ctrl+Shift+At sign (@), a or A |
|
æ, Æ |
Ctrl+Shift+Ampersand (&), a or A |
|
œ, Œ |
Ctrl+Shift+Ampersand (&), o or O |
|
ç, Ç |
Ctrl+Comma (,), c or C |
|
ð, Ð |
Ctrl+Single quotation mark (‘), d or D |
|
ø, Ø |
Ctrl+Forward slash (/), o or O |
|
¿ |
Ctrl+Alt+Shift+Question mark (?) |
|
¡ |
Ctrl+Alt+Shift+Exclamation point (!) |
|
ß |
Ctrl+Shift+Ampersand (&), s |
Top of Page
Use Input Method Editors for East Asian languages
|
To do this |
Press |
|---|---|
|
Switch to the Japanese Input Method Editor (IME) for a 101-key keyboard, if available. |
Alt+Tilde (~) |
|
Switch to the Korean Input Method Editor (IME) for a 101-key keyboard, if available. |
Right Alt |
|
Switch to the Chinese Input Method Editor (IME) for a 101-key keyboard, if available. |
Ctrl+Spacebar |
Top of Page
Work with document views
Word offers several different views of a document. Each view makes it easier to do certain tasks. For example, Read Mode enables you view the document as a horizontal sequence of pages, which you can quickly browse using the Left and Right arrow keys.
Switch the document view
|
To do this |
Press |
|---|---|
|
Switch to the Read Mode view. In Word 2007 and 2010, this is called Full Screen Reading view. |
Alt+W, F |
|
Switch to the Print Layout view. |
Ctrl+Alt+P |
|
Switch to the Outline view. |
Ctrl+Alt+O |
|
Switch to the Draft view. |
Ctrl+Alt+N |
Top of Page
Outline a document
These shortcuts only apply when the document is in the Outline view.
|
To do this |
Press |
|---|---|
|
Promote a paragraph. |
Alt+Shift+Left arrow key |
|
Demote a paragraph. |
Alt+Shift+Right arrow key |
|
Demote the paragraph to body text. |
Ctrl+Shift+N |
|
Move the selected paragraphs up. |
Alt+Shift+Up arrow key |
|
Move the selected paragraphs down. |
Alt+Shift+Down arrow key |
|
Expand the text under a heading. |
Alt+Shift+Plus sign (+) |
|
Collapse the text under a heading. |
Alt+Shift+Minus sign (-) |
|
Expand or collapse all text or headings. |
Alt+Shift+A |
|
Hide or display the character formatting. |
Forward slash (/) (on the numeric keypad) |
|
Switch between showing the first line of body text and showing all body text. |
Alt+Shift+L |
|
Show all headings with the Heading 1 style. |
Alt+Shift+1 |
|
Show all headings with the specified heading level. |
Alt+Shift+Heading level number |
|
Insert a tab character. |
Ctrl+Tab |
Top of Page
Move through the document in Read Mode
|
To do this |
Press |
|---|---|
|
Move to the beginning of the document. |
Home |
|
Move to the end of the document. |
End |
|
Go to a specific page. |
Type the page number, then press Enter |
|
Exit Read Mode. |
Esc |
Top of Page
Use function key shortcuts
|
Key |
Description |
|---|---|
|
F1 |
|
|
F2 |
|
|
F3 |
|
|
F4 |
|
|
F5 |
|
|
F6 |
|
|
F7 |
|
|
F8 |
|
|
F9 |
|
|
F10 |
|
|
F11 |
|
|
F12 |
|
Top of Page
See also
Word help center
Basic tasks using a screen reader with Word
Use a screen reader to explore and navigate Word
Screen reader support for Word
This article describes the keyboard shortcuts and function keys in Word for Mac.
Notes:
-
The settings in some versions of the Mac operating system (OS) and some utility applications might conflict with keyboard shortcuts and function key operations in Microsoft 365 for Mac. For information about changing the key assignment for a keyboard shortcut, see Mac Help for your version of macOS, your utility application, or refer to Shortcut conflicts.
-
If you don’t find a keyboard shortcut here that meets your needs, you can create a custom keyboard shortcut. For instructions, go to Create a custom keyboard shortcut for Office for Mac.
-
Many of the shortcuts that use the Ctrl key on a Windows keyboard also work with the Control key in Word for Mac. However, not all do.
-
To quickly find a shortcut in this article, you can use Search. Press Command+F, and then type your search words.
For the best experience using your keyboard with the ribbon, enable your keyboard to access all controls.
-
To open the System Preferences, press
 +Spacebar, type system preferences, and press Return.
 -
To go to Keyboard Settings, type keyboard and press Return.
-
In the Shortcuts tab, press Control+F7 to change the Full Keyboard Access setting from Text boxes and lists only to All Controls.
In this topic
-
Frequently used shortcuts
-
Shortcut conflicts
-
Navigate the document
-
Select text and graphics
-
Edit text and graphics
-
Work with tables
-
Drawing
-
Work with fields
-
Outline a document
-
Review a document
-
Use footnotes and endnotes
-
Work with right-to-left languages
-
Use function key shortcuts
Frequently used shortcuts
This table lists frequently used shortcuts in Word for Mac.
|
To do this |
Press |
|---|---|
|
Undo the previous action. |
|
|
Redo the previous action, if possible. |
|
|
Cut the selected content to the Clipboard. |
|
|
Copy the selected content to the Clipboard. |
|
|
Paste the contents of the Clipboard. |
|
|
Display the shortcut menu for the selected item. * |
Shift+F10 |
|
Display the Go To dialog box. |
|
|
Display the Spelling and Grammar dialog box. |
|
|
Enable extended selection mode. |
F8 |
|
Switch to the next window. |
|
|
Switch to the previous window. |
|
|
Display the Save As dialog box. |
|
|
Find text (move focus to the Search in Document box). |
|
|
Display the Find and Replace pane. |
Control+H |
|
Display the Print dialog box. |
|
|
Close the current document. |
|
|
Expand or minimize the ribbon. |
|
|
Find the next spelling or grammatical error. The Check spelling as you type feature must be enabled. |
Option+F7 |
|
Open the Dictionary. |
In Word 2011, Option+Shift+F7 |
Top of Page
Shortcut conflicts
Some Word for Mac keyboard shortcuts conflict with default macOS keyboard shortcuts. This topic flags such shortcuts with an asterisk ( * ). To use these shortcuts, you may have to change your Mac keyboard settings to change the shortcut for the key.
Change system preferences for keyboard shortcuts
-
From the Apple menu, select System Preferences.
-
Select Keyboard.
-
Select the Shortcuts tab.
-
Select Mission Control.
-
Clear the check box for the keyboard shortcut conflicting with the Word for Mac shortcut that you want to use.
Navigate the document
|
To do this |
Press |
|---|---|
|
Move the cursor one word to the left. |
Option+Left arrow key |
|
Move the cursor one word to the right. |
Option+Right arrow key |
|
Move the cursor up by one paragraph. |
|
|
Move the cursor down by one paragraph. |
|
|
Move the cursor to the beginning of the current line. |
Home |
|
Move the cursor to the end of the current line. |
End |
|
Move the cursor to the top of the previous page. |
On a MacBook, press |
|
Move the cursor to the top of the next page. |
On a MacBook, press |
|
Move the cursor to the beginning of the document. |
On a MacBook, press |
|
Move the cursor to the end of the document. |
On a MacBook, press |
|
Move the cursor to the previous insertion point. |
Shift+F5 |
|
Move the cursor by scrolling the document view up by one screen. |
Page up |
|
Move the cursor by scrolling the document view down by one screen. |
Page down |
Top of Page
Select text and graphics
Tip: If you know the key combination to move the cursor, you can generally select the text by using the same key combination while holding down Shift. For example,  +Right arrow moves the cursor to the next word, and +Shift+Right arrow selects the text from the cursor to the beginning of the next word.
|
To do this |
Press |
|---|---|
|
Select multiple items that are not next to each other. |
Select the first item that you want, hold down |
|
Select text. |
Shift+Arrow keys |
|
Select the word to the left. |
Shift+Option+Left arrow key |
|
Select the word to the right. |
Shift+Option+Right arrow key |
|
Select from the current position to the beginning of the current line. |
Shift+Home |
|
Select from the current position to the end of the current line. |
Shift+End |
|
Select from the current position to the beginning of the current paragraph. |
|
|
Select from the current position to the end of the current paragraph. |
|
|
Select from the current position to the top of the screen. |
Shift+Page up |
|
Select from the current position to the bottom of the screen. |
Shift+Page down |
|
Select from the current position to the beginning of the document. |
|
|
Select from the current position to the end of the document. |
|
|
Select from the current position to the bottom of the window. |
|
|
Select all document content. |
|
Top of Page
Extend a selection
|
To do this |
Press |
|---|---|
|
Start extending the selection. * |
F8 In the extend selection mode, clicking a location in the document extends the current selection to that location. |
|
Select the nearest character to the left. |
F8, Left arrow key |
|
Select the nearest character to the right. |
F8, Right arrow key |
|
Expand the selection. |
F8 repeatedly to expand the selection to the entire word, sentence, paragraph, section, and document. |
|
Reduce the selection. * |
Shift+F8 |
|
Select a vertical block of text. |
|
|
Stop extending the selection. |
Esc |
Top of Page
Edit text and graphics
|
To do this |
Press |
|---|---|
|
Cut the selected content to the Clipboard. |
F2 |
|
Copy the selected content to the Clipboard. |
F3 |
|
Paste the contents of the Clipboard. |
F4 |
|
Display the Paste Special dialog box. |
|
|
Cut the selected content to the Spike. |
|
|
Paste the contents of the Spike. |
|
|
Copy the selected formatting. |
|
|
Paste the copied formatting. |
|
|
Create an AutoText entry. |
Option+F3 |
Top of Page
Align and format paragraphs
|
To do this |
Press |
|---|---|
|
Center the paragraph. |
|
|
Justify the paragraph. |
|
|
Align the paragraph to the left. |
|
|
Align the paragraph to the right. |
|
|
Indent the paragraph. |
Control+Shift+M |
|
Remove a paragraph indent. |
|
|
Create a hanging indent. |
|
|
Remove a hanging indent. |
|
|
Apply single-spacing to the paragraph. |
|
|
Apply double-spacing to the paragraph. |
|
|
Apply 1.5-line spacing to the paragraph. |
|
|
Enable AutoFormat. |
|
|
Apply the Normal style. |
|
|
Apply the Heading 1 style. |
|
|
Apply the Heading 2 style. |
|
|
Apply the Heading 3 style. |
|
|
Apply the List style. |
|
|
Insert a nonbreaking space. |
Option+Spacebar |
Top of Page
Format characters
|
To do this |
Press |
|---|---|
|
Increase the font size. |
|
|
Decrease the font size. |
|
|
Increase the font size by 1 point. |
|
|
Decrease the font size by 1 point. |
|
|
Display the Font dialog box. |
|
|
Switch the text between upper case, lower case, and title case. |
Shift+F3 |
|
Change the text to all upper case. |
|
|
Apply bold formatting. |
|
|
Add a bulleted list. |
|
|
Apply underline formatting. |
|
|
Apply underline formatting to the words, but not the spaces. |
|
|
Apply double-underline formatting. |
|
|
Apply italics formatting. |
|
|
Apply small caps formatting. |
|
|
Apply strike-through formatting. |
|
Top of Page
Insert special characters
|
To do this |
Press |
|---|---|
|
Insert an empty field. |
|
|
Insert a line break. |
Shift+Return |
|
Insert a page break. |
|
|
Insert a column break. |
|
|
Insert a nonbreaking hyphen. |
|
|
Insert a registered trademark symbol (®). |
Option+R |
|
Insert a trademark symbol (™). |
Option+2 |
Top of Page
Work with tables
Move around in a table
|
To do this |
Press |
|---|---|
|
Move to the next cell and select its content. |
Tab key |
|
Move to the previous cell and select its content. |
Shift+Tab |
|
Move to the next row. |
Down arrow key |
|
Move to the previous row. |
Up arrow key |
|
Move to the first cell in the row. |
Control+Home |
|
Move to the last cell in the row. |
Control+End |
|
Move to the first cell in the column. |
Control+Page up |
|
Move to the last cell in the column. |
Control+Page down |
|
Add a new row to the bottom of the table. |
Tab key, at the end of the last row |
|
Insert a row. |
|
Top of Page
Select table content
|
To do this |
Press |
|---|---|
|
Select the content in the next cell. |
Tab key |
|
Select the content in the previous cell. |
Shift+Tab |
|
Extend a selection to adjacent cells. |
Shift+Arrow keys |
|
Select a row. |
Select the first or last cell in the row, and then press Shift+Alt+End or Home. |
Top of Page
Resize table columns with the ruler
|
To do this |
Press |
|---|---|
|
Retain the column sizes to the right and change the table width. |
Drag the column boundary in the ruler |
|
Move a single column line and retain the table width. |
Shift+Drag the column boundary in the ruler |
|
Equally resize all columns to the right and retain the table width. |
|
|
Proportionally resize all columns to the right and retain the table width. |
|
Top of Page
Resize table columns directly in a table
Tip: To finely adjust the column width and display the column’s measurements in the ruler when you resize the column, turn off the snap-to functionality by pressing Option with the shortcut keys.
|
To do this |
Press |
|---|---|
|
Move a single column line and retain the table width. |
Drag the column boundary |
|
Retain column sizes to the right and change the table width. |
Shift+Drag the column boundary |
|
Equally resize all columns to the right and retain the table width. |
|
|
Proportionally resize all columns to the right and retain the table width. |
|
Top of Page
Insert paragraphs and tab characters in a table
|
To do this |
Press |
|---|---|
|
Insert a new paragraph in a cell. |
Return |
|
Insert a Tab character in a cell. |
Option+Tab |
Top of Page
Drawing
|
To do this |
Press |
|---|---|
|
Toggle drawing mode. |
|
Top of Page
Work with fields
|
To do this |
Press |
|---|---|
|
Insert a DATE field. |
Control+Shift+D |
|
Insert a LISTNUM field. |
|
|
Insert a PAGE field. |
Control+Shift+P |
|
Insert a TIME field. |
Control+Shift+T |
|
Insert an empty field. |
|
|
Update the selected fields. * |
F9 |
|
Switch between a field code and its result. * |
Shift+F9 |
|
Switch between all field codes and their results. |
Option+F9 |
|
Run GOTOBUTTON or MACROBUTTON from a field displaying field results. |
Option+Shift+F9 |
|
Lock a field. |
|
|
Unlock a field. |
|
Top of Page
Outline a document
These shortcuts only apply when the document is in the Outline view.
|
To do this |
Press |
|---|---|
|
Promote a paragraph. |
Control+Shift+Left arrow key |
|
Demote a paragraph. |
Control+Shift+Right arrow key |
|
Demote the paragraph to body text. |
|
|
Move the selected paragraphs up. * |
Control+Shift+Up arrow key |
|
Move the selected paragraphs down. * |
Control+Shift+Down arrow key |
|
Expand the text under a heading. |
Control+Shift+Plus sign (+) |
|
Collapse text under a heading. * |
Control+Shift+Minus sign (-) |
|
Expand all body text and headings, or collapse all body text. |
Control+Shift+A |
|
Switch between showing the first line of body text and showing all body text. |
Control+Shift+L |
|
Show all headings with the specified heading level. |
Control+Shift+Heading level number |
Top of Page
Review a document
|
To do this |
Press |
|---|---|
|
Insert a comment. |
|
|
Turn change tracking on or off. |
|
|
Move to the beginning of a comment. |
Home |
|
Move to the end of a comment. |
End (The End key is not available on all keyboards.) |
|
Move to the beginning of the list of comments. |
|
|
Move to the end of the list of comments. |
|
Top of Page
Use footnotes and endnotes
|
To do this |
Press |
|---|---|
|
Insert a footnote. |
|
|
Insert an endnote. |
|
Top of Page
Work with right-to-left languages
Word supports right-to-left functionality for languages that work in a right-to-left or a combined right-to-left, left-to-right environment for writing, editing, and displaying text. In this context, right-to-left languages refers to any writing system that is written from right to left and includes languages that require contextual shaping, such as Arabic, and languages that do not.
Before you can use these keyboard shortcuts, you need to ensure keyboard shortcuts are enabled for the language you are using:
-
Go to Apple > System Preferences > Keyboard.
-
On the Input Sources tab, select the language for which you want to enable shortcuts.
-
On the right side of the tab, select the check box for Enable keyboard shortcuts.
|
To do this |
Press |
|---|---|
|
Switch the writing direction to right-to-left. |
Control+ |
|
Switch the writing direction to left-to-right. |
Control+ |
Top of Page
Use function key shortcuts
Word for Mac uses the function keys for common commands, including Copy and Paste. For quick access to these shortcuts, you can change your Apple system preferences so you don’t have to press the Fn key every time you use a function key shortcut.
Note: Changing system function key preferences affects how the function keys work on your Mac, not just in Word. After changing this setting, you can still perform the special features printed on a function key. Just press the Fn key. For example, to use the F12 key to change your volume, press Fn+F12.
If a function key doesn’t work as you expect it to, press the Fn key in addition to the function key. If you don’t want to press the Fn key each time, you can change your Apple system preferences. For instructions, go to Change function key preferences.
The following table provides the function key shortcuts for Word for Mac.
|
Key |
Description |
|---|---|
|
F1 |
|
|
F2 |
|
|
F3 |
|
|
F4 |
|
|
F5 |
|
|
F6 |
|
|
F7 |
|
|
F8 |
|
|
F9 |
|
|
F10 |
|
|
F11 |
|
Top of Page
Change function key preferences
-
In the Apple menu, select System Preferences.
-
Select Keyboard.
-
On the Keyboard tab, select the check box for Use all F1, F2, etc. keys as standard function keys.
See also
Word help center
Basic tasks using a screen reader with Word
Use a screen reader to explore and navigate Word
Screen reader support for Word
This article describes the keyboard shortcuts in Word for the web.
Notes:
-
If you use Narrator with the Windows 10 Fall Creators Update, you have to turn off scan mode in order to edit documents, spreadsheets, or presentations with Microsoft 365 for the web. For more information, refer to Turn off virtual or browse mode in screen readers in Windows 10 Fall Creators Update.
-
To quickly find a shortcut in this article, you can use Search. Press Ctrl+F and then type your search words.
-
When you use Word for the web, we recommend that you use Microsoft Edge as your web browser. Because Word for the web runs in your web browser, the keyboard shortcuts are different from those in the desktop program. For example, you’ll use Ctrl+F6 instead of F6 for jumping in and out of the commands. Also, common shortcuts like F1 (Help) and Ctrl+O (Open) apply to the web browser – not Word for the web.
In this topic
-
Frequently used shortcuts
-
Ribbon keyboard shortcuts
-
Navigate the document
-
Edit and format the document
-
Work with comments
Frequently used shortcuts
This table lists the most frequently used shortcuts in Word for the web.
Tip: To quickly create a new document in Word for the web, open your browser, type Word.new in the address bar, and then press Enter.
|
To do this |
Press |
|---|---|
|
In the Reading view, open a PDF-based view tagged to work with screen readers. |
Press the Tab key until you reach the Accessibility Mode button, and then press Enter |
|
Find text in the Reading view. |
Ctrl+F or F3 |
|
Find text in the Editing view. |
Ctrl+F or Ctrl+G |
|
Find and replace text in the Editing view. |
Ctrl+H |
|
Hide the task pane, if one is open. |
Esc |
|
Switch to the Zoom control. |
Alt+Period, W, then Q or Alt+Windows logo key, W, then Q |
|
Print the document. |
Ctrl+P |
|
Move to the next landmark region. |
Ctrl+F6 |
|
Go to the Tell Me or Search text field. |
Alt+Q |
Top of Page
Ribbon keyboard shortcuts
Word for the web offers shortcuts called access keys to navigate the ribbon. If you’ve used access keys to save time on Word for desktop computers, you’ll find access keys very similar in Word for the web.
On a Windows computer, access keys all start with Alt+Period (.) or Alt+Windows logo key, then add a letter for the ribbon tab. For example, to go to the Review tab, press Alt+Period, R or Alt+Windows logo key, R.
If you’re using Word for the web on a Mac computer, press Control+Period (.) to start.

-
To get to the ribbon, press Alt+Period or Alt+Windows logo key. You can alternatively press Ctrl+F6 until you reach the Home tab.
-
To move between tabs on the ribbon, press the Tab key.
-
To hide the ribbon so you have more room to work, press Ctrl+F3. Repeat to display the ribbon again.
Go to the access keys for the ribbon
To go directly to a tab on the ribbon, press one of the following access keys:
|
To do this |
Press |
|---|---|
|
Open the Tell Me or Search text field on the ribbon to type a search term. |
Alt+Period, Q or Alt+Windows logo key, Q |
|
Open the File tab to use the Backstage view. |
Alt+Period, F or Alt+Windows logo key, F |
|
Open the Home tab to format text and use the Find tool. |
Alt+Period, H or Alt+Windows logo key, H |
|
Open the Insert tab to insert a picture, link, comment, header or footer, or a page number. You can also access the Symbol gallery. |
Alt+Period, N or Alt+Windows logo key, N |
|
Open the Page Layout tab to set page margins, orientation, and size, and paragraph spacing. |
Alt+Period, A or Alt+Windows logo key, A |
|
Open the References tab to insert a table of contents, footnotes, or endnotes. |
Alt+Period, S or Alt+Windows logo key, S |
|
Open the Review tab to check spelling, add comments, or track and review changes to your document. |
Alt+Period, R or Alt+Windows logo key, R |
|
Open the View tab to choose a view, open the Navigation pane, edit the Header & Footer, and to Zoom the document view. |
Alt+Period, W or Alt+Windows logo key, W |
Top of Page
Use Search
To find an option or perform an action quickly, use the Search text field. To learn more about the Search feature, go to Find what you need with Microsoft Search.
Note: Depending on the version of Microsoft 365 you are using, the Search text field at the top of the app window might be called Tell Me instead. Both offer a largely similar experience, but some options and search results can vary.
-
Select the item or place in your document, presentation, or spreadsheet where you want to perform an action.
-
To go to the Search text field, press Alt+Q.
-
Type the search words for the action that you want to perform. For example, if you want to add a bulleted list, type bullets.
-
Press the Down arrow key to browse through the search results.
-
Once you’ve found the result that you want, press Enter to select it and to perform the action.
Work in the ribbon tabs and menus
The following shortcuts can save time when you work with the ribbon tabs and ribbon menus.
|
To do this |
Press |
|---|---|
|
Select the active tab on the ribbon, and activate the access keys. |
Alt+Period or Alt+Windows logo key. To move to a different tab, use an access key or the Tab key. |
|
When a Ribbon tab is selected, move the focus to the tab commands. |
Enter, then Tab key or Shift+Tab |
|
Activate a selected button. |
Spacebar or Enter |
|
Open the list for a selected command. |
Spacebar or Enter |
|
Open the menu for a selected button. |
Alt+Down arrow key |
|
When a menu or submenu is open, move to the next command. |
Down arrow key |
|
Collapse or expand the ribbon. |
Ctrl+F3 |
Top of Page
Navigate the document
|
To do this |
Press |
|---|---|
|
Move the cursor right by one word. |
Ctrl+Right arrow key |
|
Move the cursor left by one word. |
Ctrl+Left arrow key |
|
Move the cursor up by one paragraph. |
Ctrl+Up arrow key |
|
Move the cursor down by one paragraph. |
Ctrl+Down arrow key |
|
Move the cursor to the beginning of the current line. |
Home |
|
Move the cursor to the end of the current line. |
End |
|
Move the cursor to the beginning of the document. |
Ctrl+Home |
|
Move the cursor to the end of the document. |
Ctrl+End |
|
Select text. |
Shift+Arrow keys |
|
Select the word to the right. |
Shift+Ctrl+Right arrow key |
|
Select the word to the left. |
Shift+Ctrl+Left arrow key |
|
Select the paragraph above. |
Shift+Ctrl+Up arrow key |
|
Select the paragraph below. |
Shift+Ctrl+Down arrow key |
|
Select from the current position to the beginning of the line. |
Shift+Home |
|
Select from the current position to the end of the line. |
Shift+End |
|
Select from the current position to the beginning of the document. |
Shift+Ctrl+Home |
|
Select from the current position to the end of the document. |
Shift+Ctrl+End |
|
Select all document content. |
Ctrl+A |
Top of Page
Edit and format the document
|
To do this |
Press |
|---|---|
|
Cut the selected content to the Clipboard. |
Ctrl+X |
|
Copy the selected content to the Clipboard. |
Ctrl+C |
|
Paste the content from the Clipboard. |
Ctrl+V |
|
Undo the previous action. |
Ctrl+Z |
|
Redo the previous action. |
Ctrl+Y |
|
Shrink the font size. |
Ctrl+Left bracket ([) |
|
Grow the font size. |
Ctrl+Right bracket (]) |
|
Apply bold formatting to the selected text. |
Ctrl+B |
|
Apply italic formatting to the selected text. |
Ctrl+I |
|
Underline the selected text. |
Ctrl+U |
|
Align the paragraph to the left. |
Ctrl+L |
|
Align the paragraph to the right. |
Ctrl+R |
|
Center the paragraph. |
Ctrl+E |
|
Justify the paragraph. |
Ctrl+J |
|
Create a bulleted list. |
Ctrl+Period (.) |
|
Create a numbered list. |
Ctrl+Slash (/) |
Top of Page
See also
Word help center
Basic tasks using a screen reader with Word
Use a screen reader to explore and navigate Word
Screen reader support for Word
Есть ли способ заставить курсор прыгать только на одну строку? Именно здесь появляется и сияет сочетание клавиш Shift + Enter.
Разрывы строк и абзацев
Возможно, вы не знаете, что Word автоматически переносит текст на новую строку по умолчанию, поэтому обычно вам не нужно вводить разрывы строк вручную (как на классической пишущей машинке), если только вы не устанавливаете разрыв строки. количество специальных текстовых форматов. Поэтому Microsoft заставила клавишу Enter выполнять разрыв абзаца по умолчанию, например, вставлять два перевода строки одновременно. В приведенном ниже примере первая стрелка указывает на разрыв абзаца, а вторая стрелка — на обычный разрыв строки.

Если вы нажмете Shift + Enter в Word, вы получите разрыв строки (также известный как перевод строки). Курсор опустится на следующую строку, а не прыгнет вниз на 2 строки, чтобы начать новый абзац, как при нажатии Enter. Кроме того, если вы нажмете Ctrl + Enter, вы вставите разрыв страницы, переместив курсор в начало новой страницы.
Проще говоря, когда вы хотите начать новый фрагмент текста в Word, вы нажимаете Enter. Если вам нужен простой разрыв строки, Shift + Enter — ваш выбор.
Если вы не знакомы с использованием Shift + Enter для обычных разрывов строк, вы можете установить и изменить несколько параметров, чтобы нажатие Enter выполняло разрыв строки вместо значения по умолчанию.
Сначала перейдите на вкладку «Главная», затем выберите «Абзац и интервалы» (выглядит как пять горизонтальных линий со стрелками вверх и вниз рядом с ними). Когда откроется меню, нажмите «Параметры межстрочного интервала».
В открывшемся окне «Абзац» найдите раздел «Интервал». Установите значение «После» на «0 pt». Далее установите флажок рядом с параметром «Не добавлять пробелы между абзацами одного стиля».
Если вы хотите сделать этот параметр значением по умолчанию, нажмите «Установить по умолчанию» в нижней части окна. В противном случае нажмите «ОК», и изменения будут применены только к открытому документу. В следующий раз, когда вы нажмете Enter, вы увидите, как курсор мыши переместится на одну строку вниз, как при нажатии Shift + Enter.
![]()
Written by Allen Wyatt (last updated March 14, 2020)
This tip applies to Word 2007, 2010, 2013, 2016, 2019, and Word in Microsoft 365
Many WordTips readers have asked for a definitive list of function keys and their uses. The following table provides such a list. It is suitable for printing and handy reference while using Word.
| Key to Press | Action | |
|---|---|---|
| F1: | Invoke help system | |
| Shift+F1: | Context-sensitive help or reveal formatting | |
| Ctrl+F1: | Display or hide the ribbon | |
| Alt+F1: | Next field | |
| Shift+Ctrl+F1: | (not assigned) | |
| Shift+Alt+F1: | Previous field | |
| Ctrl+Alt+F1: | Display Microsoft System Information | |
| F2: | Move selection | |
| Shift+F2: | Copy selection | |
| Ctrl+F2: | Print Preview | |
| Alt+F2: | (not assigned) | |
| Shift+Ctrl+F2: | (not assigned) | |
| Shift+Alt+F2: | Save | |
| Ctrl+Alt+F2: | Open | |
| F3: | (not assigned) | |
| Shift+F3: | Change case of selection | |
| Ctrl+F3: | Cut selection to the Spike | |
| Alt+F3: | Create a Building Block entry | |
| Shift+Ctrl+F3: | Paste information from the Spike | |
| Shift+Alt+F3: | (not assigned) | |
| Ctrl+Alt+F3: | (not assigned) | |
| F4: | Repeat last action | |
| Shift+F4: | Repeat last Find or Go To operation | |
| Ctrl+F4: | Close window | |
| Alt+F4: | Quit | |
| Shift+Ctrl+F4: | (not assigned) | |
| Shift+Alt+F4: | Quit | |
| Ctrl+Alt+F4: | (not assigned) | |
| F5: | Go To | |
| Shift+F5: | Return to last edit location | |
| Ctrl+F5: | (not assigned) | |
| Alt+F5: | Restore program window size | |
| Shift+Ctrl+F5: | Edit bookmark | |
| Shift+Alt+F5: | (not assigned) | |
| Ctrl+Alt+F5: | (not assigned) | |
| F6: | Next pane | |
| Shift+F6: | Previous pane | |
| Ctrl+F6: | Next window | |
| Alt+F6: | Switch between dialog box and document | |
| Shift+Ctrl+F6: | Previous window | |
| Shift+Alt+F6: | Previous window | |
| Ctrl+Alt+F6: | (not assigned) | |
| F7: | Spell check | |
| Shift+F7: | Thesaurus | |
| Ctrl+F7: | (not assigned) | |
| Alt+F7: | Select next spelling error and display Context menu | |
| Shift+Ctrl+F7: | Update links | |
| Shift+Alt+F7: | Display Research task pane | |
| Ctrl+Alt+F7: | (not assigned) | |
| F8: | Extend selection | |
| Shift+F8: | Collapse selection | |
| Ctrl+F8: | (not assigned) | |
| Alt+F8: | Display Macros dialog box | |
| Shift+Ctrl+F8: | Start COL selection mode | |
| Shift+Alt+F8: | (not assigned) | |
| Ctrl+Alt+F8: | (not assigned) | |
| F9: | Update fields | |
| Shift+F9: | Toggle display of field code or results | |
| Ctrl+F9: | Insert field code braces | |
| Alt+F9: | Toggle display of all field codes or results | |
| Shift+Ctrl+F9: | Convert field to regular text | |
| Shift+Alt+F9: | Run GOTOBUTTON or MACROBUTTON from a field | |
| Ctrl+Alt+F9: | (not assigned) | |
| F10: | Show KeyTips | |
| Shift+F10: | Display Context menu | |
| Ctrl+F10: | Maximize document window | |
| Alt+F10: | Display Selection task pane | |
| Shift+Ctrl+F10: | (not assigned) | |
| Shift+Alt+F10: | Display menu or message for available actions | |
| Ctrl+Alt+F10: | (not assigned) | |
| F11: | Next field | |
| Shift+F11: | Previous field | |
| Ctrl+F11: | Lock a field | |
| Alt+F11: | Display VBA editor | |
| Shift+Ctrl+F11: | Unlock a field | |
| Shift+Alt+F11: | (not assigned) | |
| Ctrl+Alt+F11: | (not assigned) | |
| F12: | Save As | |
| Shift+F12: | Save | |
| Ctrl+F12: | Open | |
| Alt+F12: | (not assigned) | |
| Shift+Ctrl+F12: | ||
| Shift+Alt+F12: | Select TOC button when in TOC container | |
| Ctrl+Alt+F12: | (not assigned) |
There is a caveat to remember when looking at any function key list, including this one. Microsoft is notorious for changing what function keys do. Thus, the above list may not be accurate for ALL versions of Word, but it will still be helpful as you are trying to learn your way around the program.
WordTips is your source for cost-effective Microsoft Word training.
(Microsoft Word is the most popular word processing software in the world.)
This tip (5990) applies to Microsoft Word 2007, 2010, 2013, 2016, 2019, and Word in Microsoft 365.
Author Bio
With more than 50 non-fiction books and numerous magazine articles to his credit, Allen Wyatt is an internationally recognized author. He is president of Sharon Parq Associates, a computer and publishing services company. Learn more about Allen…
MORE FROM ALLEN
Opening a Workbook as Read-Only
When you need to work on a workbook, you may want to do so without modifying the original contents of the workbook. This …
Discover More
Backing Up Label Layouts
Once you create a custom label layout it is a good idea to backup the layout on a different hard drive in the event of a …
Discover More
Turning Off Line Numbering
Need to have line numbering turned off for a paragraph or two? You can accomplish the task by following these steps.
Discover More
More WordTips (ribbon)
Changing Characters on Keyboard Keys
Want to assign some fancy characters to keyboard keys for characters you seldom use? There are a couple of ways you can …
Discover More
Resetting a Single Shortcut Key
Need to get rid of a keyboard shortcut key you previously defined? It’s easy to do if you follow these steps.
Discover More
Shortcut Key for Non-Breaking Space
Most of the time you’ll use regular spaces between words in a document, but there may be times you want to use a special …
Discover More