
![]()
Download Article
A user-friendly guide to making different types of lines in Microsoft Word
![]()
Download Article
- Using Shapes to Draw a Line
- Using Borders to Add a Line
- Using Keyboard Shortcuts
- Using the Mobile App
- Q&A
- Tips
|
|
|
|
|
Do you want to create a horizontal line in your resumé or other Microsoft Word document? If you want to customize the color and format of the line, you can use the Shapes tool. If you need to make a quick, basic line, you can use the keyboard shortcut. While you can use the keyboard shortcut on Windows and Mac, you cannot use it on the mobile app. This wikiHow will show you how to insert different lines in Microsoft Word on your Windows, Mac, iPhone, or Android device.
Things You Should Know
- On desktop, go to the Insert tab. Click Shapes, then select a line. Click and drag across the document to create a line.
- To customize the line, double-click it. Click Shape Outline to change the color.
- On mobile, click the three dots. Tap Home and select Insert. Tap Shapes to select a line. Tap and drag across the document to create a line.
-

1
Open Microsoft Word on your Windows or Mac computer. Click or double-click the Word app icon, which resembles a white «W» on a dark-blue background.
- If you want to draw a line in an existing Word document, double-click the Word document to open it and skip the next step.
- You’ll need a subscription to use Office 365.
-
2
Click Blank document. It’s in the upper-left side of the page.
Advertisement
-
3
Click the Insert tab. This tab is in the blue ribbon at the top of the Word window, between Home and Draw.
-
4
Click Shapes. It’s in the Insert toolbar, next to the icon of an overlapping circle and square.
- A drop-down menu will appear.
-
5
Select a line shape. In the «Lines» heading, click one of the line templates. You can choose a line, line arrow, double line arrow, and more.
-
6
Draw your line. Click and drag across the document to create your line.
- If you need to adjust the line’s length and orientation, click the left or right circle. Drag it left or right to adjust the length, or drag it up and down to adjust the orientation.
- To move the line, double-click and drag it to the desired position.


Advertisement
-
1
Open Microsoft Word on your Windows or Mac computer. Click or double-click the Word app icon, which resembles a white «W» on a dark-blue background.
- If you want to draw a line in an existing Word document, double-click the Word document to open it and skip the next step.
-
2
Click Blank document. It’s in the upper-left side of the page.
-
3
Click the Home tab. This tab is in the blue ribbon at the top of the Word window, between File and Insert.
- You may already be on this tab by default.
-
4
Click the «Borders» arrow. This is next to the icon of the dotted square with a solid bottom line.
- A drop-down menu will open.
-
5
Click Horizontal Line. This will be towards the bottom, above Draw Table.
- A horizontal line will be added.
-
6
Format your line. Double-click the line; a dialogue box will appear.
- To change the line thickness, use the up and down arrow below Height. The higher the number, the thicker the line will be.
- To change the color, click the color box underneath Color. Select your desired color.
- Click OK to save and apply your changes.
- To move the line, double-click and drag it to the desired position.


Advertisement
-
1
Open Microsoft Word on your Windows or Mac computer. Click or double-click the Word app icon, which resembles a white «W» on a dark-blue background.[1]
- If you want to draw a line in an existing Word document, double-click the Word document to open it and skip the next step.
-
2
Click Blank document. It’s in the upper-left side of the page.
-
3
Place your cursor where you want your line to appear. You’ll need to be on a blank line, as this won’t work if there is text before or after your cursor on the same line.
- You’ll be creating a horizontal line that spans from one edge of your page to the other. The line will stop at your set margins.
- If you want to make the line span the whole page, you’ll need to change your document margins.
-
4
Type three dashes in a row. Use your dash key on the number row at the top of your keyboard, or on the numeric pad.
-
5
Press ↵ Enter to convert the dashes into a line. AutoCorrect will automatically create a solid line that will situate itself directly beneath the previous line of text.
- Note that the line does not occupy the space of a line of text, but instead exists between lines of text.
- If you do not have AutoCorrect enabled, do so by clicking File → Options → Proofing → AutoCorrect Options…. This will open a new window.
- Make sure the Border Lines box is checked. This can be found underneath Apply as you type.
- If you want to turn off AutoCorrect, uncheck the boxes.
-
6
Use different characters for different line styles. There are a variety of different lines that you can create by using characters other than the dash:[2]
- Thin line: Three hyphens (-).
- Thick line: Three underscores (_).
- Double line: Three equal signs (=).
- Dotted line: Three asterisk (*).
- Triple line: Three pound signs (#).
- Squiggly line: Three tildes (~).
-
7
Move the line by entering text above it. You can prompt the line to move down by typing text above it and then pressing Enter.
- Deleting text above the line will prompt it to move upward.


Advertisement
-
1
Open a document in the Microsoft Word app. This looks like a blue notebook next to a W.
- Microsoft Word is available for iOS in the App Store and for Android in the Google Play Store.
- Tap Blank document to open a new document or tap a file to open an existing document.
-
2
Tap ••• . This can be found above the keyboard, to the right.
- If you don’t see your keyboard, tap the document to bring it up.
- A new menu will open.
-
3
Tap Home. This will be to the left of the formatting window.
- A drop-down menu will open.
-
4
Tap Insert. You’ll see a list of all objects you can insert.
-
5
Tap Shapes. This is next to the icon of an overlapping circle and square.
-
6
Select a line shape. In the «Lines» heading, tap one of the line templates. You can choose a line, line arrow, double line arrow, and more.
-
7
Draw your line. Tap and drag across the document to create your line.
- Use two fingers to pinch and zoom out to view the entire document.
- If you need to adjust the line’s length and orientation, tap the left or right circle. Drag it left or right to adjust the length, or drag it up and down to adjust the orientation.
- To move the line, tap and drag it to the desired position.


Advertisement
Add New Question
-
Question
How do I view all available symbols in Microsoft Word?

Click «Insert» and then click «Symbols» and you should be shown a box with all of the symbols in it.
-
Question
How do I add a line on the first page, and no lines on the second?
Click «Insert» and then click «Symbols» and you should be shown a box with all of the symbols in it.
-
Question
How do I change the color of the line?
In the paragraph section, open the drop-down menu on the «Borders» button. At the very bottom is a «Borders and Shading» option. In that option, change the color of the bottom border to your specified color. Click the «Borders» button.
See more answers
Ask a Question
200 characters left
Include your email address to get a message when this question is answered.
Submit
Advertisement
-
Looking for money-saving deals on Microsoft Office products? Check out our coupon site for tons of coupons and promo codes on your next subscription.
Thanks for submitting a tip for review!
Advertisement
About This Article
Article SummaryX
1. Click Insert.
2. Click Shapes.
3. Select a line template.
4. Click and drag across your Microsoft Word document to draw the line.
Did this summary help you?
Thanks to all authors for creating a page that has been read 2,043,531 times.
Is this article up to date?
Whether you believe in having your employees sign on the dotted line or are going back to old-style printed forms, trying to insert a line in word document can be difficult even for the steadiest hand. But you can take advantage of Word’s collection of shapes, which includes a line-drawing tool, to quickly draw and duplicate straight lines. Use lines that stretch across a page to denote a place for paragraphs of writing or short lines where executives should be placing their signatures or initials.
Create a Lined Notebook Paper Template in Word
-
Open Word. If the program’s current default of a traditional 8.5 inch-by-11 inch paper doesn’t fit your lined document requirements, click the «Page Layout» tab. Click the “Size” button on the ribbon and choose your preferred document size. You can also click the “Orientation” button on the ribbon to change from Word’s default portrait, or vertical, size to landscape, which is wider than it is long.
-
Click the Insert tab, then click the “Shapes” button on the ribbon. Choose the first option, “Line,” under the “Lines” group. If you hover the cursor over the shapes, you’ll see the title of each shape pop up.
-
Position the cursor near the left margin but leave room so you do not run off the Word page onto the gray background. Press and hold the “Shift” key on the keyboard, then press and hold the left mouse button as you drag to the right side of the page. Release the “Shift” key and the left mouse button and the Word horizontal line appears.
-
Click the line to open the orange Drawing Tools tab. This is where you can format your line, such as changing its color, thickness and design by clicking the “Shape Outline” button on the ribbon. It’s beneficial to change your line’s design first, before you duplicate it, so you won’t have to reformat lines multiple times.
-
Right-click the line. You’ll see a green dot appear at each end of the line. Select “Copy.”
-
Click off the line, anywhere on the white Word page, and choose “Paste” or press “Ctrl-V.»
-
Drag the newly pasted line into place below the first. How you place your lines will vary. For example, you may want to leave enough space between lines for employees to write or for something to be typed in manually at a later time.
-
Drag the cursor to highlight the two lines. Right-click the highlight and select “Copy,” then click off the lines, right-click and select “Paste.” Two new lines paste in. Drag them into place.
-
Fill the Word document with lines, to your preference, by highlighting, copying and pasting. This saves you the time from having to redraw the lines and ensures they’re all the same length.
-
Add other elements to the lined document, such as a business logo, by clicking the “Picture” button on the Insert tab’s ribbon. Browse to the logo and double-click it. If you need to move the lines to fit the logo, highlight them with the cursor, then drag them all together so they keep their layout.
-
Click the File tab’s “Save As” option. Type a name for the lined document file, set the location to save the file and click the “Save” button.
Tip
The suggestions here go above and beyond what you may need for your Word lined document. Pick and choose what best suits your business, which may be simply lines on a page.
465
465 people found this article helpful
Use these three methods to quickly insert a line in your document
Updated on December 4, 2020
What to Know
- AutoFormat: Type the three characters for the desired line style > Enter.
- Horizontal Line tool: In Home tab, select Borders drop-down menu > Horizontal Line.
- Shapes menu: Go to Insert > Shapes. In Lines group, select and drag a line shape across the page.
This article covers three ways to insert horizontal lines in Word for Microsoft 365, Word 2019, Word 2016, Word 2013, and Word 2010.
Use AutoFormat to Insert a Line in Word
You can quickly insert a line into a Word document with the AutoFormat feature. To create a line, place the cursor in the location that you’d like to insert it, type the three characters for the desired line style, then press Enter.
To create the different types of lines, press the associated keys on the keyboard:
- Plain single line: Three hyphens (—)
- Plain double line: Three equal signs (===)
- Broken or dotted line: Three asterisks (***)
- Bold single line: Three underline symbols (___)
- Wavy line: Three tildes (~~~)
- Triple line with a thick center: Three number signs (###)
Here’s what each of these line types looks like in Word:
Use the Horizontal Line Tool to Insert a Line in Word
To insert a line into a Word document using the built-in Horizontal Line tool:
-
Place the cursor where you want to insert a line.
-
Go to the Home tab.
By default, the Home tab is selected when you open a new or existing Word document.
-
In the Paragraph group, select the Borders drop-down arrow and choose Horizontal Line.
-
To change the look of the line, double-click the line in the document.
-
In the Format Horizontal Line dialog box, modify the width, height, color, and alignment of the line.
Use the Shapes Menu to Insert a Line in Word
A third way to add a line to a Word document is to draw it on the page. The Shapes menu contains several line options, including lines with arrow points on one or both ends. After you draw the line, customize the color and appearance.
-
Place the cursor in the spot where you want to insert a line.
-
Go to the Insert tab.
-
In the Illustrations group, select the Shapes drop-down arrow.
-
In the Lines group, choose a line shape.
-
In the Word document, drag across the location where you want the line to appear.
-
To change the look of the line, select the line to enable the Shape Format tab. (Some versions of Word call this Format.)
-
Go to the Shape Format tab and change the color, use a different line style, or apply effects.
FAQ
-
How do I change line spacing in Word?
To fix spacing in Word, highlight the text whose spacing you want to change and select the Home tab. Next to Paragraph, select the down arrow to expand the options. In the Spacing section, set the amount of space before and after line breaks or choose a preset line-spacing option.
-
How do I add a signature line in Word?
To insert a signature line in Word, go to the Insert tab and select Signature Line. Selecting few or no options leaves a blank line, and a signature line will appear in the document.
-
How do I add line numbers in Word?
To add line numbers in Word, go to Layout > Page Setup > Line Numbers and choose Continuous, Restart Each Page or Restart Each Section > Line Numbering Options.
Thanks for letting us know!
Get the Latest Tech News Delivered Every Day
Subscribe
i am writing an Arabic text and i want to insert an English word in the sentence, as follows:
وأنوى تغييرها إلى وشىء آخر Access أنا استخدم قاعدة البيانات
but when trying to accomplish this in Microsoft word 2010 when switching to English the cursor goes to the beginning of the line:
أنا أستخدم قاعدة البيانات Access
how to accomplish that please.
asked May 22, 2012 at 12:57
![]()
2
We need to enable the RTL for writing arabic and english together.
open word document just Press Right CTRL+SHIFT which enables RTL
Start typing Arabic by changing the keyboard then again English by changing the keyboard layout.
You will have to enable the RTL throught the document.
answered Jun 30, 2012 at 5:25
![]()
1
This article describes the most common methods for creating ruling lines or blank lines in a Microsoft Word document. These are useful if you are creating a form that will be printed and filled out with pen or pencil.
The following six methods are described in this article:
-
Paragraph Border method
-
Table Border method
-
Blank Space method
-
Tab Leader method
-
Draw method
-
Compatibility Options method
Summary
To create lines in a Microsoft Word document, you may use any of the following methods:
Paragraph Border Method
To place a line (border) under each line that has a paragraph mark (¶), follow these steps.
NOTE: To show paragraph marks in your Word document, click Options on the Tools menu. On the View tab, click to select the Paragraph marks check box, and then click OK.
-
Select all the paragraphs to be underlined.
-
On the Format menu, click Borders and shading.
-
Click the Borders tab.
-
Under Style, click the line style you want to use for the border.
-
Under Preview, click on the diagram to select the center and bottom borders.
-
Click OK. Each line with a hard return will now have a border beneath it.
NOTE: Multiple blank paragraphs formatted in this way can be placed in text boxes and positioned underneath the normal text area to form lines that are not affected when you type text; lines created by using the Draw method are also not affected when you type text.
Table Border Method
To place a border on the bottom of the table cell, follow these steps. There will be a line under any text typed in the table cell. When text wraps to a second line, there will still be only a single border at the bottom of the cell.
-
Place the insertion point on a blank line where you want the underlined text to appear.
-
On the Table menu, point to Insert, and then click Table.
-
In the Number of columns box, type 1, in the Number of rows box, type 1, and then click OK.
NOTE: A one-column, one-row table now appears at the insertion point. You can specify the number of columns and rows you need.
-
On the Table menu, point to Select, and then click Table.
NOTE: You can also select just a particular cell, column, or row of your table to apply the bottom border to.
-
On the Format menu, click Borders and Shading, and then click the Borders tab.
-
On the Borders tab, under Setting, click None.
-
Under Style, click the line style you want to use for the border.
-
Under Preview, click on the diagram to select the bottom border, and then click OK.
Blank Space Method
To underline one space at a time, follow these steps. Word does not normally underline blank spaces. The following instructions explain how to create non-breaking spaces that Word will underline.
-
Place the insertion point where you want the ruling line (underlining).
-
On the Format menu, click Font. In the Underline style box, select the line style you want, and then click OK.
-
For every blank space you want to underline, press CTRL+SHIFT+SPACEBAR.
Tab Leader Method
-
Place the insertion point on the line where you want the underlining.
-
On the Format menu, click Tabs.
-
In the Tabs dialog box, click Clear All.
-
Under Tab stop position, type a number that corresponds to the number of inches you want the line to extend from the left margin. (For example, 6.0 inches goes from margin to margin in a document with 1.25-inch left and right margins.)
-
Under Alignment, click Right, and then under Leader, click 4 (the underline).
-
Click Set, and then click OK.
-
Press the TAB key. A line extends from the insertion point to the tab created in step 4.
-
Press ENTER to move to a blank line, and then press the TAB key again. Repeat this step as needed.
NOTE: Multiple blank paragraphs formatted in this way can be placed in text boxes and positioned underneath the normal text area to form lines that are not affected by typing text; lines created using the Draw method are also not affected by typing text.
Draw Method
-
Click the Drawing toolbar button on the Standard toolbar, or point to Toolbars on the View menu, and then click Drawing.
-
Click Line on the Drawing toolbar.
-
Place the pointer where you want the line to start. The mouse pointer is a crosshair (+).
-
Click and hold the mouse button, and drag the line to the length you want.
NOTES:
-
Holding down the SHIFT key while drawing a line produces straight horizontal or vertical lines.
-
Holding down the ALT key while drawing a line prevents the line from snapping to the grid and allows exact line placement. To turn off the snap-to-grid feature, click Draw on the Drawing toolbar, and then click Grid. Click to clear the Snap objects to grid check box, and then click OK.
-
-
Repeat steps 1 through 4 to add as many ruling lines as you want.
Compatibility Options Method
NOTE: Using this method will create an underlined character each time you press a key. Pressing the SPACEBAR will create an underlined space.
-
On the Tools menu, click Options.
-
Click the Compatibility tab.
-
Under Options, click to select the Draw underline on trailing spaces check box, and then click OK.
-
On the Format menu, click Font.
-
On the Font tab, click the underline style you want in the Underline style box, and then click OK.
More Information
For more information about using text boxes, click Microsoft Word Help on the Help menu, type text boxes in the Office Assistant or the Answer Wizard, and then click Search to view the topic.
References

By
Last updated:
August 16, 2022
Grab a cup of coffee or tea.
Turn on your favorite music (in English).
Find a piece of paper or a notebook.
Choose your favorite pen or pencil, and then get comfortable at a desk or table.
We are going to write!
When you are beginning to learn English, it is really important to write regularly. It is easy to forget about English writing, though, since most learners are focused on topics like vocabulary and grammar.
But guess what? Writing can help you learn English vocabulary, grammar, spelling and more!
So to get you started writing, here are 12 useful tips for learners who are studying English for beginners. Since reading and writing are so closely related, some of these tips will also involve reading.
Download:
This blog post is available as a convenient and portable PDF that you
can take anywhere.
Click here to get a copy. (Download)
12 Valuable Beginner Tips for Writing in English
1. Practice Writing in English Every Day
You should try to write in English every day. Repetition (doing the same thing over and over again) will really help you learn the skill of writing. Writing in English will be difficult at first, but if you write a little every day, it will start to get easier.
To make sure you never skip a day, use a system to track your progress. This could be writing it on your calendar, or using a site or app like Chains. It also helps to choose a specific time of day to sit down and write, which is our next tip.
You can also make use of techniques such as watching videos to keep you writing. For example, you can watch the following video from FluentU’s English YouTube channel and learn 50 common English verbs you can later use to write sample sentences:
FluentU English’s videos are the perfect companion to your writing practice. Subscribe to the channel, check out its videos and get ideas to keep writing your way to fluency!
2. Find the Best Time and Place to Write
Everyone has a best time of day to write. Maybe your head is the clearest in the morning. Maybe you’re a “night owl,” (someone who likes to stay up late) and you are most creative at midnight. Try writing at different times of the day to find out what time works best for you.
After you know when to write, you will also want to know where. Maybe you have trouble writing where there is a lot of noise. In that case, try writing in a quiet place like a library. Maybe you need a little background noise, and so you write best in a busy coffee shop. Experiment and see what works best for you.
If you need some background noise to write, you can use websites like Rainy Mood and Calm for relaxing background noise.
3. Have a Specific Place You Keep Your Writing
Find a notebook to keep all of your writing in. By keeping it all in one place, you will be able to look back on your writing and see how much progress you’ve made. You will also be able to go through all of your writing at once to see if you keep making the same mistakes.
If you like typing on a computer instead, you might consider using Evernote to keep your writing together. Evernote is a website (and smartphone app) that helps organize your life. You can keep all of your writing in Evernote. You can also keep track of your writing schedule with the website’s calendar.
Another fun place to keep your writing is on a blog. You can easily start a blog on Blogger or WordPress, and you can either make the blog private (so only you can see it) or public (others can read and comment).
4. Pick a Topic and Write
When you’re ready to start, choose a topic and then just start writing about it. If your topic is “fishing,” for example, it doesn’t matter if you write facts about fishing or a story about when you went fishing. Just start writing anything at all! Let your mind wander on the topic. Set a timer for 5 minutes and write the entire time. Once you get used to this, write for 10 minutes at a time.
The point of this writing exercise isn’t to write a perfect story. The purpose is to get your brain thinking in English, and to see how much you are able to say about your topic. If you can’t think of a topic, just start free writing. Free writing is when you put your pen on the paper and write everything that comes to your mind. It doesn’t matter if the ideas connect or not.
5. Keep a Journal in English
By keeping a personal journal (diary) in English, you will make sure you write every day. It is a great way to practice writing multiple tenses. You will write in the past tense about all of the things you did during the day, and you will write in the future tense about the things you are planning to do tomorrow, for example.
When you know that you will write in your journal every day, you will probably start to think in English more often during the day. That’s because as you do things, you might think about how to write about them in English.
6. Write More Than One Draft
The first draft (copy) that you write is not going to be perfect. Write one draft, and then go back and review it for mistakes. Remember the notebook where you’re keeping all your writing? When you look for mistakes, you should make a list of your common mistakes in that notebook. Then, when you edit your first draft, check for your most common mistakes.
You can also use sites like Hemingway Editor, Read-Able, Grammar Check or Reverso to check spelling and grammar—but remember, these programs cannot find all mistakes.
Once you have reviewed your writing, go back and write the entire thing again. When you rewrite it with the correct grammar, spellings and tenses, you will learn the corrections.
7. Have a Friend Edit Your Writing
Since you most likely won’t find all of your mistakes, have a friend who is fluent in English edit your writing. Having someone else look at your work will improve your writing and give you new, creative ideas for how to express ideas in English. They can edit the whole document or just a part that you’re having trouble with.
It’s good to get a second opinion on your writing. If you don’t know anyone who can edit your writing, use Lang-8. Lang-8 is a community of native speakers who will edit your writing for free.
If you want a more reliable way to have your writing corrected and are willing to pay for it, Editorr is a service that will edit a piece of writing within minutes. You can then compare the edited piece to your original one, and learn from it for the next time you write. Editorr has real, qualified editors working for them, so you can feel assured that the corrections you receive are accurate.
8. Keep an English Dictionary with You
When you hear or see a new word, look it up in your dictionary. Say the word a few times and write it down. Say it until it sounds familiar to your ear. The next time you write, try to write at least one sentence with each new word. When you find words that you really like or that seem important, highlight them in the dictionary (it’s okay—it’s your dictionary).
If you don’t want to keep a physical dictionary with you all the time, you can use online dictionaries like Merriam Webster or Dictionary.com. You can also use one of these dictionary apps for your smartphone.
9. Learn Synonyms and Antonyms
Whenever you look up a new vocabulary word in English, try to learn at least one word with the same meaning (this is a synonym), and one that has the opposite meaning (this is an antonym). For example, take the word “great.” Synonyms include “excellent” and “fantastic,” while antonyms are “plain,” “ordinary” and “bad.”
By learning more than one word for each concept, you will be able to communicate better with native speakers when you write. Here is a thesaurus, which is a dictionary full of synonyms and antonyms. Type in a word and the thesaurus will give you a list of synonyms in orange, and antonyms in grey. If you click the checkbox “Common,” it will only show synonyms and antonyms that are commonly used.
Visual Thesaurus is another great resource you can use. It’s a little different from a regular thesaurus, because it shows you the links between words in a visual format, with lines between related words. This allows you to explore new words in an easy, fun way, while still getting access to definitions and examples for context.
10. Make Flashcards
When you look up new words, their synonyms and their antonyms, make flashcards for them. On one side of the flashcard, write the word. On the other side, write the meaning, part of speech (noun, verb, adjective, etc.) and a sentence using that word. Review these flashcards often, and try to use the words in your own writing as often as possible.
But if you want to have the best flashcards in the world already done for you, you need to check FluentU out.
Each word you see on FluentU has its own interactive flashcard. FluentU’s flashcards include grammar info, pronunciation, a translation of the word, sample sentences and even a list of other videos where the word is being used. Give FluentU a free try and you’ll never want to use any other type of flashcard!
11. Read English Books out Loud
As I said earlier, reading and writing are connected, so reading more often in English will help you become a better writer. Start out with simple books. Write down any words that are new to you, and practice saying them. Work your way up to books like “Harry Potter” or “The Hunger Games.” These books are written for young adults and older adults, but the language is still quite simple.
Get a library card to access thousands of free books from your local library. You can also join websites like Audible and listen to any book you’d like. Your first book is free with Audible. After that, you will have to pay a small price for each book.
12. Translate Songs and Poems
Choose your favorite song, and translate the lyrics into English. Then, try singing it in English. You could even try to rewrite some of the lines in English to make them rhyme. You can do the same thing with poems you love. The words used in songs and poems will likely be very different from the words you see everyday in books, newspapers and even your journal.
By practicing songs, you’ll be able to practice writing, and you will also learn new ways to talk about concepts like love, faith, fear, rejection (being told “no”) and other topics usually addressed in music. Lyrics Translate is a really fun website that lets you choose an artist or song title and get translated lyrics form a huge selection of languages. Or, you can select the language and the website will give you a list of songs.
The most important part of all these tips is to write in English regularly. Learning to write in English is a learning process. You need to build your vocabulary, learn proper grammar and learn how to spell correctly.
The more often you practice your skills, the easier it will become. Have fun writing!
Download:
This blog post is available as a convenient and portable PDF that you
can take anywhere.
Click here to get a copy. (Download)
Having a good handwriting is considered to be a blessing. But a lesser known fact is that such mesmerizing handwritings are achieved by a lot of practice in the early days. A child is made to write in the dotted pages which act as a tombstone for a beautiful handwriting in the future. Schools make the kids write on the lined pages so that they are able to handle and make use of the page well.
Lined pages and their uses:
A lined paper consists of lines in the horizontal direction. The lines are equally spaced and are often covered with margins on the sides. They are used for the writing purposes mostly.
Well, lined pages have a variety of uses other than the use by the kids. Lined pages are used in for letter writing on special occasions such as Christmas as well. You can use these pages for writing book and manuscripts as well. They are used in calligraphy as well. Many people use these for making music notes as well. Graphs are sometimes plotted on these sheets. The paper size and the distance between the lines could be adjusted. The color of the lines is also customizable.
Lined paper generator:
Well, there is a several software is available online that can generate the lined papers according to your likings. You can download the lined papers give below and use the papers for your practice and work.
- You can customize your lined papers to narrow or medium ruled sizes. The line spacing could be 6.4mm or 7.1mm respectively. Such papers are used for college and school purposes only.
- If you are looking for large handwriting or calligraphy practices, you can choose our wide ruled lined pages that have a line spacing of 8.4 mm. Such pages are professionally designed for the customer’s satisfaction and use only.
- You can have the paper in the portrait size or the landscape size as well. Both sizes are readily available.
Writing is a joy and everyone has the right to feel that joy. Lined pages give you an opportunity to express your thoughts into words.
Preview & Details of Template
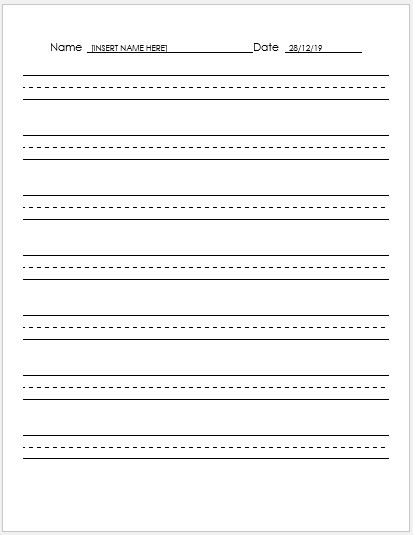
Handwriting Practice Lined Papers
Manuscript Ruled
File: Word (.doc) 2003+ and iPad
Size 34 Kb | Download
Download & Print as many pages as you want.
You can select LANDSCAPE or PORTRAIT format at the time of PRINT.
License: ENERGY (Personal Use Only)
Distribution by Kate Elizabeth(CEO)
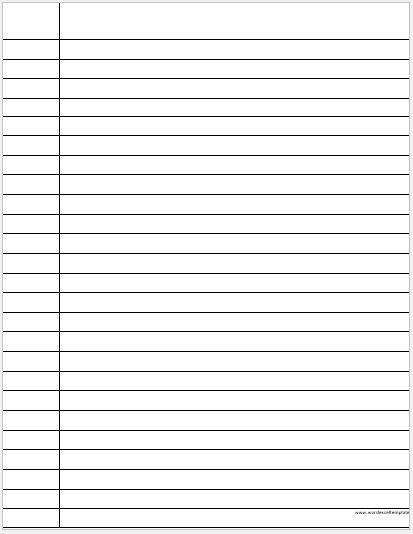
Handwriting Practice One Line Papers
File: Word (.doc) 2003+ and iPad
Size 34 Kb | Download
Colors: BLACK |BLUE | RED | GREEN
Download & Print as many pages as you want.
You can select LANDSCAPE or PORTRAIT format at the time of PRINT.

Narrow Ruled Lines Paper
Size: 1/4 [0.25″] in horizontal spacing.
Smaller handwriting
File: Word (.doc) 2003+ and iPad
Size 24 Kb | Download
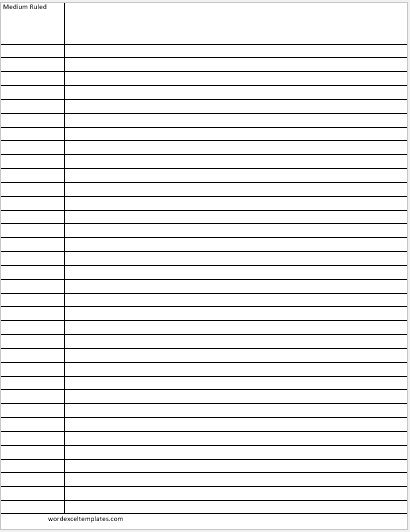
Medium Ruled Lines Paper
Size: 9/32 [0.28125″] in horizontal spacing.
Vertical Column Width: 1 ¼ in
Size 24 Kb | Download
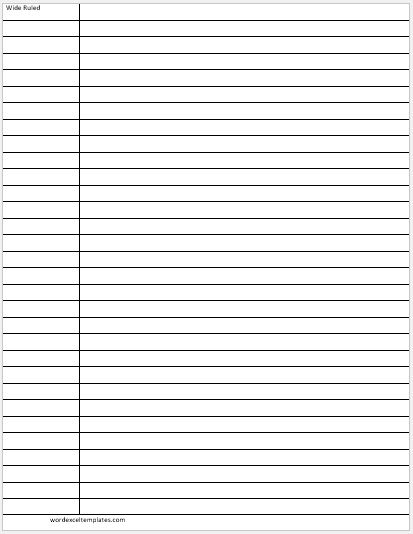
Wide Ruled Lines Paper
Law/Legal
Size: 11/32 [0.34375″] in horizontal spacing.
Vertical Column Width: 1 ¼ in
Size 24 Kb | Download
Gregg Ruled Lines Paper
Size: 11/32 [0.34375″] in horizontal spacing.
Vertical Column Width: Center
Size 24 Kb | Download
Pitman Ruled Lines Paper
Size: 1/2 [0.5″] in horizontal spacing.
Vertical Column Width: Center
Size 24 Kb | Download
Cornet Note Paper
Size 24 Kb | Download
Writing Paper for Low Vision
Size: 1/2 [0.5″] in horizontal spacing.
Font Size: 48
Vertical Column Width: Max
Size 24 Kb | Download

Writing Paper with Picture Space
Size 24 Kb | Download
Slant Lines Writing Paper
Spacing: 0.25″
Size: 12 kb| Download
Slant Lines Writing Paper
Spacing: 0.5″
Size: 12 kb | Download

Slant Lines Writing Paper
Spacing: 1″
Size: 12 kb | Download