
Visual Basic for Applications, or VBA, is a Microsoft programming language that allows users to create scripts to execute certain actions or functions in a document by using Macros. It is most widely used in Excel to manage large quantities of data; however, other uses do exist. In this article we will show you how to activate VBA in Excel. These methods should work on both PC and Mac.
How to access VBA in Excel?
Access to VBA is turned off by default in Excel as a security precaution. Microsoft Office is vulnerable to Macro viruses, which can be spread to other documents if VBA is enabled. However, enabling VBA does not increase your likelihood of contracting a computer virus if you use it correctly and with caution.
To get started manipulating data, you will need to add the VBA add-in and enable access. This article will explain how to get started with VBA on your Windows computer.
How to activate the VBA add-in?
- To enable/disable the VBA tool, first, open Excel, click Options and select Add-ins. In the list that displays, find the add-in Analysis ToolPalk — VBA, and select OK:

- VBA add-in will now be active. Next, you must ensure the VBA tool is enabled.
How to enable or disable Access to VBA in Excel?
To enable/disable VBA tool, first open Excel, click Options, and find the Trust Center. Here, select the Trust Center Settings, and search for Macro Settings:

To enable access to VBA, ensure to check the option Trust access to the VBA project object model. To disable it, make sure that the box is unchecked:

Need more help with Excel? Check out our forum!
enabling VBA code:
After downloading and unzipping, you must right click the file and choose properties. From there you’ll see the property dialog for the file. You will have the option to unblock it there. Next time you open the file you will get a macro prompt, and you can enable the VBA code to run.
add-in location:
I like to put my add-ins in my XLSTART folder. The folder opens any files in there when Excel starts, so the add-ins will always get loaded. You can use the VBA property Application.StartupPath to find yours, here are some sample paths it could be in:
C:Users[your login]AppDataRoamingMicrosoftExcelXLSTART Some of you might find it here:
C:Program Files (x86)Microsoft OfficerootOffice16xlstartTo use Application.StartupPath, boot Excel and on the developer tab click Visual basic. Then set focus to the immediate window and type
?Application.StartupPathload add-in on demand:
If you don’t want to have the add-in running all the time, just save the file to a folder on your machine and double click it when you need it. The add-in will load into the current instance of Excel and you can start using it.
Note: you still need to unblock the add-in.
Microsoft Excel VBA feature is a powerful interface tool that enables a user to automate tasks in a workbook. It is a programming language that helps excel users write their codes and even review the recorded macros they saved. In short, for a user to be a master of Excel’s VBA, they have to get used to its coding processes.
How do I open VBA? Any new beginner in Excel’s VBA Editor may find it daunting. But this should not be the case as the feature is user-friendly, and anyone can get the hang of it. This article focuses on addressing such doubts concerning VBA. Please read the article below to learn step-by-step how to open the Visual Basic Editor (VBA) in Excel.
Enabling the Developer tab in Excel
To use VBA, a user has first to enable the Developers tab in their Excel workbook. The tab has several groups and features to enhance how a user creates their worksheets. It allows one to open the VBA editor and create Form and ActiveX controls like checkboxes, buttons, and macros. Sometimes, the tab may already be available in the main menu ribbon of a worksheet. If not, here are the steps to follow to enable it;
1. In your open workbook, click on the File menu tab.

2. Click on the Excel Options button to display a dialog box.

3. On the given options on the left of the open dialog box, click on the ‘Customize Ribbon option.

4. Here, you will find two partitions, right and left.
5. Under Choose Command from on the left side of the dialog box, click on the drop-down arrow and select Popular Commands.

6. Under Customize the Ribbon on the right side of the dialog box, select Main Tabs from the drop-down list.

7. in the right panel, check the Developers checkbox if it is not already selected.

8. Click Ok to enable the tab and return to your open workbook. The main ribbon will have an additional visible tab marked as ‘Developer.’
Steps to follow to open VBA
After enabling the Developer tab, it is easy to open the VBA feature in Excel.
1. To open the feature, click on the Developers tab and select Visual Basic to display the’ Microsoft Visual Basic’ window.

Here is the Microsoft visual basic window

2. In cases where you want to use keyboard shortcuts to open the VBA window, press on Alt + F11 keys.
Both options above will open the Visual Basic Editor window in your Excel workbook. From here, you can create and even edit your macros, buttons, and codes.
Conclusion
Opening a VBA editor in Excel should no longer be a daunting task with the steps mentioned above. Using those steps will enable you to access the VBA editor and create your macros to allow you to complete tasks on time.
Note that;
Despite VBA being a powerful tool, it can also be harmful when used the wrong way. Any macro created should be saved in the appropriate files due to security risks. Some malicious writers may create dangerous macro codes as viruses to target an individual or a company’s data. Any macro-enabled document should be saved as an ‘Excel Macro-Enabled Workbook. Make sure to have permissions from your organization or a different person’s computer to run macros on their machines.
To enable macros simply means to run or execute a macro in a particular file in order to save the time spent on repetitive actions. To enable macros, select “enable all macros” from the “trust center” of the File tab (in the “options” button).
It is risky to enable macros because there is a possibility of running into errors while opening a macro-enabled worksheet. Consequently, on account of security reasons, Excel disables macros from external sources.
Table of contents
- Enable Macros in Excel
- How to Enable Macros in Excel (2007, 2010, 2013, and 2016)?
- How to Enable all Macro Files in Excel Permanently?
- The Cautions While Enabling Macros
- Frequently Asked Questions
- Recommended Articles
How to Enable Macros in Excel (2007, 2010, 2013, and 2016)?
At the foremost, the user should decide the extent of permission to be given while enabling macros. The consent can be partial, complete or zero (no permission).
Once decided on the extent of permission, follow the listed steps to enable excel macros:
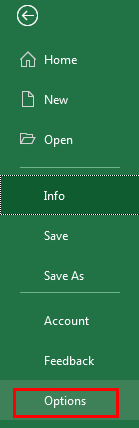
- In the File tab, click “options.”

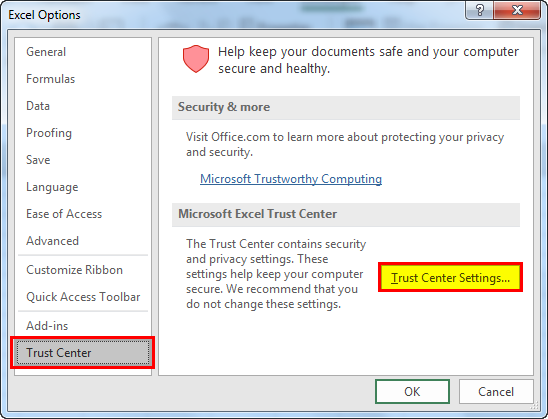
- In the “Excel options” dialog box, click “trust center settings” in the “trust center” option.

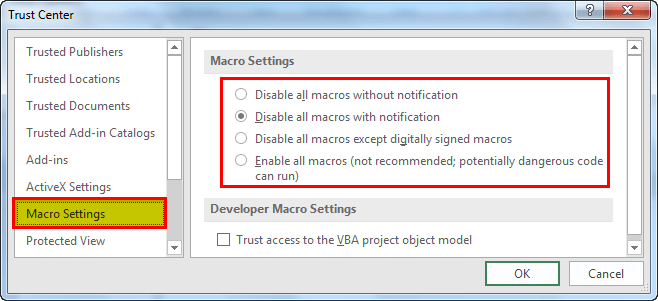
- From the “macro settings,” select the extent of permission to be granted. Depending on the requirement, the user can choose one of the following options (shown in the succeeding image):
• “Disable all macros without notification” does not send any notifications regarding the disabled macros.
• “Disable all macros with notification” sends notifications stating that macros of the current file are disabled.
• “Disable all macros except digitally signed macros” stops the usage of all macros except the digitally signed ones.
• “Enable all macros” gives full permission to run all macros.Click “Ok” to apply the selected macro settings.
Note: The option “enable all macros” is selected only if the source is trusted.

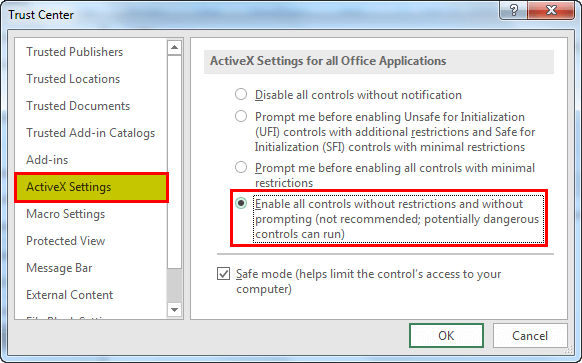
- In the “ActiveX settings” option (under “trust center settings”), select “enable all controls without restrictions and without prompting.”
The ActiveX controls are activated to enable macros properly. These controls are necessary for the object of macros.

How to Enable all Macro Files in Excel Permanently?
If a file received from a trusted source contains a macro or VBA content, the macros need to be enabled for using the file. In such cases, the macros are enabled permanently to save time.
The steps to enable macros in Excel permanently are listed as follows:
Step 1: In the File tab, click “options.”
Step 2: In the “Excel options” dialog box, click “trust center settings” in the “trust center” option.
Step 3: In the “macro settings” option, select “enable all macros.” Click “Ok” to apply the selected macro settings.

The Cautions While Enabling Macros
The following points must be remembered while enabling macros:
- The file containing VBA codeVBA code refers to a set of instructions written by the user in the Visual Basic Applications programming language on a Visual Basic Editor (VBE) to perform a specific task.read more must be saved as “macro-enabled workbook.” Saving the file with some other extension does not save the VBA code and thus, does not enable the macros.
- The option “enable all macros” runs all macros without any further warning or consent. Since the macros of both trusted and non-trusted sources are enabled, it might become dangerous.
- The option “disable all macros without any notification” does not inform the reason behind why macros are not running. Hence, select “disable all macros with notification” to view the warnings.
Frequently Asked Questions
1. How to enable macros in 2007, 2010, 2013, and 2016?
a. For Excel 2007, 2010, 2013, and 2016
• In “options” under the File tab, click “trust center.”
• In “trust center settings,” click “macro settings” and choose any of the four options depending on the extent of permission to be granted. Click “Ok.”
b. For Excel 2010, 2013, and 2016
• Via the security warning bar
o Click “enable content” on the warning bar.
• Via the security warning area
o In the File tab, click “enable content” in the security warning area.
o In “advanced options,” click “enable content for this session” (under “Microsoft office security options” dialog box). Click “Ok.”
Note: This feature (security warning area) enables macros for the current session. Closing and reopening the file will display the warning again.
2. Why should macros in Excel be enabled?
Excel Macros are a set of commands or instructions that automate repetitive actions performed by the user. To enable macros implies running a macro with or without the user confirmation.
Macros are enabled to quickly complete tasks and minimize the time spent on keystrokes. Such tasks can be formatting data, creating pre-defined programs, executing specially designed functions, and so on.
Note: The macros must be enabled only if they are from a trusted and authentic source.
3. Is it safe to enable macros in Excel?
It is safe to enable only those macros that come from trusted sources or have been self-recorded by the user. All other macros that come from unknown and non-trusted sources pose an inherent security risk.
Running a malicious macro may damage the hard drive, corrupt installation of MS Office or delete essential data files. On account of this reason, the default setting is “disable all macros with notification” in Excel.
Hence, though enabling macros can be beneficial for the user, running unknown macros can be equally harmful.
Recommended Articles
This has been a guide to enable macros in Excel 2007, 2010, 2013, and 2016. Here we discuss how to enable macros in Excel for different types of permission along with examples. You may also look at these useful functions in Excel –
- Excel Dynamic ConsolidateConsolidate is an inbuilt function in excel which is used to consolidate data from different workbooks which are opened at the same time. It allows to select multiple data from different workbooks and consolidate it in a final workbook.read more
- Record Macros in Excel
- Consolidate Data in Excel
- VBA MacrosVBA Macros are the lines of code that instruct the excel to do specific tasks, i.e., once the code is written in Visual Basic Editor (VBE), the user can quickly execute the same task at any time in the workbook. It thus eliminates the repetitive, monotonous tasks and automates the process.read more
- Drawing in ExcelDrawing in Excel means making a shape in Excel. Now, Excel has provided us with many tools for drawing. Some of them are the predefined drawings or predefined shapes, and also, there is an option for a free form of drawing where the user can design a drawing by using a mouse. It is available in the “Shapes” in Excel’s “Insert” tab.read more
Reader Interactions

Visual Basic for Applications (VBA) is a form of the Visual Basic programming language integrated into all Microsoft Office products. You can create add-on components within your basic Excel 2019 spreadsheet to create additional functionality. VBA can get complicated, but knowing how to create basic code and functionality can improve your spreadsheet’s usefulness and automate certain activity that would take hours of time.
Enabling the Developer Tab in Excel 2019
To use VBA, you need the «Developer» tab enabled. The «Developer» tab has several buttons and features that enhance the way you create spreadsheets. If you don’t have the «Developer» tab enabled, follow these next steps to enable it.
Click the «File» ribbon tab, and then click the «Options» link that shows in the bottom-left section of the Excel window. This opens a new configuration window where you can set preference for different elements of Excel. Click the «Customize Ribbon» option in the left panel.
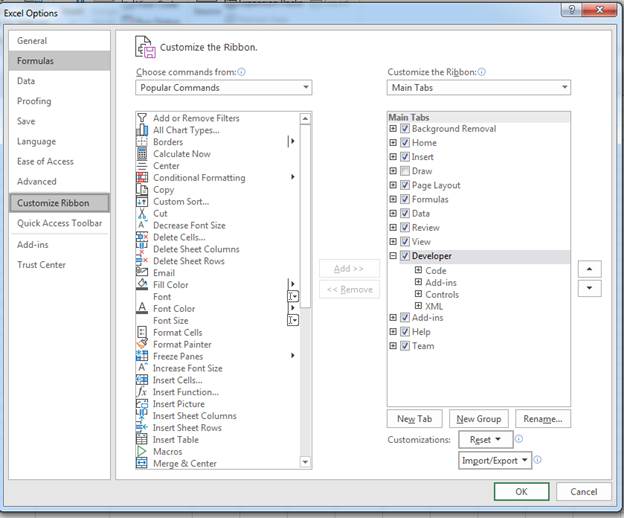
(Excel options and configuration window)
In the image above, notice that the developer option is checked in the far right panel. This check box enables the «Developer» tab in your Excel view. Click «OK» to enable the tab and return to your Excel 2019 interface.
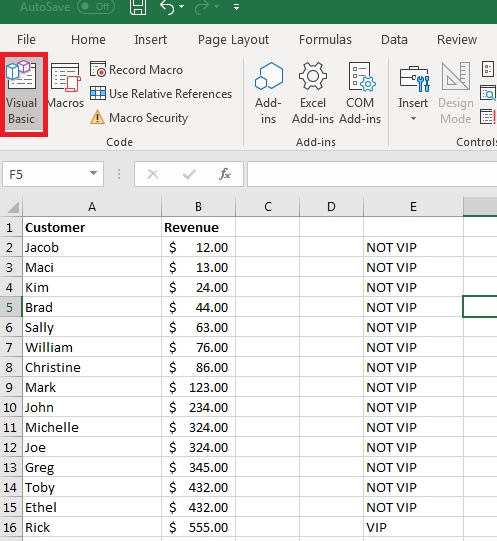
(VBA button location)
You should now see an additional tab marked «Developer» in the list of Excel 2019 menu options. Click this tab, and you’ll see the VBA button available on the left side.
Creating a Button on Your Spreadsheet
When you want to use VBA on your spreadsheet, buttons are one of the most common elements that you add to your document. With a button, you can trigger an event and use it to perform an action.
Components for VBA actions are found in the «Developer» tab in the «Insert» button dropdown.
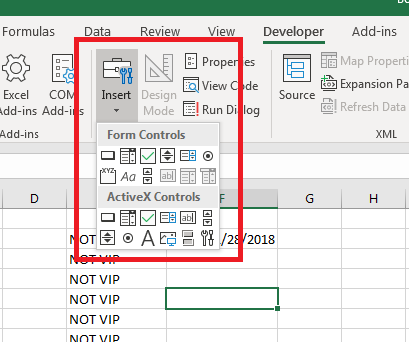
(Form and ActiveX components for VBA)
When you click the «Insert» button, a dropdown displays all of the available components that you can add to your spreadsheets. The top-left control in the «Form Controls» section has the button control. You can hover your mouse over each of the components in the list to see what you can add to a spreadsheet. If you are familiar with HTML web page components, then you will recognize most of the available components in the dropdown.
Click the button control and then you can draw the button on your spreadsheet. Drawing a button lets you make it as large as small as you want. After you draw the button, a window opens where you can assign a macro.
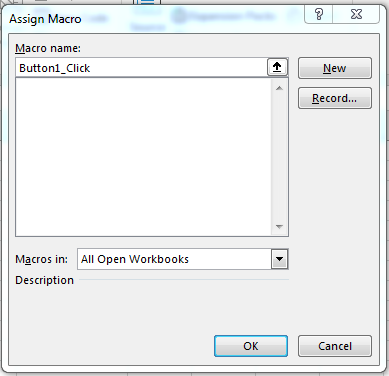
(Assign macro window)
Click «OK» and the window closes. Now you see a button on your spreadsheet with the label «Button 1.» You can change the label on the newly created button by right-clicking the button and selecting «Edit Text.» This action prompts you for the new button name. Type a new name for your button. In this example, we’ve used the text «My Button» for the button text.
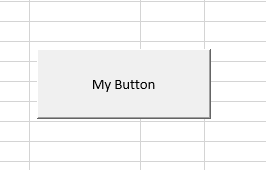
(A new button with custom text)
You can click the button if you want, and an error message with display telling you that you haven’t created a macro for it yet. This is because you haven’t created the code that will run when the button is clicked. The button serves no purpose, but you can create the macro that runs when it’s pushed, which then removes the error when you click the button.
Right click the button and choose «Assign Macro.» This action opens a Visual Basic for Applications workspace. The workspace is tied to the workbook that you have open, but you can make full applications that tie with your spreadsheet using VBA. In this workspace, you can create, test, and run any code that you assign to components in your application.
Working in the VBA Workspace
The VBA workspace looks the same whether you program macros in Word or Excel. It’s a workspace where you can program the macro and view all other code that you’ve previously created.
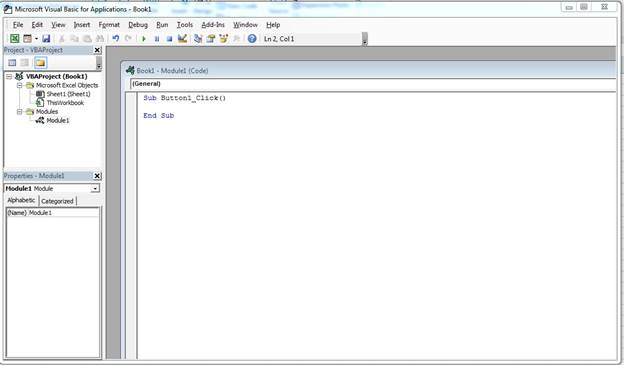
(VBA workspace)
The image above shows the VBA workspace. When you right click a component such as a button and choose «Edit Code,» VBA opens to the location where code is triggered when you click the button. VBA gives names to these functions that help you identify what happens should you perform an activity on it. Since a button is usually triggered by a click event, the function is given the original name of the button, an underscore, and then the word «Click.» For your first button created in your spreadsheet, the name for a click event is «Button1_Click()» and you add any code between the «Sub» and «End Sub» phrases.
The «Sub» keyword indicates that you are starting an event. The next part is the name of the event, and the last statement in a trigger event is the «End Sub» statement.
In the left panel of the workspace, you can see other objects in a tree view. The top object is always the workbook. If you recall, a workbook contains worksheet. Under the «Book1» main project header, you see «ThisWorkbook» which represents the workbook that you have opened, and the «Sheet1» represents the worksheet in the workbook. You can write VBA that works directly on a workbook or a worksheet activity such as when you open the workbook, a macro automatically runs.
The «Modules» section holds the files that you store containing VBA code. You can have several of these in your VBA code, or you can just have one file that contains all of the functions used to run macros.
Writing Some Simple VBA Code
With the VBA editor open, you now have a function ready to edit for your button. Anything you type in the «Sub» and «End Sub» statements will run when you click the Button1 component. When you start working with VBA, you want to create easy function statements so that you can follow what is going on as the code runs. In this example, we’ll add some text to a cell within the current spreadsheet.
Within the sub start and end phrases, type the following code:
Sub Button1_Click()
Range(«A1»).Value = «My Test»
End Sub
The code above tells Excel 2019 that you want to change the value contained in the cell «A1» in the current sheet to «My Test.» The «Range» indicates that you want to apply changes to a cell range set in the functions parameters. You can assign any value to a range, but in this example we apply text. Any formatting already set on the cell will also still apply, so if you have a cell set to bold text, then this value will have the bold format applied.
At the top of the VBA workspace, notice that there are three start, pause and stop buttons. You can use these buttons to test your new code. The «start» button will run the current function and apply changes to the spreadsheet, which in this example is changing content to «My Test.»
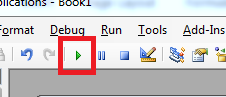
(The start button in the VBA workspace)
Click the start button and watch the text in the A1 cell change to «My Test.» Should you have a long list of statements within your function, you might want to pause the procedure. The stop button stops execution, so should you resume it then execution will start where it left off. With the pause button, execution resumes where the last statement left off.
The «MsgBox» function is extremely common in any application. The MsgBox function displays a warning or a message to the user. In any software application, you’ve seen pop-up windows that display a message that provides information. Even web applications display messages as pop-ups and warnings. The MsgBox function in VBA is the equivalent of all of these pop-ups that you’ve seen across different applications.
Suppose that you want to show a confirmation to the user that the button’s function completed execution. In this example, only one statement executes, but you might have hundreds of lines of code that must execute and you want to show the user that it’s completed. You might have a procedure that takes an unusual amount of time to complete, so users must wait for it to complete and then you display the message to confirm when the procedure is over.
Add the next line of code to the same VBA function Button1_Click():
Sub Button1_Click()
Range(«A1»).Value = «My Test»
MsgBox «Cell value change finished»
End Sub
In the code above, the cell A1 has its value changed to «My Test.» After the text is changed in the A1 cell, a message box opens and displays the text «Cell value change finished.» This is just a small example of how you can use the MsgBox function. After you finished changing your VBA code, click the play button again. You will see the two statements run, and the program will stop.
After you are finished writing your code, you still need to save it and test it within the spreadsheet. Your users won’t open the VBA workspace, so you need to make sure that the code executes outside of the VBA workspace.
Close the VBA workspace. You now need to assign the macro to the button. Right-click the button and click «Assign Macro.» Choose the Button1_Click value and click «OK.» Should you ever want to go back and change the statements executed by the macro. Use this screen to click the macro name, and then click «Edit» to again open the VBA workspace with the function code shown in the workspace window.
After the window closes, click the button. Notice that the text in cell A1 changes and then a window displays with a message that the procedure has completed. You’ve just created your first VBA macro that runs in your spreadsheet. You can create much more complex applications with VBA that run across several spreadsheets and can affect several other workbooks that aren’t even open on your desktop.
One issue to remember with VBA is that it’s a powerful tool that can do harm if it’s used the wrong way. Malware writers use VBA macros to download malicious software and install it on your computer. When you work with macros, your recipients of any spreadsheet must give your macros permission to run on their machines. Most users are trained not to open spreadsheets with macros, so they are mostly used within the same organization.