
How to Edit a Textbox in Word
- Click anywhere in the Word text box to enter editing mode.
- Click and drag your mouse across a section of text to edit it.
- Click the “Home” tab to access text formatting tools.
Contents
- 1 How do I edit text in a text box in Word?
- 2 How do I edit a locked text box in Word?
- 3 How do I edit a box in Word?
- 4 How do I unlock a text box in Word?
- 5 How will you edit a text box in scratch?
- 6 How do you remove text boxes in Word?
- 7 How do I enable editing in Word?
- 8 How do I remove editing restrictions in Word?
- 9 How do you insert an editable field in Word?
- 10 Why can’t I add a text box in Word?
- 11 Why is my text box anchored in Word?
- 12 Why are there boxes in my Word document?
- 13 Can you lock a text box in Word?
- 14 How do you add text in Scratch 3?
- 15 What is Scratch paint editor?
- 16 Can’t delete a text box in Word?
- 17 How do you delete a text box in Word without deleting the text?
- 18 How do I edit a restricted document?
- 19 How do you insert a text form field?
- 20 How do I make a Word document fillable and not editable?
To change the text box shape:
The Format tab will appear. From the Format tab, click the Edit Shape command. Hover the mouse over Change Shape, then select the desired shape from the menu that appears. The text box will appear formatted as the shape.
How do I edit a locked text box in Word?
On the Review tab, in the Protect group, click Restrict Editing. In the Editing restrictions area, select the Allow only this type of editing in the document check box. In the list of editing restrictions, click No changes (Read only). Select the part of the document where you want to allow changes.
How do I edit a box in Word?
Modifying text boxes
- Select the text box you want to change. The Format tab will appear.
- From the Format tab, click the Edit Shape command. Clicking the Edit Shape command.
- Hover the mouse over Change Shape, then select the desired shape from the menu that appears.
- The text box will appear formatted as the shape.
How do I unlock a text box in Word?
To Unlock Fields
On the toolbar ribbon, from the Developer tab, under Protect, click Restrict Editing. The Restrict Formatting and Editing pane appears on the right.
How will you edit a text box in scratch?
In vector mode, double click an existing text box with the select (mouse) tool. In bitmap mode, once clicked outside of text boxes are no longer editable and act as an image. You can also edit a vector text by clicking on it with the arrow tool and then using the T tool on it.
How do you remove text boxes in Word?
Removing the Box from a Text Box
- Either click on the border of the text box or position the insertion point within the text box.
- Select the Text Box option from the Format menu.
- Click on the Colors and Lines tab, if necessary.
- In the Color drop-down list, select No Line.
- Click on OK.
How do I enable editing in Word?
Enable editing in your document
- Go to File > Info.
- Select Protect document.
- Select Enable Editing.
How do I remove editing restrictions in Word?
When you try to edit the Word document, the Editing Restriction pane will appear on the right-side of the document. Click the Stop Protection button. To remove editing restriction in your Word document, enter your password and click OK.
How do you insert an editable field in Word?
Creating Fillable Forms Using Microsoft Word
- Enable Developer Tab. Open Microsoft Word, then go to the File Tab > Options > Customize Ribbon > check the Developer Tab in the right column > Click OK.
- Insert a Control.
- Edit Filler Text.
- Design Mode button again to exit the mode.
- Customize Content Controls.
Why can’t I add a text box in Word?
If any part of the document is protected, insertion of pictures and text boxes (which in Word are actually graphic objects) is disabled. It seems you’re limiting the restriction to headers and footers.
Why is my text box anchored in Word?
The anchor is a symbol that sometimes appears when you insert an image, or a SmartArt, or a drawing into a Word document. By default, the anchor will only appear when you insert a picture, clipart, or SmartArt and then ‘Wrap text. ‘Now, if you were to try to move this paragraph, this picture would move with it.
Why are there boxes in my Word document?
The boxes surrounding text in your example document are frames. These can be removed by pressing Ctrl+Q (which reverts paragraph formatting to that of the underlying pararaph style).
Can you lock a text box in Word?
Locking text boxes in a Word document lets you prevent others from tampering with or making inadvertent changes to these text-entry controls.A simple way of locking text boxes is to use the Restrict Editing command, which allows you to single out text boxes for restricted editing.
How do you add text in Scratch 3?
You will type your description right inside a description box.
- Click the Text tool.
- Choose a color that contrasts your rectangle.
- Choose a font.
- Click inside the top‐left corner of your rectangle.
- Type the first line of your scene description.
- Click the Return or Enter button on your keyboard to start a new line.
What is Scratch paint editor?
The Paint Editor is Scratch’s built-in image editor. Many Scratchers create their own sprites and backdrops using it. These images can be used in many ways, each having its own impact on its project.
Can’t delete a text box in Word?
To delete a textbox you must click on the textbox border, then press the Delete key.
How do you delete a text box in Word without deleting the text?
Method 1: Remove Text Box By Copying and Pasting
- Step 1: Open up a Word file. To get started, let’s open up an MS Word document.
- Step 2: Copy the text from the text box.
- Step 3: Paste the text on a space outside the text box.
- Step 4: Delete the text box.
How do I edit a restricted document?
How to Make Changes in a Restricted Word Document
- Go to the Ribbon > Review > Protect group > Restrict Editing.
- Under Editing restrictions, select the checkbox for Allow only this type of editing in the document.
- Select No changes (Read only) from the dropdown.
How do you insert a text form field?
Working with Form Fields
- Position the insertion point where you want the field to appear.
- Display the Developer tab of the ribbon.
- In the Controls group click Legacy Tools and then click the Text Form Field tool.
- Right-click the form field just entered and choose Properties from the resulting Context menu.
How do I make a Word document fillable and not editable?
Head on to the “Protect” section on the ribbon and click the button labeled “Protect Document.” You should then click the button named “Restrict Formatting and Editing.” On the options that appear, select the one that says “Allow only this type of editing in the document” and pick “Filling in forms.” Once you’re done,
Text boxes offer specialized formatting options to liven up your Microsoft Word documents and separate passages from the rest of the text. Although these text boxes can produce dazzling results, such as multi-angled borders and rotated text, the words in these boxes are recognized as plain text. This means you edit the text using the same Word editing tools you would for normal text. However, you first have to enter editing mode to apply any changes.
-
Click anywhere in the Word text box to enter editing mode. Doing so opens and focuses on a new Format tab.
-
Click and drag your mouse across a section of text to edit it. Alternatively, press «Ctrl-A» to select all text in the text box. Typing text replaces currently selected text with whatever you type.
-
Click the «Home» tab to access text formatting tools.
-
Apply formatting effects, such as bold, italics, underlining, fonts, font sizing and font colors, by clicking the appropriate buttons in the Font group.
-
Format the text with bullets, justification or indentation by clicking the tools in the Paragraph group.
-
Right-click the text box’s border and select «Edit Points.» Click and drag any line or corner to distort the box, create curved sides or add angles.
-
Click and drag the green circle above the text box to rotate it.
-
Right-click the text box’s border and select «Format Shape.» Change any formatting options, such as line color, line style and artistic effects, by clicking the appropriate left-hand tab and selecting the formatting option from the right pane.
-
Click anywhere outside the text box to exit editing mode.
In Microsoft Word, the user can create the text boxes in several built-in styles, predefined Textboxes offered in Word. If any of the built-in styles do not meet the user’s, interest there is a feature in Word that allows the user to draw the text box. There is an option where you can get more textboxes from Office.com and can save the selection to the text box gallery.
In this tutorial, we will explain:
- How to insert a Built-in Styles Text Box.
- How to insert text into Text Box.
- How to copy the Text Box to a new location.
- How to change the direction of text in the selected Text Box.
- How to Format the Text Box.
- How to change the default formatting for a Text Box.
- How to save a selected Text Box as a Building Block.
What is Text Box in Microsoft Word
A Text Box is a feature in Word that focuses on its content and displays essential text such as headings and quotes.
1] How to insert a Built-in Styles Text Box
![]()
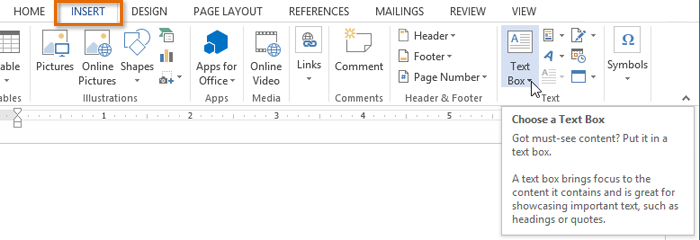
Click the Insert tab on the menu bar.
On the Insert tab in the Text group, click the drop-down arrow of the Text Box button.
You will see a list of text box built-in styles you can choose from; select the one you desire.
The text box you selected will appear in the document.
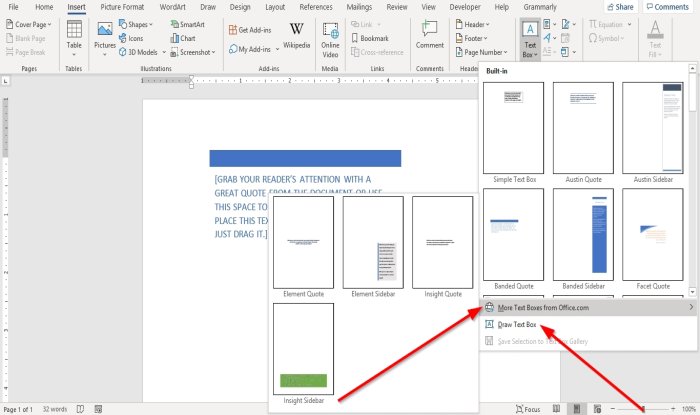
You can use More Text Boxes from Office.com to insert text boxes in the document.
In the Text Box drop-down list, you can also select Draw Text Box and draw a text box into the document.
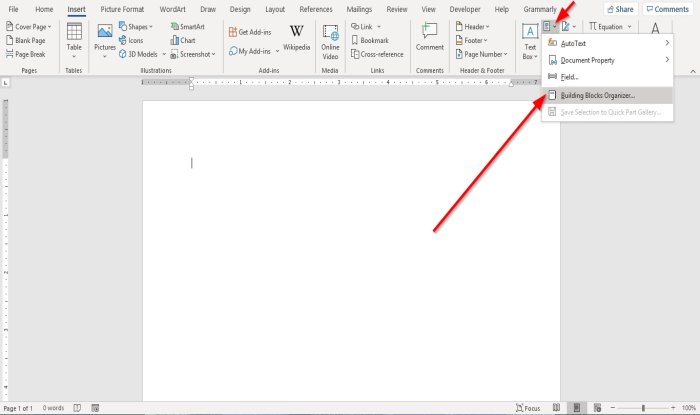
The other option to insert a Built-in Style text box is to your document is to click on the Explore Quick Parts button.
In the drop-down list, select Building Blocks Organizer.
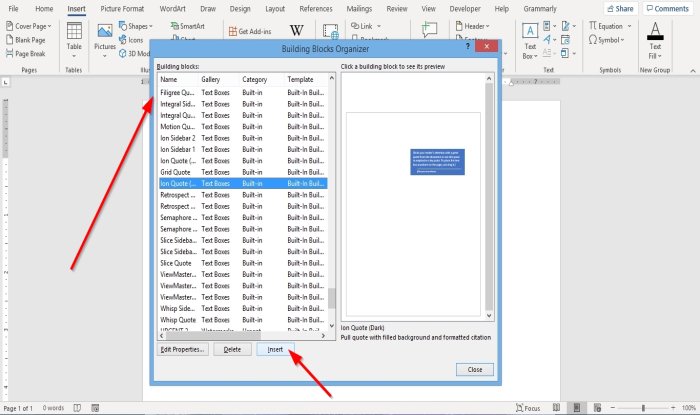
A Building Blocks Organizer dialog box will appear.
In the dialog box, scroll down until you see the text box gallery.
Click any text box of your choice and click Insert.
The text box is inserted into the document.
2] How to insert text into Text Box
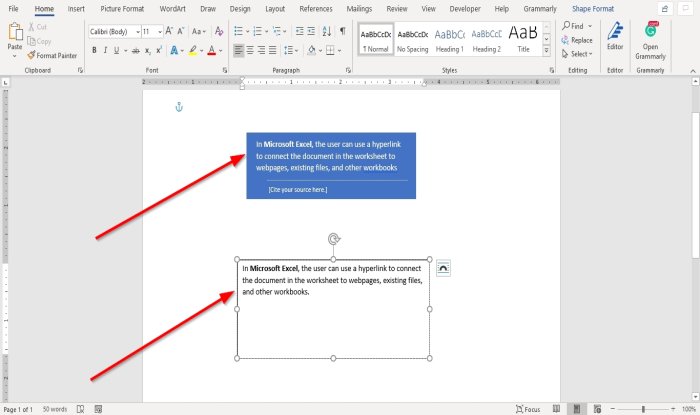
For a built-in style text box, click into the text box and press the Delete Key to delete the default text inside it and type your text.
For the text box you draw, click inside the text box and enter your text.
3] How to copy the Text Box to a new location
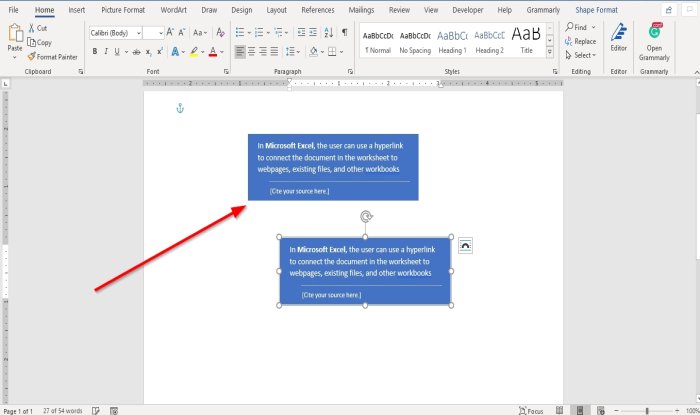
Place the cursor near the text box’s frame, hold the CTRL-key down, and drag the textbox.
You will notice that the text box is copied.
4] How to change the direction of text in the selected Text Box
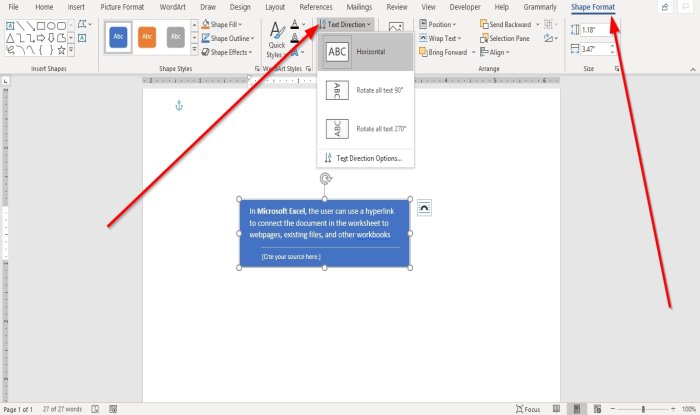
Go to the Shape Format tab.
On the Shape Format tab in the Text group, click Text Direction.
In the drop-down list, choose the direction you want the text to be in the text box.
5] How to Format the Text Box
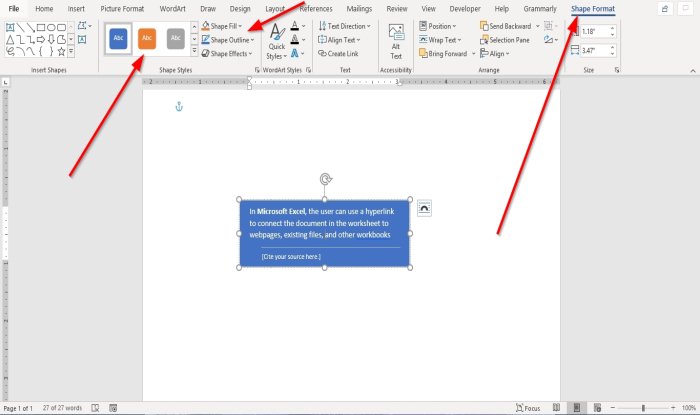
Click on the text box on the Shape Format tab in the Shape Styles group. You can choose the built-in styles you like.
You can format the text box by selecting Shape Fill, Shape Outline, and Shape Effects.
6] How to change the default formatting for a Text Box
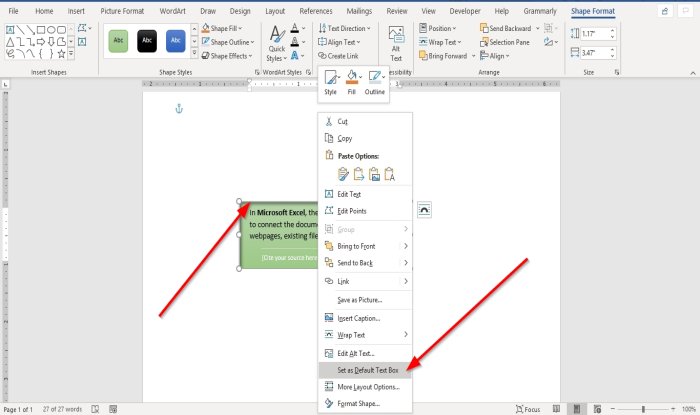
Right-click a formatted text box border and select Set as Default Text Box.
7] How to save a selected Text Box as a Building Block
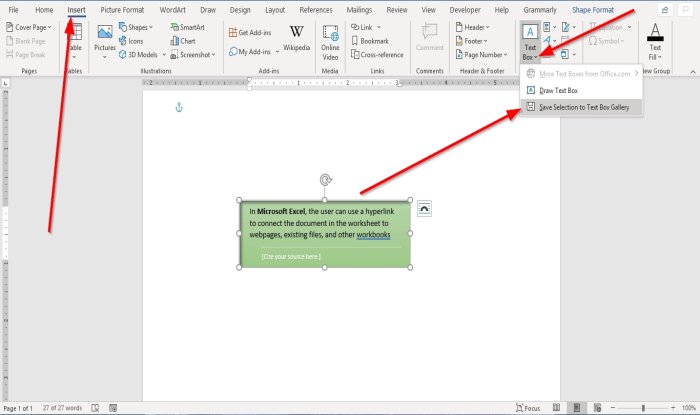
Go on the Insert tab in the Text group and select the Text Box button.
In the drop-down list, select Save Selection to Text Box Gallery.
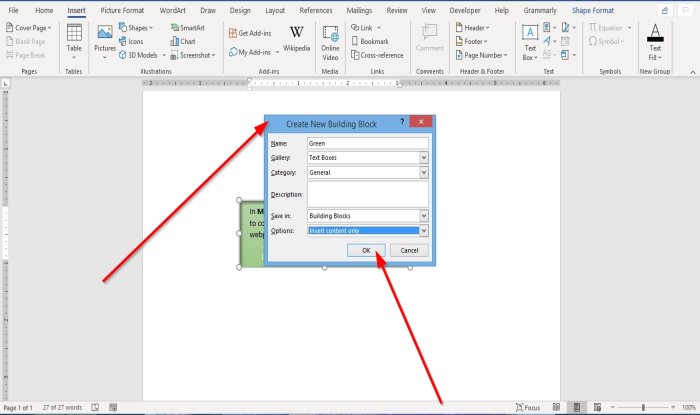
A Create New Building Block dialog box will appear, enter a name, select a category, or any changes you wish to make in the dialog box.
Click Ok.
If you want to see if the textbox you save is in the Building Block, click the Explore Quick Parts button in the Text group.
In the drop-down list, select Building Block Organizer.
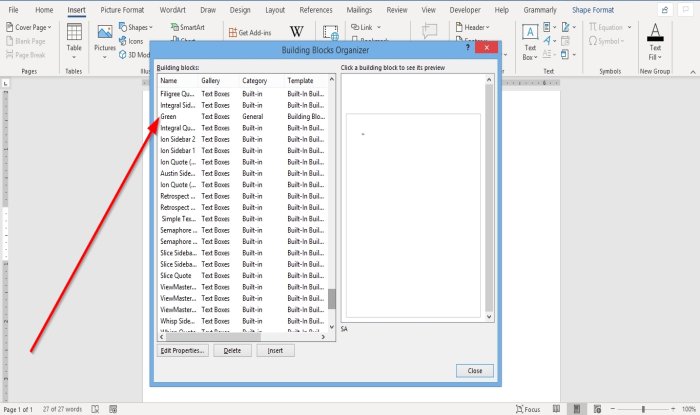
A Building Blocks Organizer dialog box will appear; Scroll down until you see the name of the text box you name.
I hope this helps; if you have questions, please comment below.
Read next: How to print hidden text in Word on Windows and Mac.
Achieve more control and flexibility with your documents
Updated on September 11, 2022
What to Know
- Select Insert > Text Box > choose a text box template. Select and drag box to the position you want.
- To resize text, select and drag circles around the edge. To rotate text, select and drag the circular arrow.
- Place the cursor inside the text box and type the information you want to appear.
This article explains how to use text boxes in Microsoft Word. Instructions apply to Word for Microsoft 365, Word 2019, Word 2016, and Word 2013.
How to Insert a Text Box in Word
Start by opening the document you want to add a text box to. Then follow the steps below.
-
On the ribbon, select Insert.
-
In the Text group, select Text Box, then choose a text box template.
-
The new text box appears in the middle of the text, and the Shape Format tab is automatically selected.
-
Select and drag the box to the position you want. To resize the text box, select and drag the circles around the edge. To rotate the text box, select and drag the circular arrow at the top of the box.
-
Place the cursor inside the text box and type the information you want to appear there.
Why Use Text Boxes?
When you type text in Microsoft Word, you have options for making it look a particular way on the page (such as changing the page margins), but those options are limited. Text boxes expand your formatting repertoire by offering additional control and flexibility for how your text appears. You can place a text box anywhere within a document and format it with different colors and fonts. This feature is especially helpful for creating a blockquote or a sidebar.
Customize a Text Box
After you create a text box, you can customize it in a number of ways.
-
To bring up options, place the cursor inside the text box and right-click. Choose an option and follow the screen prompts to add a border, change the style, or adjust the way the text box interacts with the other text on the page.
Alternatively, use the controls on the Shape Format tab.
-
To go directly to the Layout Options menu, select the text box, then select the Layout Options icon (it looks like a horseshoe and is located to the right of the text box).
-
Change the text, make more adjustments, or move the box to another location at any time. To delete a text box, select its border, then press Delete on the keyboard.
Thanks for letting us know!
Get the Latest Tech News Delivered Every Day
Subscribe

If you want to get creative with your text or simply have more flexibility, consider adding a customizing a text box in Word.
If you want more flexibility with certain text in your Word document, why not use a text box? Since a text box is considered an object, you can move it wherever you like in your document. This is handy for placing text in areas you normally wouldn’t.
You can use a text box to call attention to something in your document, rotate snippets of text, or create a unique appearance. Microsoft Word also provides formatting options for text boxes that give them their own nifty style or useful function.
Here, we’ll show you how to add or draw a text box and then format it to your liking in Microsoft Word.
With Word on Windows, you can either insert a preformatted text box or draw one of your own. Either way, you can customize it afterward, so choose the best option for you.
Go to the spot in your document where you want the text box and select the Insert tab. Click the Text Box drop-down arrow and pick a Built-In style or Draw a Text Box.

If you’re using Word on Mac, go to the Insert tab, click the Text drop-down arrow, and then the Text Box arrow. You can then choose to draw a simple text box or one where the text inside is vertical.

To draw your text box on either platform, drag the crosshairs to create the size you want. You can resize the text box any time after you draw it too.

When your text box appears, click inside to add your own words.
Format and Customize a Text Box in Word
Once you insert or draw your text box, select it and go to the Shape Format tab to view all of your formatting options. You’ll find the following features in Word on Windows, which may differ slightly in Word on Mac.

Shape Styles
Choose a theme or preset style for your text box. These options include filling colors and various effects.

Or you can use the Shape Fill, Outline, and Effects options to create your own distinctive style. From gradients and patterns to dashed lines and scribbles, you have many terrific options for customizing the appearance of your text box.

Note: Some options in the Shape Styles section may not be available if you select a preset text box.
WordArt Styles
Along with making the text box itself look snazzy, you can do the same with the text inside of it. Check out the Quick Styles in the WordArt Styles for premade options.

Or use the Text Fill, Outline, and Effects to make the text really pop. You can do things like add a shadow and glow or warp the text, so it’s curvy and cool.

Text, Accessibility, Arrange, and Size
The remaining sections of the ribbon allow you to change the direction of the text inside the box, use text wrapping with other elements in your document, rotate the text box, and adjust its exact size. You can also use the Alt Text Accessibility option to describe the text box.

Edit Your Text Box
After you customize your text box, you can still edit it anytime. Just note that when you select the text box to make changes, it may appear without some of the elements or effects you’ve applied. This is to make text editing simpler.
Once you complete your edits and deselect the text box, it will return to normal with your customizations.

Add Text Anywhere, Any Way in Word
Text boxes in Microsoft Word let you place text anywhere in your document without worries of margins or other normal text limitations. And because you can completely format the text box almost any way you want, it can be both a fun and useful addition to your document.
If you use Google Docs and Microsoft Word, take a look at how to work with text boxes in Docs too!
![]()
Lesson 21: Text Boxes and WordArt
/en/word2013/shapes/content/
Introduction
Text boxes can be useful for drawing attention to specific text. They can also be helpful when you need to move text around in your document. Word allows you to format text boxes and the text within them as WordArt.
Optional: Download our practice document.
To insert a text box:
- Select the Insert tab, then click the Text Box command in the Text group.
 Clicking the Text Box command
 - A drop-down menu will appear. Select Draw Text Box.
 Clicking Draw Text Box
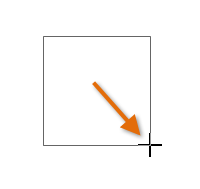
 - Click, hold, and drag to create the text box.
 Drawing a text box
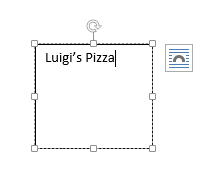
 - The insertion point will appear inside the text box. You can now type to create text inside the text box.
 Creating text
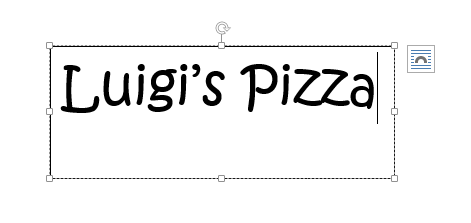
 - If you want, you can select the text and then change the font, color, and size by using the commands on the Home tab.
 The formatted text
 - Click anywhere outside of the text box to return to your document.

You can also select one of the built-in text boxes that have predefined colors, fonts, positions, and sizes. If you choose this option, the text box will appear automatically, so you will not need to draw it.
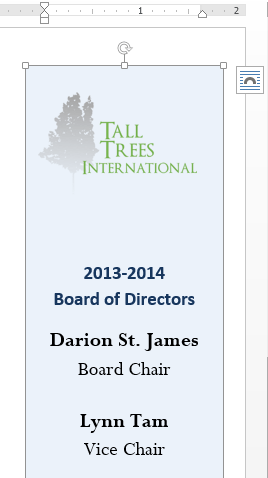 A built-in text box
To move a text box:
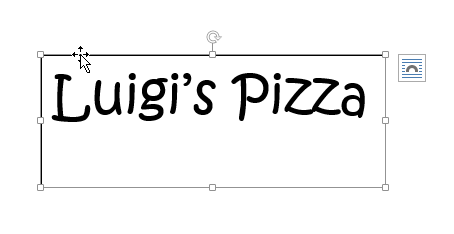
- Click the text box you want to move.
- Hover the mouse over one of the edges of the text box. The mouse will change into a cross with arrows
 .
. - Click, hold, and drag the text box to the desired location.
 Moving a text box
 .
.
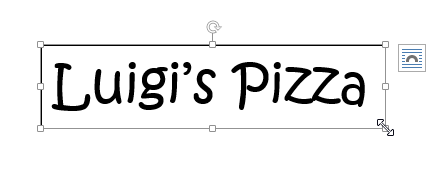
To resize a text box:
- Click the text box you want to resize.
- Click, hold, and drag any of the sizing handles on the corners or sides of the text box until it is the desired size.
 Resizing a text box
Modifying text boxes
Word offers many options for changing the way text boxes appear in your document. You can change the shape, style, and color of text boxes. Additionally, when you want to add a little more dimension you can add a shadow effect.
To change the text box shape:
Changing the shape of a text box can be a useful option for creating an interesting look in your document.
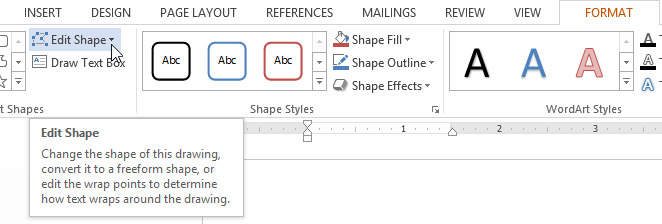
- Select the text box you want to change. The Format tab will appear.
- From the Format tab, click the Edit Shape command.
 Clicking the Edit Shape command
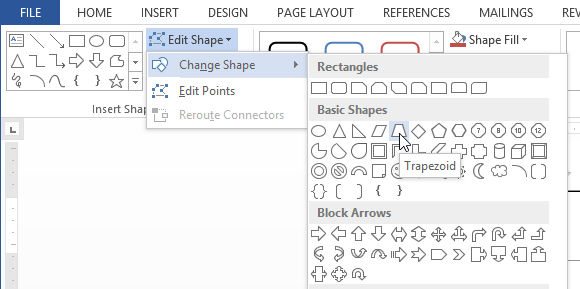
 - Hover the mouse over Change Shape, then select the desired shape from the menu that appears.
 Selecting a shape
 - The text box will appear formatted as the shape.
 The text box formatted as a shape
To change the fill color:
- Select the text box you want to change.
- On the Format tab, click the Shape Fill drop-down arrow. The Shape Fill menu will appear.
- Select the color you want to use. To view more color options, select More Fill Colors.
 Changing the shape fill color
 - The text box will appear in the selected fill color.
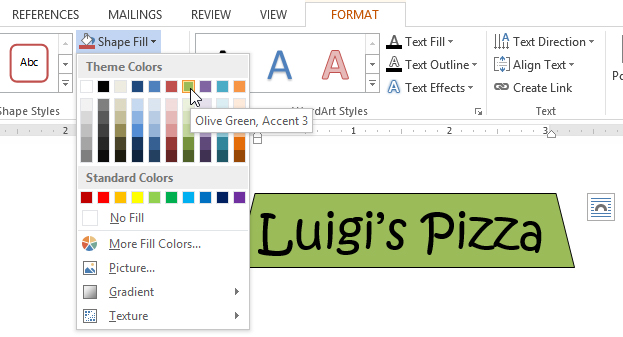
If you want to use a different type of fill, select Gradient or Texture from the drop-down menu. You can also select No Fill to make it transparent.
To change the shape outline:
- Select the text box you want to change.
- On the Format tab, click the Shape Outline drop-down arrow. The Shape Outline menu appears.
- Select the color you want to use. If you want to make the outline transparent, select No Outline.
 Changing the text box outline color
 - The text box will appear in the selected outline color.
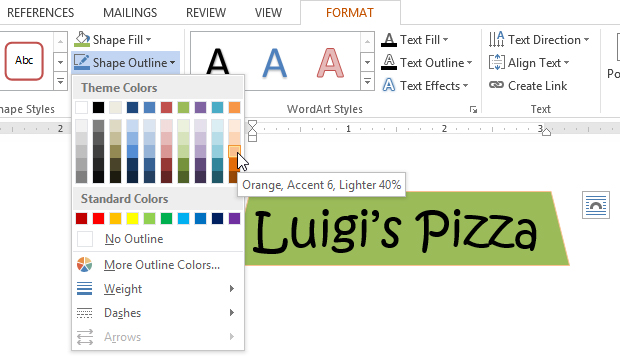
From the drop-down menu, you can change the outline color, weight (thickness), and whether or not it is a dashed line.
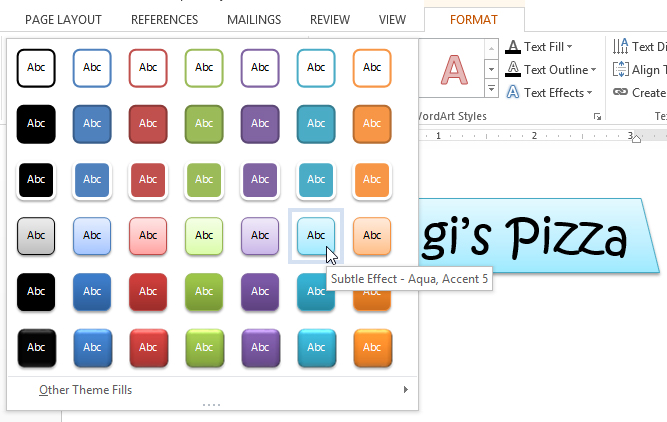
To change the shape style:
Choosing a shape style allows you to apply preset colors and effects to quickly change the appearance of your text box.
- Select the text box you want to change.
- On the Format tab, click the More drop-down arrow in the Shape Styles group.
 Clicking the More drop-down arrow
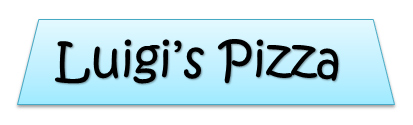
 - A drop-down menu of styles will appear. Select the style you want to use.
 Changing the text box style
 - The text box will appear in the selected style.
 The new style
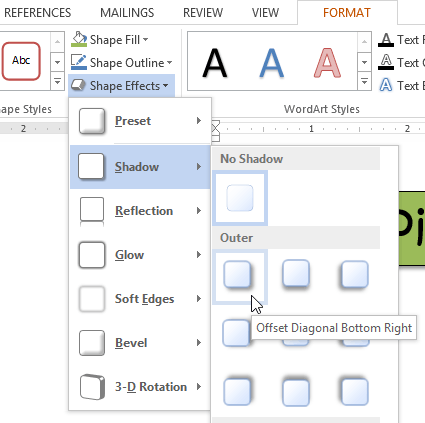
To change shadow effects:
Adding a shadow to a shape can make it appear as though it is floating above the page, and it can help to add contrast between the shape and the background.
- Select the text box you want to change.
- On the Format tab, click the Shape Effects drop-down arrow. In the menu that appears, select the shadow you want to use.
 Choosing a shadow type
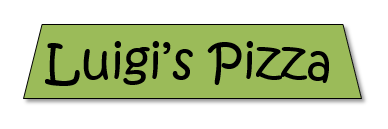
 - The shape will appear with the selected shadow.
 The text box with a shadow
To adjust the shadow color, size, distance, and more, select Shadow Options from the drop-down menu. The Format Shape pane will appear.
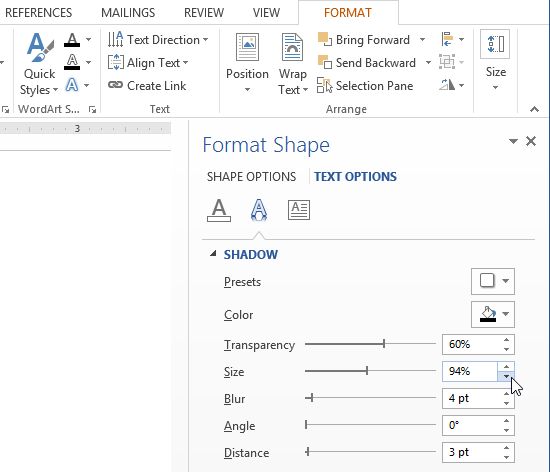 The Format Shape pane
3D effects
There are two kinds of effects you can apply to text boxes to give them a 3D appearance: 3-D Rotation and Bevel. 3-D Rotation makes text boxes appear as if you are viewing the text box from a different angle. Bevel adds thickness and a rounded edge to text boxes.
To use 3-D Rotation:
- Select the text box you want to change.
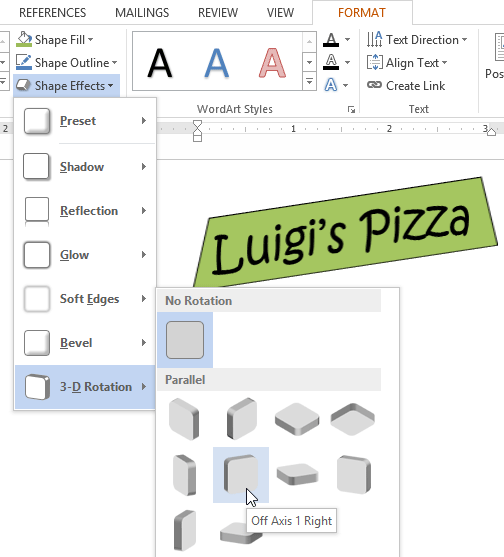
- On the Format tab, click the Shape Effects drop-down arrow. In the menu that appears, select the desired 3-D Rotation effect.
 Choosing a 3-D effect
 - The text box will appear in the selected 3-D Rotation effect.
If you want, you can customize the 3-D Rotation. Select 3-D Rotation Options… from the drop-down menu and the Format Shape pane will appear. From here, you can adjust the rotation values.
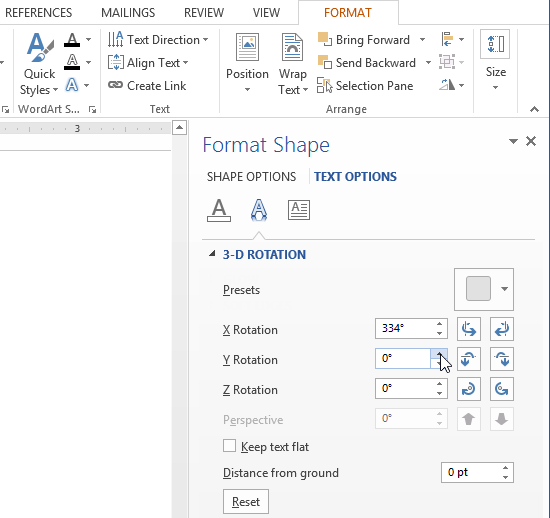 Customizing the 3-D rotation
To use Bevel:
- Select the text box you want to change.
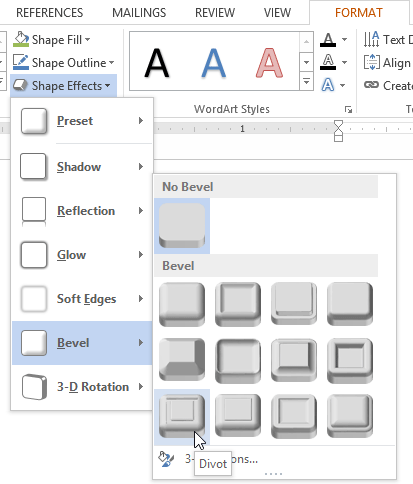
- On the Format tab, click the Shape Effects drop-down arrow. In the menu that appears, select the desired bevel preset.
 Choosing a bevel preset
 - The text box will appear in the selected bevel effect.
 The text box with a bevel effect

If you’ve changed the shape of your text box, it’s important to note bevel doesn’t work with every type of shape.
If you want, you can customize the bevel effect. Select 3-D Options… from the drop-down menu. The Format Shape pane will appear. From here, you can modify the width, height, and depth of a bevel.
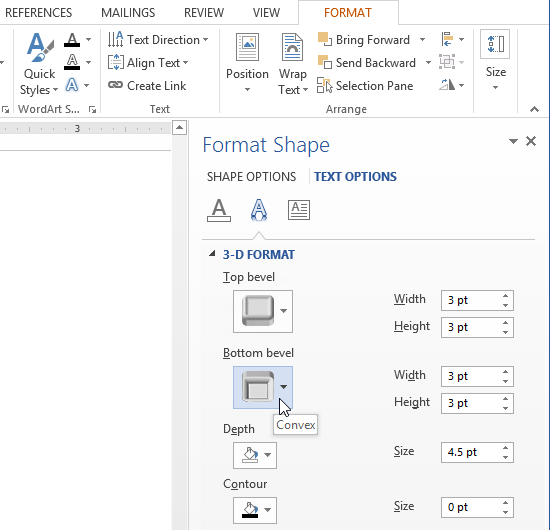 Customizing the bevel
Creating WordArt
In addition to adding effects to a text box, you can add effects to the text inside the text box, which is known as WordArt. For the most part, the types of effects you can add are the same as the ones you can add to shapes or text boxes (shadow, bevel, etc.). However, you can also Transform the text to give it a wavy, slanted, or inflated look.
Generally, you shouldn’t use WordArt in more formal documents like resumes and cover letters because it may appear too casual.
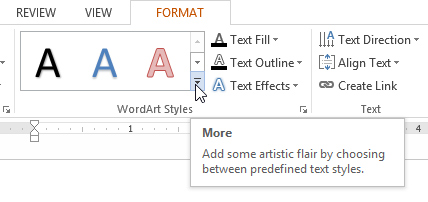
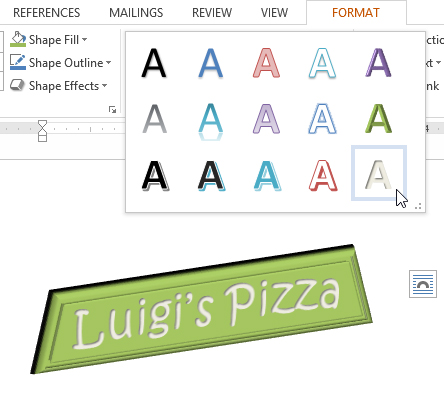
To apply a quick style to text:
A quick style will automatically apply several effects to your text at once. You can then refine the look of your text by adding or modifying text effects.
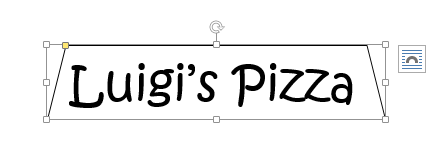
- Select the text box, or select some text inside of the text box.
 Selecting text inside of a text box
 - On the Format tab, click the Quick Styles command in the WordArt Styles group. A drop-down menu of text styles will appear. Select the style you want to use.
 Selecting a Quick Style
 - The text will appear in the selected style. If you want, you can change the font or font color from the Home tab.
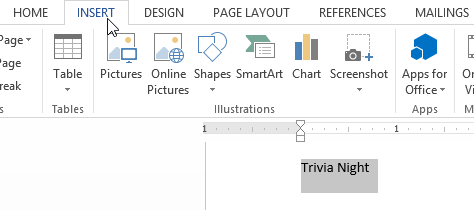
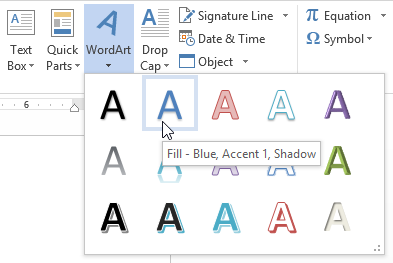
To convert regular text into WordArt:
For text to be formatted as WordArt, it must be inside a text box. However, there is a shortcut that allows you to convert text into WordArt even if it’s not in a text box.
- Select the text you want to convert, then click the Insert tab.
 Clicking the Insert tab
 - Click the WordArt drop-down arrow in the Text group. A drop-down menu of WordArt styles will appear. Select the style you want to use.
 Changing the text to WordArt
 - Word will automatically create a text box for the text, and the text will appear in the selected style. If you want, you can change the font or font color from the Home tab.
 Text as WordArt

Some effects, such as shadows, can be added from the Text Effects menu in the Home tab. When you add effects in this way, it will not place the text in a text box.
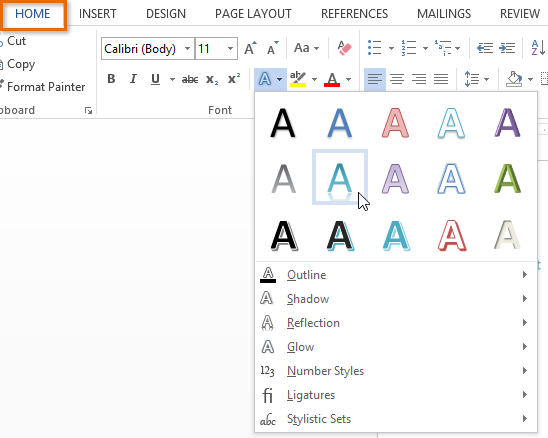 Additional text effects
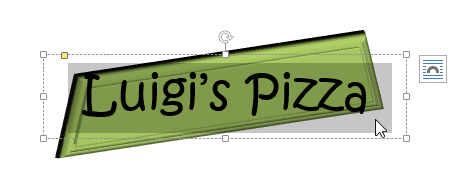
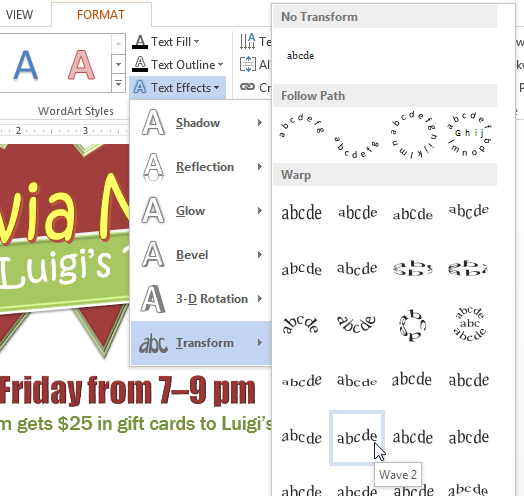
To transform text:
- Select the text box, or select some text inside of the text box.
 Selecting text inside of a text box
 - On the Format tab, click the Text Effects drop-down arrow in the WordArt Styles group.
 Clicking the Text Effects command
 - A drop-down menu of effects will appear. Hover the mouse over Transform and select a transform effect from the menu that appears.
 Selecting a transform effect
 - The text will transform into the selected style.
 The transformed text


If desired, you can add additional effects such as shadow, bevel, and more to the transformed text.
Challenge!
- Create a new Word 2013 document. If you want, you can use our practice document.
- Insert a text box.
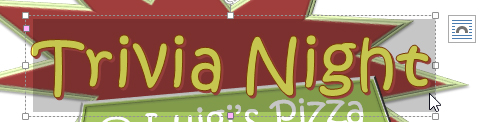
- Enter some text into the text box. If you’re using the example, enter the text Every Friday from 7-9 pm.
- Move the text box to a new location.
- Try changing the shape of the text box.
- Change the fill color of the text box.
- Change the outline of the text box to No Outline.
- Try applying some effects to the text box.
- Add some WordArt effects to the text.
/en/word2013/arranging-objects/content/