
An eBook (electronic book) is simply a digital book that uses a PC, mobile phones, tablets or a special eBook reader to display digital pages. Mainly, eBooks use three basic formats – PDF, EPUB and MOBI to enhance the readability and portability across devices. Though there are various professional tools for creating an eBook, you can create your own copy using any Microsoft Word (.doc or .docx) document, and later convert the copy any of these format. We offer lot of free eBooks in PDF format created with Microsoft Word.
Microsoft
Word is one of the most popular word processors, and offers both basic and
advanced features for authoring an eBook. These features allow to structure,
format, edit and publish your eBook effortlessly and at no cost.
1. Designing an E-book Layout
Ideally, you
can organize the content of an eBook to mimic a novel, textbook, or a magazine
depending on your topic. However, you should maintain a uniform and simple
design that enhances readability. To set up a basic design template for your eBook:
- Open a new Word document by clicking the “File” menu and select “New” from the drop-down menu. Then click the “Save” button, provide the file name and save your document in the desired location. You can save periodically to avoid losing your content.

- Under the “Layout” tab in Word 2016 or later (and “Page Layout” tab in Word 2013 or earlier) set all page size, hyphenation, page numbers, headers and footers settings, since different devices will dynamically resize the pages to their display.

- Under the “Indents and Spacing” tab, you can set left and the right indentation to zero or any desired value. Click on the paragraph settings by clicking the down-facing arrow on the “Paragraph” section.
- Indent the first line of every paragraph by choosing “First line” under “Special” tag and set it at 0.1 inches. Ensure to apply the changes only to your document and not on the template level.
- Use the “Double” line spacing for better readability and setup spacing before and after paragraph. Click the “Set as Default” button to ensure a uniform layout throughout the book.

Remember,
there are no rules to setup indent and spacing. You can setup this before
starting your document so that it looks uniform throughout.
2. Theme and Color Design
Once you have completed the initial page
layout then the next step is to choose theme for your eBook.
- Click the “Design” menu and under “Themes” select your preferred them.
- Choose a color scheme from “Colors” drop-down list or customize to your liking.
- You can also change the fonts, page background color, borders and add watermark if required.

Remember,
themes, colors and fonts will decide the look of your document.
3. Designing the Cover Page
Your
readers will judge your eBook by the cover. If possible, you can hire a
professional designer to do the task. If you have to create the cover, here are
some guidelines.
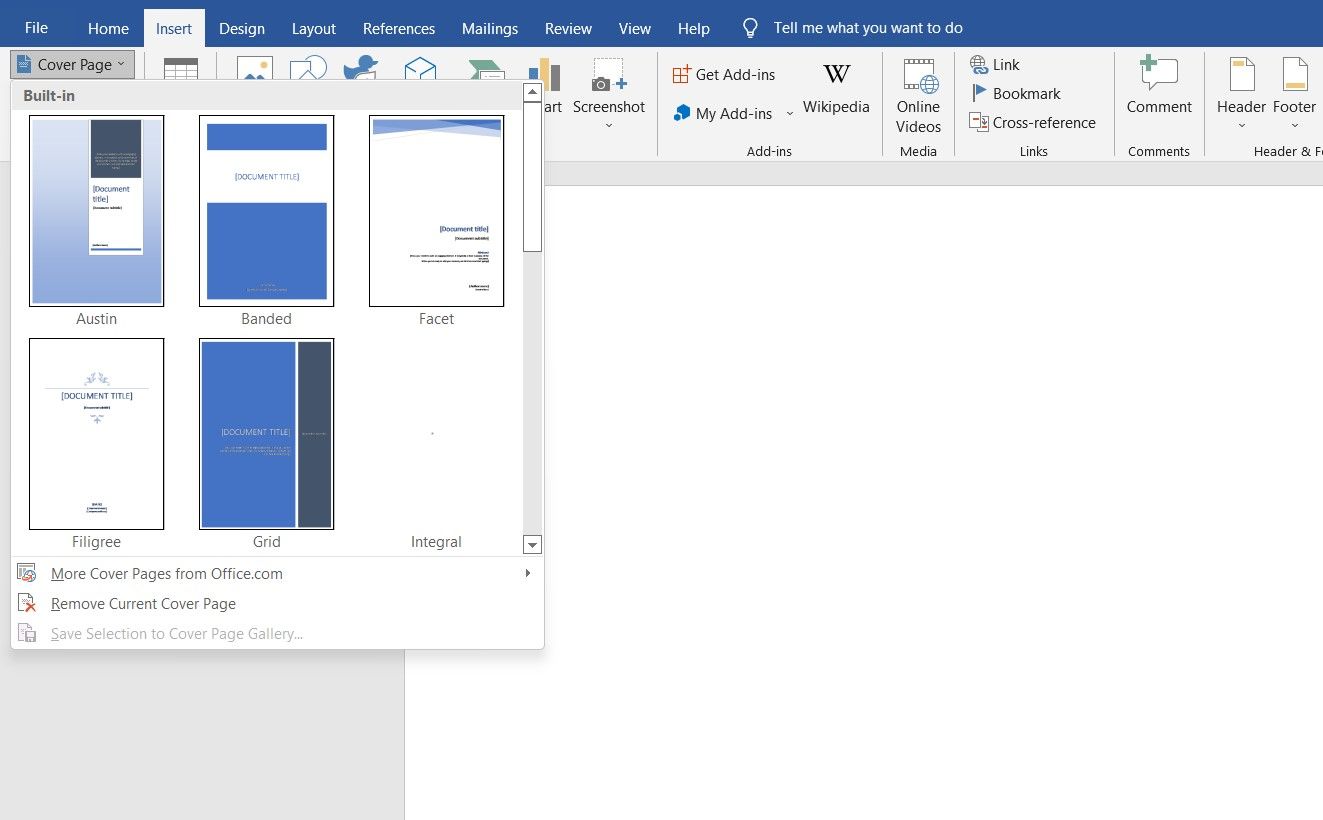
- Go to the “Insert” tab, click on “Cover Page” (the left-most option) and select one of the Microsoft Word designs.

- Insert the title of the book, author and a subtitle (Slogan) for the book. You can also add visual elements such as an image. Below is a sample eBook cover created with Microsoft Word.

Now you can
visualize the simple Word document starts looking like a beautiful eBook.
3.1. Tips for Cover Page Design
The cover page layout may vary based on
your Word version. In general, you can use one of the free templates supplied
with your Word software or look for more options from Office.com website. Be innovative
when creating your cover page and here are some of the tips.
- Ensure that the title and the background colors
are different. - Use a large and readable font for the title.
- Use high quality image (300 dpi), not pixelated
and with no outline borders.
4. Designing the Table of
Contents
It is a good idea to design your table of content to navigate your users. It will also help you to navigate through the document quickly using “Navigation” pane.
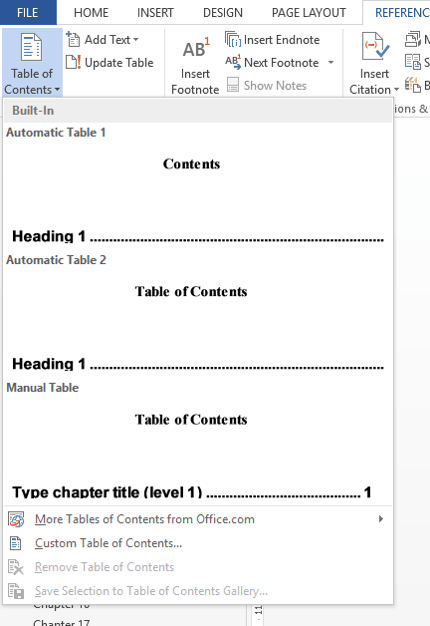
- Under “Insert” menu click on “Page Break” to start a new page. Click on the new page and go to “References” tab. As in normal hard binding books, you can insert table of contents (TOC) next to the cover page.
- Click “Table of Contents” and choose one of the existing style for your document. If you do not like any of the existing styles then select “Custom Table of Contents”.

- A new pop-up will open where you can customize the TOC settings. You can show or hide page numbers, align the page number, choose TOC format and set the number of heading levels shown in TOC. Click on the “Options” and “Modify” buttons to style your TOC further.

- When you have no content with headings, inserting TOC will display the text “No table of contents entries found.” Nothing to worry about as you can update the TOC every time you make changes to your documents.
In order to have a proper TOC, structure your content with H1 to H6 headings and update the TOC. You can enable “Navigation Pane” under “View” menu for easily going to the particular section of your document.
5. Authoring Your E-book
You are now set to start writing the book. Below
are some of the guidelines to make your eBook beautiful and readable.
- Mark the end of each chapter or section with a page break.
- Use different styles for different text levels. For instance, use the “Title Style” for the book title.
- Use “Heading 1 Style” for chapter headings (1st level), “Heading 2 Style” for chapter sub-headings (2nd level) and “Normal Style” for chapter content.

- Set the font type, color and size from “Home > Font” section. Use some readable font like “Arial” or “Time New Roman” and click “Ok”. Remember, when you setting style and fonts for elements, it will overwrite theme style and fonts. Therefore, we recommend setting fonts and choosing styles under “Design” tab as explained above. You can use custom font and style for few elements which you want to differentiate from the entire document.

6. More E-book Formatting Tips
Here are some additional tips to format your eBook.
- Use Hyperlink to direct readers to sections of the book or other sites.
- Use quality images in an unwrapped and centered format. You can insert caption to images and format image using picture tools.
- Do not use references such as ‘refer to page…)” as the page numbers may change depending on the screen size of the reader device. This will still work for fixed PDF format eBooks.
Proofread the book and correct both grammatical and formatting errors. - Use the paragraph marks for editing your document with advanced layout settings.

7. Converting Document to eBook
Format
You can offer eBooks in different formats. However, PDF format is more popular due to simplicity and support across devices.
- When your Word document is ready, go to “File > Save As”” menu.
- Select the location on your computer to save the file and choose PDF format.
- You can optimize the size for printing or online publishing.

- If you have lot of pictures on the document, click on the “Tools” and choose “Compress Pictures” option.
- On the pop-up, choose your preferred resolution and delete cropped portion of the images.

- Now, save your document as a PDF file and test your book before distributing.
Conclusion
Creating an
eBook is interesting yet involving task. You will need time to organize ideas,
put them into text, and publish them for your readers. Though most professional
authors go for sophisticated eBook development tools, Microsoft Word provides flexible
and customizable layout tools for eBook design and formatting. If you are
proficient with the Word processor, you have the right tool to create your eBook.

Ian Andrew, former Microsoft trainer turned indie author
There are many different ways for self-published authors to format their ebooks, from farming out the task to a specialist formatter, to doing it themselves. Experienced indie authors often become passionate advocates of one system or another, and some are more accessible and affordable than others. But while Vellum, for example, is a favorite among Mac users, a very common starting point is Microsoft ® Word. In today’s post, Ian Andrew, former Microsoft trainer turned self-published author, provides a simple beginner’s guide to using Word to format ebooks.
![]()
It’s easy to format ebooks with Microsoft Word, when you know how…
Why Use Word to Format Ebooks Anyway?
Yep – I get that some of you are keyboard wizards and witches, warriors all, scurrying away with Scrivener and ripping through with Reedsy… But, there are quite a lot of us mere two-finger mortals still ploughing our lonely furrows with that bastion of word processing software, the mighty Microsoft® Word.
Now, in a former life I was an accredited trainer of all things Microsoft®, and the biggest revelation to me was how poorly prepared people were when given a PC and expected to “get on with it”.
We wouldn’t let a welder just weld, but we let an administrator just wield their way through Word. Normally woefully.
Thankfully, it needn’t be that way. To format a document is a simple matter of using things that expert programmers have built into Word for us. Sadly, so few even know these things exist, let alone how to use them.
So, if you want to format a Word document such that it sails through the conversion process for Kindle’s Mobi or the more generic E-Pub… read on.
First, Ditch What You Don’t Need
First things first, you need to lose quite a lot of what would be in a paperback version. You don’t need to worry about:
- page size
- page margins
- hyphenation
- page numbers
- footers or headers
All of these are irrelevant for ebook documents, because the smartphone or tablet device relies on dynamically resizing the pages it displays. Likewise, drop capitals and anything too fancy, distract from the on-screen experience. I mean, you can have them, of course you can, but if you are doing this by yourself, keep it simple. (Editor’s note: including complex graphics in ebooks can reduce accessibility for the visually impaired, so are best avoided – see link to related post at the foot of this page.)
Having removed all the things that hinder free-flowing text, you can put in all the extras that ebooks enjoy, such as:
- links to your social media sites and websites
- links to email addresses
- links to review sites for your book
- most importantly, links to your other books
Within ebooks, hyperlinks, with a touch of a finger or the click of the mouse, will take your readers to where you want them to be.
Top Tips for Ebook Formatting in Word
Learn to view your document correctly. You need to see the formatting marks, so turn them on, as well as the navigation pane and the ruler, by clicking the back-to-front P sign (the paragraph symbol used by proofreaders).
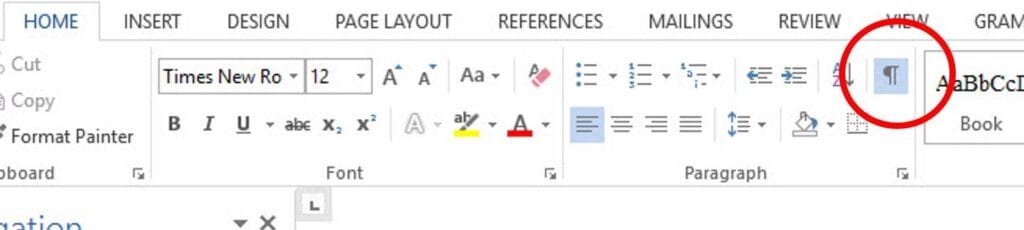
Click the circled P sign to view all the formatting marks in Word
Use the built-in styles that Word provides. Make your heading text how you want it to be, and then update Word’s built-in headings to match your selection. That way you harness their power, while keeping your preferred style. It will also allow your headings to appear in the navigation pane and the Table of Contents automatically.
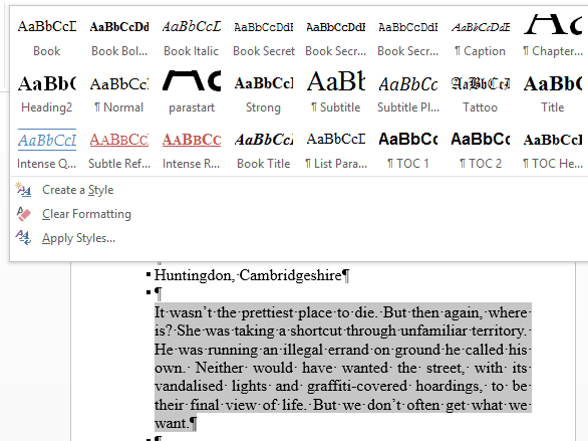
Word comes with a wealth of pre-set styles which you can easily adapt to suit your own preferences
Create your own paragraph styles. Make your paragraphs look exactly the way you want them to appear, then create a style that captures that format. Do not use spaces or tabs to set an indent, use the ruler indent marks to move the first line if required. Then highlight the paragraph and ‘Create a new style’. Give it a name. Use it to format all the rest of your document.
Insert hyperlinks to take your readers to where you want them to be. Copy the address of the page you want your readers to link to, then insert a hyperlink to that address. You can link to review sites, websites, social media, email or, most importantly, the sales pages of your other books.
Insert a hyperlinked Table of Contents. If you have used the in-built Word headings, inserting a Table of Contents is a simple matter of clicking on the Reference Tab in word and choosing to insert a Table of Contents. Turn off page numbers, select hyperlinks, click OK and that is that!
If you are still floundering, you might like to consider the new free on-line course of ‘How to format a Word document for E-Book’. Provided by ALLi partner member The Book Reality Experience, the course lasts just over an hour and will show you, step-by-step exactly how to implement the tips above. Click here for more information.
OVER TO YOU If you format your ebooks in Word, do you have any top tips to add to Ian’s list? We’d love to share them!
#Authors — how to format ebooks in Word, quickly & easily — by @IanAndrewAuthor #selfpub Click To Tweet
OTHER HELPFUL POSTS ABOUT EBOOK FORMATTING – FROM THE ALLi ARCHIVE
Want to create an ebook using Microsoft Word? Here’s how you can design and format your ebook in a few simple steps.

Ebooks are the electronic version of books that you can read on your computer, tablets, mobile devices, or Kindle.
You can write an ebook in any form—novel, non-fiction, or even create a freebie for your website’s visitors. Even though there are tons of software out there that you can use to create your ebook, Microsoft Word is one of the easiest and freemium options available.
So, let’s find out how to create an ebook using Microsoft Word.
Step 1: Do the Preparation
Before you get into the nitty-gritty of creating an ebook, the first thing you should do is decide what your ebook will be about and how you want to structure it. It’ll make the rest of the designing and writing part easier.
Some basic things you must come up with beforehand are the following:
- Topic: Decide on what topic you want to write your ebook. Make sure you have considerable knowledge of the subject you choose.
- Title: Once you’ve chosen your topic, come up with a compelling headline for your ebook.
- Length: Figuring out the right length mainly depends on your expertise in the topic and writing. If you’re creating an ebook for the first time, consider keeping the length short. Anything between several pages to a few thousand words will work fine.
- Outline: Finally, when everything is decided, come up with the outline of your ebook—for instance, chapters, headings, subheadings, and if possible, a few sentences in each section to have an idea of what it will be about. You can also create the first draft in a simple Word document before heading to the designing part.
Step 2: Create the Cover Page
Now that you already have the perfect book title ready, all you need is an impressive cover page to put it on. Follow these steps to create the cover page for your ebook in Microsoft Word.
- Go to the Insert menu.
- Click on the Cover Page button available on the left side.
- Select the cover page that’s suitable for your ebook,
Step 3: Add a Disclaimer/Copyright Page
To tell your readers that your ebook is copyrighted intellectual property, you’ll need to add a copyright page. Adding a copyright disclaimer can help you stay protected from any legal liability.
To get started, just follow these steps
- Go to the Insert menu.
- Click on Symbols on the rightmost side.
- Search for the copyright symbol and enter it on the page.
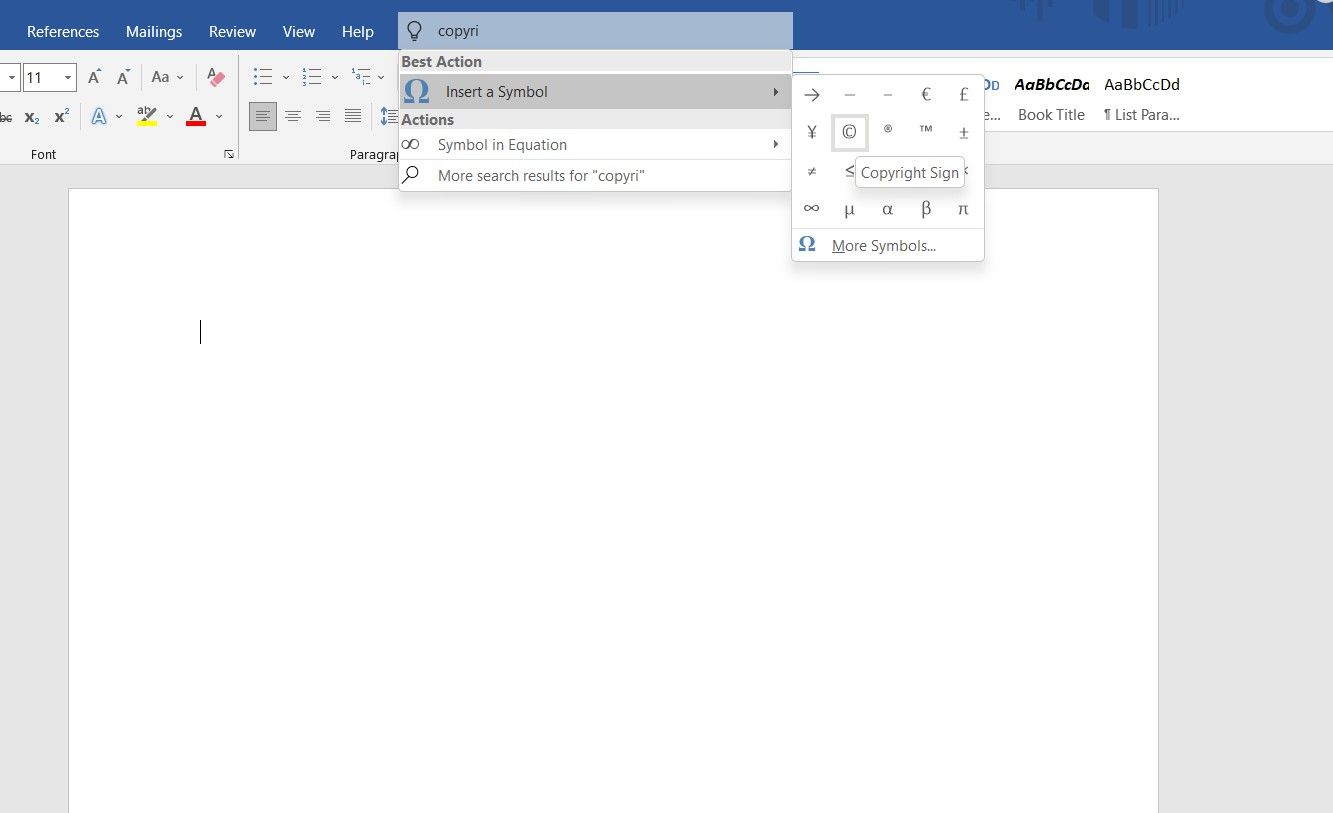
Finally, write your copyright disclaimer.
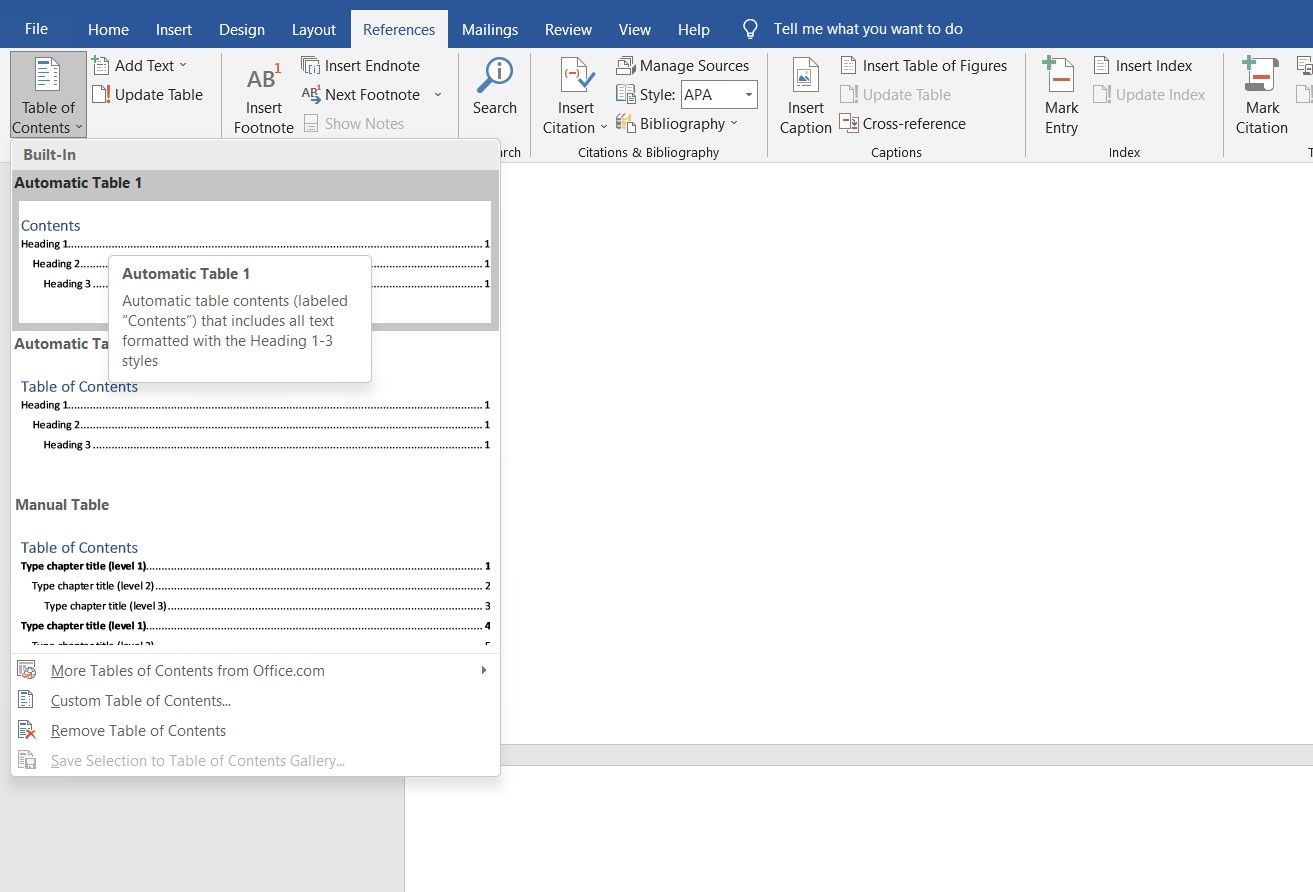
Step 4: Insert an Active Table of Content
The table of contents helps your readers quickly scan what topics the ebook covers and what they will get out of it. Microsoft Word offers you two different types of tables.
- Automatic table: It displays all the headlines, from one to three, in order. These tables are available under two separate titles: Contents and Table of Content. You can choose either of them, they’ll work the same. Since they’re automatic, you can enter as many headlines (up to H3 level) as you want and simply update the table, it will fill the context automatically.
- Manual Table: If you have more than three levels of subheadings in your ebook, for instance, H4, H5, H6, and so on, you can opt for the manual table. As the name suggests, you can manually enter the details in it.
To insert the table of content in your ebook, follow these steps.
- Go to References menu.
- Click on the Table of Content button present on the left-most side.
- Choose Automatic or Manual table from the drop-down menu.
To update the automatic Table of Content, follow these simple steps:
- Go to the References option.
- Click on the Update Table button available next to the Table of Content button.
You can also update the content from the table itself.
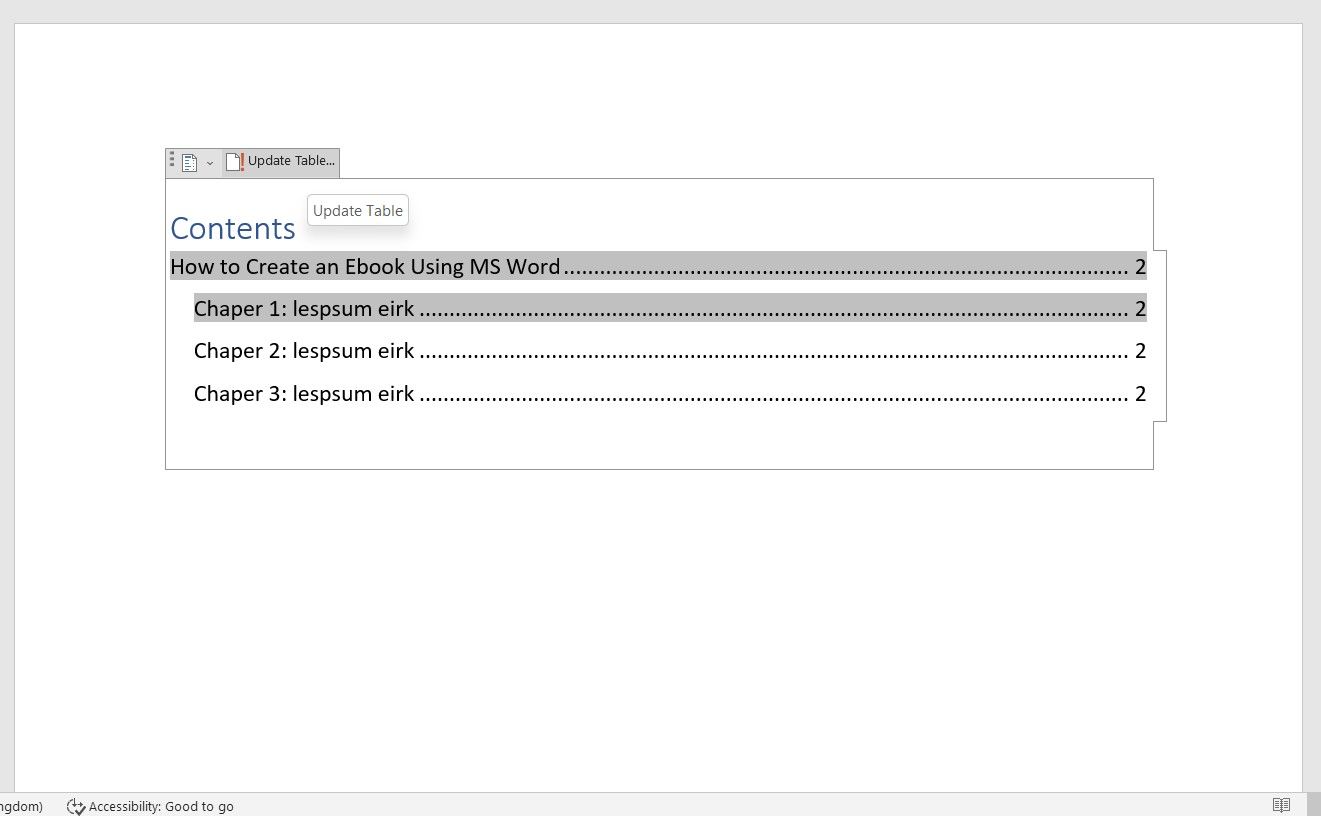
- Go to the Table of Content page in your ebook.
- Select the table.
- Click on the Update Table button from there.
- Choose Update Entire Table.
Depending on your purpose of the ebook, you can add your company name or website URL, page number, or more in your header and footer.
Most ebooks have the title written on their header. To insert it in your ebook, follow these steps.
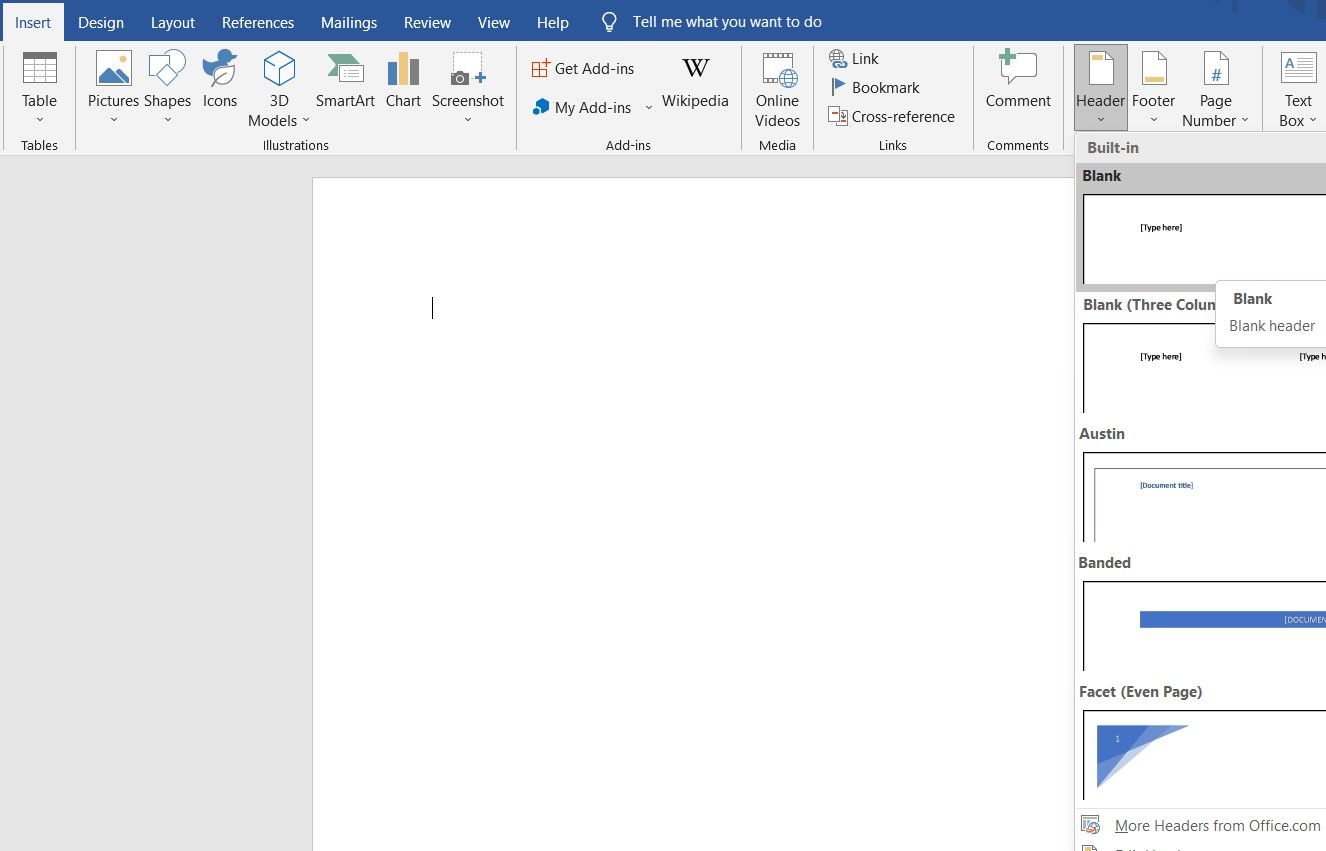
- Go to Insert menu.
- Click on the Header option.
- Choose the right header from the multiple options available.
Similarly, you can use your footer to display any information that’s suitable for your ebook. To insert the footer, follow these steps.
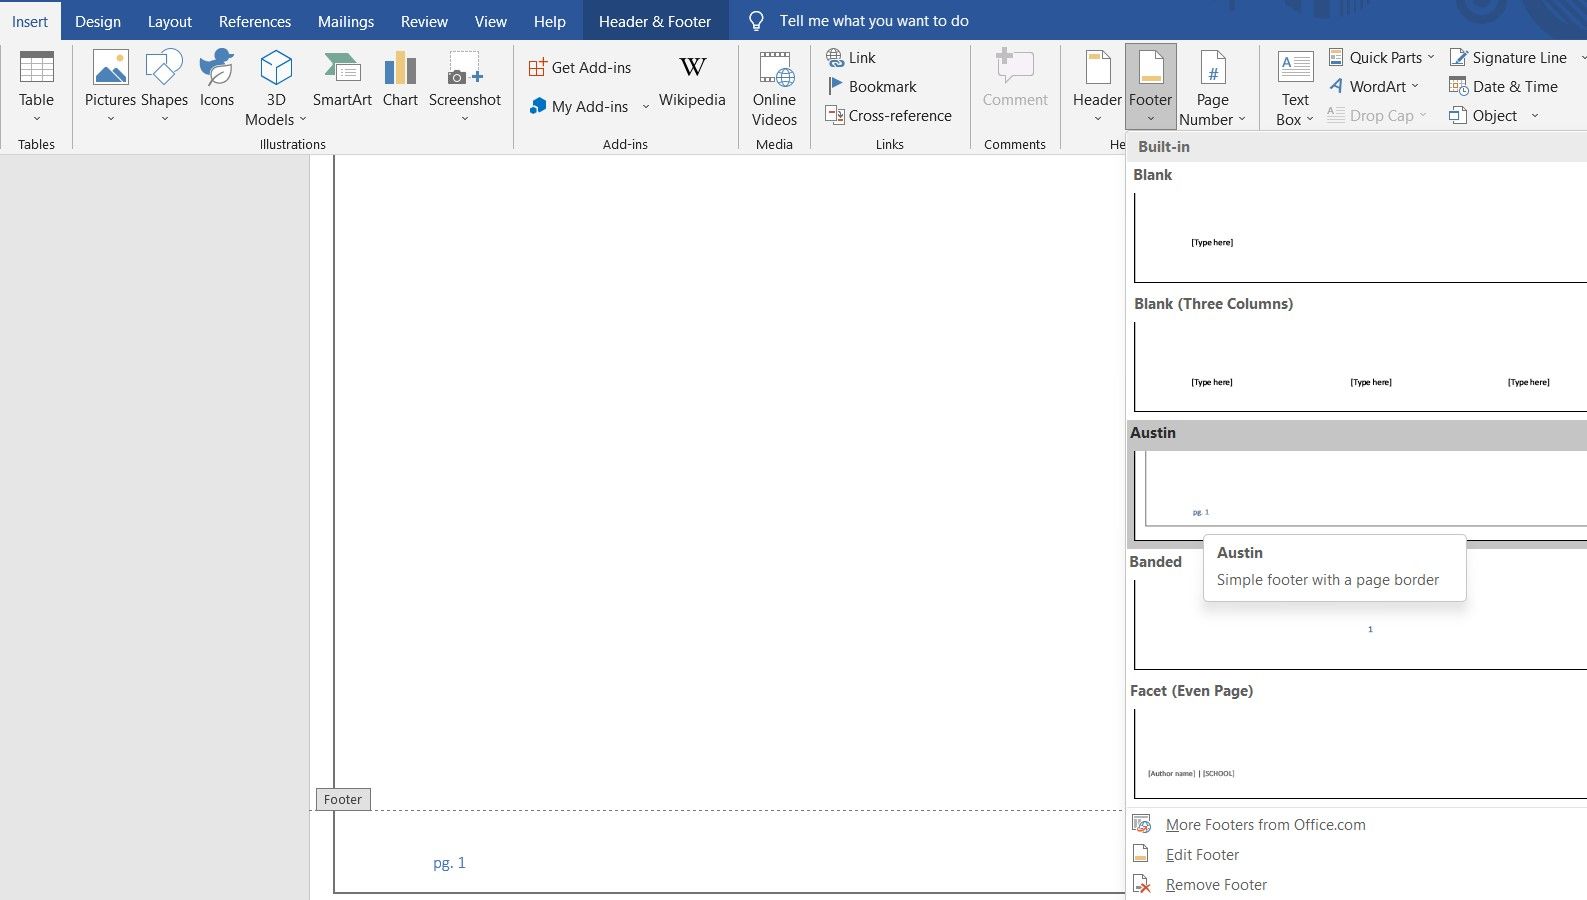
- Go to Insert menu.
- Click on the Footer option.
- Select the footer of your choice. (To automatically add the number of pages, choose Austin or Branded footer options.)
Step 6: Create Your Draft
You’re done with most of the formatting you need for your ebook. Now, you can start writing your draft, or if you’ve already created it in another document, just copy-paste the text.
To ensure the automatic table of content covers each of your headlines, choose them from the headings option.
- Go to the Home menu.
- Select the required headings (Heading 1, Heading 2, and Heading 3).
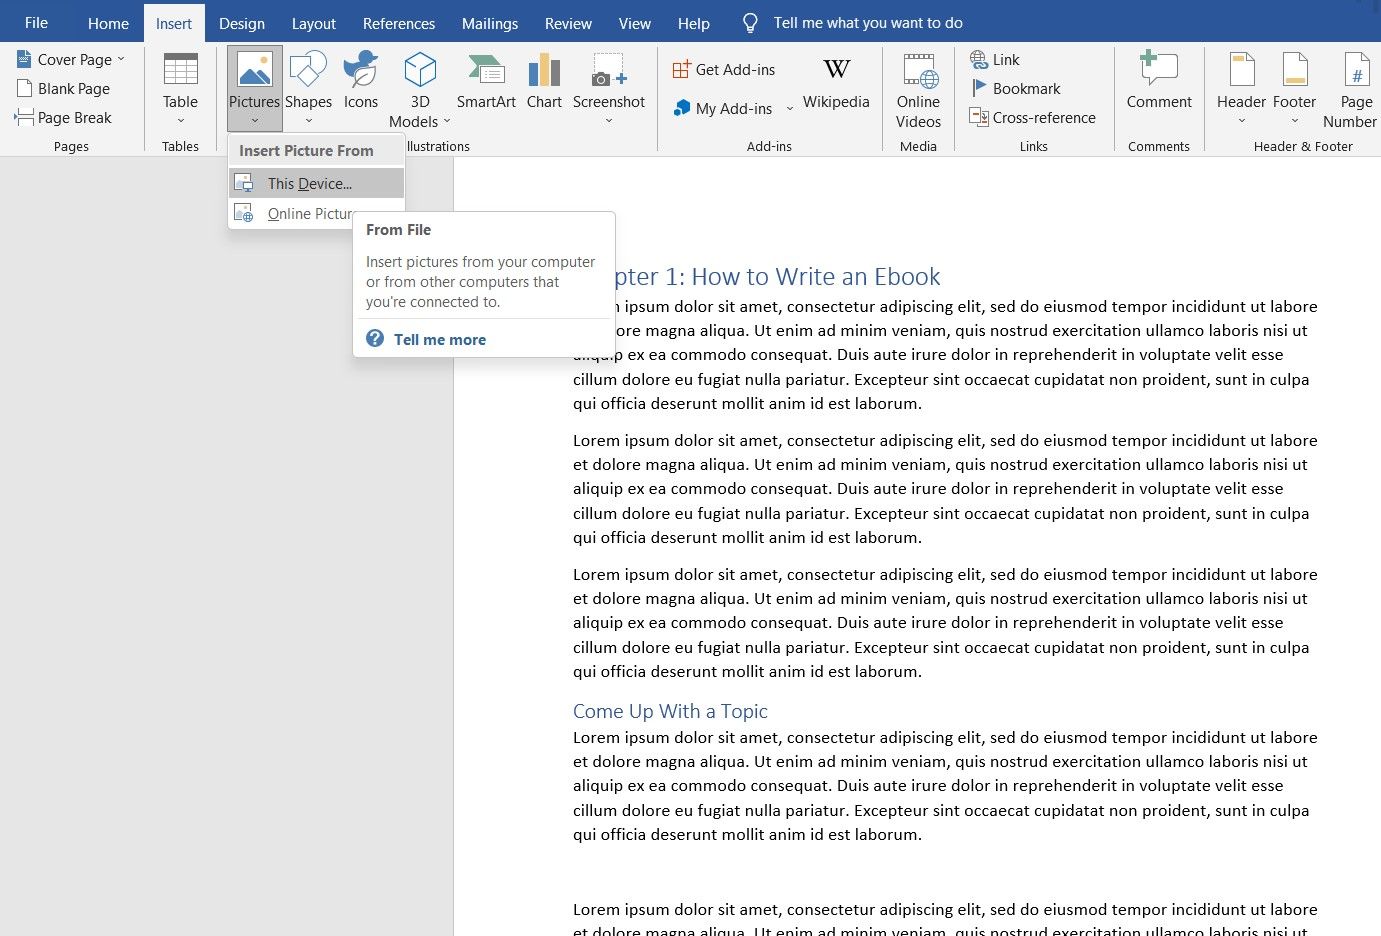
Moreover, Microsoft Word also allows you to insert images or graphs in your document. To add an image, follow these steps.
- Go to Insert menu
- Click on Pictures.
- Select This Device if your pictures are available offline, or choose Online Pictures to directly insert images from the web.
If you’re writing a non-fiction ebook and need to explain various concepts, you can choose to insert:
- Multiple shapes—Microsoft Word has a broad list of elements to select from.
- Icons—You can search for the specific icon depending on your need, for instance, arrows, body parts, graph icons, etc.
- 3D Models—just like images, you can directly insert them from the online option or upload them from your device.
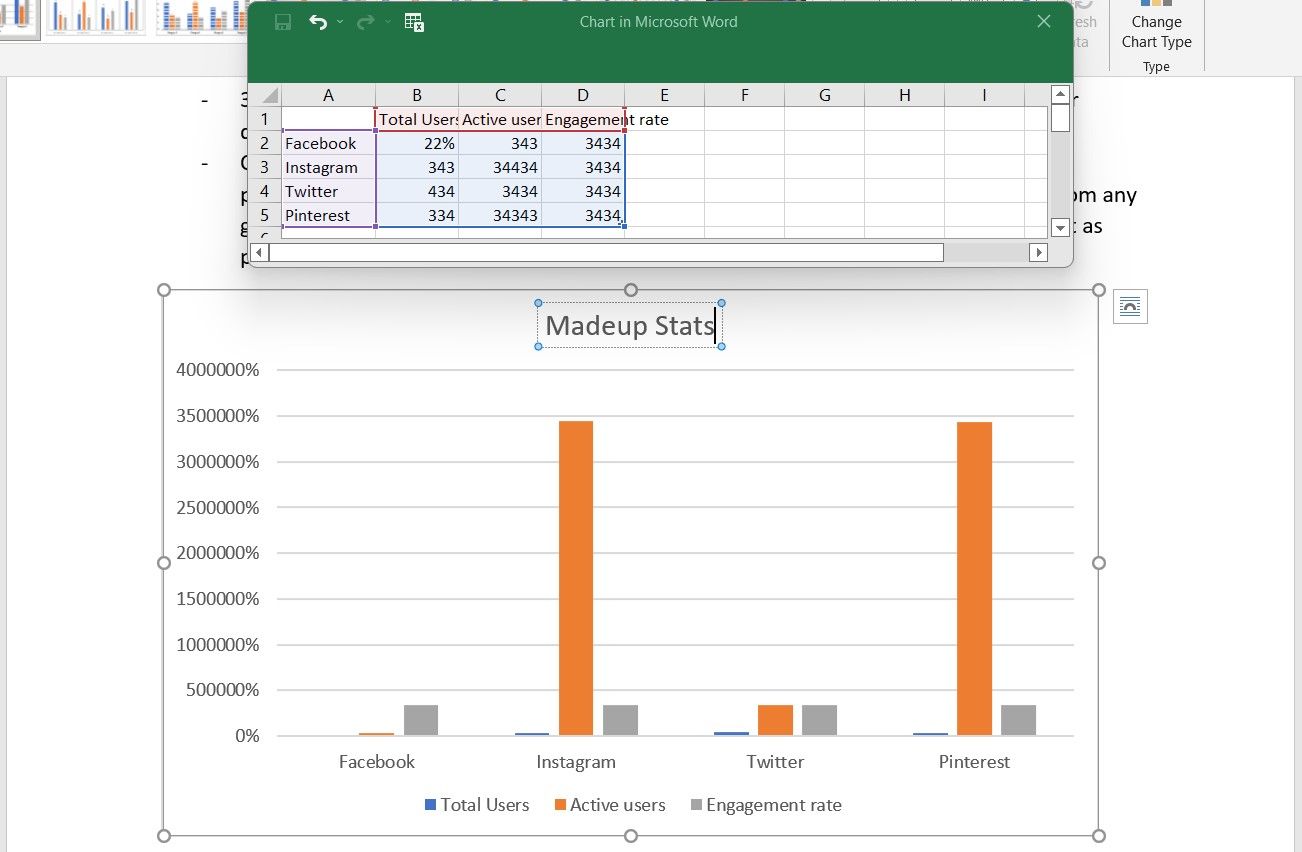
- Charts—if you need charts to explain concepts or show values, you can insert column, line, pie, bar, histogram, or any other graph or charts from the Chart option and customize it as per your needs.
Since it’s an ebook, you can add hyperlinks in the text and lead your readers to any website or landing page from here. To insert a hyperlink, follow these steps.
- Select the text you want to link to a webpage.
- Right-click and choose the Link option.
- Paste the link’s URL and hit enter.
Step 7: Add the Author Page
Ending your ebook with your author page is a good marketing technique.
So, add a good author bio and a nice headshot of yourself on this page (to insert your picture, follow the steps as explained above). Moreover, you can also add your social media or website links, your email address, or even promote your products or services, if you offer any, in this area.
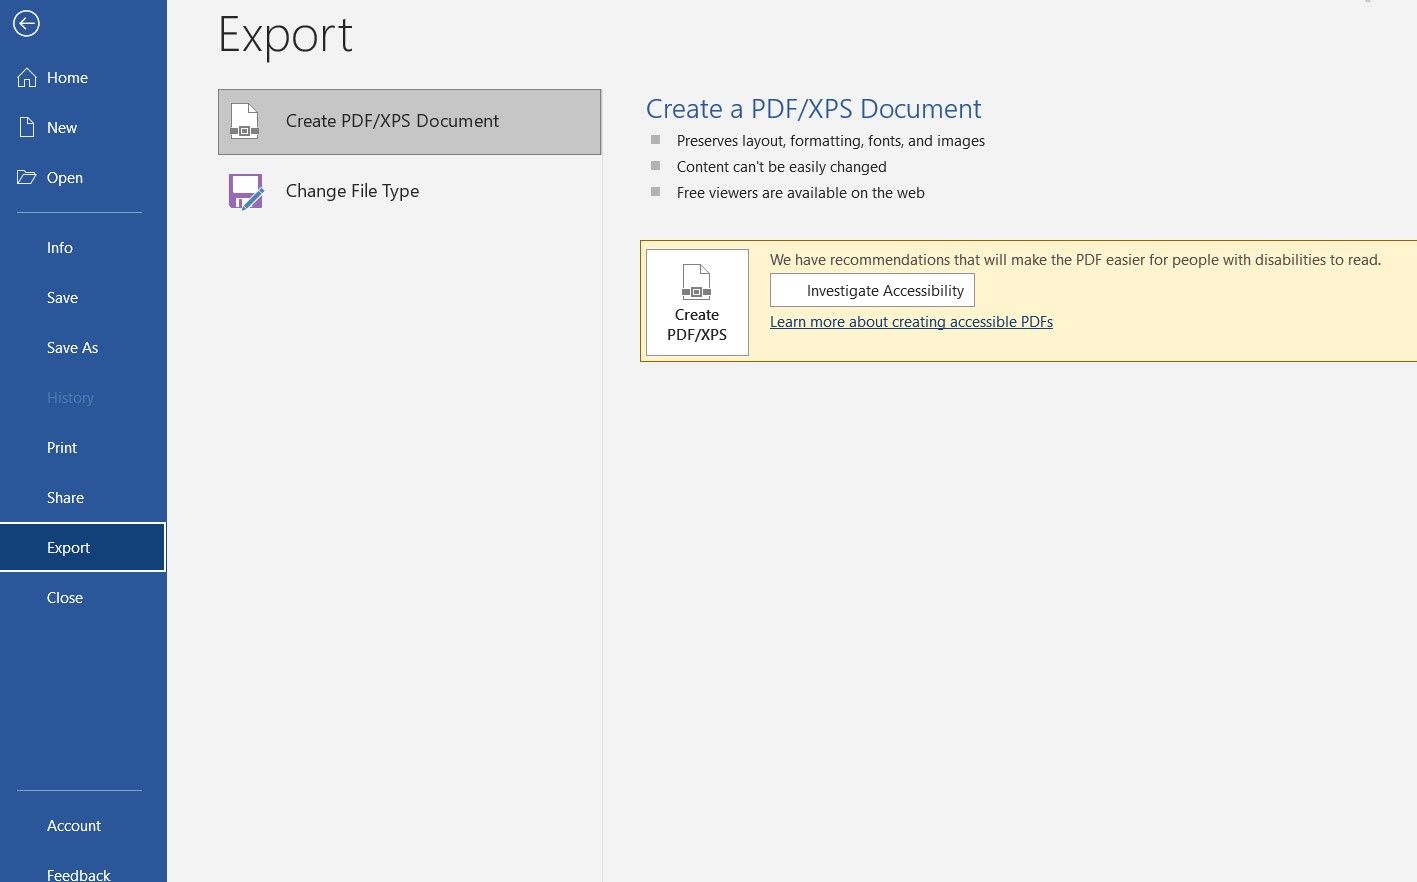
Step 8: Finalize and Export Your Ebook
Now that your ebook is finished and you have finalized the design, edit and proofread it for better accuracy, and export it in the form of PDF to share it with your readers.
Follow these steps to convert your Microsoft Word ebook into a PDF.
- Go to the Files option from the main menu.
- Click Export.
- Hit Create a PDF/XPS file.
Create an Ebook Easily With Microsoft Word
The ebooks you can create with Microsoft Word are pretty basic and not much captivating. But the tool is easy to use and can help you be done through the process in minimum time.
If you’re writing a short story or a novel, then Microsoft Word can be your perfect option to get started.

The Book Builder’s Blog
On The Book Builder’s Blog, C. D. Tavenor discusses the art of crafting novels, from the very beginning concepts that form stories to the editorial processes involved prior to publishing. The blog goes beyond just storysmithing; it considers all the pieces necessary to construct a complete book!
The 7 steps to formatting your e-book with Microsoft Word!
So you’ve finished writing your manuscript. You’ve received all the feedback you need. You’ve sent it to an editor. The manuscript has received its final proofread.
What’s next?
You need to format your book properly so it can convert into e-reader-friendly files. The two most common are .mobi and .epub. A number of great programs exist to assist you with e-book formatting, from Reedsy to Draft2Digital (and for Mac users, Vellum).
Personally, I prefer to format my e-books using Microsoft Word for two reasons:
-
I’m comfortable using the program; and
-
I can quickly make changes to the files if typos or mistakes are spotted after publication.
More importantly, formatting an e-book is incredibly easy in Microsoft Word!
So is your manuscript ready? Let’s go!
Step 1: Clear Meta-Data

Open your manuscript. Before we start formatting, we must ensure your word document has no underlying data capable of clogging the file.
To clear the metadata of your document, click File->Inspect Document. Run the “Inspect Document” function and Remove All data it detects.
For an e-book, you don’t need Headers, Footers, or Page Numbers. Including this extra data in your Word document (and eventual e-book) will only provide an opportunity for something to go wrong with the file.
Step 2: Section Breaks Between Chapters
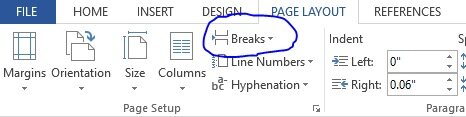
Many authors most likely create “page breaks” between chapters using “Ctrl + Enter.” However, page breaks aren’t sufficient for proper e-book formatting. You must use a Section Break.
Section Breaks ensure readers swipe right to the next chapter after the end of the previous chapter. The Section Break should also come right after the final word of your chapter, to ensure no white space could also trigger an extra page between chapters. There’s nothing worse than a reader swiping after a chapter ends and discovering a random blank page in the e-book!
To insert a Section Break: Page Layout -> Breaks-> Section Breaks-> Next Page.
Place a Section Break between each chapter of your manuscript. To ensure no excess page breaks appear, I’d recommend deleting all space between the end of a chapter and the beginning of the next before inserting the Section Break.
Then, ensure your chapter headings are formatted as you wish. At this point, you should also make sure your text is “justified,” rather than right-aligned, and that you’ve turned on auto-hyphenation. Here’s an example from Flight of the 500, my most recent novel:
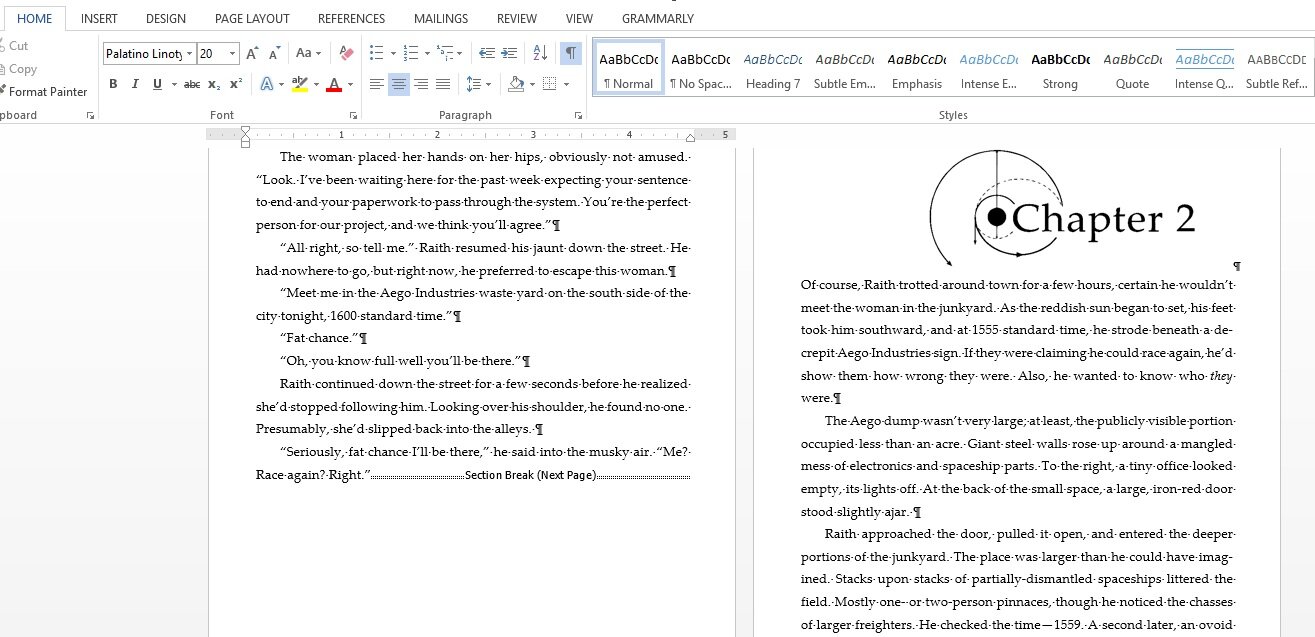
Notice: I’ve turned on the Formatting view on Microsoft Word so I can see all hidden characters. It’s incredibly useful when formatting an e-book in Word, because it shows where all Section Breaks are, paragraphs, tabs, extra spaces, and more!
Step 3: Create Front Matter and Back Matter
After placing proper Section Breaks between every chapter, you need to create your Front and Back Matter. Front Matter should include a Title Page, Copyright Page, and potentially a Table of Contents (more on that later) or an Acknowledgements section. The absolute essential pages are the first two:
I’ve included my contact information and the contact information of my cover artist and editor. I’ve included the basic copyright language, ISBNs, and other credits for graphics used throughout the book.

You could also include Acknowledgements at the beginning. Importantly, you should include a Section Break between each “part” of your Front Matter, and make sure a Section Break rests between your Front Matter and your first chapter!
For Back Matter, I would recommend a brief note encouraging readers to leave a review and a link to additional books or your mailing list. I wrote a short note (featured left) at the end of Flight of the 500.
Like the Front Matter, a Section Break rests between the final chapter and this page, and then another Section Break is at the end of this page, leading readers into the excerpt!
Step 4: Creating Your Table of Contents

The Table of Contents. It’s very simple! Go through each chapter and highlight the Chapter Title, apply Heading 1 Style to each Chapter Title (Home->Style->Heading 1).
I recommend, when applying the style, to first right-click and select “Update Style to Match Selection” so the Heading Style doesn’t override your Chapter Title formatting.
Once you’ve applied “Heading 1” to your Chapter Titles, head to References->Table of Contents->Custom Table of Contents. Deselect “Right Align Page Numbers” and “Page Numbers” and have it only show Level 1, as illustrated.
The Table of Contents will appear wherever your mouse cursor is currently located in the document, so make sure you’ve already built a Table of Contents page in the Front Matter of your book!
Some of you might be asking… is a Table of Contents necessary for an e-book? For a long time, I didn’t think they were necessary, but then I bought a Kindle Paperwhite.
When you create a Table of Contents for your e-book, the Kindle detects the Table of Contents and reads it into the e-reader, giving extra functionality and navigation for readers! Also, Amazon and other retailers highly encourage a Table of Contents for optimal reader experience.
Step 5: Remove Extra Formatting
This next step is the most technical and time-consuming, but it’s one of the reasons I prefer Microsoft Word over other formatting programs.
Remember that formatting view I teased earlier? Turn it on again. You need to go through your entire Word document and ensure there aren’t random page breaks, tabs, extra spaces, or other formatting quirks you may have accidentally included when drafting.
Have you ever read an e-book where random line breaks appear where you wouldn’t expect them to be, or a line suddenly only has two words on it with a massive space? These glitches occur because excess formatting errors haven’t been scrubbed from a manuscript. See an example below (I’ve added three errors as examples).
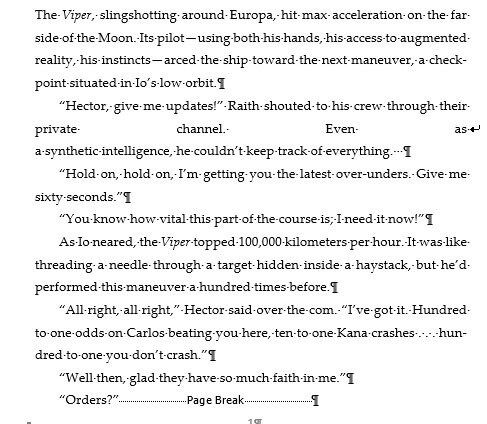
There are three formatting errors above. Can you spot them all?
Step 6: Convert to MOBI and epub!
If you’ve followed all the steps above, you should be ready to convert your Microsoft Word document into an e-pub or a MOBI file! Unfortunately, Microsoft Word can’t do the conversion on its own. You’ll need another program like Calibre to do the trick (Calibre is free, and it’s what I use).
Once you’ve installed Calibre, click “Add Your Book.” Click “Update Metadata” to provide accurate details about the book, then click “Convert Books.”
On this final screen, you can convert your Word document into tons of different file types, but generally speaking, epub and MOBI are all you need.
Note: when converting to a MOBI file, make sure you select “Do Not Add Table of Contents” in the “MOBI Output” Tab. If you leave it selected, it’ll place a redundant Table of Contents at the back of your book. No need for it!
An important note: some e-book distributors, like KDP, can convert Word documents directly into e-books. I prefer to manually convert e-books myself so I can send the file to my Kindle to see how it looks. In addition, I can use those MOBI files to send Advance Reader Copies to dedicated fans.
Step 7: Upload your files!
You’re all set! You’ve got an epub, a MOBI, and they’re formatted properly. I’ve used this method to format all my e-books, and they all come out looking clean and professional, with little to no formatting errors. At least, I’ve not had anyone tell me (yet) that they’ve had issues with the files!
To make clear: there are many different ways to format e-books, and this is my method. I use it because I’m comfortable with Microsoft Word. I like being able to easily edit my Word Document and re-convert it through Calibre in just a few short steps.
Find the method you like, and if you enjoy using Microsoft Word for everything, I hope you’ve found this guide useful!
e-book formatting
May 26, 2020
publishing, editing, formatting, e-book, kindle, kdp, ingram, calibre, mobi, epub, word
10 Comments
Publishing your own e-book can be a good way to offer value to your existing clients, attract new clients and help position you as an expert in your industry. There are two formats used for e-book readers: MOBI and EPUB. The Amazon Kindle uses MOBI format with an AZW file extension, while most other e-book readers use the EPUB format. In addition to these, e-books can also be produced as PDF files, which are readable on most readers. You can download software to convert a Word document into any of these formats or use any of the numerous conversion utilities available online.
Preparation
-
An e-book can be created from any Microsoft Word document in either DOC or DOCX format. Once your document is complete, you can then convert the document file to one or more e-book formats. Regardless of the format you choose, insert a line break at the beginning of every chapter. You can create a table of contents in Word and link the table to each chapter heading. With these hyperlinks, page numbers are not necessary in a PDF. Avoid page numbers in a table of contents for a MOBI or EPUB e-book as page counts vary depending on the device and the reader’s personal settings. Remember to proofread your book before converting it. Spell check alone is seldom sufficient.
Formatting for MOBI and EPUB
-
If you are publishing your e-book in MOBI or EPUB format, keep in mind that these formats drastically limit your choices in formatting. Limit your fonts in the Word document to one basic style, like Times New Roman. Limit font sizes to 10, 12, 14 or 18 point. Use left alignment and delete any tabs in the document. Do not use tables, WordArt or graphs. If you really need graphs and tables in the book, use image files embedded in the document. For your cover, use a separate image file and don’t place it in the document itself. During conversion, the cover will automatically be added to the e-book. E-book readers like the Kindle automatically indent every paragraph, so if you don’t want indents, use an indent of 0.01 inches in the Word document, which will appear as if there is no indent while being read.
Converting to MOBI or EPUB Formats
-
If you want to distribute the e-book through Amazon, you can upload a Word document to Amazon’s Kindle Direct Publishing conversion tool after you have created an account. If you want to create an EPUB version of the book for other book readers, you can upload it to a free service like Lulu. Alternatively, you can format the book yourself using a free program like Calibre or the Mobipocket eBook creator. Note that if you are using Calibre, you should save the Word document as an HTML file first. If you need to tweak a converted e-book, you can use a free program like Sigil.
PDF E-books
-
PDF e-books have a few disadvantages compared to MOBI or EPUB formats. The files are usually larger. Because their formatting is locked, they can’t be manipulated in a reader the same way other e-books can. As well, they can’t be distributed in services like Apple iBooks or Kindle Direct Publishing. On the other hand, as author and publisher, you have complete control over the formatting. You can use any font styles, sizes or alignment you want. You can also use tables and graphs. You can convert a Word document to PDF using software like Adobe Acrobat, or free software like CutePDF.