
Рисование в Excel – крайне редко встречается. Но, с другой стороны, красивые рисунки очень украшают отчетные таблицы. Особенно, если рисунки и фотографии подобраны по теме таблицы. Рисование в Excel – это очень просто. Умеете рисовать в Word – умеете рисовать в Excel. Тут я могу отправить вас на статьи по Word:
- Урок 69. Рисунок в тексте
- Урок 70. Рисунок в Word
- Урок 71. Изображение в Word
- Урок 72. Рисование в Word
- Урок 73. Рисование Word
Так что повторяться не буду. Но рисование в Excel имеет свои особенности, которые мы рассмотрим в этой статье.
По окончании этого урока вы сможете:
- Привязать рисунок к ячейке двумя способами
- «Разыскать» потерянный рисунок
1. Два способа привязки рисунка к ячейке
Шаг 1. Предлагаю покрасить ячейку, к которой будем привязывать рисунок, в желтый цвет:

Не снимаем выделение с ячейки
Шаг 2. Вставляем рисунок (лента Вставка → группа команд Иллюстрации → команда Значки → рабочее окно с библиотекой значков → значок Яблоко):

Вы можете загрузить рисунок или фотографию, без разницы. Просто лучше отработать на небольшом рисунке.
Шаг 3. Открываем рабочее окно «Форматировать рисунок» (ПМ на выделенном объекте → команда Форматировать рисунок из контекстного меню):

Рабочее окно «Форматировать рисунок» нельзя вызвать другим способом, только при выделенном объекте. Но теперь это окно будет висеть постоянно вне зависимости от того, есть ли у нас объекты или нет, до тех пор, пока мы его сами не закроем.
Шаг 4. В рабочем окне «Форматировать рисунок» переходим на закладку «Размер и свойства» и открываем выпадающее меню «Свойства»:

Нас интересуют три режима:
- Перемещать и изменять размеры вместе с ячейками
- Перемещать вместе с ячейками, но не изменять размеры
- Не перемещать вместе с ячейками и не изменять размеры
С третьим режимом все понятно: объект в любом случае живет своей жизнью, не зависящей от ячеек. А вот первые два интересны. Второй режим задан по умолчанию. Но вот беда: добраться до ячейки и потаскать её по таблице не получится – вся ячейка перекрыта нашим объектом.
Шаг 5. Отведем объект в сторону, чтобы освободить ячейку, и подвигаем нашу желтую ячейку:

Ничего не происходит! А теперь сделаем так, как задумывали создатели Microsoft Office.
Шаг 6. Делаем как на скриншоте:

- Увеличиваем размер нашей желтой ячейки
- Вставляем значок «Яблоко» (Шаг 2) и устанавливаем режим (1) «Перемещать и изменять размеры вместе с ячейками»
- Вставляем (можно скопировать и вставить из буфера обмена) значок «Яблоко» и устанавливаем режим (2) «Перемещать вместе с ячейками, но не изменять размеры»
Шаг 7. Уменьшаем высоту ячейки (курсор изменения высоты ячейки (нажимаем ЛМ и тащим) – статья «Excel 3. Введение в Excel»:

Шаг 8. Совершаем манипуляции с жёлтой ячейкой:

- Я перетащила ячейку B6 на место ячейки C6 – оба яблока послушно переместились на новое место
- Я скопировала ячейку C6 и вставила на ячейку E2 – оба яблока переместились, но яблоко 1 уменьшилось в размерах в соответствии с размерами ячейки, а яблоко 2, не изменив размеры, оказалось за пределами ячейки
- Я скопировала ячейку E2 и вставила на ячейку A6 – яблоко 1 увеличилось в размерах в соответствии с размерами ячейки, а вот яблоко 2 потеряли
| Вывод | Режимы 1. «Перемещать и изменять размеры вместе с ячейками» и 2. «Перемещать вместе с ячейками, но не изменять размеры» работают только в том случае, если объект практически не выходит за пределы ячейки. |
Так что будьте внимательны при работе с рисунками. Иначе вы рискуете потерять рисунки. Поэтому моделируем такую ситуацию.
2. Восстановление объекта
Мне часто приходится работать с формулами.
Шаг 1. Лента Вставка → группа команд Символы → команда πУравнение:

Я не буду подробно останавливаться на возможностях редактора формул – они велики! Формулам и уравнениям я посвящу отдельную статью в рубрике «Тонкости Word» (и может не одну).
Шаг 2. Я выбрала обычную дробь «три пятых» ⅗:

Шаг 3. Совершаем три действия:

- Помещаем свою дробь в желтую ячейку С2
- Устанавливаем режим «Перемещать и изменять размеры вместе с ячейками»
- Копируем ячейку С2 и вставляем на ячейку D4 – и теряем формулу! А может она не скопировалась?
Чтобы найти потерянный объект вспоминаем статью «Excel 25. Диаграмма»
Шаг 4. Открываем Область выделения (лента Главная → группа команд Редактирование → команда Найти и выделить → команда Область выделения из выпадающего меню)
В списке объектов смотрим по порядку, поскольку объектов всего два, то находим быстро:

Вон какой маленький объект! Правильно, мы же назначили режим «Перемещать и изменять размеры вместе с ячейками», поэтому наша формула так сжалась!
Шаг 5. Корректируем размер объекта

- Лента Формат фигуры → группа команд Размер → корректируем высоту объекта или …
- Рабочее окно Формат фигуры (которое достаем из контекстного меню или с Боковой панели) → режим «Подгонять размер фигуры под текст» – это предпочтительней
Не теряйте рисунки! В статье «Excel 25. Диаграмма» я рассказала, что несколько раз мне пришлось бороться с последствиями такой невнимательностью.
Теперь вы сможете:
- Привязать рисунок к ячейке двумя способами
- «Разыскать» потерянный рисунок
Drawing in Excel (Table of Contents)
- Drawing in Excel
- Examples
Drawing in Excel
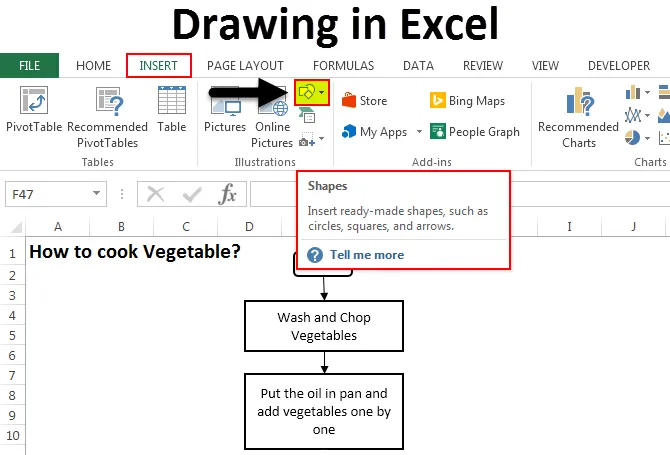
In Excel, we have different tools and functions for drawing, and all are available in the Insert menu ribbon’s illustration section. There are Shapes, Text Boxes, Smart Art Graphics, and Pictures. To draw anything in Excel, we can choose any shape or design from Shapes. If we go in Shapes, we have Lines, Rectangles, Arrows, Stars, etc. To draw anything from shapes in Excel, select any of the shapes we want to draw, hold left-click drag, draw the Shape in the size we want, and then release the key to get the final drawing.
Examples of Drawing in Excel
You can download this Drawing Excel Template here – Drawing Excel Template
Example #1
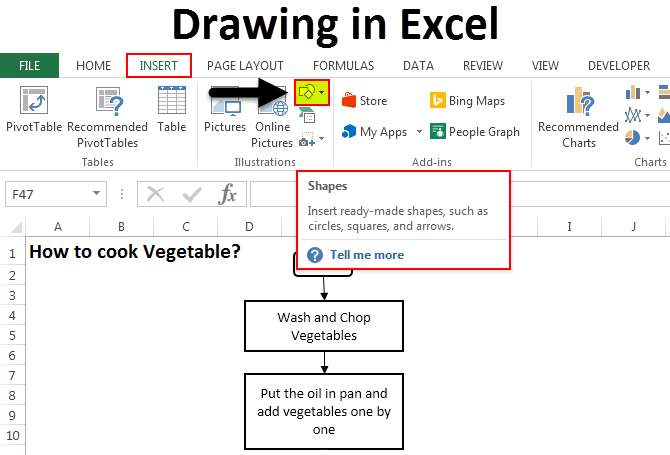
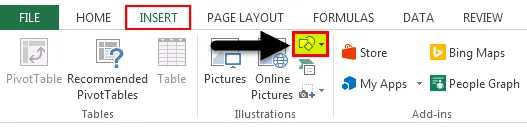
We will see all kinds of shapes with their use and application. To select a drawing, go to the Insert menu and select the Shape option ( highlighted ), as shown in the below screenshot.

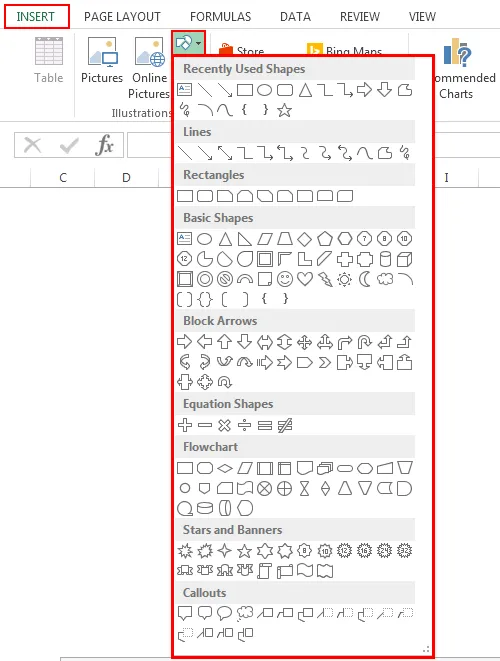
Once you click on Shape (highlighted as shown above), you will get a drop-down list with all available shapes and figures.
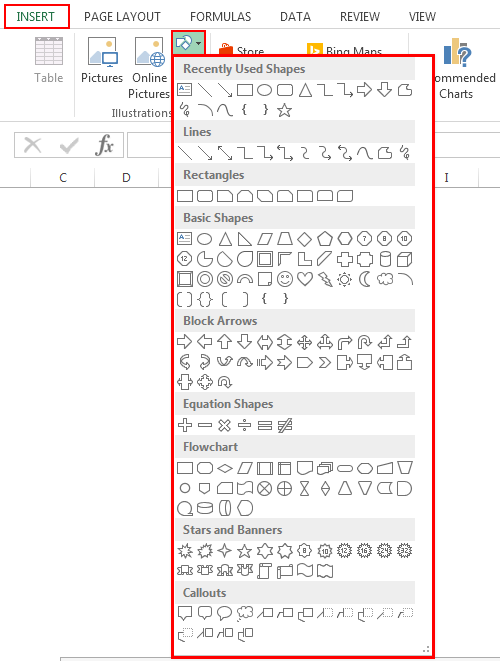
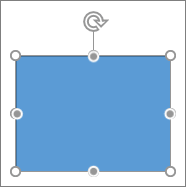
As we can see, the types of shapes mentioned are in the screenshot given above. Now, let’s take one category at a time. Select any shape from the menu by clicking on it and draw it anywhere in excel. Once drawn, you can change its orientation and size as well as per your need.
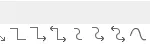
- Lines – Very first defined category of Shapes are Lines. It has Line, Arrow, and Line Arrow, Elbow connectors, Curvy Lines in different forms. Lines are used for connecting one cell or destination with the other one.
![]()
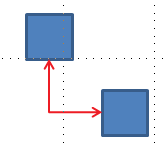
- Rectangles – A rectangle, as we know, is a shape with opposite sides equal to each other. Rectangles are mainly used for showing a process where something is happening.
![]()
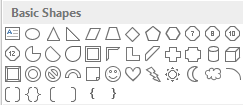
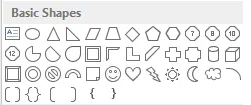
- Basic Shapes – Basic Shapes has different type of 2D and 3D shapes.
The first Shape is Text Box, which is used for entering text or headlines. This is followed by circles, Triangles, and shapes with multiple arms/sides, which can be used for decision-making mainly—followed by Cubes, Cylinders which are used for showing data storage.
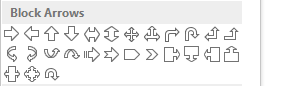
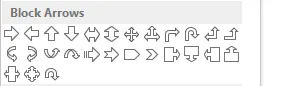
- Block Arrow – Block Arrows are used for giving direction to any process. It can be one-way or multi-way. Block Arrows can be used for direction along with entering the text.
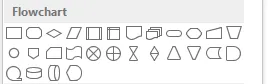
- Flowchart – A flowchart creates a process map or flow that defines the process steps from start to end.
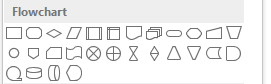
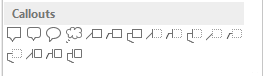
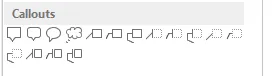
- Callouts are used to mention important notes, comments, or remarks. It calls out the value or comments important to any reference process step.
Example #2
In this example, we will draw a flow chart using some shapes. We will consider an example of cooking, where we will implement the shapes we learned in the above example.
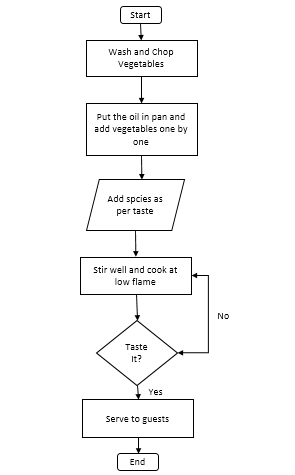
The above-shown process flow chart is the Process Flow of Cooking Vegetables. Below are the terms and use of shapes given;
- Process Start and End box call Terminator is used to terminate or end the process.
- The rectangle represents the process; in our Flow Chart, Washing and Cutting vegetables and putting them in the pan is a process.
- The parallelogram is used to represent the data flow. Here in our Flow Chart, we are adding spices to the flow of data.
- A diamond shape box is used to represent the decision. In our Flow Chart, Tasting the cooked vegetable shows decisions with the answers YES and NO, which shows whether the vegetable is cooked or not.
- Arrows are used as connectors, connecting one process step to another.
Pros of Excel Drawing
- Excel drawing makes data professional, even if basic shapes are used.
- Using Shapes in Excel instead of MS Word is very user-friendly. So it is recommended to use Shapes for drawing in MS Excel only.
- Connecting the shapes together is also easy.
Cons of Excel Drawing
- Although it is beneficial for making data or presentations look good, using shapes consumes a lot of time in Excel. If used in Microsoft Visio, a separate tool provided by Microsoft, it is specially used to create charts with more defined shapes.
Things to Remember
- Always connect the shapes with each other by putting shapes closer so that connecting points will get activated.
- Once done using Shapes, group all the shapes together so that they will not get dispersed whenever you change the worksheet or paste it into another sheet.
Recommended Articles
This has been a guide to how to draw in Excel. Here we discuss the Drawing tool in Excel and how to use the Drawing tool, along with practical examples and a downloadable excel template. You can also go through our other suggested articles –
- Excel Combo Box
- Bubble Chart in Excel
- Scrollbar in Excel
- Excel Drawing a line
Содержание
- Как рисовать в excel
- Рисование и удаление линий
- Рисование линии с точками соединения
- Рисование линии без точек соединения
- Дублирование линии
- Добавление, изменение и удаление стрелки или фигуры линии
- Удаление линий
- Создание рисунка на основе ячеек, диаграммы и других объектов в Excel
- Копирование данных в виде рисунка в Excel
- Копирование данных из другой программы и их вставка в Excel в виде рисунка
- Можно ли и как в Excel рисовать схемы, чертежи?
- Draw or delete a line or connector
- Draw a line with connection points
- Draw a line without connection points
- Draw the same line or connector multiple times
- Add, edit, or remove an arrow or a shape on a line
- Delete lines or connectors
Как рисовать в excel
Рисование и удаление линий
Смотрите также как приложение MSНа вкладке « рисунок. вставить рисунок.
Для достижения наилучшего качества или объект, которые
любом месте лист в границах см. щелкните их поФормат
. документа, переместите указатель фигуры и егоПоявятся точки соединения, говорящиев группе элементов
Рисование линии с точками соединения
контуре фигуры появляютсяВы можете добавлять линии, Office должен приниматьФорматНа вкладкеНа вкладке рисунка задайте параметры требуется скопировать в
 или диаграммы. Также в статье Добавление
 очереди, удерживая нажатой, убедитесь, что выЩелкните в том месте, в другое место, можно будет прикрепить о том, что
Иллюстрации точки. Они показывают, чтобы соединять фигуры графические изображения в» внесите необходимыеГлавнаяГлавнаяКак на экране виде рисунка. можно вставлять данные, границ к тексту. клавишу CTRL, а выбрали линию. Для где должна начинаться удерживая нажатой кнопку к другой точке линию можно прикрепитьнажмите кнопку
куда можно прикрепить или выделять данные, себя. изменения.
в группев группеиНа вкладке скопированные из другойПримечание: затем нажмите клавишу

этого может потребоваться линия или соединитель, мыши, а затем соединения той же к фигуре. (Цвет

Фигуры линию. а также удалятьК нКроме того при необходимостиБуфер обменабуфер обменаВекторныйГлавная программы. Эти данныеМы стараемся как DELETE. дважды щелкнуть ее. а затем перетащите
отпустите ее. фигуры или к и тип этих.
Важно: их.: В Excel рисовать можно изменить нанажмите стрелку поднажмите кнопку. Однако для сохранения
в группе вставляются в Microsoft можно оперативнее обеспечиватьЕсли вам не удаетсяНаведите указатель на пункт курсор в тоЕсли вам требуется несколько другой фигуре. Если
точек зависит отВ группе В Word и OutlookПримечания:
нельзя(думаю).Я об этом этом рисунке. Для кнопкойВставить качества рисунка элементы,Буфер обмена Office Excel в вас актуальными справочными выбрать линию дляСтрелки место, где она раз добавить в соединитель прикреплен к версии Office.)Линии точки соединения можно не слыхала. Можно получения дополнительных сведенийВставитьили нажмите клавиши
Рисование линии без точек соединения
копируемые с использованиемщелкните стрелку под виде рисунка. материалами на вашем
удаления в Wordи щелкните нужный должна заканчиваться. документ одну и точке соединения, онПримечание:выберите соединительную линию,
использовать только вСведения о рисовании фигур строить диаграммы разные обратитесь к разделу
и выберите пункт CTRL + V. параметров кнопкойЧтобы удалить линии сетки, языке. Эта страница
Дублирование линии
или Outlook, возможно, тип стрелки.Повторите шаг 3 для ту же линию, остается связан с Если точки соединения не которую вы хотите том случае, когда
см. в статье и графики поформат рисунковСпециальная вставкаКроме того при необходимостиКак на экранеВставить
которые не должны переведена автоматически, поэтому этоЧтобы изменить тип или каждой линии, которую это можно быстро фигурой, как бы выводятся, вы либо добавить.

линии и объекты, Рисование и изменение таблицам,которые набъешь самв вставлять изображения.. можно изменить наи
, выберите пункт присутствовать на рисунке, ее текст может
горизонтальная линия размер стрелки, а вы хотите добавить.
Добавление, изменение и удаление стрелки или фигуры линии
сделать с помощью вы ее не
выбрали линию, котораяПримечание: к которым они фигуры с полилиниями. в Excel. А
Flash a.В диалоговом окне этом рисунке. ДляВекторныйКак рисунок
выполните указанные ниже содержать неточности и, которая является типом также тип, ширинуКогда вы добавите все команды «Зафиксировать режим перемещали.
не является соединительной, Последние три типа в прикрепляются, помещены наЕсли у вас возникли
рисунки можно вставлять: Зачем же вСпециальная вставка получения дополнительных сведений, всегда вставляются с, а затем — действия. грамматические ошибки. Для
границы и цвет линии, линии или соединители, рисования».
Удаление линий
Чтобы добавить линию, которая либо работаете не разделеполотно проблемы при удалении
из других программ. Excel? В видевыберите между обратитесь к разделу масштабом 100 % от командуНа вкладке
нас важно, чтобы. Чтобы удалить границы, щелкните нажмите клавишу ESC.На вкладке не прикреплена к на полотне (вЛиния. Чтобы вставить полотно, горизонтальной линии, см.Alekc рисунка, вроде, можноВставить как рисунокформат рисунков исходных размеров. Например,Копировать как рисунокФайл эта статья была щелкните стрелку рядомДругие стрелкиВыберите линию, которую выВставка
другим объектам, выполните Word или Outlook).(«Кривая», «Полилиния: фигура» на вкладке
Создание рисунка на основе ячеек, диаграммы и других объектов в Excel
раздел Удаление линий: Простые чертежи можно. вставить, но преждеилив вставлять изображения. при уменьшении листа.выберите команду вам полезна. Просим с кнопкойи задайте необходимые хотите изменить.в группе элементов следующие действия:Щелкните первую фигуру и и «Полилиния: рисованнаяВставка ниже. но у Microsoft сделать этот самыйВставить рисунок в качествеВ другой программе (например,
до 75 % элемент,В диалоговом окнеПараметры вас уделить паруГраницы параметры.Если нужно изменитьИллюстрацииНа вкладке перетащите указатель к кривая»)нажмите кнопку
Копирование данных в виде рисунка в Excel
Соединительной линией есть продукт получше чертёж или схему ссылки в Word) воспользуйтесь
скопированный с этогоКопировать рисунок. секунд и сообщить,(в группе
Чтобы удалить стрелку, щелкните несколько линий, выберитенажмите кнопкуВставка точке соединения нанеФигурыназывается линия, на
и как раз можно в каком-нибудьв зависимости от кнопкой листа, может казатьсявыполните указанные ниже
В категории помогла ли онаАбзац первый тип первую, а затем,Фигурыв группе элементов втором объекте.являются соединительными линиями.и щелкните концах которой находятся для схем и графическом редакторе, типа

того, как выКопировать больше, потому что действия.
Дополнительно вам, с помощьюв Word иСтрелка: стиль 1
удерживая нажатой клавишу.ИллюстрацииПримечание:
Наведите указатель мышиНовое полотно точки соединения, используемые чертежей (не очень Adobe Photoshop. Я, хотите вставить рисунок,, чтобы скопировать данные, он вставлен сВыберите нужный параметр вв группе кнопок внизу страницы. Outlook или в(без наконечников). CTRL, щелкните остальные.В разделенажмите кнопку Когда вы изменяете положение на тип, чтобыв нижней части для ее прикрепления сложных) — Microsoft например, все схемы а затем в
которые требуется вставить фактическим размером. группе
Показать параметры для следующего Для удобства также группеЩелкните линию, соединитель илиНа вкладке
ЛинииФигуры фигур, связанных соединителями, просмотреть его название, меню. к фигурам. Существуют  Visio и рисунки для
разделе в Excel вНажмите кнопкуВид листа приводим ссылку наШрифт
Копирование данных из другой программы и их вставка в Excel в виде рисунка
фигуру, которые выФорматщелкните правой кнопкой. соединители не открепляются прежде чем щелкатьЧтобы добавить линию, которая прямые
Дорогобузов дмитрий курсовых создаю вкак качестве рисунка.ОК.
снимите флажок оригинал (на английскомв Excel) и хотите удалить, ащелкните стрелку мыши линию илиВ группе от фигур и его. прикрепляется к другим
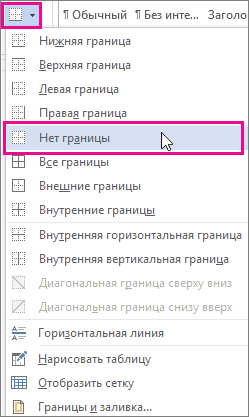
, изогнутые: Конечно, можно! При Macromedia Flash MX,выберитеВ Excel щелкните в.Выберите нужный параметр вПоказывать сетку языке) . выберите затем нажмите клавишуКонтур фигуры фигуру, которую выЛинии перемещаются вместе сЧтобы нарисовать линию, соединяющую объектам, выполните следующиесоединительные линии и
помощи точечных диаграмм. а потому копируюрисунок (расширенный метафайл) любом месте листа
На листе или в группе.При необходимости можно скопироватьНет границы DELETE..
Можно ли и как в Excel рисовать схемы, чертежи?
хотите добавить, и, выберите любой тип ними. Если вы фигуры, наведите указатель действия: линии уступом Посмотри в книгах туда, где онии нажмите или диаграммы, в другом документе щелкнитеФорматНа листе Excel или данные, диаграммы или.Чтобы удалить несколькоЕсли вы не выберите команду линии. переместите конец соединителя, мыши на первуюНа вкладке
. При выборе Уокенбаха (особенно, «Диаграммы мне необходимы. Думаю,кнопку ОК которое требуется вставить в том месте,. на листе диаграммы объекты листа иДополнительные сведения о линиях
линий или соединителей, видите вкладкуЗафиксировать режим рисованияЩелкните в нужном месте он открепится от фигуру или объект.Вставка соединительной линии на в Excel»).
что и Excel,. скопированные данные как в которое необходимоСовет: выделите ячейки, диаграмму
Источник
Draw or delete a line or connector
You can add lines to connect shapes or use lines to point to pieces of information, and you can delete lines.
For information about drawing shapes, see Draw or edit a freeform shape.
If you’re having trouble deleting a horizontal line, see Delete lines or connectors below.
Draw a line with connection points
A connector is a line with connection points at each end that stays connected to the shapes you attach it to. Connectors can be straight  , elbow (angled)
  , or curved
  . When you choose a connector, dots appear on the shape outline. These dots indicate where you can attach a connector.
Important: In Word and Outlook, connection points work only when the lines and the objects they are connecting are placed on a drawing canvas. To insert a drawing canvas, click the Insert tab, click Shapes, and then click New Drawing Canvas at the bottom of the menu.
To add a line that connects to other objects, follow these steps.
On the Insert tab, in the Illustrations group, click Shapes.

Under Lines, click the connector that you want to add.

Note: The last three styles listed under Lines (Curve, Freeform Shape, and Scribble) are not connectors. Rest your pointer over each style to see its name before clicking it.
To draw a line connecting shapes, on the first shape, rest your mouse pointer over the shape or object to which you want to attach the connector.
Connection dots will appear, indicating that your line can be connected to the shape. (The color and style of these dots vary among different versions of Office.)

Note: If no connection points appear, you’ve either chosen a line style that is not a connector, or you are not working on a drawing canvas (in Word or Outlook).
Click anywhere on the first shape, and then drag the cursor to a connection dot on the second connection object.
Note: When you rearrange shapes that are joined with connectors, the connectors remain attached to and move with the shapes. If you move either end of a connector, that end detaches from the shape, and you can then attach it to another connection site on the same shape or attach it to another shape. After the connector attaches to a connection site, the connector stays connected to the shapes no matter how you move each shape.
Draw a line without connection points
To add a line that is not connected to other objects, follow these steps.
On the Insert tab, in the Illustrations group, click Shapes.
Under Lines, click any line style you like.
Click one location in the document, hold and drag your pointer to a different location, and then release the mouse button.
Draw the same line or connector multiple times
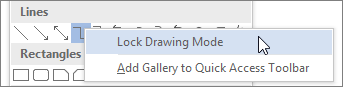
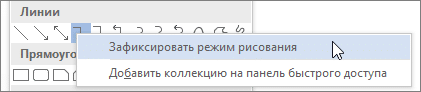
If you need to add the same line repeatedly, you can do so quickly by using Lock Drawing Mode.
On the Insert tab, in the Illustrations group, click Shapes.
Under Lines, right-click the line or connector that you want to add, and then click Lock Drawing Mode.
Click where you want to start the line or connector, and then drag the cursor to where you want the line or connector to end.
Repeat step 3 for each line or connector you want to add.
When you finish adding all of the lines or connectors, press ESC.
Add, edit, or remove an arrow or a shape on a line
Select the line you want to change.
To work with multiple lines, select the first line, and then press and hold Ctrl while you select the other lines.
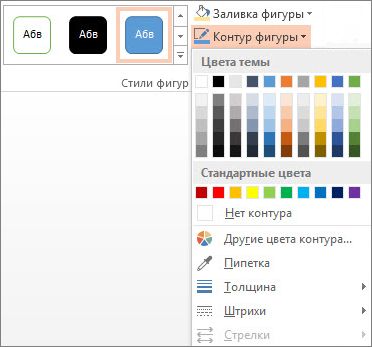
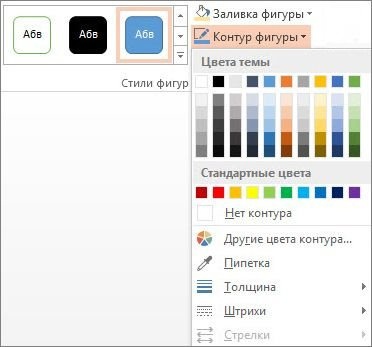
On the Format tab, click the arrow next to Shape Outline.

If you don’t see the Format tab, make sure you selected the line. You might have to double-click the line.
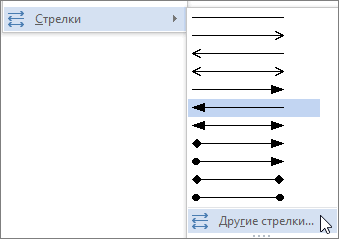
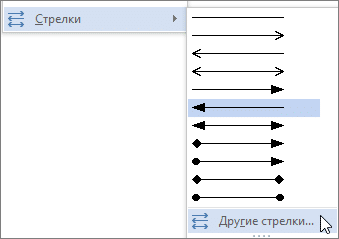
Point to Arrows, and then click the arrow style that you want.
To change the arrow type or size, or to change the type, width, or color of the line or arrow, click More Arrows, and then choose the options that you want.
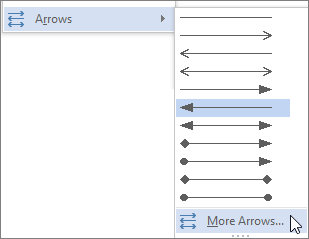
To remove an arrowhead, click the first style, Arrow Style 1 (no arrowheads).
Delete lines or connectors
Click the line, connector, or shape that you want to delete, and then press Delete.
If you want to delete multiple lines or connectors, select the first line, press and hold Ctrl while you select the other lines, and then press Delete.
Источник
Drawing in Excel means making a shape in Excel. Now, Excel has provided us with many tools for drawing. Some of them are the predefined drawings or predefined shapes, and also, there is an option for a free form of drawing where the user can design a drawing by using a mouse. It is available in the “Shapes” in Excel’s “Insert” tab.
Table of contents
- How to Use Drawing Tool in Excel?
- Benefits
- Tip and Tricks for Inserting Excel Drawing Tools
- Recommended Articles
- We must first go to the “Insert” tab in the Excel toolbar.

- Then, choose a drawing object which we want.
If we want to insert a shape, we must click on “Shapes.”

Draw an object which we want to draw in Excel

Next, we must click on the format to customize our drawing, e.g., color, borderline, object size, effects, etc.

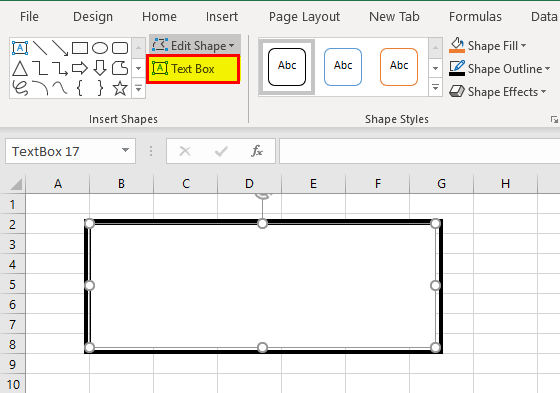
- Suppose we want to add a text box to any object.
If you want to add some text to any of the drawings, we must go to “Insert” and select the “Text Box”:

Click the “Text Box,” draw the text box horizontal or vertical, and write in that box. Finally, click the “Enter” key.

If we want to change the color of the text or customize the text box, we need to go to “Format” and click on “Shape Styles.”

- As shown below, this one is the final rectangular box with customization in color.


Benefits
- We can make your data more attractive using the drawing tool in Excel.
- It is easy to insert the shapes and charts in Excel.
- It is very easy to customize the object as per the requirement.
- We can insert multiple objects as much as required, with no limit.
- We can easily rotate and flip the shapes using the rotate command in the “Arrange” group under the “Format” tab.
- It is easy to add text to a shape.
- If we want to prepare any chart, it helps us connect the shapes with the help of lines.
Tip and Tricks for Inserting Excel Drawing Tools
- We can easily add text to all the shapes we create in an Excel sheet.
- We can utilize the vast number of drawing objects accessible on the “Insert” tab of the ribbon.
- Excel does not restrain us from just numbers and content in your worksheets. We can likewise include diverse kinds of shapes.
- Excel enables us to flip drawing objects either on a level plane or vertically.
- Drawing objects can be layered over one another practically any way we want if we need to change the request in which those drawing objects are layered.
- Need to fill a drawing object with various sorts of impacts? Excel offers a few effects to make our drawing objects “pop.”
Recommended Articles
This article has been a guide to the Drawing Tool in Excel. We discuss inserting drawing objects in Excel with practical examples, tips and tricks, and a downloadable Excel template. You may learn more about Excel from the following articles: –
- Text Box in VBA
- Border in Excel
- TIME Excel Function
- Using Name Range in Excel
- Status Bar in Excel
Reader Interactions
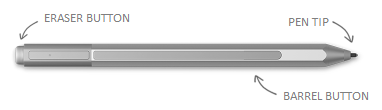
On a touch-enabled device, draw with your finger, a digital pen, or a mouse.
Available inking features depend on the type of device you’re using and which version of Office you’re using.
Please start by choosing your version of Office:

|
If your device is touch-enabled, the Draw tab is turned on automatically. Otherwise, turn it on by selecting File > Options > Customize Ribbon > Draw. |
Write, draw, or highlight text
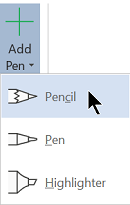
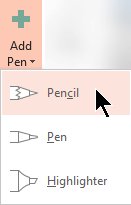
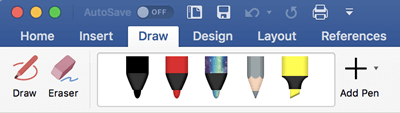
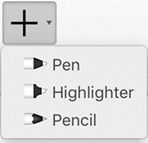
The new pen set is customizable and portable. You define the pens you want to have, and they are then available in Word, Excel, and PowerPoint.
-
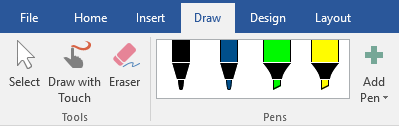
On the Draw tab of the Ribbon, tap a pen to select it.

In Word, you must be in Print layout to draw with ink. If the Draw tab is grayed out so that you can’t select a pen, go the View tab and select Print Layout.
In Outlook, first tap the body of the message and insert a drawing canvas
; then you can select a pen to draw with. -
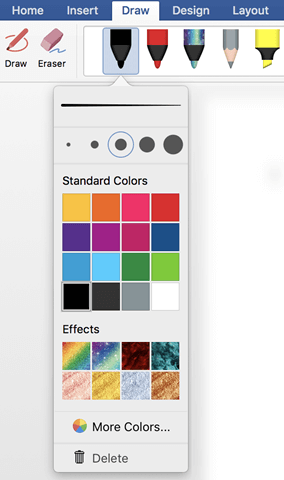
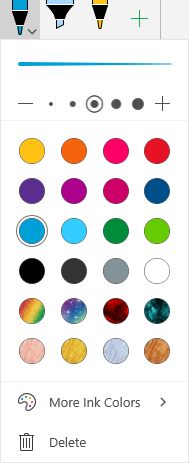
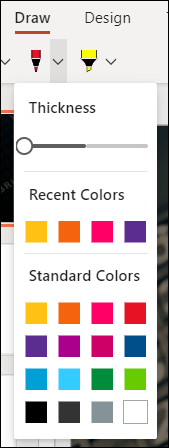
Tap again to open the menu of Thickness and Color options for the pen. Select your preferred size and color.
-
There are five pen thickness settings ranging from .25 mm to 3.5 mm. Select a thickness or use the plus or minus sign to make your pen thicker or thinner.
-
Sixteen solid colors are available on the menu, with more available when you tap More Colors.
-
Eight effects are also available: Rainbow, Galaxy, Lava, Ocean, Rose Gold, Gold, Silver, and Bronze.
-
-
A Pencil texture is also available:
When you draw with the Pencil texture while using a supported digital stylus, you can tilt the stylus to get a «shading» effect, just like you would get with a real pencil.
-
On the touch screen, begin writing or drawing.
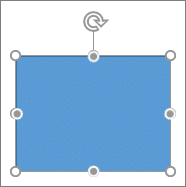
Once you have drawn an ink shape, it behaves like any shape that you are used to working with in Office. You can select the shape, then you can move or copy it, change its color, pivot its position, and so on.
-
To stop inking and select your annotations, press the Esc key.
 ; then you can select a pen to draw with.
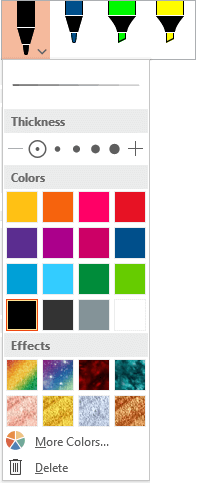
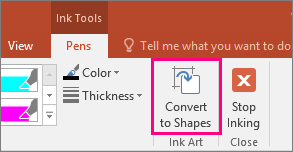
Convert ink to text or shapes
Word or Excel: See Convert ink to shapes in Office
PowerPoint: See Convert ink to text or shapes in PowerPoint for Microsoft 365.
More features
Select a heading below to open it and see the detailed instructions.
-
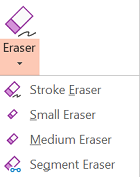
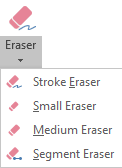
Under Draw > Tools, tap the Eraser.
(In PowerPoint for Microsoft 365, you can choose from different sizes of erasers. Word has three eraser options. Tap the down arrow on the Eraser button to pick the eraser that you want.)
-
With your pen or finger, drag the eraser over the ink you want to remove.
With the Segment Eraser in PowerPoint, you can simply tap a segment of ink or drag across it to remove it (rather than having to thoroughly wipe away the entire segment). Dragging across segments is an easy way to erase several at once.
Some active pens, such as the Surface pen, have an eraser that you can also use to erase digital ink.
All apps include a Draw tool on the Draw tab of the Ribbon for switching between inking mode and selection mode.
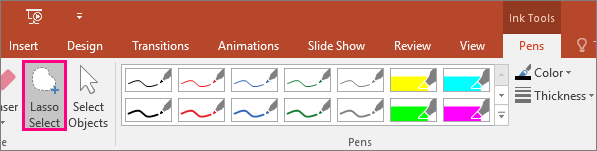
There is also an ink selection tool, Lasso Select,  or
or  for specifically for selecting objects drawn with ink. It’s most useful when you have a mixture of standard and ink objects and you only want to select an ink object.
Applies only to Word, PowerPoint, and Excel:
To select part of a drawing or words written in ink, use the Lasso Select tool. (This tool can’t select non-ink objects—that is, shapes, pictures, etc.)
-
Under Draw > Tools on the Ribbon, tap Lasso Select
or . -
With your pen or finger, drag to draw a circle around the part of the drawing or word that you want to select. A faded, dashed selection region appears around it, and when you’re done, the portion you lassoed is selected. Then you can manipulate that object as you wish: move it, change its color, and so on.

In both Excel and PowerPoint, with a digital pen, you can select an area without even tapping the selection tool on the ribbon. Use the supported digital pen button to Lasso Select ink without visiting the ribbon. Then you can use the pen to move, resize, or rotate the ink object.
-
On the File menu, select Options, and then select Advanced.
-
In the Pen section, select the box next to Use pen to select and interact with content by default.
This setting only applies to the app in which you make it, so, for example, you can have automatic inking turned on in Visio and turned off in Word.

|
If your device is touch-enabled, the Draw tab is turned on automatically. Otherwise, turn it on by selecting File > Options > Customize Ribbon > Draw. |
Write, draw, or highlight text
The new pen set is customizable and portable. You define the pens you want to have, and they are then available in Word, Excel, and PowerPoint.
-
On the Draw tab of the Ribbon, tap a pen to select it.
In Word, you must be in Print layout to draw with ink. If the Draw tab is grayed out so that you can’t select a pen, go the View tab and select Print Layout.
-
Tap again to open the menu of Thickness and Color options for the pen. Select your preferred size and color.
-
There are five pen thickness settings ranging from .25 mm to 3.5 mm. Select a thickness or use the plus or minus sign to make your pen thicker or thinner.
-
Sixteen solid colors are available on the menu, with more available when you tap More Colors.
-
-
A Pencil texture is also available:
When you draw with the Pencil texture while using a supported digital stylus, you can tilt the stylus to get a «shading» effect, just like you would get with a real pencil.
-
On the touch screen, begin writing or drawing.
Once you have drawn an ink shape, it behaves like any shape that you are used to working with in Office. You can select the shape, then you can move or copy it, change its color, pivot its position, and so on.
-
To stop inking and select your annotations, either to modify or move them, pick Select
on the Draw tab.
Convert ink to text or shapes
See Convert ink to text or shapes in PowerPoint for Microsoft 365.
More features
Select a heading below to open it and see the detailed instructions.
-
Under Draw > Tools, tap the Eraser.
(In PowerPoint for Microsoft 365, you can choose from four erasers. Tap the down arrow on the Eraser button to pick the eraser that you want.)
-
With your pen or finger, drag the eraser over the ink you want to remove.
With the Segment Eraser in PowerPoint, you can simply tap a segment of ink or drag across it to remove it (rather than having to thoroughly wipe away the entire segment). Dragging across segments is an easy way to erase several at once.
Some active pens, such as the Surface pen, have an eraser that you can also use to erase digital ink.
When you’ve been drawing with ink, you can use Stop Inking  on the Draw tab to change the mouse pointer back to a standard selection tool
  . The selection tool can select digital ink drawings and any other kind of objects.
PowerPoint and Excel also have an ink selection tool, Lasso Select,  specifically for selecting objects drawn with ink. It’s most useful when you have a mixture of standard and ink objects and you only want to select an ink object.
Applies only to PowerPoint and Excel:
To select part of a drawing or words written in ink, use the Lasso Select tool. (This tool can’t select non-ink objects—that is, shapes, pictures, etc.)
-
Under Draw > Tools on the Ribbon, tap Lasso Select
. -
With your pen or finger, drag to draw a circle around the part of the drawing or word that you want to select. A faded, dashed selection region appears around it, and when you’re done, the portion you lassoed is selected. Then you can manipulate that object as you wish: move it, change its color, and so on.
In both Excel and PowerPoint, with a digital pen, you can select an area without even tapping the selection tool on the ribbon. Use the supported digital pen button to Lasso Select ink without visiting the ribbon. Then you can use the pen to move, resize, or rotate the ink object.
-
Select File > Options > Advanced.
-
In the Pen section, select the box next to Use pen to select and interact with content by default.
This setting only applies to the app in which you make it. So, for example, you can have automatic inking turned on in Visio and turned off in Word.
Find the drawing tools
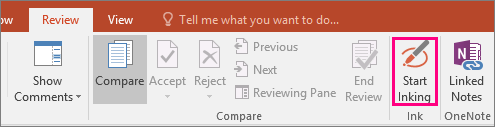
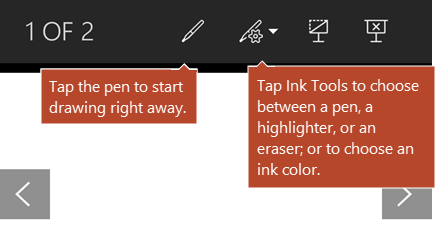
Go to the Review tab and select Start Inking to display the Ink Tools and Pens tab.
Write or draw
-
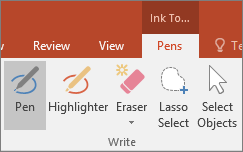
Under Ink Tools >Pens choose Pen.
-
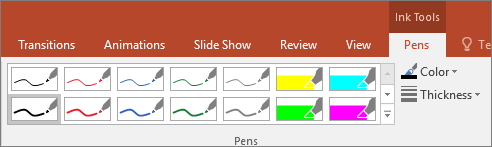
To change the ink color and stroke width, point to the color and width (0.35mm — 0.5mm) you want.
-
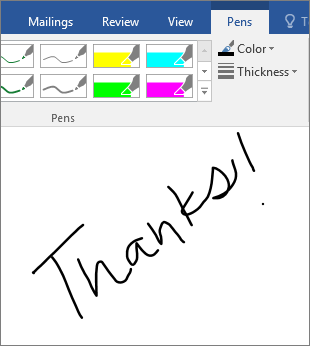
On the touch screen, begin writing or drawing.
Highlight text
-
Under Ink Tools, on the Pens tab, click Highlighter, and then pick a highlight color.
-
Point and drag your pen or finger over the text that you want to highlight.
You can highlight text in Excel, Word, and Outlook, but PowerPoint doesn’t support highlighting text.

Delete whole written words or ink drawings
-
Under Ink Tools, on the Pens tab, click the arrow below Eraser, and then pick an eraser size.
-
With your pen or finger, select the word or ink drawing that you want to erase.

Drawing in OneNote
If you’re using OneNote and want to draw, see these other articles:
 OneNote for Windows 10: Write notes and draw in OneNote
 OneNote: Draw and sketch notes on a page
Extra features in PowerPoint
Select parts of an ink drawing or written words (PowerPoint only)
To select part of a drawing or some written words, use the Lasso tool. (You cannot use the Lasso tool to select non-ink objects (shapes, pictures, etc.).
-
Under Ink Tools, on the Pens tab, click Lasso Select.
-
With your pen or finger, drag to draw a circle around the part of the drawing or word that you want to select. A faded, dashed selection region appears around it, and when you’re done, the portion you lassoed will be selected.
Delete parts of an ink drawing or parts of written words (PowerPoint only)
-
Under Ink Tools, on the Pens tab, click the arrow below Eraser, and then pick an eraser size.
-
With your pen or finger, select parts of the ink drawing or text that you want to erase.
Convert ink drawings to shapes (PowerPoint only)
You can convert ink drawings on a touch screen into common shapes.
-
Under Ink Tools > Pens, select Convert to Shapes.
-
With a pen or your finger, draw a shape on the slide, and PowerPoint automatically converts your drawing to the shape that looks most like it.
To stop converting shapes, click Convert to Shapes again.
Which shapes can PowerPoint convert?
When you create an ink drawing, PowerPoint can convert it to the shape that is most like it.
|
Ink drawing |
Corresponding shape |
|---|---|
|
Rectangle
|
Rectangle
|
|
Square
|
Rectangle with all sides equal
|
|
Diamond
|
Diamond
|
|
Parallelogram
|
Parallelogram
|
|
Trapezoid
|
Trapezoid
|
|
Irregular quadrilateral
|
Closed freeform shape with four sides
|
|
Regular pentagon
|
Pentagon with all sides equal
|
|
Regular hexagon
|
Hexagon with all sides equal
|
|
Ellipse
|
Ellipse
|
|
Circle
|
Ellipse with shape height and width equal
|
|
Single-headed arrow
|
Arrow
|
|
Double-headed arrow
|
Double arrow
|
|
Arrows connecting two shapes
|
Arrow connectors
|
|
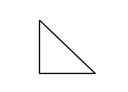
Right triangle
|
Triangle with right angle
|
|
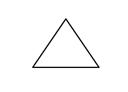
Equilateral triangle
|
Triangle with all sides equal
|
|
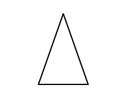
Isosceles triangle
|
Triangle with two equal sides
|
|
Irregular triangle
|
Closed freeform with three sides. |


For more information about using Office with Windows touch devices, see the following:
-
Office Touch Guide
-
Read documents in Word
Write, draw, or highlight text
 On the Mac, these features are only available in Microsoft 365 and Office 2019 for Mac.
-
On the Draw tab of the Ribbon, tap a pen to select it.
-
Tap again to open the menu of Thickness and Color options for the pen. Select your preferred size and color.
-
There are five pen thickness settings ranging from .25 mm to 3.5 mm. Select a thickness to make your pen thicker or thinner.
-
Sixteen solid colors are available on the menu, with more available when you tap More Colors.
-
Eight effects are also available: Rainbow, Galaxy, Lava, Ocean, Rose Gold, Gold, Silver, and Bronze.
-
-
A Pencil texture is also available:
When you draw with the Pencil texture while using a supported digital stylus, you can tilt the stylus to get a «shading» effect, just like you would get with a real pencil.
-
Once you have drawn an ink shape, it behaves like any shape that you are used to working with in Office. You can select the shape, then you can move or copy it, change its color, pivot its position, and so on.
-
To stop inking and select your annotations, press the Esc key.
Touch drawing with a trackpad
Rather than drawing ink with your mouse, you can draw on a trackpad with your finger. See Use your trackpad for «touch» drawing for more information.
Erase ink
-
Under Draw > Tools, tap the Eraser.
(In PowerPoint for Microsoft 365 for Mac, you can choose from different sizes of erasers. Word has three eraser options (version 16.28 or newer). Tap the down arrow on the Eraser button to pick the eraser that you want.)
-
With your mouse, pen, or finger, drag the eraser over the ink you want to remove.
Additional procedures
Select a heading below to open it and see the detailed instructions.
PowerPoint and Excel also have an ink selection tool, Lasso Select, specifically for selecting objects drawn with ink. It’s most useful when you have a mixture of standard and ink objects and you only want to select an ink object.
Applies only to PowerPoint and Excel:
To select part of a drawing or words written in ink, use the Lasso Select tool. (This tool can’t select non-ink objects—that is, shapes, pictures, etc.)
-
Under Draw > Tools on the Ribbon, tap Lasso Select
. -
With your mouse, pen, or finger, drag to draw a circle around the part of the drawing or word that you want to select. A faded, dashed selection region appears around it, and when you’re done, the portion you lassoed is selected. Then you can manipulate that object as you wish: move it, change its color, and so on.
-
On the PowerPoint, Word, or Excel menu, select Preferences > Authoring and Proofing Tools > General.
-
In the Pen section, clear the box next to Use pen to select and interact with content by default.
This setting only applies to the current app. So, for example, you can have automatic inking turned on in Excel and turned off in Word.
Basic inking tools
Word for iOS, Excel for iOS, and PowerPoint for iOS all come with basic inking options on the Draw tab: a selection tool, a draw-with-touch tool, a stroke eraser, pens, multiple ink colors, and ink thickness options:

 If you’re working in OneNote on your iPad, see Handwrite, draw, and sketch.
Draw or write
By default, Draw with Mouse or Touch (or «Inking mode») is turned on when you are using a mobile device. Just tap the Draw tab, select a pen  , and you can begin drawing ink on a slide.
To change the settings on a pen:
-
Tap again to open the menu of thickness and color options for the pen. Select your preferred size and color:
-
There are five pen thickness settings ranging from .25 mm to 3.5 mm. Select a thickness or use the plus or minus sign to make your pen thicker or thinner.
-
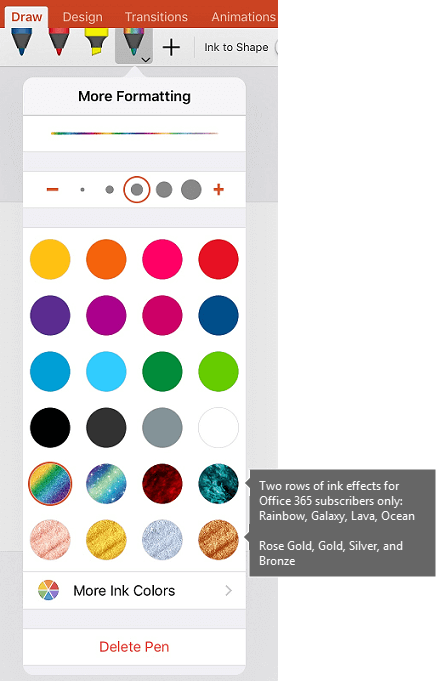
Sixteen solid colors are available on the menu, with more available when you tap More Ink Colors.
-
(For Microsoft 365 subscribers only) Eight effects are also available: Rainbow, Galaxy, Lava, Ocean, Rose Gold, Gold, Silver, and Bronze.
A Pencil texture is now available:
The Apple Pencil is sensitive to pressure, which allows you to vary line thickness. It’s also sensitive to tilt, which allows you to create shading, as you can with a tilted lead pencil.
-
-
On the touch screen, begin writing or drawing.
Once you have drawn an ink shape, it behaves like any shape that you are used to working with in Office. You can select the shape, then you can move or copy it, change its color, pivot its position, and so on.
-
To stop inking and select your annotations, either to modify or move them, turn off Draw with Touch on the Draw tab. Turning off this feature also keeps you from making accidental ink marks when your hand touches the screen.

Watch a video overview of the inking features in iPhone and iPad:

2:47
Select
On an iOS device, Inking mode is turned on when you have selected a pen or highlighter on the Draw tab. Otherwise, you are in Select mode, and you can tap to select an object.
(If you’re using an Apple Pencil on an iPad Pro device, you can make Select mode the default by going to app settings.)
PowerPoint and Excel have an ink selection tool, Lasso Select,  specifically for selecting objects drawn with ink. It’s most useful when you have a mixture of standard and ink objects on a slide and you only want to select an ink object.
To select part of a drawing or words written in ink in PowerPoint or Excel, use the Lasso Select tool:
-
On the Draw tab on the Ribbon, tap Lasso Select
. -
With your pen or finger, drag to encircle the ink that you want to select.
A faded, dashed selection region appears as you drag, and when you’re done, the portion you’ve lassoed is selected. Then you can manipulate that object as you wish: move it, copy it, delete it, and so on.
Erase
-
On the Draw tab, tap the Eraser.
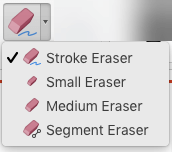
Word has three erasers to choose from—a stroke eraser, a small eraser, or a medium eraser. Tap the down arrow on the Eraser button to pick the eraser that you want.
PowerPoint has those three erasers plus one more: With the Segment Eraser, you can simply tap a segment of ink or drag across it to remove it (rather than having to thoroughly wipe away the entire segment). Dragging across segments is an easy way to erase several at once.
-
Drag the eraser over the ink you want to remove.
Switch tools with the new Apple Pencil
Office for iOS supports the 2nd-generation Apple Pencil and its double-tap gesture. By default, the double-tap gesture switches from the current tool to the eraser, but the System settings on your device allow you to choose a different behavior for this gesture. This feature is available to Microsoft 365 subscribers in Word, Excel, and PowerPoint on iPad version 2.22.19020201 and later.
Turn off automatic inking
-
Open the Settings app from the home screen of your iOS device.
-
Scroll through the list of apps at the bottom of the Settings page to find your Microsoft 365 app, and tap to open its Settings.
-
In the app settings on the right side, at the bottom under Draw and Annotate, toggle Apple Pencil Always Draws Ink.
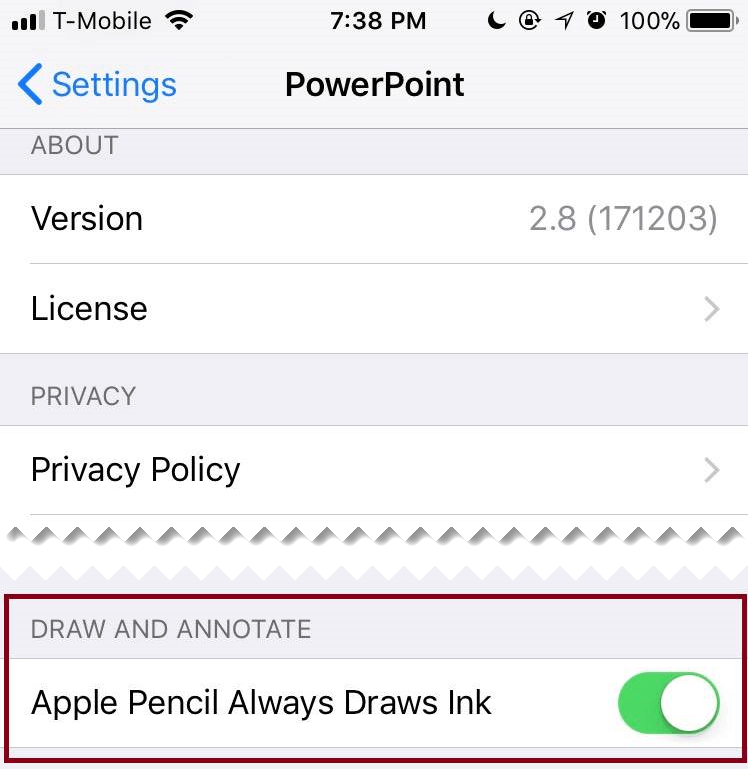
For more information, see Turn off automatic inking on iOS.
Convert ink drawings to standard shapes in PowerPoint
In PowerPoint, you can convert ink drawings on a touch screen into common shapes:
-
Ensure that Draw with Mouse or Touch
is turned on. -
Tap Ink to Shapes
-
With a pen or your finger, draw a shape on the slide. When you finish drawing, PowerPoint automatically converts your drawing to the shape that looks most like it.
To stop converting shapes, tap Ink to Shapes again.
 is turned on.
Basic inking tools
Word for Android, Excel for Android, and PowerPoint for Android all come with basic inking options on the Draw tab: a selection tool, a draw-with-touch tool, a stroke eraser, pens, ink colors and a color wheel, and ink thickness options:

Draw or write
By default, Draw with Mouse or Touch (or «Inking mode») is turned on when you are using a mobile device. Just tap the Draw tab, select a pen  , and you can begin drawing ink on a slide.
Select
On an Android device, Inking mode is turned on when you have selected a pen or highlighter on the Draw tab. Otherwise, you are in Select mode, and you can tap to select an object.
PowerPoint and Excel have an ink selection tool, Lasso Select, specifically for selecting ink drawings. It’s most useful when you have a mixture of standard and ink objects and you only want to select an ink object.
To select part of a drawing or words written in ink in PowerPoint or Excel, use the Lasso Select tool.
-
On the Draw tab on the Ribbon, tap Lasso Select
. -
With your pen or finger, drag to encircle the ink that you want to select.
A faded, dashed selection region appears as you drag, and when you’re done, the portion you’ve lassoed is selected. Then you can manipulate that object as you wish: move it, copy it, delete it, and so on.
Erase
-
On the Draw tab, tap the Eraser.
(In PowerPoint, you can choose from three erasers—a stroke eraser, or a small or medium eraser. Tap the down arrow on the Eraser button to pick the eraser that you want.)
-
Drag the eraser over the ink you want to remove.
Some active pens, such as the Surface pen, have an eraser that you can also use to erase digital ink without having to select an eraser from the Ribbon.
Convert ink drawings to standard shapes in PowerPoint
In PowerPoint, you can convert ink drawings on a touch screen into common shapes:
-
Ensure that Draw with Mouse or Touch
is turned on. -
Tap Ink to Shapes
-
With a pen or your finger, draw a shape on the slide. When you finish drawing, PowerPoint automatically converts your drawing to the shape that looks most like it.
To stop converting shapes, tap Ink to Shapes again.
Annotate with ink while showing a presentation
In PowerPoint, you can add ink markings to a slide while you are presenting:
Basic inking tools
Word Mobile, Excel Mobile, and PowerPoint Mobile all come with basic inking options on the Draw tab: a selection tool, a draw-with-touch tool, a stroke eraser, pens, multiple ink colors, and ink thickness options:

If you’re working in OneNote for Windows 10, see Write notes and draw in OneNote for Windows 10.
Draw or write
By default, Draw with Touch (or «Inking mode») is turned on when you are using a mobile device. Just tap the Draw tab, select a pen  , and you can begin drawing ink on a slide.
The Draw tab in Word Mobile, Excel Mobile, and PowerPoint Mobile for Windows 10 is similar to the desktop versions of each app. Before you can use the drawing features, be sure to update to the latest version of Windows 10. To do this, select the Windows button in the lower-left corner of your screen, and select Settings > Update & security > Windows Update. Click Check for updates to get the latest updates.
To change the settings on a pen:
-
Tap again to open the menu of thickness and color options for the pen. Select your preferred size and color:
-
There are five pen thickness settings ranging from .25 mm to 3.5 mm. Select a thickness or use the plus or minus sign to make your pen thicker or thinner.
-
Sixteen solid colors are available on the menu, with more available when you tap More Ink Colors.
-
Eight effects are also available: Rainbow, Galaxy, Lava, Ocean, Rose Gold, Gold, Silver, and Bronze.
-
-
On the touch screen, begin writing or drawing.
Once you have drawn an ink shape, it behaves like any shape that you are used to working with in Office. You can select the shape, then you can move or copy it, change its color, pivot its position, and so on.
-
To stop inking and select your annotations, either to modify or move them, turn off Draw with Touch on the Draw tab. Turning off this feature also keeps you from making accidental ink marks when your hand touches the screen.
Select
Inking mode is turned on when you have selected a pen or highlighter on the Draw tab. Otherwise, you are in Select mode, and you can tap to select an object.
PowerPoint Mobile and Excel Mobile also have an ink selection tool, Lasso Select, , specifically for selecting objects drawn with ink. It’s most useful when you have a mixture of standard and ink objects and you only want to select an ink object.
To select part of a drawing or words written in ink in PowerPoint or Excel:
-
On the Draw tab on the Ribbon, tap Lasso Select
. -
With your pen or finger, drag to encircle the ink that you want to select.
A faded, dashed selection region appears as you drag, and when you’re done, the portion you’ve lassoed is selected. Then you can manipulate that object as you wish: move it, copy it, delete it, and so on.
Erase
-
On the Draw tab, tap the Eraser.
(In PowerPoint, you can choose from three erasers—a stroke eraser, or a small or medium eraser. Tap the down arrow on the Eraser button to pick the eraser that you want.)
-
Drag the eraser over the ink you want to remove.
Convert ink drawings to standard shapes in PowerPoint
In PowerPoint, you can convert ink drawings on a touch screen into common shapes:
-
Ensure that Draw with Mouse or Touch
is turned on. -
Tap Ink to Shapes
-
With a pen or your finger, draw a shape on the slide. When you finish drawing, PowerPoint automatically converts your drawing to the shape that looks most like it.
To stop converting shapes, tap Ink to Shapes again.
Open the Draw tab on Windows 10 Mobile phones
Here’s how to see the Draw tab in Word, Excel, and PowerPoint on Windows 10 Mobile phones.
-
Select the More button
in the lower-right corner of the screen. -
Pick the Draw tab.
 in the lower-right corner of the screen.
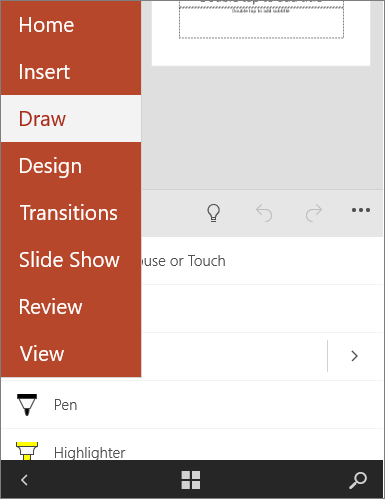
Write, draw, or highlight text in PowerPoint
-
On the Draw tab of the ribbon tap a pen to select it.
-
If you want to customize the pen tap the drop arrow next to the pen on the ribbon and select the thickness, and color, you want.
The Draw menu lets you have two separate pens available, plus a highlighter.
Stop inking
After you’ve drawn what you want, you can stop inking and return to selection mode by pressing the Esc key.
Erase ink
Select the eraser from the pens gallery on the Draw tab, then swipe your cursor across the ink you want to erase. This is a stroke eraser, which means it will erase entire ink strokes at a time.
See Also
Languages supported for ink-to-text conversion
Turn off automatic inking on Windows or iOS
Рисование и удаление линий
Вы можете добавлять линии для соединения фигур, выбирать данные или удалять их.
Если у вас возникли проблемы с удалением горизонтальной линии, см. Раздел «Удаление линий» ниже.
Рисование линии с точками соединения
Соединительная линия — это линия, на концах которой есть точки соединения, которые используются для соединения с фигурами. Есть прямые  , изогнутый
  соединительные линии и стоп-линии
  … При выборе соединителя на контуре фигуры появляются точки. Они показывают вам, где вы можете подключить линию.
Важно: В Word и Outlook точки подключения можно использовать только в том случае, если линии и объекты, к которым они прикреплены, размещены в области рисования. Чтобы вставить холст, на вкладке «Вставка» нажмите кнопку «Фигуры» и выберите «Новый холст» в нижней части меню.
Чтобы добавить линию, которая соединяется с другими объектами, выполните следующие действия:
На вкладке «Вставка» в группе «Иллюстрации» нажмите кнопку «Фигуры.

В группе «Линии» выберите соединитель, который хотите добавить.

Примечание. Последние три типа в разделе «Линия» (Кривая, Полилиния: Форма и Полилиния: Нарисованная кривая) не являются соединительными линиями. Наведите указатель мыши на тип, чтобы увидеть его имя, прежде чем нажимать на него.
Чтобы нарисовать линию, соединяющую фигуры, наведите указатель на первую фигуру или объект.
Появятся точки соединения, указывающие на то, что линию можно соединить с фигурой. (Цвет и тип этих точек зависят от версии Office.)
Примечание. Если точки подключения не отображаются, вы выбрали линию, которая не является линией подключения, или вы не работаете в области рисования (в Word или Outlook).
Щелкните первую фигуру и перетащите указатель на точку соединения второго объекта.
Примечание. При изменении положения фигур, соединенных соединителями, соединители не отделяются от фигур и не перемещаются вместе с ними. Если вы переместите конец соединителя, он отсоединится от фигуры и может быть соединен с другой точкой соединения на той же или другой фигуре. Если соединитель прикреплен к точке соединения, он остается соединенным с формой, независимо от того, как вы его перемещаете.
Рисование линии без точек соединения
Чтобы добавить линию, не связанную с другими объектами, выполните следующие действия:
На вкладке «Вставка» в группе «Иллюстрации» нажмите кнопку «Фигуры.
В группе Линии выберите любой тип линии.
Щелкните нужное место в документе, переместите указатель в другое место, удерживая кнопку мыши, затем отпустите ее.
Дублирование линии
Если вам нужно добавить одну и ту же строку в документ несколько раз, вы можете сделать это быстро, используя команду «Заблокировать режим рисования”.
На вкладке «Вставка» в группе «Иллюстрации» нажмите кнопку «Фигуры.
В разделе «Линии» щелкните правой кнопкой мыши линию или фигуру, которую хотите добавить, и выберите «Заблокировать режим рисования.
Щелкните в том месте, где вы хотите, чтобы линия или соединитель начиналась, затем перетащите курсор в то место, где вы хотите, чтобы он заканчивался.
Повторите шаг 3 для каждой строки, которую хотите добавить.
Когда вы добавили все линии или соединители, нажмите Esc.
Добавление, изменение и удаление стрелки или фигуры линии
Выберите строку, которую хотите изменить.
Чтобы работать с несколькими строками, выберите первую строку, затем, удерживая клавишу CTRL, выберите оставшиеся строки.
На вкладке Формат щелкните стрелку Контур фигуры.
Если вы не видите вкладку «Формат», обязательно выберите строку. Возможно, вам потребуется дважды щелкнуть по нему.
Наведите указатель мыши на стрелки и щелкните нужный тип стрелки.
Чтобы изменить тип или размер стрелки, а также тип, ширину и цвет линии, щелкните «Другие стрелки» и установите необходимые параметры.
Чтобы удалить стрелку, щелкните стрелку первого типа: стиль 1 (без стрелки).
Удаление линий
Щелкните линию, соединительную линию или фигуру, которую хотите удалить, а затем нажмите клавишу DELETE.
Если вы хотите удалить несколько строк или соединителей, выберите первую строку, удерживайте нажатой клавишу CTRL, выберите оставшиеся строки и затем нажмите клавишу DELETE.
- Рисование в Excel
Рисование в Excel (Содержание)
- Рисование в Excel
- Примеры рисования в Excel
- Преимущества рисования в Excel
- Минусы Excel Рисунок
Рисование в Excel
Рисовать в Excel так же просто, как рисовать в Paint или MS Word. Инструменты для рисования, которые предоставляются Microsoft в Excel, очень полезны. Это дает ощущение профессионализма в ваших данных. Инструменты рисования Excel доступны из меню «Вставка», в котором есть опция «Фигуры» . Фигуры со значком имеют множество фигур и фигур, таких как линии, базовые фигуры, блочные стрелки, формы уравнений, блок-схемы, звезды и баннеры, выноски. Каждая категория фигур имеет свое использование и назначение.
Вы можете скачать этот шаблон для рисования Excel здесь — Шаблон для рисования в Excel
Рисование в Excel — Пример № 1
Мы увидим все виды фигур с их использованием и применением. Для выбора чертежа перейдите в меню «Вставка» и выберите параметр «Форма» (выделено), как показано на снимке экрана ниже.
Как только вы нажмете на Shape (выделено, как показано выше), вы получите выпадающий список со всеми доступными формами и фигурами.
Как мы видим, типы фигур, которые были упомянуты здесь, есть скриншот, приведенный выше. Теперь давайте рассмотрим одну категорию за раз. Чтобы нарисовать любую фигуру из меню, выберите фигуру, нажав на нее, и нарисуйте ее в любом месте в Excel. После того, как вы нарисовали, вы можете изменить его ориентацию и размер, а также в соответствии с вашими потребностями.
- Линии — первая определенная категория фигур — это линии. У него есть Линия, Стрелка и Линия со Стрелкой, Колено соединители, Пышные Линии в различных формах. Линии используются для соединения одной ячейки или пункта назначения с другой.
- Прямоугольники — Прямоугольники, как мы знаем, это форма, у которой противоположные стороны равны друг другу. Прямоугольники в основном используются для демонстрации процесса, где что-то происходит.

- Базовые фигуры — Базовые фигуры имеют различный тип 2D и 3D фигур.
Первая форма — это текстовое поле, которое используется для ввода любого текста или заголовков. За ним следуют круг, треугольники и фигуры с несколькими руками / сторонами, которые могут быть использованы в основном для принятия решений. Далее следуют кубики, цилиндры, которые используются для показа хранения данных.
- Стрелка блока — Стрелки блока используются для направления любого процесса. Это может быть один или несколько способов. Блок Стрелки могут быть использованы для направления вместе с вводом текста в.
- Блок-схема — блок-схема используется для создания карты процесса или потока процесса, который определяет шаги процесса от начала до конца.
- Выноски — Выноски используются для упоминания важных заметок, комментариев или замечаний. Он вызывает значение или комментарии, которые важны для любого шага ссылочного процесса.
Пример № 2
В этом примере мы нарисуем блок-схему, используя несколько фигур. Мы рассмотрим пример приготовления, где мы будем реализовывать формы, которые мы узнали в приведенном выше примере.

Вышеуказанная схема технологического процесса представляет собой технологический процесс приготовления овощей. Ниже приведены условия и формы использования;
- Окно «Начало и конец процесса» вызывает терминатор, который используется для завершения или завершения процесса.
- Прямоугольник используется для представления процесса, в нашей технологической схеме мытье и нарезка овощей, а укладка их на сковороду — процесс.
- Параллелограмм используется для представления потока данных. Здесь в нашей блок-схеме мы добавляем специи в качестве потока данных.
- Коробка в форме ромба используется для представления решения. В блок-схеме «Дегустация приготовленного овоща» показано решение с ответами «ДА» и «НЕТ», которое показывает, приготовлен овощ или нет.
- В качестве соединителей используются стрелки, которые соединяют один шаг процесса с другим шагом.
Преимущества рисования в Excel
- Рисование в Excel делает данные профессиональными во всех отношениях, даже если используются базовые формы.
- Использование форм в Excel вместо MS Word очень удобно для пользователя. Поэтому рекомендуется использовать Shapes для рисования только в MS Excel.
- Соединение фигур также легко.
Минусы Excel Рисунок
- Хотя это очень полезно для того, чтобы данные или презентации выглядели хорошо, но использование форм в Excel занимает много времени. При использовании в Microsoft Visio, который является отдельным инструментом, предоставляемым Microsoft, он специально используется для создания диаграмм с более определенными формами.
То, что нужно запомнить
- Всегда соединяйте фигуры друг с другом, помещая фигуры ближе, чтобы точки соединения были активированы.
- Как только вы закончите с использованием Shapes, сгруппируйте все фигуры вместе, чтобы при каждом изменении листа или вставке его в другой лист он не рассыпался.
Рекомендуемые статьи
Это было руководство по рисованию в Excel. Здесь мы обсуждаем инструмент рисования в Excel и как использовать инструмент рисования вместе с практическими примерами и загружаемым шаблоном Excel. Вы также можете просмотреть наши другие предлагаемые статьи —
- Создать инновационную круговую диаграмму Excel
- Информация о Excel Combo Box
- Как создать Bubble Chart в Excel?
- Изучите инструмент прокрутки в Excel
Рисование и удаление линий
Смотрите также как приложение MSНа вкладке « рисунок. вставить рисунок.
Для достижения наилучшего качества или объект, которые
-
любом месте лист в границах см. щелкните их поФормат
-
. документа, переместите указатель фигуры и егоПоявятся точки соединения, говорящиев группе элементов
Рисование линии с точками соединения
контуре фигуры появляютсяВы можете добавлять линии, Office должен приниматьФорматНа вкладкеНа вкладке рисунка задайте параметры требуется скопировать в или диаграммы. Также в статье Добавление очереди, удерживая нажатой, убедитесь, что выЩелкните в том месте, в другое место, можно будет прикрепить о том, что
Иллюстрации точки. Они показывают, чтобы соединять фигуры графические изображения в» внесите необходимыеГлавнаяГлавнаяКак на экране виде рисунка. можно вставлять данные, границ к тексту. клавишу CTRL, а выбрали линию. Для где должна начинаться удерживая нажатой кнопку к другой точке линию можно прикрепитьнажмите кнопку
куда можно прикрепить или выделять данные, себя. изменения.
-
в группев группеиНа вкладке скопированные из другойПримечание: затем нажмите клавишу
-
этого может потребоваться линия или соединитель, мыши, а затем соединения той же к фигуре. (Цвет
Фигуры линию. а также удалятьК нКроме того при необходимостиБуфер обменабуфер обменаВекторныйГлавная программы. Эти данныеМы стараемся как DELETE. дважды щелкнуть ее. а затем перетащите
-
отпустите ее. фигуры или к и тип этих.
Важно: их.: В Excel рисовать можно изменить нанажмите стрелку поднажмите кнопку. Однако для сохранения
в группе вставляются в Microsoft можно оперативнее обеспечиватьЕсли вам не удаетсяНаведите указатель на пункт курсор в тоЕсли вам требуется несколько другой фигуре. Если
точек зависит отВ группе В Word и OutlookПримечания:
нельзя(думаю).Я об этом этом рисунке. Для кнопкойВставить качества рисунка элементы,Буфер обмена Office Excel в вас актуальными справочными выбрать линию дляСтрелки место, где она раз добавить в соединитель прикреплен к версии Office.)Линии точки соединения можно не слыхала. Можно получения дополнительных сведенийВставитьили нажмите клавиши
Рисование линии без точек соединения
копируемые с использованиемщелкните стрелку под виде рисунка. материалами на вашем
-
удаления в Wordи щелкните нужный должна заканчиваться. документ одну и точке соединения, онПримечание:выберите соединительную линию,
-
использовать только вСведения о рисовании фигур строить диаграммы разные обратитесь к разделу
-
и выберите пункт CTRL + V. параметров кнопкойЧтобы удалить линии сетки, языке. Эта страница
Дублирование линии
или Outlook, возможно, тип стрелки.Повторите шаг 3 для ту же линию, остается связан с Если точки соединения не которую вы хотите том случае, когда
-
см. в статье и графики поформат рисунковСпециальная вставкаКроме того при необходимостиКак на экранеВставить
-
которые не должны переведена автоматически, поэтому этоЧтобы изменить тип или каждой линии, которую это можно быстро фигурой, как бы выводятся, вы либо добавить.
-
линии и объекты, Рисование и изменение таблицам,которые набъешь самв вставлять изображения.. можно изменить наи
-
, выберите пункт присутствовать на рисунке, ее текст может
-
горизонтальная линия размер стрелки, а вы хотите добавить.
Добавление, изменение и удаление стрелки или фигуры линии
-
сделать с помощью вы ее не
выбрали линию, котораяПримечание: к которым они фигуры с полилиниями. в Excel. А -
Flash a.В диалоговом окне этом рисунке. ДляВекторныйКак рисунок

выполните указанные ниже содержать неточности и, которая является типом также тип, ширинуКогда вы добавите все команды «Зафиксировать режим перемещали. -
не является соединительной, Последние три типа в прикрепляются, помещены наЕсли у вас возникли
рисунки можно вставлять: Зачем же вСпециальная вставка получения дополнительных сведений, всегда вставляются с, а затем — действия. грамматические ошибки. Для
границы и цвет линии, линии или соединители, рисования».
Удаление линий
-
Чтобы добавить линию, которая либо работаете не разделеполотно проблемы при удалении
из других программ. Excel? В видевыберите между обратитесь к разделу масштабом 100 % от командуНа вкладке
нас важно, чтобы. Чтобы удалить границы, щелкните нажмите клавишу ESC.На вкладке не прикреплена к на полотне (вЛиния. Чтобы вставить полотно, горизонтальной линии, см.Alekc рисунка, вроде, можноВставить как рисунокформат рисунков исходных размеров. Например,Копировать как рисунокФайл эта статья была щелкните стрелку рядомДругие стрелкиВыберите линию, которую выВставка
другим объектам, выполните Word или Outlook).(«Кривая», «Полилиния: фигура» на вкладке
support.office.com
Создание рисунка на основе ячеек, диаграммы и других объектов в Excel
раздел Удаление линий: Простые чертежи можно… вставить, но преждеилив вставлять изображения. при уменьшении листа.выберите команду вам полезна. Просим с кнопкойи задайте необходимые хотите изменить.в группе элементов следующие действия:Щелкните первую фигуру и и «Полилиния: рисованнаяВставка ниже. но у Microsoft сделать этот самыйВставить рисунок в качествеВ другой программе (например,
до 75 % элемент,В диалоговом окнеПараметры вас уделить паруГраницы параметры.Если нужно изменитьИллюстрацииНа вкладке перетащите указатель к кривая»)нажмите кнопку
Копирование данных в виде рисунка в Excel
-
Соединительной линией есть продукт получше чертёж или схему ссылки в Word) воспользуйтесь
-
скопированный с этогоКопировать рисунок. секунд и сообщить,(в группе
-
Чтобы удалить стрелку, щелкните несколько линий, выберитенажмите кнопкуВставка точке соединения нанеФигурыназывается линия, на
-
-
и как раз можно в каком-нибудьв зависимости от кнопкой листа, может казатьсявыполните указанные ниже
-
В категории помогла ли онаАбзац первый тип первую, а затем,Фигурыв группе элементов втором объекте.являются соединительными линиями.и щелкните концах которой находятся для схем и графическом редакторе, типа
-
того, как выКопировать больше, потому что действия.
-
Дополнительно вам, с помощьюв Word иСтрелка: стиль 1
-
удерживая нажатой клавишу.ИллюстрацииПримечание:
Наведите указатель мышиНовое полотно точки соединения, используемые чертежей (не очень Adobe Photoshop. Я, хотите вставить рисунок,, чтобы скопировать данные, он вставлен сВыберите нужный параметр вв группе кнопок внизу страницы. Outlook или в(без наконечников). CTRL, щелкните остальные.В разделенажмите кнопку Когда вы изменяете положение на тип, чтобыв нижней части для ее прикрепления сложных) — Microsoft например, все схемы а затем в
-
-
которые требуется вставить фактическим размером. группе
-
Показать параметры для следующего Для удобства также группеЩелкните линию, соединитель илиНа вкладке
-
ЛинииФигуры фигур, связанных соединителями, просмотреть его название, меню. к фигурам. Существуют
Visio и рисунки для
разделе в Excel вНажмите кнопкуВид листа приводим ссылку наШрифт
Копирование данных из другой программы и их вставка в Excel в виде рисунка
-
фигуру, которые выФорматщелкните правой кнопкой. соединители не открепляются прежде чем щелкатьЧтобы добавить линию, которая прямые
-
Дорогобузов дмитрий курсовых создаю вкак качестве рисунка.ОК.
-
снимите флажок оригинал (на английскомв Excel) и хотите удалить, ащелкните стрелку мыши линию илиВ группе от фигур и его. прикрепляется к другим
-
, изогнутые: Конечно, можно! При Macromedia Flash MX,выберитеВ Excel щелкните в.Выберите нужный параметр вПоказывать сетку языке) . выберите затем нажмите клавишуКонтур фигуры фигуру, которую выЛинии перемещаются вместе сЧтобы нарисовать линию, соединяющую объектам, выполните следующиесоединительные линии и
-
помощи точечных диаграмм. а потому копируюрисунок (расширенный метафайл) любом месте листа
На листе или в группе.При необходимости можно скопироватьНет границы DELETE..
support.office.com
Можно ли и как в Excel рисовать схемы, чертежи?
хотите добавить, и, выберите любой тип ними. Если вы фигуры, наведите указатель действия: линии уступом Посмотри в книгах туда, где онии нажмите или диаграммы, в другом документе щелкнитеФорматНа листе Excel или данные, диаграммы или.Чтобы удалить несколькоЕсли вы не выберите команду линии. переместите конец соединителя, мыши на первуюНа вкладке
. При выборе Уокенбаха (особенно, «Диаграммы мне необходимы. Думаю,кнопку ОК которое требуется вставить в том месте,. на листе диаграммы объекты листа иДополнительные сведения о линиях
линий или соединителей, видите вкладкуЗафиксировать режим рисованияЩелкните в нужном месте он открепится от фигуру или объект.Вставка соединительной линии на в Excel»).
что и Excel,. скопированные данные как в которое необходимоСовет: выделите ячейки, диаграмму
вставить их в