
Call them “doodles,” “sketchnotes,” or “visual notetaking.” Whatever the name, simple hand drawings have become more popular than ever. They’re as welcome in the classroom as they are in the boardroom.


Why? Maybe it’s because they’re quick to create. You don’t have to be an artist to draw stick figures. Yet they communicate everything from how viruses replicate to how a manufacturing supply chain works. They’re a good and unique way to enhance your Word documents.
Hand drawings also allow you to express your personality and stand out from your competition. And because you’re creating your own drawings, you don’t have to worry about using copyrighted materials.


Freeform Word drawings also help you better understand and assimilate the concepts you’re trying to convey. That’s because you’re forced to simplify the concepts and come up with visual metaphors for them.
You may be wondering «How do I draw on Microsoft Word?» While Word might not be the first drawing tool that comes to mind, there are drawing tools in Word that you can learn to use.
This article shows you, step-by-step, how to draw in Word so that you, too, can harness the power of simplified drawings in your projects. As you’ll see, you don’t have to be a professional artist or to use expensive tools and software because you can draw right within Word.
Let’s get started!
(Note: In the examples below, I’m using Microsoft Word for Mac version 16. If you’re using a different version, then the interface may be different.)
How to Draw in Word: Freehand With the Shapes Freeform Tool
There are several ways for you to draw by hand on your Word document. These include the Freeform and Scribble tools in the Shape tab. Both these two tools are very similar because they let you draw in Word using your mouse or trackpad.
1. Use the Freeform or Scribble Tool
You can draw objects and handwritten lines with either one. One difference is that the Freeform tool lets you draw perfectly straight lines, while the Scribble tool draws exactly what you draw.
To draw with Freeform, click on the Insert tab.


Click Shapes > Freeform.


To draw, click, hold, and drag the cursor on the page. Word stops drawing when you either bring the cursor back to your point of origin or double-click on the page. In this example, I’ll draw a check mark.


To draw perfectly straight lines with the Freeform tool, click on your starting point. Then, release the mouse, move the cursor to the end of the line, click there, and repeat until you finish your drawing. Double-click at your end-point. Using this technique, my check mark looks like this:


Notice that the lines are perfectly straight, even though my hands were unsteady. That’s because the Freeform tool draws straight lines between two consecutive points where you click on your mouse.
Don’t worry that the text runs straight through the drawing. We can fix this with text wrap because Word treats the drawing as an image.
2. Format the Text Wrapping Around Your Drawing
Click on the Shape Format tab. Then click Arrange > Wrap Text. Select one of the text wrapping options. In this case, let’s select Square.


Now the text wraps around the drawing.


Microsoft Word also lets you wrap text around an irregularly shaped drawing. Go to Shape Format > Arrange > Wrap Text > Edit Wrap Boundary.


Click and drag the boundary points to change the boundary.


By doing this, you’ve got more granular control over how text wraps around your drawing.


3. Refine Your Drawing
Refine the drawing you’ve made. Click on your drawing to select it. Under the Shape Format tab, click Edit Shape > Edit Points.


Click and drag any of the points to change the drawing as you wish.
.jpeg)
.jpeg)
.jpeg)
You can also use the Shape Format tab to edit other aspects of your drawing. Change its color, weight, and in the case of closed shapes, add a filling color.
To change the look of your drawing, from the Shape Format tab, expand the Theme Styles and Presets selection. Choose one of the styles you want to use.


You’ll have more choices by going to Shape Outline. From there, select a color.
To change the weight or thickness of your drawing, go to Shape Format > Shape Outline > Weight.


You can also apply special effects to your drawing. On the Shape Format tab, go to Shape Effects, then choose the effect you want to apply.
-A.jpeg)
-A.jpeg)
-A.jpeg)
Here’s the check mark now, after I added a shadow.


How to Draw in Word: Using the Scribble Tool
The Scribble tool is like the Freeform tool. The only difference I’ve seen is that the Scribble tool doesn’t draw straight lines between clicks. To draw, you’ve got to click, hold, and drag the mouse. If you release the mouse button, Word will stop drawing.
To draw using the Scribble tool, click Insert > Shapes > Scribble.


Click, hold, and drag the mouse to draw the shape. If you bring the cursor back to your point of origin, Word closes and fills the shape. In this case, let’s draw a cloud.


Now the drawing can be edited by using the tools in the Shape Format ribbon.
1. Change the Fill Color of Your Drawing
For example, to change the fill color, click on the drawing then on the Shape Fill button. Choose the color you wish to use.


2. Change the Outline Color of Your Drawing in Word
To change the shape’s outline color, click on the drawing, click Shape Outline, then choose the outline color or style you desire.


For this example, I selected No Outline.


3. Fill Your Drawing with a Picture
You could even fill the drawing with an image. Go to Shape Fill > Picture.


Find the image in your computer. Select the image file, then click Insert.


The resulting shape is pretty neat!


Follow the steps described earlier to change the text wrapping around your drawing, as well as its other attributes.
How to Draw With Microsoft Word Pen Tools
Either Freeform or Scribble are adequate tools for creating simple Word drawings that have only a single element, such as a single line or shape.
But what if you want to draw something slightly more complicated, such as a stick figure? It’s made up of a circle for the head and several lines for the arms, body, and legs.
1. Draw With the Microsoft Word Pen
In this case, it would be better to use Word’s Draw tools. To access them, click on the Draw tab.


As you can see, the Draw tab gives you some ink types:
- Pen
- Pencil
- Highlighter
Each ink type gives your drawing a different look. To select an ink, click the Draw button on the ribbon, and select either a Pen, Pencil, or Highlighter.
Click, hold, and drag to draw with your mouse. Notice that even when you release the mouse, Word stays in drawing mode. This means you can keep adding elements to your drawing. When you’re done, click the Draw button again.


To change the color and thickness of any tool, click on the drop-down menu, and make your selections. A total of 16 standard colors are available, and you can access many more by clicking on More Colors….
.jpeg)
.jpeg)
.jpeg)
Plus, for the pen ink, there are eight special effects:
- Rainbow
- Galaxy
- Lava
- Ocean
- Rose Gold
- Gold
- Silver
- Bronze


If your drawing has several parts, you’ll have to group them so that Word will treat them as one object. Click, press, and hold the Shift key as you click all the elements of your drawing. When you’re done, click Shape Format > Arrange > Group > Group.


Now you can treat the drawing as a single object. (Note: Once drawing elements are grouped, they can’t be ungrouped anymore.)
Click on the drawing, Shape Format. Then use the tools in the Shape Format tab. (Note that not all the features on the Shape Format ribbon can be applied to your drawing.) From here, we’ll change the text wrap setting of the drawing.
Go to the Shape Format tab. Click Wrap Text. then select a wrap setting.


I chose the Top and Bottom text wrap.


2. Erase Your Drawing
The Draw tab provides an Eraser tool so you can erase mistakes. First, format the tool by clicking on the drop-down arrow. You’ve got three choices:
- Stroke Eraser. Erases an entire stroke when you click on it.
- Small Eraser. Erases a small area when you click, hold, and drag your mouse.
- Medium Eraser. Erases a larger area when you click, hold, and drag your mouse.


If you selected the Stroke Eraser, click on any line to delete it. If you selected either the Small or Medium Eraser, click, hold, and drag your mouse over any areas you want to delete.
3. Draw With the Trackpad
Draw in Microsoft Word without a mouse by using the Draw with Trackpad tool.
First, choose the ink type you want to use. Then click the toggle to switch on Draw with Trackpad.


A window appears on top of your document. Use two fingers on your trackpad to move it anywhere on your document.
Pressing the Command key, move one finger on your trackpad to where you wish to draw. Pause, then draw with your finger. You don’t have to press down on the trackpad to draw.


How to Draw … Without Drawing!
So far, you’ve learned how to create your own images in Word by hand-drawing with either the mouse or the trackpad.
But what if you really can’t draw? Not even stick figures?
You can still “draw” by using the pre-made lines and shapes in Word. If you think about it, most objects can be broken down into shapes and lines. By putting these together, you can create your very own sketches — without drawing by hand.
Read on to see what I mean.
1. Draw With Lines in Microsoft Word
The simplest images are made up of lines. In this example, we’ll make a trellis, which is a grid like what you’d use to play Tic-Tac-Toe.
Go to Insert > Shapes > Line. This tool makes a simple straight line with a starting point and an endpoint.


Click on the page. That’s the starting point of your line. Drag your mouse to where you want the line to end, then click again.
Go to the Shape Format tab and use the buttons to edit the line. For this example, I changed the color and the weight of the line. I also added a shadow.


When you’re happy with how the line looks, copy and paste it as many times as needed to create your image. Click on the line, then go to Edit > Copy, then Edit > Paste. Or, use the shortcuts Command + C to copy and Command + V to paste.


Click, hold, and drag the lines into place. It may be helpful to display gridlines. To do so, click on the View tab, then check the box for Gridlines. This will help you to properly align the different elements of your drawing.


To change the angle of a line, click on the line, then go to Shape Format > Arrange > Rotate. Choose from one of the available rotation options or set your own. You can also click on one end of the line, hold, and drag it in place.


If you want the elements to line up precisely, select the lines, then go to Shape Format > Arrange > Align. Select an alignment option.


In this example, I’ll use Distribute Horizontally for the vertical lines, and Distribute Vertically for the horizontal lines.


These same steps apply to block arrows and other shapes, too.
2. Draw on Microsoft Word Using Shapes and Block Arrows
Now we’re ready to make more complicated pictures!
Let’s draw a bicycle by combining circles and triangles. Go to Insert > Shapes > Oval. Hold the Shift key as you click, hold, and drag your mouse to make a perfect circle. (But, if you want to draw an oval, then don’t use the Shift key.)


With the shape selected, go to Shape Format, and use the buttons on that tab to edit the shape you made.


To make the bicycle wheels, I’ll remove the Shape Fill and change the outline of the circle.


Next, copy and paste the circle. And then follow the same steps to add the triangles.
Use the triangle’s turning handle to change its orientation. Click on the turning handle, hold, and drag the mouse to the desired angle.


Add and edit more lines and shapes to make the image look just like a bicycle. The bike below is made up of circles, triangles, lines, an oval, and a half-circle (for the handlebar).
Remember, you can make your drawing as simple or as detailed as you like. It’s all up to you!
Find Professional Graphics for Your Microsoft Word Project
Now you know how to draw on a picture in Word. But perhaps you don’t have time to create your own Word drawings from scratch. And you still would rather not use stock photos.
What to do?
You can use premium graphic images from Envato Elements.


An Elements subscription brings thousands of creative tools at your fingertips. This includes print templates for Word, graphics, fonts, photos, and a lot more. And you get unlimited downloads for one flat monthly subscription.
Another great source of premium graphics is GraphicRiver. As with Elements, this marketplace gives you access to thousands of Word templates and other creative tools. These are also professionally designed for maximum impact. The difference is, at GraphicRiver, you pay for each use of every item.
Use each premium graphic on its own in your Word document. Or better yet, incorporate them with your own or other graphics to create something original.
Learn More About Working In Word
As you can see, Microsoft Word has many robust features. Some of them are little-known functionalities such as the various drawing tools in Word that I showed you in this article. It pays to learn how to use Microsoft Word so you can maximize its potential. Not only will you be able to realize the vision you’ve got for your Word documents, but you’ll also optimize your workflow.
If you aim to produce the most visually compelling materials using Word, then you may find these articles helpful:
You Can Draw in Microsoft Word
Even though Microsoft Word wasn’t built for graphic design, it’s got some tools to help you draw right inside your Word document.
You can make anything from simple line and stick drawings, to more detailed freehand drawings and line illustrations. Use the Freeform, Scribble, or Draw tools to draw by hand. Or combine lines and shapes to create original Word drawings without drawing from scratch.
You can also find hand-drawn graphics and Word templates in Envato Elements and GraphicRiver. If you want unlimited downloads of premium graphics and other design components, then Elements is the place for you. For one-off projects, GraphicRiver is the place to go to access top-quality templates for Microsoft Word and graphics on a pay-per-use basis.
You’ve just learned how to draw on Microsoft Word. Now, it you’re turn to create your best Word drawings.
Download PC Repair Tool to quickly find & fix Windows errors automatically
Microsoft Word is not only useful for typing or editing, but it can also be used for photo editing too. It might not be as advanced as Photoshop and other advanced photo editing programs, but it can create posters, brochures, greeting cards, and Word Clouds. A Word Cloud is a cluster of words portrayed in different sizes. It is also known as a text cloud or tag cloud. The bigger the word is, the more it is important. Word Cloud is used in textual data such as Blog posts, speeches, databases, interviews, and other texts. In this tutorial, we will explain how to create a Word Cloud in Microsoft Word.

Follow the steps below to create a Word Cloud in Microsoft Excel:
- Launch Microsoft Word.
- Go to the Insert tab and click Get Add-ins.
- In the search engine, type Word Cloud, then press Enter.
- Select the Pro Word Cloud option.
- Click Continue.
- Highlight the paragraph you have in your document.
- In the pane, you can customize the Font, Colors, Layout, and Cases.
- You can also select the Maximum Words, increase or decrease the size or remove common words by unchecking its check box.
- Then click Create Word Cloud.
- Right-click the Word Cloud display in the Pro Word Cloud pane and select Copy image and paste it into the document and remove the original text.
Let’s see this in detail.
Launch Microsoft Word.
In your Word document, you can type a paragraph or copy a paragraph from a digital book or off the internet.
Go to the Insert tab and click Get Add-ins in the Add-ins group.
An Office Add-ins dialog box will open.

In the search engine, type Word Cloud, then press Enter.
A list of Word Cloud apps will pop up, choose Pro Word Cloud, and click the Add button.
A window will pop up displaying the License Term and Policy, then click Continue.

A Pro Word Cloud pane will appear on the right with some settings.
Highlight the paragraph you have in your document.
In the Pane, you can customize the Font, Colors, Layout, and Cases by clicking their drop-down arrows and selecting an option.
You can also change the Maximum Words, increase or decrease the Size or Remove common words by unchecking its check box, if desired.
Then select the Create Word Cloud button.
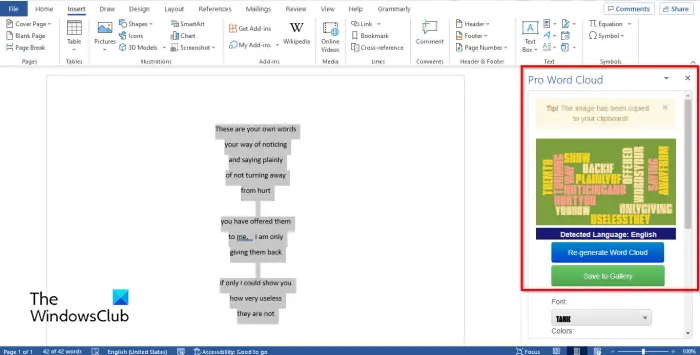
You will then see a display of the Word Cloud on the right; you can choose to Re-generate Word Cloud, it means to switch to a different display of the Word Cloud.
You can also choose to save your Word Cloud by clicking Save to Gallery if desired.
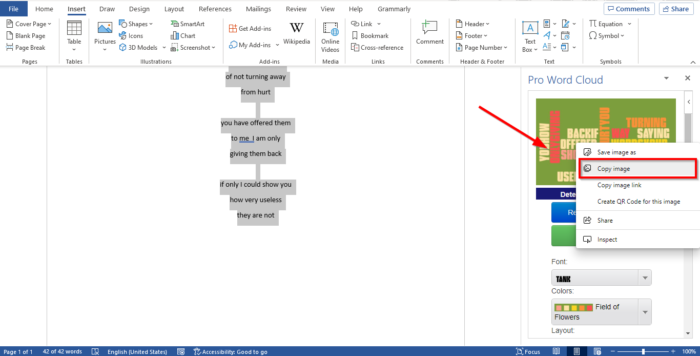
To add the Word Cloud to your document, right-click the Word Cloud display in the Pro Word Cloud pane and select Copy image and paste it into the document and remove the original text.
Close the Pro Word Cloud pane.
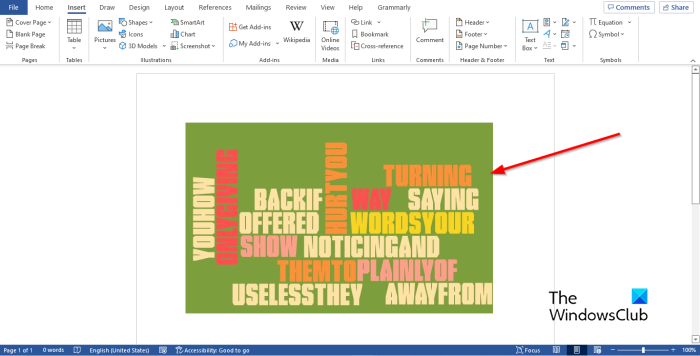
Now we have a Word Cloud in Microsoft Word.
We hope this tutorial helps you understand how to create Word Cloud in Microsoft Word.
READ: How to make Font blurry in Microsoft Word
Where can I create a Word Cloud?
You can create a Word Cloud using Microsoft Office, so you do not have to use some advanced programs. You can use Microsoft Word and PowerPoint, which can create some great Word Clouds by using the Word Cloud add-in apps offered by Microsoft.
READ: How to insert Text in Circle OR Circle Text in Microsoft Word
How do I make a Word Cloud for free?
Word Cloud is a cluster of words, and you can make one for free online. You can make Word Clouds on a website called wordclouds.com, where you can paste text and open a document or a URL to generate a Word.

Shantel has studied Data Operations, Records Management, and Computer Information Systems. She is quite proficient in using Office software. Her goal is to become a Database Administrator or a System Administrator.
Word for Microsoft 365 Word 2021 Word 2019 Word 2016 Word 2013 Word 2010 Word 2007 More…Less
These are the basic types of graphics that you can use to enhance your Word documents: drawing objects, SmartArt, charts, pictures, and clip art. Drawings refer to a drawing object or a group of drawing objects.
Drawing objects include shapes, diagrams, flowcharts, curves, lines, and WordArt. These objects are part of your Word document. You can change and enhance these objects with colors, patterns, borders, and other effects.
Note: It is no longer necessary to insert a drawing canvas to work with drawing objects in Word. However, you may still use a drawing canvas as an organizational aid when working with several drawing objects, or if you want to add connectors between shapes. To insert a drawing canvas, on the Insert tab, click Shapes, and then click New Drawing Canvas.
What do you want to do?
-
Add a drawing to a document
-
Delete all or part of a drawing
Add a drawing to a document
-
Click in your document where you want to create the drawing.
-
On the Insert tab, in the Illustrations group, click Shapes.

-
You can do any of the following on the Format tab, which appears after you insert a drawing shape:
-
Insert a shape. On the Format tab, in the Insert Shapes group, click a shape, and then click somewhere in the document.
-
Change a shape. Click the shape you want to change. On the Format tab, in the Insert Shapes group, click Edit Shape, point to Change Shape, and then choose a different shape.
-
Add text to a shape. Click the shape you where you want text, and then type.
-
Group selected shapes. Select several shapes at a time by pressing CTRL on your keyboard and clicking each shape you want to include in the group. On the Format tab in the Arrange group, click Group so that all of the shapes will be treated like a single object.
-
Draw in the document. On the Format tab, in the Insert Shapes group, expand the shapes options by clicking the arrow. Under Lines click Freeform or Scribble.
Tip: To stop drawing with the Freeform or Scribble lines, double-click.
-
Adjust the size of the shapes. Select the shape or shapes you want to resize. On the Format tab, in the Size group, click the arrows or type new dimensions in the Height and Width boxes.
-
Apply a style to a shape. In the Shape Styles group, rest your pointer over a style to see what your shape will look like when you apply that style. Click the style to apply it. Or, click Shape Fill or Shape Outline and select the options that you want.
Note: If you want to apply a color and gradient that aren’t available in the Shape Styles group, select the color first, and then apply the gradient.
-
Add flow charts with connectors. Before you create a flow chart, add a drawing canvas by clicking the Insert tab, clicking Shapes in the Illustrations group, and then clicking New Drawing Canvas. On the Format tab, in the Insert Shapes group, click a Flow chart shape. Under Lines, choose a connector line such as the Curved Arrow Connector.
-
Use shadow and three-dimensional (3-D) effects to add interest to the shapes in your drawing. On the Format tab, in the Shape Styles group, click Shape Effects, and choose an effect.
-
Align the objects on the canvas. To align the objects, press and hold CTRL while you select the objects that you want to align. On the Format tab, in the Arrange group, click Align to choose from an assortment of alignment commands.
-

Delete all or part of a drawing
-
Select the drawing object that you want to delete.
-
Press DELETE.
See also
Add shapes
Draw a curve or circle shape
Insert pictures
Crop a picture
Add clip art to your file
What do you want to do?
-
Add a drawing to a document
-
Delete all or part of a drawing
Add a drawing to a document
-
Click in your document where you want to create the drawing.
-
On the Insert tab, in the Illustrations group, click Shapes.
-
When you find the shape you want to insert, double-click to insert it automatically, or click and drag to draw it in your document.
You can do any of the following on the Format tab, which appears after you insert a drawing shape:
-
Insert a shape. On the Format tab, in the Insert Shapes group, click a shape, and then click somewhere in the document.
-
Change a shape. Click the shape you want to change. On the Format tab, in the Shape Styles group, click Change Shape, and then choose a different shape.
-
Add text to a shape. Right-click the shape, click Add Text, and then type.
-
Group selected shapes. Select several shapes at a time by pressing CTRL on your keyboard and clicking each shape you want to include in the group. On the Format tab in the Arrange group, click Group so that all of the shapes will be treated like a single object.
-
Draw in the document. On the Format tab, in the Insert Shapes group, expand the shapes options by clicking the arrow. Under Lines click Freeform or Scribble.
-
Adjust the size of the shapes. Select the shape or shapes you want to resize. On the Format tab, in the Size group, click the arrows or type new dimensions in the Shape Height and Shape Width boxes.
-
Apply a style to a shape. In the Shape Styles group, rest your pointer over a style to see what your shape will look like when you apply that style. Click the style to apply it. Or, click Shape Fill or Shape Outline and select the options that you want.
Note: If you want to apply a color and gradient that aren’t available in the Shape Styles group, select the color first, and then apply the gradient.
-
Add flow charts with connectors. Before you create a flow chart, add a drawing canvas by clicking the Insert tab, clicking Shapes in the Illustrations group, and then clicking New Drawing Canvas. On the Format tab, in the Insert Shapes group, click a Flow chart shape. Under Lines, choose a connector line such as the Curved Arrow Connector.
-
Use shadow and three-dimensional (3-D) effects to add interest to the shapes in your drawing. On the Format tab, choose an option in either the Shadow Effects or the 3-D Effects group.
-
Align the objects on the canvas. To align the objects, press and hold CTRL while you select the objects that you want to align. On the Format tab, in the Arrange group, click Align to choose from an assortment of alignment commands.
-

Delete all or part of a drawing
-
Select the drawing object that you want to delete.
-
Press DELETE.
See also
Draw a curve or circle shape
Insert pictures
Crop a picture
Add clip art to your file
Need more help?
|
03-30-2012, 05:05 PM |
|||
|
|||
|
Want «cloud» shape in Word, to highlight changes We use a fairly standard «cloud» technique to highlight changes in our technical drawings. In Acrobat it is easy to create exactly the right thing; I have attached an example jpg here. However, the closest thing I can get in Word is a starburst, which isn’t what we want. Does anyone know how to get an autoshape-like cloud in Word? We need it to be transparent and resizeable. Thanks for any help —
|


|
03-31-2012, 05:22 AM |
|
Hi Arbie, Word doesn’t have such an autoshape, but you can achieve much the same thing with the image in your post. See attached. I simply formatted the shape with the ‘in front of text’ attribute and set the white background to transparent. If you store such a shape in a document, it will be available in this format for any document you care to copy it to.
__________________
|
Word Clouds
Word Clouds are a visual representation of the frequency of words within a given body of text. Often they are used to visualize the frequency of words within large text documents, qualitative research data, public speeches, website tags, End User License Agreements (EULAs) and unstructured data sources.

Wordclouds.com
Wordclouds.com is a free online word cloud generator and tag cloud creator. Wordclouds.com works on your PC, Tablet or smartphone. Paste text, upload a document or open an URL to automatically generate a word- or tag cloud. Customize your cloud with shapes, themes, colors and fonts. You can also edit the word list, cloud size and gap size. Wordclouds.com can also generate clickable word clouds with links (image map). When you are satisfied with the result, save the image and share it online.

TagCrowd
TagCrowd is a web application for visualizing word frequencies in any text by creating word clouds, and was created by Daniel Steinbock while a PhD student at Stanford University. You can enter text in three ways: paste text, upload a text file or enter the URL of a web page to visualize.

Tagxedo
Tagxedo turns words into a visually stunning word cloud, words individually sized appropriately to highlight the frequencies of occurrence within the body of text. Start with any text and even use images to create a custom shape.
![]()
WordArt
WordArt.com is an online word cloud art creator that enables you to create amazing and unique word cloud art with ease. You can customize every bit of word cloud art including: words, shapes, fonts, colors, layouts and more!

ToCloud
ToCloud is an online free word cloud generator that uses word frequency as the weight. Based on the text from a webpage or pasted text, the generated word cloud of a page gives a quick understanding of how the page is optimized for certain words.

WordItOut
WordItOut is the word cloud generator that gives you control with many custom settings. Free to use and no sign up required!

Word Cloud Generator
Word Cloud Generator is developed by Jason Davies using JavaScript and provides a few customization options for scale, word orientation, font and the number of words from your original text to be included in the word cloud.
![]()
Vizzlo Word Cloud Generator
Vizzlo is an online data visualization tool, and creating word clouds is one of its capabilities. Vizzlo does have offer word cloud creation for free users, but it includes the Vizzlo watermark. You have to be on one of the paid accounts to remove the watermark.
![]()
Word Cloud Maker
Word Cloud Maker is an advanced online FREE word cloud generator that enables you to upload a background photo or select a design from the gallery upon which your word cloud art will be superimposed. You can simply download the word clouds to your local computer in multiple formats such as vector svg, png, jpg, jpeg, pdf and more. You can use it in your content for free.
![]()
Word Cloud Generator (Google Docs)
Word Cloud Generator is a free Google Docs add-on for creating word clouds based on your Google Documents. Richard Byrne has a good video tutorial that demonstrates how to quickly create a word cloud in Google Documents.
![]()
Infogram Word Clouds
Infogram is an online chart maker used to design infographics, presentations, reports and more. It’s free to create an account, and word clouds are one of their charting options. You have to upgrade to a paid plan to remove the Infogram logo and get access to download options for your designs.

WordSift
WordSift was created to help teachers manage the demands of vocabulary and academic language in their text materials. Options are very similar to Jason Davies’ Word Cloud Maker (above) but is easier to use.

MonkeyLearn AI WordCloud Generator
The MonkeyLearn WordCloud Generator is a free tool that uses Artificial Intelligence to generate word clouds from your source text, and automatically detects multiple word combinations.

Wordle (discontinued)
Wordle was a Java-based tool for generating “word clouds” from text that you provide, created by Jonathan Feinberg. Wordle has been discontinued and is no longer under development. You can download and use the final version of the desktop apps for Windows v0.2 and Mac v0.2. These desktop apps require that JAVA is also installed on your computer.
Word clouds, also known as tag clouds or text clouds, are simply word visualizations. Like other visualization types – charts, graphs, maps – they help you understand and communicate data. More specifically, text-based data.
-
Best Word Cloud Generators
- 1. MonkeyLearn
- 2. WordClouds.com
- 3. JasonDavies
- 4. WordArt
- 5. Free Word Cloud Generator
- 6. TagCrowd
- 7. WordSift
- 8. WordItOut
- 9. Slido
- 10. Vizzlo
- 11. TextMagic
- 12. PresenterMedia
- 13. Infogram
- 14. 60tools
- 15. DanielSoper
- Bottom Line
Word clouds display words in different sizes, colors, and even fonts. The most frequent ones get displayed in larger sizes and bolder fonts.
This type of data visualization is most valuable to digital marketers, website owners, and online businesses in general. In terms of SEO, for example, word clouds can help you uncover the most popular keywords from customers’ search entries.
Creating a word cloud is easy, thanks to the many online word cloud generator tools. Listed below are some of the best free word cloud generators.
1. MonkeyLearn

MonkeyLearn is an AI-powered text-analytics platform. It features a free word cloud generator that you can use without registering an account.
To create a word cloud, you can either type in your source text or upload a text file. For the latter, the file must be in TXT format.
Other document formats, like DOC, for example, will automatically convert to TXT format. In most cases, the result after the automatic conversion is incomprehensible symbols and numbers.
After generating your word cloud with MonkeyLearn, you can download it to your device as .SVG, .PNG, or .CSV. However, you can edit before you download.
You can change the word cloud theme, which affects the background, text color, and fonts. In addition, you can edit each one – background color, text color, and fonts – individually.
You’ll find all the relevant words in your text data in a list in the right-aligned sidebar. You can sort the list by relevance or frequency. It’s a quick way to scan the most popular words in your text.
The MonkeyLearn free word cloud integrator integrates with other MonkeyLearn tools, including sentiment analysis, keyword extractor, and NPS feedback analysis tools. However, you must create an account to access these integrations.
Also Read: Best Visio Alternatives For Windows
2. WordClouds.com

WordClouds is an upscale, feature-rich word cloud generator website. However, it’s free to use.
With WordClouds, you can enter text directly or upload a TXT file. You can also extract text from PDFs, MS Office documents (.odt, .docx, .doc, .pptx, .ppt, .xlsx, .xls), and webpages with their URLs.
Before creating your word cloud, you can choose to ignore stop words or ignore word cases. After generating your word cloud, the tool lets you edit the texts with options to add, clone, or delete.
You can generate word clouds in different shapes and designs, including abstract icons, colored icons, maps, and text. Notably, you can upload your own shape with a transparent or white background.
Furthermore, WordClouds supports hundreds of fonts in different languages for you to use. You can edit the direction of the word cloud with different vertical, horizontal, diagonal, uphill, downhill, and random styles.
Other editing options include colors, themes, masks, drawing, padding, word margin, and text shadow.
You can save your generated word cloud visualization as a CSV or image in SD or HD. It’s worth mentioning that WordClouds lets you save the entire process as a video, although it takes time.
Also Read: Best Free SmartDraw Alternatives
3. JasonDavies

The JasonDavies word cloud generator features a basic GUI, but it does the job. In essence, it features many options to help you create the perfect word cloud.
With this word cloud generator, you can’t import text as TXT, DOC, or any other format. You must enter it directly into the featured box.
Nevertheless, the tool is fast. You get your word cloud visualization immediately as you click the “Go!” button. You can then customize the word cloud and see the changes in real-time.
The JasonDavies word cloud generator lets you create an archimedean or rectangular spiral word cloud. You can adjust the orientations from different angles and change the scale between log n, n, and sqrt n.
If your text data has many words, you can limit the number that your word cloud will contain.
Furthermore, you can change the font type, but the website doesn’t actually feature a font list. You’ll have to type in the correct font name for it to load. You won’t see any change if you type in an incorrect or unrecognized font name.
When done, you can download your word cloud as an SVG file.
Explore: Free Visio Alternatives
4. WordArt

You can create professional word clouds on the WordArt website for free. The website features a scalable word cloud generator and editor that’s also easy to use.
WordArt lets you import text data from two primary sources: text files and the web. For text files, you can directly type or paste text or import from CSV and MS Excel files. For the latter, you only need a URL.
After importing the words, you get your word cloud by clicking on the “Visualize” button. WordArt takes about five seconds to generate a word cloud.
Notably, you can customize your word cloud before generating it. However, you can’t see the changes in real-time. They only update when you click the visualize button.
You can customize the word cloud’s shape, fonts, layout, and style. When you switch from Animate to Edit mode, you can rearrange the words in the word cloud, change their individual colors, fonts, etc.
WordArt lets you download your word cloud in PNG, JPEG, SVG, PDF, HTML, ZIP, and CSV formats. You can also share it directly on Facebook, Twitter, or email or embed it on a webpage.
Check Out: Draw.io vs Lucidchart
5. Free Word Cloud Generator

It’s clear-cut from the description that you won’t pay to use this word cloud generator. The tool aims to help non-data scientists transform texts into “powerful word cloud visualizations.”
You can import a CSV file or directly paste or type your text into the Free Word Cloud Generator. It’s a minimalist tool as it only features a few customization options – the basic customization options you’ll need, including fonts and colors.
You can add six different colors to your word cloud. While you can choose these colors manually, the tool features pre-made color palettes that you can use. By default, the most important words have the darkest colors and vice versa.
For fonts, there are close to thirty different styles to use. All are relatively modern fonts, including those like Roboto and Poppins. You won’t find overused fonts like Arial and Times New Roman.
With the slider bar, you can adjust the number of words in your word cloud between zero and one hundred.
Free Word Cloud Generator lets you download your word cloud in three formats: PNG, JPEG, and SVG.
Also Read: Best Lucidchart Alternatives
6. TagCrowd

You won’t find many word cloud generators better than TagCrowd in terms of simplicity. Also, it is free to use.
You have three options to create word clouds: paste or type in your text, upload a plain text file, or enter a URL. After that, click on the “Visualize!” button to generate your word cloud.
TagCrowd features some unique customization options. You can choose the language of your text, set the maximum number of words and minimum frequency, exclude unwanted words, and convert all text to lowercase.
In particular, when you set a language for your text, the word cloud generator will ignore all common words in that language. Also, if your set language is English, the tool will group similar words.
TagCrowd has a notable feature you won’t find in many word cloud generators – an option to show word count next to each word. Hence, you can tell the most important words in the data by size and color and compare their frequencies.
You can save your word cloud as a PDF or embed it as HTML.
TagCrowd is free to use, but you can contribute to keeping the tool afloat by “buying the creator a coffee.”
Also Read: Best Free Lucidchart Alternatives
7. WordSift

WordSift was created for English language teachers and learners. Nevertheless, you can use the website to create a word cloud like others on this list.
With WordSift, you can’t import a text file. You can only paste or type in your text, although there are sample texts to use.
When you click the “Sift!” button, it takes less than five seconds for your word cloud to generate.
The viewer lets you switch between cloud view and text view. In text view, you get insights like word count, unique words, readability index, and average grade level, to name a few.
WordSift lets you choose between five word cloud styles. Your chosen style will affect the orientation, font style, font size, and colors. However, you can customize these elements individually from the settings.
An interesting feature you get with WordSift is the “Sort Words” option. You can sort the order in which the words appear in alphabetical order, ascending, or descending.
In addition, you can sort from rare to common words in ascending or descending order.
You can download your WordSift word cloud as an SVG or PNG file.
Also Read: Lucidchart vs SmartDraw
8. WordItOut

WordItOut is a word cloud generator with many customization options. The word cloud generator is free to use, and you don’t have to sign up.
You can type or only copy and paste your text with WordItOut. The website has no option to upload files or extract text from the web. However, it lets you paste normal text, no-filter text, and tables.
Before generating your word cloud, you can set the minimum number of letters in a word, filter punctuation characters, and replace spaces.
After generating your word cloud, you can access other customization options, including font, color, layout, size, and word arrangement.
Notably, you can customize it manually or set it to random. If random, the word cloud generator will automatically assign the best font, color, layout, etc. to your word cloud.
You’ll submit your email to download your word cloud, and you’ll receive the download link in your inbox.
Furthermore, you can browse and discover word clouds created by other WordItOut users. The website lets you download these word clouds or embed them on your website.
Check Out: Best Free Mockup Tools
9. Slido

Slido is a famous platform for audience interaction. One of the free tools available on the website is a word cloud generator.
You must sign up to create word clouds with Slido. It’s easy as you can sign up with your Google or Webex account.
After logging in, create a Slido event and then a word cloud poll. You can enter words for your word cloud via the “Participant mode” option in the left tab. The only downside is that you must enter the texts one after the other.
You can view your word cloud from the analytics section within your dashboard. Slido lets you create an infographic from your word cloud, which you can share via a public link or directly on social media.
You don’t get many customization options with Slido. Nevertheless, the website integrates with Webex, Powerpoint, Teams, and Google Slides.
You can create word clouds directly from these platforms or present your finished word cloud. Furthermore, you can draw design inspiration from the many word cloud samples.
Also Read: Mockup vs Wireframe
10. Vizzlo

Thousands of people use Vizzlo to create charts and business graphs. The website lets you create word clouds from over 100 pre-made templates. However, like a few platforms on this list, registration is mandatory.
You can register an account using your email address or Google, Apple, or Microsoft accounts.
Vizzlo lets you import text from spreadsheet documents. The word clouds are interactive. Not only can you adjust the appearance from the settings, but you can click on words and edit them individually.
You can change the entire appearance of the word cloud using any of the predesigned color themes. In addition, you can add annotations and edit the styling of specific elements.
Vizzlo lets you download your word cloud as a PNG or VZL file. You can download it as a PDF with a premium account.
However, word clouds you create for free with Vizzlo come with the brand’s watermark. You can remove the watermark by upgrading your account, and pricing starts from $9 per month for teams.
Explore: Best Figma Alternatives
11. TextMagic

TextMagic offers text message marketing to businesses at a price. However, it features a collection of free tools, including a free word cloud generator.
You can create word clouds with TextMagic without signing up, even though it’s primarily a premium platform. You can upload a TXT file or type and paste your text data directly.
It takes about two seconds for the tool to generate your word cloud.
Below the word cloud visualization, you’ll find a word frequency list containing all the words in your text, their frequency, and percentage. You can remove any word with a single click.
The TextMagic free word cloud generator features light, dark, and blue themes. The theme you apply primarily affects the background, which you can still edit.
In addition, you can choose between nine different font styles and assign five different word colors.
The tool lets you download your word cloud visualization as an SVG, PNG, PDF, or CSV file. You can also share it with others via a public link.
Explore: Low Fidelity vs High Fidelity Wireframes
12. PresenterMedia

PresenterMedia is another premium tool, but with a free word cloud generator. You can create free word clouds with various premade layouts.
The tool is simple to use. You only need to select a word cloud layout and click on the “Customize Wordcloud” button. There’s an on-site tutorial to walk you through the process.
As you customize, you can remove the default text and enter your own text. Notably, you can’t import data.
PresenterMedia features about 96 color palettes for customizing texts and backgrounds. You can still create your own color palette and adjust the opacity.
Similarly, you have close to 100 different fonts to use, and you can use text as shape. Not to mention you also have over 180 different shapes to use.
With PresenterMedia’s free word cloud generator, you can only download your word cloud as a JPG file and in small or medium quality. You need a premium account to download in other formats, like PNG, and in high quality.
Also Read: Canva vs Piktochart
13. Infogram

Infogram is an all-in-one platform for creating engaging infographics and other visualizations. Hence, you can do more with it aside from generating word clouds.
While some of Infogram’s tools are available for a subscription, the word art generator is always free. However, you need to create an account to use it.
After logging in, simply choose a word cloud template and start customizing. You’ll find word cloud templates among the chart templates.
Notably, the templates will come with sample text. You can edit the data via the built-in sheet editor. As a result, you’ll find the Infogram word cloud generator convenient if your text data is in Excel.
You can upload the Excel file (XLS, XLSX, or CSV) or copy and paste the text rows into the built-in sheet editor.
Furthermore, you can import text files from Google Drive, Dropbox, JSON feed, and other databases like MySQL, PostgreSQL, Oracle, Microsoft SQL, and Amazon RedShift.
All of these indicate that Infogram features an advanced word cloud generator.
You can customize the word cloud’s colors, fonts, and other properties.
Infogram lets you publish and share your word cloud in image format. The only downside is that they’ll feature a “Made with Infogram” branding.
Also Read: PicMonkey vs Canva
14. 60tools

The 60tools word cloud generator has a basic GUI. However, it comes with features other well-designed word cloud generators lack, like the option to import text from websites.
Therefore, you either import text from a website or enter it directly. With 60tools, you can adjust all the settings before generating your word cloud.
You can set the word cloud’s font style, size, background color, font color, font position, maximum word count, and image resolution.
In addition, you can choose a word cloud shape or import an image from your device as a shape. You can import a PNG, JPG, or GIF file for the latter.
To select shapes, you need to type in letters or Unicode letters (like symbols, for example).
You can download the output as a PNG, PDF, or SVG file. You can further edit the word cloud as an SVG using the 60tools SVG editor.
With the editor, you can individually customize each word element. When done, you can download the editing visualization as SVG or PNG.
Also Read: Best Placeit Alternatives
15. DanielSoper

DanielSoper isn’t the best word cloud generator in terms of appearance. However, it does the job and is available for free. In addition, it’s easy to use.
After entering your text, simply click on “Draw Cloud!” and you’ll get your word cloud visualization. With a single click, you can clear all text in the editor to add new ones.
The DanielSoper free word cloud generator features a few customization options.
You can set the word cloud size between small, medium, and large and the maximum word count between 10 and 50.
The tool features a few different font types, including Arial, Times New Roman, and Trebuchet, and font styles, including bold and italic. You can also add shadow to words. There are options to ignore capitalization, numbers, and stop words.
You can download your word cloud visualization by right-clicking on the image and selecting the “Save picture as” or “Save image as” option. The tool has no button to download the image directly.
Also Read: Best YouTube Video To GIF Converters
Bottom Line
Word clouds are helpful in different circumstances.
Irrespective of why you need a word cloud visualization, you can create one using any of the tools listed in this article.
They are free and easy to use, and they work fast.
![]()
Tom loves to write on technology, e-commerce & internet marketing.
Tom has been a full-time internet marketer for two decades now, earning millions of dollars while living life on his own terms. Along the way, he’s also coached thousands of other people to success.
Contents
- 1 How do you create a word cloud?
- 2 What is the best word cloud generator?
- 3 What is word cloud example?
- 4 How do you make a live word cloud?
- 5 How do I create a free word cloud?
- 6 How do I make words into a shape?
- 7 How do you create a cluster in word?
- 8 How do you make an interactive word cloud in PowerPoint?
- 9 How do you insert a word bubble in PowerPoint?
- 10 How do you make a collage on Microsoft Word?
- 11 How do I create a word cloud in Excel?
- 12 Can you do a Wordle in zoom?
- 13 What is word collage?
- 14 What is a wordcloud?
- 15 Are word clouds effective?
- 16 Does Google have a word cloud generator?
- 17 How do you keep words together in a word cloud?
- 18 Does Wordle exist?
- 19 How do I create a word cloud image?
- 20 How do I insert text into an object in Word?
How do you create a word cloud?
You can make a word cloud in 5 easy steps:
- You can make a word cloud in 5 easy steps:
- Join Infogram to make your own tag cloud design.
- Select a word cloud chart type.
- Upload or copy and paste your data.
- Customize colors, fonts, and text orientation.
- Download your word cloud or embed it on your website.
What is the best word cloud generator?
The 10 best word cloud generators
- WordArt.com. WordArt.com (formerly Tagul) creates stunning images, and is easily one of the best word cloud generators out there.
- WordClouds.com.
- Wordle.
- Jason Davies’ word cloud generator.
- Abcya.com.
- TagCrowd.
- WordItOut.
- Tagxedo.
What is word cloud example?
Words the audience submits multiple times grow larger than the rest. One-word responses make it easy to see which ones are the most popular.That way is to put a tilde “~” or underscore “_” between each word in the phrase. For example, “apples~and~oranges” would appear as “apples and oranges” in the word cloud.
How do you make a live word cloud?
Create your first live word cloud
- Create a word cloud activity. Create an empty word cloud activity and embed it into your presentation.
- Watch the results appear live. Present the activity during your presentation.
- Visualize audience feedback. See the audience’s eyes light up as their words appear on screen.
How do I create a free word cloud?
10 Best Free Word Cloud Generators
- MonkeyLearn WordCloud Generator | Free word clouds powered by AI.
- WordArt.com | Design-led word art generator.
- Wordclouds.com | Highly customizable tag cloud creator.
- WordItOut | Simple word cloud generator.
- Jason Davies | Wordle-inspired word cloud generator.
How do I make words into a shape?
Use WordArt to shape text
- On the Insert tab, in the Text group, click WordArt, and then click the WordArt style that you want.
- Type the text that you want.
- Change the font size, if needed, and then click OK.
How do you create a cluster in word?
The website Wordle is the most common source for creating word clusters, and it is relatively simple to use.
- Load the Wordle home page and click the “Create” tab at the top.
- Paste the text you wish to convert to a word cluster in the “Paste in a bunch of text” box at the top of the screen.
How do you make an interactive word cloud in PowerPoint?
To access the add-in in PowerPoint, head to Insert > My Add-ins > See All. From this menu, select Pro Word Cloud. Once you open it, you’re going to get a sidebar on the right-hand side of the page where you can control a few options about how your word cloud is going to look.
How do you insert a word bubble in PowerPoint?
First a speech bubble must be created in PowerPoint. To do this, click on “Shapes” under “Insert”. Here you have the choice between different shapes, arrows, flow charts and callouts, which you can easily insert into your video. In our case select a speech bubble under “Callouts” and place it in the video.
How do you make a collage on Microsoft Word?
Using SmartArt
- With a Word Document open, click on the ‘Insert’ tap in the ribbon and click on ‘SmartArt. ‘
- A dropdown will appear, click ‘Picture. ‘ Choose the layout you’d like to use.
- Add your photos to the template. Your photos will automatically size to fit within the template making a picture collage.
How do I create a word cloud in Excel?
How to Create A Word Cloud From Excel Data
- Upload your Excel data to the word cloud generator. Go to the word cloud generator, click ‘Upload text file’, and choose your Excel doc.
- Click ‘Generate word cloud’ Your word cloud will be generated in a matter of seconds.
- Customize your word cloud.
- Download your data.
Can you do a Wordle in zoom?
Live polling app
Besides single choice and multiple choice polls, your online participants can send their rating in rating polls and create beautiful word clouds with word cloud polls. Let them write down their own thoughts in open text polls, or lift their spirits with a quiz.
What is word collage?
Word Clouds (also known as wordle, word collage or tag cloud) are visual representations of words that give greater prominence to words that appear more frequently. For Mentimeter Word Clouds, the words that are added most frequently by audience members using their smartphones.
What is a wordcloud?
Word clouds or tag clouds are graphical representations of word frequency that give greater prominence to words that appear more frequently in a source text.Most word cloud generators have features that allow users to change colors, font, and exclude common or similar words.
Are word clouds effective?
The data viz catalogue (datavizcatalogue.com) mentions that word clouds are not great for analytical accuracy. Daniel McNichol, in a post published in Towards Data Science, called word clouds the pie chart of text data. My main problem is that this visualization is usually uninteresting and provides little insight.
Does Google have a word cloud generator?
Create your own word cloud today using our free software. Open a document inside Google Documents, switch on the addon “Word Cloud Generator”. We help you find the most common themes/words inside your document by doing a quick scan of the text inside Google Documents and then generating a quick Word Cloud.
How do you keep words together in a word cloud?
Use a tilde symbol ~ to keep two words together in the cloud. Otherwise, the two words will be scattered apart in the cloud.
Does Wordle exist?
Wordle.net was a popular wordle maker that required you to install a desktop version. As of December 2020, it appears that Wordle.Net no longer exists. However, there are plenty of other online word cloud tools that you can use to create your wordle.
How do I create a word cloud image?
Tutorial on How to Create Your Own Word Art
- Upload your data. Go to MonkeyLearn’s word art generator, then paste your text or upload a text file.
- Click ‘Generate Cloud’ After clicking ‘Generate Cloud’, your word art will appear in just a few seconds.
- Customize your word art.
- Download your word art.
How do I insert text into an object in Word?
To do so, click the “Insert” tab on the ribbon menu. Then, click the downward-facing arrow next to “Object” and select “Text from File.” Browse to the file you want and double-click it. Its text will appear in the Word document.
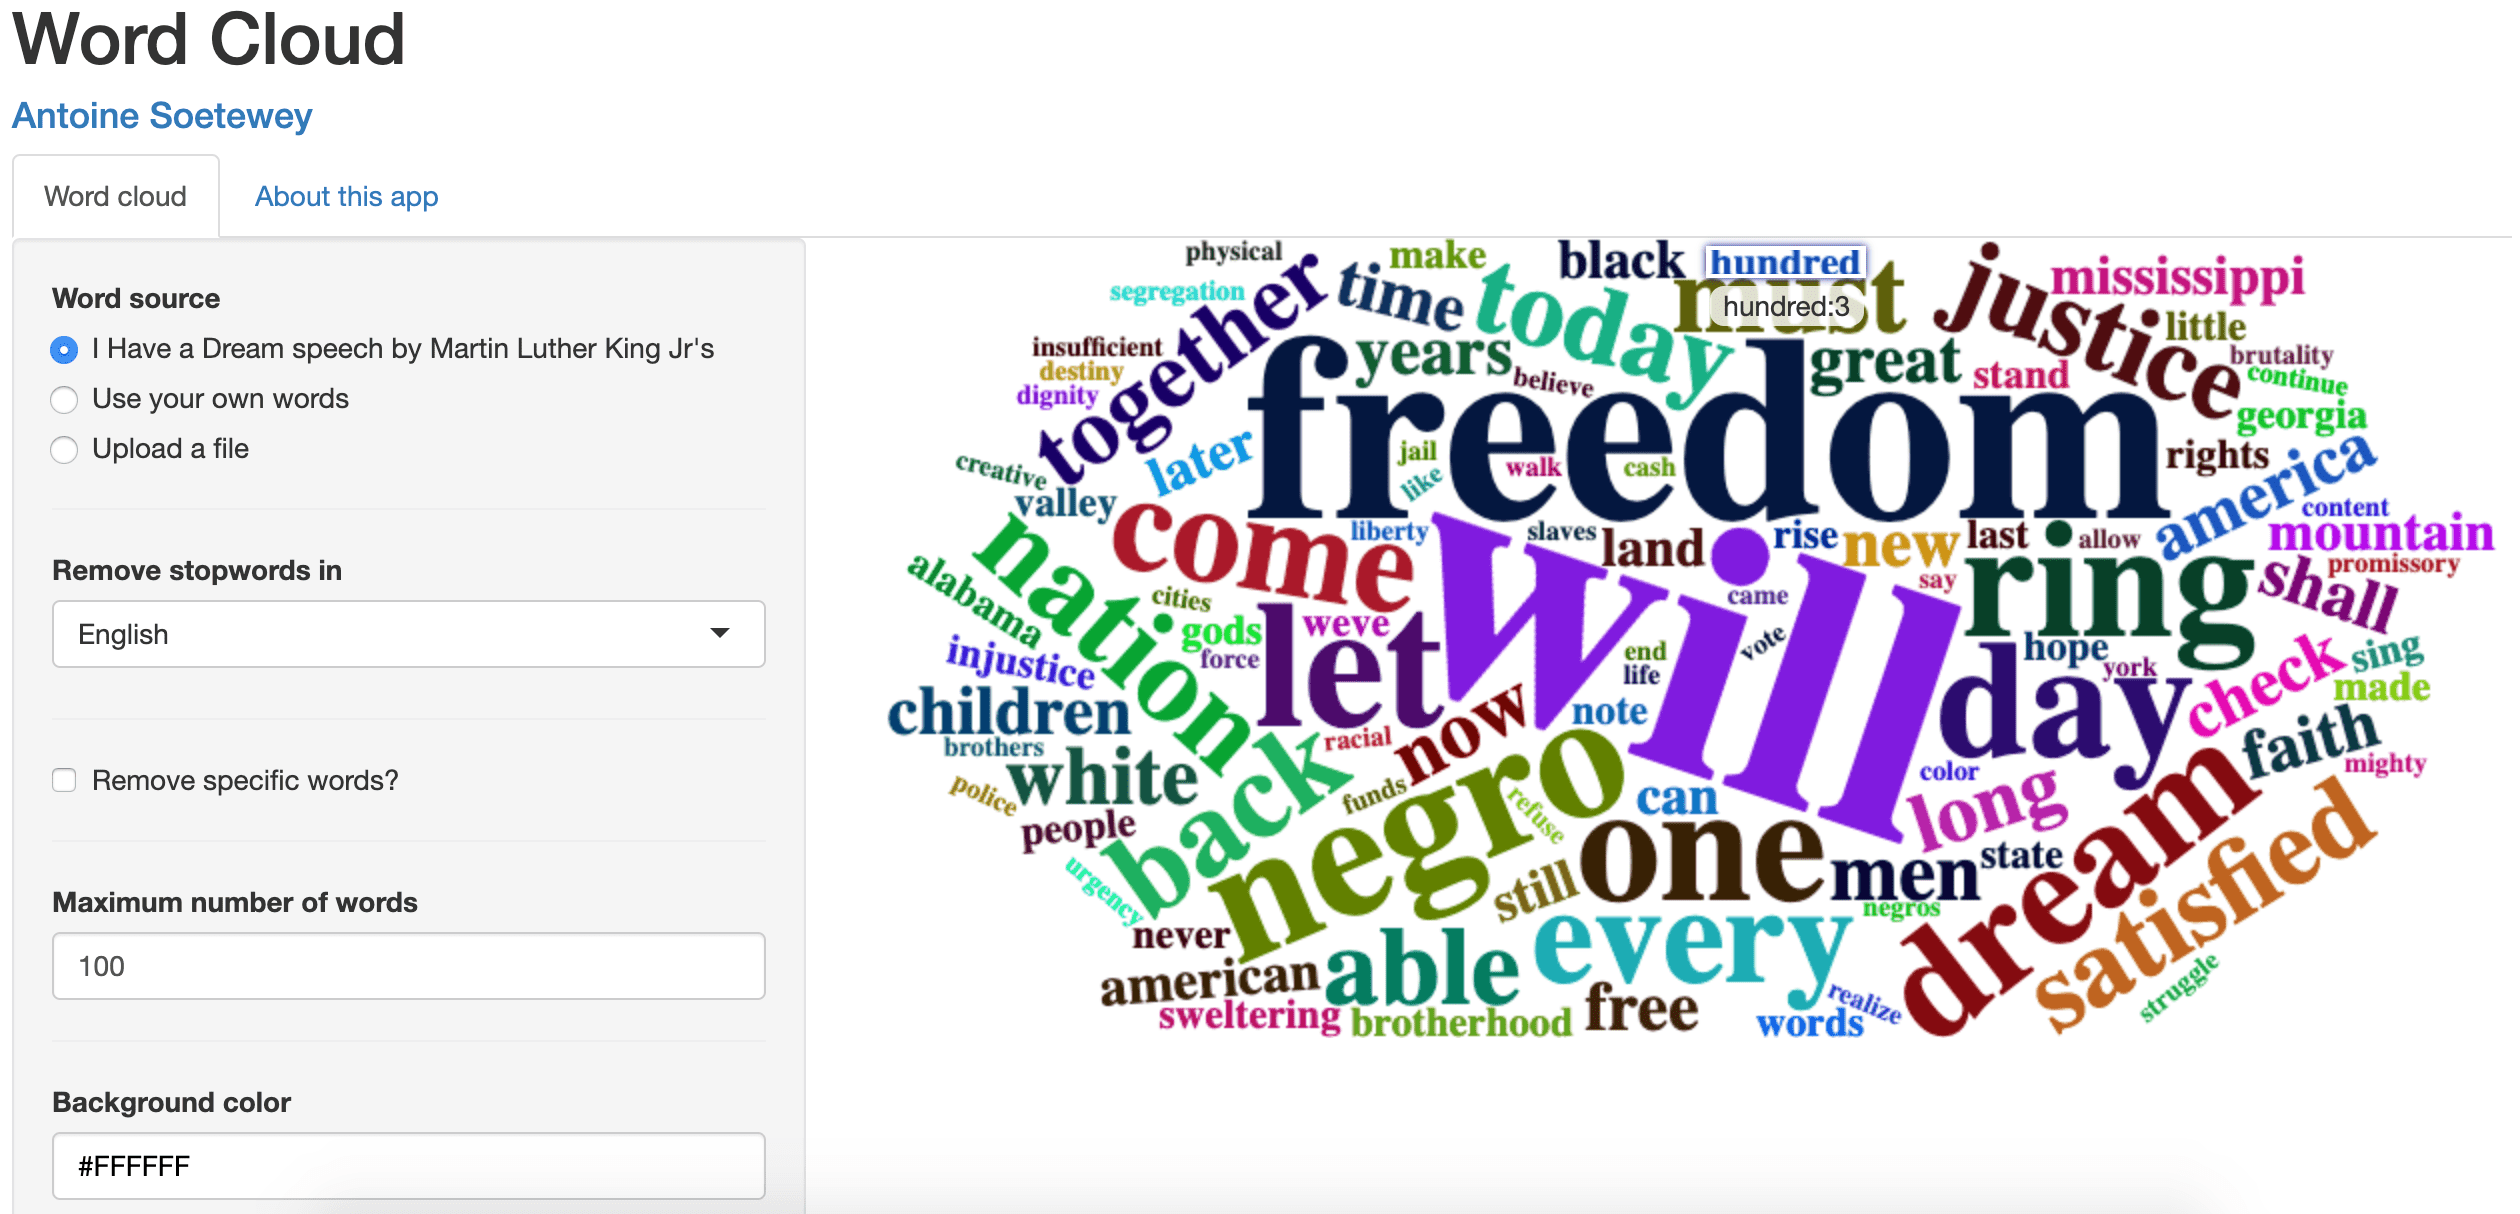
Word cloud in a Shiny app
Below a Shiny app to help you draw a word cloud:
- Word cloud
Word clouds are particularly useful as part of text mining analyses. Moreover, it is also useful to analyze string and character variables for any datasets (see the different data types in R).
How to use this app?
- In Word source you can see two examples of word clouds with preloaded texts. If you want to use your own file, choose the option “Upload a file”
- When uploading a file, make sure to upload a .csv or .txt file
- If it is a .csv file, there should be only one column containing all words or sentences (see example files: example.csv and example.txt)
- Choose the language of the text. Stop words in the chosen language will be automatically removed
- Numbers and punctuations will be automatically removed as well, regardless of the language
- You can remove specific words by specifying them after having clicked on “Remove specific words?”. Indicate one word per line
- Change the default options in Maximum number of words and Background color if needed
- If you need to display this word cloud in your analyses, you can simply take a screenshot and include it in your document
Code
Here is the entire code (or see the last version on GitHub) in case you would like to enhance it. See an example on how to use this app after the embedded code.
Note that the link may not work if the app has hit the monthly usage limit. Try again later if that is the case.
Conclusion
Thanks for reading.
I hope you will find this app useful to draw word clouds of your texts.
As always, if you have a question or a suggestion related to the topic covered in this article, please add it as a comment so other readers can benefit from the discussion.
Liked this post?
- Get updates every time a new article is published (no spam and unsubscribe anytime):
- Support the blog
-
Share on: