
How to Draw a Text Box in Word
- Launch Word.
- Click the small drop-down arrow on the “Text Box” button on the ribbon.
- Click “Draw Text Box.” The cursor turns into a plus sign.
- Position the cursor on the document page, press and hold down the left mouse button and drag to draw the text box.
Contents
- 1 How do you draw a box in Microsoft Word?
- 2 How do I draw a rectangle box in Word?
- 3 How do I draw a shape in Word?
- 4 How do you draw a box and line in Word?
- 5 How do I make a small box in Word?
- 6 How do I create a fill in box in Word?
- 7 Why are there boxes in my Word document?
- 8 Can you Draw freehand in Word?
- 9 How do I apply a shape style to a text box in Word?
- 10 Is there a Draw tool in Word?
- 11 How do you draw a carton?
- 12 How do I draw a box around text in Word 2016?
- 13 Can I draw a line in Word?
- 14 How do you draw a straight line in Word?
- 15 How do you insert checkboxes in Word?
- 16 How do you create fields in Word?
- 17 How do I create a fillable form?
- 18 How do I fix boxes in Word?
- 19 How do I get rid of checkboxes in Word?
- 20 How do I make the text box not outline in Word?
How do you draw a box in Microsoft Word?
Go to Insert > Text Box, and then select Draw Text Box. Click or tap in the document, and drag to draw the text box the size that you want. To add text to a text box, select inside the text box, and then type or paste text.
How do I draw a rectangle box in Word?
On the Insert tab, click Shapes. Click the shape you want, click anywhere in the workspace, and then drag to place the shape. To create a perfect square or circle (or constrain the dimensions of other shapes), press and hold Shift while you drag.
How do I draw a shape in Word?
Click in your document where you want to create the drawing. On the Insert tab, in the Illustrations group, click Shapes. When you find the shape you want to insert, double-click to insert it automatically, or click and drag to draw it in your document.
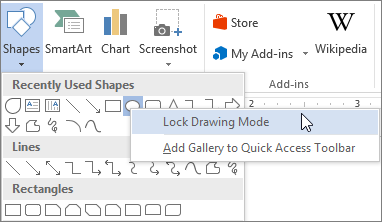
How do you draw a box and line in Word?
On the Insert tab, in the Illustrations group, click Shapes. Under Lines, right-click the line or connector that you want to add, and then click Lock Drawing Mode. Click where you want to start the line or connector, and then drag the cursor to where you want the line or connector to end.
How do I make a small box in Word?
Make your list
- Create your list.
- Place you cursor at the start of the first line.
- Go to the Developer tab, and then click Check Box.
- If you want a space after the check box, press Tab or Spacebar.
- Select and copy (⌘ + C) the check box and any tabs or spaces.
How do I create a fill in box in Word?
Creating Fillable Forms Using Microsoft Word
- Enable Developer Tab. Open Microsoft Word, then go to the File Tab > Options > Customize Ribbon > check the Developer Tab in the right column > Click OK.
- Insert a Control.
- Edit Filler Text.
- Design Mode button again to exit the mode.
- Customize Content Controls.
Why are there boxes in my Word document?
The boxes surrounding text in your example document are frames. These can be removed by pressing Ctrl+Q (which reverts paragraph formatting to that of the underlying pararaph style).
Can you Draw freehand in Word?
There are two sets of drawing tools available to Microsoft Word users. If you want to draw basic, block-like images, you can insert shapes or lines into your Word document and group them together.To insert shapes, you’ll need to press the Insert tab on the ribbon bar. For freehand drawings, press the Draw tab instead.
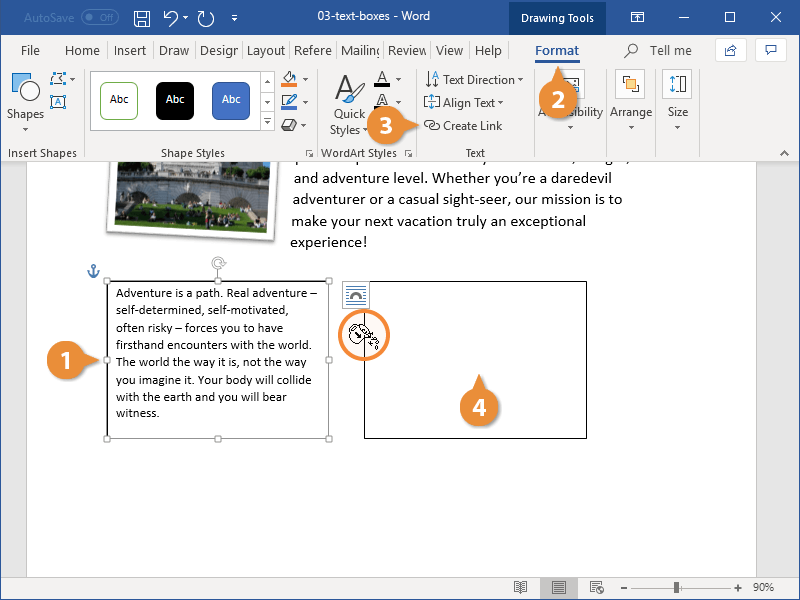
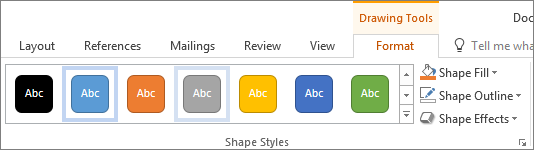
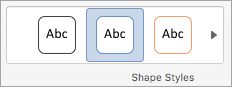
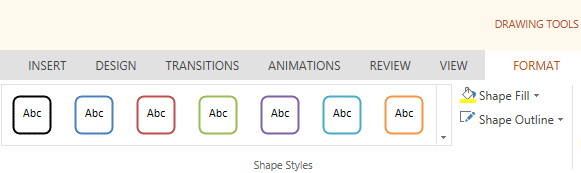
How do I apply a shape style to a text box in Word?
To change the shape style:
- Select the text box you want to change.
- On the Format tab, click the More drop-down arrow in the Shape Styles group.
- A drop-down menu of styles will appear. Select the style you want to use.
- The text box will appear in the selected style.
Is there a Draw tool in Word?
You can draw freely in Microsoft Word using the “Draw” feature whether you have Word for Mac or Windows. You can also insert customizable shapes into your document, or draw using the “Scribble” feature. The process of drawing in Word varies based on which version of Word and device you’re using.
How do you draw a carton?
How to Draw a Fun Cartoon Character
- Start with the head. Draw a medium-sized oval shape with small ears on each side.
- Draw the face.
- Sketch the body.
- Add the arms.
- Place the legs.
- Add shoes.
- Add some accessories.
- When you’re finished, ink your character for his final, complete look.
How do I draw a box around text in Word 2016?
How to highlight or select text.
- Once the text is highlighted, click the Home tab.
- On the Home tab, click the down arrow on the border to get border options, like those shown in the picture.
- Select the type of border you want to use. If you want a single border around the text, click Outside Borders.
Can I draw a line in Word?
Draw a line
To add a line, follow these steps. On the Insert tab, select Shapes. Under Lines, select any line style you like. Select a location in the document, hold and drag your pointer to a different location, and then release the mouse button.
How do you draw a straight line in Word?
How to create a straight line in Microsoft Word
- Go to the Insert menu.
- Click on Shapes, and select which type of line you want to draw.
- Press the Shift button on the keyboard while dragging the pointer to form a straight line (horizontal or vertical).
- The straight line has created!
How do you insert checkboxes in Word?
Inserting a tick-box in Microsoft Word
- Select the Customize Quick Access Toolbar dropdown.
- Select More Commands.
- Select Developer Tab.
- Select Tick Box.
- Press Insert.
How do you create fields in Word?
Inserting built-in fields
- Navigate to the location in the Word document where you want to insert a field.
- Click the Insert tab in the Ribbon and then click Quick Parts in the Text group.
- Select Field.
- In the list of Field names, select a field.
- Under Field properties, select any properties or options you want.
How do I create a fillable form?
How to create fillable PDF files:
- Open Acrobat: Click on the “Tools” tab and select “Prepare Form.”
- Select a file or scan a document: Acrobat will automatically analyze your document and add form fields.
- Add new form fields: Use the top toolbar and adjust the layout using tools in the right pane.
- Save your fillable PDF:
How do I fix boxes in Word?
To fix this issue, do this:
- Open the document that displays boxes instead of text.
- Select all lines that include boxes.
- On the Word menu, click Preferences.
- Under Output and Sharing, click Compatibility.
- Click Font Substitution.
- Choose the Gulim font (under Substituted font), and then click OK.
How do I get rid of checkboxes in Word?
The simplest approach is to go to the Layout tab of the Ribbon & click the Selection Pane button in the Arrange group. You then can select them one or more at a time in the Selection Pane in order to delete them.
How do I make the text box not outline in Word?
Remove the border
- Select the text box or shape. If you want to change multiple text boxes or shapes, click the first text box or shape, and then press and hold Ctrl while you click the other text boxes or shapes.
- On the Format tab, click Shape Outline, and then click No Outline.
Even though Microsoft Word gives you plenty of ways to format, align, and manipulate text, there may be a time when it’s not enough. By using text boxes in Word, you have the flexibility to place text where you want, put it inside a shape, or customize it to make it pop.
Content
- How to Insert a Text Box in Word
- How to Resize, Rotate, or Move a Text Box
- How to Customize the Text Box Appearance
- How to Connect Text Boxes in Word
- Frequently Asked Questions
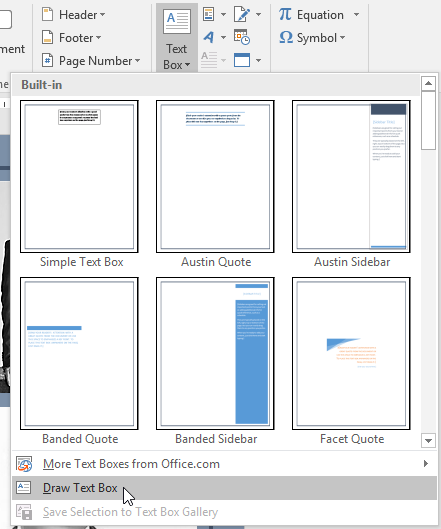
You can insert a premade text box that includes formatting and a style or start from scratch by drawing your own.
Insert a Built-In Text Box
Using a premade text box, you can get a jump start on the formatting or apply a bit of flare without any extra work. Currently, this feature is only available in Word on Windows, not Mac.
- Head to the “Insert” tab and open the “Text Box” drop-down box. You’ll see options below “Built-in” at the top. If you hover your cursor over one, you can see a brief description.

- Choose the premade text box you want to use, and you’ll see it pop onto the page.

- Click inside the box, which selects the sample text, then type your own.

You can customize the built-in text box, just like one you draw yourself, which is described below.
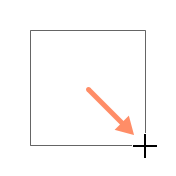
Draw a Text Box
If you want a complete blank canvas for your text box, you can draw one the size you need and insert your text. Additionally, this is the only option for inserting a text box in Word on Mac at this time.
- Go to the “Insert” tab and open the “Text Box” drop-down box. On Windows, select “Draw Text Box.”

- On Mac, select either “Draw Text Box” or “Draw Vertical Text Box.” The latter places the text sideways in the box as shown below.

- When your cursor changes to a crosshair symbol, drag to draw the text box the size you want. You can still resize the text box later if needed.

- Once you have your box, just type your text inside of it.

Note: you can also add text boxes in Google Docs.
How to Resize, Rotate, or Move a Text Box
You aren’t stuck with the size, angle, or location of your new text box. You can easily resize, rotate, or move a text box in Word a few different ways.
Resize a Text Box
- To quickly resize a text box, drag a corner or edge.

- You can also go to the “Shape Format” tab to change the size. Use the Size section of the ribbon to enter the dimensions in the “Height” and “Width” boxes.

- If you want to size your box according to the text within it, right-click the text box and pick “Format Shape.” When the sidebar opens, go to the “Layout & Properties” tab and check the box for “Resize shape to fit text.”

Rotate a Text Box
- To freely rotate the box, drag the circular arrow at the top to the right or left.

- To rotate it right or left 90 degrees, go to the “Shape Format” tab. Pick an option from the “Rotate” drop-down menu in the “Arrange” section of the ribbon.

- For an exact angle, right-click and choose “More Layout Options.” Open the Size tab, enter the angle in the “Rotation” box, and click “OK.”

Move a Text Box
To move a text box, drag it to your desired location.
Because a text box works like an object, any other text in your document won’t move out of the way for a text box. However, you can use the Wrap Text and Position features to adjust this if needed.

- Go to the “Shape Format” tab, then use the “Wrap Text” drop-down box in the “Arrange” section of the ribbon to choose a wrapping option. For instance, you can place the box in line with the text.

- You can also use the “Position” drop-down box to the left of “Wrap Text” to place the box in a specific spot within the text. For example, you can place it on the top left with text wrapping around it.

Tip: learn how you can create and customize tables in Word.
How to Customize the Text Box Appearance
Along with resizing, rotating, or moving a text box, you may want to change its appearance. You can customize the shape of the text box, apply a background color, or give it a border.
- Select the text box and head to the “Shape Format” tab, then use the following sections of the ribbon to customize the box and text:
- Insert Shapes: open the “Edit Shape” drop-down menu, move to “Change Shape,” and select a new shape in the pop-out menu.

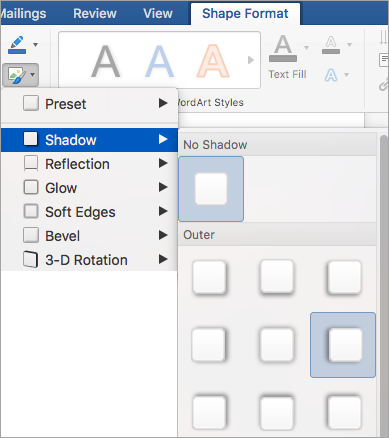
- Shape Styles: pick a preformatted design in the Shapes Styles box or choose a fill, apply a border, or add a shadow.

- WordArt Styles and Text: use these two sections to adjust the appearance of the text. Apply a design, fill, outline, or effect. You can also change the direction or align the text. For the font style and size, use the options in the “Font” section of the “Home” tab.

- For additional options, right-click the text box and select “Format Shape,” then you can adjust both the box and text settings in the sidebar. Some options match those in the ribbon while others are different. For instance, you can adjust the transparency of the box or text.

Try this: create an organized document with a table of contents and add page numbers in Word.
How to Connect Text Boxes in Word
One super-handy feature of text boxes in Word is that you can link them together. This allows you to start typing in one box and have the text carry over to the next box. It’s ideal for a list of tips, brief instructions, or short stories you want to include with your content.
To link text boxes, the box you want to connect to the previous one must be empty. If you already have your boxes filled with text, you can either remove the text from the subsequent boxes or add new boxes and remove the existing ones.
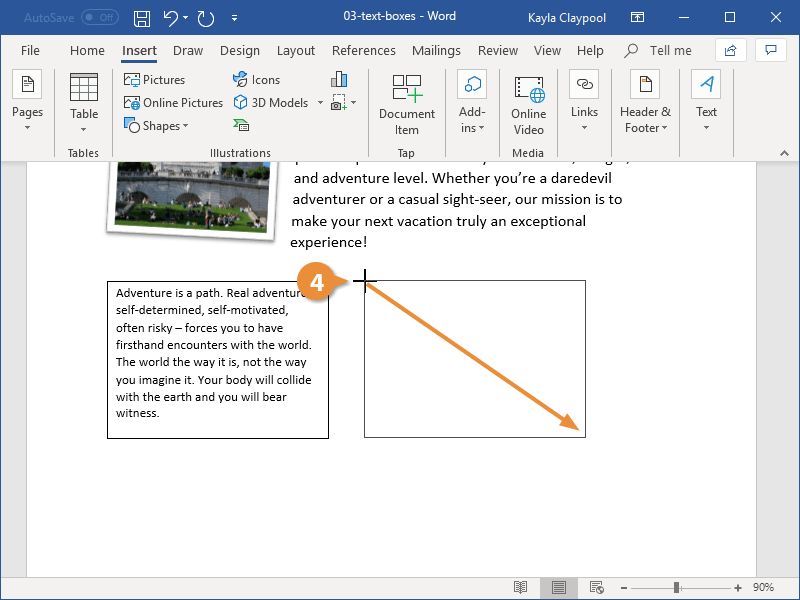
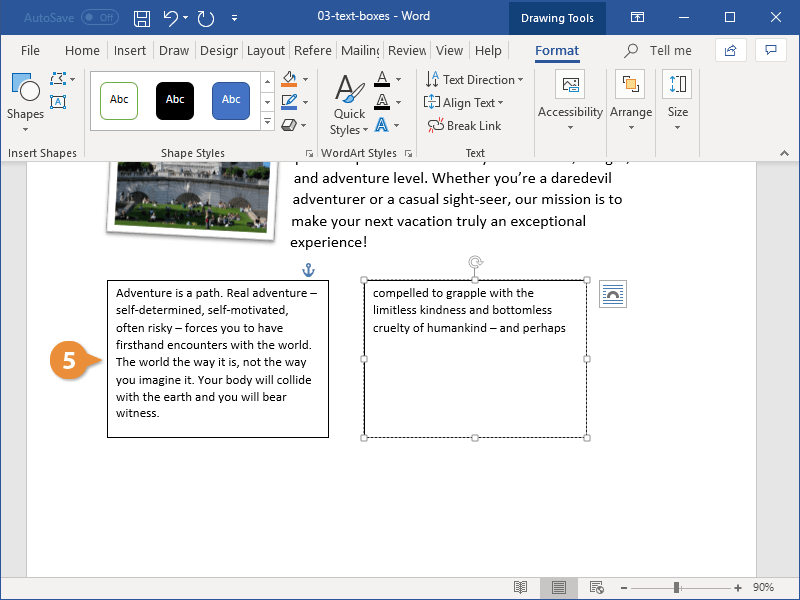
- Insert a text box as described earlier, then add a second text box, but be sure to leave it empty.

- Select the first text box, go to the “Shape Format” tab, and pick “Create Link” in the Text section of the ribbon.

- When your cursor changes to a paint can icon, click inside the second text box. This creates a link between the two. If you want a third or fourth text box linked, follow the same process by linking the second box to the third, third to the fourth, and so on.
- As you add text to the first box, the text that won’t fit then fills the second text box. If you have more text boxes, they will continue to fall into them.

- If you resize the text boxes, the amount of text in each one adjusts to accommodate it. When you resize one text box, you’ll see the linked box automatically resize as well.

- Should you decide later you don’t want the boxes linked, you can break the link. Select the first text box, go to the “Shape Format” tab, and click “Break Link.” Follow the same process to remove any additional text box connections.

Frequently Asked Questions
Can I add a hyperlink to a text box in Word?
You can add a link to a text box or specific text within it, just like any other object or text in a Word document.
To link the box, select it. To link specific text within the box, select it instead. Right-click, pick “Link” or “Hyperlink,” then choose an existing file or web page, place in the document, new document, or email address. On the right, select the item or add the URL and click “OK.”
How do I stop text from wrapping inside of a text box?
By default, the text inside of a text box wraps to the next line when it reaches the edge of the shape. But you can change this if you would like.
Right-click the text box and pick “Format Shape.” When the sidebar opens, select the “Layout & Properties” tab and uncheck the box for “Wrap text in shape.”
Can I temporarily hide text boxes in Word?
As you work on the other content in your document, you may want to hide a text box or two to focus on other things.
Select a text box, go to the “Shape Format” tab, and click “Selection Pane” in the “Arrange” section. When the sidebar opens, click the eye icon to the right of a text box to hide it. For all text boxes, click “Hide All” at the top. To unhide the text boxes, select the eye with a line through it to the right or pick “Show All” at the top.
Image credit: Pixabay. All screenshots by Sandy Writtenhouse.

Sandy Writtenhouse
With her BS in Information Technology, Sandy worked for many years in the IT industry as a Project Manager, Department Manager, and PMO Lead. She wanted to help others learn how technology can enrich business and personal lives and has shared her suggestions and how-tos across thousands of articles.
Subscribe to our newsletter!
Our latest tutorials delivered straight to your inbox
Table of Contents
- How do you spell rectangular prism?
- How do you draw a perfect rectangle?
- How do I draw a rectangle in Word?
- Is draw a box free?
- Should I do draw a box?
- Why do I always draw boxes?
- Can I do Drawabox with a pencil?
- Should your hand touch the paper when you draw?
- What is RSI wrist?
- Can you draw with a wrist brace?
- Should you wear a wrist brace while drawing?
- What does it mean to draw with your arm?
- Why does my shoulder hurt when drawing?
Go to Insert > Text Box, and then select one of the pre-formatted text boxes from the list, select More Text Boxes from Office.com, or select Draw Text Box. If you select Draw Text Box, click in the document, and then drag to draw the text box the size that you want.
How do you spell rectangular prism?
A solid (3-dimensional) object which has six faces that are rectangles. It has the same cross-section along a length, which makes it a prism. It is also a “cuboid”.
How do you draw a perfect rectangle?
Steps
- Draw a straight, horizontal line using a ruler.
- Make a shorter vertical line coming down from one end of the first line.
- Draw a horizontal line coming off the bottom end of the vertical line.
- Draw a vertical line between the ends of the two horizontal lines.
- Color in your rectangle to make it pop.
How do I draw a rectangle in Word?
Left click on Insert. Then left click on Shapes. You will see a menu of shapes that you can choose. Left click on the Rectangle in the Shapes menu.
Is draw a box free?
Drawabox is a set of free exercise-based lessons that focus on the fundamentals – the skills you’ll need to make sense of all the other resources and tutorials out there.
Should I do draw a box?
Drawabox should be considered the true beginner’s resource. It will get you started thinking like an artist and looking at things in the right way. But it will not bring you all the way to a professional level. If you’re a complete beginner this is still absolutely worth the time.
Why do I always draw boxes?
Squares or boxes Drawing squares suggests that you want control of a situation and are trying to work out a problem. Progressing from a square to a cube or box means that you’re likely to be very efficient and can deal with difficult situations easily.
Can I do Drawabox with a pencil?
This is easier in pen but you can do it in pencil. i’d just go with ballpoint /regular pens, otherwise pencils work. i used pencil for a bit when i had nothing else. just dont erase anything!
Should your hand touch the paper when you draw?
Do not keep your wrist on the desk or drawing surface. Instead, you want to move both your hand and forearm when you draw as this will give you control without grounding you which leads to more unplanned curves in your lines and details. Let the knuckles on your pinky barely touch or glide along the paper as you draw.
What is RSI wrist?
Repetitive strain injury (RSI) is a general term used to describe the pain felt in muscles, nerves and tendons caused by repetitive movement and overuse. It’s also known as work-related upper limb disorder, or non-specific upper limb pain.
Can you draw with a wrist brace?
When you put a brace on, you’re enabling yourself to keep drawing when your wrist is about to give out. Your wrist doesn’t support itself anymore, so it atrophies. Lastly, you leave bad form unattended. Sleeping with a wrist band also prevents tendonitis/carpal tunnel.
Should you wear a wrist brace while drawing?
“It makes a big difference to put them on and rest your wrists when you finish drawing, even if you don’t think you’re having any symptoms,” says Passey. The bottom line: When considering a splint, use discretion. Wear a splint only if recommended by a doctor.
What does it mean to draw with your arm?
Sketching from your shoulder means that you can draw lines in one continuous movement. Instead of drawing by moving your wrist, keep your wrist still and move your entire arm in one long movement from your shoulder. It’s not an easy skill to master but once you have, you definitely will see the benefit.
Why does my shoulder hurt when drawing?
Long hours sitting at the literal drawing board (whether drawing on paper or digitally) can strain muscles in the back, neck, and shoulders; repetitive motions inflame tendons in the arms.
A text box is an element you can insert and position anywhere in a document. Text boxes are great for calling special attention to a quote or a whole block of text.
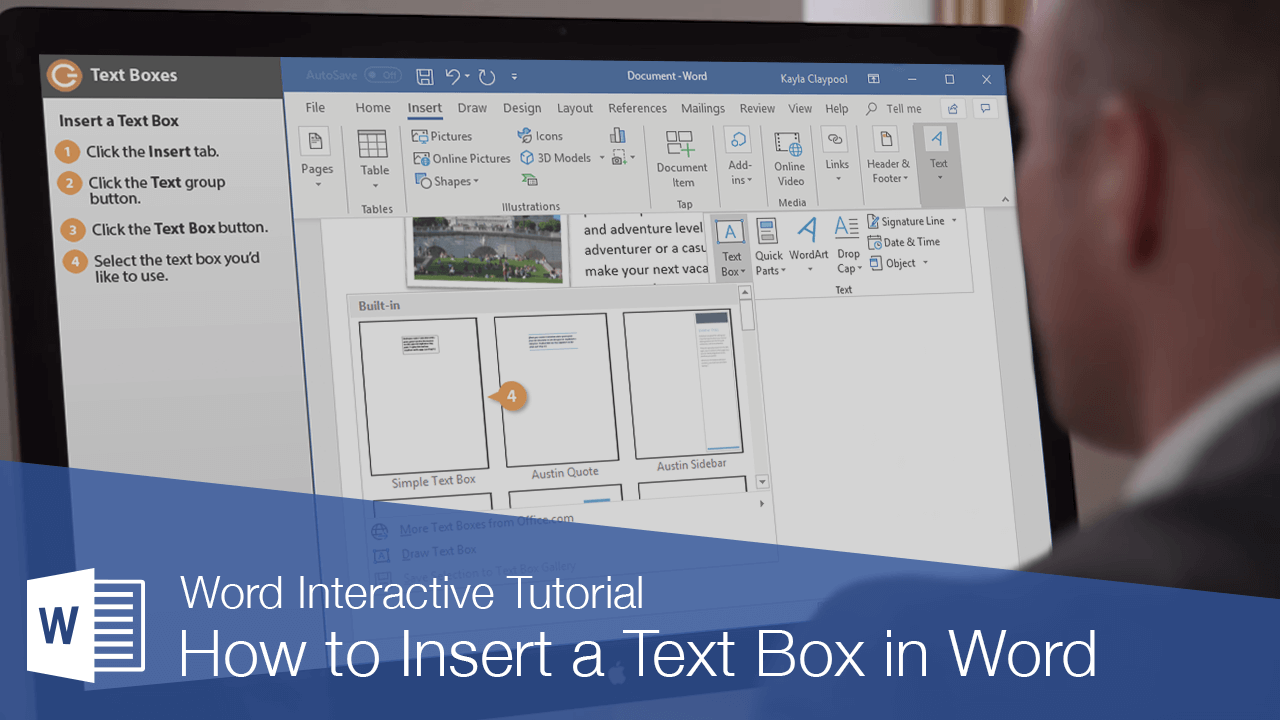
Insert a Text Box
- Click the Insert tab.
- Expand the Text group, if necessary.
- Click the Text Box button.
- Select the text box you’d like to use.

- Click the text box and type to replace the placeholder text.
A gallery of text box styles appears. The styles range from simple text boxes to stylized sidebars.
The text box is automatically inserted.
The placeholder text disappears as soon as you start typing.
Text boxes can be sized, moved, arranged, and styled just like shapes and pictures.
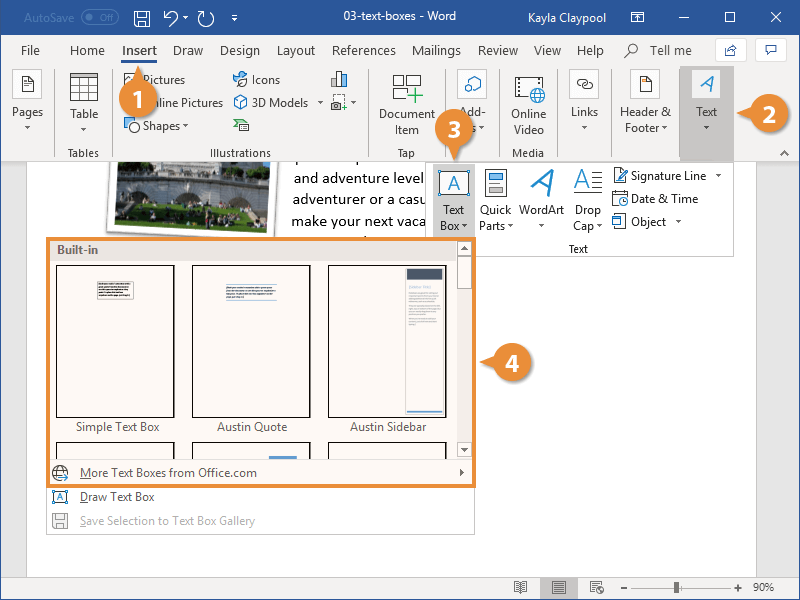
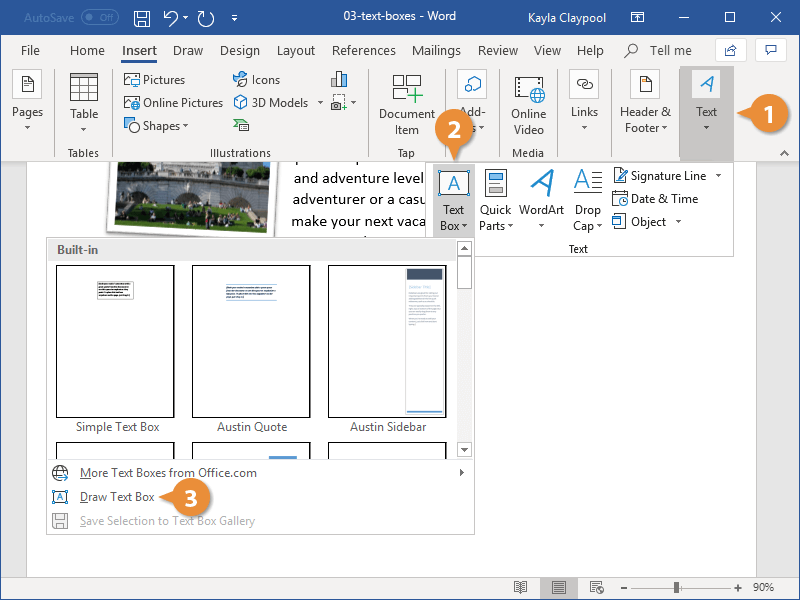
Draw Text Boxes
You don’t have to use one of Word’s built-in text boxes; you can create one from scratch.
- From the Insert tab, expand the Text group, if necessary.
- Click the Text Box button.
- Select Draw Text Box.
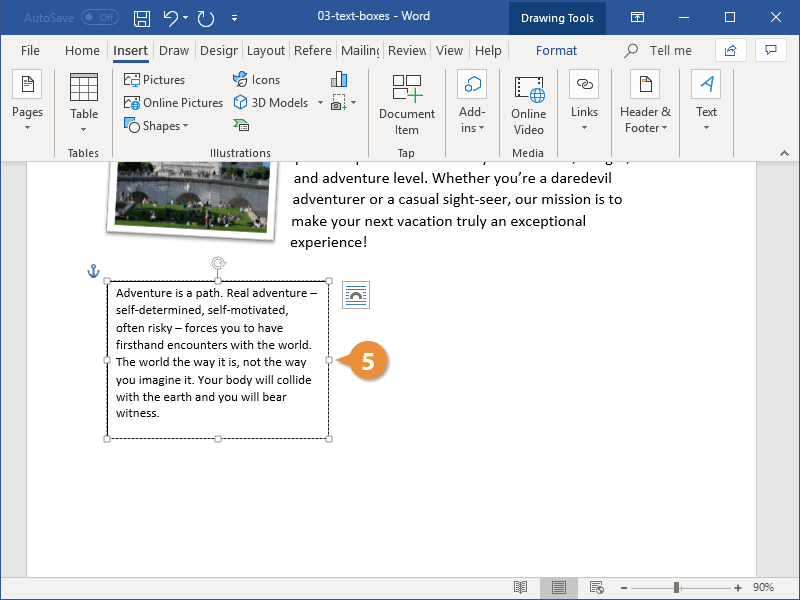
- Click and drag in your document to create the text box.
The pointer changes to a crosshair, indicating that you can draw the text box.
The text box is inserted.
Link Text Boxes
Linking text boxes allows text to flow between them. For example, you could make the text of a long article flow through several smaller text boxes in a more advanced layout.
- After you have created two or more text boxes, select the first one.
- Click the Format tab in the Drawing Tools ribbon group.
- Click Create Link from the Text group.
- Click the second text box with the new cursor.
- Switch back to the first text box and type into it.
The second text box must be empty, so make sure to remove any text in it before proceeding.
The cursor changes into a tiny pitcher full of letters. Moving the cursor over the second text box reveals that you can “pour” additional text into it.
The two text boxes are linked. Now, once enough text is entered into the first text box, it will automatically overflow into the second.
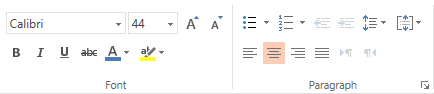
You can format the text in a text box just as you would any other text by using the Font and Paragraph groups on the Home tab.

FREE Quick Reference
Click to Download
Free to distribute with our compliments; we hope you will consider our paid training.
You can add shapes, such as boxes, circles, and arrows, to your documents, email messages, slide shows, and spreadsheets. To add a shape, click Insert, click Shapes, select a shape, and then click and drag to draw the shape.
After you add one or more shapes, you can add text, bullets, and numbering to them, and you can change their fill, outline, and other effects on the Format tab.
Tip: You can add individual shapes to a chart, or add shapes on top of a SmartArt graphic to customize the chart or the graphic.
Add a shape in Excel, Outlook, Word, or PowerPoint
-
On the Insert tab, click Shapes.

-
Click the shape you want, click anywhere in the workspace, and then drag to place the shape.
To create a perfect square or circle (or constrain the dimensions of other shapes), press and hold Shift while you drag.


To follow these steps, you need to open or create a report. To do that, on the Report tab, click Recent to open an existing report, or click More Reports to select a report from the list in the Reports dialog box or create a new report.
-
In the open report, on the Design tab, click Shapes.
-
Click the shape you want, click anywhere in the workspace, and then drag to place the shape.
To create a perfect square or circle (or constrain the dimensions of other shapes), press and hold Shift while you drag.
Insert a shape, or click an existing shape, and then enter text.
-
Right-click the shape and click Add Text or Edit Text, or just start typing.
Note: The text that you add becomes part of the shape — if you rotate or flip the shape, the text rotates or flips also.
-
To format and align your text, click the Home tab, and then choose options from the Font, Paragraph, or Alignment groups, depending on the program you’re using and what kind of formatting you want to apply. (Text formatting options are limited in Project.)
Note: These commands aren’t available in Project.
-
Click the shape you want to change.
To change multiple shapes, press Ctrl while you click the shapes that you want to change.
-
On the Format tab, in the Insert Shapes group, click Edit Shape
, point to Change Shape, and then click the new shape that you want.
 , point to Change Shape, and then click the new shape that you want.
If you need to add the same shape repeatedly, you can do so quickly by using Lock Drawing Mode.
Note: Instead of adding individual shapes to create a drawing, you might want to Choose a SmartArt graphic. In a SmartArt graphic, the arrangement of the shapes and the font size in those shapes is updated automatically as you add or remove shapes and edit your text.
-
On the Insert tab, click Shapes.
-
Right-click the shape you want to add, and then click Lock Drawing Mode.
-
Click anywhere in the workspace, and then drag to place the shape.
-
Repeat step 3 to add the shape as many times as you like.
Tip: To create a perfect square or circle (or constrain the dimensions of other shapes), press and hold Shift while you drag.
-
After you add all the shapes you want, press Esc to turn off Lock Drawing Mode.
Note: This feature isn’t available in Project.
-
Select the text in the shape that you want to add bullets or numbering to.
-
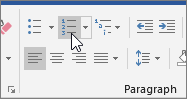
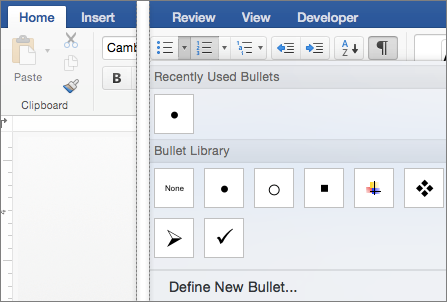
Select the Home tab on the ribbon, and in the Paragraph group, select Bullets or Numbering.
You can find different bullet styles and numbering formats by clicking the down arrow next to Bullets or Numbering.
Quick Styles let you apply a style to your shape with one click. You’ll find the styles in the Quick Style gallery. When you rest your pointer over a Quick Style thumbnail, you can see how the style affects your shape.
-
Click the shape you want to change.
-
Select the Format tab, and in the Shape Styles group, select the Quick Style you want to use.
To see more Quick Styles, click the More button
.
 .
.Click the shape that you want to delete, and then press Delete. To delete multiple shapes, press Ctrl while you click the shapes that you want to delete, and then press Delete.
See Also
Draw or delete a line, connector, or freeform shape
Rotate a text box, shape, WordArt, or picture
Change the colors in a text box or shape
Draw a decorative line in Word or Outlook
Choose a SmartArt graphic
Create a chart from start to finish
Add clip art to a file
Draw and sketch notes on a page
After adding a shape to a document, you can modify it by adding connector lines, changing the style, adding a mirror image, changing the color, and applying a variety of other effects, such as shadows, glow, and 3-D.
Add a shape
-
On the Insert tab, click Shapes.
-
Click the shape you want, click anywhere in the workspace, and then drag to place the shape.

-
Right-click the shape and click Add Text or Edit Text, or just click inside the shape and start typing .
Note: The text that you add becomes part of the shape — if you rotate or flip the shape, the text rotates or flips also.
-
To format and align your text, click the Home tab, and then choose the available formatting options. For example, you can change font color, styles, sizes, change alignment or indentation, change the text orientation, to name a few.
-
Click the shape you want to change.
To change multiple shapes, press
while you click the shapes you want to change. -
On the Shape Format tab, click
, point to Change Shape, and click the new that you want.
 while you click the shapes you want to change.
 , point to Change Shape, and click the new that you want.
-
Select the shape you want to copy.
-
Press the option key and drag the shape anywhere you want. Release the mouse, and a copy of the shape is created. You can drag and release the shape as many times as necessary.
Note: Adding lists is not available in Excel 2016 for Mac.
-
Select the text in the shape that you want to add bullets or numbering to.
-
On the Home tab, click the arrow next to Bullets or Numbering.
-
Press Enter every time you want a new bullet or number, or press Enter twice to end the list.
-
Click the shape you want to change.
-
Click the Shape Format tab, and in the style gallery, click the style you want.
To see more styles, click
below the style gallery.
 below the style gallery.
-
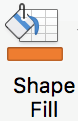
Click the shape you want to change.
-
Click the Shape Format tab, and click
(Shape Fill icon). -
Do one of the following:
-
To use a different fill color, under Theme Colors or Standard Colors, click the color that you want to use.
-
To remove the color from the selected chart element, click No Fill.
-
To use a fill color that is not available under Theme Colors or Standard Colors, click More Fill Colors. In the Colors dialog box, use the available options to pick a color, and then click OK.
-
To fill the shape with a picture, click Picture. In the Insert Picture dialog box, click the picture that you want to use, and then click Insert.
-
To use a gradient effect for the selected fill color, click Gradient, and then click the gradient style that you want to use.
For additional gradient styles, click More Gradients, and then in the Format Chart Area pane, under Fill, click the gradient options that you want to use.
-
To use a texture fill, click Texture, and then click the texture that you want to use.
-
 (Shape Fill icon).
-
Click your shape, and then click the Shape Format tab.
-
In the Shape Styles group, click Shape Effects, point to an effect category, and then click the effect that you want.
-
On the Shape Format tab, click Format Pane.
-
In the Format Shape pane, click the Fill & Line tab, and then click either Fill or Line.
-
Drag the Transparency slider to achieve the effect you want.


Click the shape that you want to delete, and then press Delete. To delete multiple shapes, press Command while you click the shapes that you want to delete, and then press Delete.
See also
Change the size of an object
Crop a picture
Move, rotate, or group a picture, text box, or other object
Align objects in Word for Mac
Group or ungroup objects
You can add shapes, such as boxes, circles, and arrows, to your workbooks and presentations. (Word for the web doesn’t support shapes.) To add a shape, select Insert on the ribbon, select Shapes, and then choose a shape.
After you add a shape, you can move it and resize it; add text, bullets, or numbering; and you can change the fill color or outline.
-
On the Insert tab, select Shapes.
-
Select the shape you want from the drop-down gallery.
A default-sized shape is immediately inserted in the middle of the visible page.
-
Select a sizing handle on the perimeter of the shape and drag inward or outward to change the size of the shape.
To create a perfect square or circle (or constrain the dimensions of other shapes), press and hold Shift while you drag.
-
To move the shape, point the mouse at it until the pointer turns into a four-headed arrow. Then click and drag to move the shape where you want it.
When a shape is selected in your document, a Shape tab appears on the toolbar ribbon. It has buttons for things you can do with the shape such as adding a fill color or outline, or choosing a predefined shape style.
Note: If you have the Simplified Ribbon turned off, the tab name in step #4 is Format. For more information on the Simplified Ribbon see The new look of Microsoft 365.

Insert a shape, or click an existing shape, and then enter text, as follows:
-
Right-click the shape and select Edit Text.
A blinking cursor appears in the center of the shape.
-
Type the text you want to add to the shape.
-
To format and align your text, select the Home tab, and then choose options from the Font, Paragraph, or Alignment groups.
Quick Styles let you apply a style to your shape with one click. You’ll find the styles in the Shape gallery.
-
Select the shape you want to change.
-
On the Shape tab (or the Format tab if you have the Simplified Ribbon turned off), open the Shape Style gallery and select the Quick Style you want to use.
Select the down arrow on the end of the gallery to open it and see the complete list of options:
You can pause the mouse pointer over an option in the gallery to see a short description of it.

-
Select the shape you want to change.
-
On the Shape tab (or the Format tab if you have the Simplified Ribbon turned off), select the down arrow next to Fill to open the gallery of fill colors.
-
Select a color.
-
To make the shape transparent, select No Fill at the bottom of the color gallery.
-
Select the shape you want to change.
-
On the Shape tab, (or the Format if you’re still using the classic ribbon) select the down arrow next to Outline to open the gallery of outline colors.
-
Select a color.
-
At the bottom of the gallery there are also options for the thickness (Weight) of the outline, and whether the outline is solid, dotted, or a dashed line. Point at Weight or Dashes to see a pop-out list of options.
Click the shape that you want to delete, and then press the Delete key. To delete multiple shapes, press Ctrl while you select the shapes that you want to delete, and then press Delete.
Lesson 21: Text Boxes
/en/word2016/shapes/content/
Introduction
Text boxes can be useful for drawing attention to specific text. They can also be helpful when you need to move text around in your document. Word allows you to format text boxes and the text within them with a variety of styles and effects.
Optional: Download our practice document.
Watch the video below to learn more about text boxes in Word.
To insert a text box:
- Select the Insert tab, then click the Text Box command in the Text group.

- A drop-down menu will appear. Select Draw Text Box.
- Click and drag anywhere on the document to create the text box.
- The insertion point will appear inside the text box. You can now type to create text inside the text box.
- If you want, you can select the text and then change the font, color, and size by using the commands on the Format and Home tabs. To learn more about using these formatting commands, see our Formatting Text lesson.
- Click anywhere outside the text box to return to your document.


You can also select one of the built-in text boxes that have predefined colors, fonts, positions, and sizes. If you choose this option, the text box will appear automatically, so you will not need to draw it.
To move a text box:
- Click the text box you want to move.
- Hover the mouse over one of the edges of the text box. The mouse will change into a cross with arrows.
- Click and drag the text box to the desired location.

To resize a text box:
- Click the text box you want to resize.
- Click and drag any of the sizing handles on the corners or sides of the text box until it is the desired size.

Modifying text boxes
Word offers several options for changing the way text boxes appear in your document. You can change the shape, style, and color of text boxes or add various effects.
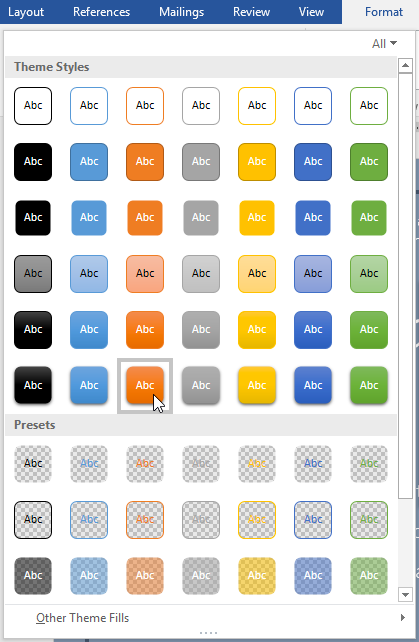
To change the shape style:
Choosing a shape style allows you to apply preset colors and effects to quickly change the appearance of your text box.
- Select the text box you want to change.
- On the Format tab, click the More drop-down arrow in the Shape Styles group.
- A drop-down menu of styles will appear. Select the style you want to use.
- The text box will appear in the selected style.

If you want to have more control over text box formatting, you can use any of the shape formatting options such as Shape Fill and Shape Outline. To learn more, see our Shapes lesson.
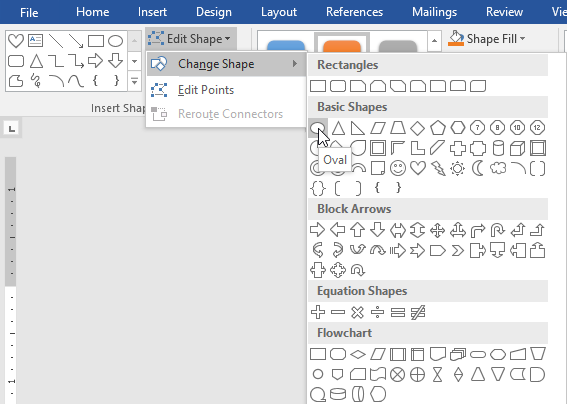
To change the text box shape:
Changing the shape of a text box can be a useful option for creating an interesting look in your document.
- Select the text box you want to change. The Format tab will appear.
- From the Format tab, click the Edit Shape command.
- Hover the mouse over Change Shape, then select the desired shape from the menu that appears.
- The text box will appear formatted as the shape.

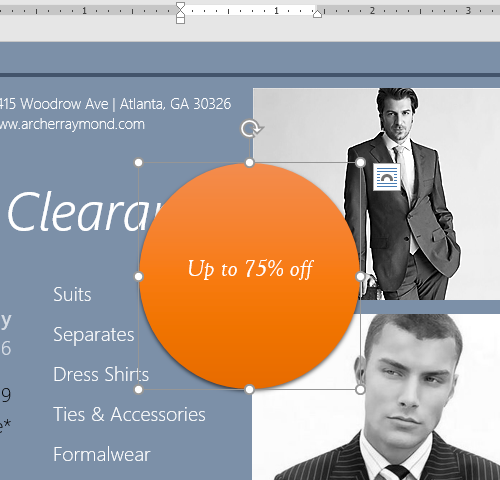
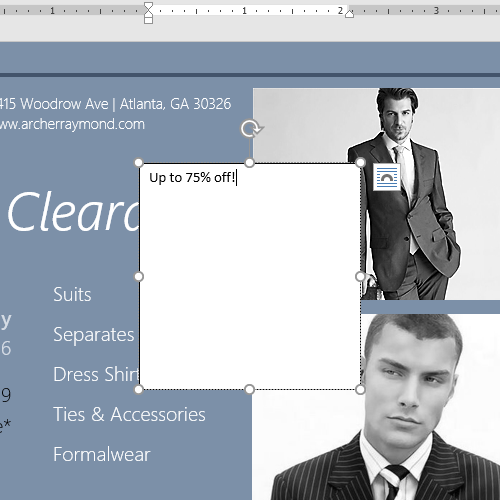
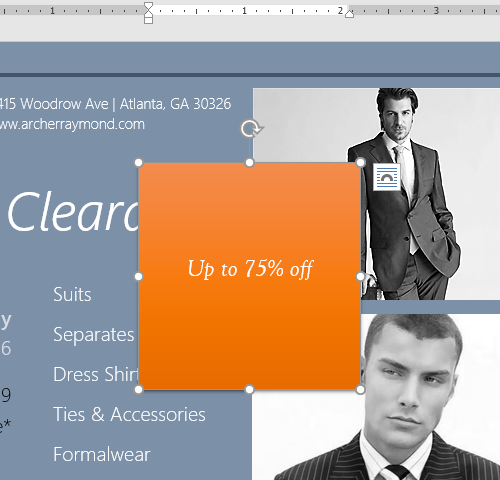
Challenge!
- Open our practice document.
- Insert a Simple Text Box.
- In the text box, type Get an additional 25% off when you mention this ad!
- Change the font to Gadugi, 20 pt, Center Align.
- Change the shape of the text box to Double Wave from the Stars and Banners group.
- Change the text box style by selecting any style in the Intense Effect row.
- Drag the text box to the space below Buy 1, Get 1 Free* and Formalwear.
- When you’re finished, your document should look something like this:


/en/word2016/aligning-ordering-and-grouping-objects/content/
Reading
a lengthy text document can make anyone bored in minutes. However, there are
few simple ways to make your documents more attractive and appealing to the
reader. One such option is to add colorful text boxes in-between paragraphs.
This is a useful way to show important action points on full text based
documents. In this article, let us explore how to create text box in Word
document.
Related: How to quickly add dividers in Word?
We
will discuss the following options based on Word 2016 or later version.
- Create text box from existing text
- Creating empty text box
- Changing text box size and position
- Changing text direction
- Deleting borders
Creating
Text Box from Existing Text
You can convert any of the existing text paragraph and list to a text box in Word. Let’s see how to do that.
- First open your document and select the paragraph you want to convert to a text box.
- Switch to the “Insert” tab from the ribbon menu.
- Open the “Text Box” menu.
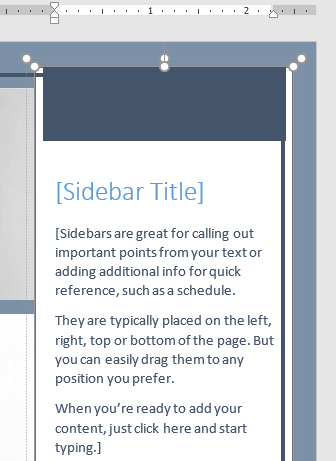
- Word offers a selection of predefined text boxes, for example for creating sidebars with quotes.
- However, for converting the existing text, select the entry “Draw Text Box” in the lower pane.

This will instantly add a bordered text box around
the selected text. Word treats text boxes as a drawing and you can design the
box as per your need using the “Drawing Tools” menu. You can move the text
boxes anywhere in the document, depending on the layout. This can be useful for
the design of flyers and brochure.
Creating
Empty Text Box
Of course, you do not necessarily need existing text to
create a new text box. Alternatively, you can also create empty text boxes and
enter the text into them later.
- Place the cursor where you want to insert a text box.
- Reopen the “Insert” menu and select “Text Box” option.
- Click the “Draw Text Box” menu item. You will see the cursor now changed to cross hair shape.
- Draw out the text box while holding down the left mouse button.
- Then enter the text into the text box.
- You can look at the various options in the context menu of your text box for designing your text box.

Changing
Text Box Size and Position
When
you have created a text box out, you have various options for editing. You can
design it, change the size and place it anywhere in your document.
- You can change the size of the box using the handles on the edges of it. Word will automatically adjust the text content inside the box.
- It is also possible to freely move the box using the mouse. You can hover over the mouse to change the cursor into a star shape, allowing you to drag the box.
- Formatting is also possible as usual, for example, right-click on the selected text to use the Mini toolbar and format the text in bold or change the alignment.
- You can click on the “Layout Options” button on the side of the text box to wrap text box with the content on your document.

Changing
Text Direction
Within
a text box, you can also influence the text direction. Besides the default
horizontal alignment the text can also run vertically.
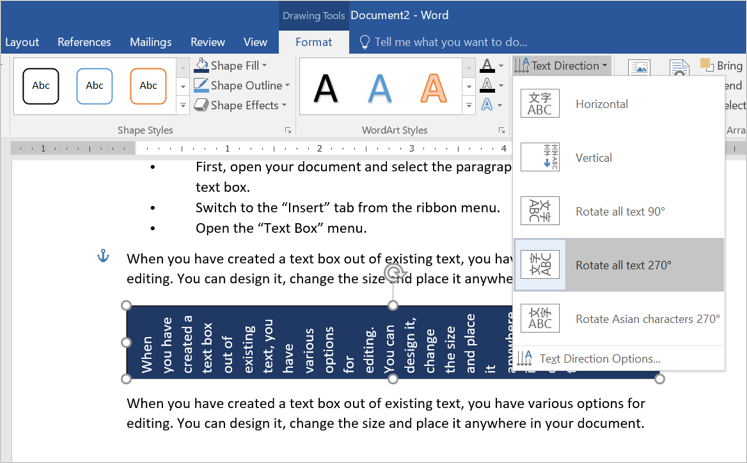
- What about if you want to rotate the text inside text box? This is also
very easy. Open the “Text Direction”. - Double click on the text box to open “Drawing Tools” menu. Click on the
“Text Direction” menu and select the entry, “Rotate all text 270°”. - The text is now set vertically in the text box and you can adjust the
format and position of the box.
- You can move the text box between paragraphs or columns by dragging the
box while keeping the left mouse button pressed.
Related: How to embed Excel table in Word document?
Deleting
Borders and Content
By
default, text boxes are displayed with borders, but you do not have to keep
them. You can easily remove the borders.
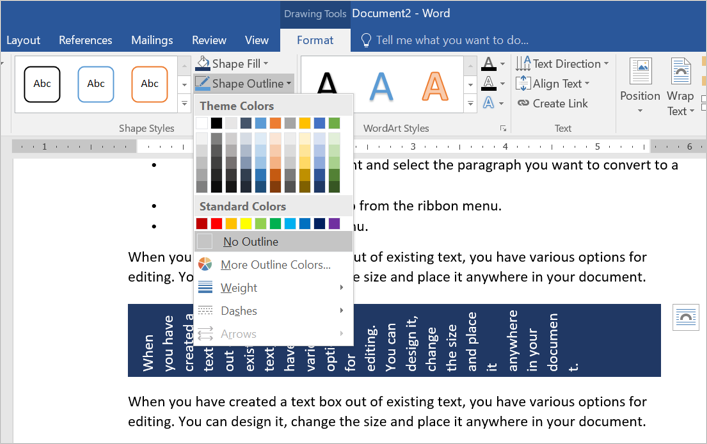
- Click on the text box to open the “Drawing Tools” and select “Shape Outline”
button under “Format” menu. - Now, select the entry “No Outline” to remove the borders from the box.
- You can also apply different colors, weight and styles to the border if
you want. - In order to delete a text box content, simply click inside the box and
edit or delete the content. Alternatively, select the text box by clicking on
the border and press delete to completely delete the box. - In this respect, text boxes behave in the same way as other drawing
objects.
Using Text Box Templates
The best and easy way to use text box in Word is to
select one of the predefined text box template. You can select from one of the good-looking
templates from the “Text Box” menu dropdown.

For example, you can use text box in a sidebar
format or choose one of the colorful formats. You can adjust the layout
positions to align the content beside the box.

You can also customize the text box and create a
custom template as a Quick Parts.
- First, select the box you want to use as templates.
- Go to “Insert > Text Box” and choose “Save Selection to Text Box Gallery” option.
- Fill up the details to create a new building block.
- You can view the saved template under “Text Box” menu dropdown from next time onwards.
Other Formatting Options
The “Formatting Tools” menu offers various
additional options for customizing your text box content. You can double click
on any text box to view the menus applicable for drawing object. Below are some
of the activities you can do with the formatting tools:
- Apply shape styles like fill, effects and borders.
- Create WordArt inside text box.
- Change text direction.
- Position and wrap the content around the text box.