
Your finger or a digital pen gives you freedom from a keypad when you’re working on a touch device. In addition to drawing, writing and highlighting, Ink Editor lets you use natural gestures like circling to select and crossing out to delete.

Note: Pictures in this article are from Word for Microsoft 365, but Ink Editor is also available in Word Mobile. Use it on Windows touch devices and devices that work with digital pens such as Microsoft Surface running Windows 10 TH2 or higher operating system.
Edit with natural gestures
If your device is touch-enabled, the Draw tab is turned on automatically. Otherwise, turn it on by selecting File > Options > Customize Ribbon > Draw.
-
Choose Draw and select the Ink Editor pen.

(If you don’t have a digital pen enabled device and have a touch device instead, choose Draw with Touch > Ink Editor pen.)
-
Do any of the following to edit your document using natural gestures:
Circle to select text
Draw a circle around the text you want to select. You can select words, sentences or paragraphs. Now you can apply formatting like font color, bold, or italic.
Cross out to delete text
Draw a line thorough the text to delete it. Delete large chunks of text by drawing a diagonal line or up-and-down squiggles.
Apply highlighting
Choose a highlighter pen from the Pens group and draw across text to highlight the text. To remove the highlight draw across the text again. You can either highlight freeform or select the highlighter and choose Snap to Text.
Join words
Draw a curve to join two words. Be sure both ends of the curve touch the words you want to join.
Split words
Draw a vertical line within a word to split it in two.
Insert a word
Draw a caret between two words to insert text. After you draw the caret, write the words you want to add. When you’re done writing, the text is inserted where you drew the caret.
Make a new line
Draw a backwards L shape. Text after the shape moves to a new line.

Notes:
-
If you wish to keep a record of your ink edits, select the Ink Editor pen > Track Changes before you start reviewing your document.
-

Select Ink using the Lasso tool
In Word, you can use the Lasso tool to select one or more drawn objects. Most of your tools are in the Pens gallery.
-
Go to Draw > Lasso.
-
Click and drag the lasso around the drawing you want to select.
-
Do any of the following
-
Press Delete to remove the selected drawing.
-
Use your mouse or arrow keys to move the drawing.
-
Right-click the selected drawing and select Format Ink. Change color, transparency, and line width options from the Format Ink pane.
-
Right-click the selected drawing and select caption, text wrap, or Alt text options.
-
Click and drag a sizing handle to stretch, shrink, or resize the drawing.
-


See Also
Draw and write with ink in Office
Languages supported for ink-to-text conversion
Tell us what you think about Ink Editor and suggest improvements
If you have suggestions for new actions or gestures you’d like to see in Ink Editor, let us know by providing us feedback. See How do I give feedback on Microsoft Office? for more information.
Need more help?
Sometimes, you can’t express yourself in words and numbers alone.
Sometimes, you need to express yourself through art. Luckily, Microsoft Word recognizes this need and gives users the option to draw on a document.
If you want a new way to showcase your ideas, give drawing a try! It’s easy, adds some flair to your document and might be a more effective way to communicate your thoughts.
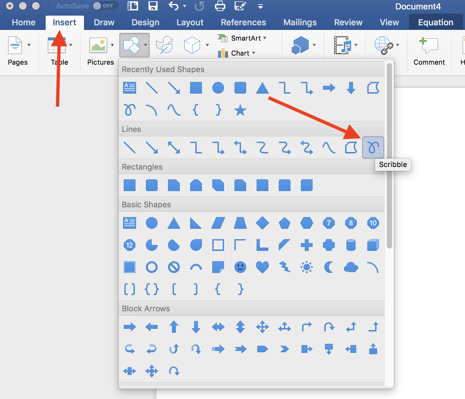
- In the ‘Insert tab,’ click the ‘Shapes’ button, and in the drop-down menu select ‘Scribble’
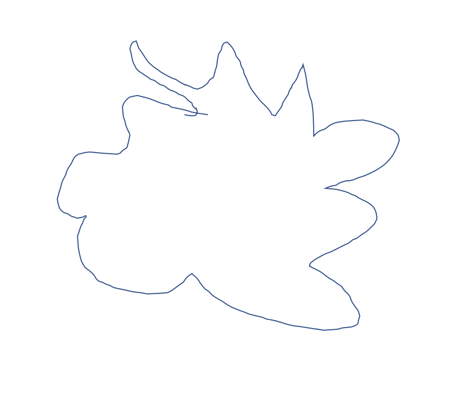
- Click and hold down your mouse to draw the shape you want
- Release the mouse when you’ve finished drawing
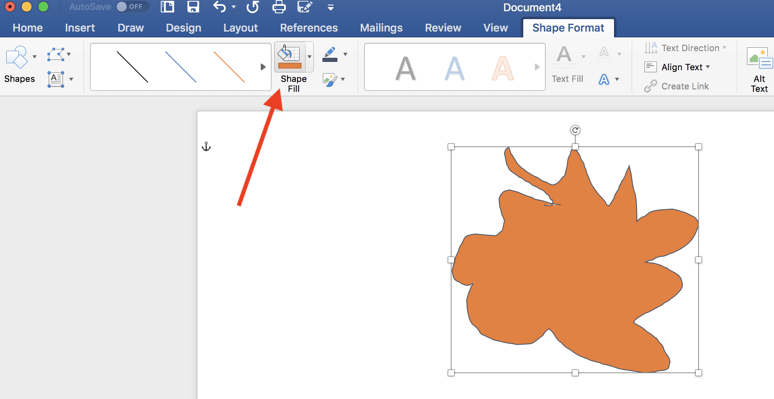
- Go to the ‘Shape Format’ tab to edit your shape

How to draw in Word
For all my visual learners in the house, follow along as I go through the drawing process step-by-step. I also include some formatting and editing tips and tricks to consider.
1. Click the ‘Shapes’ button and select ‘Scribble’
Open up your Microsoft Word document. It can be an empty document or it can be filled with an essay — you can draw over words if you want.
Navigate to the ‘Insert’ tab. From there, select ‘Shapes.’ A drop-down menu will appear. Under the ‘Lines’ options, select the very last button. It looks like a scribble and is aptly named ‘Scribble.’
2. Hold down your mouse to draw
Click and hold down your mouse to draw. Admittedly, this isn’t the most intuitive thing in the world and your drawings probably won’t look like they do on paper. That’s okay, you do get a chance to tweak and sculpt your drawing later — as well as adjust the line coloring, width, fill color, and more.
Here’s the strange shape I chose to draw (don’t ask me what it is):
3. Release the mouse
As soon as you release your mouse, the drawing will be finished. You’ll no longer be able to continue drawing, like you would if it were pen and paper.
If you released the mouse too early, you can delete the shape and start over. If you want to add another shape to complement the one you just drew, go ahead and click the ‘Scribble’ button and go through the drawing process once more.
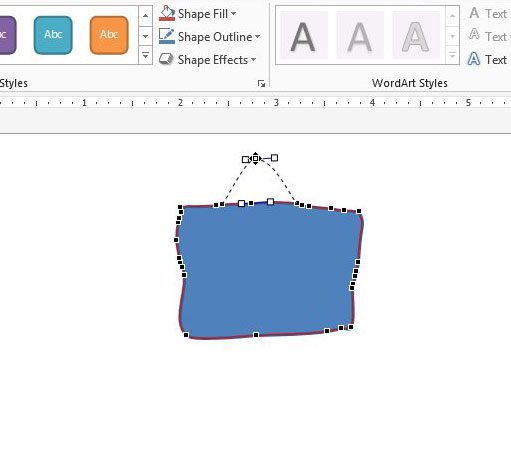
If you have the basic idea of the drawing done but it’s not exactly what you wanted, you can tweak the lines a bit. Double-click on the drawing. Click on the small ‘Edit Shape’ button in the top left corner. Then, select ‘Edit Points.’

A bunch of, you guessed it, points will appear on your drawing. Dragging a point out, in, or sideways effectively drags the line of the drawing with it. When you click off of the point, the drawing will be altered accordingly.
4. Edit your drawing
Double-click your drawing. A new tab will appear in the menu banner called ‘Shape Format.’ Now you can resize your shape by dragging the corners of the box around it. You can use the ‘Shape Fill’ button to add color inside your shape.
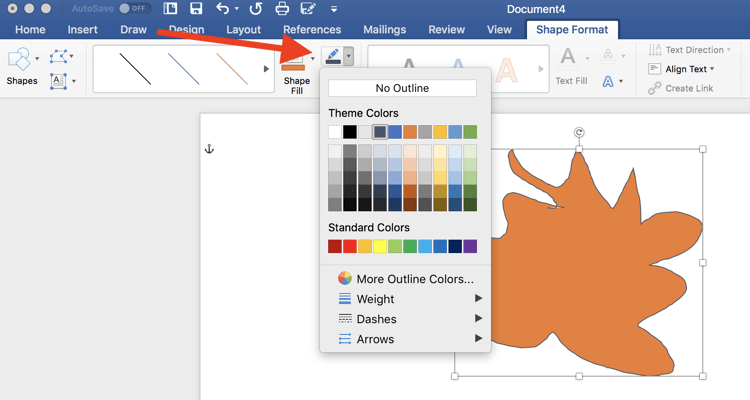
You can change the color of the outline by clicking the pencil button, located next to the ‘Shape Fill’ button. You can also choose to have ‘No Outline’ if you want.
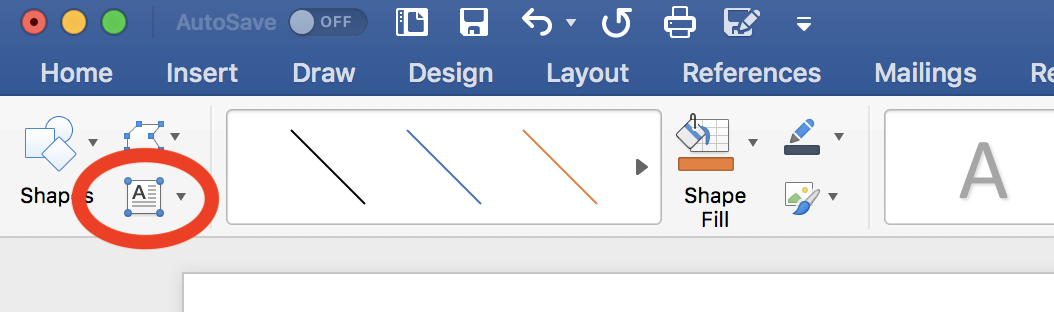
Another way to make your drawing stand out is by adding text to it. Click on the ‘Draw a Text Box’ icon located next to the ‘Shapes’ button.
Drag your mouse over where you want the text box to live inside your shape. You can play with all the text editing options and include hanging indents, if you want.
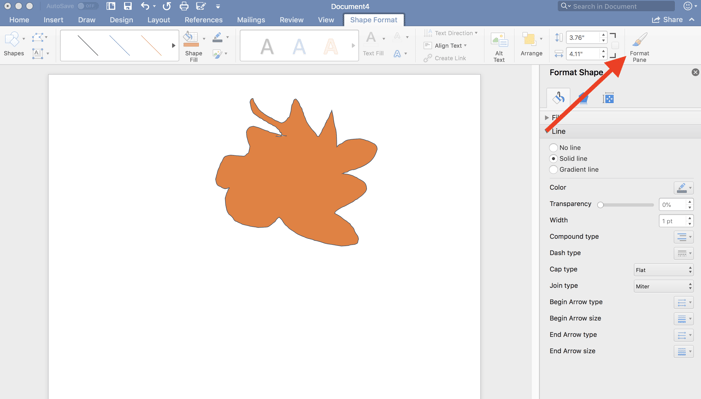
To unlock more editing options, select the ‘Format Pane’ on the far right. This will open a sidebar where you can edit the line type of the outline, play with color effects for the fill color, and more!
Once you’ve manipulated your shape into a final product that you’re happy with, go ahead and ‘Save As.’ Now you’re ready to share your creativity with the world!

Other things to know about drawing in Word
It will be very difficult for you to draw straight lines in Word. That’s simply due to the impossibility of dragging a mouse precisely. If that’s frustrating you to no end, there are work arounds.
How to draw a line in Word
If you want to have a very straight line, maybe the ‘Scribble’ tool is not the right one for you. Go back to the ‘Shapes’ drop-down menu under the ‘Insert’ tab and go through the different line options available to you. Select what’s best for your vision and go from there!
You’ll also notice that Word offers a variety of pre-made shapes to choose from. If you’re struggling to draw a star that doesn’t look like a sad blob, maybe try select the pre-made star shape. You can still play with the coloring, size, lines and more.
TIP: If you are dead-set on drawing freehand but Word isn’t working out for you, try drawing in Microsoft Paint. You can always insert that image into Word later on.
Want to put your artistry to the test in other ways? Discover how to make a brochure in Word.

Holly is the director of content marketing at G2. An avid reader and writer, Holly graduated from the University of Missouri with a dual major in Journalism and English. She firmly believes in the power of content and is constantly seeking ways to better engage and delight readers.
You can add drawings to a document to add some personalized flair.
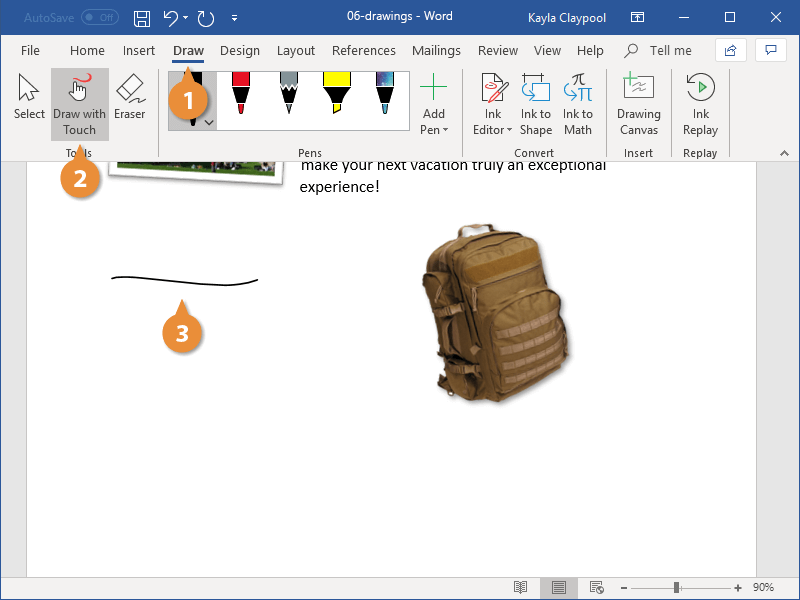
Create a Drawing
- Click the Draw tab.
- Click the Draw with Touch button.
- Draw a shape using the mouse or touchscreen.
The mouse cursor changes to a drawing tool, and you can draw a shape by clicking and drawing on the page. If your computer has a touch screen, you can also draw using your finger or stylus.
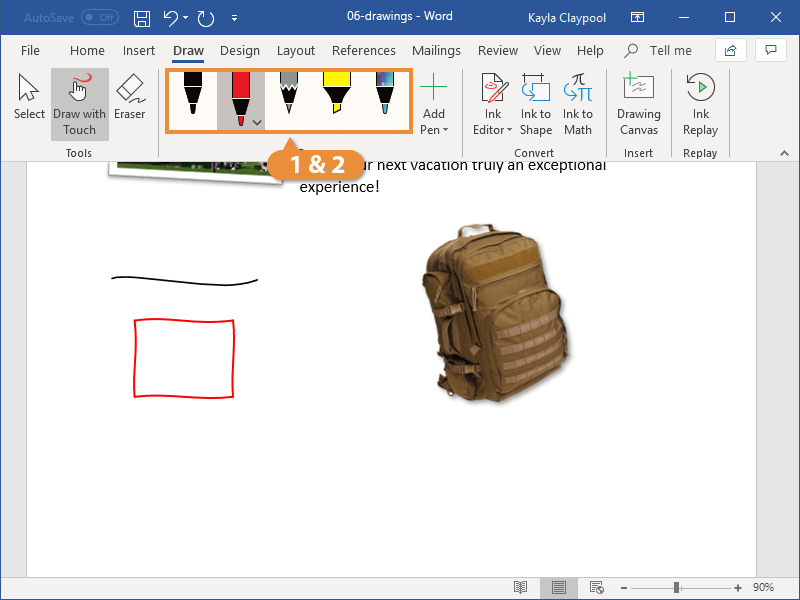
Change Pen Type
While drawing, you also have a number of pen effects to choose from in the Pens gallery.
- Select a pen from the gallery.
- Click the active pen in the gallery.

- Modify the pen’s properties, such as its thickness or color.
Now, when you draw, the line effect has changed.
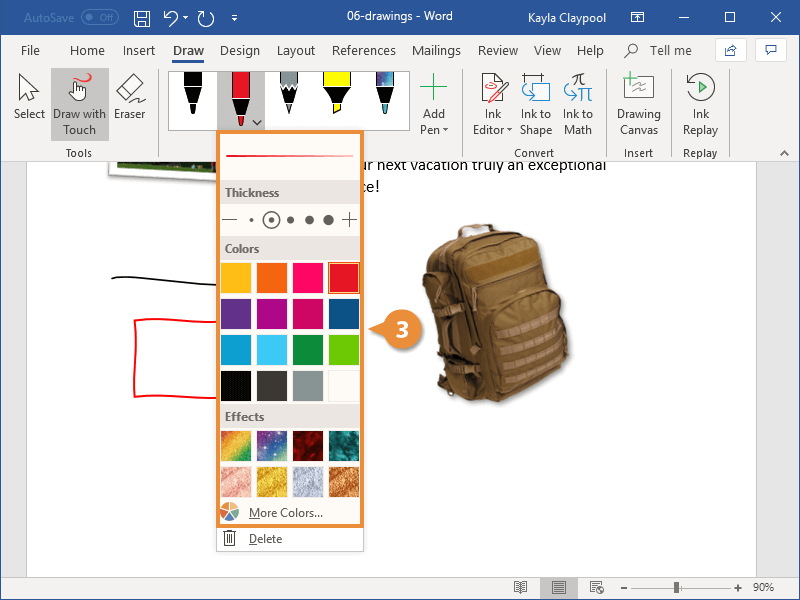
Now the next time you draw, the pen uses the new settings.
You can also create new pens by clicking the Add Pen button, with the same options you have when modifying a pen.
Erase a Drawing
If you’ve added a drawing that you don’t want to keep, you can erase drawings that you’ve made.
- Click the Eraser button.
- Click a drawing.
- Click the Eraser button again.
The drawing is erased. If you’re finished erasing drawings, click the Eraser button again to turn it off.
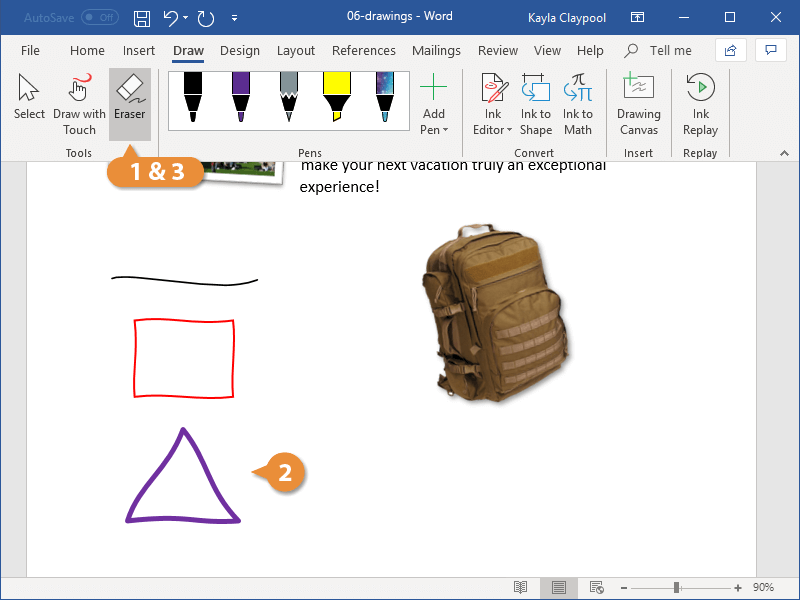
The eraser is turned off, and you can go back to editing your document or making more drawings.

FREE Quick Reference
Click to Download
Free to distribute with our compliments; we hope you will consider our paid training.
- You can draw freely in Microsoft Word using the «Draw» feature whether you have Word for Mac or Windows.
- You can also insert customizable shapes into your document, or draw using the «Scribble» feature.
- The process of drawing in Word varies based on which version of Word and device you’re using.
If you’ve ever wanted to express an idea visually rather than with words, you can do so in Microsoft Word with the «Draw» feature.
Word lets you create your own custom drawings using the mouse or touch tools. Or, if you’re not the best artist, you can insert pre-set shapes and illustrations that can be customized to your liking. Here’s how to do both in Word.
How to draw on Microsoft Word using touch tools or the mouse
The steps for creating a custom drawing in Word are different depending on what kind of device and what version of Word you have.
If you have a Windows computer with Microsoft 365 or Office 2019:
1. Open an existing document or create a blank document in Word.
2. The «Draw» tab may be already available on your ribbon if you have a touch-enabled device. If «Draw» is not an available tab on your ribbon, you’ll need to add it. To do so, click «File» at the top of your screen, then «Options,» and select «Customize Ribbon.» In the Customize screen, click on «Draw» to add it to the ribbon.
How to draw on Microsoft Word 5, Click on «Draw» under the customize the ribbon Main Tabs menu.
3. Once «Draw» is in the ribbon, click on it.
4. Click on whichever drawing tool you want to use. To change the size or color of the drawing tool, click on it again and select from the dropdown list of options.
5. Use your mouse or trackpad to begin drawing.
How to draw on Microsoft Word 6, Select whichever tool you want to draw freely on your Word document.
If you have a Windows computer with Office 2016 or Office 2013:
1. Open an existing document or create a blank document in Word.
2. In the Word ribbon, click the «Review» tab and choose «Start Inking.»
3. Under «Ink Tools,» select «Pens» and then choose «Pen» again.
4. Choose the ink color and pen thickness you want and begin drawing.
If you have a Mac computer with Microsoft 365 or Office 2019:
Unlike Windows computers, the Draw feature is only available on Macs if you have either Microsoft 365 or Office 2019.
1. Open an existing document or create a blank document in Word.
2. Click the «Draw» tab on the ribbon at the top of Word.
3. You’ll see a list of pens to choose from. Once you’ve clicked on one, click on it again to change the ink color or pen thickness.
4. You can also select «Draw with Trackpad» to use your finger to draw on your trackpad, instead of dragging your cursor to draw.
How to draw on Microsoft Word using default tools
1. Open an existing document or create a blank document in Word.
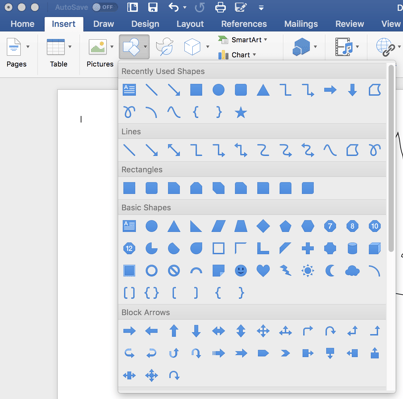
2. Click on the «Insert» tab, then select «Shapes.»
Ryan Ariano/Business Insider
3. You’ll be shown a long list of shapes you can add to your document. You can pick one of the pre-defined shapes, but if you want to draw, click on the icon that looks like a scribble under the «Lines» header. It’ll be the last option.
Ryan Ariano/Business Insider
4. Once you’ve selected the «Scribble» icon, your cursor will turn into a crosshair. Click and drag your mouse to draw with it, and release the mouse when you’re done. Your drawing will be turned into an image, and you can move or resize it like any other image.
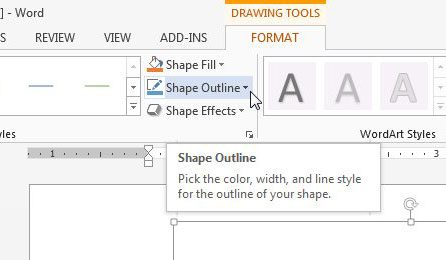
5. Once you’ve added the shape, you can refine it using the tools at the top of the screen. You can adjust the color in «Shape Fill,» adjust the outline of it in «Shape Outline,» or add «Shape Effects» like shadows to the shape.
Ryan Ariano/Business Insider
Related coverage from Tech Reference:
-
How to convert PDFs into Word files and edit them on a Mac computer
-
How to convert a Word document to a Google Doc on desktop or mobile
-
‘Can you get Microsoft Word on an iPad?’: Yes, you can — here’s how to download and set it up
-
How to use the find and replace feature in Microsoft Word on your Mac in 2 different ways
-
How to view, add, or edit alt text on an image in Microsoft Word to help users with screen readers
Ryan Ariano grew up in Baltimore when the Macintosh was cutting edge, lived in Los Angeles as Blackberries gave way to iPhones, and now lives in Jackson Hole where his life is held together by Bluetooth. He writes on a wide range of topics but especially loves nerding out across the tech spectrum.
Learn more about how our team of experts tests and reviews products at Insider here.
Read more
Read less
Do you need to add something to your Word 2013 document, but the only way that you can accurately express the information is through a drawing? Fortunately you can draw in Microsoft Word 2013 with the Scribble shape.
The scribble shape allows you to make a freehand drawing directly in your document. Word will then convert the drawing to a shape object, where you can adjust the appearance of the shape that you just drew.
Note that Word will create a new shape every time that you let go of your mouse with the scribble shape, so you will need to re-select it after letting go. You can also select one of the other shapes on the menu in our guide below, if your needs require a specific shape or straight lines.
This article will show you how to draw in Word and provide you with a new way to express your ideas and information that might have otherwise required you to use a different program.
How to Make Drawings in Word
- Click Insert.
- Click the Shapes button, then click the Scribble icon in the Lines section.
- Click and hold down the mouse button, then move the mouse cursor to draw.
- Click the Format tab under Drawing Tools to make any changes to your drawing.
Our article continues below with additional information on how to draw on Word, including pictures of these steps.
How to Make a Freehand Drawing in Microsoft Word 2013 (Guide with Pictures)
The steps in this article will show you how to do freehand drawing in a Microsoft Word document. You will be selecting the “Scribble” shape, which gives you complete control over what is output on your screen. You can also draw freely anywhere in the document, even on top of text that has already been entered.
Please note that drawing in Microsoft Word can be very difficult. If you find that you are having trouble achieving your desired result, then you may have more luck with Microsoft Paint, or with a more advanced tool like Adobe Photoshop.
Step 1: Open a document in Microsoft Word 2013.
Step 2: Click the Insert tab at the top of the window.

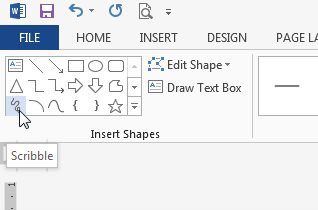
Step 3: Click the Shapes button in the Illustrations section of the navigational ribbon, then click the Scribble button in the Lines section.

Step 4: Use your mouse to draw on the canvas.
The drawing shape will be completed once you let go of the mouse, which will bring up a new Drawing Tools option. This menu will have options for ways to change the color of the drawing, or to change the fill color.
If you need to draw more, then you can re-click the Scribble shape at the left side of the navigational ribbon, as in the image below.
How to Edit the Shape of an Existing Drawing in Word
This section will show you a way to change the shape of your drawing. This method is a little cumbersome, but can be effective if you only need to make minor adjustments to your drawing.
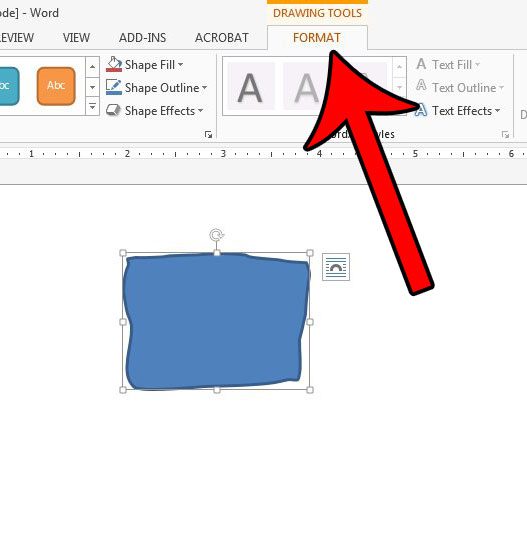
Step 1: Select your drawing, then click the Format tab under Drawing Tools.
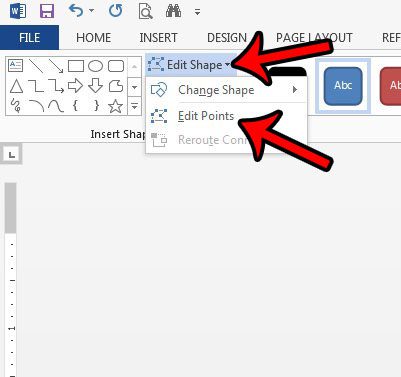
Step 2: Click the Edit Shape button in the Insert Shapes section of the ribbon, then click the Edit Points option.
Step 3: Click on one of the points on your drawing, then drag the point to adjust the shape.
Making drawings in Word is a helpful option in the application when you need to include a simple drawing in your document and either don’t want to use a dedicated image-editing application or don’t have one at your disposal.
I use the Word drawing tool mainly when I need to make something basic, or when the quality of the drawing isn’t terribly important for the document. I’m also a terrible artist (as indicated by my drawings in the guide above) so I haven’t spent a lot of time getting good with Word’s drawing tools.
Note that drawing in Microsoft Word can be somewhat difficult, even frustrating at times. If you find that the drawing capabilities of Word are limited, then you might have better luck drawing in Microsoft Paint and inserting the saved Paint drawing into your document. This article will show you how to insert a picture in Word 2013.
More Information on How to Draw in Word
While our article above focuses specifically on how to draw on Word using the “scribble” tool, there are other ways that you can draw in your document as well.
When you go to the “Shapes” tool from the Insert tab there are a lot of different shapes that you can use. For example, if you wanted to draw a line, a square, or a circle, you could select that shape instead. This can be a preferable option if you are struggling to draw a freehand shape, as it can be very difficult to do with a mouse.
You may want to consider getting a USB drawing tablet if you are going to be doing a lot of drawings in Microsoft Word. It can be much easier to use that type of tool, as it allows you to draw in the same manner that you would when drawing on paper.
Where is the Draw Tool in Word?
Finding the Draw tool can be a little tricky, simply because there isn’t a tool that is directly called “Draw” by default. You need to use one of the shape tools, specifically the “scribble” tool that is found on the Shapes menu.
Alternatively, however, you could go to File > Options > Customize Ribbon, then check the box to the left of Draw. This is going to add a new tab to the ribbon where you can find some drawing tools and options.
How Do I Use the Pen Tool in Word?
As we mentioned in the section above, you will need to enable the Drawing tab in the ribbon by opening the Word Optiones menu, then checking the box to the left of Draw.
Once you have the Draw tab in your ribbon you will find an assortment of different drawing tools, including some pen options. While you can use these with a mouse, many people find them easier to use with a touchscreen tablet or laptop, or a drawing tablet accessory.
How Do I Use Handwriting in Word?
You can use handwriting in Microsoft Word with either the scribble tool, then Pen tool on the Draw tab, or with a connected tablet.
Alternatively you could use on of the script fonts found in Word by default, or by downloading a script font from a resource like Google Fonts.
How Do You Get Word Art on Microsoft Word?
The Word Art option is located on the Insert tab, at the right side, in the Text section of the ribbon.
This is going to add a text box with the WordArt style that you selected. You can then customize the appearance of the Word Art by selecting the text in the text box, then choosing a formatting option from the Format Shape tab in the ribbon.
See also
- How to insert a check mark in Microsoft Word
- How to do small caps in Microsoft Word
- How to center text in Microsoft Word
- How to merge cells in Microsoft Word tables
- How to insert a square root symbol in Microsoft Word

Matthew Burleigh has been writing tech tutorials since 2008. His writing has appeared on dozens of different websites and been read over 50 million times.
After receiving his Bachelor’s and Master’s degrees in Computer Science he spent several years working in IT management for small businesses. However, he now works full time writing content online and creating websites.
His main writing topics include iPhones, Microsoft Office, Google Apps, Android, and Photoshop, but he has also written about many other tech topics as well.
Read his full bio here.