
You can add shapes, such as boxes, circles, and arrows, to your documents, email messages, slide shows, and spreadsheets. To add a shape, click Insert, click Shapes, select a shape, and then click and drag to draw the shape.
After you add one or more shapes, you can add text, bullets, and numbering to them, and you can change their fill, outline, and other effects on the Format tab.
Tip: You can add individual shapes to a chart, or add shapes on top of a SmartArt graphic to customize the chart or the graphic.
Add a shape in Excel, Outlook, Word, or PowerPoint
-
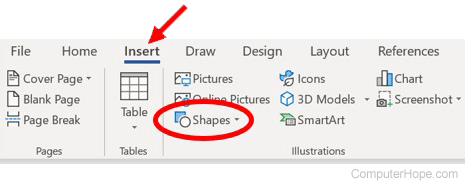
On the Insert tab, click Shapes.

-
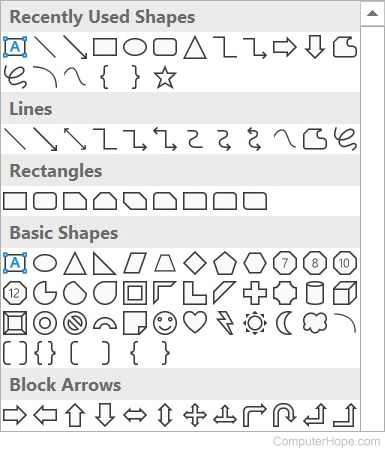
Click the shape you want, click anywhere in the workspace, and then drag to place the shape.
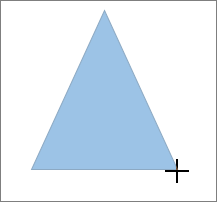
To create a perfect square or circle (or constrain the dimensions of other shapes), press and hold Shift while you drag.


To follow these steps, you need to open or create a report. To do that, on the Report tab, click Recent to open an existing report, or click More Reports to select a report from the list in the Reports dialog box or create a new report.
-
In the open report, on the Design tab, click Shapes.
-
Click the shape you want, click anywhere in the workspace, and then drag to place the shape.
To create a perfect square or circle (or constrain the dimensions of other shapes), press and hold Shift while you drag.
Insert a shape, or click an existing shape, and then enter text.
-
Right-click the shape and click Add Text or Edit Text, or just start typing.
Note: The text that you add becomes part of the shape — if you rotate or flip the shape, the text rotates or flips also.
-
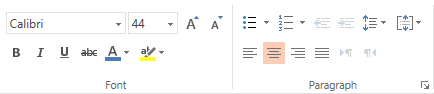
To format and align your text, click the Home tab, and then choose options from the Font, Paragraph, or Alignment groups, depending on the program you’re using and what kind of formatting you want to apply. (Text formatting options are limited in Project.)
Note: These commands aren’t available in Project.
-
Click the shape you want to change.
To change multiple shapes, press Ctrl while you click the shapes that you want to change.
-
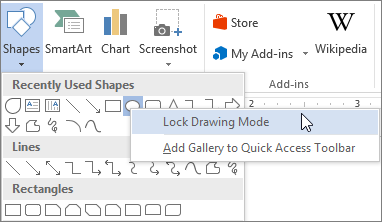
On the Format tab, in the Insert Shapes group, click Edit Shape
, point to Change Shape, and then click the new shape that you want.
 , point to Change Shape, and then click the new shape that you want.
If you need to add the same shape repeatedly, you can do so quickly by using Lock Drawing Mode.
Note: Instead of adding individual shapes to create a drawing, you might want to Choose a SmartArt graphic. In a SmartArt graphic, the arrangement of the shapes and the font size in those shapes is updated automatically as you add or remove shapes and edit your text.
-
On the Insert tab, click Shapes.
-
Right-click the shape you want to add, and then click Lock Drawing Mode.
-
Click anywhere in the workspace, and then drag to place the shape.
-
Repeat step 3 to add the shape as many times as you like.
Tip: To create a perfect square or circle (or constrain the dimensions of other shapes), press and hold Shift while you drag.
-
After you add all the shapes you want, press Esc to turn off Lock Drawing Mode.
Note: This feature isn’t available in Project.
-
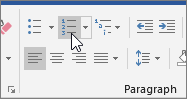
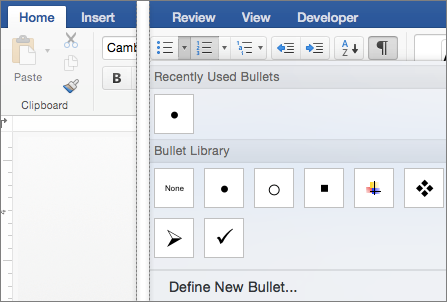
Select the text in the shape that you want to add bullets or numbering to.
-
Select the Home tab on the ribbon, and in the Paragraph group, select Bullets or Numbering.
You can find different bullet styles and numbering formats by clicking the down arrow next to Bullets or Numbering.
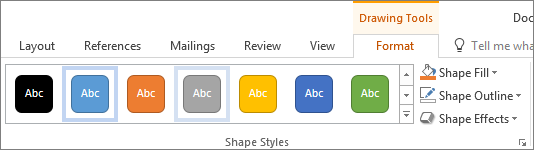
Quick Styles let you apply a style to your shape with one click. You’ll find the styles in the Quick Style gallery. When you rest your pointer over a Quick Style thumbnail, you can see how the style affects your shape.
-
Click the shape you want to change.
-
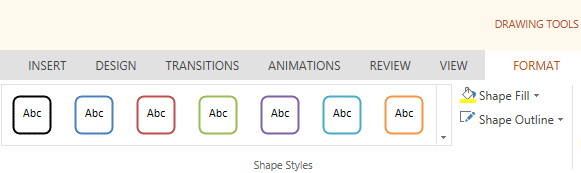
Select the Format tab, and in the Shape Styles group, select the Quick Style you want to use.
To see more Quick Styles, click the More button
.
 .
.Click the shape that you want to delete, and then press Delete. To delete multiple shapes, press Ctrl while you click the shapes that you want to delete, and then press Delete.
See Also
Draw or delete a line, connector, or freeform shape
Rotate a text box, shape, WordArt, or picture
Change the colors in a text box or shape
Draw a decorative line in Word or Outlook
Choose a SmartArt graphic
Create a chart from start to finish
Add clip art to a file
Draw and sketch notes on a page
After adding a shape to a document, you can modify it by adding connector lines, changing the style, adding a mirror image, changing the color, and applying a variety of other effects, such as shadows, glow, and 3-D.
Add a shape
-
On the Insert tab, click Shapes.
-
Click the shape you want, click anywhere in the workspace, and then drag to place the shape.

-
Right-click the shape and click Add Text or Edit Text, or just click inside the shape and start typing .
Note: The text that you add becomes part of the shape — if you rotate or flip the shape, the text rotates or flips also.
-
To format and align your text, click the Home tab, and then choose the available formatting options. For example, you can change font color, styles, sizes, change alignment or indentation, change the text orientation, to name a few.
-
Click the shape you want to change.
To change multiple shapes, press
while you click the shapes you want to change. -
On the Shape Format tab, click
, point to Change Shape, and click the new that you want.
 while you click the shapes you want to change.
 , point to Change Shape, and click the new that you want.
-
Select the shape you want to copy.
-
Press the option key and drag the shape anywhere you want. Release the mouse, and a copy of the shape is created. You can drag and release the shape as many times as necessary.
Note: Adding lists is not available in Excel 2016 for Mac.
-
Select the text in the shape that you want to add bullets or numbering to.
-
On the Home tab, click the arrow next to Bullets or Numbering.
-
Press Enter every time you want a new bullet or number, or press Enter twice to end the list.
-
Click the shape you want to change.
-
Click the Shape Format tab, and in the style gallery, click the style you want.
To see more styles, click
below the style gallery.
 below the style gallery.
-
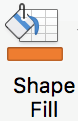
Click the shape you want to change.
-
Click the Shape Format tab, and click
(Shape Fill icon). -
Do one of the following:
-
To use a different fill color, under Theme Colors or Standard Colors, click the color that you want to use.
-
To remove the color from the selected chart element, click No Fill.
-
To use a fill color that is not available under Theme Colors or Standard Colors, click More Fill Colors. In the Colors dialog box, use the available options to pick a color, and then click OK.
-
To fill the shape with a picture, click Picture. In the Insert Picture dialog box, click the picture that you want to use, and then click Insert.
-
To use a gradient effect for the selected fill color, click Gradient, and then click the gradient style that you want to use.
For additional gradient styles, click More Gradients, and then in the Format Chart Area pane, under Fill, click the gradient options that you want to use.
-
To use a texture fill, click Texture, and then click the texture that you want to use.
-
 (Shape Fill icon).
-
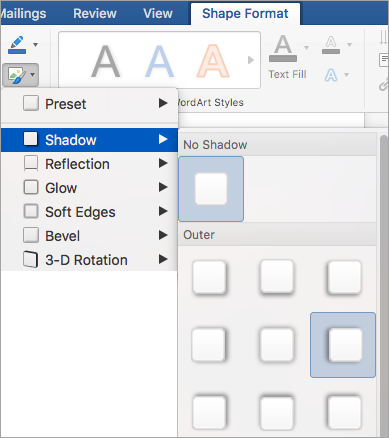
Click your shape, and then click the Shape Format tab.
-
In the Shape Styles group, click Shape Effects, point to an effect category, and then click the effect that you want.
-
On the Shape Format tab, click Format Pane.
-
In the Format Shape pane, click the Fill & Line tab, and then click either Fill or Line.
-
Drag the Transparency slider to achieve the effect you want.


Click the shape that you want to delete, and then press Delete. To delete multiple shapes, press Command while you click the shapes that you want to delete, and then press Delete.
See also
Change the size of an object
Crop a picture
Move, rotate, or group a picture, text box, or other object
Align objects in Word for Mac
Group or ungroup objects
You can add shapes, such as boxes, circles, and arrows, to your workbooks and presentations. (Word for the web doesn’t support shapes.) To add a shape, select Insert on the ribbon, select Shapes, and then choose a shape.
After you add a shape, you can move it and resize it; add text, bullets, or numbering; and you can change the fill color or outline.
-
On the Insert tab, select Shapes.
-
Select the shape you want from the drop-down gallery.
A default-sized shape is immediately inserted in the middle of the visible page.
-
Select a sizing handle on the perimeter of the shape and drag inward or outward to change the size of the shape.
To create a perfect square or circle (or constrain the dimensions of other shapes), press and hold Shift while you drag.
-
To move the shape, point the mouse at it until the pointer turns into a four-headed arrow. Then click and drag to move the shape where you want it.
When a shape is selected in your document, a Shape tab appears on the toolbar ribbon. It has buttons for things you can do with the shape such as adding a fill color or outline, or choosing a predefined shape style.
Note: If you have the Simplified Ribbon turned off, the tab name in step #4 is Format. For more information on the Simplified Ribbon see The new look of Microsoft 365.

Insert a shape, or click an existing shape, and then enter text, as follows:
-
Right-click the shape and select Edit Text.
A blinking cursor appears in the center of the shape.
-
Type the text you want to add to the shape.
-
To format and align your text, select the Home tab, and then choose options from the Font, Paragraph, or Alignment groups.
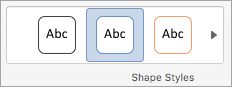
Quick Styles let you apply a style to your shape with one click. You’ll find the styles in the Shape gallery.
-
Select the shape you want to change.
-
On the Shape tab (or the Format tab if you have the Simplified Ribbon turned off), open the Shape Style gallery and select the Quick Style you want to use.
Select the down arrow on the end of the gallery to open it and see the complete list of options:
You can pause the mouse pointer over an option in the gallery to see a short description of it.

-
Select the shape you want to change.
-
On the Shape tab (or the Format tab if you have the Simplified Ribbon turned off), select the down arrow next to Fill to open the gallery of fill colors.
-
Select a color.
-
To make the shape transparent, select No Fill at the bottom of the color gallery.
-
Select the shape you want to change.
-
On the Shape tab, (or the Format if you’re still using the classic ribbon) select the down arrow next to Outline to open the gallery of outline colors.
-
Select a color.
-
At the bottom of the gallery there are also options for the thickness (Weight) of the outline, and whether the outline is solid, dotted, or a dashed line. Point at Weight or Dashes to see a pop-out list of options.
Click the shape that you want to delete, and then press the Delete key. To delete multiple shapes, press Ctrl while you select the shapes that you want to delete, and then press Delete.
Click in your document where you want to create the drawing. On the Insert tab, in the Illustrations group, click Shapes.
Add a drawing to a document
- Insert a shape.
- Change a shape.
- Add text to a shape.
- Group selected shapes.
- Draw in the document.
- Adjust the size of the shapes.
Contents
- 1 Can you draw your own shape in Word?
- 2 How do I draw a shape around text in Word?
- 3 How do you draw and fill a shape in Word?
- 4 Can you freehand draw in Word?
- 5 Why can I not insert a shape in Word?
- 6 How do you make a Venn diagram on Microsoft Word?
- 7 Where is the draw tool in Word?
- 8 How do I use drawing tools in Word?
- 9 How do I use the pen in Word 2016?
- 10 Where is the drawing toolbar in Word 2016?
- 11 How do you draw shapes on a computer?
- 12 How do you put a circle around a letter?
- 13 How do you Format shapes in Word?
- 14 What is shapes in MS Word?
- 15 How do you make a Venn diagram on Word 2020?
- 16 How do you draw a Venn diagram?
- 17 What is a Venn diagram template?
- 18 Where is the ribbon in Word?
- 19 Where is the Drawing toolbar in Word 2013?
Can you draw your own shape in Word?
Draw a freeform shape
On the Insert tab, in the Illustrations group, click Shapes. Click anywhere in the document, and then drag to draw.To finish drawing the shape, do one of the following: To leave the shape open, double-click at any time.
How do I draw a shape around text in Word?
Draw an oval or circle
- On the Insert tab, click Shapes.
- Under Basic Shapes, click Oval.
- Click where you want the oval to start, and drag to draw the shape.
- To draw a circle, press Shift while you drag. Notes: You can change the look of your circle or curve by adding a shape fill or effect or changing the border.
How do you draw and fill a shape in Word?
To draw using the Scribble tool, click Insert > Shapes > Scribble.
Now the drawing can be edited by using the tools in the Shape Format ribbon.
- Change the Fill Color of Your Drawing.
- Change the Outline Color of Your Drawing in Word.
- Fill Your Drawing with a Picture.
Can you freehand draw in Word?
Yes, you can freehand draw whatever you want
When you can’t find the right clip art for your Word document, draw your own. Microsoft Word contains a variety of shapes that can be used alone or in combination to create stunning graphics.
Why can I not insert a shape in Word?
As the issue occurs with specific document, you may recreate the document then save it in a different name. Then reopen the new document and check if the ‘Insert > Shapes’ option is enabled. To create an instance of document, click on the ‘View’ tab > click on ‘New Window’ under ‘Window’ group.
How do you make a Venn diagram on Microsoft Word?
How to make a Venn diagram using SmartArt graphics in MS Word
- In Word, go to Insert > Illustrations > SmartArt.
- Go to Relationship > Basic Venn.
- Double-click “Text” to modify the text or use the text pane.
- Select the graphic, and click “Add Shape” to make your Venn diagram larger.
- Once finished, save the document.
Where is the draw tool in Word?
Adding the Draw tab to the Ribbon
- Right-click the Ribbon and select Customize the Ribbon.
- Check the box next to Draw, then click OK.
- The Draw tab will now be available in the Ribbon.
How do I use drawing tools in Word?
Click in your document where you want to create the drawing. On the Insert tab, in the Illustrations group, click Shapes.
Add a drawing to a document
- Insert a shape.
- Change a shape.
- Add text to a shape.
- Group selected shapes.
- Draw in the document.
- Adjust the size of the shapes.
How do I use the pen in Word 2016?
To use inking in Word 2016, go to the Review tab and click on the Start inking icon. When you do that, Word will display a Pens tab, similar to the one shown in the previous figure. You can use this tab to choose ink color, pen thickness, etc. Inking is a little bit more straightforward in Word Mobile.
Where is the drawing toolbar in Word 2016?
Click View > Toolbars > Drawing. The Drawing toolbar is displayed or hidden. The Drawing toolbar contains a collection of icon buttons that allows the user to draw shapes and images in the document.
How do you draw shapes on a computer?
To create a perfect square or circle, press and hold the Shift key while you drag. To resize the shape, drag one of the control handles on the corners or sides.
Sometimes the best way to get your point across is to draw it.
- Select Insert > Shapes.
- Select the shape you want to add.
- Click and drag to draw it.
How do you put a circle around a letter?
Follow these steps:
- Position the insertion point where you want the circled text.
- Display the Insert tab of the ribbon.
- In the Symbols group, click the Symbol tool and then choose More Symbols.
- Using the Font drop-down list, choose Arial Unicode MS.
- Make sure that the From drop-down list is set to Unicode (Hex).
How do you Format shapes in Word?
Under Text Box Tools, on the Format tab, in the Text Box Styles group, click Change Shape, and then click the shape that you want.
What is shapes in MS Word?
More Information. A SHAPE field is the Drawing Canvas and is similar to a placeholder, which is automatically created for any drawn picture. Drawn pictures (also called vector drawings) are created from lines, curves, rectangles, and other objects. AutoShapes are drawn pictures.
How do you make a Venn diagram on Word 2020?
Create a Venn diagram
- On the Insert tab, in the Illustrations group, click SmartArt.
- In the Choose a SmartArt Graphic gallery, click Relationship, click a Venn diagram layout (such as Basic Venn), and then click OK.
How do you draw a Venn diagram?
How to Make a Venn Diagram
- The first step to creating a Venn diagram is deciding what to compare. Place a descriptive title at the top of the page.
- Create the diagram. Make a circle for each of the subjects.
- Label each circle.
- Enter the differences.
- Enter the similarities.
What is a Venn diagram template?
Originally created by John Venn in 1880, Venn diagrams were invented as a way of picturing relationships between different groups of information.A Venn diagram uses overlapping circles or other shapes to illustrate the logical relationships between two or more sets of items.
Where is the ribbon in Word?
The Ribbon is a user interface element which was introduced by Microsoft in Microsoft Office 2007. It is located below the Quick Access Toolbar and the Title Bar. It comprises seven tabs; Home, Insert, Page layout, References, Mailing, Review and View. Each tab has specific groups of related commands.
Where is the Drawing toolbar in Word 2013?
Click Insert. Click the Shapes button, then click the Scribble icon in the Lines section. Click and hold down the mouse button, then move the mouse cursor to draw. Click the Format tab under Drawing Tools to make any changes to your drawing.
Call them “doodles,” “sketchnotes,” or “visual notetaking.” Whatever the name, simple hand drawings have become more popular than ever. They’re as welcome in the classroom as they are in the boardroom.


Why? Maybe it’s because they’re quick to create. You don’t have to be an artist to draw stick figures. Yet they communicate everything from how viruses replicate to how a manufacturing supply chain works. They’re a good and unique way to enhance your Word documents.
Hand drawings also allow you to express your personality and stand out from your competition. And because you’re creating your own drawings, you don’t have to worry about using copyrighted materials.


Freeform Word drawings also help you better understand and assimilate the concepts you’re trying to convey. That’s because you’re forced to simplify the concepts and come up with visual metaphors for them.
You may be wondering «How do I draw on Microsoft Word?» While Word might not be the first drawing tool that comes to mind, there are drawing tools in Word that you can learn to use.
This article shows you, step-by-step, how to draw in Word so that you, too, can harness the power of simplified drawings in your projects. As you’ll see, you don’t have to be a professional artist or to use expensive tools and software because you can draw right within Word.
Let’s get started!
(Note: In the examples below, I’m using Microsoft Word for Mac version 16. If you’re using a different version, then the interface may be different.)
How to Draw in Word: Freehand With the Shapes Freeform Tool
There are several ways for you to draw by hand on your Word document. These include the Freeform and Scribble tools in the Shape tab. Both these two tools are very similar because they let you draw in Word using your mouse or trackpad.
1. Use the Freeform or Scribble Tool
You can draw objects and handwritten lines with either one. One difference is that the Freeform tool lets you draw perfectly straight lines, while the Scribble tool draws exactly what you draw.
To draw with Freeform, click on the Insert tab.


Click Shapes > Freeform.


To draw, click, hold, and drag the cursor on the page. Word stops drawing when you either bring the cursor back to your point of origin or double-click on the page. In this example, I’ll draw a check mark.


To draw perfectly straight lines with the Freeform tool, click on your starting point. Then, release the mouse, move the cursor to the end of the line, click there, and repeat until you finish your drawing. Double-click at your end-point. Using this technique, my check mark looks like this:


Notice that the lines are perfectly straight, even though my hands were unsteady. That’s because the Freeform tool draws straight lines between two consecutive points where you click on your mouse.
Don’t worry that the text runs straight through the drawing. We can fix this with text wrap because Word treats the drawing as an image.
2. Format the Text Wrapping Around Your Drawing
Click on the Shape Format tab. Then click Arrange > Wrap Text. Select one of the text wrapping options. In this case, let’s select Square.


Now the text wraps around the drawing.


Microsoft Word also lets you wrap text around an irregularly shaped drawing. Go to Shape Format > Arrange > Wrap Text > Edit Wrap Boundary.


Click and drag the boundary points to change the boundary.


By doing this, you’ve got more granular control over how text wraps around your drawing.


3. Refine Your Drawing
Refine the drawing you’ve made. Click on your drawing to select it. Under the Shape Format tab, click Edit Shape > Edit Points.


Click and drag any of the points to change the drawing as you wish.
.jpeg)
.jpeg)
.jpeg)
You can also use the Shape Format tab to edit other aspects of your drawing. Change its color, weight, and in the case of closed shapes, add a filling color.
To change the look of your drawing, from the Shape Format tab, expand the Theme Styles and Presets selection. Choose one of the styles you want to use.


You’ll have more choices by going to Shape Outline. From there, select a color.
To change the weight or thickness of your drawing, go to Shape Format > Shape Outline > Weight.


You can also apply special effects to your drawing. On the Shape Format tab, go to Shape Effects, then choose the effect you want to apply.
-A.jpeg)
-A.jpeg)
-A.jpeg)
Here’s the check mark now, after I added a shadow.


How to Draw in Word: Using the Scribble Tool
The Scribble tool is like the Freeform tool. The only difference I’ve seen is that the Scribble tool doesn’t draw straight lines between clicks. To draw, you’ve got to click, hold, and drag the mouse. If you release the mouse button, Word will stop drawing.
To draw using the Scribble tool, click Insert > Shapes > Scribble.


Click, hold, and drag the mouse to draw the shape. If you bring the cursor back to your point of origin, Word closes and fills the shape. In this case, let’s draw a cloud.


Now the drawing can be edited by using the tools in the Shape Format ribbon.
1. Change the Fill Color of Your Drawing
For example, to change the fill color, click on the drawing then on the Shape Fill button. Choose the color you wish to use.


2. Change the Outline Color of Your Drawing in Word
To change the shape’s outline color, click on the drawing, click Shape Outline, then choose the outline color or style you desire.


For this example, I selected No Outline.


3. Fill Your Drawing with a Picture
You could even fill the drawing with an image. Go to Shape Fill > Picture.


Find the image in your computer. Select the image file, then click Insert.


The resulting shape is pretty neat!


Follow the steps described earlier to change the text wrapping around your drawing, as well as its other attributes.
How to Draw With Microsoft Word Pen Tools
Either Freeform or Scribble are adequate tools for creating simple Word drawings that have only a single element, such as a single line or shape.
But what if you want to draw something slightly more complicated, such as a stick figure? It’s made up of a circle for the head and several lines for the arms, body, and legs.
1. Draw With the Microsoft Word Pen
In this case, it would be better to use Word’s Draw tools. To access them, click on the Draw tab.


As you can see, the Draw tab gives you some ink types:
- Pen
- Pencil
- Highlighter
Each ink type gives your drawing a different look. To select an ink, click the Draw button on the ribbon, and select either a Pen, Pencil, or Highlighter.
Click, hold, and drag to draw with your mouse. Notice that even when you release the mouse, Word stays in drawing mode. This means you can keep adding elements to your drawing. When you’re done, click the Draw button again.


To change the color and thickness of any tool, click on the drop-down menu, and make your selections. A total of 16 standard colors are available, and you can access many more by clicking on More Colors….
.jpeg)
.jpeg)
.jpeg)
Plus, for the pen ink, there are eight special effects:
- Rainbow
- Galaxy
- Lava
- Ocean
- Rose Gold
- Gold
- Silver
- Bronze


If your drawing has several parts, you’ll have to group them so that Word will treat them as one object. Click, press, and hold the Shift key as you click all the elements of your drawing. When you’re done, click Shape Format > Arrange > Group > Group.


Now you can treat the drawing as a single object. (Note: Once drawing elements are grouped, they can’t be ungrouped anymore.)
Click on the drawing, Shape Format. Then use the tools in the Shape Format tab. (Note that not all the features on the Shape Format ribbon can be applied to your drawing.) From here, we’ll change the text wrap setting of the drawing.
Go to the Shape Format tab. Click Wrap Text. then select a wrap setting.


I chose the Top and Bottom text wrap.


2. Erase Your Drawing
The Draw tab provides an Eraser tool so you can erase mistakes. First, format the tool by clicking on the drop-down arrow. You’ve got three choices:
- Stroke Eraser. Erases an entire stroke when you click on it.
- Small Eraser. Erases a small area when you click, hold, and drag your mouse.
- Medium Eraser. Erases a larger area when you click, hold, and drag your mouse.


If you selected the Stroke Eraser, click on any line to delete it. If you selected either the Small or Medium Eraser, click, hold, and drag your mouse over any areas you want to delete.
3. Draw With the Trackpad
Draw in Microsoft Word without a mouse by using the Draw with Trackpad tool.
First, choose the ink type you want to use. Then click the toggle to switch on Draw with Trackpad.


A window appears on top of your document. Use two fingers on your trackpad to move it anywhere on your document.
Pressing the Command key, move one finger on your trackpad to where you wish to draw. Pause, then draw with your finger. You don’t have to press down on the trackpad to draw.


How to Draw … Without Drawing!
So far, you’ve learned how to create your own images in Word by hand-drawing with either the mouse or the trackpad.
But what if you really can’t draw? Not even stick figures?
You can still “draw” by using the pre-made lines and shapes in Word. If you think about it, most objects can be broken down into shapes and lines. By putting these together, you can create your very own sketches — without drawing by hand.
Read on to see what I mean.
1. Draw With Lines in Microsoft Word
The simplest images are made up of lines. In this example, we’ll make a trellis, which is a grid like what you’d use to play Tic-Tac-Toe.
Go to Insert > Shapes > Line. This tool makes a simple straight line with a starting point and an endpoint.


Click on the page. That’s the starting point of your line. Drag your mouse to where you want the line to end, then click again.
Go to the Shape Format tab and use the buttons to edit the line. For this example, I changed the color and the weight of the line. I also added a shadow.


When you’re happy with how the line looks, copy and paste it as many times as needed to create your image. Click on the line, then go to Edit > Copy, then Edit > Paste. Or, use the shortcuts Command + C to copy and Command + V to paste.


Click, hold, and drag the lines into place. It may be helpful to display gridlines. To do so, click on the View tab, then check the box for Gridlines. This will help you to properly align the different elements of your drawing.


To change the angle of a line, click on the line, then go to Shape Format > Arrange > Rotate. Choose from one of the available rotation options or set your own. You can also click on one end of the line, hold, and drag it in place.


If you want the elements to line up precisely, select the lines, then go to Shape Format > Arrange > Align. Select an alignment option.


In this example, I’ll use Distribute Horizontally for the vertical lines, and Distribute Vertically for the horizontal lines.


These same steps apply to block arrows and other shapes, too.
2. Draw on Microsoft Word Using Shapes and Block Arrows
Now we’re ready to make more complicated pictures!
Let’s draw a bicycle by combining circles and triangles. Go to Insert > Shapes > Oval. Hold the Shift key as you click, hold, and drag your mouse to make a perfect circle. (But, if you want to draw an oval, then don’t use the Shift key.)


With the shape selected, go to Shape Format, and use the buttons on that tab to edit the shape you made.


To make the bicycle wheels, I’ll remove the Shape Fill and change the outline of the circle.


Next, copy and paste the circle. And then follow the same steps to add the triangles.
Use the triangle’s turning handle to change its orientation. Click on the turning handle, hold, and drag the mouse to the desired angle.


Add and edit more lines and shapes to make the image look just like a bicycle. The bike below is made up of circles, triangles, lines, an oval, and a half-circle (for the handlebar).
Remember, you can make your drawing as simple or as detailed as you like. It’s all up to you!
Find Professional Graphics for Your Microsoft Word Project
Now you know how to draw on a picture in Word. But perhaps you don’t have time to create your own Word drawings from scratch. And you still would rather not use stock photos.
What to do?
You can use premium graphic images from Envato Elements.


An Elements subscription brings thousands of creative tools at your fingertips. This includes print templates for Word, graphics, fonts, photos, and a lot more. And you get unlimited downloads for one flat monthly subscription.
Another great source of premium graphics is GraphicRiver. As with Elements, this marketplace gives you access to thousands of Word templates and other creative tools. These are also professionally designed for maximum impact. The difference is, at GraphicRiver, you pay for each use of every item.
Use each premium graphic on its own in your Word document. Or better yet, incorporate them with your own or other graphics to create something original.
Learn More About Working In Word
As you can see, Microsoft Word has many robust features. Some of them are little-known functionalities such as the various drawing tools in Word that I showed you in this article. It pays to learn how to use Microsoft Word so you can maximize its potential. Not only will you be able to realize the vision you’ve got for your Word documents, but you’ll also optimize your workflow.
If you aim to produce the most visually compelling materials using Word, then you may find these articles helpful:
You Can Draw in Microsoft Word
Even though Microsoft Word wasn’t built for graphic design, it’s got some tools to help you draw right inside your Word document.
You can make anything from simple line and stick drawings, to more detailed freehand drawings and line illustrations. Use the Freeform, Scribble, or Draw tools to draw by hand. Or combine lines and shapes to create original Word drawings without drawing from scratch.
You can also find hand-drawn graphics and Word templates in Envato Elements and GraphicRiver. If you want unlimited downloads of premium graphics and other design components, then Elements is the place for you. For one-off projects, GraphicRiver is the place to go to access top-quality templates for Microsoft Word and graphics on a pay-per-use basis.
You’ve just learned how to draw on Microsoft Word. Now, it you’re turn to create your best Word drawings.
Updated: 03/05/2023 by

When creating a document in Microsoft Word, or a spreadsheet in Microsoft Excel, users can add many types of shapes to highlight important items. Bringing attention to those items helps readers to better understand the content of the document or spreadsheet. After a shape is added, it can be modified by changing features, such as size, color, and fill.
To add and edit a shape in Microsoft Word and Microsoft Excel, select a link below for help.
Add shapes in Microsoft Word
Select the version of Microsoft Word you’re using below and follow the steps to learn how to add a shape in a document.
- Microsoft Word Online.
- Microsoft Word desktop application.
Microsoft Word Online
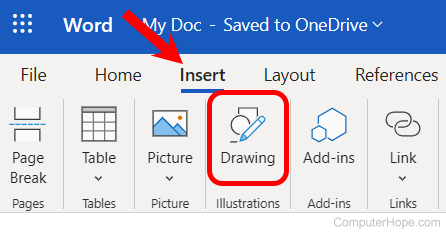
- In Microsoft Word Online, click the Insert tab at the top of the window.
- On the Insert tab, in the Illustrations group, click the Drawings option.
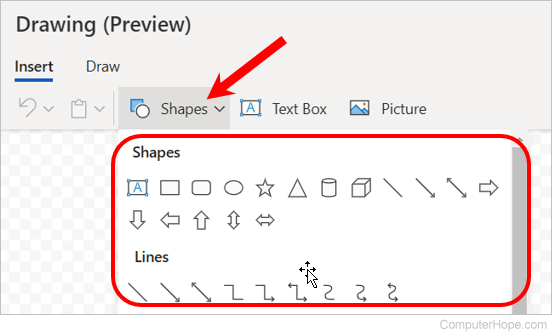
- In the Drawings (Preview) window, click the Shapes option, and select the type of shape you want to add or draw from the drop-down menu that appears.
- After selecting the desired type of shape, draw the shape in the Drawing window, then click the Save and Close button to add the shape in your Word Online document.
Microsoft Word desktop application
- In Microsoft Word, click the Insert tab at the top of the program window.
- On the Insert tab, in the Illustrations group, click the Shapes option.
- Select the type of shape you want to add or draw from the drop-down menu that appears.
Add shapes in Microsoft Excel
The following steps help you add a shape to a spreadsheet in Microsoft Excel Online or the desktop application.
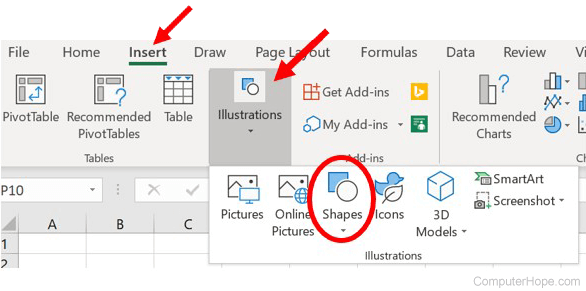
- In Microsoft Excel, click the Insert tab at the top of the program window.
- On the Insert tab, click the Illustrations option, then click the Shapes option.
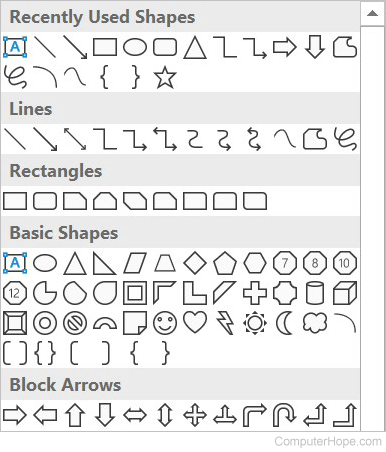
- Select the type of shape you want to add or draw from the drop-down menu that appears.
Edit shapes in Microsoft Word and Excel
- Click the shape to select it.
- Right-click the shape and select Format Shape in the pop-up menu.
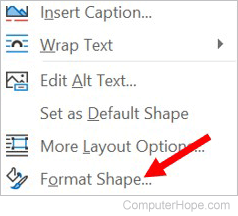
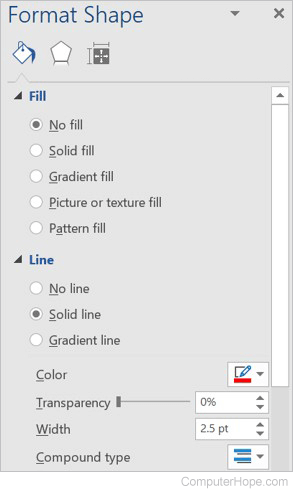
- The Format Shape section opens on the right side of the program window. You can change the shape’s fill, select the type and fill color (or no fill at all), and the size, color, and shape’s lines. You can also add shadow, glow, reflection, and other effects.

Contents
- 1 How to Draw in Word with the Shapes Tool
- 2 How to Draw on a Word Document with the Microsoft Word Drawing Tool
- 3 Extra: How to Draw on Google Docs
- 4 Extra: How to Annotate Screenshots with Snip and Sketch
The instances where you’d want to draw in Word in a professional environment are slim, but that doesn’t mean you shouldn’t do it.
Drawings can add some extra flavor to your documents while remaining suitable for certain audiences. We’re going to show you how to draw on Word documents using two tools: the freehand tool and the shapes tool.
Drawings in Word
The Shapes tool lets you create illustrations using a variety of preset shapes or its line tool. It’s best suited for those using a keyboard and mouse, as it allows you to get passable drawings without having a steady hand.
Freehand drawing in Word is primarily designed for those with touchscreens or tablets. It forgoes shapes for a series of more traditional pens and markers. You can choose whichever of these suits you and follow along below:
Drawing with the shapes tool doesn’t produce the best results, but it’ll definitely do in a pinch. You can even use the freeform: scribble tool to draw any shape you want. Here’s how to use it:
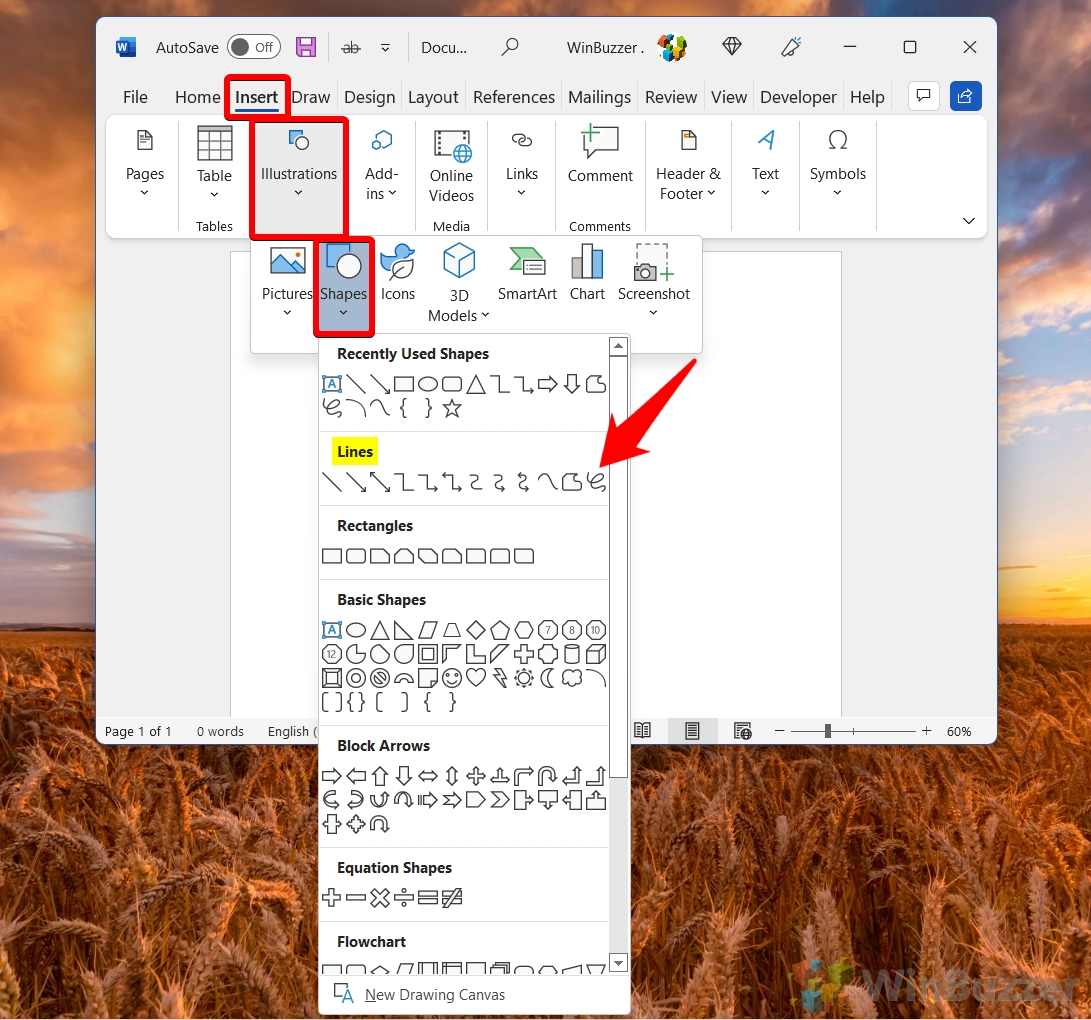
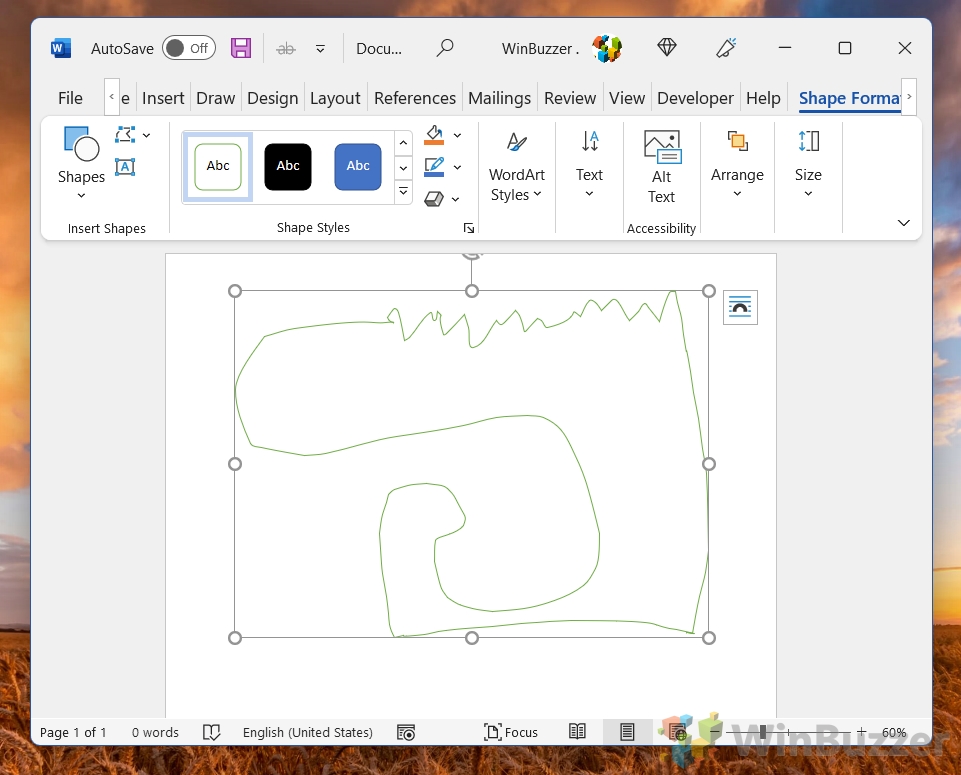
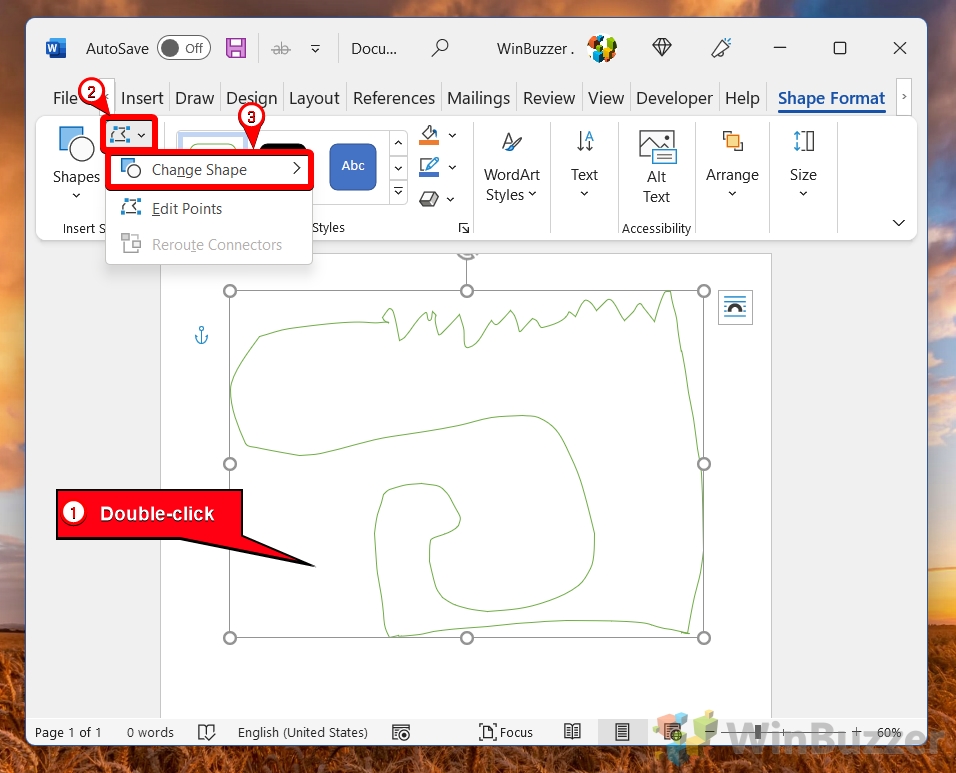
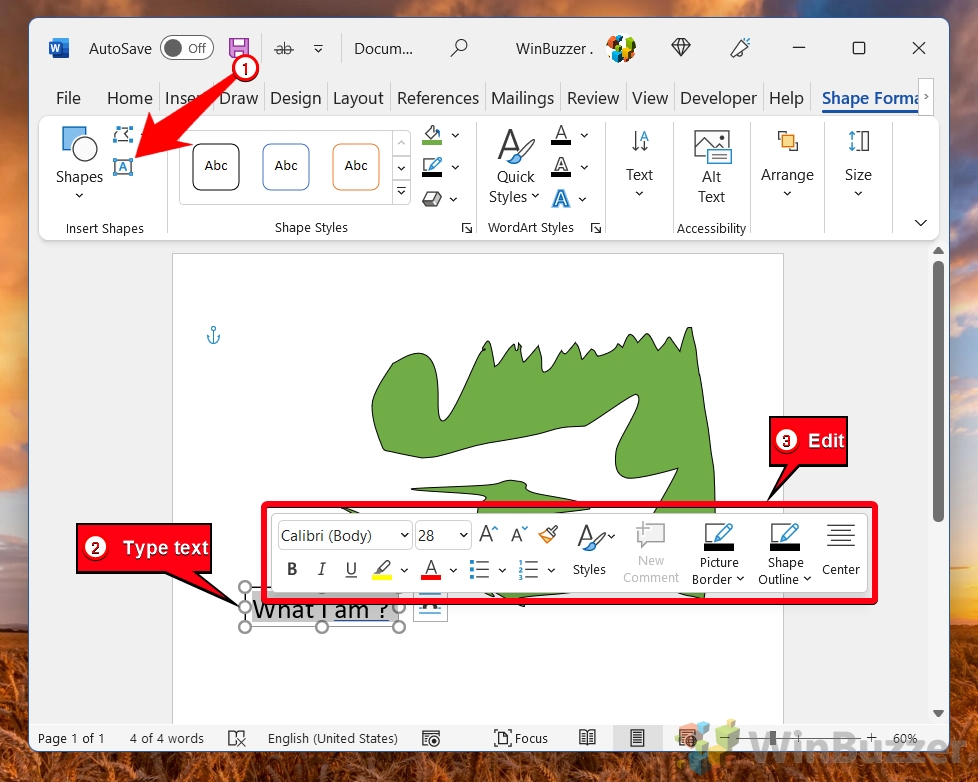
- Open the “Insert” tab of your ribbon and click “Illustrations > Shapes > Freeform: scribble”

- Click and drag on your canvas to draw

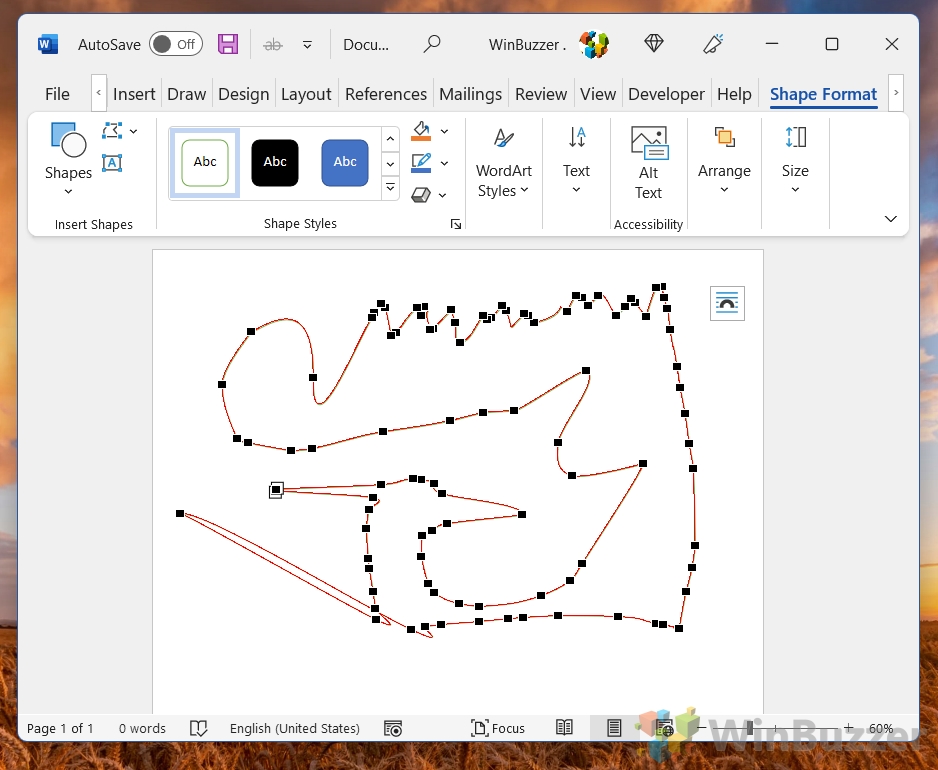
- Modify your drawing by double-clicking it and pressing “Edit points icon > Change shape”

- Move the points around to edit your drawing
Click away when you’re done to apply the changes.

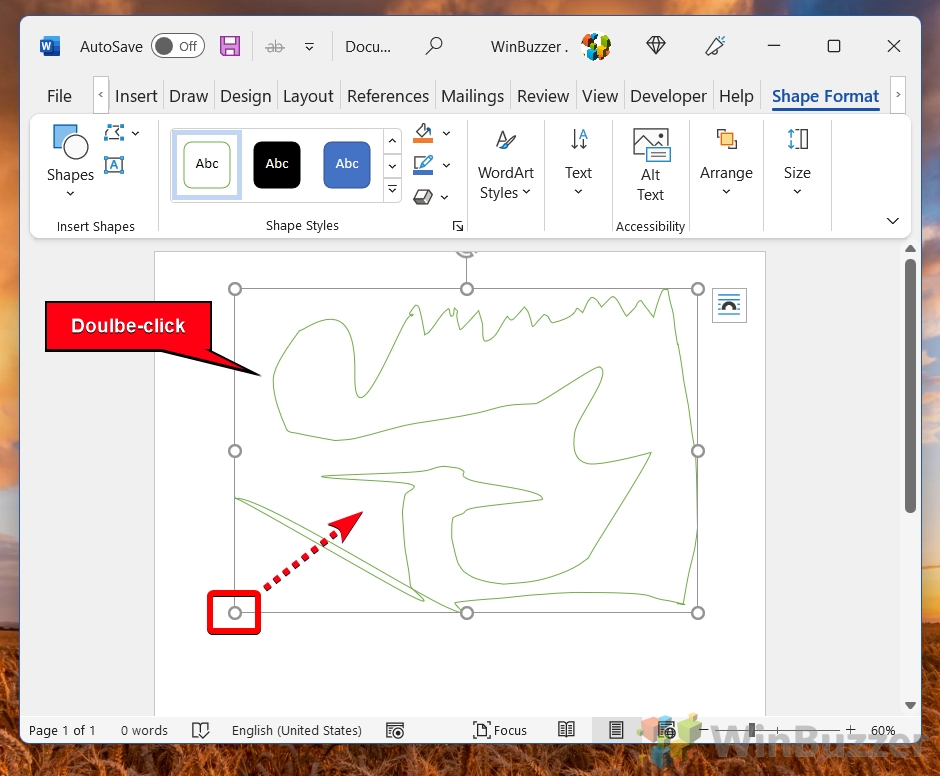
- Double-click the shape and drag a corner or other anchor point to resize it
Step description

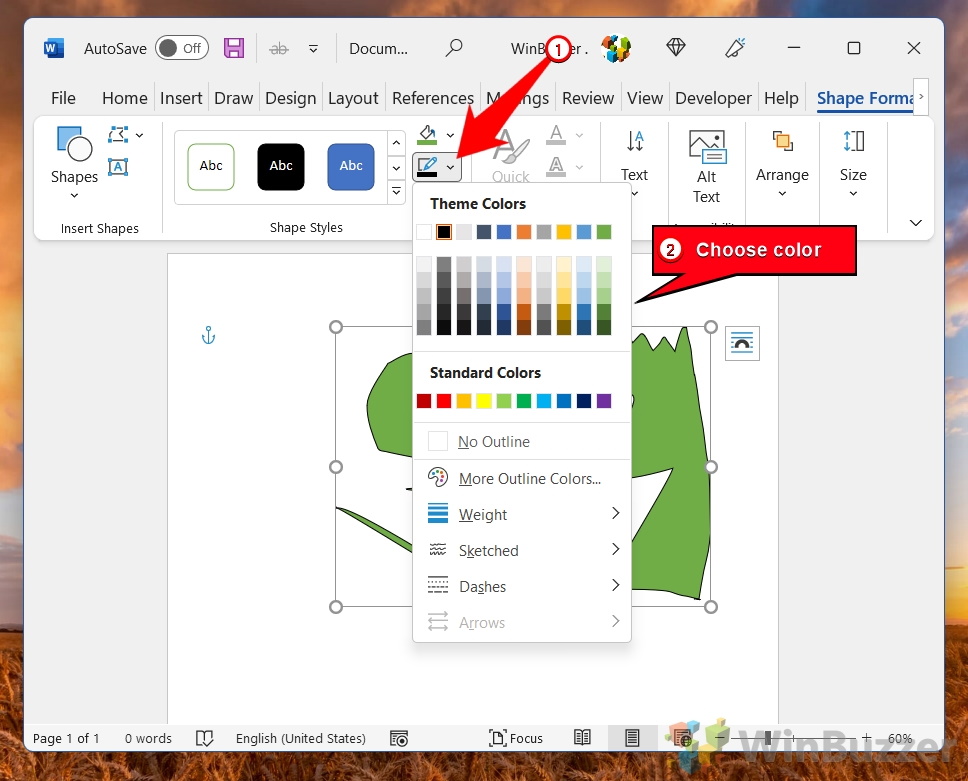
- With the shape selected, press the paint bucket and choose a color to fill it in

- Click the pencil icon to choose a stroke color

- Click the “A” in a box on the left to add text and use the pop-up menu to adjust its formatting

- Click the “WordArt Styles” link in the ribbon and add gradients, shadows, and textures
Once you’re done, you can right-click it and press “Save as Picture…” to save it as a shareable image file.


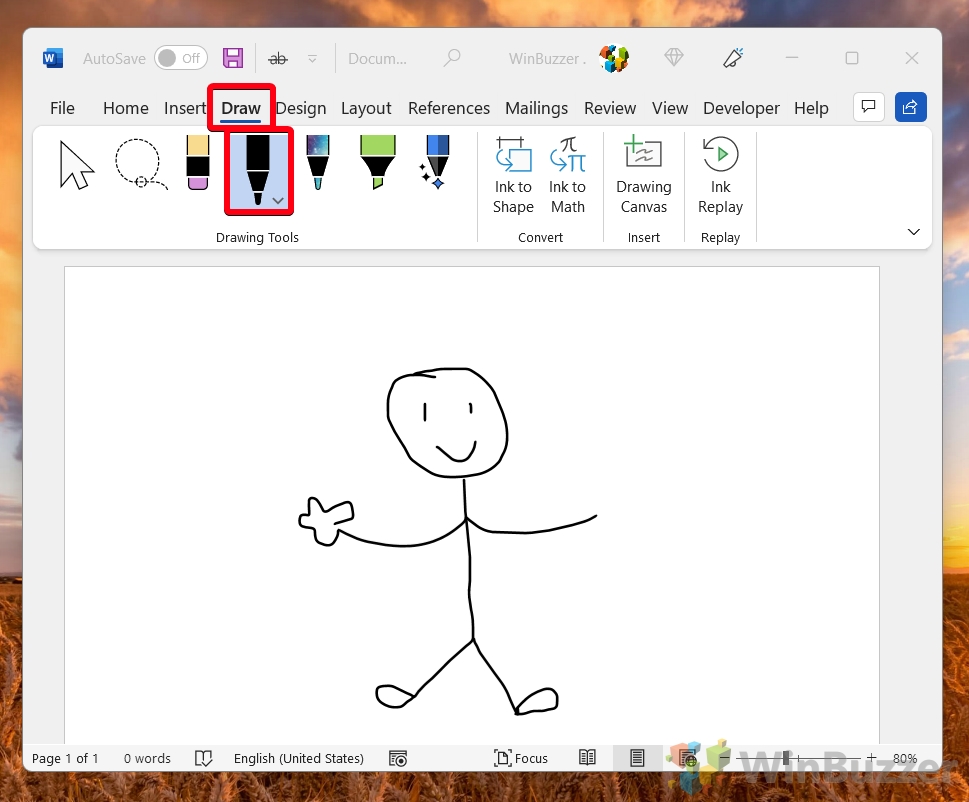
How to Draw on a Word Document with the Microsoft Word Drawing Tool
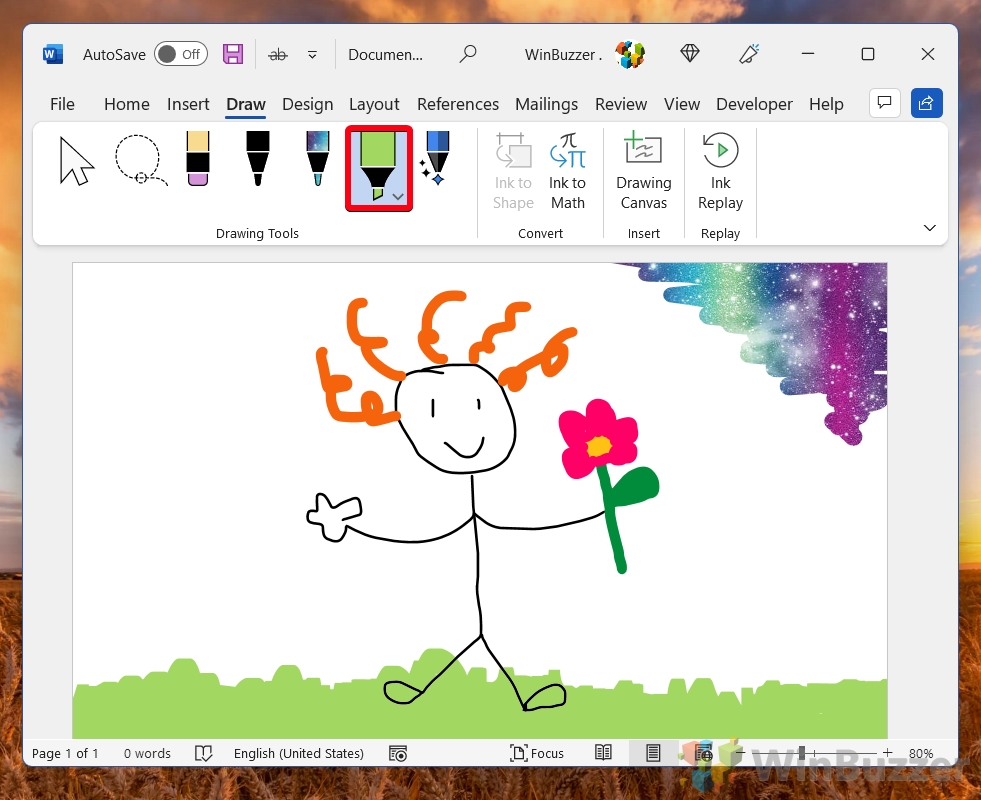
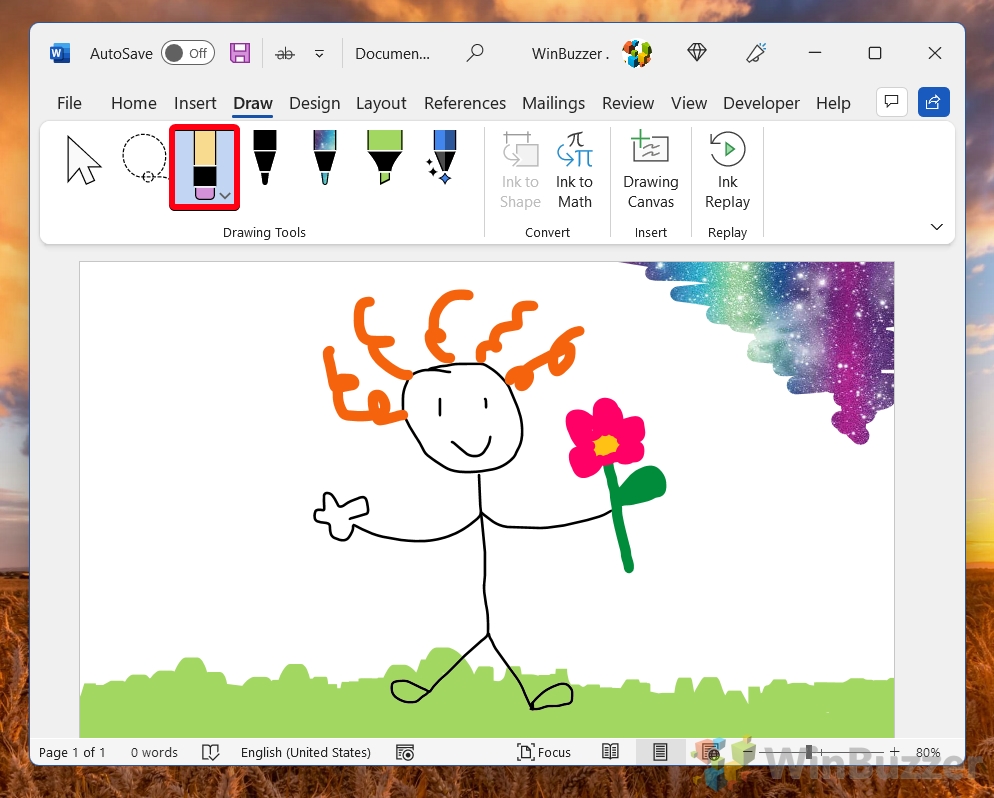
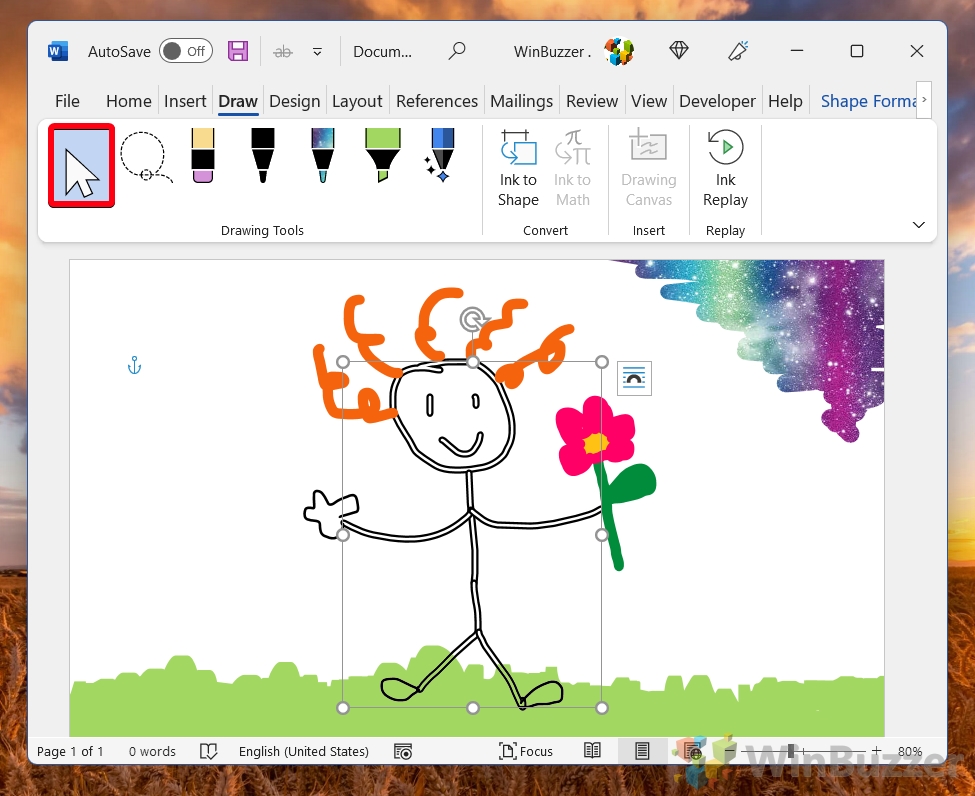
The Microsoft Word drawing tool uses the Microsoft Ink engine for a very competent drawing and annotation experience. It supports advanced features like pressure sensitivity and allows you to choose between a variety of pen/pencil textures for your brush. Here’s how you use it:
- Open the “Draw” tab of the ribbon and click on the pen tool
Click and drag with your cursor, finger, or tablet pen to draw.

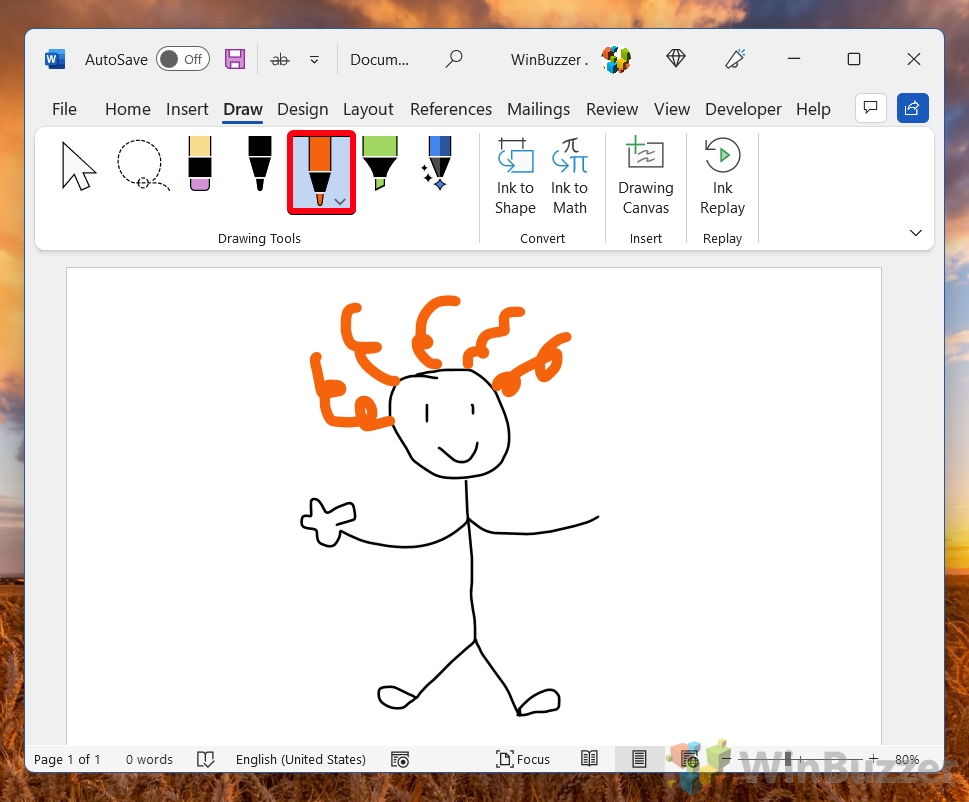
- Add some color via the colored pen icon
Technically, you can change the color of the regular pen, but having a separate tool helps you to quickly switch between different colors and thicknesses.
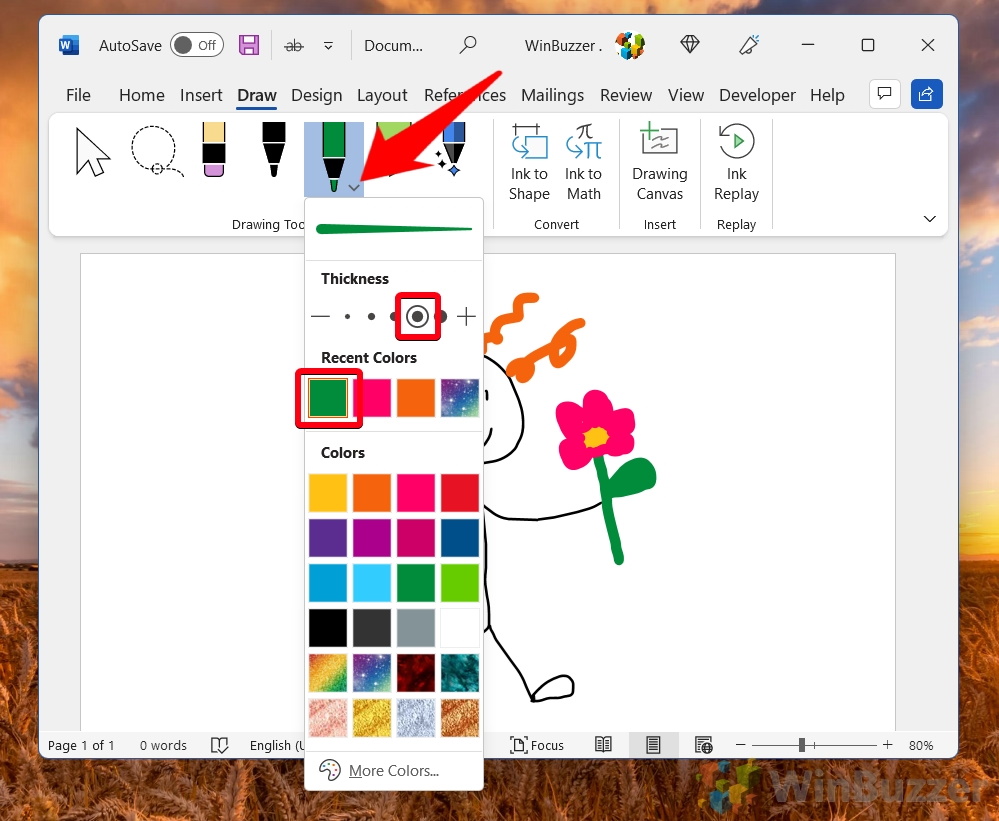
- Press the down arrow on the colored pen to modify color and thickness

- Press one of the images to use it as a pen texture

- Use the highlighter pen for a square brush

- Press the eraser icon and use it to clean up your image
You can just click and drag over lines with this tool to remove them.

- Select shapes by clicking the lasso tool and dragging around them

- Click and drag with the cursor tool to move your lines

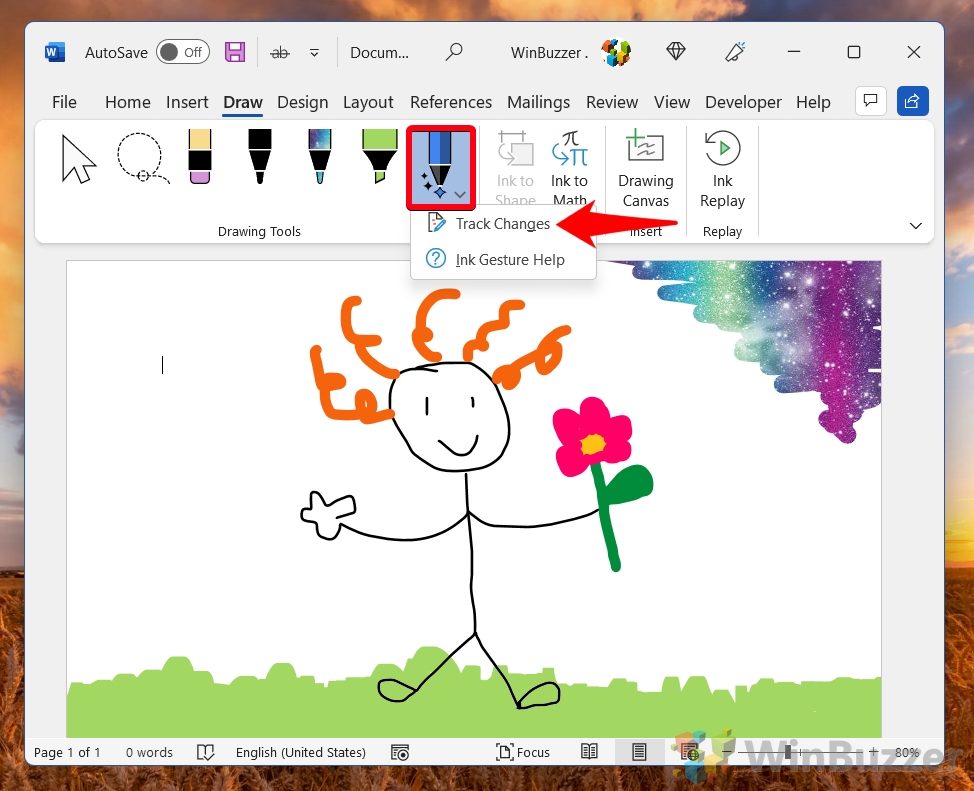
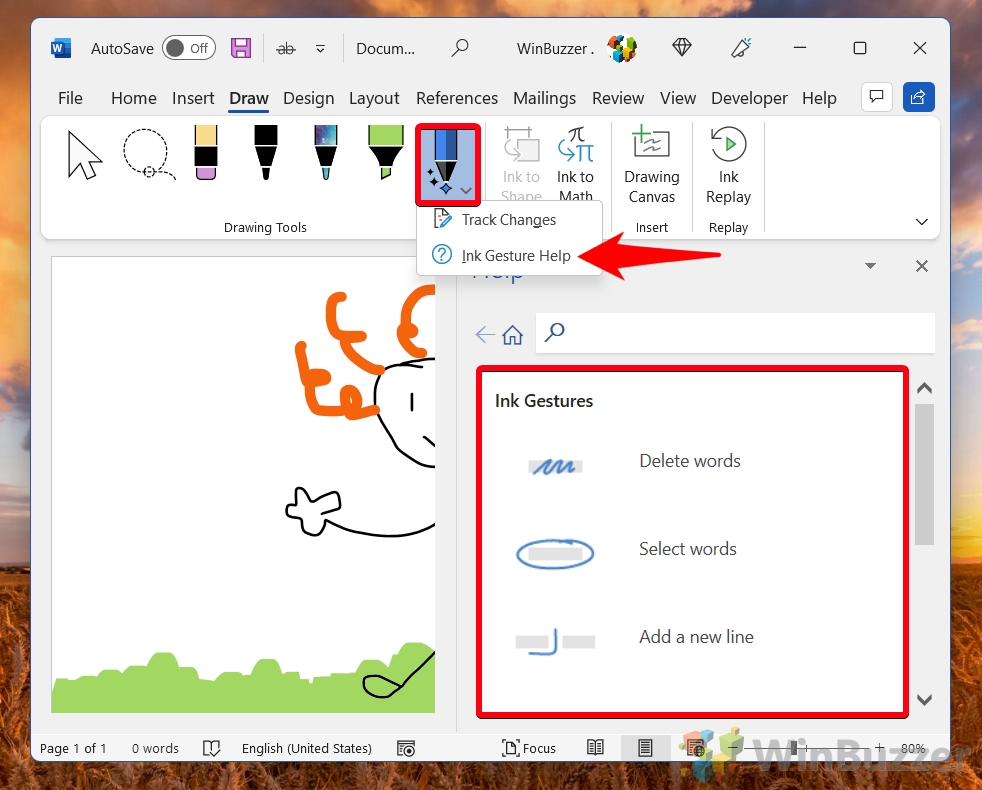
- Click on the action pen and choose “Track Changes”

- Annotate on text with typical editing marks to modify it

- For editing mark tips, click the action pen and press “Ink Gesture Help”


If you prefer to use Google’s text editing tools, drawing gets a bit less intuitive, but it’s still entirely possible. Here’s our existing guide on how to draw on Google Docs.

Extra: How to Annotate Screenshots with Snip and Sketch
You can also take a screenshot and annotate on it directly using Microsoft’s Snip and Sketch tool. Here’s our tutorial on the matter.
