
Word for Microsoft 365 Word 2021 Word 2019 Word 2016 Word 2013 Word 2010 Word 2007 More…Less
These are the basic types of graphics that you can use to enhance your Word documents: drawing objects, SmartArt, charts, pictures, and clip art. Drawings refer to a drawing object or a group of drawing objects.
Drawing objects include shapes, diagrams, flowcharts, curves, lines, and WordArt. These objects are part of your Word document. You can change and enhance these objects with colors, patterns, borders, and other effects.
Note: It is no longer necessary to insert a drawing canvas to work with drawing objects in Word. However, you may still use a drawing canvas as an organizational aid when working with several drawing objects, or if you want to add connectors between shapes. To insert a drawing canvas, on the Insert tab, click Shapes, and then click New Drawing Canvas.
What do you want to do?
-
Add a drawing to a document
-
Delete all or part of a drawing
Add a drawing to a document
-
Click in your document where you want to create the drawing.
-
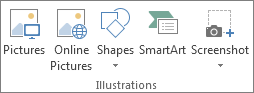
On the Insert tab, in the Illustrations group, click Shapes.

-
You can do any of the following on the Format tab, which appears after you insert a drawing shape:
-
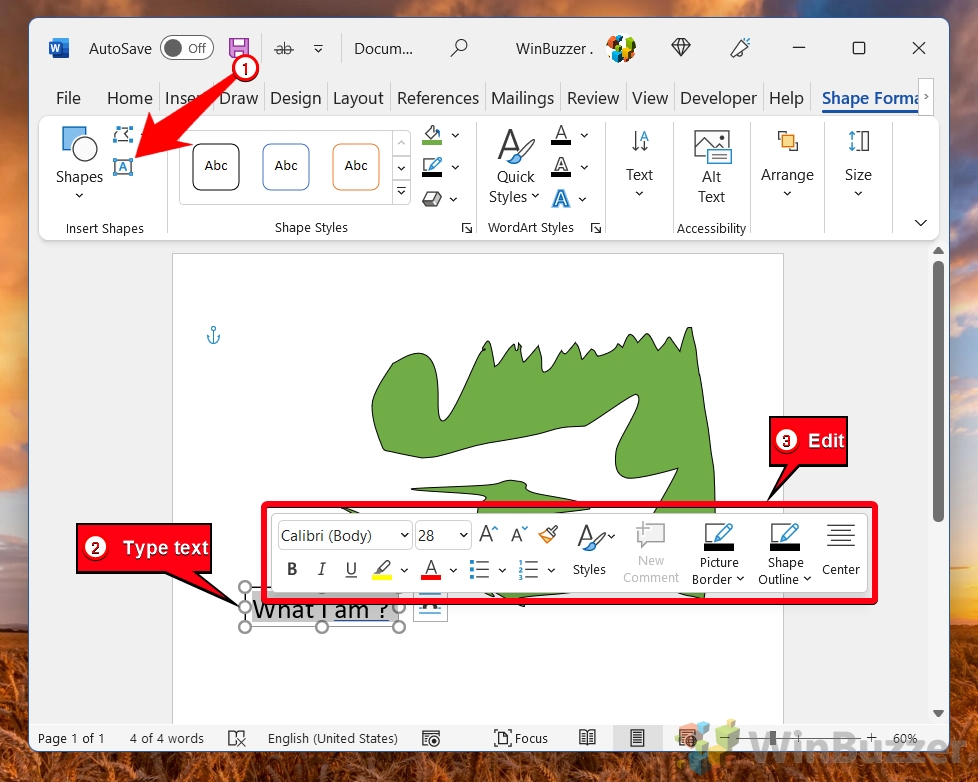
Insert a shape. On the Format tab, in the Insert Shapes group, click a shape, and then click somewhere in the document.
-
Change a shape. Click the shape you want to change. On the Format tab, in the Insert Shapes group, click Edit Shape, point to Change Shape, and then choose a different shape.
-
Add text to a shape. Click the shape you where you want text, and then type.
-
Group selected shapes. Select several shapes at a time by pressing CTRL on your keyboard and clicking each shape you want to include in the group. On the Format tab in the Arrange group, click Group so that all of the shapes will be treated like a single object.
-
Draw in the document. On the Format tab, in the Insert Shapes group, expand the shapes options by clicking the arrow. Under Lines click Freeform or Scribble.
Tip: To stop drawing with the Freeform or Scribble lines, double-click.
-
Adjust the size of the shapes. Select the shape or shapes you want to resize. On the Format tab, in the Size group, click the arrows or type new dimensions in the Height and Width boxes.
-
Apply a style to a shape. In the Shape Styles group, rest your pointer over a style to see what your shape will look like when you apply that style. Click the style to apply it. Or, click Shape Fill or Shape Outline and select the options that you want.
Note: If you want to apply a color and gradient that aren’t available in the Shape Styles group, select the color first, and then apply the gradient.
-
Add flow charts with connectors. Before you create a flow chart, add a drawing canvas by clicking the Insert tab, clicking Shapes in the Illustrations group, and then clicking New Drawing Canvas. On the Format tab, in the Insert Shapes group, click a Flow chart shape. Under Lines, choose a connector line such as the Curved Arrow Connector.
-
Use shadow and three-dimensional (3-D) effects to add interest to the shapes in your drawing. On the Format tab, in the Shape Styles group, click Shape Effects, and choose an effect.
-
Align the objects on the canvas. To align the objects, press and hold CTRL while you select the objects that you want to align. On the Format tab, in the Arrange group, click Align to choose from an assortment of alignment commands.
-

Delete all or part of a drawing
-
Select the drawing object that you want to delete.
-
Press DELETE.
See also
Add shapes
Draw a curve or circle shape
Insert pictures
Crop a picture
Add clip art to your file
What do you want to do?
-
Add a drawing to a document
-
Delete all or part of a drawing
Add a drawing to a document
-
Click in your document where you want to create the drawing.
-
On the Insert tab, in the Illustrations group, click Shapes.
-
When you find the shape you want to insert, double-click to insert it automatically, or click and drag to draw it in your document.
You can do any of the following on the Format tab, which appears after you insert a drawing shape:
-
Insert a shape. On the Format tab, in the Insert Shapes group, click a shape, and then click somewhere in the document.
-
Change a shape. Click the shape you want to change. On the Format tab, in the Shape Styles group, click Change Shape, and then choose a different shape.
-
Add text to a shape. Right-click the shape, click Add Text, and then type.
-
Group selected shapes. Select several shapes at a time by pressing CTRL on your keyboard and clicking each shape you want to include in the group. On the Format tab in the Arrange group, click Group so that all of the shapes will be treated like a single object.
-
Draw in the document. On the Format tab, in the Insert Shapes group, expand the shapes options by clicking the arrow. Under Lines click Freeform or Scribble.
-
Adjust the size of the shapes. Select the shape or shapes you want to resize. On the Format tab, in the Size group, click the arrows or type new dimensions in the Shape Height and Shape Width boxes.
-
Apply a style to a shape. In the Shape Styles group, rest your pointer over a style to see what your shape will look like when you apply that style. Click the style to apply it. Or, click Shape Fill or Shape Outline and select the options that you want.
Note: If you want to apply a color and gradient that aren’t available in the Shape Styles group, select the color first, and then apply the gradient.
-
Add flow charts with connectors. Before you create a flow chart, add a drawing canvas by clicking the Insert tab, clicking Shapes in the Illustrations group, and then clicking New Drawing Canvas. On the Format tab, in the Insert Shapes group, click a Flow chart shape. Under Lines, choose a connector line such as the Curved Arrow Connector.
-
Use shadow and three-dimensional (3-D) effects to add interest to the shapes in your drawing. On the Format tab, choose an option in either the Shadow Effects or the 3-D Effects group.
-
Align the objects on the canvas. To align the objects, press and hold CTRL while you select the objects that you want to align. On the Format tab, in the Arrange group, click Align to choose from an assortment of alignment commands.
-

Delete all or part of a drawing
-
Select the drawing object that you want to delete.
-
Press DELETE.
See also
Draw a curve or circle shape
Insert pictures
Crop a picture
Add clip art to your file
Need more help?
Want more options?
Explore subscription benefits, browse training courses, learn how to secure your device, and more.
Communities help you ask and answer questions, give feedback, and hear from experts with rich knowledge.
 Please Note:
This article is written for users of the following Microsoft Word versions: 97, 2000, 2002, and 2003. If you are using a later version (Word 2007 or later), this tip may not work for you. For a version of this tip written specifically for later versions of Word, click here: Creating a Drawing Object.
![]()
Written by Allen Wyatt (last updated December 27, 2019)
This tip applies to Word 97, 2000, 2002, and 2003
Word allows you to create drawing objects in your document. These objects (such as an oval, rectangle, line, or AutoShape) are positioned on what is termed the «drawing layer,» which is separate and distinct from the text that appears in a document. You generally create such objects by using the tools on the Drawing toolbar. (Display the Drawing toolbar by clicking your mouse on the Drawing tool on the Standard toolbar.)
Notice that on the left side of the Drawing toolbar are several tools used to create basic shapes. The line, arrow, rectangle, and oval tools are easily identifiable. In addition, the AutoShapes tool displays a menu of more than 125 different symbols, banners, and callouts.
You can follow these steps to place a drawing object in your document:
- Click on the tool that represents the type of object you want to create or select the object from the AutoShape tool. Once a tool is selected, the mouse pointer changes to crosshairs, or a plus sign.
- Click within your document at one corner of where you want the shape to appear.
- Drag the mouse to the opposite corner for the object.
- When you release the mouse button, the object appears in the document and you can manipulate it as desired.
WordTips is your source for cost-effective Microsoft Word training.
(Microsoft Word is the most popular word processing software in the world.)
This tip (1318) applies to Microsoft Word 97, 2000, 2002, and 2003. You can find a version of this tip for the ribbon interface of Word (Word 2007 and later) here: Creating a Drawing Object.
Author Bio
With more than 50 non-fiction books and numerous magazine articles to his credit, Allen Wyatt is an internationally recognized author. He is president of Sharon Parq Associates, a computer and publishing services company. Learn more about Allen…
MORE FROM ALLEN
Avoid Using the Normal Style
The basis of almost all styles in Word is the Normal style. Here’s a good reason why you shouldn’t use it.
Discover More
Stopping a Conditional Formatting Rule from Breaking into Smaller Ranges
When you paste information into a row that is conditionally formatted, you may end up messing up the rules applied to …
Discover More
Choosing a Power Management Plan
Windows maintains a number of power management plans that define how long the various components of your system sit idle …
Discover More
More WordTips (menu)
Placing Many Graphics in a Document
Word documents can contain more than just text. You can even create documents that contain almost no text at all. This …
Discover More
Clip Art Sizing Difficulties
A discussion of problems a reader was having resizing clip art in Word.
Discover More
Keeping Callouts Positioned
Using graphics to add callouts to your graphics is a common occurrence in Word. Here’s how to stop all those graphics …
Discover More
![]()
Download Article
![]()
Download Article
In Microsoft Word, you can do a lot more than simple word processing—you can create charts and graphs, add media, and draw and format shapes. These quick, easy steps will show you how to draw a 3D shape or add 3D effects to existing shapes. Before beginning, make sure you have updated to the latest version of Microsoft Word.
-
1
Select Insert > Shape. You’ll find the “Insert” menu at the top of the screen.
- Mac users will see a menu of shapes appear on the right side of the screen.
- PC users will see a drop down menu of shapes.
-
2
Select a 3D shape. As you scroll through the available shapes, you’ll see a small selection of pre-formatted 3D objects, including a cube, a cylinder (“can”), and a bevel. Click on your desired shape to select it.
Advertisement
-
3
Draw your 3D shape. Click anywhere on your document and your shape will appear in previously determined measurements, usually equalling or close to 1”x1”.
- You can also click and drag to draw your shape in the desired dimensions.
-
4
Modify your shape. You can modify your shape by clicking on it to reveal resize boxes. Click and drag any of these to resize your object and also change the direction it’s facing.


Advertisement
-
1
Select Insert > Shape. You’ll find the “Insert” menu at the top of the screen.
- Mac users will see a menu of shapes appear on the right side of the screen.
- PC users will see a drop down menu of shapes.
-
2
Draw a 2D object. Click on a 2D object that you’d like to convert to three dimensions. Click on your document and your shape will appear.
-
3
Open the format menu. Right click (for Mac users, Ctrl + click) the shape and select “Format Shape”.
-
4
Rotate your object in three dimensions. Select “3-D Rotation” and use the rotation buttons to turn your shape along the X, Y, and Z axes. Play with the rotation until your shape is facing the desired direction.
- You need to rotate the shape along the X or Y axis to see the depth you are about to add.
-
5
Add depth to your object. Still in your “Format Shape” menu, select 3-D Format > Depth and Surface. Increase the “Depth” value to your desired depth and watch your 2D shape become 3D.
- You can experiment with the depth amount and the X, Y, and Z angles until you are satisfied with the look of your 3D object.
- The 3-D Format > Bevel menu allows you to add more 3D effects to the top and bottom of your object.
-
6
Click “Ok” when you are finished.


Advertisement
-
1
Add a Text Box or WordArt. Select Insert > Text Box or Insert > WordArt. You’ll find the “Insert” menu at the top of the screen. Draw your box and type your desired text in the box.
-
2
Add 3D effects to the box. Right click (for Mac users, Ctrl + click) your WordArt or Text Box and choose “Format Shape” from the drop down menu. Under «3-D Rotation», change the X and/or Y axis numbers; under «3-D Format», increase the value of the depth.
- You can experiment with the depth amount and the X, Y, and Z angles until you are satisfied with the look of your 3D object.
- To better see the 3D effects you’ve added to the object, change the fill color in the «Format Shape» menu.
-
3
Add 3D effects to the letters. Right click (for Mac users, Ctrl + click) your WordArt or Text Box and select “Format Text Effects” from the drop down menu. Under «3-D Rotation», change the X and/or Y axis numbers; under «3-D Format», increase the value of the depth.
- To better see the 3D effects you’ve added to the object, change the fill color in the «Format Text Effects» menu.


Advertisement
Add New Question
-
Question
Can I divide the cube into 12 x 12 text boxes in each part?

You have to click the insert button and click INSERT CHART. Then you have to choose the 12 by 12 cube, and you’re done!
Ask a Question
200 characters left
Include your email address to get a message when this question is answered.
Submit
Advertisement
-
If you haven’t made 3D objects before, it is best to start with a simple shape.
-
You can experiment with coloring and shading in Format Shape > Fill and Format Shape > 3-D Format > Depth and Surface.
Thanks for submitting a tip for review!
Advertisement
About This Article
Thanks to all authors for creating a page that has been read 200,037 times.
Is this article up to date?

Contents
- 1 How to Draw in Word with the Shapes Tool
- 2 How to Draw on a Word Document with the Microsoft Word Drawing Tool
- 3 Extra: How to Draw on Google Docs
- 4 Extra: How to Annotate Screenshots with Snip and Sketch
The instances where you’d want to draw in Word in a professional environment are slim, but that doesn’t mean you shouldn’t do it.
Drawings can add some extra flavor to your documents while remaining suitable for certain audiences. We’re going to show you how to draw on Word documents using two tools: the freehand tool and the shapes tool.
Drawings in Word
The Shapes tool lets you create illustrations using a variety of preset shapes or its line tool. It’s best suited for those using a keyboard and mouse, as it allows you to get passable drawings without having a steady hand.
Freehand drawing in Word is primarily designed for those with touchscreens or tablets. It forgoes shapes for a series of more traditional pens and markers. You can choose whichever of these suits you and follow along below:
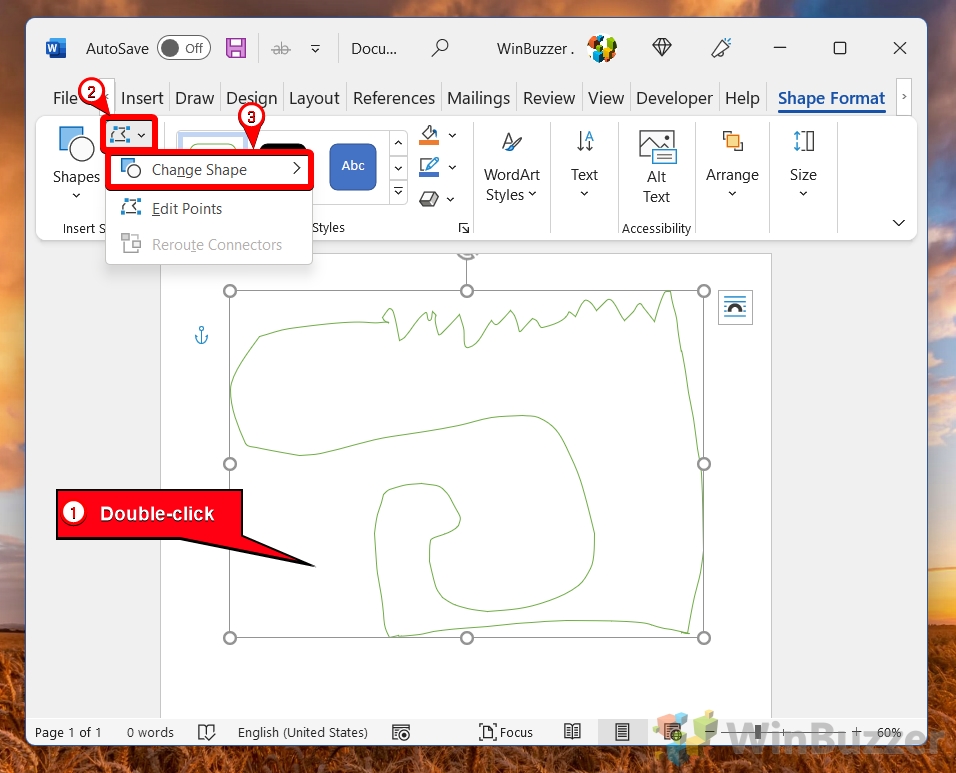
Drawing with the shapes tool doesn’t produce the best results, but it’ll definitely do in a pinch. You can even use the freeform: scribble tool to draw any shape you want. Here’s how to use it:
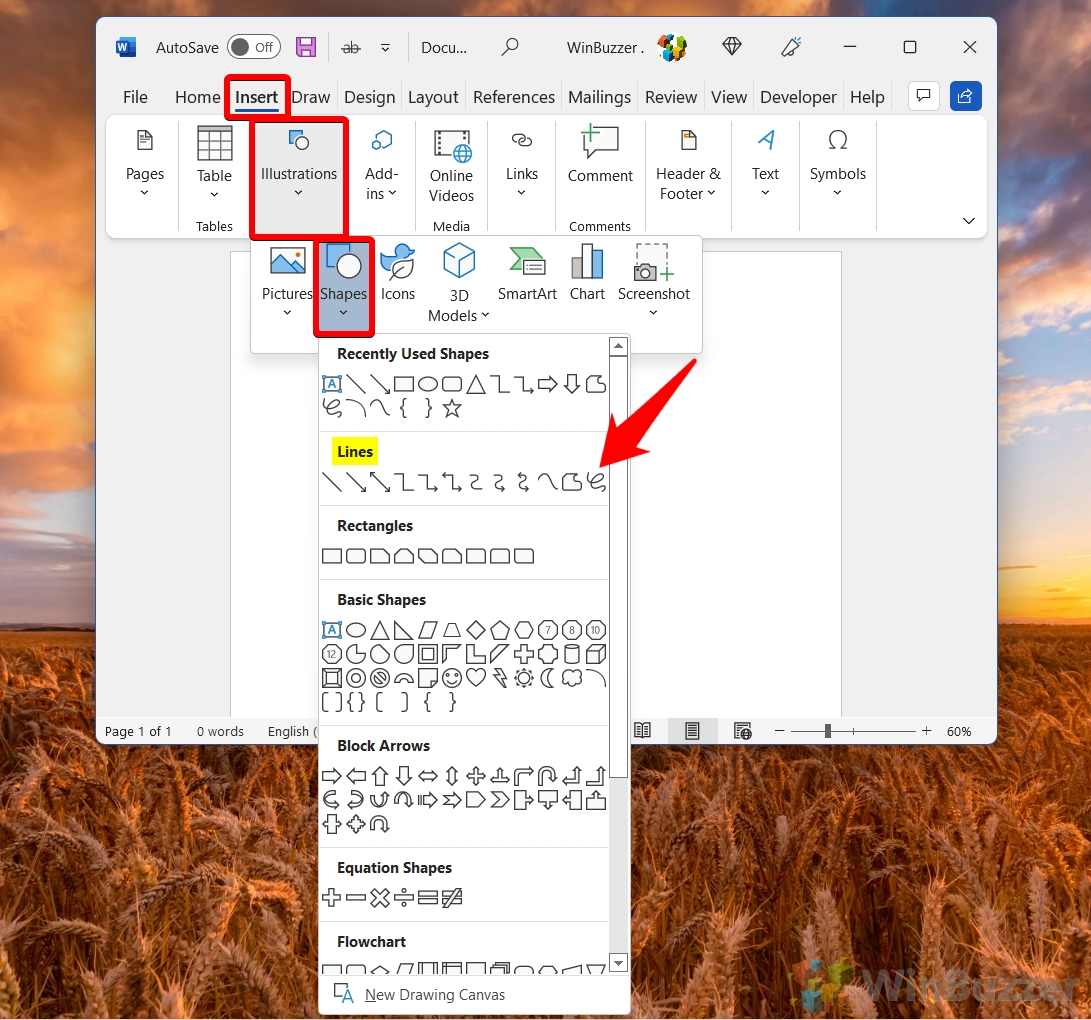
- Open the “Insert” tab of your ribbon and click “Illustrations > Shapes > Freeform: scribble”

- Click and drag on your canvas to draw

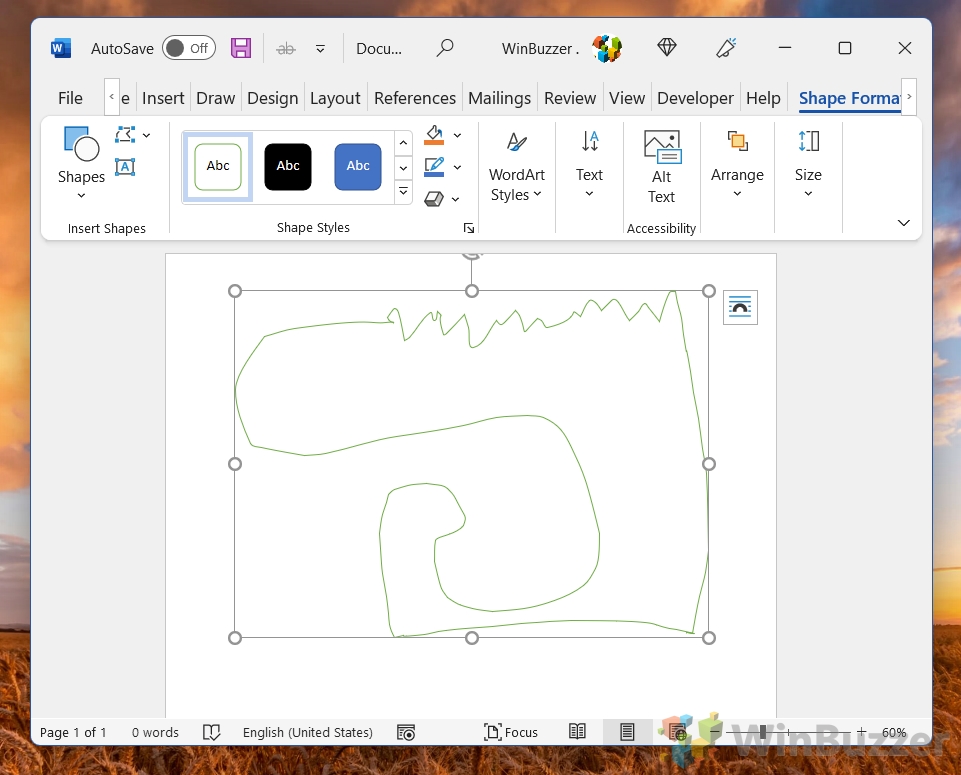
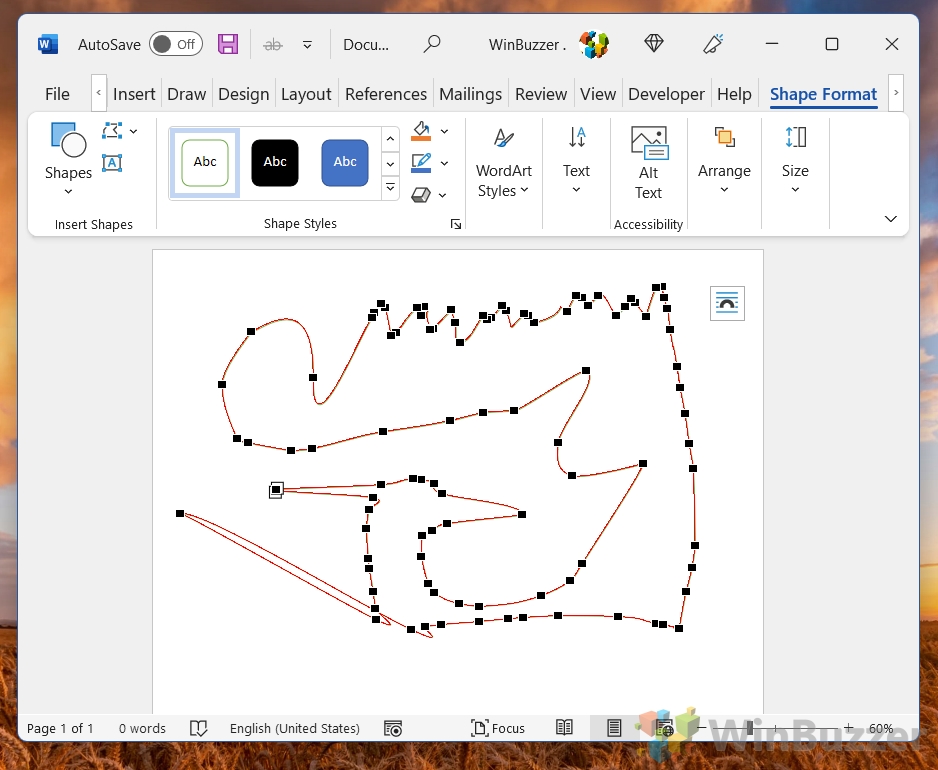
- Modify your drawing by double-clicking it and pressing “Edit points icon > Change shape”

- Move the points around to edit your drawing
Click away when you’re done to apply the changes.

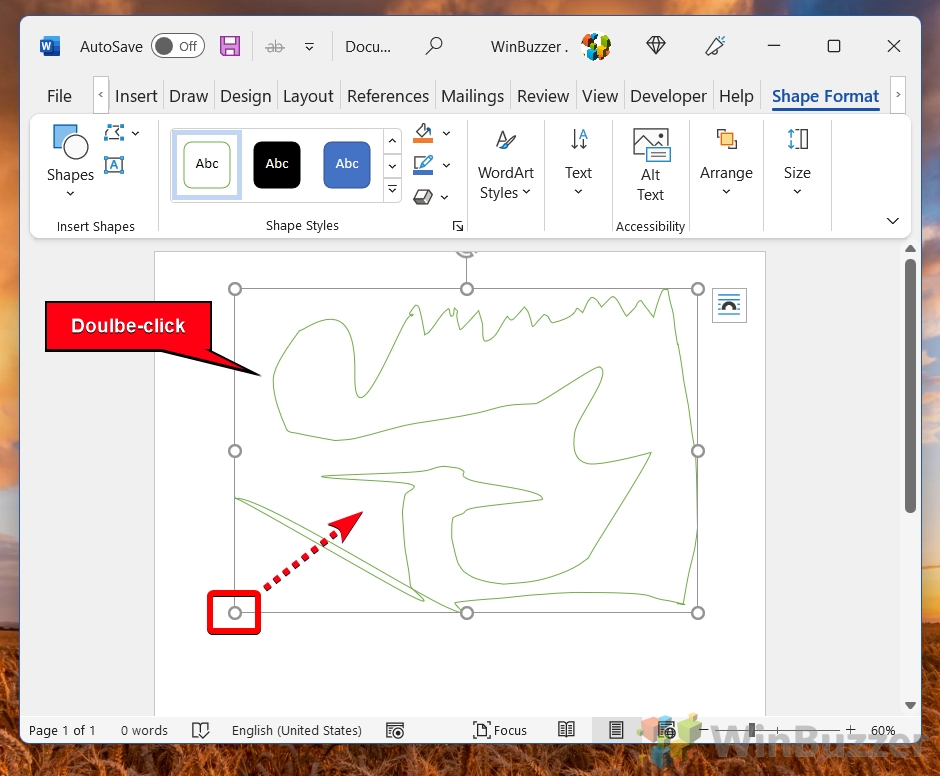
- Double-click the shape and drag a corner or other anchor point to resize it
Step description

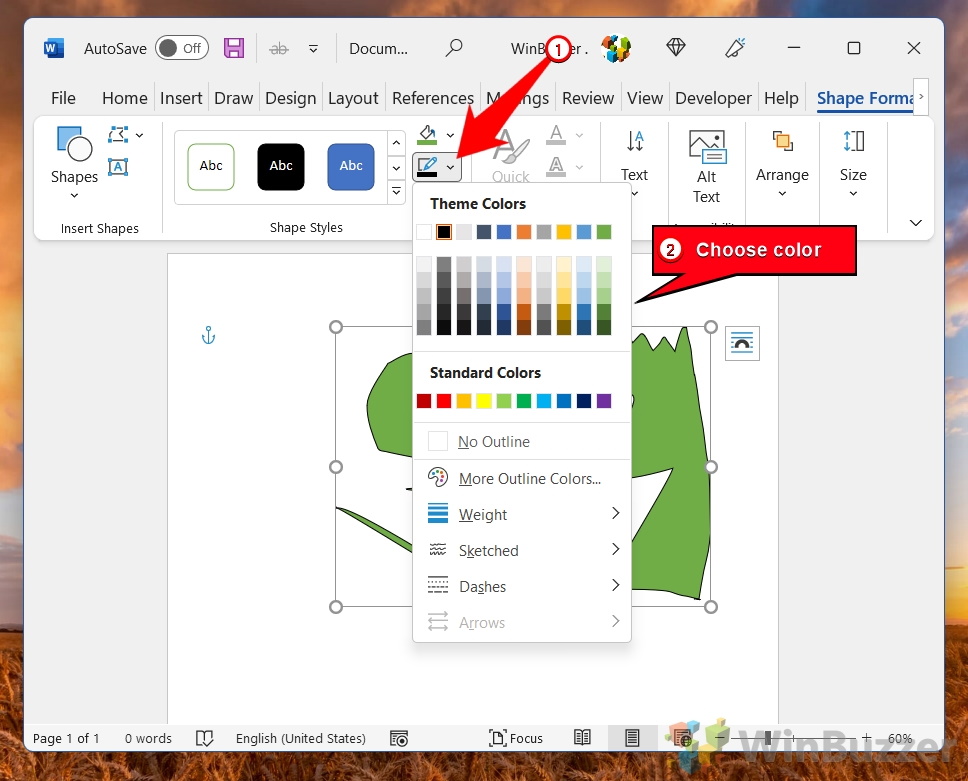
- With the shape selected, press the paint bucket and choose a color to fill it in

- Click the pencil icon to choose a stroke color

- Click the “A” in a box on the left to add text and use the pop-up menu to adjust its formatting

- Click the “WordArt Styles” link in the ribbon and add gradients, shadows, and textures
Once you’re done, you can right-click it and press “Save as Picture…” to save it as a shareable image file.


How to Draw on a Word Document with the Microsoft Word Drawing Tool
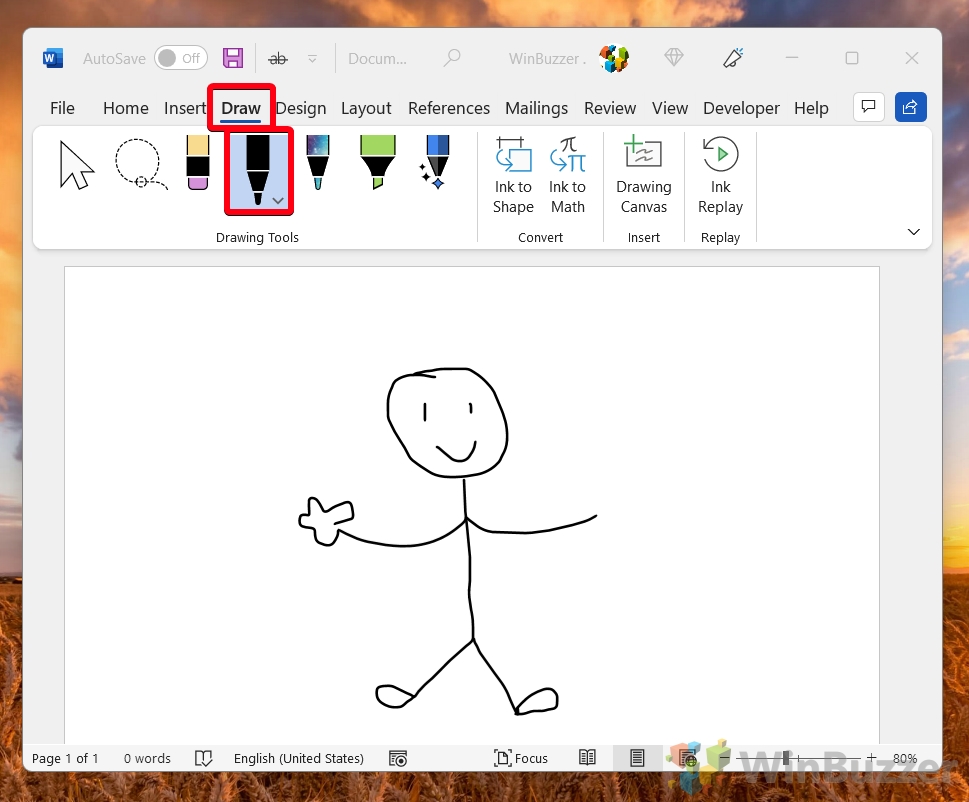
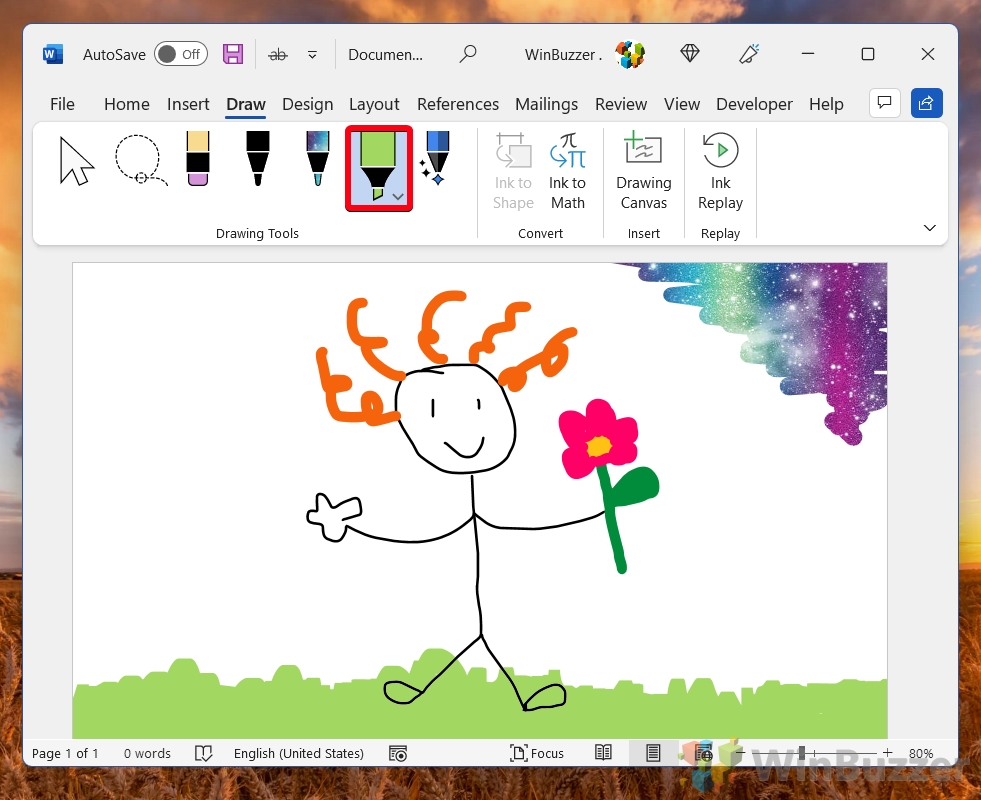
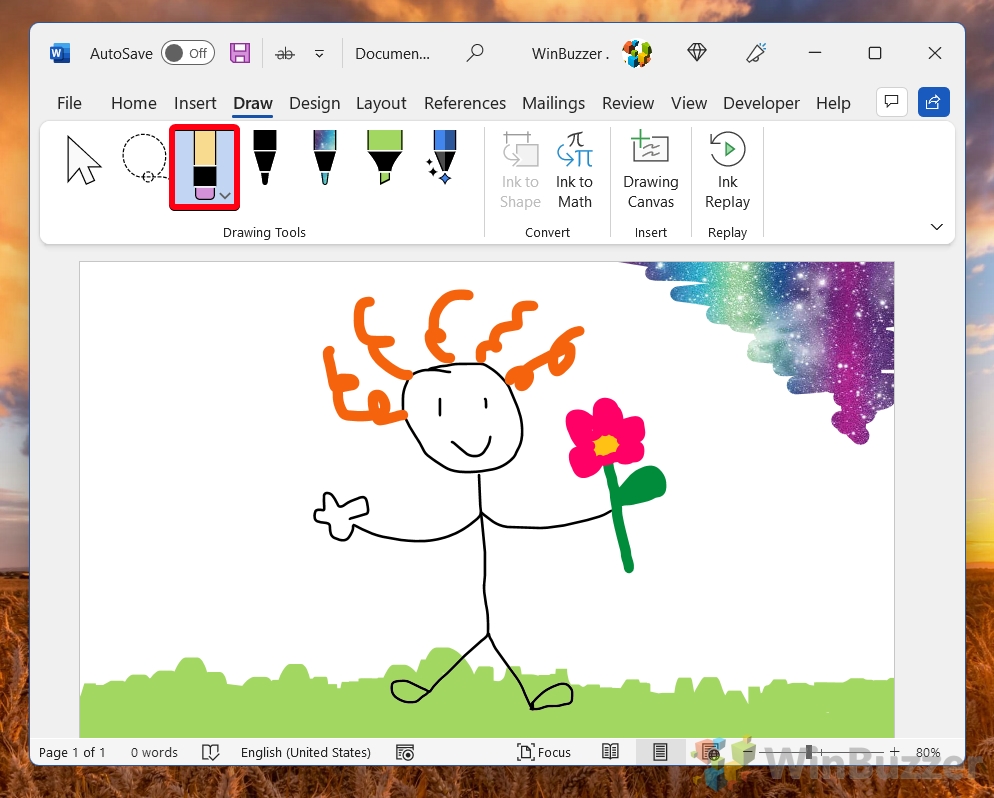
The Microsoft Word drawing tool uses the Microsoft Ink engine for a very competent drawing and annotation experience. It supports advanced features like pressure sensitivity and allows you to choose between a variety of pen/pencil textures for your brush. Here’s how you use it:
- Open the “Draw” tab of the ribbon and click on the pen tool
Click and drag with your cursor, finger, or tablet pen to draw.

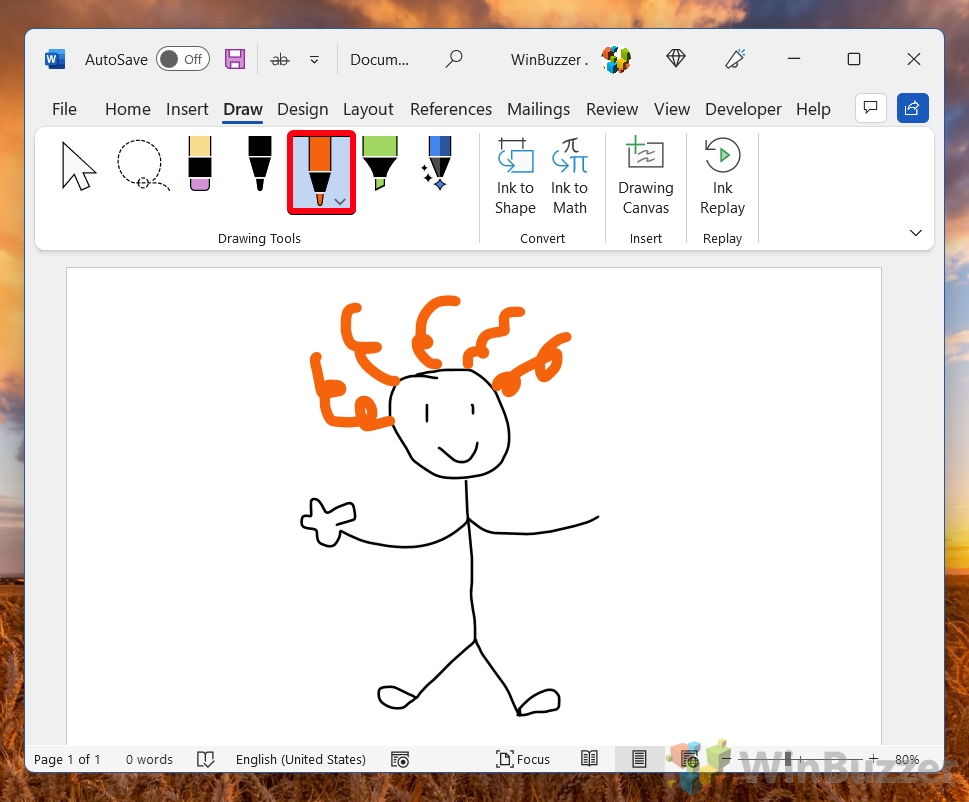
- Add some color via the colored pen icon
Technically, you can change the color of the regular pen, but having a separate tool helps you to quickly switch between different colors and thicknesses.
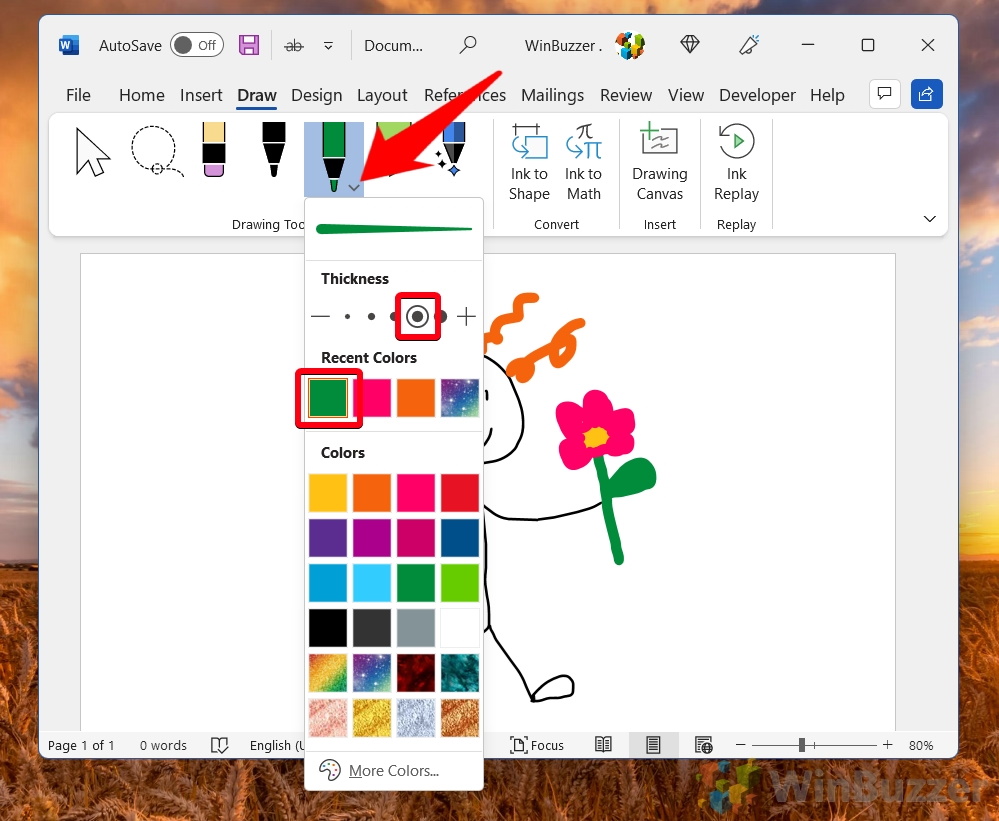
- Press the down arrow on the colored pen to modify color and thickness

- Press one of the images to use it as a pen texture

- Use the highlighter pen for a square brush

- Press the eraser icon and use it to clean up your image
You can just click and drag over lines with this tool to remove them.

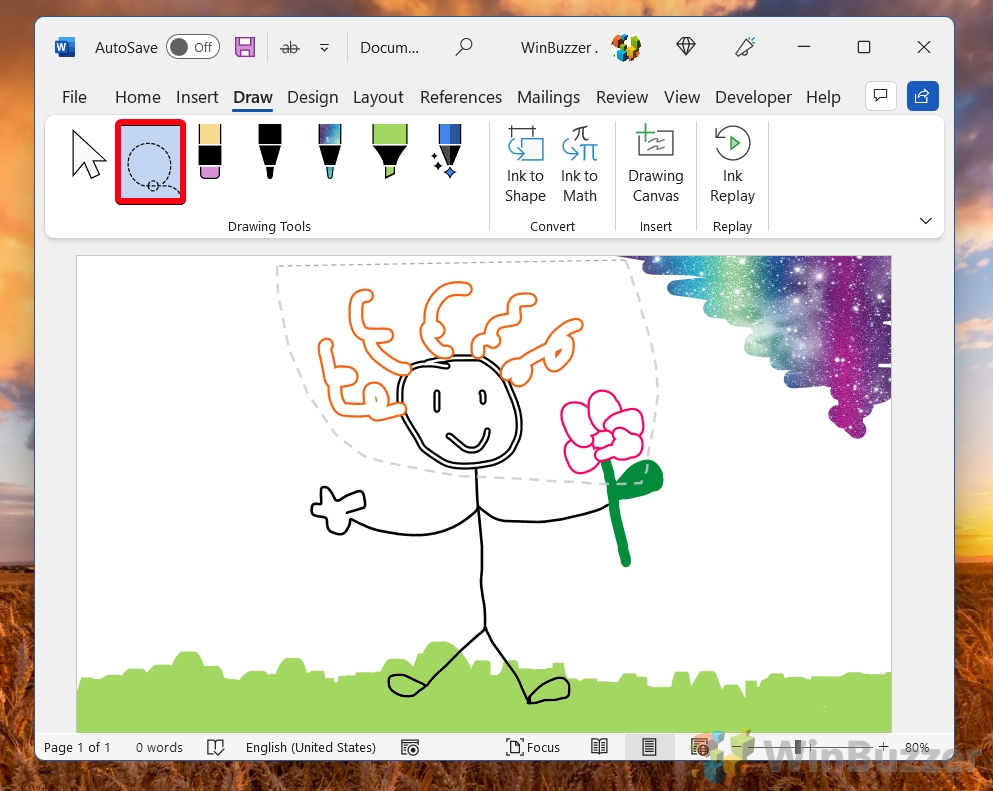
- Select shapes by clicking the lasso tool and dragging around them

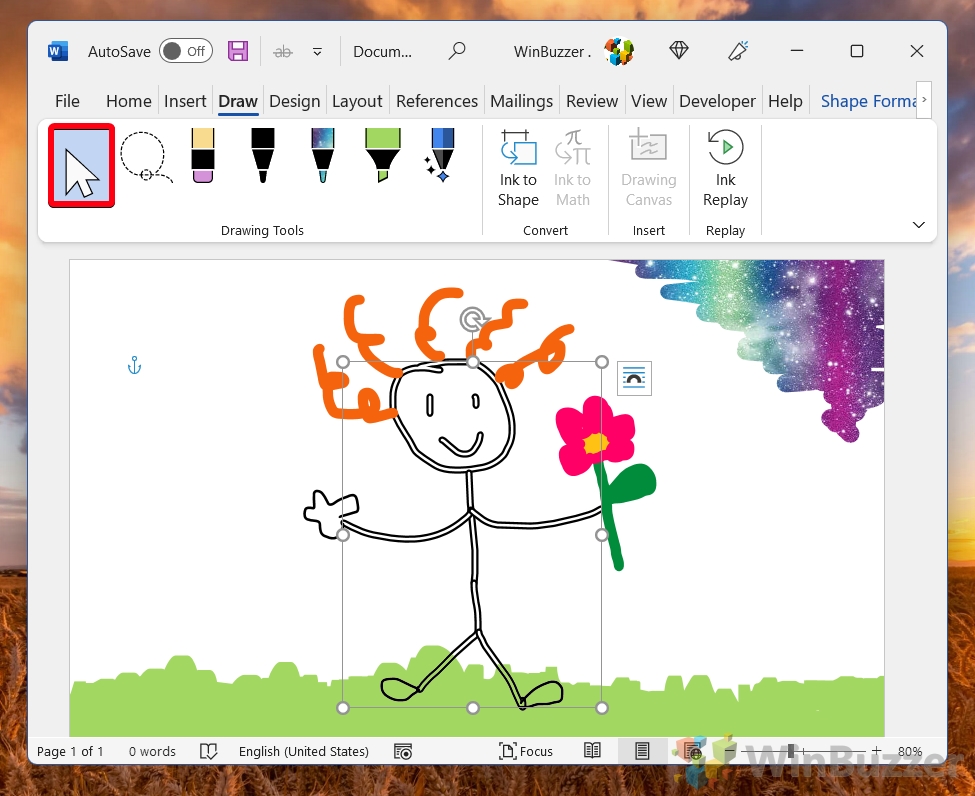
- Click and drag with the cursor tool to move your lines

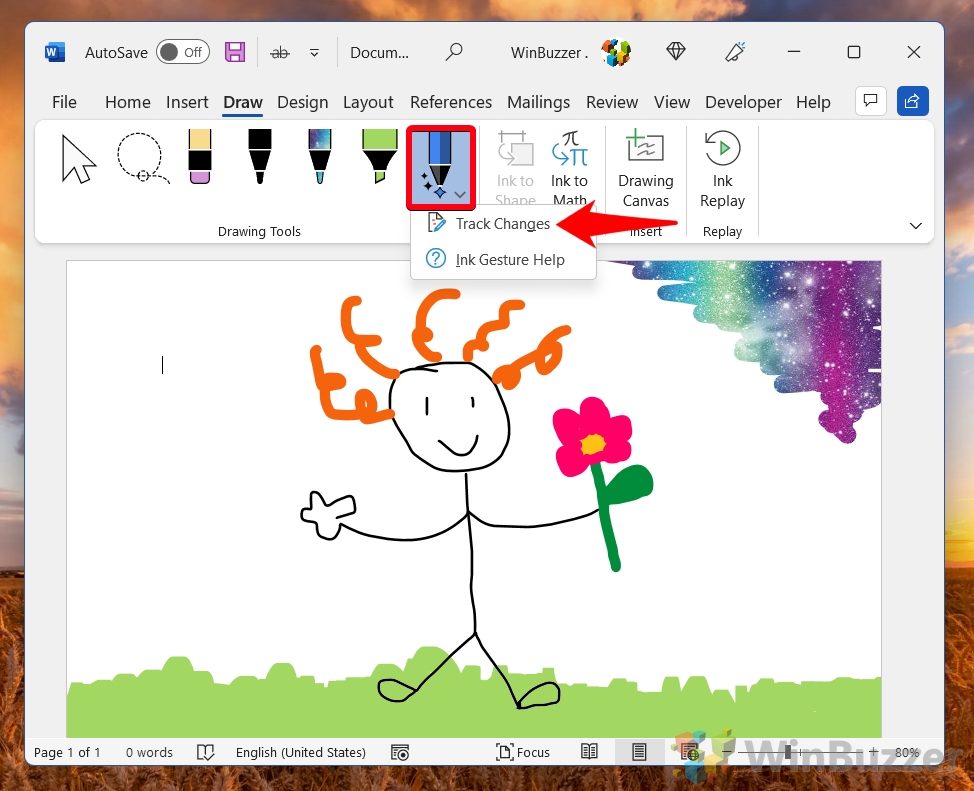
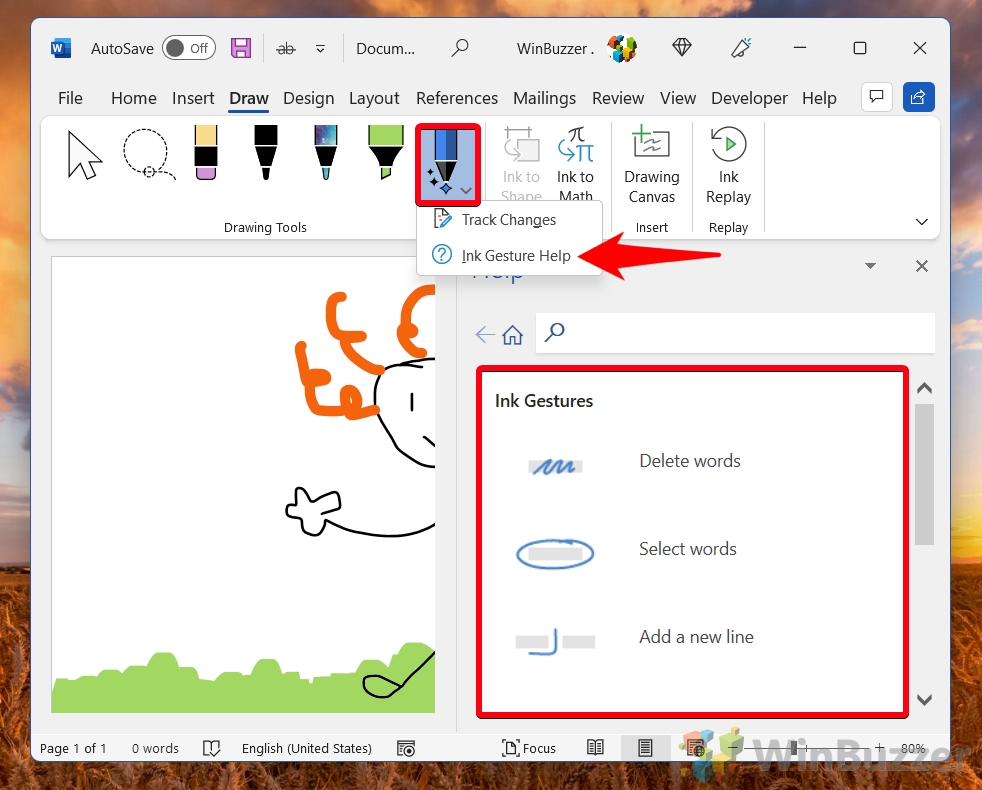
- Click on the action pen and choose “Track Changes”

- Annotate on text with typical editing marks to modify it

- For editing mark tips, click the action pen and press “Ink Gesture Help”


If you prefer to use Google’s text editing tools, drawing gets a bit less intuitive, but it’s still entirely possible. Here’s our existing guide on how to draw on Google Docs.

Extra: How to Annotate Screenshots with Snip and Sketch
You can also take a screenshot and annotate on it directly using Microsoft’s Snip and Sketch tool. Here’s our tutorial on the matter.

Microsoft Office
Microsoft Word is more than just a document-creation app. With it, you can also draw objects and shapes like you do with digital painting tools.

Download the Free How to Draw on Microsoft Word Article in PDF
![]() Download
Download
How to Draw on Microsoft Word
Drawing in Microsoft Word is easy. It’s as easy as inserting images. Just follow these steps and you’ll be able to create shapes and objects in MS Word.
-
Step 1: Start a Blank MS Word Document

First, open MS Word on your computer and start a blank document. You may also open a saved document with content as long as adding drawings to it is appropriate. -
Step 2: Open the Drawing Pane

Once you’ve started a blank document, proceed to open the drawing pane. Simply go to the Insert tab and click on the Drawing option. The drawing pane will then appear on your screen. -
Step 3: Start Drawing

>
You can then start drawing shapes and objects after doing Step 2. Click the pen icons in the toolbar. Hold the left-click button of your mouse and drag your mouse to start drawing on the drawing board. -
Step 4: Click the Save and Close Button

Once you’re drawing is complete, you can then insert it into the document. Simply click the Save and Close button in the upper-right corner of the Drawing pane. This will automatically attach your drawing to the blank document. -
Step 5: Adjust the Drawing and Save the Doc

Your drawing will be inserted in the doc like an image. You can make adjustments to its width and height measurements and position it anywhere like moving a picture in Microsoft Word. Once that’s done, make sure to save your document in MS Word.


FAQs
Can I draw freehand in MS Word?
Yes, you can draw freehand in MS Word using a mouse, and if you’re using a mobile device, you can draw using your fingertips in MS Word mobile.
Can I draw over images in MS Word?
Yes, you can draw over images in MS Word by following the usual steps in drawing objects in MS Word and dragging your finished drawing over an image, or even better, you can draw freehand on the image itself.
Is there are Microsoft Office app made for drawing?
Yes, there’s an MS Office app specifically made for drawing called Microsoft Drawing.
How many objects can I draw and insert in MS Word?
You can draw and insert as many objects and shapes as you need in MS Word.
Can MS Word serve as my drawing app or tool?
If you have no other apps or tools for drawing on your computer or device, then you can use MS Word as your primary drawing tool.
Can I use gridlines to draw on MS Word?
Yes, you can use gridlines to draw on MS Word, but first, you need to make the gridlines visible in the document through the Page Layout tab.
More in Microsoft Office
| 46+ Best Hand Drawn Poster Fonts Free Download | 40+ Best Graffiti Drawings / Artworks for your Inspiration |
| 43+ Premium Hand Drawn Photoshop Brushes Free Download | 26+ 3D Pencil Drawings |
| 32+ Amazing Collection of Realistic WaterColour Drawings for Download | 49+ Best Pencil Drawings Pictures |
| 33+ Best Graffiti Pencil Drawings & Sketches for your Inspiration | Collection of 70+ Best Photorealistic Pencil Drawings for your Inspiration |
| 15+ Architectural Drawings | 49+ Cartoon Drawings |
| 28+ Love Drawings Templates | 24+ Drawing Deer Drawings |