
In this article, you will learn the different parts of Microsoft Word Windows 2019. This is a lesson – 03 of Microsoft Word. You may also read previous lessons to learn the complete Microsoft Word.
Microsoft Word is application software for writing texts, and different types of documents can be easily developed in a practical way.
In other words, it is a word processor that allows you to create and edit text. As long as you know what the parts of Microsoft Word are and what they are used for. With this software, the user will be able to write and design texts where they will be able to use different fonts, colors, and sizes, with the different commands of Word.
In this section, we will make references to the basic parts of Microsoft Word Windows 2019. This program is a part of the Microsoft Office package developed by Microsoft. Along with other programs, there is a number of visual appearances and program window layout that can make the work easier. Let’s understand the basic parts of Microsoft Word Windows 2019.
In the below screenshot, you can see and learn about the various important parts of Microsoft Word Windows. If you learn the name of these parts then you will be used easily MS word application.

Quick Access Toolbar:
This bar is one of the most important parts of Microsoft Word Windows 2019. It is also located at the top of the screen, in the left corner just above the File Tab. It is the place for the most frequently used commands. You can customize this Toolbar by clicking the little arrow that displays some more commands such as “New” which refers to opening a new document, “Open” which implies displaying a document that we have saved on our computer, “Undo” reverse the previous action or “Redo” do the action again, and “Save” to save the current document.
Title bar:
The title bar is also one of the parts of the Microsoft Word window. It is located at the center and top of the document window and shows the name of the program or document. There, when we open a Microsoft Word document, we can read the title as Document1 – Word. It refers to a general name displayed by the program software. When we save our document, we can replace that name with a personalized one related to our file.
In this bar, on the right side, there are three more buttons known as window controls. It allows to perform of three commands i.e., minimize, maximize, and close the document or file.
The 1st is the “X” icon that is used to close the window of the Microsoft Word document we are working on. And the 02nd component is a double box icon which is located in the center of the previous ones and used to maximize or enlarge the document. The 03rd icon is a dash “_” used to minimize the document we are working on.
File Tab:
In Microsoft Word 2019, the File tab replaces the Microsoft Office button from Word 2007. Microsoft Office button is the circular button that is located in some operating systems at the bottom and in others at the top, on the left side. You can click it to see the backstage view. In this tab, where you can see the previously opened or saved files, create a new document, print a document, and do other operations.
Ribbon of Microsoft Word:
The Ribbon is one of the basic parts of Microsoft Word widow and contains organized commands in three layers.
- Tabs or Menu: These are the horizontal menu that appears at the top of the Ribbon and contain groups of related commands, i.e., File, Home, Insert, Design, Layout, References, Mailings, Review, View, and Help are examples of ribbon tabs.
- Groups: These are the organized related commands displayed below each tab or menu. The name of each group appears below the group on the Ribbon. For example, a group of commands related to a paragraph or a group of commands related to the font, etc.
- Commands: Commands appear within each group as mentioned above. For example, when we press the “File” tab, some commands or functions such as “New”, “Open” “Save”, “Save as” etc. are displayed.
Rulers:
Microsoft Word has two rulers – one is a horizontal ruler and the second is a vertical ruler. The horizontal ruler seems just under the Ribbon. It is used to set the size of the margins and tab stop position of the document. The vertical ruler appears on the left side of the document window and is used to measure the vertical position of elements on the page.
Scrollbar:
It is one of the parts of MS Word widow, which is characterized by being a long bar that is generally located on the right side of the document. It consists of an open bar containing an arrow that allows the user to scroll up and down more quickly.
Help icon:
The Help Icon can be used to find online-related queries. This provides helpful tutorials on various functions and commands related to MS word.
Zoom Control Buttons:
The zoom slider allows you to resize the document to view it according to the user’s requirements. It allows you to zoom in or zoom out from 0% to 500% wide range. The zoom controls consist of a slider that you can slide left (zoom in) or right (zoom out); you can also click the plus or minus sign buttons to increase or minus decrease the zoom factor.
View Buttons:
It is a group of buttons located to the left of the Zoom control, and near the bottom of the screen. It lets you switch the various Word document views.
- Print Layout view− This view displays pages exactly as they will show in print.
- Read Mode− This displays a full-screen view of the document.
- Web Layout − This displays a document view that appears on a Web browser, such as Internet Explorer.
- Outline view− This lets you display your document in outline form. For this view, we will first create using Word’s standard heading styles.
- Draft view− This displays only the text of your document as it appears on the printed page. No headers and footers are shown in this view.
Document or Work Area:
If we open MS Word on the computer then we can see different parts of the MS Word window on the screen. The document or work area is the area where we can type documents, letters, memos, or simply communication will be developed. The vertical flashing bar is called Cursor and the insertion point represents the location where text can write. It is generally white and can see when we open the MS Word application. These allow giving width and flexibility to the document.
Status Bar:
It is located at the bottom of the document and displays the information related to the word document. From left to right, it shows the total number of pages, word count, language, translator, error notifications, and sections among other information.
In this bar, we can visualize the document we are working on in five ways, e.g. print layout, full-screen reading, web layout, and outline view.
Dialog Box Launcher:
We can see a small arrow in the lower-right corner of many groups on the Ribbon that display some commands. By clicking this arrow, the downward window will open that provides more options about the group.
Word 2016 is designed to help you create professional-quality documents. Word can also help you organize and write documents more efficiently.
When you create a document in Word, you can choose to start from a blank document or let a template do much of the work for you. From then on, the basic steps in creating and sharing documents are the same. And Word’s powerful editing and reviewing tools can help you work with others to make your document great.
Start a document
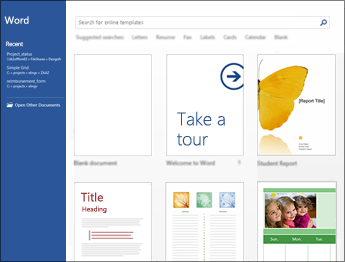
It’s often easier to create a new document using a template instead of starting with a blank page. Word templates come ready-to-use with pre-set themes and styles. All you need to do is add your content.
Each time you start Word, you can choose a template from the gallery, click a category to see more templates, or search for more templates online.
For a closer look at any template, click it to open a large preview.
If you’d rather not use a template, click Blank document.
Open a document
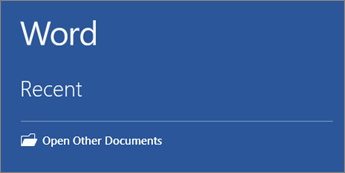
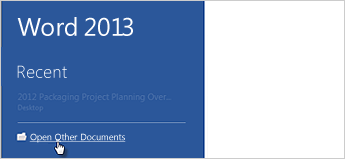
Every time you start Word, you’ll see a list of your most recently used documents in the left column. If the document you’re looking for isn’t there, click Open Other Documents.
If you’re already in Word, click File > Open and then browse to the file’s location.
When you open a document that was created in earlier versions of Word, you see Compatibility Mode in the title bar of the document window. You can work in compatibility more or you can upgrade the document to use Word 2016.
Save a document
To save a document for the first time, do the following:
-
On the File tab, click Save As.
-
Browse to the location where you’d like to save your document.
Note: To save the document on your computer, choose a folder under This PC or click Browse. To save your document online, choose an online location under Save As or click Add a Place. When your files are online, you can share, give feedback and work together on them in real time.
-
Click Save.
Note: Word automatically saves files in the .docx file format. To save your document in a format other than .docx, click the Save as type list, and then select the file format that you want.
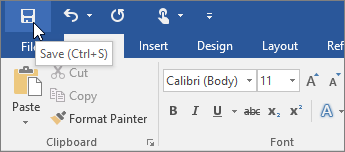
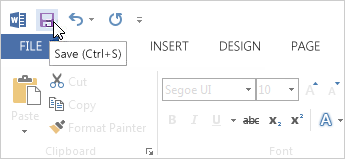
To save your document as you continue to work on it, click Save in the Quick Access Toolbar.
Read documents
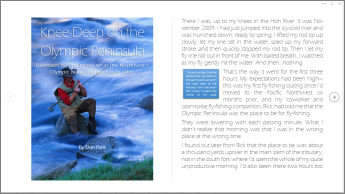
Open your document in Read Mode to hide most of the buttons and tools so you can get absorbed in your reading without distractions.
-
Open the document you want to read.
Note: Some documents open in Read Mode automatically, such as protected documents or attachments.
-
Click View > Read Mode.
-
To move from page to page in a document, do one of the following:
-
Click the arrows on the left and right sides of the pages.
-
Press page down and page up or the spacebar and backspace on the keyboard. You can also use the arrow keys or the scroll wheel on your mouse.
-
If you’re on a touch device, swipe left or right with your finger.
Tip: Click View > Edit Document to edit the document again.
-
Track changes
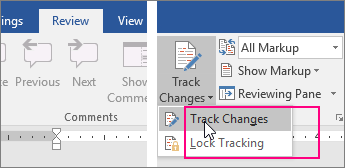
When you’re working on a document with other people or editing a document yourself, turn on Track Changes to see every change. Word marks all additions, deletions, moves, and formatting changes.
-
Open the document to be reviewed.
-
Click Review and then on the Track Changes button, select Track Changes.

Read Track changes to learn more.
Print your document
All in one place, you can see how your document will look when printed, set your print options, and print the file.
-
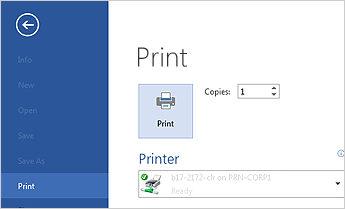
On the File tab, click Print.
-
Do the following:
-
Under Print, in the Copies box, enter the number of copies you want.
-
Under Printer, make sure the printer you want is selected.
-
Under Settings, the default print settings for your printer are selected for you. If you want to change a setting, just click the setting you want to change and then select a new setting.
-
-
When you’re satisfied with the settings, click Print.
For details, see Print a document.
Beyond the basics
For more on the fundamentals of using Word, see What’s new in Word 2016.
Top of Page
With Word for the web, you use your web browser to create, view, and edit the personal documents that you store on OneDrive. If your organization or college has a Microsoft 365 plan or SharePoint site, start using Word for the web by creating or storing documents in libraries on your site.Save changes
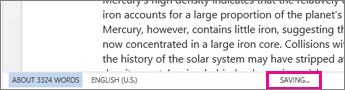
Word saves your changes automatically. Look on the status bar at the bottom left corner of Word for the web. It will either show Saved or Saving.
Share documents online
Because your document is online, you can share it by sending a link instead of an email attachment. People can read it in their web browser or mobile device.
Click File > Share > Share with People.

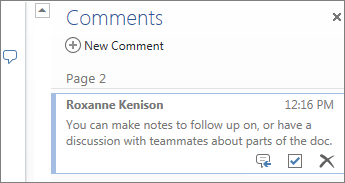
Comment in the browser
A comment balloon shows where comments have been made in the doc.

Reply to comments, and check off items you’ve addressed.
Edit in the browser
If you try to type in the document and nothing happens, you’re probably in Reading view. Switch to Editing view: click Edit Document > Edit in Word for the web.

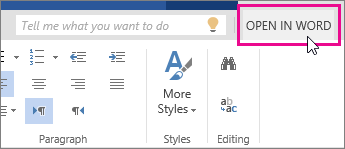
Type and format text, add pictures, adjust the layout of the page, and more. For more advanced editing, click Open in Word.
Work together on the same doc
To work together in Word for the web, you edit a document as you normally would. If others are also editing it, Word for the web alerts you to their presence. You can see everyone who is currently working in the document by clicking in the ribbon.

Clicking on an author’s name jumps you to where they’re working in the doc. And you’ll see the changes they make as they’re happening. They can be working in Word for the web, Word 2010 or later, or Word for Mac 2011.
Add a header or footer
Go to Insert > Header & Footer to add headers and footers to your document.
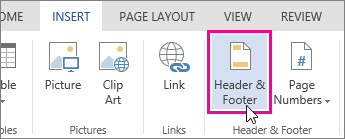
Click Options to choose how you’d like them to appear.

Add page numbers
Click Insert > Page Numbers and then choose from the gallery where you’d like the page numbers to appear.
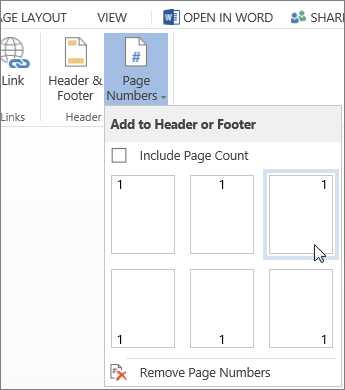
Select Include Page Count to show the current page number along with the total number of pages (page X of Y).
Find and replace text
Quickly search for every occurrence of a specific word or phrase in your document by clicking Home > Find (or type Ctrl+F). Results appear next to your document so you can see the term in context. Clicking on a search result jumps you to that occurrence.
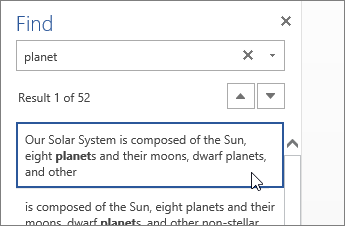
Click Replace (or type Ctrl+H) to find and replace text.
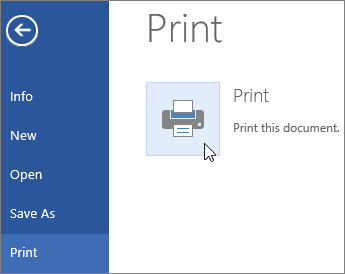
Print in Word for the web
Go to File > Print. Word for the web creates a PDF preview of your document that keeps all the layout and formatting of your document. Send the PDF to your printer and it will print the way you expect.
Microsoft Word 2013 is a word-processing program designed to help you create professional-quality documents. Word helps you organize and write your documents more efficiently.
Your first step in creating a document in Word 2013 is to choose whether to start from a blank document or to let a template do much of the work for you. From then on, the basic steps in creating and sharing documents are the same. Powerful editing and reviewing tools help you work with others to make your document perfect.
Choose a template
It’s often easier to create a new document using a template instead of starting with a blank page. Word templates are ready to use with themes and styles. All you need to do is add your content.
Each time you start Word 2013, you can choose a template from the gallery, click a category to see the templates it contains, or search for more templates online. (If you’d rather not use a template, just click the Blank document.)
For a closer look at any template, just click it to open a large preview.
Top of Page
Open a document
Every time you start Word, you’ll see a list of your most recently used documents in the left column. If the document you’re looking for isn’t there, click Open Other Documents.
If you’re already in Word, click File > Open and then browse to the file’s location.
When you open a document that was created in earlier versions of Word, you see Compatibility Mode in the title bar of the document window. You can work in compatibility more or you can upgrade the document to use features that are new or enhanced in Word 2013.
Top of Page
Save a document
To save a document for the first time, do the following:
-
Click the File tab.
-
Click Save As.
-
Browse to the location where you’d like to save your document.
Note: To save the document on your computer, choose a folder under Computer or click Browse. To save your document online, choose a location under Places or Add a Location. When your files are online, you can share, give feedback and work together on them in real time.
-
Click Save.
Note: Word automatically saves files in the .docx file format. To save your document in a format other than .docx, click the Save as type list, and then select the file format that you want.
To save your document as you continue to work on it, click Save in the Quick Access Toolbar.
Top of Page
Read documents
Open your document in Read Mode to hide most of the buttons and tools so you can get absorbed in your reading without distractions.
-
Open the document you want to read.
Note: Some documents open in Read Mode automatically, such as protected documents or attachments.
-
Click View > Read Mode.
-
To move from page to page in a document, do one of the following:
-
Click the arrows on the left and right sides of the pages.
-
Press page down and page up or the spacebar and backspace on the keyboard. You can also use the arrow keys or the scroll wheel on your mouse.
-
If you’re on a touch device, swipe left or right with your finger.
Tip: Click View > Edit Document to edit the document again.
-
Top of Page
Track changes
When you’re working on a document with other people or editing a document yourself, turn on Track Changes to see every change. Word marks all additions, deletions, moves, and formatting changes.
-
Open the document to be reviewed.
-
Click Review and then on the Track Changes button, select Track Changes.

Read Track changes to learn more.
Top of Page
Print your document
All in one place, you can see how your document will look when printed, set your print options, and print the file.
-
Click the File tab and then click Print.
-
Do the following:
-
Under Print, in the Copies box, enter the number of copies you want.
-
Under Printer, make sure the printer you want is selected.
-
Under Settings, the default print settings for your printer are selected for you. If you want to change a setting, just click the setting you want to change and then select a new setting.
-
-
When you’re satisfied with the settings, click Print.
For details, see Print and preview documents.
Beyond the basics
Go beyond the basics with your documents by creating a table of contents or saving a document as a template.
Top of Page
Important:
Office 2010 is no longer supported. Upgrade to Microsoft 365 to work anywhere from any device and continue to receive support.
Upgrade now
In this article
-
What is Word?
-
Find and apply a template
-
Create a new document
-
Open a document
-
Save a document
-
Read documents
-
Track changes and insert comments
-
Print your document
What is Word?
Microsoft Word 2010 is a word-processing program, designed to help you create professional-quality documents. With the finest document-formatting tools, Word helps you organize and write your documents more efficiently. Word also includes powerful editing and revising tools so that you can collaborate with others easily.
Top of Page
Find and apply a template
Word 2010 allows you to apply built-in templates, to apply your own custom templates, and to search from a variety of templates available on the web.
To find and apply a template in Word, do the following:
-
On the File tab, click New.
-
Under Available Templates, do one of the following:
-
To use one of the built-in templates, click Sample Templates, click the template that you want, and then click Create.
-
To reuse a template that you’ve recently used, click Recent Templates, click the template that you want, and then click Create.
-
To use your own template that you previously created, click My Templates, click the template that you want, and then click OK.
-
To find a template on Office.com, under Office.com Templates, click the template category that you want, click the template that you want, and click Download to download the template from Office.com to your computer.
-
Note: You can also search for templates on Office.com from within Word. In the Search Office.com for templates box, type one or more search terms, and then click the arrow button to search.
Top of Page
Create a new document
-
Click the File tab and then click New.
-
Under Available Templates, click Blank Document.
-
Click Create.
For more information about how to create a new document, see Create a document.
Top of Page
Open a document
-
Click the File tab, and then click Open.
-
In the left pane of the Open dialog box, click the drive or folder that contains the document.
-
In the right pane of the Open dialog box, open the folder that contains the drawing that you want.
-
Click the document and then click Open.
Top of Page
Save a document
To save a document in the format used by Word 2010 and Word 2007, do the following:
-
Click the File tab.
-
Click Save As.
-
In the File name box, enter a name for your document.
-
Click Save.
To save a document so that it is compatible with Word 2003 or earlier, do the following:
-
Open the document that you want to be used in Word 2003 or earlier.
-
Click the File tab.
-
Click Save As.
-
In the Save as type list, click Word 97-2003 Document. This changes the file format to .doc.
-
In the File name box, type a name for the document.
-
Click Save.
For more information about how to create a document that is compatible with Word 2003 or earlier versions, see Create a document to be used by previous versions of Word.
Top of Page
Read documents
-
Open the document that you want to read.
-
On the View tab, in the Document Views group, click Full Screen Reading
-
To move from page to page in a document, do one of the following:
-
Click the arrows in the lower corners of the pages.
-
Press PAGE DOWN and PAGE UP or SPACEBAR and BACKSPACE on the keyboard.
-
Click the navigation arrows at the top center of the screen.
Tip: Click View Options, and then click Show Two Pages
to view two pages, or screens, at a time.
-
 to view two pages, or screens, at a time.
For more information about how to view documents, see Read documents in Word.
Top of Page
Track changes and insert comments
-
To turn on change tracking, on the Review tab, in the Tracking group, click Track Changes.
-
To insert a comment, on the Review tab, in the Comments group, click New Comment.
For more information about how to track changes made while revising, see Track changes and insert comments.
Top of Page
Print your document
-
Click the File tab and then click Print.
-
Do the following:
-
Under Print, in the Copies box, enter the number of copies that you want to print.
-
Under Printer, make sure that the printer that you want is selected.
-
Under Settings, the default print settings for your printer are selected for you. If you want to change a setting, click the setting you want to change and then select the setting that you want.
-
-
When you are satisfied with the settings, click Print.
For more information about how to print a file, see Preview and print a file.
Top of Page
Change How Word Looks on Screen to Be More Productive
How do you change views in Word documents?
Updated on December 4, 2019
Microsoft Word provides several ways to view a document you’re working on. Each is suitable for different aspects of working with a document, and some are better suited for multi-page documents than single pages. If you’ve always worked in the default view, you may find other views that make you more productive.
Instructions in this article apply to Word for Microsoft 365, Word 2019, Word 2016, Word 2013, and Word 2010.
Change Layouts
Word documents open in the Print Layout by default. You can select an alternative layout at any time.
-
Go to the Ribbon and select the View tab.
-
In the Views group, select one of the other available layouts available to change the layout.
Change Layouts With the Icons Under the Document
Another way to change layouts on the fly is to use the buttons at the bottom of the Word document window. The current layout icon is highlighted. To switch to a different layout, select the corresponding icon.
Word Layout Options
Current versions of Word provide the following layout options:
- Print Layout is the default layout and the one you see most often.
- Web Layout is suitable if you are designing a web page in Word. Web Layout view shows how the document will look as a web page.
- Outline generates an outline version of the contents of the document. You can control the number of levels that are shown and whether the text is formatted. Use Outline view to organize and navigate through a lengthy document.
- Draft view displays only basic text without any formatting or graphics. It is Word’s equivalent of a plain text editor.
- Read Mode hides the writing tools and menus, leaving leave more room for the document pages.
- Focus Mode is a simplified view of the document without any distractions and is available in Microsoft 365. If you need the ribbon, move the mouse to the top of the screen and the ribbon will drop down.
Other Ways to Change How Word Displays
Also in the View tab are other ways to control how a Word document looks on screen.
- Zoom opens a dialog box you can use to specify the percentage of zoom you want. Choose from Word-supplied choices or enter any percentage you like.
- Zoom to 100% instantly returns the document to 100% size.
- One Page or Multiple Pages toggles the view so that either one page of the document displays on the screen or thumbnails of several pages display on the screen.
- Page Width expands the width of the working document to the screen size, usually displaying only the top part of the document.
- Ruler and Gridlines make it easier to measure distance and objects in a document and line up objects on the page.
- Navigation Pane adds a column to the left of the document that holds thumbnails for every page. It is useful for navigating through documents that have more than one page.
- Split displays parts of two pages at the same time, which is useful when you want to copy text or graphics from one page and paste to another.
Thanks for letting us know!
Get the Latest Tech News Delivered Every Day
Subscribe
Lesson 1: Word Window, New, Open and Change View
Introduction
Microsoft Word 2000 is the word processing application in the Microsoft Office suite. Create professional-looking, formatted text documents with this powerful Word processing software.
By the end of this lesson, you should be able to:
- Identify the parts of the Word window
- Create a new document
- Open a previously saved file
- Change the document view
The Word window
Word is the word processing application included in the Microsoft Office 2000 suite. Aside from Word processing, Word allows you to perform many tasks in a typical office environment.
Shown below is the Microsoft Word default window. When Word is launched, a new blank document—or default window—opens in Print Layout view. Although window elements are fully explained in our Windows tutorial, here is a brief explanation of the Word window.
Title bar
This displays the document name followed by a program name.
Menu bar
This contains a list of options to manage and customize documents.
Standard toolbar
This contains shortcut buttons for the most popular demands.
Formatting toolbar
This contains buttons that are used for formatting text.
Ruler
This is used to set margins, indents, and tabs.
Insertion point
This is the location where the next character appears.
End-of-document marker
This indicates the end of the document.
Scroll bars
This is used to view parts of the document.
Status bar
This displays the position of the insertion point and working mode buttons.
Office Assistant
This links to the Microsoft Office Help feature.
Create a new document
There are three ways to create a new document in Word.
- When you launch Word, it automatically creates a new document.
- Choose File
 New (Ctrl+N).
 - Click the New Blank Document button on the Standard toolbar.

Opening a previously saved file
You will spend a lot of time editing documents you created and saved at an earlier time. There are four ways to open a previously saved file.
To open a previously saved file:
- Choose FileOpen (Ctrl+O).
OR
- Click the Open button on the Standard toolbar
 .
.
OR
- The last four files you saved appear at the bottom of the File menu. Choose one from the list.
Remember: Save As allows you to save a document under a new name. This is important to do when you intend to edit or revise a document because you may want to keep the original.
A change in view
Word processing requires you to stare at a computer screen for long periods of time. In order to alleviate the strain on your eyes, Word provides four different ways Word elements are displayed. The four views are Normal view, Print Layout view, Web Layout view, and Outline view.
Normal view is used for most typing, editing, and formatting. It provides a nice, clean look without rulers or page numbers cluttering your view.
Web Layout view shows what your text will look like on a webpage.
Print Layout view shows what your document will look like when it is printed. Print Preview shows you this as well.
Outline view is used to create and edit outlines. This view is particularly handy when making notes.
To change your document view:
- Choose Viewclick the view of your choice.

OR
- Click one of the four buttons at the bottom-left of your Word window.

Challenge!
- Start Word.
- Create a new document.
- Type the following: «This exercise helped me learn how to open existing Word documents.»
- Save your document using any name you want.
- Close the document without exiting Word.
- Open the document you just created.
/en/word2000/using-the-insertion-point/content/
 Please Note:
This article is written for users of the following Microsoft Word versions: 2007, 2010, 2013, 2016, 2019, and Word in Microsoft 365. If you are using an earlier version (Word 2003 or earlier), this tip may not work for you. For a version of this tip written specifically for earlier versions of Word, click here: Understanding Views.
![]()
Written by Allen Wyatt (last updated December 18, 2021)
This tip applies to Word 2007, 2010, 2013, 2016, 2019, and Word in Microsoft 365
Word provides different ways you can view your documents, depending on your particular needs. The major views available in Word are Print Layout, Full Screen Reading, Web Layout, Outline, and Draft. (In Word 2013 the Full Screen Reading view was renamed the Read Mode view.) You can choose which view you are using by clicking on the view controls at the bottom-right corner of the program window or by selecting a view from the View tab of the ribbon. (Using the view controls at the bottom-right corner of the program window allows you to access only a limited number of views. To get to all of the available views, use the View tab of the ribbon.)
Print Layout view is the one most closely related to what your document will look like when you actually print it. This viewing mode, which is the one you will probably use most of the time, allows you to see your headers and footers in place, what your margins look like, how your text boxes appear in relation to text, and what your graphics look like in your document. This is the viewing mode you should use if you want to always see what your document will look like.
Read Mode view (Full Screen Reading view in earlier versions of Word) allows you to do exactly what its name suggests—read your document using the full screen of your system. The view gets rid of the ribbons and uses the maximum screen space available to display your document. Typically, the document will be displayed in two facing pages, but the number of pages displayed can be affected by the size of the monitor you are using. There is no editing allowed in this view; it is for reading only. You can exit this view by simply pressing the Esc key. (In many ways, Read Mode is very similar to Print Preview in older versions of Word.)
Web Layout view is designed to allow you to easily see how your documents will look if used in an online environment. There is not much more to say about this viewing mode; it is provided for those who intend on publishing their Word documents online.
Outline view is used when you want to work with large portions of your document at the same time. It allows you to collapse your document and view only the major headings. The text under each heading can be hidden so it does not obscure your view of document organization. When you select Outline view, an additional Outlining tab appears on the ribbon. This tab allows you to control what is displayed in this view.
Draft view can be considered a «pared down» version of the Print Layout view. It allows you to generally see how your text will appear on paper. This means you can see what each line will look like, how the text appears, and where the lines will break. You can also see where each page will break. An advantage of this view is that the styles used in the document are displayed in the style pane to the left of the screen. Draft view is helpful if you are using an older, slower computer that can’t display the Print Layout view particularly quickly. (Print Layout view requires more computing overhead to display information.)
There is one additional «view» (more correctly called a «mode») that should be addressed—Focus. This view or mode is available on the View tab of the ribbon, in the Immersive group. It was added in Microsoft 365, and it removes all extraneous distractions so that you can focus specifically on the words. It is similar to Read Mode, except it allows you to edit your document. Like Read Mode, you can exit Focus mode by pressing the Esc key.
If you open multiple documents, or you are use multiple panes or windows to view the same document, switching views in one of the windows or panes will generally not affect the others. Read Mode and Focus mode can affect the others, as these modes rely upon the full screen, not on individual panes or windows. The other views, however, work within panes or windows and Word allows you to control the views in the panes and windows independently. Thus, you can use one document pane to see what your document looks like in one view, and another to work with the document in an entirely different way.
WordTips is your source for cost-effective Microsoft Word training.
(Microsoft Word is the most popular word processing software in the world.)
This tip (8142) applies to Microsoft Word 2007, 2010, 2013, 2016, 2019, and Word in Microsoft 365. You can find a version of this tip for the older menu interface of Word here: Understanding Views.
Author Bio
With more than 50 non-fiction books and numerous magazine articles to his credit, Allen Wyatt is an internationally recognized author. He is president of Sharon Parq Associates, a computer and publishing services company. Learn more about Allen…
MORE FROM ALLEN
Previous Column Values in a Drop-Down List
Want a quick way to add non-unique values into a column? You probably know you can do this by starting to simply type in …
Discover More
Blank Lines before Tables
Adding a blank line before your table is easy, but Word’s behavior as you attempt to make the insert can depend on where …
Discover More
Styles for Lines, Dashes, and Arrows
Create a simple drawing object, and Excel makes some assumptions about how that object should appear. Excel provides a …
Discover More