
Word 2016 is designed to help you create professional-quality documents. Word can also help you organize and write documents more efficiently.
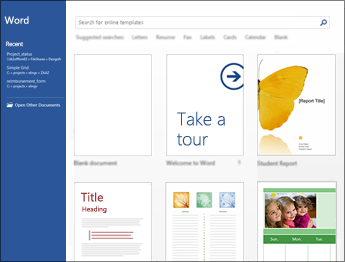
When you create a document in Word, you can choose to start from a blank document or let a template do much of the work for you. From then on, the basic steps in creating and sharing documents are the same. And Word’s powerful editing and reviewing tools can help you work with others to make your document great.
Start a document
It’s often easier to create a new document using a template instead of starting with a blank page. Word templates come ready-to-use with pre-set themes and styles. All you need to do is add your content.
Each time you start Word, you can choose a template from the gallery, click a category to see more templates, or search for more templates online.
For a closer look at any template, click it to open a large preview.
If you’d rather not use a template, click Blank document.
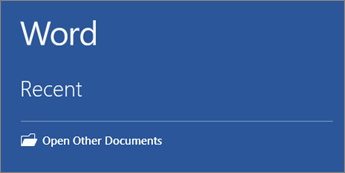
Open a document
Every time you start Word, you’ll see a list of your most recently used documents in the left column. If the document you’re looking for isn’t there, click Open Other Documents.
If you’re already in Word, click File > Open and then browse to the file’s location.
When you open a document that was created in earlier versions of Word, you see Compatibility Mode in the title bar of the document window. You can work in compatibility more or you can upgrade the document to use Word 2016.
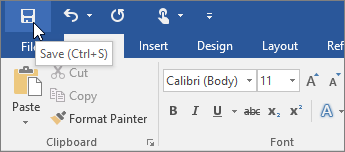
Save a document
To save a document for the first time, do the following:
-
On the File tab, click Save As.
-
Browse to the location where you’d like to save your document.
Note: To save the document on your computer, choose a folder under This PC or click Browse. To save your document online, choose an online location under Save As or click Add a Place. When your files are online, you can share, give feedback and work together on them in real time.
-
Click Save.
Note: Word automatically saves files in the .docx file format. To save your document in a format other than .docx, click the Save as type list, and then select the file format that you want.
To save your document as you continue to work on it, click Save in the Quick Access Toolbar.
Read documents
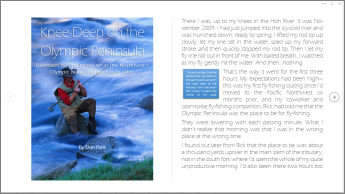
Open your document in Read Mode to hide most of the buttons and tools so you can get absorbed in your reading without distractions.
-
Open the document you want to read.
Note: Some documents open in Read Mode automatically, such as protected documents or attachments.
-
Click View > Read Mode.
-
To move from page to page in a document, do one of the following:
-
Click the arrows on the left and right sides of the pages.
-
Press page down and page up or the spacebar and backspace on the keyboard. You can also use the arrow keys or the scroll wheel on your mouse.
-
If you’re on a touch device, swipe left or right with your finger.
Tip: Click View > Edit Document to edit the document again.
-
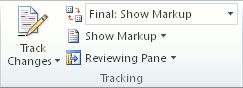
Track changes
When you’re working on a document with other people or editing a document yourself, turn on Track Changes to see every change. Word marks all additions, deletions, moves, and formatting changes.
-
Open the document to be reviewed.
-
Click Review and then on the Track Changes button, select Track Changes.

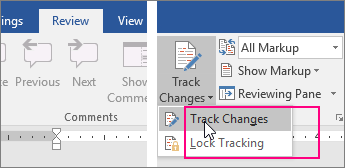
Read Track changes to learn more.
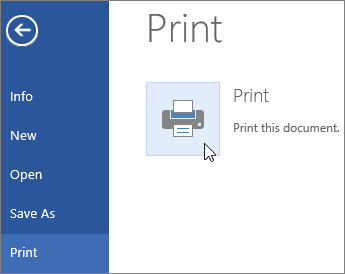
Print your document
All in one place, you can see how your document will look when printed, set your print options, and print the file.
-
On the File tab, click Print.
-
Do the following:
-
Under Print, in the Copies box, enter the number of copies you want.
-
Under Printer, make sure the printer you want is selected.
-
Under Settings, the default print settings for your printer are selected for you. If you want to change a setting, just click the setting you want to change and then select a new setting.
-
-
When you’re satisfied with the settings, click Print.
For details, see Print a document.
Beyond the basics
For more on the fundamentals of using Word, see What’s new in Word 2016.
Top of Page
With Word for the web, you use your web browser to create, view, and edit the personal documents that you store on OneDrive. If your organization or college has a Microsoft 365 plan or SharePoint site, start using Word for the web by creating or storing documents in libraries on your site.Save changes
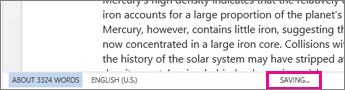
Word saves your changes automatically. Look on the status bar at the bottom left corner of Word for the web. It will either show Saved or Saving.
Share documents online
Because your document is online, you can share it by sending a link instead of an email attachment. People can read it in their web browser or mobile device.
Click File > Share > Share with People.

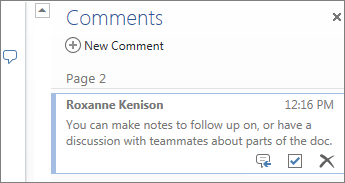
Comment in the browser
A comment balloon shows where comments have been made in the doc.

Reply to comments, and check off items you’ve addressed.
Edit in the browser
If you try to type in the document and nothing happens, you’re probably in Reading view. Switch to Editing view: click Edit Document > Edit in Word for the web.

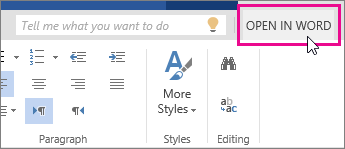
Type and format text, add pictures, adjust the layout of the page, and more. For more advanced editing, click Open in Word.
Work together on the same doc
To work together in Word for the web, you edit a document as you normally would. If others are also editing it, Word for the web alerts you to their presence. You can see everyone who is currently working in the document by clicking in the ribbon.

Clicking on an author’s name jumps you to where they’re working in the doc. And you’ll see the changes they make as they’re happening. They can be working in Word for the web, Word 2010 or later, or Word for Mac 2011.
Add a header or footer
Go to Insert > Header & Footer to add headers and footers to your document.
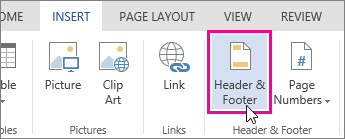
Click Options to choose how you’d like them to appear.

Add page numbers
Click Insert > Page Numbers and then choose from the gallery where you’d like the page numbers to appear.
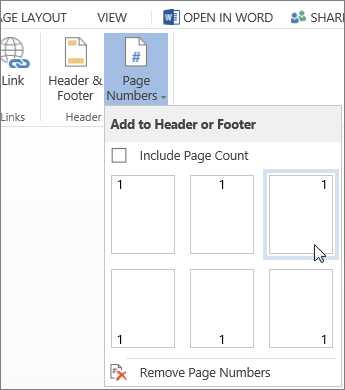
Select Include Page Count to show the current page number along with the total number of pages (page X of Y).
Find and replace text
Quickly search for every occurrence of a specific word or phrase in your document by clicking Home > Find (or type Ctrl+F). Results appear next to your document so you can see the term in context. Clicking on a search result jumps you to that occurrence.
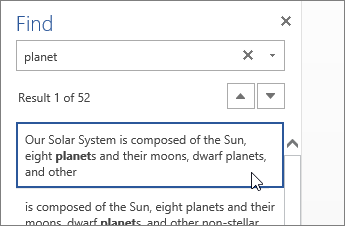
Click Replace (or type Ctrl+H) to find and replace text.
Print in Word for the web
Go to File > Print. Word for the web creates a PDF preview of your document that keeps all the layout and formatting of your document. Send the PDF to your printer and it will print the way you expect.
Microsoft Word 2013 is a word-processing program designed to help you create professional-quality documents. Word helps you organize and write your documents more efficiently.
Your first step in creating a document in Word 2013 is to choose whether to start from a blank document or to let a template do much of the work for you. From then on, the basic steps in creating and sharing documents are the same. Powerful editing and reviewing tools help you work with others to make your document perfect.
Choose a template
It’s often easier to create a new document using a template instead of starting with a blank page. Word templates are ready to use with themes and styles. All you need to do is add your content.
Each time you start Word 2013, you can choose a template from the gallery, click a category to see the templates it contains, or search for more templates online. (If you’d rather not use a template, just click the Blank document.)
For a closer look at any template, just click it to open a large preview.
Top of Page
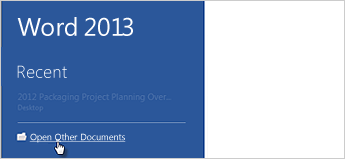
Open a document
Every time you start Word, you’ll see a list of your most recently used documents in the left column. If the document you’re looking for isn’t there, click Open Other Documents.
If you’re already in Word, click File > Open and then browse to the file’s location.
When you open a document that was created in earlier versions of Word, you see Compatibility Mode in the title bar of the document window. You can work in compatibility more or you can upgrade the document to use features that are new or enhanced in Word 2013.
Top of Page
Save a document
To save a document for the first time, do the following:
-
Click the File tab.
-
Click Save As.
-
Browse to the location where you’d like to save your document.
Note: To save the document on your computer, choose a folder under Computer or click Browse. To save your document online, choose a location under Places or Add a Location. When your files are online, you can share, give feedback and work together on them in real time.
-
Click Save.
Note: Word automatically saves files in the .docx file format. To save your document in a format other than .docx, click the Save as type list, and then select the file format that you want.
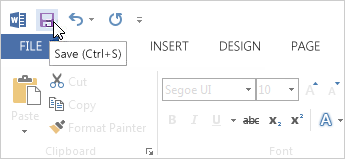
To save your document as you continue to work on it, click Save in the Quick Access Toolbar.
Top of Page
Read documents
Open your document in Read Mode to hide most of the buttons and tools so you can get absorbed in your reading without distractions.
-
Open the document you want to read.
Note: Some documents open in Read Mode automatically, such as protected documents or attachments.
-
Click View > Read Mode.
-
To move from page to page in a document, do one of the following:
-
Click the arrows on the left and right sides of the pages.
-
Press page down and page up or the spacebar and backspace on the keyboard. You can also use the arrow keys or the scroll wheel on your mouse.
-
If you’re on a touch device, swipe left or right with your finger.
Tip: Click View > Edit Document to edit the document again.
-
Top of Page
Track changes
When you’re working on a document with other people or editing a document yourself, turn on Track Changes to see every change. Word marks all additions, deletions, moves, and formatting changes.
-
Open the document to be reviewed.
-
Click Review and then on the Track Changes button, select Track Changes.

Read Track changes to learn more.
Top of Page
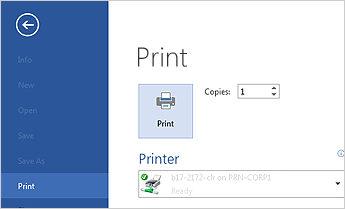
Print your document
All in one place, you can see how your document will look when printed, set your print options, and print the file.
-
Click the File tab and then click Print.
-
Do the following:
-
Under Print, in the Copies box, enter the number of copies you want.
-
Under Printer, make sure the printer you want is selected.
-
Under Settings, the default print settings for your printer are selected for you. If you want to change a setting, just click the setting you want to change and then select a new setting.
-
-
When you’re satisfied with the settings, click Print.
For details, see Print and preview documents.
Beyond the basics
Go beyond the basics with your documents by creating a table of contents or saving a document as a template.
Top of Page
Important:
Office 2010 is no longer supported. Upgrade to Microsoft 365 to work anywhere from any device and continue to receive support.
Upgrade now
In this article
-
What is Word?
-
Find and apply a template
-
Create a new document
-
Open a document
-
Save a document
-
Read documents
-
Track changes and insert comments
-
Print your document
What is Word?
Microsoft Word 2010 is a word-processing program, designed to help you create professional-quality documents. With the finest document-formatting tools, Word helps you organize and write your documents more efficiently. Word also includes powerful editing and revising tools so that you can collaborate with others easily.
Top of Page
Find and apply a template
Word 2010 allows you to apply built-in templates, to apply your own custom templates, and to search from a variety of templates available on the web.
To find and apply a template in Word, do the following:
-
On the File tab, click New.
-
Under Available Templates, do one of the following:
-
To use one of the built-in templates, click Sample Templates, click the template that you want, and then click Create.
-
To reuse a template that you’ve recently used, click Recent Templates, click the template that you want, and then click Create.
-
To use your own template that you previously created, click My Templates, click the template that you want, and then click OK.
-
To find a template on Office.com, under Office.com Templates, click the template category that you want, click the template that you want, and click Download to download the template from Office.com to your computer.
-
Note: You can also search for templates on Office.com from within Word. In the Search Office.com for templates box, type one or more search terms, and then click the arrow button to search.
Top of Page
Create a new document
-
Click the File tab and then click New.
-
Under Available Templates, click Blank Document.
-
Click Create.
For more information about how to create a new document, see Create a document.
Top of Page
Open a document
-
Click the File tab, and then click Open.
-
In the left pane of the Open dialog box, click the drive or folder that contains the document.
-
In the right pane of the Open dialog box, open the folder that contains the drawing that you want.
-
Click the document and then click Open.
Top of Page
Save a document
To save a document in the format used by Word 2010 and Word 2007, do the following:
-
Click the File tab.
-
Click Save As.
-
In the File name box, enter a name for your document.
-
Click Save.
To save a document so that it is compatible with Word 2003 or earlier, do the following:
-
Open the document that you want to be used in Word 2003 or earlier.
-
Click the File tab.
-
Click Save As.
-
In the Save as type list, click Word 97-2003 Document. This changes the file format to .doc.
-
In the File name box, type a name for the document.
-
Click Save.
For more information about how to create a document that is compatible with Word 2003 or earlier versions, see Create a document to be used by previous versions of Word.
Top of Page
Read documents
-
Open the document that you want to read.
-
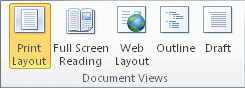
On the View tab, in the Document Views group, click Full Screen Reading
-
To move from page to page in a document, do one of the following:
-
Click the arrows in the lower corners of the pages.
-
Press PAGE DOWN and PAGE UP or SPACEBAR and BACKSPACE on the keyboard.
-
Click the navigation arrows at the top center of the screen.
Tip: Click View Options, and then click Show Two Pages
to view two pages, or screens, at a time.
-
 to view two pages, or screens, at a time.
For more information about how to view documents, see Read documents in Word.
Top of Page
Track changes and insert comments
-
To turn on change tracking, on the Review tab, in the Tracking group, click Track Changes.
-
To insert a comment, on the Review tab, in the Comments group, click New Comment.
For more information about how to track changes made while revising, see Track changes and insert comments.
Top of Page
Print your document
-
Click the File tab and then click Print.
-
Do the following:
-
Under Print, in the Copies box, enter the number of copies that you want to print.
-
Under Printer, make sure that the printer that you want is selected.
-
Under Settings, the default print settings for your printer are selected for you. If you want to change a setting, click the setting you want to change and then select the setting that you want.
-
-
When you are satisfied with the settings, click Print.
For more information about how to print a file, see Preview and print a file.
Top of Page
Getty Images / Geri Lavrov
Updated on January 26, 2019
There are many shortcuts for common functions in Microsoft Word. These shortcuts or commands can come in handy when typing a report or term paper, or even a letter. It is a good idea to try some of these functions before you actually begin a project. Once you become familiar with the way they work, you may become hooked on shortcuts.
Executing Shortcuts
Before you can use shortcuts commands, it’s important to understand a few requirements. If the shortcut involves a section of text (words you have typed), you will need to highlight the text before typing the command. For instance, to bold a word or words, you must highlight them first.
For other commands, you may only need to place the cursor at a specific place. For instance, if you want to insert a footnote, place the cursor in the relevant position. The commands below are sectioned into groups by alphabetical order to make it easier to find the ones you need.
Bold Through Italics
Boldfacing a word or group of words is one of the handiest shortcut commands in Microsoft Word. Other commands, such as centering text, creating a hanging indent, or even calling for help can be useful shortcuts to know. The latter command—calling for help by pressing the F1 key—brings up a printed helpfile to the right of your document, which even includes its own search function. (The last section of this article contains instructions for the search command.)
|
Function |
Shortcut |
|
Bold |
CTRL + B |
|
Center a paragraph |
CTRL + E |
|
Copy |
CTRL + C |
|
Create a hanging indent |
CTRL + T |
|
Decrease the font size by 1 point |
CTRL + [ |
|
Double-space lines |
CTRL + 2 |
|
Hanging Indent |
CTRL + T |
|
Help |
F1 |
|
Increase the font size by 1 point |
CTRL + ] |
|
Indent a paragraph from the left |
CTRL + M |
|
Indent |
CTRL + M |
|
Insert a footnote |
ALT + CTRL + F |
|
Insert an endnote |
ALT + CTRL + D |
|
Italic |
CTRL + I |
Justify Through Single-Space Lines
Justifying a paragraph will make it flush left and flush right rather than ragged-right, which is the default in Word. But, you can also left-align a paragraph, create a page break, and even mark a table of contents or index entry, as the shortcut commands in this section show.
|
Function |
Shortcut |
|
Justify a paragraph |
CTRL + J |
|
Left-align a paragraph |
CTRL + L |
|
Mark a table of contents entry |
ALT + SHIFT + O |
|
Mark an index entry |
ALT + SHIFT + X |
|
Page Break |
CTRL + ENTER |
|
|
CTRL + P |
|
Remove a paragraph indent from the left |
CTRL + SHIFT + M |
|
Remove paragraph formatting |
CTRL + Q |
|
Right-align a paragraph |
CTRL + R |
|
Save |
CTRL + S |
|
Search |
CTRL = F |
|
Select All |
CTRL + A |
|
Shrink Font One Point |
CTRL + [ |
|
Single-space lines |
CTRL + 1 |
Subscripts Through Undo
If you’re writing a science paper, you might need to place certain letters or numbers in subscript, such as in H20, the chemical formula for water. The subscript shortcut makes it easy to do this, but you can also create a superscript with a shortcut command. And, if you make a mistake, correcting it is only a CTRL = Z away.
|
Function |
Shortcut |
|
To type a Subscript |
CTRL + = |
|
To type a Superscript |
CTRL + SHIFT + = |
|
Thesaurus |
SHIFT + F7 |
|
Remove Hanging Indent |
CTRL + SHIFT + T |
|
Remove Indent |
CTRL + SHIFT + M |
|
Underline |
CTRL + U |
|
Undo |
CTRL + Z |
Updated: 12/31/2022 by

Below is a listing of the more commonly used shortcut keys in Microsoft Word. See the computer shortcuts page if you are looking for a list of shortcut keys used in other programs. Please be aware that some shortcuts may not work in all versions of Microsoft Word.
Note
If the device you are using does not have function keys (F1-F12) on its keyboard, like a Chromebook, certain shortcuts are unavailable to you.
Note
Some Microsoft Word shortcut keys below may not work in Word 365, and most shortcut keys do not work in Word on a mobile device.
| Shortcut | Description |
|---|---|
| Ctrl+0 | Toggle 6pts of spacing above the paragraph. |
| Ctrl+A | Select all contents of the page. |
| Ctrl+B | Bold highlighted selection. |
| Ctrl+C | Copy selected text. |
| Ctrl+D | Open the font preferences window. |
| Ctrl+E | Align the line or selected text to the center of the screen. |
| Ctrl+F | Open find box. |
| Ctrl+I | Italic highlighted selection. |
| Ctrl+J | Align the selected text or line to justify the screen. |
| Ctrl+K | Insert a hyperlink. |
| Ctrl+L | Align the line or selected text to the left of the screen. |
| Ctrl+M | Indent the paragraph. |
| Ctrl+N | Open new, blank document window. |
| Ctrl+O | Open the dialog box or page for selecting a file to open. |
| Ctrl+P | Open the print window. |
| Ctrl+R | Align the line or selected text to the right of the screen. |
| Ctrl+S | Save the open document. Like Shift+F12. |
| Alt+F, A | Save the document under a different file name. |
| Alt+X | Show the Unicode code of a highlighted character. |
| Ctrl+T | Create a hanging indent. |
| Ctrl+U | Underline the selected text. |
| Ctrl+V | Paste. |
| Ctrl+W | Close the currently open document. |
| Ctrl+X | Cut selected text. |
| Ctrl+Y | Redo the last action performed. |
| Ctrl+Z | Undo last action. |
| Ctrl+Shift+A | Sets the selected text to all capital letters. |
| Ctrl+Shift+D | Adds double underline to the selected text. |
| Ctrl+Shift+E | Enable or disable revision tracking. |
| Ctrl+Shift+F | Open Font window to change the font. |
| Ctrl+Shift+L | Quickly create a bullet point. |
| Ctrl+Shift+> | Increase selected font +1pts up to 12pt and then increase font +2pts. |
| Ctrl+] | Increase selected font +1pts. |
| Ctrl+Shift+< | Decrease selected font -1pts if 12pt or lower; if above 12, decreases font by +2pt. |
| Ctrl+[ | Decrease selected font -1pts. |
| Ctrl+/+C | Insert a cent sign (¢). |
| Ctrl+'+<char> | Insert a character with an accent (acute) mark, where <char> is the character you want. For example, if you wanted an accented é you would use Ctrl+’+e as your shortcut key. To reverse the accent mark, use the opposite accent mark, often found on the tilde key. |
| Ctrl+Shift+* | View or hide non printing characters. |
| Ctrl+Left arrow | Move one word to the left. |
| Ctrl+Right arrow | Move one word to the right. |
| Ctrl+Up arrow | Move to the beginning of the line or paragraph. |
| Ctrl+Down arrow | Move to the end of the paragraph. |
| Ctrl+Del | Delete word to right of cursor. |
| Ctrl+Backspace | Delete word to left of cursor. |
| Ctrl+End | Move the cursor to the end of the document. |
| Ctrl+Home | Move the cursor to the beginning of the document. |
| Ctrl+Spacebar | Reset highlighted text to the default font. |
| Ctrl+Enter | Insert a page break. |
| Ctrl+1 | Single-space lines. |
| Ctrl+2 | Double-space lines. |
| Ctrl+5 | 1.5-line spacing. |
| Ctrl+= | Set selected text as subscript. |
| Ctrl+Pg Up | Move one page up in the document. |
| Ctrl+Pg Dn | Move one page down in the document. |
| Ctrl+Shift+= | Set selected text as superscript. |
| Ctrl+Alt+T | Insert trademark (TM) symbol. |
| Ctrl+Alt+1 | Changes text to heading 1. |
| Ctrl+Alt+2 | Changes text to heading 2. |
| Ctrl+Alt+3 | Changes text to heading 3. |
| Ctrl+Alt+F2 | Open new document. |
| Ctrl+F1 | Open the Task Pane. |
| Ctrl+F2 | Display the print preview. |
| Ctrl+Shift+> | Increase the font size of selected text by one point. |
| Ctrl+Shift+< | Decrease the font size of selected text by one point. |
| Ctrl+Shift+F6 | Switch to another open Microsoft Word document. |
| Ctrl+Shift+F12 | Print the document. |
| F1 | Open help. |
| F4 | Repeat the last action performed (Word 2000+). |
| F5 | Open the Find, Replace, and Go To window in Microsoft Word. |
| F7 | Spellcheck and grammar check selected text or document. |
| F12 | Save As. |
| Shift+F3 | Change the text in Microsoft Word from uppercase to lowercase or a capital letter at the beginning of every word. |
| Shift+F7 | Run a Thesaurus check on the selected word. |
| Shift+F12 | Save the open document. Like Ctrl+S. |
| Shift+Enter | Create a soft break instead of a new paragraph. |
| Shift+Insert | Paste. |
| Shift+Alt+D | Insert the current date. |
| Shift+Alt+T | Insert the current time. |
You can also utilize the mouse to perform many common actions. The following section contains examples of mouse shortcuts.
| Mouse shortcuts | Description |
|---|---|
| Click, hold, and drag | Selects text from where you click and hold to the point you drag and let go. |
| Double-click | If double-clicking a word, selects the complete word. |
| Double-click | Double-clicking the left, center, or right of a blank line makes the alignment of the text left, center, or right aligned. |
| Double-click | Double-clicking anywhere after text on a line sets a tab stop. |
| Triple-click | Selects the line or paragraph of the text where the mouse is triple-clicked. |
| Ctrl+Mouse wheel | Zooms in and out of document. |
| title | description | ms.date | ms.topic | dev_langs | helpviewer_keywords | author | ms.author | manager | ms.technology | ms.workload | ||||||
|---|---|---|---|---|---|---|---|---|---|---|---|---|---|---|---|---|
|
Add Actions pane to Word documents or Excel workbooks |
Learn that to add an actions pane to a Microsoft Office Word document or a Microsoft Excel workbook, you should first create a Windows Forms user control. |
02/02/2017 |
how-to |
|
|
John-Hart |
johnhart |
jmartens |
office-development |
office |
How to: Add an Actions Pane to Word Documents or Excel Workbooks
[!INCLUDE Visual Studio]
To add an actions pane to a Microsoft Office Word document or a Microsoft Excel workbook, first create a Windows Forms user control. Then, add the user control to the xref:Microsoft.Office.Tools.ActionsPane.Controls%2A property of the ThisDocument.ActionsPane field (Word) or ThisWorkbook.ActionsPane field (Excel) in your project.
[!INCLUDEappliesto_alldoc]
[!NOTE]
Your computer might show different names or locations for some of the Visual Studio user interface elements in the following instructions. The Visual Studio edition that you have and the settings that you use determine these elements. For more information, see Personalize the Visual Studio IDE.
Creating the User Control
The following procedure shows how to create user control in a Word or Excel project. It also adds a button to the user control that writes text to the document or workbook when it is clicked.
To create the user control
-
Open your Word or Excel document-level project in Visual Studio.
-
On the Project menu, click Add New Item.
-
In the Add New Item dialog box, select Actions Pane Control, name it HelloControl, and click Add.
[!NOTE]
You can alternatively add a User Control item to your project. The classes generated by the Actions Pane Control and User Control items are functionally equivalent. -
From the Windows Forms tab of the Toolbox, drag a Button control onto the control.
[!NOTE]
If the control is not visible in the designer, double click HelloControl in Solution Explorer. -
Add the code to the xref:System.Windows.Forms.Control.Click event handler of the button. The following example shows code for a Microsoft Office Word document.
C#
:::code language=»csharp» source=»../vsto/codesnippet/CSharp/Trin_VstcoreActionsPaneWordCS/HelloControl.cs» id=»Snippet12″:::
VB
:::code language=»vb» source=»../vsto/codesnippet/VisualBasic/Trin_VstcoreActionsPaneWordVB/HelloControl.vb» id=»Snippet12″:::
-
In C#, you must add an event handler for the button click. You can place this code in the
HelloControlconstructor after the call toInitializeComponent.For information about how to create event handlers, see How to: Create Event Handlers in Office Projects.
:::code language=»csharp» source=»../vsto/codesnippet/CSharp/Trin_VstcoreActionsPaneWordCS/HelloControl.cs» id=»Snippet13″:::
Add the user control to the actions pane
To show the actions pane, add the user control to the xref:Microsoft.Office.Tools.ActionsPane.Controls%2A property of the ThisDocument.ActionsPane field (Word) or ThisWorkbook.ActionsPane field (Excel).
To add the user control to the actions pane
-
Add the following code to the
ThisDocumentorThisWorkbookclass as a class-level declaration (do not add this code to a method).C#
:::code language=»csharp» source=»../vsto/codesnippet/CSharp/Trin_VstcoreActionsPaneWordCS/ThisDocument.cs» id=»Snippet14″:::
VB
:::code language=»vb» source=»../vsto/codesnippet/VisualBasic/Trin_VstcoreActionsPaneWordVB/ThisDocument.vb» id=»Snippet14″:::
-
Add the following code to the
ThisDocument_Startupevent handler of theThisDocumentclass or theThisWorkbook_Startupevent handler of theThisWorkbookclass.C#
:::code language=»csharp» source=»../vsto/codesnippet/CSharp/Trin_VstcoreActionsPaneWordCS/ThisDocument.cs» id=»Snippet15″:::
VB
:::code language=»vb» source=»../vsto/codesnippet/VisualBasic/Trin_VstcoreActionsPaneWordVB/ThisDocument.vb» id=»Snippet15″:::
See also
- Actions pane overview
- Walkthrough: Insert text into a document from an actions pane
- How to: Manage control layout on actions panes
- Walkthrough: Insert text into a document from an actions pane
Create a non-breaking space: CONTROL+SHIFT+SPACEBAR
Create a non-breaking hyphen: CONTROL+HYPHEN
Make letters bold: CONTROL+B
Make letters italic: CONTROL+I
Make letters underline: CONTROL+U
Decrease font size: CONTROL+SHIFT+<
Increase font size: CONTROL+SHIFT+>
Remove paragraph formatting: CONTROL+Q
Remove character formatting: CONTROL+SPACEBAR
Copy the selected text or object: CONTROL+C
Cut the selected text or object: CONTROL+X
Paste text or an object: CONTROL+V
Undo the last action: CONTROL+Z
Redo the last action: CONTROL+Y
Get online Help or the Office Assistant: F1
Move text or graphics: F2
Insert an AutoText entry (after Word displays the entry): F3
Repeat the last action: F4
Choose the Go To command (Edit menu): F5
Go to next pane or frame: F6
Choose the Spelling command (Tools menu): F7
Extend a selection: F8
Update selected fields: F9
Activate the menu bar: F10
Go to the next field: F11
Choose the Save As command (File menu): F12
Start context-sensitive Help or reveal formatting: SHIFT+F1
Copy text: SHIFT+F2
Change the case of letters: SHIFT+F3
Repeat a Find or Go To action: SHIFT+F4
Move to a previous revision: SHIFT+F5
Go to the previous pane or frame: SHIFT+F6
Choose the Thesaurus command (Tools menu, Language submenu): SHIFT+F7
Shrink a selection: SHIFT+F8
Switch between a field code and its result: SHIFT+F9
Display a shortcut menu: SHIFT+F10
Go to the previous field: SHIFT+F11
Choose the Save command (File menu): SHIFT+F12
Choose the Print Preview command (File menu): CONTROL+F2
Cut to the Spike: CONTROL+F3
Close the window: CONTROL+F4
Restore the document window size: CONTROL+F5
Go to the next window: CONTROL+F6
Choose the Move command (Control menu): CONTROL+F7
Choose the Size command (document Control menu): CONTROL+F8
Insert an empty field: CONTROL+F9
Maximize the document window: CONTROL+F10
Lock a field: CONTROL+F11
Choose the Open command (File menu): CONTROL+F12
Insert the contents of the Spike: CONTROL+SHIFT+F3
Edit a bookmark: CONTROL+SHIFT+F5
Go to the previous window: CONTROL+SHIFT+F6
Update linked information in a Word source document: CONTROL+SHIFT+F7
Extend a selection or block (then press an arrow key): CONTROL+SHIFT+F8
Unlink a field: CONTROL+SHIFT+F9
Activate the ruler: CONTROL+SHIFT+F10
Unlock a field: CONTROL+SHIFT+F11
Choose the Print command (File menu): CONTROL+SHIFT+F12
Go to the next field: ALT+F1
Create an AutoText entry: ALT+F3
Quit Word: ALT+F4
Restore the program window size: ALT+F5
Find the next misspelling or grammatical error: ALT+F7
Run a macro: ALT+F8
Switch between all field codes and their results: ALT+F9
Maximize the program window: ALT+F10
Display Microsoft Visual Basic code: ALT+F11
Change the font: CONTROL+SHIFT+F
Change the font size: CONTROL+SHIFT+P
Increase the font size: CONTROL+SHIFT+>
Decrease the font size: CONTROL+SHIFT+<
Increase the font size by 1 point: CONTROL+]
Decrease the font size by 1 point: CONTROL+[
Change the formatting of characters (Font command, Format menu): CONTROL+D
Change the case of letters: SHIFT+F3
Format letters as all capitals: CONTROL+SHIFT+A
Apply bold formatting: CONTROL+B
Apply an underline: CONTROL+U
Underline words but not spaces: CONTROL+SHIFT+W
Double-underline text: CONTROL+SHIFT+D
Apply hidden text formatting: CONTROL+SHIFT+H
Apply italic formatting: CONTROL+I
Format letters as small capitals: CONTROL+SHIFT+K
Apply subscript formatting (automatic spacing): CONTROL+EQUAL SIGN
Apply superscript formatting (automatic spacing): CONTROL+SHIFT+PLUS SIGN
Remove manual character formatting: CONTROL+SPACEBAR
Change the selection to the Symbol font: CONTROL+SHIFT+Q
Center a paragraph: CONTROL+E
Justify a paragraph: CONTROL+J
Left align a paragraph: CONTROL+L
Right align a paragraph: CONTROL+R
Indent a paragraph from the left: CONTROL+M
Remove a paragraph indent from the left: CONTROL+SHIFT+M
Create a hanging indent: CONTROL+T
Reduce a hanging indent: CONTROL+SHIFT+T
Remove paragraph formatting: CONTROL+Q
Apply a style: CONTROL+SHIFT+S
Start AutoFormat: ALT+CONTROL+K
Apply the Normal style: CONTROL+SHIFT+N
Apply the Heading 1 style: ALT+CONTROL+1
Apply the Heading 2 style: ALT+CONTROL+2
Apply the Heading 3 style: ALT+CONTROL+3
Apply the List style: CONTROL+SHIFT+L
Delete one character to the left: BACKSPACE
Delete one word to the left: CONTROL+BACKSPACE
Delete one character to the right: DELETE
Delete one word to the right: CONTROL+DELETE
Cut selected text to the Clipboard: CONTROL+X
Undo the last action: CONTROL+Z
Cut to the Spike: CONTROL+F3
Copy text or graphics: CONTROL+C
Display the Clipboard: CONTROL+C, CONTROL+C
Move text or graphics: F2 (then move the insertion point and press ENTER)
Create AutoText: ALT+F3
Paste the Clipboard contents: CONTROL+V
Paste the Spike contents: CONTROL+SHIFT+F3
Copy the header or footer used in the previous section of the document: ALT+SHIFT+R
A field: CONTROL+F9
An AutoText entry: ENTER (after typing the first few characters of the AutoText entry name and when the ScreenTip appears)
A line break: SHIFT+ENTER
A page break: CONTROL+ENTER
A column break: CONTROL+SHIFT+ENTER
An optional hyphen: CONTROL+HYPHEN
A non-breaking hyphen: CONTROL+SHIFT+HYPHEN
A non-breaking space: CONTROL+SHIFT+SPACEBAR
The copyright symbol: ALT+CONTROL+C
The registered trademark symbol: ALT+CONTROL+R
The trademark symbol: ALT+CONTROL+T
An ellipsis: ALT+CONTROL+PERIOD
One character to the right: SHIFT+RIGHT ARROW
One character to the left: SHIFT+LEFT ARROW
To the end of a word: CONTROL+SHIFT+RIGHT ARROW
To the beginning of a word: CONTROL+SHIFT+LEFT ARROW
To the end of a line: SHIFT+END
To the beginning of a line: SHIFT+HOME
One line down: SHIFT+DOWN ARROW
One line up: SHIFT+UP ARROW
To the end of a paragraph: CONTROL+SHIFT+DOWN ARROW
To the beginning of a paragraph: CONTROL+SHIFT+UP ARROW
One screen down: SHIFT+PAGE DOWN
One screen up: SHIFT+PAGE UP
To the beginning of a document: CONTROL+SHIFT+HOME
To the end of a document: CONTROL+SHIFT+END
To the end of a window: ALT+CONTROL+SHIFT+PAGE DOWN
To include the entire document: CONTROL+A
To a vertical block of text: CONTROL+SHIFT+F8, and then use the arrow keys; press
ESCAPE to cancel selection mode
To a specific location in a document: F8+ARROW keys; press ESCAPE to cancel selection mode
Select the next cell’s contents: TAB
Select the preceding cell’s contents: SHIFT+TAB
Extend a selection to adjacent cells: Hold down SHIFT and press an arrow key repeatedly
Select a column: Highlight the column’s top or bottom cell. Hold down SHIFT and press the UP ARROW or DOWN ARROW key repeatedly
Extend a selection (or block): CONTROL+SHIFT+F8, and then use the arrow keys; press
ESCAPE to cancel selection mode
Reduce the selection size: SHIFT+F8
Select an entire table: ALT+5 on the numeric keypad (with NUM LOCK off)
Turn extend mode on: F8
Select the nearest character: F8, and then press LEFT ARROW or RIGHT ARROW
Increase the size of a selection: F8 (press once to select a word, twice to select a sentence, and so forth)
Reduce the size of a selection: SHIFT+F8
Turn extend mode off: ESCAPE
One character to the left: LEFT ARROW
One character to the right: RIGHT ARROW
One word to the left: CONTROL+LEFT ARROW
One word to the right: CONTROL+RIGHT ARROW
One paragraph up: CONTROL+UP ARROW
One paragraph down: CONTROL+DOWN ARROW
One cell to the left (in a table): SHIFT+TAB
One cell to the right (in a table): TAB
Up one line: UP ARROW
Down one line: DOWN ARROW
To the beginning of a line: HOME
To the end of a line: END
To the top of the window: ALT+CONTROL+PAGE UP
To the end of the window: ALT+CONTROL+PAGE DOWN
Up one screen (scrolling): PAGE UP
Down one screen (scrolling): PAGE DOWN
To the top of the previous page: CONTROL+PAGE UP
To the top of the next page: CONTROL+PAGE DOWN
To the beginning of a document: CONTROL+HOME
To the end of a document: CONTROL+END
To a previous revision: SHIFT+F5
To the location of the insertion point when the document was last closed: SHIFT+F5
Next cell in a row: TAB
Previous cell in a row: SHIFT+TAB
First cell in a row: ALT+HOME
Last cell in a row: ALT+END
First cell in a column: ALT+PAGE UP
Last cell in a column: ALT+PAGE DOWN
Previous row: UP ARROW
Next row: DOWN ARROW
Create a new document of the same type as the current or most recent document:
CONTROL+N
Open a document: CONTROL+O
Close a document: CONTROL+W
Split the document window: ALT+CONTROL+S
Remove the document window split: ALT+SHIFT+C
Save a document: CONTROL+S
Find text, formatting, and special items: CONTROL+F
Repeat find (after closing Find and Replace window): ALT+CONTROL+Y
Replace text, specific formatting, and special items: CONTROL+H
Go to a page, bookmark, footnote, table, comment, graphic, or other location:
CONTROL+G
Go back to a page, bookmark, footnote, table, comment, graphic, or other location:
ALT+CONTROL+Z
Browse through a document: ALT+CONTROL+HOME
Insert a comment: ALT+CONTROL+M
Turn track changes on or off: CONTROL+SHIFT+E
Go to the beginning of a comment: HOME
Go to the end of a comment: END
Go to the beginning of the list of comments: CONTROL+HOME
Go to the end of the list of comments: CONTROL+END
Mark a table of contents entry: ALT+SHIFT+O
Mark a table of authorities entry: ALT+SHIFT+I
Mark an index entry: ALT+SHIFT+X
Insert a footnote: ALT+CONTROL+F
Insert an endnote: ALT+CONTROL+D
Promote a paragraph: ALT+SHIFT+LEFT ARROW
Demote a paragraph: ALT+SHIFT+RIGHT ARROW
Demote to body text: CONTROL+SHIFT+N
Move selected paragraphs up: ALT+SHIFT+UP ARROW
Move selected paragraphs down: ALT+SHIFT+DOWN ARROW
Expand text under a heading: ALT+SHIFT+PLUS SIGN
Collapse text under a heading: ALT+SHIFT+MINUS SIGN
Expand or collapse all text or headings: ALT+SHIFT+A or the asterisk (*) key on the numeric keypad
Hide or display character formatting: The slash (/) key on the numeric keypad
Show the first line of body text or all body text: ALT+SHIFT+L
Show all headings with the Heading 1 style: ALT+SHIFT+1
Show all headings up to Heading n: ALT+SHIFT+N
To use these keystrokes, you must first set up a main document for a mail merge.
While using the Mail Merge command:
Preview a mail merge: ALT+SHIFT+K
Merge a document: ALT+SHIFT+N
Print the merged document: ALT+SHIFT+M
Edit a mail-merge data document: ALT+SHIFT+E
Insert a merge field: ALT+SHIFT+F
To perform most of the following actions, the Office Assistant must be turned on and visible. How to show the Office Assistant.
Display the Assistant balloon.: F1, if the Assistant is showing
Select a Help topic from the list the Assistant displays.: ALT+number (ALT+1 is the first topic, ALT+2 is the second, and so on)
See more Help topics.: ALT+DOWN ARROW
See previous Help topics.: ALT+UP ARROW
Close an Assistant message or a tip.: ESCAPE
to select Microsoft Word Help then the SPACEBAR to show the Assistant or turn off Help with the wizard, Show the Assistant in a wizard, or turn off Help with the wizard.: TAB (if a wizard is showing)
Switch to the next program or Microsoft Word document window: ALT+TAB
Switch to the previous program or Word document window: ALT+SHIFT+TAB
Show the Microsoft Windows Start menu: CONTROL+ESCAPE
Close the active document window: CONTROL+W
Restore the size of the active document window after you’ve maximized the window:
CONTROL+F5
Switch to the next Word document window: CONTROL+F6
Switch to the previous Word document window: CONTROL+SHIFT+F6
Carry out the Move command when the document window isn’t maximized (document icon menu, menu bar):
CONTROL+F7, press arrow keys, and then press ENTER
Carry out the Size command when the document window isn’t maximized (document icon menu, menu bar):
CONTROL+F8, press arrow keys, and then press ENTER
Maximize the document window or restore the window to its previous size and location:
CONTROL+F10
Switch to the next tab in a dialog box: CONTROL+TAB or CONTROL+PAGE DOWN
Switch to the previous tab in a dialog box: CONTROL+SHIFT+TAB or CONTROL+PAGE UP
Move to the next option or option group: TAB
Move to the previous option or option group: SHIFT+TAB
Move between options in the selected list or between some options in a group of options: Arrow keys
Perform the action assigned to the selected button; select or clear the check box: SPACEBAR
In the selected list, move to the next option that starts with the letter you type: Letter key
Select the option or select or clear the check box next to the letter underlined in the option name: ALT+letter key
Open the selected list: ALT+DOWN ARROW (when a list is selected)
Close the selected list: ESCAPE (when a list is selected)
Perform the action assigned to the default button in the dialog box: ENTER
Cancel the command and close the dialog box: ESCAPE
Move to the beginning of the line: HOME
Move to the end of the line: END
Move one character to the left or right: LEFT ARROW or RIGHT ARROW
Move one word to the left or right: CONTROL+LEFT ARROW or CONTROL+RIGHT ARROW
Select from the insertion point to the beginning of the line: SHIFT+HOME
Select from the insertion point to the end of the line: SHIFT+END
Select or cancel the selection of one character to the left: SHIFT+LEFT ARROW
Select or cancel the selection of one character to the right: SHIFT+RIGHT ARROW
Select or cancel the selection of one word to the left: CONTROL+SHIFT+LEFT ARROW
Select or cancel the selection of one word to the right: CONTROL+SHIFT+RIGHT ARROW
Display the Open dialog box: CONTROL+F12
Display the Save As dialog box: F12
Go to the previous folder: ALT+1
Open the folder up one level from the open folder (Up One Level button): ALT+2
Closes the dialog box and opens your World Wide Web search page (Search the Web button): ALT+3
Delete the selected folder or file (Delete button): ALT+4
Create a new subfolder in the open folder (Create New Folder button): ALT+5
Switch between List, Details, Properties, and Preview views (click the arrow next to Views): ALT+6
Show the Tools menu (Tools button): ALT+7
Update the files visible in the Open or Save As dialog box (File menu): F5
Make the menu bar active: F10
Select the next or previous toolbar: CONTROL+TAB or CONTROL+SHIFT+TAB
Select the next or previous button or menu on the toolbar: TAB or SHIFT+TAB (when a toolbar is active)
Open the menu: ENTER (when a menu on a toolbar is selected)
Perform the action assigned to a button: ENTER (when a button is selected)
Enter text in a text box: ENTER (when the text box is selected)
Select the option you want: ENTER (when a drop-down list box is selected)
Move through options in a menu or drop-down list: Arrow keys
Use the following keys (if you are e-mailing a document or a message) when the e-mail header is active.
To activate the e-mail header, press SHIFT+TAB.
Send the active document or message: ALT+S
Open the Address Book: CONTROL+SHIFT+B
Check the names on the To, Cc and Bcc lines against the Address Book: ALT+K
Open the Address Book in the To field: ALT+. (period)
Opens the Address Book in the Cc field: ALT+C
Open the Address Book in the Bcc field: ALT+B
Go to the Subject field: ALT+J
Open the Microsoft Outlook Message Options dialog box (in a message, View menu, Options command): ALT+P
Create a message flag: CONTROL+SHIFT+G
Select the next box in the e-mail header or the body of the document or message when the last box in the e-mail header is active: TAB
Select the previous field or button in the e-mail header: SHIFT+TAB