
Вставка диапазона со сдвигом ячеек вправо или вниз методом Insert объекта Range. Вставка и перемещение строк и столбцов из кода VBA Excel. Примеры.
Range.Insert – это метод, который вставляет диапазон пустых ячеек (в том числе одну ячейку) на рабочий лист Excel в указанное место, сдвигая существующие в этом месте ячейки вправо или вниз. Если в буфере обмена содержится объект Range, то вставлен будет он со своими значениями и форматами.
Синтаксис
|
Expression.Insert(Shift, CopyOrigin) |
Expression – выражение (переменная), возвращающее объект Range.
Параметры
| Параметр | Описание | Значения |
|---|---|---|
| Shift | Необязательный параметр. Определяет направление сдвига ячеек. Если параметр Shift опущен, направление выбирается в зависимости от формы* диапазона. | xlShiftDown (-4121) – ячейки сдвигаются вниз; xlShiftToRight (-4161) – ячейки сдвигаются вправо. |
| CopyOrigin | Необязательный параметр. Определяет: из каких ячеек копировать формат. По умолчанию формат копируется из ячеек сверху или слева. | xlFormatFromLeftOrAbove (0) – формат копируется из ячеек сверху или слева; xlFormatFromRightOrBelow (1) – формат копируется из ячеек снизу или справа. |
* Если диапазон горизонтальный или квадратный (количество строк меньше или равно количеству столбцов), ячейки сдвигаются вниз. Если диапазон вертикальный (количество строк больше количества столбцов), ячейки сдвигаются вправо.
Примеры
Простая вставка диапазона
Вставка диапазона ячеек в диапазон «F5:K9» со сдвигом исходных ячеек вправо:
|
Range(«F5:K9»).Insert Shift:=xlShiftToRight |
Если бы параметр Shift не был указан, сдвиг ячеек, по умолчанию, произошел бы вниз, так как диапазон горизонтальный.
Вставка вырезанного диапазона
Вставка диапазона, вырезанного в буфер обмена методом Range.Cut, из буфера обмена со сдвигом ячеек по умолчанию:
|
Range(«A1:B6»).Cut Range(«D2»).Insert |
Обратите внимание, что при использовании метода Range.Cut, точка вставки (в примере: Range("D2")) не может находится внутри вырезанного диапазона, а также в строке или столбце левой верхней ячейки вырезанного диапазона вне вырезанного диапазона (в примере: строка 1 и столбец «A»).
Вставка скопированного диапазона
Вставка диапазона, скопированного в буфер обмена методом Range.Copy, из буфера обмена со сдвигом ячеек по умолчанию:
|
Range(«B2:D10»).Copy Range(«F2»).Insert |
Обратите внимание, что при использовании метода Range.Copy, точка вставки (в примере: Range("F2")) не может находится внутри скопированного диапазона, но в строке или столбце левой верхней ячейки скопированного диапазона вне скопированного диапазона находится может.
Вставка и перемещение строк
Вставка одной строки на место пятой строки со сдвигом исходной строки вниз:
Вставка четырех строк на место пятой-восьмой строк со сдвигом исходных строк вниз:
Вставка строк с использованием переменных, указывающих над какой строкой осуществить вставку и количество вставляемых строк:
|
1 2 3 4 5 6 7 8 9 10 11 12 13 14 15 16 17 18 19 20 21 22 |
Sub Primer1() Dim n As Long, k As Long, s As String ‘Номер строки, над которой необходимо вставить строки n = 8 ‘Количесто вставляемых строк k = 4 ‘Указываем адрес диапазона строк s = n & «:» & (n + k — 1) ‘Вставляем строки Rows(s).Insert End Sub ‘или то же самое с помощью цикла Sub Primer2() Dim n As Long, k As Long, i As Long n = 8 k = 4 For i = 1 To k Rows(n).Insert Next End Sub |
Перемещение второй строки на место шестой строки:
|
Rows(2).Cut Rows(6).Insert |
Вторая строка окажется на месте пятой строки, так как третья строка заместит вырезанную вторую строку, четвертая встанет на место третьей и т.д.
Перемещение шестой строки на место второй строки:
|
Rows(6).Cut Rows(2).Insert |
В этом случае шестая строка окажется на месте второй строки.
Вставка и перемещение столбцов
Вставка одного столбца на место четвертого столбца со сдвигом исходного столбца вправо:
Вставка трех столбцов на место четвертого-шестого столбцов со сдвигом исходных столбцов вправо:
Перемещение третьего столбца на место седьмого столбца:
|
Columns(3).Cut Columns(7).Insert |
Третий столбец окажется на месте шестого столбца, так как четвертый столбец заместит вырезанный третий столбец, пятый встанет на место четвертого и т.д.
Перемещение седьмого столбца на место третьего столбца:
|
Columns(7).Cut Columns(3).Insert |
В этом случае седьмой столбец окажется на месте третьего столбца.
Содержание
- Метод Insert (Excel Graph)
- Синтаксис
- Параметры
- Пример
- Поддержка и обратная связь
- Метод Range.Insert (Excel)
- Синтаксис
- Параметры
- Возвращаемое значение
- Примечания
- Пример
- Поддержка и обратная связь
- VBA в Excel Объект Excel.Range и программная работа с ячейками средствами VBA
- 10.6 Объект Range, его свойства и методы
Метод Insert (Excel Graph)
Вставляет ячейку или диапазон ячеек в таблицу и перемещает другие ячейки в сторону, чтобы освободить место.
Синтаксис
expression. Insert (SHIFT)
выражение (обязательно). Выражение, возвращающее один из объектов списка Применяется к.
Параметры
| Имя | Обязательный или необязательный | Тип данных | Описание |
|---|---|---|---|
| Shift | Необязательный | XlInsertShiftDirection | Определяет способ сдвига ячеек. Может быть одной из следующих констант XlInsertShiftDirection : xlShiftToRight или xlShiftDown. Если этот аргумент опущен, Graph принимает решение на основе формы диапазона. |
Пример
В этом примере новая строка вставляется перед четвертой строкой таблицы.
В этом примере новые ячейки вставляются в диапазонЕ A1:C5 в таблице и сдвигаются вниз.
Поддержка и обратная связь
Есть вопросы или отзывы, касающиеся Office VBA или этой статьи? Руководство по другим способам получения поддержки и отправки отзывов см. в статье Поддержка Office VBA и обратная связь.
Источник
Метод Range.Insert (Excel)
Вставляет ячейку или диапазон ячеек в лист или лист макросов и перемещает другие ячейки в сторону, чтобы освободить место.
Синтаксис
expression. Insert (SHIFT, CopyOrigin)
выражение: переменная, представляющая объект Range.
Параметры
| Имя | Обязательный или необязательный | Тип данных | Описание |
|---|---|---|---|
| Shift | Необязательный | Variant | Определяет способ сдвига ячеек. Может быть одной из следующих констант XlInsertShiftDirection : xlShiftToRight или xlShiftDown. Если этот аргумент опущен, Microsoft Excel принимает решение на основе формы диапазона. |
| CopyOrigin | Необязательный | Variant | Источник копирования; то есть, откуда копировать формат для вставленных ячеек. Может быть одной из следующих констант XlInsertFormatOrigin : xlFormatFromLeftOrAbove (по умолчанию) или xlFormatFromRightOrBelow. |
Возвращаемое значение
Примечания
Для параметра CopyOrigin нет значения, эквивалентного значению Clear Formatting при вставке ячеек в Excel в интерактивном режиме. Для этого используйте метод ClearFormats .
Пример
В этом примере вставляется строка над строкой 2, копируя формат из строки ниже (строка 3), а не из строки заголовка.
Поддержка и обратная связь
Есть вопросы или отзывы, касающиеся Office VBA или этой статьи? Руководство по другим способам получения поддержки и отправки отзывов см. в статье Поддержка Office VBA и обратная связь.
Источник
VBA в Excel Объект Excel.Range и программная работа с ячейками средствами VBA
10.6 Объект Range, его свойства и методы
Объект Excel.Range, программная работа с ячейками и диапазонами (наборами) ячеек средствами VBA, создание объекта Excel.Range, свойства, методы и события объекта Excel.Range
Пожалуй, наиболее часто используемый объект в иерархии объектной модели Excel — это объект Range. Этот объект может представлять одну ячейку, несколько ячеек (в том числе несмежные ячейки или наборы несмежных ячеек) или целый лист. Если в Word вы могли для ввода данных использовать как объект Range, так и объект Selection, то в Excel все сводится к объекту Range:
- если вам нужно ввести данные в ячейку или отформатировать ее, то вы должны получить объект Range, представляющий эту ячейку;
- если вы хотите сделать что-то с выделенными вами ячейками, вам необходимо получить объект Range, представляющий выделение;
- если вам нужно просто что-то сделать с группой ячеек, первое ваше действие — опять-таки получить объект Range, представляющий эту группу ячеек.
В Microsoft Knowledge Base есть статья под номером 291308, в котором описываются 22 способа получения объекта Range в Excel. Вряд ли вы будете пользоваться всеми эти способами. Мы рассмотрим только самые распространенные:
- самый простой и очевидный способ — воспользоваться свойством Range. Это свойство предусмотрено для объектов Application, Worksheet и самого объекта Range (если вы решили создать новый диапазон на основе уже существующего). Например, получить ссылку на объект Range, представляющий ячейку A1, можно так:
Dim oRange As Range
Set oRange = Worksheets(«Лист1»).Range(«A1»)
А на диапазон ячеек с A1 по D10 — так:
Dim oRange As Range
Set oRange = Worksheets(«Лист1»).Range(«A1:D10»)
С применением свойства Range самого объекта Range нужно быть очень осторожным. Дело в том, что Excel создает на основе объекта Range виртуальный лист со своей собственной нумерацией. Поэтому такой код:
Set oRange1 = Worksheets(«Лист1»).Range(«C1»)
Set oRange2 = oRange1.Range(«B1»)
пропишет значение 20 не в ячейку B1, как можно было понять из кода, а в ячейку D1 (то есть B1 по отношению к виртуальному листу, начинающемуся с C1).
- второй способ — воспользоваться свойством Cells. Возможностей у этого свойства меньше — мы можем вернуть диапазон, состоящий только из одной ячейки. Зато мы можем использовать более удобный синтаксис (с точки зрения передачи переменных, перехода в любую сторону на любое количество ячеек и т.п.). Например, для получения ссылки на ячейку D1 можно использовать код вида:
Dim oRange As Range
Set oRange = Worksheets(«Лист1»).Cells(1, 4)
Чтобы получить диапазон, состоящий из нескольких ячеек, удобно применять свойства Range и Cells вместе:
Set oRange = Range(Cells(1, 1), Cells(5, 3))
- третий способ — воспользоваться многочисленными свойствами объекта Range, которые позволяют изменить текущий диапазон или создать на основе его новый. Эти свойства будут рассмотрены ниже.
Обычно после того, как нужная ячейка найдена, в нее нужно что-то записать. Для этой цели используется свойство Value, например:
oRange.Value = «Мое значение»
Поскольку объект Range с функциональной точки зрения очень важен, то свойств и методов у него очень много (и для комфортной работы в Excel их нужно знать). Ниже представлены некоторые самые употребимые свойства:
- Address — позволяет вернуть адрес текущего диапазона, например, для предыдущего примера вернется $A$1:$C$5. Этому свойству можно передать много параметров — для определения стиля ссылки, абсолютного или относительного адреса для столбцов и строк, по отношению к чему этот адрес будет относительным и т.п. Свойство доступно только для чтения. AddressLocal — то же самое, но с поправкой на особенности локализованных версий Excel.
На практике встречается множество ситуаций, когда адрес ячейки нужно разобрать на части и вернуть из него имя столбца или номер строки. Это очень просто сделать при помощи строковых функций — спасибо знакам доллара. Например, имя столбца для объекта oRange, представляющего одну ячейку, можно вернуть так:
sColumnName = Mid(oRange.Address, 2, (InStr(2, oRange.Address, «$») — 2))
sRowNumber = Mid(oRange.Address, (InStr(2, oRange.Address, «$») + 1))
На первый взгляд кажется сложным, но на самом деле все очень просто — для имени столбца мы просто берем все, что у нас находится между первым знаком доллара (он у нас всегда первый символ) и вторым, а для номера строки бы берем все, что у нас находится после второго знака доллара. Найти этот второй знак доллара можно при помощи встроенной функции InStr(), а взять нужное количество символов начиная с какого либо проще всего при помощи встроенной функции Mid().
- AllowEdit — это свойство, доступное только для чтения, позволяет определить, сможет ли пользователь править данную ячейку (набор ячеек) на защищенном листе. Используется для проверок.
- Areas — свойство исключительно важное. Дело в том, что, как уже говорилось, объект Range может состоять из несмежных наборов ячеек. Многие методы применительно к таким диапазонам ведут себя совершенно непредсказуемо или просто возвращают ошибки. Свойство Areas позволяет разбить подобные нестандартные диапазоны на набор стандартных. Созданные таким образом объекты Range будут помещены в коллекцию Areas. Это свойство можно использовать и для проверки «нестандартности» диапазона:
If Selection.Areas.Count > 1 Then
Debug.Print «Диапазон с несмежными областями»
- Borders — возможность получить ссылку на коллекцию Borders, при помощи которой можно управлять рамками для нашего диапазона.
- Cells — это свойство есть и для объекта Range. Работает оно точно так же, за исключением того, что опять-таки используется своя собственная виртуальная адресация на основе диапазона:
Dim oRange, oRange2 As Range
Set oRange = Range(Cells(2, 2), Cells(5, 3))
Set oRange2 = oRange.Cells(1, 1) ‘Вместо A1 получаем ссылку на B2
Debug.Print oRange2.Address ‘Так оно и есть
Точно такие же особенности у свойств Row и Rows, Column и Columns.
- Characters — это простое с виду свойство позволяет решить непростую задачу: как изменить (текст или формат) части текста в ячейке, не затрагивая остальные данные. Например, чтобы ввести текст в ячейку A1 и изменить цвет первой буквы, можно воспользоваться кодом
Dim oRange As Range
Set oRange = Range(«A1»)
oRange.Value = «Мой текст»
oRange.Characters(1, 1).Font.Color = vbRed
Если же вам просто нужно изменить значение, то лучше воспользоваться свойством Value — как в третьей строке примера.
- Count — возвращает количество ячеек в диапазоне. Может использоваться для проверок.
- CurrentRegion — очень удобное свойство, которое может пригодиться, например, при копировании/экспорте данных, полученных из внешнего источника (когда сколько будет этих данных, нам изначально неизвестно). Оно возвращает объект Range, представляющий диапазон, окруженный пустыми ячейками (то есть непустую область, в которую входит исходный диапазон/ячейка). Например, чтобы выделить всю непустую область вокруг активной ячейки, можно воспользоваться кодом
- Dependents — позволяет получить объект Range (скорее всего, включающий несмежные области) которые зависят от ячеек исходного диапазона. Работает только для текущего листа — ссылки во внешних листах этим свойством не отслеживаются. Например, чтобы выделить все ячейки, зависимые от активной, можно использовать код
- Worksheets(«Лист1»).Activate
- ActiveCell.Dependents.Select
Чтобы просмотреть обратную зависимость, можно использовать свойство Precedents. Чтобы просмотреть только первый уровень зависимостей, можно использовать свойства DirectDependents и DirectPrecedents.
- End — еще одно часто используемое свойство. Оно позволяет получить объект Range, представляющий последнюю ячейку исходного диапазона. В какой стороне будет считаться последняя ячейка, можно определить при помощи передаваемого параметра.
- Errors — свойство, которое через коллекцию Errors позволяет получить доступ к объектам Error, представляющим обнаруженные ошибки в диапазоне.
- Font — как и в Word, это свойство позволяет получить доступ к объекту Font, при помощи которого можно настроить особенности оформления текста в ячейке (цвет, шрифт, размер букв и т.п.)
- FormatConditions — возможность создать собственный объект, представляющий вариант оформления ячеек, который затем можно применять к разным ячейкам и диапазонам.
- Formula — одно из самых важных свойств объекта Range. Доступно и на чтение, и на запись. Если используется на чтение, то возвращает текст формулы, прописанной в ячейку (а не вычисленное значение), если используется на запись, то позволяет записать формулу в ячейку. Если применить это свойство для диапазона, в который входит несколько ячеек, то формула будет прописана по все ячейки диапазона. Пример применения этого свойства может выглядеть так:
- Свойство FormulaLocal, как и AddressLocal, позволяет внести поправки на особенности нумерации ячеек в локализованной версии Excel (для русских версий Excel в нем нет необходимости).
- FormulaHidden — возможность спрятать формулы в диапазоне от пользователя. Работает только на защищенных листах.
- HasFormula — проверить диапазон на наличие вычисляемых значений (формул).
- Hidden — спрятать диапазон. Будет работать только в случае, если диапазон включает в себя хотя бы одну строку или столбец целиком, в противном случае вернется ошибка.
- Interior — еще одно свойство, связанное с форматированием. В основном позволяет покрасить ячейки диапазона.
- Item — позволяет получить еще один объект Range, который определяется путем смещения исходного диапазона.
- Locked — это свойство позволяет заблокировать ячейки диапазона при защите листа.
- Name — возможность получить ссылку на специальный объект именованного диапазона Name. На графическом экране с его возможностями можно познакомиться при помощи меню Вставка ->Имя. Он позволяет обращаться к диапазонам и формулам по именам и несколько напоминает по функциональности объект закладки в Word.
- Next — перейти на следующую ячейку. Если лист не защищен, то следующей ячейкой будет считаться ячейка справа, если защищен — то следующая незаблокированная ячейка.
- NumberFormat — возможность установить один из предопределенных форматов для чисел. Соответствует возможностям вкладки Число в меню Формат ->Ячейки на графическом экране.
- Offset — это свойство позволяет получить новый объект Range с определенным смещением от исходного. Например, чтобы получить ячейку со смещением на три ячейки вверх от сходной и три ячейки влево, можно использовать код
- свойство Orientation позволяет сориентировать текст в ячейках. Указывается угол наклона в градусах. Например, чтобы расположить текст по диагонали, можно использовать код
- PageBreak — это свойство обычно используется для программной вставки разрывов страницы. Его применение может выглядеть так:
- все свойства, которые начинаются на Pivot…, относятся к работе с объектом PivotTable (сводная таблица). Особенности работы с ней будут рассмотрены ниже.
- QueryTable — это очень важное свойство позволяет получить ссылку на объект QueryTable — полученные с внешнего источника данные. Это свойство для объекта Range позволяет получить ссылку на объект QueryTable, которые находится в данном диапазоне. Подробнее про объект QueryTable будет рассказано ниже.
- Range — это свойство, как уже говорилось выше, позволяет создать новый диапазон на основе уже существующего. Необходимо помнить про особенности нумерации ячеек в этом случае.
- Resize — возможность изменить текущий диапазон. Например, увеличение его на один столбец вниз и одну строку вправо может выглядеть так:
oRange.Resize(oRange.Rows.Count + 1, oRange.Columns.Count + 1).Select
- ShrinkToFit — это свойство позволяет автоматически настроить размер текста в диапазоне таким образом, чтобы текст умещался в ширину столбца.
- Style — это свойство позволяет вернуть объект Style, представляющий стиль для указанного диапазона. На графическом экране то, что позволяет сделать объект Style, можно сделать через меню Формат ->Стиль.
- Text — возможность получить значение первой ячейки диапазона в виде значения типа String. Для объекта Range это свойство доступно только для чтения.
- Validation — это свойство позволяет вернуть объект Validation, при помощи которого можно настроить проверку вводимых в диапазон данных.
- Value — наиболее часто используемое свойство объекта Range. Позволяет получить или назначить значение (числовое, текстовое или какое-либо другое) ячейкам диапазона. Точно для той же цели используется свойство Value2, единственное отличие — это свойство не поддерживает типы данных Currency и Date.
- WrapText — возможность включить/отключить перевод текста на следующую строку в ячейках диапазона.
Теперь — о методах объекта Range:
- Activate() — выделяет текущий диапазон и устанавливает курсор ввода на его первую ячейку.
- AddComment() — возможность добавить комментарий к ячейке. Ячейка будет помечена красным уголком, а текст комментария будет показан в виде всплывающей подсказки. Этот метод можно вызвать только для диапазона, состоящего из одной ячейки. То же самое на графическом экране можно сделать при помощи меню Вставка ->Примечание.
- AutoFill() — возможность использовать автозаполнение для диапазона (например, если первые две ячейки будут заполнены как 1 и 2, то дальше в автоматическом режиме будет продолжено: 3, 4, 5 и т.п.)
- AutoFit() — автоматически поменять ширину всех столбцов и высоту всех строк в диапазоне, чтобы туда уместился текст ячеек. Можно применять только к тем диапазонам, которые состоят из набора столбцов (полностью) или набора ячеек (также полностью), иначе будет ошибка.
- AutoFormat() — возможности использовать один из стилей автоформатирования (то, что на графическом экране доступно через меню Формат ->Автоформат).
- BorderAround() — возможность поместить диапазон в рамку с выбранными вами параметрами.
- методы Clear… позволяют очистить содержимое диапазона — от значений, форматирования, комментарий и т.п.
- Consolidate() — возможность слить данные нескольких диапазонов (в том числе на разных листах) в один диапазон, используя при этом выбранную вами агрегатную функцию.
- Copy() — возможность скопировать диапазон в другое место. Если место назначения не указано, он копируется в буфер обмена. Аналогично работает метод Cut(), при котором данные исходного диапазона вырезаются.
- CopyFromRecordset() — очень удобный метод, который позволяет вставить данные из объекта ADO Recordset на лист Excel, начиная с верхнего левого угла указанного диапазона.
- DataSeries() — метод, который может сэкономить множество времени и избежать возни с функциями даты и времени. Этот метод позволяет увеличить вами значения даты в диапазоне на указанный вами временной интервал. Например, если у вас в диапазоне стоит первое января, то при помощи этого метода можно сгенерировать первое число любого другого месяца.
- Delete() — удаляет данные текущего диапазона. В качестве необязательно параметра можно определить, с какой стороны будут сдвигаться ячейки на место удаленных.
- Dirty() — пометить ячейки диапазона как «грязные». Такие ячейки будут пересчитаны при следующем же пересчете. Обычно используется, когда Word сам не может догадаться, что их нужно пересчитать. Пересчитать ячейки диапазона можно и принудительно — при помощи метода Calculate().
- методы Fill… (FillDown(), FillUp(), FillLeft(), FillRight()) позволяют размножить одно и то же значение по ячейкам диапазона в указанном вами направлении.
- метод Find() позволяет произвести поиск по ячейкам диапазона и вернуть новый объект Range, который представляет первую ячейку, в котором было найдено нужное значение. У этого метода есть множество необязательных параметров, которые позволяют определить направление поиска, чувствительность к регистру, искать все значение ячейки или часть и т.п. Методы FindNext() и FindPrevious() позволяют продолжить поиск, начатый методом Find(), в разных направлениях.
- метод GoalSeek() позволяет применить автоподбор значений для функции Excel программным способом. На графическом экране то же самое можно сделать при помощи меню Сервис ->Подбор параметра.
- метод Insert() позволяет вставить ячейки в диапазон, сдвинув остальные (вы можете выбрать — вправо или вниз).
- метод Justify() позволяет равномерно распределить текст по диапазону. Если в данный диапазон он не помещается, он будет распространен на соседние ячейки (с перезаписью их значений).
- метод Merge() позволяет слить все ячейки диапазона в одну. При этом останется только одно значение — верхней левой ячейки. Разбить обратно такую слитую ячейку на несколько обычных можно при помощи метода UnMerge().
- Parse() — позволяет разбить одну ячейку на несколько по указанному вами шаблону (например, чтобы отделить код города от номера телефона).
- PasteSpecial() — операция, дополняющая Copy() и Cut(). Она позволяет вставить то, что лежит в буфере обмена, с указанием специальных параметров вставки (вставлять с добавлением к существующим данным, с умножением, вычитанием, делением и т.п.)
- PrintOut() и PrintPreview() — позволяют вывести диапазон на печать или открыть режим просмотра перед печатью..
- Replace() — метод, дополняющий метод Find(). Позволяет проводить поиск и замену значений в диапазоне.
- Select() — возможность выделить указанный диапазон. Объекта Selection в Excel нет — вместо него есть возможность получить объект Range, представляющий выделенную область.
- Show() — экран будет проскроллирован таким образом, чтобы показать указанный диапазон.
- ShowDependents() — показать стрелки для ячеек, которые зависят от указанного диапазона (только первый уровень зависимости) или эти стрелки убрать. Обратный метод — ShowPrecedents().
- ShowErrors() — показать источник ошибки для указанной ячейки.
- Sort() — возможность произвести сортировку ячеек в диапазоне. Можно использовать большое количество необязательных параметров для настройки сортировки. SortSpecial() — с учетом особенностей азиатских языков.
- Speak() — удивительный метод, который позволяет зачитывать вслух содержимое диапазона (можно определить, в каком направлении и будут ли зачитываться формулы). К сожалению, в локализованной версии Excel не работает.
- SpecialCells() — очень удобный метод, который позволяет вернуть объект Range, включающий в себя все ячейки определенного типа (пустые, с ошибками, с комментариями, последние, с константами, с формулами, с определенным форматированием) и с определенным значением. Например, чтобы вернуть объект Range, состоящий из всех пустых ячеек диапазона, можно использовать код
Set oRange2 = oRange.SpecialCells(xlCellTypeBlanks)
oRange 2. Select ‘проверяем, так ли это
- метод SubTotal() позволяет посчитать итоговое значение для диапазона (можно выбрать агрегатную функцию и множество других параметров).
- метод Table() позволяет создать таблицу на основе передаваемого столбца, строки и функции, которую нужно использовать для вычисления ячеек таблицы. Пример из документации по этому методу позволяет автоматически сгенерировать таблицу умножения.
- TextToColumns() — сложный метод, который позволяет разбить столбцы в диапазоне на несколько столбцов в соответствии с определенным алгоритмом. Принимает множество необязательных параметров.
Источник
Всё о работе с ячейками в Excel-VBA: обращение, перебор, удаление, вставка, скрытие, смена имени.
Содержание:
Table of Contents:
- Что такое ячейка Excel?
- Способы обращения к ячейкам
- Выбор и активация
- Получение и изменение значений ячеек
- Ячейки открытой книги
- Ячейки закрытой книги
- Перебор ячеек
- Перебор в произвольном диапазоне
- Свойства и методы ячеек
- Имя ячейки
- Адрес ячейки
- Размеры ячейки
- Запуск макроса активацией ячейки
2 нюанса:
- Я почти везде стараюсь использовать ThisWorkbook (а не, например, ActiveWorkbook) для обращения к текущей книге, в которой написан этот код (считаю это наиболее безопасным для новичков способом обращения к книгам, чтобы случайно не внести изменения в другие книги). Для экспериментов можете вставлять этот код в модули, коды книги, либо листа, и он будет работать только в пределах этой книги.
- Я использую английский эксель и у меня по стандарту листы называются Sheet1, Sheet2 и т.д. Если вы работаете в русском экселе, то замените Thisworkbook.Sheets(«Sheet1») на Thisworkbook.Sheets(«Лист1»). Если этого не сделать, то вы получите ошибку в связи с тем, что пытаетесь обратиться к несуществующему объекту. Можно также заменить на Thisworkbook.Sheets(1), но это менее безопасно.
Что такое ячейка Excel?
В большинстве мест пишут: «элемент, образованный пересечением столбца и строки». Это определение полезно для людей, которые не знакомы с понятием «таблица». Для того, чтобы понять чем на самом деле является ячейка Excel, необходимо заглянуть в объектную модель Excel. При этом определения объектов «ряд», «столбец» и «ячейка» будут отличаться в зависимости от того, как мы работаем с файлом.
Объекты в Excel-VBA. Пока мы работаем в Excel без углубления в VBA определение ячейки как «пересечения» строк и столбцов нам вполне хватает, но если мы решаем как-то автоматизировать процесс в VBA, то о нём лучше забыть и просто воспринимать лист как «мешок» ячеек, с каждой из которых VBA позволяет работать как минимум тремя способами:
- по цифровым координатам (ряд, столбец),
- по адресам формата А1, B2 и т.д. (сценарий целесообразности данного способа обращения в VBA мне сложно представить)
- по уникальному имени (во втором и третьем вариантах мы будем иметь дело не совсем с ячейкой, а с объектом VBA range, который может состоять из одной или нескольких ячеек). Функции и методы объектов Cells и Range отличаются. Новичкам я бы порекомендовал работать с ячейками VBA только с помощью Cells и по их цифровым координатам и использовать Range только по необходимости.
Все три способа обращения описаны далее
Как это хранится на диске и как с этим работать вне Excel? С точки зрения хранения и обработки вне Excel и VBA. Сделать это можно, например, сменив расширение файла с .xls(x) на .zip и открыв этот архив.
Пример содержимого файла Excel:
Далее xl -> worksheets и мы видим файл листа
Содержимое файла:
То же, но более наглядно:
<?xml version="1.0" encoding="UTF-8" standalone="yes"?>
<worksheet xmlns="http://schemas.openxmlformats.org/spreadsheetml/2006/main" xmlns:r="http://schemas.openxmlformats.org/officeDocument/2006/relationships" xmlns:mc="http://schemas.openxmlformats.org/markup-compatibility/2006" mc:Ignorable="x14ac xr xr2 xr3" xmlns:x14ac="http://schemas.microsoft.com/office/spreadsheetml/2009/9/ac" xmlns:xr="http://schemas.microsoft.com/office/spreadsheetml/2014/revision" xmlns:xr2="http://schemas.microsoft.com/office/spreadsheetml/2015/revision2" xmlns:xr3="http://schemas.microsoft.com/office/spreadsheetml/2016/revision3" xr:uid="{00000000-0001-0000-0000-000000000000}">
	<dimension ref="B2:F6"/>
	<sheetViews>
		<sheetView tabSelected="1" workbookViewId="0">
			<selection activeCell="D12" sqref="D12"/>
		</sheetView>
	</sheetViews>
	<sheetFormatPr defaultRowHeight="14.4" x14ac:dyDescent="0.3"/>
	<sheetData>
		<row r="2" spans="2:6" x14ac:dyDescent="0.3">
			<c r="B2" t="s">
				<v>0</v>
			</c>
		</row>
		<row r="3" spans="2:6" x14ac:dyDescent="0.3">
			<c r="C3" t="s">
				<v>1</v>
			</c>
		</row>
		<row r="4" spans="2:6" x14ac:dyDescent="0.3">
			<c r="D4" t="s">
				<v>2</v>
			</c>
		</row>
		<row r="5" spans="2:6" x14ac:dyDescent="0.3">
			<c r="E5" t="s">
				<v>0</v></c>
		</row>
		<row r="6" spans="2:6" x14ac:dyDescent="0.3">
			<c r="F6" t="s"><v>3</v>
		</c></row>
	</sheetData>
	<pageMargins left="0.7" right="0.7" top="0.75" bottom="0.75" header="0.3" footer="0.3"/>
</worksheet>
Как мы видим, в структуре объектной модели нет никаких «пересечений». Строго говоря рабочая книга — это архив структурированных данных в формате XML. При этом в каждую «строку» входит «столбец», и в нём в свою очередь прописан номер значения данного столбца, по которому оно подтягивается из другого XML файла при открытии книги для экономии места за счёт отсутствия повторяющихся значений. Почему это важно. Если мы захотим написать какой-то обработчик таких файлов, который будет напрямую редактировать данные в этих XML, то ориентироваться надо на такую модель и структуру данных. И правильное определение будет примерно таким: ячейка — это объект внутри столбца, который в свою очередь находится внутри строки в файле xml, в котором хранятся данные о содержимом листа.
Способы обращения к ячейкам
Выбор и активация
Почти во всех случаях можно и стоит избегать использования методов Select и Activate. На это есть две причины:
- Это лишь имитация действий пользователя, которая замедляет выполнение программы. Работать с объектами книги можно напрямую без использования методов Select и Activate.
- Это усложняет код и может приводить к неожиданным последствиям. Каждый раз перед использованием Select необходимо помнить, какие ещё объекты были выбраны до этого и не забывать при необходимости снимать выбор. Либо, например, в случае использования метода Select в самом начале программы может быть выбрано два листа вместо одного потому что пользователь запустил программу, выбрав другой лист.
Можно выбирать и активировать книги, листы, ячейки, фигуры, диаграммы, срезы, таблицы и т.д.
Отменить выбор ячеек можно методом Unselect:
Selection.UnselectОтличие выбора от активации — активировать можно только один объект из раннее выбранных. Выбрать можно несколько объектов.
Если вы записали и редактируете код макроса, то лучше всего заменить Select и Activate на конструкцию With … End With. Например, предположим, что мы записали вот такой макрос:
Sub Macro1()
' Macro1 Macro
    Range("F4:F10,H6:H10").Select 'выбрали два несмежных диапазона зажав ctrl
    Range("H6").Activate          'показывает только то, что я начал выбирать второй диапазон с этой ячейки (она осталась белой). Это действие ни на что не влияет
    With Selection.Interior
        .Pattern = xlSolid
        .PatternColorIndex = xlAutomatic
        .Color = 65535            'залили желтым цветом, нажав на кнопку заливки на верхней панели
        .TintAndShade = 0
        .PatternTintAndShade = 0
    End With
End Sub
Почему макрос записался таким неэффективным образом? Потому что в каждый момент времени (в каждой строке) программа не знает, что вы будете делать дальше. Поэтому в записи выбор ячеек и действия с ними — это два отдельных действия. Этот код лучше всего оптимизировать (особенно если вы хотите скопировать его внутрь какого-нибудь цикла, который должен будет исполняться много раз и перебирать много объектов). Например, так:
Sub Macro11()
'
' Macro1 Macro
    Range("F4:F10,H6:H10").Select '1. смотрим, что за объект выбран (что идёт до .Select)
    Range("H6").Activate
    With Selection.Interior       '2. понимаем, что у выбранного объекта есть свойство interior, с которым далее идёт работа
        .Pattern = xlSolid
        .PatternColorIndex = xlAutomatic
        .Color = 65535
        .TintAndShade = 0
        .PatternTintAndShade = 0
    End With
End Sub


Sub Optimized_Macro()
    With Range("F4:F10,H6:H10").Interior '3. переносим объект напрямую в конструкцию With вместо Selection
' ////// Здесь я для надёжности прописал бы ещё Thisworkbook.Sheet("ИмяЛиста") перед Range,
' ////// чтобы минимизировать риск любых случайных изменений других листов и книг
' ////// With Thisworkbook.Sheet("ИмяЛиста").Range("F4:F10,H6:H10").Interior
        .Pattern = xlSolid               '4. полностью копируем всё, что было записано рекордером внутрь блока with
        .PatternColorIndex = xlAutomatic
        .Color = 55555                   '5. здесь я поменял цвет на зеленый, чтобы было видно, работает ли код при поочерёдном запуске двух макросов
        .TintAndShade = 0
        .PatternTintAndShade = 0
    End With
End Sub
Пример сценария, когда использование Select и Activate оправдано:
Допустим, мы хотим, чтобы во время исполнения программы мы одновременно изменяли несколько листов одним действием и пользователь видел какой-то определённый лист. Это можно сделать примерно так:
Sub Select_Activate_is_OK()
Thisworkbook.Worksheets(Array("Sheet1", "Sheet3")).Select 'Выбираем несколько листов по именам
Thisworkbook.Worksheets("Sheet3").Activate 'Показываем пользователю третий лист
'Далее все действия с выбранными ячейками через Select будут одновременно вносить изменения в оба выбранных листа

'Допустим, что тут мы решили покрасить те же два диапазона:
Range("F4:F10,H6:H10").Select
    Range("H6").Activate
    With Selection.Interior
        .Pattern = xlSolid
        .PatternColorIndex = xlAutomatic
        .Color = 65535
        .TintAndShade = 0
        .PatternTintAndShade = 0
    End With

End Sub
Единственной причиной использовать этот код по моему мнению может быть желание зачем-то показать пользователю определённую страницу книги в какой-то момент исполнения программы. С точки зрения обработки объектов, опять же, эти действия лишние.
Получение и изменение значений ячеек
Значение ячеек можно получать/изменять с помощью свойства value.
'Если нужно прочитать / записать значение ячейки, то используется свойство Value
a = ThisWorkbook.Sheets("Sheet1").Cells (1,1).Value 'записать значение ячейки А1 листа "Sheet1" в переменную "a"
ThisWorkbook.Sheets("Sheet1").Cells (1,1).Value = 1  'задать значение ячейки А1 (первый ряд, первый столбец) листа "Sheet1"

'Если нужно прочитать текст как есть (с форматированием), то можно использовать свойство .text:
ThisWorkbook.Sheets("Sheet1").Cells (1,1).Text = "1"
a = ThisWorkbook.Sheets("Sheet1").Cells (1,1).Text

'Когда проявится разница:
'Например, если мы считываем дату в формате "31 декабря 2021 г.", хранящуюся как дата
a = ThisWorkbook.Sheets("Sheet1").Cells (1,1).Value 'эапишет как "31.12.2021"
a = ThisWorkbook.Sheets("Sheet1").Cells (1,1).Text  'запишет как "31 декабря 2021 г."
Ячейки открытой книги
К ячейкам можно обращаться:
'В книге, в которой хранится макрос (на каком-то из листов, либо в отдельном модуле или форме)
ThisWorkbook.Sheets("Sheet1").Cells(1,1).Value        'По номерам строки и столбца
ThisWorkbook.Sheets("Sheet1").Cells(1,"A").Value      'По номерам строки и букве столбца
ThisWorkbook.Sheets("Sheet1").Range("A1").Value       'По адресу - вариант 1
ThisWorkbook.Sheets("Sheet1").[A1].Value              'По адресу - вариант 2
ThisWorkbook.Sheets("Sheet1").Range("CellName").Value 'По имени ячейки (для этого ей предварительно нужно его присвоить)

'Те же действия, но с использованием полного названия рабочей книги (книга должна быть открыта)
Workbooks("workbook.xlsm").Sheets("Sheet1").Cells(1,1).Value 'По номерам строки и столбца
Workbooks("workbook.xlsm").Sheets("Sheet1").Cells(1,"A").Value                'По номерам строки и букве столбца
Workbooks("workbook.xlsm").Sheets("Sheet1").Range("A1").Value                 'По адресу - вариант 1
Workbooks("workbook.xlsm").Sheets("Sheet1").[A1].Value                        'По адресу - вариант 2
Workbooks("workbook.xlsm").Sheets("Sheet1").Range("CellName").Value           'По имени ячейки (для этого ей предварительно нужно его присвоить)
Ячейки закрытой книги
Если нужно достать или изменить данные в другой закрытой книге, то необходимо прописать открытие и закрытие книги. Непосредственно работать с закрытой книгой не получится, потому что данные в ней хранятся отдельно от структуры и при открытии Excel каждый раз производит расстановку значений по соответствующим «слотам» в структуре. Подробнее о том, как хранятся данные в xlsx см выше.
Workbooks.Open Filename:="С:closed_workbook.xlsx"    'открыть книгу (она становится активной)
a = ActiveWorkbook.Sheets("Sheet1").Cells(1,1).Value  'достать значение ячейки 1,1
ActiveWorkbook.Close False                            'закрыть книгу (False => без сохранения)
Скачать пример, в котором можно посмотреть, как доставать и как записывать значения в закрытую книгу.
Код из файла:
Option Explicit
Sub get_value_from_closed_wb() 'достать значение из закрытой книги
Dim a, wb_path, wsh As String
wb_path = ThisWorkbook.Sheets("Sheet1").Cells(2, 3).Value 'get path to workbook from sheet1
wsh = ThisWorkbook.Sheets("Sheet1").Cells(3, 3).Value
Workbooks.Open Filename:=wb_path
a = ActiveWorkbook.Sheets(wsh).Cells(3, 3).Value
ActiveWorkbook.Close False
ThisWorkbook.Sheets("Sheet1").Cells(4, 3).Value = a
End Sub

Sub record_value_to_closed_wb() 'записать значение в закрытую книгу
Dim wb_path, b, wsh As String
wsh = ThisWorkbook.Sheets("Sheet1").Cells(3, 3).Value
wb_path = ThisWorkbook.Sheets("Sheet1").Cells(2, 3).Value 'get path to workbook from sheet1
b = ThisWorkbook.Sheets("Sheet1").Cells(5, 3).Value 'get value to record in the target workbook
Workbooks.Open Filename:=wb_path
ActiveWorkbook.Sheets(wsh).Cells(4, 4).Value = b 'add new value to cell D4 of the target workbook
ActiveWorkbook.Close True
End Sub
Перебор ячеек
Перебор в произвольном диапазоне
Скачать файл со всеми примерами
Пройтись по всем ячейкам в нужном диапазоне можно разными способами. Основные:
- Цикл For Each. Пример:
Sub iterate_over_cells() For Each c In ThisWorkbook.Sheets("Sheet1").Range("B2:D4").Cells MsgBox (c) Next c End SubЭтот цикл выведет в виде сообщений значения ячеек в диапазоне B2:D4 по порядку по строкам слева направо и по столбцам — сверху вниз. Данный способ можно использовать для действий, в который вам не важны номера ячеек (закрашивание, изменение форматирования, пересчёт чего-то и т.д.).
- Ту же задачу можно решить с помощью двух вложенных циклов — внешний будет перебирать ряды, а вложенный — ячейки в рядах. Этот способ я использую чаще всего, потому что он позволяет получить больше контроля над исполнением: на каждой итерации цикла нам доступны координаты ячеек. Для перебора всех ячеек на листе этим методом потребуется найти последнюю заполненную ячейку. Пример кода:
Sub iterate_over_cells() Dim cl, rw As Integer Dim x As Variant 'перебор области 3x3 For rw = 1 To 3 ' цикл для перебора рядов 1-3 For cl = 1 To 3 'цикл для перебора столбцов 1-3 x = ThisWorkbook.Sheets("Sheet1").Cells(rw + 1, cl + 1).Value MsgBox (x) Next cl Next rw 'перебор всех ячеек на листе. Последняя ячейка определена с помощью UsedRange 'LastRow = ActiveSheet.UsedRange.Row + ActiveSheet.UsedRange.Rows.Count - 1 'LastCol = ActiveSheet.UsedRange.Column + ActiveSheet.UsedRange.Columns.Count - 1 'For rw = 1 To LastRow 'цикл перебора всех рядов ' For cl = 1 To LastCol 'цикл для перебора всех столбцов ' Действия ' Next cl 'Next rw End Sub - Если нужно перебрать все ячейки в выделенном диапазоне на активном листе, то код будет выглядеть так:
Sub iterate_cell_by_cell_over_selection() Dim ActSheet As Worksheet Dim SelRange As Range Dim cell As Range Set ActSheet = ActiveSheet Set SelRange = Selection 'if we want to do it in every cell of the selected range For Each cell In Selection MsgBox (cell.Value) Next cell End SubДанный метод подходит для интерактивных макросов, которые выполняют действия над выбранными пользователем областями.
- Перебор ячеек в ряду
Sub iterate_cells_in_row() Dim i, RowNum, StartCell As Long RowNum = 3 'какой ряд StartCell = 0 ' номер начальной ячейки (минус 1, т.к. в цикле мы прибавляем i) For i = 1 To 10 ' 10 ячеек в выбранном ряду ThisWorkbook.Sheets("Sheet1").Cells(RowNum, i + StartCell).Value = i '(i + StartCell) добавляет 1 к номеру столбца при каждом повторении Next i End Sub - Перебор ячеек в столбце
Sub iterate_cells_in_column() Dim i, ColNum, StartCell As Long ColNum = 3 'какой столбец StartCell = 0 ' номер начальной ячейки (минус 1, т.к. в цикле мы прибавляем i) For i = 1 To 10 ' 10 ячеек ThisWorkbook.Sheets("Sheet1").Cells(i + StartCell, ColNum).Value = i ' (i + StartCell) добавляет 1 к номеру ряда при каждом повторении Next i End Sub
Свойства и методы ячеек
Имя ячейки
Присвоить новое имя можно так:
Thisworkbook.Sheets(1).Cells(1,1).name = "Новое_Имя"Для того, чтобы сменить имя ячейки нужно сначала удалить существующее имя, а затем присвоить новое. Удалить имя можно так:
ActiveWorkbook.Names("Старое_Имя").DeleteПример кода для переименования ячеек:
Sub rename_cell()

old_name = "Cell_Old_Name"
new_name = "Cell_New_Name"

ActiveWorkbook.Names(old_name).Delete
ThisWorkbook.Sheets(1).Cells(2, 1).Name = new_name
End Sub

Sub rename_cell_reverse()

old_name = "Cell_New_Name"
new_name = "Cell_Old_Name"

ActiveWorkbook.Names(old_name).Delete
ThisWorkbook.Sheets(1).Cells(2, 1).Name = new_name
End Sub
Адрес ячейки
Sub get_cell_address() ' вывести адрес ячейки в формате буква столбца, номер ряда
  '$A$1 style
  txt_address = ThisWorkbook.Sheets(1).Cells(3, 2).Address
  MsgBox (txt_address)
End Sub

Sub get_cell_address_R1C1()' получить адрес столбца в формате номер ряда, номер столбца
  'R1C1 style
  txt_address = ThisWorkbook.Sheets(1).Cells(3, 2).Address(ReferenceStyle:=xlR1C1)
  MsgBox (txt_address)
End Sub

  'пример функции, которая принимает 2 аргумента: название именованного диапазона и тип желаемого адреса
  '(1- тип $A$1 2- R1C1 - номер ряда, столбца)
Function get_cell_address_by_name(str As String, address_type As Integer)
  '$A$1 style
  Select Case address_type
    Case 1
      txt_address = Range(str).Address
    Case 2
      txt_address = Range(str).Address(ReferenceStyle:=xlR1C1)
    Case Else
      txt_address = "Wrong address type selected. 1,2 available"
    End Select
  get_cell_address_by_name = txt_address
End Function

'перед запуском нужно убедиться, что в книге есть диапазон с названием,
'адрес которого мы хотим получить, иначе будет ошибка
Sub test_function() 'запустите эту программу, чтобы увидеть, как работает функция
  x = get_cell_address_by_name("MyValue", 2)
  MsgBox (x)
End Sub
Размеры ячейки
Ширина и длина ячейки в VBA меняется, например, так:
Sub change_size()
Dim x, y As Integer
Dim w, h As Double

'получить координаты целевой ячейки
x = ThisWorkbook.Sheets("Sheet1").Cells(2, 2).Value
y = ThisWorkbook.Sheets("Sheet1").Cells(3, 2).Value

'получить желаемую ширину и высоту ячейки
w = ThisWorkbook.Sheets("Sheet1").Cells(6, 2).Value
h = ThisWorkbook.Sheets("Sheet1").Cells(7, 2).Value

'сменить высоту и ширину ячейки с координатами x,y
ThisWorkbook.Sheets("Sheet1").Cells(x, y).RowHeight = h
ThisWorkbook.Sheets("Sheet1").Cells(x, y).ColumnWidth = w


End Sub
Прочитать значения ширины и высоты ячеек можно двумя способами (однако результаты будут в разных единицах измерения). Если написать просто Cells(x,y).Width или Cells(x,y).Height, то будет получен результат в pt (привязка к размеру шрифта).
Sub get_size()
Dim x, y As Integer
'получить координаты ячейки, с которой мы будем работать
x = ThisWorkbook.Sheets("Sheet1").Cells(2, 2).Value
y = ThisWorkbook.Sheets("Sheet1").Cells(3, 2).Value

'получить длину и ширину выбранной ячейки в тех же единицах измерения, в которых мы их задавали
ThisWorkbook.Sheets("Sheet1").Cells(2, 6).Value = ThisWorkbook.Sheets("Sheet1").Cells(x, y).ColumnWidth
ThisWorkbook.Sheets("Sheet1").Cells(3, 6).Value = ThisWorkbook.Sheets("Sheet1").Cells(x, y).RowHeight

'получить длину и ширину с помощью свойств ячейки (только для чтения) в поинтах (pt)
ThisWorkbook.Sheets("Sheet1").Cells(7, 9).Value = ThisWorkbook.Sheets("Sheet1").Cells(x, y).Width
ThisWorkbook.Sheets("Sheet1").Cells(8, 9).Value = ThisWorkbook.Sheets("Sheet1").Cells(x, y).Height

End Sub
Скачать файл с примерами изменения и чтения размера ячеек
Запуск макроса активацией ячейки
Для запуска кода VBA при активации ячейки необходимо вставить в код листа нечто подобное:
3 важных момента, чтобы это работало:
1. Этот код должен быть вставлен в код листа (здесь контролируется диапазон D4)
2-3. Программа, ответственная за запуск кода при выборе ячейки, должна называться Worksheet_SelectionChange и должна принимать значение переменной Target, относящейся к триггеру SelectionChange. Другие доступные триггеры можно посмотреть в правом верхнем углу (2).
Скачать файл с базовым примером (как на картинке)
Скачать файл с расширенным примером (код ниже)
Option Explicit

Private Sub Worksheet_SelectionChange(ByVal Target As Range)

        ' имеем в виду, что триггер SelectionChange будет запускать эту Sub после каждого клика мышью (после каждого клика будет проверяться:
          '1. количество выделенных ячеек и
          '2. не пересекается ли выбранный диапазон с заданным в этой программе диапазоном.
        ' поэтому в эту программу не стоит без необходимости писать никаких других тяжелых операций

    If Selection.Count = 1 Then 'запускаем программу только если выбрано не более 1 ячейки


    'вариант модификации - брать адрес ячейки из другой ячейки:
    'Dim CellName as String
    'CellName = Activesheet.Cells(1,1).value 'брать текстовое имя контролируемой ячейки из A1 (должно быть в формате Буква столбца + номер строки)
    'If Not Intersect(Range(CellName), Target) Is Nothing Then
    'для работы этой модификации следующую строку надо закомментировать/удалить


        If Not Intersect(Range("D4"), Target) Is Nothing Then
        'если заданный (D4) и выбранный диапазон пересекаются
        '(пересечение диапазонов НЕ равно Nothing)

        'можно прописать диапазон из нескольких ячеек:
        'If Not Intersect(Range("D4:E10"), Target) Is Nothing Then
        'можно прописать несколько диапазонов:
        'If Not Intersect(Range("D4:E10"), Target) Is Nothing or Not Intersect(Range("A4:A10"), Target) Is Nothing Then

            Call program 'выполняем программу
        End If
    End If
End Sub

Sub program()

MsgBox ("Program Is running") 'здесь пишем код того, что произойдёт при выборе нужной ячейки


End Sub
In this Article
- Insert a Single Row or Column
- Insert New Row
- Insert New Column
- Insert Multiple Rows or Columns
- Insert Multiple Rows
- Insert Multiple Columns
- Insert – Shift & CopyOrigin
- Other Insert Examples
- Insert Copied Rows or Columns
- Insert Rows Based on Cell Value
- Delete Rows or Columns
This tutorial will demonstrate how to use VBA to insert rows and columns in Excel.
To insert rows or columns we will use the Insert Method.
Insert a Single Row or Column
Insert New Row
To insert a single row, you can use the Rows Object:
Rows(4).InsertOr you can use the Range Object along with EntireRow:
Range("b4").EntireRow.InsertInsert New Column
Similar to inserting rows, we can use the Columns Object to insert a column:
Columns(4).InsertOr the Range Object, along with EntireColumn:
Range("b4").EntireColumn.InsertInsert Multiple Rows or Columns
Insert Multiple Rows
When inserting multiple rows with the Rows Object, you must enter the rows in quotations:
Rows("4:6").InsertInserting multiple rows with the Range Object works the same as with a single row:
Range("b4:b6").EntireRow.InsertInsert Multiple Columns
When inserting multiple columns with the Columns Object, enter the column letters in quotations:
Columns("B:D").InsertInserting multiple columns with the Range Object works the same as with a single column:
Range("b4:d4").EntireColumn.InsertVBA Coding Made Easy
Stop searching for VBA code online. Learn more about AutoMacro — A VBA Code Builder that allows beginners to code procedures from scratch with minimal coding knowledge and with many time-saving features for all users!

Learn More
Insert – Shift & CopyOrigin
The Insert Method has two optional arguments:
- Shift – Which direction to shift the cells
- CopyOrigin – Which cell formatting to copy (above, below, left, or right)
The Shift argument is irrelevant when inserting entire rows or columns. It only allows you to indicate to shift down or shift to the right:
- xlShiftDown – Shift cells down
- xlShiftToRight – Shift cells to the right
As you can see, you can’t shift up or to the left.
The CopyOrigin argument has two potential inputs:
- xlFormatFromLeftorAbove – (0) Newly-inserted cells take formatting from cells above or to the left
- xlFormatFromRightorBelow (1) Newly-inserted cells take formatting from cells below or to the right.
Let’s look at some examples of the CopyOrigin argument. Here’s our initial data:
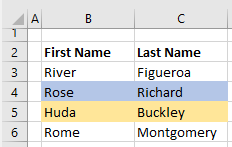
This example will insert a row, taking the formatting from the above row.
Rows(5).Insert , xlFormatFromLeftOrAbove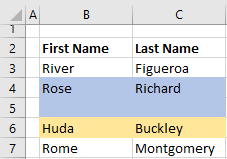
This example will insert a row, taking the formatting from the below row.
Rows(5).Insert , xlFormatFromRightOrBelow
Other Insert Examples
Insert Copied Rows or Columns
If you’d like to insert a copied row, you would use code like this:
Range("1:1").Copy
Range("5:5").Insert
Here we copy Row 1 and Insert it at Row 5.
VBA Programming | Code Generator does work for you!
Insert Rows Based on Cell Value
This will loop through a range, inserting rows based on cell values:
Sub InsertRowswithSpecificValue()

Dim cell As Range

For Each cell In Range("b2:b20")
    If cell.Value = "insert" Then
        cell.Offset(1).EntireRow.Insert
    End If
Next cell

End Sub
Delete Rows or Columns
To delete rows or columns, simply use the Delete method.
Rows(1).Delete

Range("a1").EntireRow.Delete

Columns(1).Delete

Range("a1").EntireColumn.Delete In certain cases, you may need to automate the process of inserting a row (or several rows) in a worksheet. This is useful, for example, when you’re (i) manipulating or adding data entries, or (ii) formatting a worksheet that uses blank rows for organization purposes.
The information and examples in this VBA Tutorial should allow you to insert rows in a variety of circumstances.
This VBA Tutorial is accompanied by Excel workbooks containing the data and macros I use in the examples below. You can get immediate free access to these example workbooks by clicking the button below.

Use the following Table of Contents to navigate to the section you’re interested in.
Insert Rows in Excel
When working manually with Excel, you can insert rows in the following 2 steps:
- Select the row or rows above which to insert the row or rows.
- Do one of the following:
- Right-click and select Insert.
- Go to Home > Insert > Insert Sheet Rows.
- Use the “Ctrl + Shift + +” keyboard shortcut.

You can use the VBA constructs and structures I describe below to automate this process to achieve a variety of results.
Excel VBA Constructs to Insert Rows
Insert Rows with the Range.Insert Method
Purpose of Range.Insert
Use the Range.Insert method to insert a cell range into a worksheet. The 2 main characteristics of the Range.Insert method are the following:
- Range.Insert can insert a single cell or a cell range. For purposes of this VBA Tutorial, you’re interested in inserting entire rows.
- To make space for the newly-inserted cells, Range.Insert shifts other cells away.
Syntax of Range.Insert
expression.Insert(Shift, CopyOrigin)
“expression” is a Range object. Therefore, I simplify as follows:
Range.Insert(Shift, CopyOrigin)
Parameters of Range.Insert
- Parameter: Shift.
- Description: Specifies the direction in which cells are shifted away to make space for the newly-inserted row.
- Optional/Required: Optional.
- Data type: Variant.
- Values: Use a constant from the xlInsertShiftDirection Enumeration:
- xlShiftDown or -4121: Shifts cells down.
- xlShiftToRight or -4161: Shifts cells to the right.
- Default: Excel decides based on the range’s shape.
- Usage notes: When you insert a row: (i) use xlShiftDown or -4121, or (ii) omit parameter and rely on the default behavior.
- Parameter: CopyOrigin.
- Description: Specifies from where (the origin) is the format for the cells in the newly inserted row copied.
- Optional/Required: Optional.
- Data type: Variant.
- Values: A constant from the xlInsertFormatOrigin Enumeration:
- xlFormatFromLeftOrAbove or 0: Newly-inserted cells take formatting from cells above or to the left.
- xlFormatFromRightOrBelow or 1: Newly-inserted cells take formatting from cells below or to the right.
- Default: xlFormatFromLeftOrAbove or 0. Newly-inserted cells take the formatting from cells above or to the left.
How to Use Range.Insert to Insert Rows
Use the Range.Insert method to insert a row into a worksheet. Use a statement with the following structure:
Range.Insert Shift:=xlShiftDown CopyOrigin:=xlInsertFormatOriginConstant
For these purposes:
- Range: Range object representing an entire row. Use the Worksheet.Rows or Range.EntireRow properties to return a Range object that represents the entire row. Please refer to the sections about the Rows and EntireRow properties below.
- xlInsertFormatOriginConstant: xlFormatFromLeftOrAbove or xlFormatFromRightOrBelow. xlFormatFromLeftOrAbove is the default value. Therefore, when inserting rows with formatting from row above, you can usually omit the CopyOrigin parameter.
You can usually omit the Shift parameter. By default, VBA decides how to shift the cells based on the range’s shape. When inserting a row, this usually results in Excel shifting the cells down.
Specify Rows with the Worksheet.Rows Property
Purpose of Worksheet.Rows
Use the Worksheet.Rows property to return a Range object representing all the rows within the worksheet the property works with.
Worksheet.Rows is read-only.
Syntax of Worksheet.Rows
expression.Rows
“expression” is a Worksheet object. Therefore, I simplify as follows:
Worksheet.Rows
How to Use Worksheet.Rows to Insert Rows
Use the Worksheet.Rows property to specify the row or rows above which new rows are inserted.
To insert a row, use a statement with the following structure:
Worksheets.Rows(row#).Insert
“row#” is the number of the row above which the row is inserted.
To insert multiple rows, use a statement with the following structure:
Worksheet.Rows("firstRow#:lastRow#").Insert
“firstRow#” is the row above which the rows are inserted. The number of rows VBA inserts is calculated as follows:
lastRow# - firstRow# + 1
Specify the Active Cell with the Application.ActiveCell Property
Purpose of Application.ActiveCell
Use the Application.ActiveCell property to return a Range object representing the active cell.
Application.ActiveCell is read-only.
Syntax of Application.ActiveCell
expression.ActiveCell
“expression” is the Application object. Therefore, I simplify as follows:
Application.ActiveCell
How to Use Application.ActiveCell To Insert Rows
When you insert a row, use the Application.ActiveCell property to return the active cell. This allows you to use the active cell as reference for the row insertion operation.
Use the Range.Offset property to return a Range object a specific number of rows above or below the active cell. Use the Range.EntireRow property to return a Range object representing the entire row or rows above which to insert the new row. Please refer to the sections about the Offset and EntireRow properties below.
To insert a row above the active cell, use the following statement:
ActiveCell.EntireRow.Insert Shift:=xlShiftDown
To insert a row a specific number of rows above or below the active cell, use a statement with the following structure:
ActiveCell.Offset(RowOffset).EntireRow.Insert Shift:=xlShiftDown
Specify a Cell Range with the Worksheet.Range Property
Purpose of Worksheet.Range
Use the Worksheet.Range property to return a Range object representing a single cell or a cell range.
Syntax of Worksheet.Range
expression.Range(Cell1, Cell2)
“expression” is a Worksheet object. Therefore, I simplify as follows:
Worksheet.Range(Cell1, Cell2)
Parameters of Worksheet.Range
- Parameter: Cell1.
- Description:
- If you use Cell1 alone (omit Cell2), Cell1 specifies the cell range.
- If you use Cell1 and Cell2, Cell1 specifies the cell in the upper-left corner of the cell range.
- Required/Optional: Required.
- Data type: Variant.
- Values:
- If you use Cell1 alone (omit Cell2): (i) range address as an A1-style reference in language of macro, or (ii) range name.
- If you use Cell1 and Cell2: (i) Range object, (ii) range address, or (iii) range name.
- Description:
- Parameter: Cell2.
- Description: Cell in the lower-right corner of the cell range.
- Required/Optional: Optional.
- Data type: Variant.
- Values: (i) Range object, (ii) range address, or (iii) range name.
How to Use Worksheet.Range to Insert Rows
When you insert a row, use the Worksheet.Range property to return a cell or cell range. This allows you to use a specific cell or cell range as reference for the row insertion operation.
Use the Range.Offset property to return a Range object a specific number of rows above or below the cell or cell range. Use the Range.EntireRow property to return a Range object representing the entire row or rows above which to insert the new row or rows. Please refer to the sections about the Offset and EntireRow properties below.
To insert rows above the cell range specified by Worksheet.Range, use a statement with the following structure:
Worksheet.Range(Cell1, Cell2).EntireRow.Insert Shift:=xlShiftDown
To insert rows a specific number of rows above or below the cell range specified by Worksheet.Range use a statement with the following structure:
Worksheet.Range(Cell1, Cell2).Offset(RowOffset).EntireRow.Insert Shift:=xlShiftDown
If the cell range represented by the Worksheet.Range property spans more than 1 row, the Insert method inserts several rows. The number of rows inserted is calculated as follows:
lastRow# - firstRow# + 1
Please refer to the section about the Worksheet.Rows property above for further information about this calculation.
Specify a Cell with the Worksheet.Cells and Range.Item Properties
Purpose of Worksheet.Cells and Range.Item
Use the Worksheet.Cells property to return a Range object representing all the cells within a worksheet.
Once your macro has all the cells within the worksheet, use the Range.Item property to return a Range object representing one of those cells.
Syntax of Worksheet.Cells and Range.Item
Worksheet.Cells
expression.Cells
“expression” is a Worksheet object. Therefore, I simplify as follows:
Worksheet.Cells
Range.Item
expression.Item(RowIndex, ColumnIndex)
“expression” is a Range object. Therefore, I simplify as follows:
Range.Item(RowIndex, ColumnIndex)
Worksheet.Cells and Range.Item Together
Considering the above:
Worksheet.Cells.Item(RowIndex, ColumnIndex)
However, Item is the default property of the Range object. Therefore, you can generally omit the Item keyword before specifying the RowIndex and ColumnIndex arguments. I simplify as follows:
Worksheet.Cells(RowIndex, ColumnIndex)
Parameters of Worksheet.Cells and Range.Item
- Parameter: RowIndex.
- Description:
- If you use RowIndex alone (omit ColumnIndex), RowIndex specifies the index of the cell you work with. Cells are numbered from left-to-right and top-to-bottom.
- If you use RowIndex and ColumnIndex, RowIndex specifies the row number of the cell you work with.
- Required/Optional: Required.
- Data type: Variant.
- Values: You usually specify RowIndex as a value.
- Description:
- Parameter: ColumnIndex.
- Description: Column number or letter of the cell you work with.
- Required/Optional: Optional.
- Data type: Variant.
- Values: You usually specify ColumnIndex as a value (column number) or letter within quotations (“”).
How to use Worksheet.Cells and Range.Item to Insert Rows
When you insert a row, use the Worksheet.Cells and Range.Item properties to return a cell. This allows you to use a specific cell as reference for the row insertion operation.
Use the Range.Offset property to return a Range object a specific number of rows above or below the cell. Use the Range.EntireRow property to return a Range object representing the entire row above which to insert the row. Please refer to the sections about the Offset and EntireRow properties below.
To insert a row above the cell specified by Worksheet.Cells, use a statement with the following structure:
Worksheet.Cells(RowIndex, ColumnIndex).EntireRow.Insert Shift:=xlShiftDown
To insert a row a specific number of rows above or below the cell specified by Worksheet.Cells, use a statement with the following structure:
Worksheet.Cells(RowIndex, ColumnIndex).Offset(RowOffset).EntireRow.Insert Shift:=xlShiftDown
Specify a Cell Range a Specific Number of Rows Below or Above a Cell or Cell Range with the Range.Offset Property
Purpose of Range.Offset
Use the Range.Offset property to return a Range object representing a cell range located a number of rows or columns away from the range the property works with.
Syntax of Range.Offset
expression.Offset(RowOffset, ColumnOffset)
“expression” is a Range object. Therefore, I simplify as follows:
Range.Offset(RowOffset, ColumnOffset)
Parameters of Range.Offset
- Parameter: RowOffset.
- Description: Number of rows by which cell or cell range is offset.
- Required/Optional: Optional.
- Data type: Variant.
- Values:
- Positive number: Moves down the worksheet.
- Negative number: Moves up the worksheet.
- 0: Stays on the same row.
- Default: 0. Stays on the same row.
- Parameter: ColumnOffset.
- Description: Number of columns by which cell or cell range is offset.
- Required/Optional: Optional.
- Data type: Variant.
- Values:
- Positive number: Moves towards the right of the worksheet.
- Negative number: Moves towards the left of the worksheet.
- 0: Stays on the same column.
- Default: 0. Stays on the same column.
- Usage notes: When you insert a row, you can usually omit the ColumnOffset parameter. You’re generally interested in moving a number of rows (not columns) above or below.
How to Use Range.Offset to Insert Rows
When you insert a row, use the Range.Offset property to specify a cell or cell range located a specific number of rows below above another cell or cell range. This allows you to use this new cell or cell range as reference for the row insertion operation.
Use properties such as Application.ActiveCell, Worksheet.Range and Worksheet.Cells to specify the base range the Offset property works with. Please refer to the sections about the ActiveCell, Range and Cells properties above.
Specify Entire Row with the Range.EntireRow Property
Purpose of Range.EntireRow
Use the Range.EntireRow property to return a Range object representing the entire row or rows containing the cell range the property works with.
Range.EntireRow is read-only.
Syntax of Range.EntireRow
expression.EntireRow
“expression” is a Range object. Therefore, I simplify as follows:
Range.EntireRow
How to Use Range.EntireRow to Insert Rows
When you insert a row, use the Range.EntireRow property to return the entire row or rows above which the new row or rows are inserted.
Use properties such as Application.ActiveCell, Worksheet.Range and Worksheet.Cells to specify the range the EntireRow property works with. Please refer to the sections about the ActiveCell, Range and Cells properties above.
Clear Row Formatting with the Range.ClearFormats Method
Purpose of Range.ClearFormats
Use the Range.ClearFormats method to clear the formatting of a cell range.
Syntax of Range.ClearFormats
expression.ClearFormats
“expression” is a Range object. Therefore, I simplify as follows:
Range.ClearFormats
How to Use Range.ClearFormats to Insert Rows
The format of the newly-inserted row is specified by the CopyOrigin parameter of the Range.Insert method. Please refer to the description of Range.Insert and CopyOrigin above.
When you insert a row, use the Range.ClearFormats method to clear the formatting of the newly-inserted rows. Use a statement with the following structure after the statement that inserts the new row (whose formatting you want to clear):
Range.ClearFormats
“Range” is a Range object representing the newly-inserted row.
Use the Worksheet.Rows or Range.EntireRow properties to return a Range object that represents the newly-inserted row. Please refer to the sections about the Rows and EntireRow properties above.
Copy Rows with the Range.Copy Method
Purpose of Range.Copy
Use the Range.Copy method to copy a cell range to another cell range or the Clipboard.
Syntax of Range.Copy
expression.Copy(Destination)
“expression” is a Range object. Therefore, I simplify as follows:
Range.Copy(Destination)
Parameters of Range.Copy
- Parameter: Destination.
- Description: Specifies the destination cell range to which the copied cell range is copied.
- Required/Optional: Optional parameter.
- Data type: Variant.
- Values: You usually specify Destination as a Range object.
- Default: Cell range is copied to the Clipboard.
- Usage notes: When you insert a copied row, omit the Destination parameter to copy the row to the Clipboard.
How to Use Range.Copy to Insert Rows
Use the Range.Copy method to copy a row which you later insert.
Use a statement with the following structure before the statement that inserts the row:
Range.Copy
“Range” is a Range object representing an entire row.
Use the Worksheet.Rows or Range.EntireRow properties to return a Range object that represents a row. Please refer to the sections about the Rows and EntireRow properties above.
Related VBA and Macro Tutorials
- General VBA constructs and structures:
- Introduction to Excel VBA constructs and structures.
- The Excel VBA Object Model.
- How to declare variables in Excel VBA.
- Excel VBA data types.
- Practical VBA applications and macro examples:
- How to copy and paste with Excel VBA.
You can find additional VBA and Macro Tutorials in the Archives.
Example Workbooks
This VBA Tutorial is accompanied by Excel workbooks containing the data and macros I explain below. If you want to follow and practice, you can get immediate free access to these example workbooks by clicking the button below.
Each worksheet within the workbook contains a single data range. Most of the entries simply state “Data”.

Example #1: Excel VBA Insert Row
VBA Code to Insert Row
The following macro inserts a row below row 5 of the worksheet named “Insert row”.
Sub insertRow()
    'Source: powerspreadsheets.com/
    'For further information: https://powerspreadsheets.com/excel-vba-insert-row/
    Worksheets("Insert row").Rows(6).Insert Shift:=xlShiftDown
End Sub

Process Followed by Macro

VBA Statement Explanation
Worksheets(“Insert row”).Rows(6).Insert Shift:=xlShiftDown
- Item: Worksheets(“Insert row”).
- VBA construct: Workbook.Worksheets property.
- Description: Returns a Worksheet object representing the “Insert row” worksheet.
- Item: Rows(6).
- VBA construct: Worksheets.Rows property.
- Description: Returns a Range object representing row 6 of the worksheet returned by item #1 above.
- Item: Insert.
- VBA construct: Range.Insert method.
- Description: Inserts a new row above the row returned by item #2 above.
- Item: Shift:=xlShiftDown.
- VBA construct: Shift parameter of Range.Insert method.
- Description:
- Shifts rows down (xlShiftDown) to make space for the row inserted by item #3 above.
- You can usually omit this parameter. By default, VBA decides how to shift the cells based on the range’s shape. When inserting a row, this usually results in Excel shifting the cells down.
Effects of Executing the Macro
The following GIF illustrates the results of executing this macro. As expected, VBA inserts a row below row 5 of the worksheet.

Example #2: Excel VBA Insert Multiple Rows
VBA Code to Insert Multiple Rows
The following macro inserts 5 rows below row 10 of the worksheet named “Insert row”.
Sub insertMultipleRows()
    'Source: powerspreadsheets.com/
    'For further information: https://powerspreadsheets.com/excel-vba-insert-row/
    Worksheets("Insert row").Rows("11:15").Insert Shift:=xlShiftDown
End Sub

Process Followed by Macro

VBA Statement Explanation
Worksheets(“Insert row”).Rows(“11:15”).Insert Shift:=xlShiftDown
- Item: Worksheets(“Insert row”).
- VBA construct: Workbook.Worksheets property.
- Description: Returns a Worksheet object representing the “Insert row” worksheet.
- Item: Rows(“11:15”).
- VBA construct: Worksheet.Rows property.
- Description: Returns a Range object representing rows 11 to 15 of the worksheet returned by item #1 above.
- Item: Insert.
- VBA construct: Range.Insert method.
- Description:
- Inserts new rows above the rows returned by item #2 above.
- The number of inserted rows is equal to the number of rows returned by item #2 above. This is calculated as follows:
lastRow# - firstRow# + 1
In this example:
15 - 11 + 1 = 5
- Item: Shift:=xlShiftDown.
- VBA construct: Shift parameter of Range.Insert method.
- Description:
- Shifts rows down (xlShiftDown) to make space for the rows inserted by item #3 above.
- You can usually omit this parameter. By default, VBA decides how to shift the cells based on the range’s shape. When inserting a row, this usually results in Excel shifting the cells down.
Effects of Executing the Macro
The following GIF illustrates the results of executing this macro. As expected, VBA inserts 5 rows below row 10 of the worksheet.

Example #3: Excel VBA Insert Row with Same Format as Row Above
VBA Code to Insert Row with Same Format as Row Above
The following macro (i) inserts a row below row 20, and (ii) applies the formatting of row 20 to the newly-inserted row.
Sub insertRowFormatFromAbove()
    'Source: powerspreadsheets.com/
    'For further information: https://powerspreadsheets.com/excel-vba-insert-row/
    Worksheets("Insert row").Rows(21).Insert Shift:=xlShiftDown, CopyOrigin:=xlFormatFromLeftOrAbove
End Sub

Process Followed by Macro

VBA Statement Explanation
Worksheets(“Insert row”).Rows(21).Insert Shift:=xlShiftDown, CopyOrigin:=xlFormatFromLeftOrAbove
- Item: Worksheets(“Insert row”).
- VBA construct: Workbook.Worksheets property.
- Description: Returns a Worksheet object representing the “Insert row” worksheet.
- Item: Rows(21).
- VBA construct: Worksheet.Rows property.
- Description: Returns a Range object representing row 21 of the worksheet returned by item #1 above.
- Item: Insert.
- VBA construct: Range.Insert method.
- Description: Inserts a new row above the row returned by item #2 above.
- Item: Shift:=xlShiftDown.
- VBA construct: Shift parameter of Range.Insert method.
- Description:
- Shifts rows down (xlShiftDown) to make space for the row inserted by item #3 above.
- You can usually omit this parameter. By default, VBA decides how to shift the cells based on the range’s shape. When inserting a row, this usually results in Excel shifting the cells down.
- Item: CopyOrigin:=xlFormatFromLeftOrAbove.
- VBA construct: CopyOrigin parameter of Range.Insert method.
- Description:
- Sets formatting of row inserted by item #3 above to be equal to that of row above (xlFormatFromLeftOrAbove).
- You can usually omit this parameter. xlFormatFromLeftOrAbove (or 0) is the default value of CopyOrigin.
Effects of Executing the Macro
The following GIF illustrates the results of executing this macro. As expected, VBA (i) inserts a row below row 20, and (ii) applies the formatting of row 20 to the newly-inserted row.

Example #4: Excel VBA Insert Row with Same Format as Row Below
VBA Code to Insert Row with Same Format as Row Below
The following macro (i) inserts a row below row 25, and (ii) applies the formatting of the row below to the newly-inserted row.
Sub insertRowFormatFromBelow()
    'Source: powerspreadsheets.com/
    'For further information: https://powerspreadsheets.com/excel-vba-insert-row/
    Worksheets("Insert row").Rows(26).Insert Shift:=xlShiftDown, CopyOrigin:=xlFormatFromRightOrBelow
End Sub

Process Followed by Macro

VBA Statement Explanation
Worksheets(“Insert row”).Rows(26).Insert Shift:=xlShiftDown, CopyOrigin:=xlFormatFromRightOrBelow
- Item: Worksheets(“Insert row”).
- VBA construct: Workbook.Worksheets property.
- Description: Returns a Worksheet object representing the “Insert row” worksheet.
- Item: Rows(26).
- VBA construct: Worksheet.Rows property.
- Description: Returns a Range object representing row 26 of the worksheet returned by item #1 above.
- Item: Insert.
- VBA construct: Range.Insert method.
- Description: Inserts a new row above the row returned by item #2 above.
- Item: Shift:=xlShiftDown.
- VBA construct: Shift parameter of Range.Insert method.
- Description:
- Shifts rows down (xlShiftDown) to make space for the row inserted by item #3 above.
- You can usually omit this parameter. By default, VBA decides how to shift the cells based on the range’s shape. When inserting a row, this usually results in Excel shifting the cells down.
- Item: CopyOrigin:=xlFormatFromRightOrBelow.
- VBA construct: CopyOrigin parameter of Range.Insert method.
- Description: Sets formatting of row inserted by item #3 above to be equal to that of row below (xlFormatFromRightOrBelow).
Effects of Executing the Macro
The following GIF illustrates the results of executing this macro. As expected, VBA (i) inserts a row below row 25, and (ii) applies the formatting of the row below to the newly-inserted row.

Example #5: Excel VBA Insert Row without Formatting
VBA Code to Insert Row without Formatting
The following macro inserts a row below row 30 without applying the formatting from the rows above or below the newly- inserted row.
Sub insertRowWithoutFormat()
    'Source: powerspreadsheets.com/
    'For further information: https://powerspreadsheets.com/excel-vba-insert-row/
    Dim myNewRowNumber As Long
    myNewRowNumber = 31
    With Worksheets("Insert row")
        .Rows(myNewRowNumber).Insert Shift:=xlShiftDown
        .Rows(myNewRowNumber).ClearFormats
    End With
End Sub

Process Followed by Macro

VBA Statement Explanation
Lines #4 and #5: Dim myNewRowNumber As Long | myNewRowNumber = 31
- Item: Dim myNewRowNumber As Long.
- VBA construct: Dim statement.
- Description:
- Declares a new variable (myNewRowNumber) as of the Long data type.
- myNewRowNumber represents the number of the newly inserted row.
- Item: myNewRowNumber = 31.
- VBA construct: Assignment statement.
- Description: Assigns the value 31 to myNewRowNumber
Lines #6 and #9: With Worksheets(“Insert row”) | End With
- Item: With | End With.
- VBA construct: With… End With statement.
- Description: Statements within the With… End With statement (lines #7 and #8 below) are executed on the worksheet returned by item #2 below.
- Item: Worksheets(“Insert row”).
- VBA construct: Workbook.Worksheets property.
- Description: Returns a Worksheet object representing the “Insert row” worksheet.
Line #7: .Rows(myNewRowNumber).Insert Shift:=xlShiftDown
- Item: Rows(myNewRowNumber).
- VBA construct: Worksheet.Rows property.
- Description:
- Returns a Range object representing a row (whose number is represented by myNewRowNumber) of the worksheet in the opening statement of the With… End With statement (line #6 above).
- In this example, myNewRowNumber equals 31. Therefore, Worksheet.Rows returns row 31 prior to the insertion of the new row. This is a different row from that returned by Worksheet.Rows in line #8 below.
- This line #7 returns a row prior to the row insertion. This line is that above which the new row is inserted.
- Line #8 below returns a row after the row insertion. This line is the newly-inserted row.
- Item: Insert.
- VBA construct: Range.Insert method.
- Description: Inserts a new row above the row returned by item #1 above.
- Item: Shift:=xlShiftDown.
- VBA construct: Shift parameter of Range.Insert method.
- Description:
- Shifts rows down (xlShiftDown) to make space for the row inserted by item #2 above.
- You can usually omit this parameter. By default, VBA decides how to shift the cells based on the range’s shape. When inserting a row, this usually results in Excel shifting the cells down.
Line #8: .Rows(myNewRowNumber).ClearFormats
- Item: Rows(myNewRowNumber).
- VBA construct: Worksheet.Rows property.
- Description:
- Returns a Range object representing a row (whose number is represented by myNewRowNumber) of the worksheet in the opening statement of the With… End With statement (line #6 above).
- In this example, myNewRowNumber equals 31. Therefore, Worksheet.Rows returns row 31 after the insertion of the new row. This is a different row from that returned by Worksheet.Rows in line #7 above.
- This line #8 returns a row after the row insertion. This line is the newly-inserted row.
- Line #7 above returns a row prior to the row insertion. This line is that below the newly-inserted row.
- Item: ClearFormats.
- VBA construct: Range.ClearFormats method.
- Description: Clears the formatting of the row returned by item #1 above.
Effects of Executing the Macro
The following GIF illustrates the results of executing this macro. As expected, VBA inserts a row below row 30 without applying the formatting from the rows above or below the newly- inserted row.

Example #6: Excel VBA Insert Row Below Active Cell
VBA Code to Insert Row Below Active Cell
The following macro inserts a row below the active cell.
Sub insertRowBelowActiveCell()
    'Source: powerspreadsheets.com/
    'For further information: https://powerspreadsheets.com/excel-vba-insert-row/
    ActiveCell.Offset(1).EntireRow.Insert Shift:=xlShiftDown
End Sub

Process Followed by Macro

VBA Statement Explanation
ActiveCell.Offset(1).EntireRow.Insert Shift:=xlShiftDown
- Item: ActiveCell.
- VBA construct: Application.ActiveCell property.
- Description: Returns a Range object representing the active cell.
- Item: Offset(1).
- VBA construct: Range.Offset property.
- Description:
- Returns a Range object representing the cell range 1 row below the cell returned by item #1 above.
- In this example, Range.Offset returns the cell immediately below the active cell.
- Item: EntireRow:
- VBA construct: Range.EntireRow property.
- Description: Returns a Range object representing the entire row containing the cell range returned by item #2 above.
- Item: Insert.
- VBA construct: Range.Insert method.
- Description: Inserts a new row above the row returned by item #3 above.
- Item: Shift:=xlShiftDown.
- VBA construct: Shift parameter of Range.Insert method.
- Description:
- Shifts rows down (xlShiftDown) to make space for the row inserted by item #4 above.
- You can usually omit this parameter. By default, VBA decides how to shift the cells based on the range’s shape. When inserting a row, this usually results in Excel shifting the cells down.
Effects of Executing the Macro
The following GIF illustrates the results of executing this macro. When I execute the macro, the active cell is B35. As expected, inserts a row below the active cell.

Example #7: Excel VBA Insert Copied Row
VBA Code to Insert Copied Row
The following macro (i) copies row 45, and (ii) inserts the copied row below row 40.
Sub insertCopiedRow()
    'Source: powerspreadsheets.com/
    'For further information: https://powerspreadsheets.com/excel-vba-insert-row/
    With Worksheets("Insert row")
        .Rows(45).Copy
        .Rows(41).Insert Shift:=xlShiftDown
    End With
    Application.CutCopyMode = False
End Sub

Process Followed by Macro

VBA Statement Explanation
Lines #4 and #7: With Worksheets(“Insert row”) | End With
- Item: With | End With.
- VBA construct: With… End With statement.
- Description: Statements within the With… End With statement (lines #5 and #6 below) are executed on the worksheet returned by item #2 below.
- Item: Worksheets(“Insert row”).
- VBA construct: Workbook.Worksheets property.
- Description: Returns a Worksheet object representing the “Insert row” worksheet.
Line #5: .Rows(45).Copy
- Item: Rows(45).
- VBA construct: Worksheet.Rows property.
- Description: Returns a Range object representing row 45 of the worksheet in the opening statement of the With… End With statement (line #4 above).
- Item: Copy.
- VBA construct: Range.Copy method.
- Description: Copies the row returned by item #1 above to the Clipboard.
Line #6: .Rows(41).Insert Shift:=xlShiftDown
- Item: Rows(41).
- VBA construct: Worksheet.Rows property.
- Description: Returns a Range object representing row 41 of the worksheet in the opening statement of the With… End With statement (line #4 above).
- Item: Insert.
- VBA construct: Range.Insert method.
- Description:
- Inserts a new row above the row returned by item #1 above.
- The newly-inserted row isn’t blank. VBA inserts the row copied by line #5 above.
- Item: Shift:=xlShiftDown.
- VBA construct: Shift parameter of Range.Insert method.
- Description:
- Shifts rows down (xlShiftDown) to make space for the row inserted by item #2 above.
- You can usually omit this parameter. By default, VBA decides how to shift the cells based on the range’s shape. When inserting a row, this usually results in Excel shifting the cells down.
Line #8: Application.CutCopyMode = False
- Item: Application.CutCopyMode = False.
- VBA construct: Application.CutCopyMode property.
- Description: Cancels (False) the Cut or Copy mode and removes the moving border that accompanies this mode.
Effects of Executing the Macro
The following GIF illustrates the results of executing this macro. As expected, VBA (i) copies row 45, and (ii) inserts the copied row below row 40.

Example #8: Excel VBA Insert Blank Rows Between Rows in a Data Range
VBA Code to Insert Blank Rows Between Rows in a Data Range
The following macro inserts blank rows within the specified data range. This results in all rows within the data range being separated by a blank row.
Sub insertBlankRowsBetweenRows()
    'Source: powerspreadsheets.com/
    'For further information: https://powerspreadsheets.com/excel-vba-insert-row/
    Dim myFirstRow As Long
    Dim myLastRow As Long
    Dim myWorksheet As Worksheet
    Dim iCounter As Long
    myFirstRow = 5
    Set myWorksheet = Worksheets("Insert blank rows")
    myLastRow = myWorksheet.Cells.Find( _
                                        What:="*", _
                                        LookIn:=xlFormulas, _
                                        LookAt:=xlPart, _
                                        SearchOrder:=xlByRows, _
                                        SearchDirection:=xlPrevious).Row
    For iCounter = myLastRow To (myFirstRow + 1) Step -1
        myWorksheet.Rows(iCounter).Insert Shift:=xlShiftDown
    Next iCounter
End Sub

Process Followed by Macro

VBA Statement Explanation
Lines #4 through #9: Dim myFirstRow As Long | Dim myLastRow As Long | Dim myWorksheet As Worksheet | Dim iCounter As Long | myFirstRow = 5 | Set myWorksheet = Worksheets(“Insert blank rows”)
- Item: Dim myFirstRow As Long.
- VBA construct: Dim statement.
- Description:
- Declares a new variable (myFirstRow) as of the Long data type.
- myFirstRow represents the number of the first row with data in the data range you work with.
- Item: Dim myLastRow As Long.
- VBA construct: Dim statement.
- Description:
- Declares a new variable (myLastRow) as of the Long data type.
- myLastRow represents the number of the last row with data in the data range you work with.
- Item: Dim myWorksheet As Worksheet.
- VBA construct: Dim statement.
- Description:
- Declares a new object variable (myWorksheet) to reference a Worksheet object.
- myWorksheet represents the worksheet you work with.
- Item: Dim iCounter As Long.
- VBA construct: Dim statement.
- Description:
- Declares a new variable (iCounter) as of the Long data type.
- iCounter represents a loop counter.
- Item: myFirstRow = 5.
- VBA construct: Assignment statement.
- Description: Assigns the value 5 to myFirstRow.
- Item: Set myWorksheet = Worksheets(“Insert blank rows”).
- VBA constructs:
- Set statement.
- Workbooks.Worksheets property.
- Description: Assigns the Worksheet object representing the “Insert blank rows” worksheet to myWorksheet.
- VBA constructs:
Lines #10 through #15: myLastRow = myWorksheet.Cells.Find( What:=”*”, LookIn:=xlFormulas, LookAt:=xlPart, SearchOrder:=xlByRows, SearchDirection:=xlPrevious).Row
- Item: myLastRow =.
- VBA construct: Assignment statement.
- Description: Assigns the value returned by items #2 through #9 below to myLastRow.
- Item: myWorksheet.Cells.
- VBA construct: Worksheet.Cells property.
- Description: Returns a Range object representing all cells on myWorksheet.
- Item: Find.
- VBA construct: Range.Find method.
- Description:
- Finds information in the cell range returned by item #2 above and returns a Range object representing the first cell where the information is found.
- In this example, the Range object Range.Find returns represents the last cell with data in last row with data in myWorksheet.
- Item: What:=”*”.
- VBA construct: What parameter of Range.Find method.
- Description: Specifies the data Range.Find searches for. The asterisk (*) is a wildcard and, therefore, Range.Find searches for any character sequence.
- Item: LookIn:=xlFormulas.
- VBA construct: LookIn parameter of Range.Find method.
- Description: Specifies that Range.Find looks in formulas (xlFormulas).
- Item: LookAt:=xlPart.
- VBA construct: LookAt parameter of Range.Find method.
- Description: Specifies that Range.Find looks at (and matches) a part (xlPart) of the search data.
- Item: SearchOrder:=xlByRows.
- VBA construct: SearchOrder parameter of Range.Find method.
- Description: Specifies that Range.Find searches by rows (xlByRows).
- Item: SearchDirection:=xlPrevious.
- VBA construct: SearchDirection parameter of Range.Find method.
- Description: Specifies that Range.Find searches for the previous match (xlPrevious).
- Item: Row.
- VBA construct: Range.Row property.
- Description:
- Returns the row number of the Range object returned by item #3 above.
- In this example, the number returned by Range.Row corresponds to the last row with data in myWorksheet.
Lines #16 and #18: For iCounter = myLastRow To (myFirstRow + 1) Step -1 | Next iCounter
- Item: For | Next iCounter.
- VBA construct: For… Next statement.
- Description:
- Repeats the statement inside the For… Next loop (line #17 below) a specific number of times.
- In this example:
- The macro starts on the last row of the data range as specified by item #2 below.
- Every iteration, the loop counter decreases by 1, as specified by item #4 below. Therefore, the macro moves to the previous row.
- The macro exits the loop after working with the second row in the data range (myFirstRow + 1), as specified by item #3 below.
- Item: iCounter = myLastRow.
- VBA construct: Counter and Start of For… Next statement.
- Description: Specifies myLastRow as the initial value of the loop counter (iCounter).
- Item: To (myFirstRow + 1).
- VBA construct: End of For… Next statement.
- Description: Specifies the value represented by myFirstRow plus 1 (myFirstRow + 1) as the final value of the loop counter.
- Item: Step -1.
- VBA construct: Step of For… Next statement.
- Description: Specifies that the loop counter (iCounter) decreases by 1 (-1) every loop iteration.
Line #17: myWorksheet.Rows(iCounter).Insert Shift:=xlShiftDown
- Item: myWorksheet.Rows(iCounter).
- VBA construct: Worksheet.Rows property.
- Description:
- Returns a Range object representing the row (whose number is represented by iCounter) of myWorksheet.
- Worksheet.Rows returns the row through which the macro is currently looping.
- Item: Insert.
- VBA construct: Range.Insert method.
- Description:
- Inserts a new row above the row returned by item #1 above.
- The macro loops through each line in the data range (excluding the first) as specified by lines #16 and #18 above. Therefore, Range.Insert inserts a row between all rows with data.
- Item: Shift:=xlShiftDown.
- VBA construct: Shift parameter of Range.Insert method.
- Description:
- Shifts rows down (xlShiftDown) to make space for the row inserted by item #2 above.
- You can usually omit this parameter. By default, VBA decides how to shift the cells based on the range’s shape. When inserting a row, this usually results in Excel shifting the cells down.
Effects of Executing the Macro
The following GIF illustrates the results of executing this macro. As expected, VBA inserts blank rows within the specified data range. This results in all rows within the data range being separated by a blank row.

Example #9: Excel VBA Insert a Number of Rows Every Number of Rows in a Data Range
VBA Code to Insert a Number of Rows Every Number of Rows in a Data Range
The following macro inserts 2 rows every 3 rows within the specified data range.
Sub insertMRowsEveryNRows()
    'Source: powerspreadsheets.com/
    'For further information: https://powerspreadsheets.com/excel-vba-insert-row/
    Dim myFirstRow As Long
    Dim myLastRow As Long
    Dim myNRows As Long
    Dim myRowsToInsert As Long
    Dim myWorksheet As Worksheet
    Dim iCounter As Long
    myFirstRow = 5
    myNRows = 3
    myRowsToInsert = 2
    Set myWorksheet = Worksheets("Insert M rows every N rows")
    myLastRow = myWorksheet.Cells.Find( _
                                        What:="*", _
                                        LookIn:=xlFormulas, _
                                        LookAt:=xlPart, _
                                        SearchOrder:=xlByRows, _
                                        SearchDirection:=xlPrevious).Row
    For iCounter = myLastRow To (myFirstRow + myNRows) Step -1
        If (iCounter - myFirstRow) Mod myNRows = 0 Then myWorksheet.Rows(iCounter & ":" & iCounter + myRowsToInsert - 1).Insert Shift:=xlShiftDown
    Next iCounter
End Sub

Process Followed by Macro

VBA Statement Explanation
Lines #4 through 13: Dim myFirstRow As Long | Dim myLastRow As Long | Dim myNRows As Long | Dim myRowsToInsert As Long | Dim myWorksheet As Worksheet | Dim iCounter As Long | myFirstRow = 5 | myNRows = 3 | myRowsToInsert = 2 | Set myWorksheet = Worksheets(“Insert M rows every N rows”)
- Item: Dim myFirstRow As Long.
- VBA construct: Dim statement.
- Description:
- Declares a new variable (myFirstRow) as of the Long data type.
- myFirstRow represents the number of the first row with data in the data range you work with.
- Item: Dim myLastRow As Long.
- VBA construct: Dim statement.
- Description:
- Declares a new variable (myLastRow) as of the Long data type.
- myLastRow represents the number of the last row with data in the data range you work with.
- Item: Dim myNRows As Long.
- VBA construct: Dim statement.
- Description:
- Declares a new variable (myNRows) as of the Long data type.
- myNRows represents the number of rows per block. The macro doesn’t insert rows between these rows.
- Item: Dim myRowsToInsert As Long.
- VBA construct: Dim statement.
- Description:
- Declares a new variable (myRowsToInsert) as of the Long data type.
- myRowsToInsert represents the number of rows to insert.
- Item: Dim myWorksheet As Worksheet.
- VBA construct: Dim statement.
- Description:
- Declares a new object variable (myWorksheet) to reference a Worksheet object.
- myWorksheet represents the worksheet you work with.
- Item: Dim iCounter As Long.
- VBA construct: Dim statement.
- Description:
- Declares a new variable (iCounter) as of the Long data type.
- iCounter represents a loop counter.
- Item: myFirstRow = 5.
- VBA construct: Assignment statement.
- Description: Assigns the value 5 to myFirstRow.
- Item: myNRows = 3.
- VBA construct: Assignment statement.
- Description: Assigns the value 3 to myNRows.
- Item: myRowsToInsert = 2.
- VBA construct: Assignment statement.
- Description: Assigns the value 2 to myRowsToInsert.
- Item: Set myWorksheet = Worksheets(“Insert M rows every N rows”).
- VBA constructs:
- Set statement.
- Workbooks.Worksheets property.
- Description: Assigns the Worksheet object representing the “Insert M rows every N rows” worksheet to myWorksheet.
- VBA constructs:
Lines #14 through #19: myLastRow = myWorksheet.Cells.Find( What:=”*”, LookIn:=xlFormulas, LookAt:=xlPart, SearchOrder:=xlByRows, SearchDirection:=xlPrevious).Row
- Item: myLastRow =.
- VBA construct: Assignment statement.
- Description: Assigns the value returned by items #2 through #9 below to myLastRow.
- Item: myWorksheet.Cells.
- VBA construct: Worksheet.Cells property.
- Description: Returns a Range object representing all cells on myWorksheet.
- Item: Find.
- VBA construct: Range.Find method.
- Description:
- Finds information in the cell range returned by item #2 above and returns a Range object representing the first cell where the information is found.
- In this example, the Range object Range.Find returns represents the last cell with data in last row with data in myWorksheet.
- Item: What:=”*”.
- VBA construct: What parameter of Range.Find method.
- Description: Specifies the data Range.Find searches for. The asterisk (*) is a wildcard and, therefore, Range.Find searches for any character sequence.
- Item: LookIn:=xlFormulas.
- VBA construct: LookIn parameter of Range.Find method.
- Description: Specifies that Range.Find looks in formulas (xlFormulas).
- Item: LookAt:=xlPart.
- VBA construct: LookAt parameter of Range.Find method.
- Description: Specifies that Range.Find looks at (and matches) a part (xlPart) of the search data.
- Item: SearchOrder:=xlByRows.
- VBA construct: SearchOrder parameter of Range.Find method.
- Description: Specifies that Range.Find searches by rows (xlByRows).
- Item: SearchDirection:=xlPrevious.
- VBA construct: SearchDirection parameter of Range.Find method.
- Description: Specifies that Range.Find searches for the previous match (xlPrevious).
- Item: Row.
- VBA construct: Range.Row property.
- Description:
- Returns the row number of the Range object returned by item #3 above.
- In this example, the number returned by Range.Row corresponds to the last row with data in myWorksheet.
Lines #20 and #22: For iCounter = myLastRow To (myFirstRow + myNRows) Step -1 | Next iCounter
- Item: For | Next iCounter.
- VBA construct: For… Next statement.
- Description:
- Repeats the statement inside the For… Next loop (line #21 below) a specific number of times.
- In this example:
- The macro starts on the last row of the data range as specified by item #2 below.
- Every iteration, the loop counter decreases by 1, as specified by item #4 below. Therefore, the macro moves to the previous row.
- The macro exits the loop after working with the row below the first block of rows you want to keep, as specified by item #3 below. Each block of rows has a number of rows equal to myNRows.
- In this example, myNRows equals 3. Therefore, the macro exits the loop after working with the fourth row in the data range.
- Item: iCounter = myLastRow.
- VBA constructs: Counter and Start of For… Next statement.
- Description: Specifies myLastRow as the initial value of the loop counter (iCounter).
- Item: To (myFirstRow + myNRows).
- VBA construct: End of For… Next statement.
- Description: Specifies the value represented by myFirstRow plus myNRows (myFirstRow + myNRows) as the final value of the loop counter.
- Item: Step -1.
- VBA construct: Step of For… Next statement.
- Description: Specifies that the loop counter (iCounter) decreases by 1 (-1) every loop iteration.
Line #21: If (iCounter – myFirstRow) Mod myNRows = 0 Then myWorksheet.Rows(iCounter & “:” & iCounter + myRowsToInsert – 1).Insert Shift:=xlShiftDown
- Item: If | Then.
- VBA construct: If… Then… Else statement.
- Description: Conditionally executes the statement specified by items #3 and #4 below, subject to condition specified by item #2 below being met.
- Item: (iCounter – myFirstRow) Mod myNRows = 0.
- VBA constructs:
- Condition of If… Then… Else statement.
- Numeric expression with Mod operator.
- Description:
- The Mod operator (Mod) (i) divides one number (iCounter – myFirstRow) by a second number (myNRows), and (ii) returns the remainder of the division.
- The condition ((iCounter – myFirstRow) Mod myNRows = 0) is met (returns True) if the remainder returned by Mod is 0.
- The condition is met (returns True) every time the macro loops through a row above which blank rows should be added.
- iCounter represents the number of the row through which the macro is currently looping.
- (iCounter – myFirstRow) is the number of rows (in the data range) above the row through which the macro is currently looping.
- ((iCounter – myFirstRow) Mod myNRows) equals 0 when the number of rows returned by (iCounter – myFirstRow) is a multiple of myNRows. This ensures that the number of rows left above the row through which the macro is currently looping can be appropriately separated into blocks of myNRows. In this example, myNRows equals 3. Therefore, the condition is met every 3 rows.
- VBA constructs:
- Item: myWorksheet.Rows(iCounter & “:” & iCounter + myRowsToInsert – 1).
- VBA constructs:
- Statements executed if the condition specified by item #2 above is met.
- Worksheet.Rows property.
- Description:
- Returns an object representing several rows of myWorksheet. The first row is represented by iCounter. The last row is represented by (iCounter + myRowsToInsert – 1).
- The number of rows Worksheet.Rows returns equals the number of rows to insert (myRowsToInsert).
- iCounter represents the number of the row through which the macro is currently looping.
- (iCounter + myRowsToInsert – 1) returns a row located a number of rows (myRowsToInsert – 1) below the row through which the macro is currently looping. In this example, myRowsToInsert equals 2. Therefore, (iCounter + myRowsToInsert – 1) returns a row located 1 (2 – 1) rows below the row through which the macro is currently looping.
- VBA constructs:
- Item: Insert.
- VBA construct: Range.Insert method.
- Description:
- Inserts new rows above the rows returned by item #3 above.
- The number of inserted rows is equal to the value of myRowsToInsert. This is calculated as follows:
lastRow# - firstRow# + 1
(iCounter + myRowsToInsert - 1) - iCounter + 1 = myRowsToInsert
In this example, if the current value of iCounter is 8:
(8 + 2 - 1) - 8 + 1
9 - 8 + 1 = 2
- Item: Shift:=xlShiftDown.
- VBA construct: Shift parameter of Range.Insert method.
- Description:
- Shifts rows down (xlShiftDown) to make space for the rows inserted by item #4 above.
- You can usually omit this parameter. By default, VBA decides how to shift the cells based on the range’s shape. When inserting a row, this usually results in Excel shifting the cells down.
Effects of Executing the Macro
The following GIF illustrates the results of executing this macro. As expected, VBA inserts 2 rows every 3 rows within the specified data range.

Home / VBA / How to Insert a Row using VBA in Excel
In this tutorial, we will look at how to insert a row or a column using a VBA code in Excel. We will also explore what are the different ways to write a macro for this.
To insert a row using a VBA code, you need to use the “Entire Row” property with the “Insert” method. With the entire row property, you can refer to the entire row using a cell and then insert a new row there. By default, it will insert a single row before the cell that you have mentioned.

- First, specify a cell using the range object.
- Now, enter a dot (.) to get the list of properties and methods.
- After that, select the “Entire Row” property or type it.
- In the end, again enter a dot (.) and select the “Insert” method or type it.
Range("A1").EntireRow.InsertYour code is ready here to insert a row. Now when you run this code, it will instantly insert a new row before cell A1.
Insert Multiple Rows
There are two ways to insert multiple rows in a worksheet that I have found. The first is the same insert method that we have used in the above example.
With this, you need to specify a range whose count is equivalent to the count of rows you want to insert. Now let’s say you want to insert 5 rows after, in that case, you can use a code like the following.

To be honest, I haven’t found this method quite useful because you need to change the range if you want to change the count of the rows.
So here’s the second method.
Dim iRow As Long
Dim iCount As Long
Dim i As Long

iCount = InputBox(Prompt:="How many rows you want to add?")
iRow = InputBox _
(Prompt:="After which row you want to add new rows? (Enter the row number")

For i = 1 To iCount
    Rows(iRow).EntireRow.Insert
Next i
When you run this code, it asks you to enter the number of rows that you want to add and then the row number where you want to add all those rows. It uses a FOR LOOP (For Next) to loop that number of times and insert rows one by one.
Insert Rows Based on the Cell Values
If you want to insert rows based on a cell value, then you can use the following code.
Dim iRow As Long
Dim iCount As Long
Dim i As Long

iCount = Range("A1").Value
iRow = Range("B1").Value

For i = 1 To iCount
    Rows(iRow).EntireRow.Insert
Next i
When you run this macro, it takes the count of rows from cell A1 and the row where you want to add rows from cell B1.
Insert a Row without Formatting
When you insert a row where the above row has some specific formatting, in that case, the row will also have that formatting automatically. And the simplest way to deal with this thing is to use clear formats. Consider the following code.
Rows(7).EntireRow.Insert
Rows(7).ClearFormats
When you run the above code, it inserts a new row before the 7th row. Now, what happens, when you insert a row before the 7th row that new row becomes the 7th row, and then the second line of code clears the formats from that row.
Insert Copied Row
You can also use the same method to copy a row and then insert it somewhere else. See the following code.
Application.CutCopyMode = False

With Worksheets("Data")

.Rows(5).Copy
.Rows(9).Insert Shift:=xlShiftDown

End With

Application.CutCopyMode = True
More Tutorials
- Count Rows using VBA in Excel
- Excel VBA Font (Color, Size, Type, and Bold)
- Excel VBA Hide and Unhide a Column or a Row
- Excel VBA Range – Working with Range and Cells in VBA
- Apply Borders on a Cell using VBA in Excel
- Find Last Row, Column, and Cell using VBA in Excel
- Merge Cells in Excel using a VBA Code
- Select a Range/Cell using VBA in Excel
- SELECT ALL the Cells in a Worksheet using a VBA Code
- ActiveCell in VBA in Excel
- Special Cells Method in VBA in Excel
- UsedRange Property in VBA in Excel
- VBA AutoFit (Rows, Column, or the Entire Worksheet)
- VBA ClearContents (from a Cell, Range, or Entire Worksheet)
- VBA Copy Range to Another Sheet + Workbook
- VBA Enter Value in a Cell (Set, Get and Change)
- VBA Insert Column (Single and Multiple)
- VBA Named Range | (Static + from Selection + Dynamic)
- VBA Range Offset
- VBA Sort Range | (Descending, Multiple Columns, Sort Orientation
- VBA Wrap Text (Cell, Range, and Entire Worksheet)
- VBA Check IF a Cell is Empty + Multiple Cells
⇠ Back to What is VBA in Excel
Helpful Links – Developer Tab – Visual Basic Editor – Run a Macro – Personal Macro Workbook – Excel Macro Recorder – VBA Interview Questions – VBA Codes