
After you create a table, Microsoft Office Word 2007 offers you many ways to format that table. If you decide to use Table Styles, you can format your table all at once, and even see a preview of what your table will look like formatted in a particular style before you actually apply the style.
You can create a custom look for tables by splitting or merging cells, adding or deleting columns or rows, or adding borders. If you’re working with a long table, you can repeat the table headings on each page on which the table appears. To prevent awkward page breaks that disrupt the flow of your table, you can also specify just how and where the table should break across pages.
What do you want to do?
-
Use Table Styles to format an entire table
-
Add or remove borders
-
Display or hide gridlines
-
Add a cell, row, or column
-
Delete a cell, row, or column
-
Merge or split cells
-
Repeat a table heading on subsequent pages
-
Control where a table is divided
Use Table Styles to format an entire table
After you create a table, you can format the entire table by using Table Styles. By resting your pointer over each of the preformatted table styles, you can preview what the table will look like.
-
Click in the table that you want to format.
-
Under Table Tools, click the Design tab.
-
In the Table Styles group, rest the pointer over each table style until you find a style that you want to use.
Note: To see more styles, click the More arrow
 .
. -
Click the style to apply it to the table.
-
In the Table Style Options group, select or clear the check box next to each the table element to apply or remove the selected style.
 .
.Top of Page
Add or remove borders
You can add or remove borders to format a table the way that you want.
Add table borders
-
Under Table Tools, click the Layout tab.
-
In the Table group, click Select, and then click Select Table.
-
Under Table Tools, click the Design tab.
-
In the Table Styles group, click Borders, and then do one of
the following:-
Click one of the predefined border sets.
-
Click Borders and Shading, click the Borders tab, and then choose the options that you want.
-
Remove table borders from the whole table
-
Under Table Tools, click the Layout tab.
-
In the Table group, click Select, and then click Select Table.
-
Under Table Tools, click the Design tab.
-
In the Table Styles group, click Borders, and then click No Border.
Add table borders to specified cells only
-
On the Home tab, in the Paragraph group, click Show/Hide.
-
Select the cells that you want, including their end-of-cell marks.
-
Under Table Tools, click the Design tab.
-
In the Table Styles group, click Borders, and then click the border that you want to add.


Remove table borders from specified cells only
-
On the Home tab, in the Paragraph group, click Show/Hide.
-
Select the cells that you want, including their end-of-cell marks.
-
Under Table Tools, click the Design tab.
-
In the Table Styles group, click Borders, and then click No Border.
Top of Page
Display or hide gridlines
Gridlines show the cell boundaries of a table on the screen wherever the table doesn’t have borders applied. If you hide the gridlines in a table that has borders, you won’t see the change because the gridlines are behind the borders. To view the gridlines, remove the borders.
Unlike borders, gridlines appear only on the screen; they are never printed. If you turn off gridlines, the table is displayed as it will be printed.
Note: Gridlines are not visible when you view a document in a Web browser or in Print Preview.
Display or hide table gridlines in a document
-
Under Table Tools, on the Layout tab, in the Table group, click View Gridlines.
Top of Page
Add a cell, row, or column
Add a cell
-
Click in a cell that is located just to the right of or above where you
want to insert a cell. -
Under Table Tools, on the Layout tab, click the Rows & Columns Dialog Box Launcher.
-
Click one of the following options:
|
Click this |
To do this |
|
Shift cells right |
Insert a cell and move all other cells in that row to the right. Note: This option may result in a row that has more cells than the other rows. |
|
Shift cells down |
Insert a cell and move remaining existing cells in that column down one row each. A new row will be added at the bottom of the table to contain the last existing cell. |
|
Insert entire row |
Insert a row just above the cell that you clicked in. |
|
Insert entire column |
Insert a column just to the right of the cell that you clicked in. |
Add a row
-
Click in a cell that is located just below or above where you want to add a row.
-
Under Table Tools, click the Layout tab.
-
Do one of the following:
-
To add a row just above the cell that you clicked in, in the Rows and Columns group, click Insert Above.
-
To add a row just below the cell that you clicked in, in the Rows and Columns group, click Insert Below.
-
Add a column
-
Click in a cell that is located just to the right or left of where you want to add a column.
-
Under Table Tools, click the Layout tab.
-
Do one of the following:
-
To add a column just to the left of the cell that you clicked in, in the Rows and Columns group, click Insert Left.
-
To add a column just to the right of the cell that you clicked in, in the Rows and Columns group, click Insert Right.
-
Top of Page
Delete a cell, row, or column
-
Do one of the following:
To select
Do this
A cell
Click the left edge of the cell.
.A row
Click to the left of the row.
A column
Click the column’s top gridline or top border.
-
Under Table Tools, click the Layout tab.
-
In the Rows & Columns group, click Delete, and then click Delete Cells, Delete Rows, or Delete Columns, as appropriate.


Top of Page
Merge or split cells
Merge cells
You can combine two or more cells in the same row or column into a single cell. For example, you can merge several cells horizontally to create a table heading that spans several columns.
-
Select the cells that you want to merge by clicking the left edge of a cell and then dragging across the other cells that you want.
-
Under Table Tools, on the Layout tab, in the Merge group, click Merge Cells.
Split cells
-
Click in a cell, or select multiple cells that you want to split.
-
Under Table Tools, on the Layout tab, in the Merge group, click Split Cells.
-
Enter the number of columns or rows that you want to split the selected cells into.
Top of Page
Repeat a table heading on subsequent pages
When you work with a very long table, it will be divided wherever a page break occurs. You can make adjustments to the table so that the table headings are repeated on each page.
Repeated table headings are visible only in Print Layout view and when you print the document.
-
Select the heading row or rows. The selection must include the first row of the table.
-
Under Table Tools, on the Layout tab, in the Data group, click Repeat Header Rows.
Note: Word automatically repeats the table headings on each new page that results from an automatic page break. Word does not repeat a heading if you insert a manual page break within a table.
Top of Page
Control where a table is divided
When you work with a very long table, it must be divided wherever a page break occurs. By default, if a page break occurs within a large row, Microsoft Word allows a page break to divide the row between the two pages.
You can make adjustments to the table to make sure that the information appears as you want it to when the table spans multiple pages.
Prevent a
table row from breaking across pages
-
Click in the table.
-
Under Table Tools, click the Layout tab.
-
In the Table group, click Properties, and then click the Row tab.
-
Clear the Allow row to break across pages check box.
Force a table to break across pages at a particular row
-
Click in the row that you want to appear on the next page.
-
Press CTRL+ENTER.
Top of Page

By default, when you insert a table, there is a simple, black border around all the cells in the table. However, you may want to change or remove the borders, and there are a few easy ways you can do this.
NOTE: We used Word 2013 to illustrate this feature.
If you have removed all or some of the borders from your table, or you want to change the style or thickness of the borders, place the cursor in any cell in the table. The table handle displays on the upper-left corner of the table. Click on the table handle to select the entire table. If you only want to apply borders to a specific portion of the table, place the cursor in the first cell of this portion and drag over the rest of the cells you want to include in your selection.

The “Table Tools” tabs become available on the ribbon. Make sure the “Design” tab is active and click “Border Styles”. Select a border style from the drop-down box of “Theme Borders”.
Once you select a “Border Style”, the “Border Painter” tool automatically turns on.
The cursor changes to a paintbrush. Click the cursor on any cell borders to which you want to apply the chosen border style.
Once you’ve chosen a border style, you can also use the “Borders” button on the “Design” tab and select an option from the drop-down menu to apply borders to specific parts of the table or “All Borders” on the table. To remove all the borders from the table, click “Borders” and select “No Border” from the drop-down menu.
NOTE: As you move your mouse over the options in the “Borders” drop-down menu, the results of each choice are displayed on the selected table so you can see what the selected borders will look like.
NOTE: You can also access the same border options using the “Borders” button in the “Paragraph” section of the “Home” tab. Just make sure you’ve selected the part of the table to which you want to apply the borders first.
To manually customize the borders on your table, use the “Line Style” drop-down list.
Select the style of line from the “Line Style” drop-down list. Notice that there are more easily available styles using this option.
Click the “Line Weight” drop-down list (right below the “Line Style” drop-down list) and select the desired thickness for the selected line style.
Once you’ve selected the “Line Style” and “Line Weight”, click “Pen Color” and then click on a color to use that color for the selected line style.
Click the cursor on any cell borders to which you want to apply the manually chosen border style. Again, you can use the “Borders” button to apply borders to multiple parts of the table at once.
NOTE: If you want to apply borders to certain parts of the table, you don’t necessarily have to select the entire table. Simply place the cursor in any cell in the table to activate the “Table Tools” tabs and select a border style using either of the methods mentioned above. Then, click “Border Painter” on the “Design” tab and click on any cell borders to which you want to apply the selected style.
There’s a quick and easy way to apply not only borders to a table, but shading and colors as well. Make sure the cursor is in one of the cells of the tables and the “Design” tab is active. Click the down arrow (or “More” arrow button) in the “Table Styles” section.
Select a style from one of the sections (“Plain Tables”, “Grid Tables”, or “List Tables”) on the “Table Styles” drop-down list.
The borders, shading, and colors are automatically changed on the entire table to match the style you selected.
NOTE: When you use table styles, the chosen style is automatically applied to any new rows and columns you add to the table.
These methods allow you to quickly and easily customize the look of your Word tables to make them stand out.
You can also show and hide the cell gridlines on all tables in Word, freeze the size of the cells in a table, and quickly move a row in a table.
READ NEXT
- › How to Remove Borders in Microsoft Word
- › How to Create a Basic Survey in Microsoft Word
- › How to Create a Table Template in Microsoft Word
- › How to Nest a Table Within a Table in Word
- › How to Draw a Custom Table in Microsoft Word
- › How to Add a Border to an Entire Page in Word
- › How to Put a Border Around Text in Microsoft Word
- › This New Google TV Streaming Device Costs Just $20
Borders can improve a table’s appearance, giving it a polished, professional look. Borders also make it easier to keep the information in different cells visually separate.
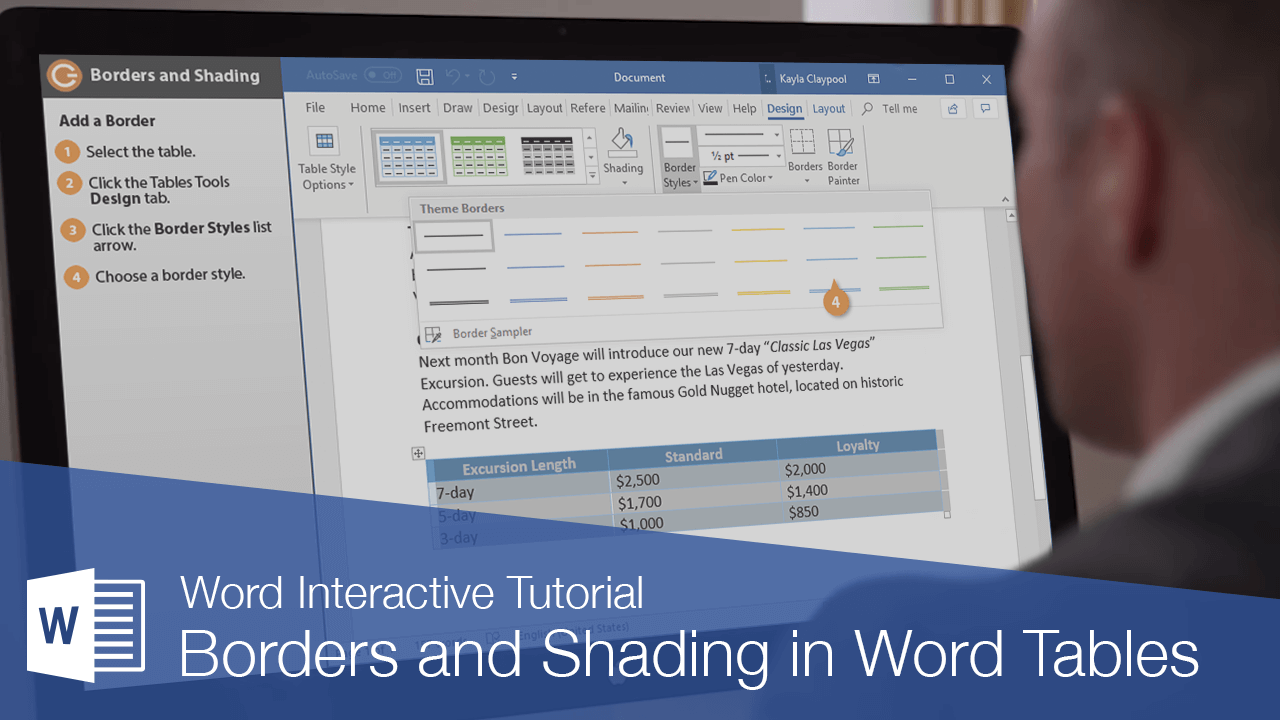
Add a Border
- Select a cell, multiple cells, or the whole table.
- Click the Design tab in the Table Tools ribbon group.
- Click the Border Styles list arrow.
- Select a border style.

- Click the Borders list arrow.
- Select the borders you want to add.
Borders will only be added to the cell or cells you have selected.
Before applying a border, you need to specify the border style. You can individually select a line style, weight, and color, or use an existing border style.
This menu shows a few borders included in the document theme, in a variety of colors and line styles.
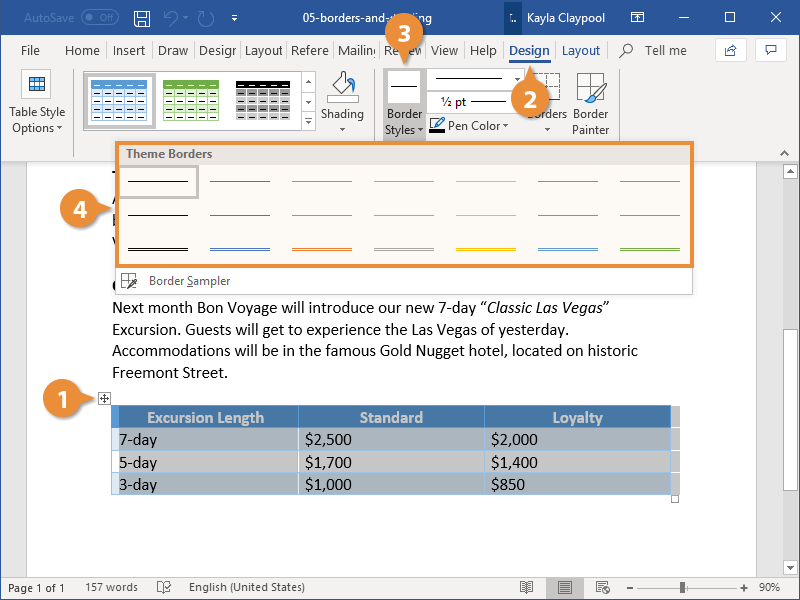
Now that you’ve selected a border style, choose which borders to apply that style to.
This menu shows which borders the style can be applied to. You can select All Borders or a subset.
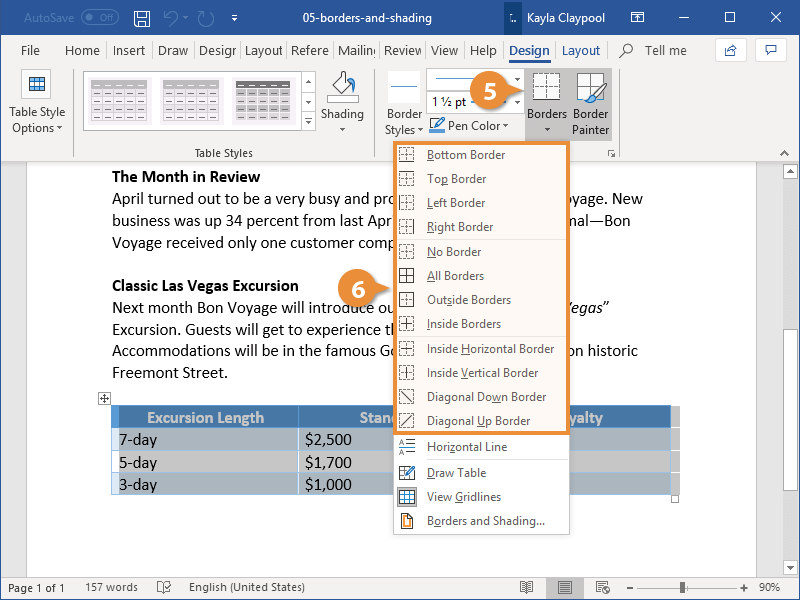
The selected border style is applied to the selected borders.
Select No Borders from the Borders menu to remove borders from the selected cells.
Add Cell Shading
Shading includes fill colors and patterns that you can apply to table cells.
- Select the cell or cells you want to add shading to.
- Click the Shading list arrow in the Table Tools Design tab.
- Select a color.
The shading menu will show a spectrum of colors from the current document theme as well as a few standard colors. You could also select More Colors to select a custom color or select No Color to remove existing shading.
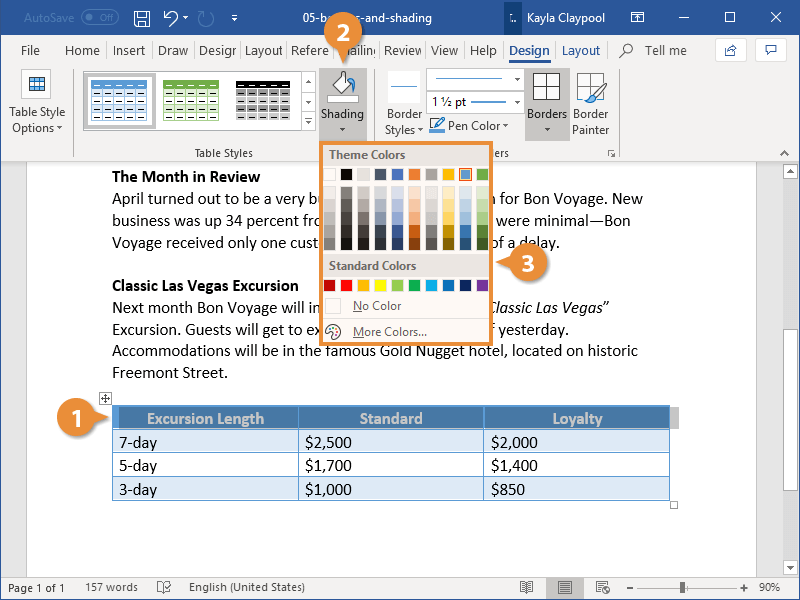
The color is added as a background to the selected cells.
To use a pattern instead of a solid color in your table, click the Borders group dialog box launcher, click the Shading tab, and select a pattern in the Style list.

FREE Quick Reference
Click to Download
Free to distribute with our compliments; we hope you will consider our paid training.
In this tutorial , we will discuss 2 methods to change table border color of a word document.

- Using the Borders and Shading option.
- Using the Border Styles button.
Method 1: Using the Borders and Shading option.
This is a simple method which lets you quickly change the border colors of the whole table.
Step 1: Open Word document.

Step 2: Prompt the Borders and Shading dialogue box.
Click anywhere in the table. A Table Selection Icon will appear at the top corner.
Click on this icon to select the whole table.
Selecting the table will display a horizontal context menu.
You will find Borders and Shading Button there.
Click on this button to open the Borders and Shading dialogue box.

Step 3: Choose the color of your border.
You will see a Color Dropdown under the Borders Tab.
Simply select the color of your choice.
By default the Border color will apply to the whole table.
You can use the “Apply to” Setting to apply the color to a cell or a paragraph.

Method 2: Using the Border Styles button.
This method lets you select certain borders to apply color too.
Step 1: Open Word document.

Step 2: Locate the Border Styles Button.
Click anywhere on the table and go to Table Tools -> Design – Border Styles.

Step 3: Choose your border style.
Click on Border Styles Button. It will show a selection of border styles.
Select the border style of your choice.

At this point, the cursor is changed to a Border Painter tool.
Clicking on specific borders will apply color with the style of your choosing. You can also click and drag to apply through borders with intersections.

Conclusion
Changing borders colors is quite simple. We hope you’ve found this article helpful!
Select the table
- Using the mouse: Move the mouse over the table until you see the table selection icons in the upper-left corner of the table and click it:

Note: You can also click on the table selection icon in the bottom-right corner (resizing handle) for the same effect.
- Using the keyboard: To select table elements, on the Table Layout tab, on the Table group, click the Select button, then select the option you prefer:

- Select Cell
- Select Column
- Select Row
- Select Table
Format the table
After positioning the cursor anywhere in a table or selecting a table element, Word shows two tabs: Table Design and Layout. E.g.:

See also Select and format table elements in Word.
Apply a predefined Table style
There are several predefined styles you can use for the table. Styles include a variety of borders, colors, and other attributes that give a table a very professional appearance.
To choose any of the predefined styles, do the following:
1. Select the table.
2. On the Table Design tab, in the Table Styles group, in the Styles Gallery, click the More arrow to see the complete list of styles:

3. Select the table style you want:

The Table Styles gallery includes three categories of styles:
- Plain Tables have minimal formatting.
- Grid Tables include vertical separators between columns.
- List Tables do not include vertical column separators:

Note: The selected style overrides any previously added style changes for the table.
Modify the table style options
To change the table or selected style, on the Table Design tab, in the Table Style group, click Modify Table Style…:

In the Modify Style dialog box, make changes you want:

Note: Click the Format button at the bottom of the dialog box to change other options such as Font or Paragraph. See also how to clear formatting.
Customize the table formatting
After applying a table style, you can turn various options on or off to change their appearance. On the Table Design tab, in the Table Style Options group, there are six options:

- Header Row is the first row of the table that contains Headers that helps identify the contents of a particular column. Usually, the Header Row is formatted differently and should be repeated at the beginning of each new page for tables that extend beyond one page.
Note: According to most requirements, data tables should have a header row to provide a contextual structure that aids navigation.
- Total Row is the last row of the table. If this option is selected, the last row will be formatted differently from the body rows, designed to summarize the rows above it (see how to insert formulas).
- First Column used special formatting to the column. Usually, the First Column contains the row headings.
- Last Column applies special formatting to the column to summarize the earlier columns (see how to insert formulas).
- Banded Rows and Banded Columns alternate the background color of rows and columns (see how to change the background color for the selected cells below).
Note: Certain Table Style Options may have a different effect depending on the Table Style you’ve chosen. You might need to experiment to get the look you want.
Apply the border styles
To apply and remove cell borders, do the following:
1. Select the cells or entire table to which you want to add a border.
2. On the Table Design tab, in the Borders group, choose the desired Border Styles, Line Style, Line Weight, and Pen Color:

- Select the predefined Line Style, Line Weight, and Line Color from the Border Styles dropdown list:

- Select the Line Style:

- Select a border thickness from the Line Weight dropdown list:

- Select the border color from the Pen Color dropdown list:

- Select the borders from the Borders dropdown list:

Note: Select No Borders from the Borders dropdown list to remove borders from the selected cells.
- Draw the border where you want:
- After selecting border style or color, the Border Painter button is automatically checked, or
- If all that you want is selected already, just click the Border Painter button by yourself:

After any of these actions, your cursor changes to the brush. Now, draw the border where you need it:

Note: Use the Eraser button in the Draw group on the Table Layout tab to remove the unnecessary border:


Apply background colors and shading
To change the background color for some table elements, select them, then on the Table Design tab, in the Table Styles group, click the Shading button, then select the background color you prefer:

Note: To use a pattern instead of a solid color, on the Table Design tab, in the Borders group, click the dialog box launcher:

In the Borders and Shading dialog box, on the Shading tab, select a pattern in the Style list:

Layout of the table
The Table Layout tab includes commands for changing the entire table format, as well as commands for changing the appearance of individual table components such as cells, columns, rows:

See Select and format table elements in Word for more details.
Resize a table
- Using the mouse: To resize a table in a Word document, move the mouse over the table until you see the table resizing icons (handle) in the bottom-right corner of the table and click it:

Drag the table to the size you need, and then release the handle.
- Using the keyboard: Select a table (see also how to resize individual cells, specific rows, or columns); the do one of the following:
- On the Layout tab, in the Cell Size group, change the values in the Height and Width fields:

- Open the Table Properties dialog box by doing one of the following:
- On the Table Layout tab, in the Table group, click the Properties button:

- Right-click the table and select Table Properties… in the popup menu:

In the Table Properties dialog box, on the Table tab, in the Size section, select the Preferred width check box, then:
- In the Preferred width field, type or select the value you need,
- In the Measure in dropdown list, select one of the items:
- Percent to specify the percentage of the table width,
- Inches to fix the column width:

- On the Table Layout tab, in the Table group, click the Properties button:
- On the Layout tab, in the Cell Size group, change the values in the Height and Width fields:


See how to resize table elements for more details.
Freeze the table
Some Word tables change the width of their columns according to the data. To stop changing the table size when new data is inserted, do the following:
1. Select the table.
2. Open the Table Properties dialog box.
3. In the Table Properties dialog box, on the Table tab, click the Options… button:

4. In the Table Options dialog box, deselect the Automatically resize to fit contents check box:

See also how to fix the height of table rows.
Move a table
To move a table to a new page or a new document, select it, then use the Cut and Paste commands. You can also use the Copy command to leave a copy of the table in the original location.