
Создание нового экземпляра приложения Word из кода VBA Excel или подключение к открытому для работы с документами. Функции CreateObject и GetObject.
Работа с Word из кода VBA Excel
Часть 1. Управление приложением Word
[Часть 1] [Часть 2] [Часть 3] [Часть 4] [Часть 5] [Часть 6]
Создание объекта Word.Application
Экземпляр приложения Word необходим для того, чтобы с его помощью создавать новые документы или открывать существующие для редактирования из кода VBA Excel.
Создать новый экземпляр объекта Word.Application можно при помощи раннего или позднего связывания, используя при позднем связывании функцию CreateObject. Подключиться к открытому экземпляру приложения Word можно только при помощи позднего связывания, используя функцию GetObject.
Раннее связывание приложения Word
Создание нового экземпляра Word.Application и присвоение ссылки на него переменной myWord:
|
‘Создание экземпляра приложения Word ‘с ранней привязкой одной строкой Dim myWord As New Word.Application ‘Создание экземпляра приложения Word ‘с ранней привязкой двумя строками Dim myWord As Word.Application Set myWord = New Word.Application |
Для раннего связывания переменной с объектом Word.Application необходимо подключить в редакторе VBA Excel ссылку на библиотеку Microsoft Word Object Library, если она не подключена. Подключается ссылка в окне «References VBAproject», перейти в которое можно через главное меню редактора: Tools–>References…

Раннее связывание позволяет при написании кода использовать лист подсказок для выбора и вставки свойств и методов привязанных объектов (Auto List Members). Если проект VBA Excel создается на заказ, то, после его завершения, раннее связывание следует заменить на позднее, так как на компьютере пользователя может не оказаться нужной библиотеки, и код работать не будет.
Позднее связывание приложения Word
Создание нового экземпляра Word.Application с помощью функции CreateObject и присвоение ссылки на него переменной myWord:
|
Dim myWord As Object Set myWord = CreateObject(«Word.Application») |
Присвоение переменной myWord ссылки на открытый экземпляр приложения Word с помощью функции GetObject:
|
Dim myWord As Object Set myWord = GetObject(, «Word.Application») |
Если открытого приложения Word нет, выполнение функции GetObject приведет к ошибке. Чтобы ее избежать, следует предусмотреть создание нового экземпляра Word.Application с помощью функции CreateObject, если открытое приложение не будет найдено (смотрите пример 3).
В программы VBA Excel, работающие с Word, следует включать обработчик ошибок.
Закрытие объекта Word.Application
Новый экземпляр приложения Word открывается в фоновом режиме. Если необходимо его отобразить на экране перед завершением программы, используйте следующий код:
|
‘отображаем приложение Word myWord.Visible = True ‘освобождаем переменную от ссылки Set myWord = Nothing |
Если перед завершением процедуры VBA Excel необходимо приложение Word закрыть, используйте метод Quit:
|
‘закрываем приложение Word myWord.Quit ‘освобождаем переменную от ссылки Set myWord = Nothing |
Если переменная не содержит ссылку на приложение (myWord = Nothing), метод Quit возвратит ошибку. Чтобы этого не произошло, перед применением метода Quit необходимо проверить наличие ссылки в переменной myWord (смотрите пример 3).
Пример 1
Создаем новый экземпляр объекта Word.Application с ранним связыванием и отображаем его на экране:
|
Sub Primer1() Dim myWord As New Word.Application ‘———- ‘блок операторов для создания, открытия ‘и редактирования документов Word ‘———- myWord.Visible = True Set myWord = Nothing End Sub |
Запустите код примера 1 на выполнение. Вы увидите появившийся на панели задач ярлык приложения Word. Перейдите на него и закройте приложение вручную.
Пример 2
Создаем новый экземпляр объекта Word.Application с поздним связыванием, отображаем его на экране, останавливаем программу и наблюдаем закрытие приложения методом Quit:
|
Sub Primer2() Dim myWord As Object Set myWord = CreateObject(«Word.Application») ‘———- ‘блок операторов для создания, открытия ‘и редактирования документов Word ‘———- myWord.Visible = True MsgBox «Остановка программы» myWord.Quit Set myWord = Nothing End Sub |
Запустите код примера 2 на выполнение. Закройте информационное окно MsgBox и смотрите, как исчезнет с панели задач ярлык приложения Word, созданного перед остановкой кода.
Пример 3
Пытаемся создать ссылку на открытый экземпляр приложения Word с помощью функции GetObject, а если открытого экземпляра нет, создаем новый с помощью функции CreateObject:
|
1 2 3 4 5 6 7 8 9 10 11 12 13 14 15 16 17 18 19 20 21 22 23 24 |
Sub Primer3() Dim myWord As Object On Error Resume Next Set myWord = GetObject(, «Word.Application») If myWord Is Nothing Then Set myWord = CreateObject(«Word.Application») End If On Error GoTo Instr ‘———- ‘блок операторов для создания, открытия ‘и редактирования документов Word ‘———- myWord.Visible = True Set myWord = Nothing Exit Sub Instr: If Err.Description <> «» Then MsgBox «Произошла ошибка: « & Err.Description End If If Not myWord Is Nothing Then myWord.Quit Set myWord = Nothing End If End Sub |
Строка On Error Resume Next передаст управление следующему оператору, если открытого экземпляра программы Word не существует, и выполнение функции GetObject приведет к ошибке. В этом случае будет создан новый экземпляр Word.Application с помощью функции CreateObject.
В код добавлен обработчик ошибок On Error GoTo Instr, который поможет корректно завершить программу при возникновении ошибки. А также он позволит во время тестирования не наплодить большое количество ненужных экземпляров приложения Word. Проверяйте их наличие по Диспетчеру задач (Ctrl+Shift+Esc) и удаляйте лишние.
Строка Exit Sub завершит процедуру, если она прошла без ошибок. В случае возникновения ошибки, будет выполнен код после метки Instr:.
Sub CreateAkte()

Dim WA As New Word.Application
Dim wd As Word.Document, ra As Word.Range
Dim x, y As Integer
Dim xx, yy
Dim FirstCell As Range
' проверка на пустые значения в 9 столбце
For i = 9 To Cells(Rows.Count, 1).End(xlUp).Row
    If Cells(i, 21) <> "" Then: GoTo Line1
Next i
MsgBox "Выберите позици для  формирования Акта." & vbNewLine & vbNewLine & "Введите количество в столбец  U", vbCritical, "ВНИМАНИЕ": Exit Sub
Line1:
' проверка на масксимальное кол-во позиций в уведомлении
Count = 0
For i = 9 To Cells(Rows.Count, 1).End(xlUp).Row
    If Cells(i, 21).Value <> "" Then Count = Count + 1
             If Count > 10 Then: MsgBox "Количество позиций в акте больше 10", vbCritical, "Измените количество позиций": Exit Sub
    Next i

' проверка перед заполнением акта на участие выбранных позиций
For i = 9 To Cells(Rows.Count, 1).End(xlUp).Row
 If Cells(i, 21).Value <> "" Then
    Cells(i, 21).Interior.Color = vbRed
 End If:
Next i
xx = MsgBox("Заполнить Акт для выделенных позиций?", vbYesNo, "ВНИМАНИЕ")
          If xx = 6 Then: GoTo Line3
          If xx = 7 Then:
          Range("u9:u500").Interior.Color = vbWhite
          Exit Sub
Line3:
Set FirstCell = Range("a:a").Find("*", Cells(Rows.Count, 1))
x = FirstCell.Row
Line2:
Set wd = WA.Documents.Add("\main-fs0..." & "Форма Шаблон.dotx")
    For i = 9 To Cells(Rows.Count, 1).End(xlUp).Row
       If Cells(i, 21).Value <> "" Then
            Cells(i, 21).Interior.Color = vbRed

                wd.Range.Find.Execute FindText:="{№}", ReplaceWith:=Range("AD2"), Replace:=1
                wd.Range.Find.Execute FindText:="{date}", ReplaceWith:=Range("AE2"), Replace:=1
                wd.Range.Find.Execute FindText:="{date1}", ReplaceWith:=Range("AF2"), Replace:=1
                wd.Range.Find.Execute FindText:="{Name}", ReplaceWith:=Cells(i, 2), Replace:=1
                wd.Range.Find.Execute FindText:="{6}", ReplaceWith:=Cells(i, 1), Replace:=1
                wd.Range.Find.Execute FindText:="{1}", ReplaceWith:=Cells(i, 5), Replace:=1
                wd.Range.Find.Execute FindText:="{2}", ReplaceWith:=Cells(i, 7), Replace:=1
                wd.Range.Find.Execute FindText:="{3}", ReplaceWith:=Cells(i, 22), Replace:=1
                wd.Range.Find.Execute FindText:="{4}", ReplaceWith:=Cells(i, 19), Replace:=1
                wd.Range.Find.Execute FindText:="{5}", ReplaceWith:=Cells(i, 21), Replace:=1
                wd.Range.Find.Execute FindText:="{11}", ReplaceWith:=Range("AE6"), Replace:=1
                wd.Range.Find.Execute FindText:="{22}", ReplaceWith:=Range("AF6"), Replace:=1
                wd.Range.Find.Execute FindText:="{33}", ReplaceWith:=Range("AM6"), Replace:=1
                wd.Range.Find.Execute FindText:="{44}", ReplaceWith:=Range("AL6"), Replace:=1
                wd.Range.Find.Execute FindText:="{55}", ReplaceWith:=Range("AD6"), Replace:=1

        End If

    Next i
    wd.SaveAs ("\main-fs0..." & Range("AD2").Text & ".docx")
    MsgBox "Акт заполнен. По адресу: ..."
Range("u9:u500").Clear
Range("AD2").Clear
End Sub
- Remove From My Forums
-
Question
-
Hi,
I used
Cells(i, j).Copy
appWD.Selection.PasteSpecial Placement:=wdInLine, DataType:=wdPasteTextinside two for-loop to copy a particular cell and paste the cell in word document.
two problem:
1. The appWD command paste the cell in the word, but I want the content of the cell to be pasted with plain text?
2. Sometimes the vba complain about the clipboard object?
David
-
Changed type
Thursday, September 11, 2014 1:57 AM
This is a question
-
Changed type
Answers
-
If Not IsEmpty(cell) Then
-
Marked as answer by
Fei XueMicrosoft employee
Wednesday, September 17, 2014 9:33 AM
-
Marked as answer by
-
In VBE click Tools -> References and add references to Microsoft Word 14.0 Object Library and then
Sub Main()

    Dim wb As Workbook
    Set wb = ThisWorkbook

    Cells(1, 1).Copy

    Dim wd As New Word.Application
    wd.Application.Visible = True

    Dim wdDoc As Word.Document
    Set wdDoc = wd.Documents.Add

    wdDoc.Paragraphs(1).Range.PasteSpecial Placement:=wdInLine, DataType:=wdPasteText

End Sub
This macro will open Word and paste the text from cell to word as text.
-
Proposed as answer by
Fei XueMicrosoft employee
Thursday, September 11, 2014 1:57 AM -
Marked as answer by
Fei XueMicrosoft employee
Wednesday, September 17, 2014 9:33 AM
-
Proposed as answer by
Содержание
- 1 After the reference is set, Word variables can be declared with the correct (Word) variable type.
- 2 An Example of Early Binding
- 3 creates a new instance of Word and then opens and makes visible an existing Word document:
- 4 Creating and Referencing Objects
- 5 Early vs. Late Binding
- 6 If multiple versions of Word are installed, you can create an object for a specific version. The following statement, for example, uses Word 97.
- 7 Late Binding
- 8 Using the CreateObject Function to Create a Late-Bound Instance of Excel
After the reference is set, Word variables can be declared with the correct (Word) variable type.
<source lang="vb">
Sub WordEarlyBinding()
   Dim wdApp As Word.Application
   Dim wdDoc As Document
   Set wdApp = New Word.Application
   Set wdDoc = wdApp.Documents.Open(ThisWorkbook.Path & "Word.docx")
   wdApp.Visible = True
   Set wdApp = Nothing
   Set wdDoc = Nothing
End Sub
</source>
An Example of Early Binding
<source lang="vb">
Sub EarlyBinding()
   Dim objExcel As Excel.Application
   Set objExcel = New Excel.Application
   With objExcel
       .Visible = True
       .Workbooks.Add
       .Range("A1") = "Hello World"
   End With
End Sub
</source>
creates a new instance of Word and then opens and makes visible an existing Word document:
<source lang="vb">
Sub WordLateBinding()
   Dim wdApp As Object, wdDoc As Object
   Set wdApp = CreateObject("Word.Application")
   Set wdDoc = wdApp.Documents.Open(ThisWorkbook.Path & "Word.docx")
   wdApp.Visible = True
   Set wdApp = Nothing
   Set wdDoc = Nothing
End Sub
</source>
Creating and Referencing Objects
<source lang="vb">
Sub UseGetObject()
   Dim wdDoc As Object
   Set wdDoc = GetObject(ThisWorkbook.Path & "Word.docx")
   wdDoc.Application.Visible = True
   Set wdDoc = Nothing
End Sub
</source>
Early vs. Late Binding
<source lang="vb">
Sub WordEarlyBound()
   Dim wd As Word.Application
   Dim doc As Word.Document
   Set wd = New Word.Application
   Set doc = wd.Documents.Add
   doc.SaveAs "C:testdoc1.doc"
   doc.Close
   Set doc = Nothing
   Set wd = Nothing
End Sub
</source>
If multiple versions of Word are installed, you can create an object for a specific version. The following statement, for example, uses Word 97.
<source lang="vb">
Sub mate()
   Dim WordApp As Object
   Set WordApp = CreateObject("Word.Application.8")
End Sub
</source>
Late Binding
<source lang="vb">
Sub late()
   Dim WordApp As Object
   Set WordApp = CreateObject("Word.Application")
End Sub
</source>
Using the CreateObject Function to Create a Late-Bound Instance of Excel
<source lang="vb">
Sub LateBinding()
   "Declare a generic object variable
   Dim objExcel As Object
   "Point the object variable at an Excel application object
   Set objExcel = CreateObject("Excel.Application")
   "Set properties and execute methods of the object
   With objExcel
       .Visible = True
       .Workbooks.Add
       .Range("A1") = "Hello World"
   End With
End Sub
</source>
![]()
Автоматизация работы с имеющимися данными 163
.SenderCompany = «ООО Универсал»
Наконец, наименование должности отправителя:
.SenderJobTitle = «Менеджер по работе с клиентами»
На этом заполнение свойств объекта LetterContent можно завершить:
End With
Поскольку предполагается воспользоваться методом SetLetterContent, заполнение всех свойств необязательно (остался целые ряд свойств, которые не были упомянуты). При других способах создания и использования объекта LetterContent необходимо задать значения абсолютно всем свойствам объекта.
Итак, поскольку приложение Word уже запущено и доступно через переменную WD, можно создать новый документ,
WD.Documents.Add
вставить в пустой документ заготовленную строку текста письма,
WD.ActiveDocument.Content.InsertBefore LetterText
и обратиться к методу SetLetterContent активного документа, передав ему в качестве параметра подготовленный объект типа LetterContent:
WD.ActiveDocument.SetLetterContent MyLetter
В результате документ превратится в письмо, которое мог бы создать мастер писем, основываясь на шаблоне Современное письмо. Помошник Office, возможно, предложит создать также конверт или наклейку.
Программный код функции Анализ_баланса
Теперь можно свести весь разработанный код воедино и записать исходный текст функции
Анализ_баланса (листинг 6.2).
ЛИСТИНГ 6.2
Public Function Анализ_Баланса()
Dim MyDb As Database
Dim Klients As Recordset
Dim Operations As Recordset
Dim WordRunning As Boolean
Dim KodKlienta As String
Dim SQLstr As String
Dim SumIn, SumOut As Currency
Dim LetterText As String
Dim WD As Word.Application
Dim MyLetter As New LetterContent
Set MyDb = CurrentDb
Set Klients = MyDb.OpenRecordset(«Клиенты»)

164 Глава 6. Access: автоматизация офисной базы данных
WordRunning = False
Klients.MoveFirst
Do While Not Klients.EOF
If Klients.Fields(«Фамилия») <> «» Then
KodKlienta = Klients.Fields(«КодКлиента»)
SQLstr = «SELECT * _
FROM Операции WHERE КодКлиента=» + KodKlienta
Set Operations = MyDb.OpenRecordset(SQLstr)
SumIn = 0
SumOut = 0
Operations.MoveFirst
Do While Not Operations.EOF
If Operations.Fields(«КодОперации») = 2 Then
SumIn = SumIn + _
Operations.Fields(«СуммаОперации»)
Else
SumOut = SumOut + _
Operations.Fields(«СуммаОперации»)
End If
Operations.MoveNext
Loop
Operations.Close
Set Operations = Nothing
If SumOut > SumIn Then
If MsgBox(«Отрицательное сальдо по клиенту » _ + Klients.Fields(«Фамилия») + _
«. Создать письмо?», vbYesNo, _ «Отрицательное сальдо») = vbYes _
Then
If Not WordRunning Then
Set WD = CreateObject(«Word.Application»)
WD.Visible = True
WordRunning = True
End If
LetterText = _
«Считаем необходимым обратить » + _ «Ваше внимание на то, что Ваш » + _ «баланс в операциях с нашей » + _ «компанией принял отрицательное » + _ «значение и составляет » + _
Str(SumIn — SumOut) + » руб.»

Автоматизация работы с имеющимися данными 165
With MyLetter
.DateFormat = Date$
.IncludeHeaderFooter = True
.PageDesign = _
«D:OfficeTemplates1049» + _ «Современное письмо ltr.dot»
.LetterStyle = wdModifiedBlock
.RecipientName = Klients.Fields(«Имя») + _
«» + Klients.Fields(«Отчество») + _
«» + Klients.Fields(«Фамилия»)
.RecipientAddress = _ Klients.Fields(«Адрес»)
.MailingInstructions = _ «ДЕЛОВАЯ КОРРЕСПОНДЕНЦИЯ»
.AttentionLine = «Внимание!»
.Subject = «Отрицательный баланс»
.ReturnAddress = _
«ООО Универсал, малая Ивановская 1»
.SenderName = «Петров П.П.»
.Closing = «С уважением,»
.SenderCompany = «ООО Универсал»
.SenderJobTitle = _
«Менеджер по работе с клиентами»
End With
WD.Documents.Add
WD.ActiveDocument.Content.InsertBefore LetterText
WD.ActiveDocument.SetLetterContent MyLetter
End If
End If
End If
Klients.MoveNext
Loop
Klients.Close
Set Klients = Nothing
Set Operations = Nothing
Set MyDb = Nothing
On Error Resume Next
If WordRunning Then WD.Quit
End Function
Чтобы выполнить функцию, достаточно выбрать двойным щелчком макрос Анализ балан-
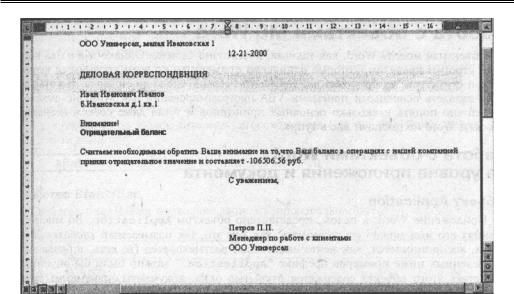
са на вкладке Макросы. Далее, если в процессе анализа обнаружится отрицательное сальдо по одному из клиентов, достаточно будет щелкнуть на кнопке Äà в окне сообщения, и в открывшемся окне Word будет создано и отформатировано “современное письмо” с заданным содержанием и реквизитами (рис. 6.7).
166 Глава 6. Access: автоматизация офисной базы данных
Рис. 6.7. Письмо сформировано методом SetLetterContent

Глава 7
В мире объектов MS Office
Кое-что об объектах MS Office уже было рассмотрено в предыдущих главах. Чтобы более полно осознать возможности макросов VBA и представить себе, какие вообще задачи можно было бы решать с их помощью, а также узнать, как выполнить ту или иную операцию над ними, посвятим отдельную главу книги краткому обзору объектов MS Office. Направленность и объем этой книги не предполагают полного и детального рассмотрения объектной модели MS Office — этого, собственно, и не требуется никому, кроме профессиональных офис-программистов. Поэтому для начала вполне достаточно познакомиться с основными объектами, которые требуются для решения часто встречающихся задач, и научиться выполнять с ними типичные операции. Более того: многие действия с объектами MS Office можно выполнить десятком способов. Здесь будут рассмотрены на примерах одно-два самых простых действий. Таким образом, эта глава должна представлять собой что-то вроде краткого путеводителя по миру объектов Office или сборника “готовых рецептов” для непрофессионального программиста, который пытается самостоятельно решать при помощи VBA задачи автоматизации, характерные для своего конкретного офиса.
Работа с объектами MS Word
Объектная модель Word, как таковая, достаточно сложна. Однако все в ней подчинено строгим правилам, которые одинаково применимы ко всем уровням ее иерархической структуры: на уровне приложения, документа, абзаца, слова или символа. По этой причине овладеть основными приемами VBA-программирования для Word не так уж и трудно: достаточно понять несколько основных принципов, и уже никакие, даже совсем незнакомые объекты Word не поставят вас в тупик.
Работа с объектами Word на уровне приложения и документа
Объект Application
Приложение Word в целом представлено объектом Application. Это так называемый глобальный объект и во многих ситуациях его имя можно не упоминать, как нечто само собой разумеющееся (то есть, в большинстве приведенных ниже примеров префикс “Application.” можно было бы опустить). В свойствах этого объекта содержатся открытые окна, документы, всевозможные параметры рабочей среды Word и многое другое.
Свойство Caption
Например, заголовок окна Word задается свойством Caption этого объекта:
Application.Caption = “Мое приложение”
Свойства ActiveWindow, ActiveDocument и ActivePrinter
В свойствах ActiveWindow, ActiveDocument и ActivePrinter содержатся ссылки на,
соответственно, текущее окно, документ и принтер. Следующий код максимизирует текущее окно, сохраняет текущий документ и сообщает пользователю имя текущего принтера:

168 Глава 7. В мире объектов MS Office
Application.ActiveWindow.WindowState = wdWindowStateMaximize Application.ActiveDocument.Save
MsgBox Application.ActivePrinter
Семейство CommandBars
Семейство CommandBars представляет панели меню и панели инструментов Word. Например, включить в окне Word режим “крупные значки” можно при помощи следующего кода:
Application.CommandBars.LargeButtons = True
Свойства DisplayScrollBars и DisplayStatusBar
Многие свойства объекта Application отвечают за внешний вид и поведение окна Word. Например, присваивание логического значения False следующим свойствам приведет к тому, что будет отключено отображение полос прокрутки и строки состояния:
Application.DisplayScrollBars = False
Application.DisplayStatusBar = False
Объект Options
Все параметры и настройки Word, содержащиеся в диалоговом окне Сервис | Параметры, доступны посредством объекта Options.
Свойство AllowDragAndDrop: управление режимом перетаскивания текста в режиме Правка
Например, флажок использовать перетаскивание текста на вкладке Правка можно устано-
вить при помощи присваивания:
Application.Options.AllowDragAndDrop = True
Свойство SaveInterval: задание интервала автосохранения
А следующий код задаст интервал автосохранения (см. вкладку Сохранение) равным десяти минутам:
Application.Options.SaveInterval = 10
Свойство StatusBar
Свойство StatusBar позволяет записать произвольный текст в строку состояния Word:
Application.StatusBar = «Выполняется макрос, ждите…»
Метод Quit
Метод Quit завершает работу Word и закрывает его окно. Закрыть окно Word с сохранением всех открытых документов можно при помощи следующего кода:
Application.Quit wdSaveChanges
Семейство Documents
Семейство Documents, содержащееся в одноименном свойстве объекта Application, представляет все открытые документы. Создать новый или открыть существующий документ можно при помощи методов этого семейства.

Работа с объектами MS Word 169
Метод Add
Метод Add создает новый документ на основе указанного шаблона (если не задавать этот параметр, то документ будет создан на основе шаблона Обычный). Как правило, используют объектную переменную типа Document, чтобы “запомнить” ссылку на вновь созданный документ:
Dim MyDoc As Document
Set MyDoc = Documents.Add(«C:MSOfficeTemplatesMy.dot»)
Метод Open
Метод Open используют для открытия уже существующего, то есть записанного ранее на диск документа:
Set MyDoc = Documents.Open(«C:Мои документыMyDoc1.doc»)
Методы Close и Activate
Обращаться к членам семейства Documents можно как по номерам, так и по именам. Например, следующий код закроет документ с именем “Документ1” и сделает активным четвертый из остающихся открытыми документов (если документа с именем “Документ1” среди открытых документов нет, или, если открыто менее четырех документов, то возникнет ошибка выполнения):
Documents(“Документ1”).Close
Documents(4).Activate
Объекты ActiveDocument и ThisDocument
С точки зрения макроса VBA есть два особенных документа из всех документов семейства Documents. Очень часто эти два документа совпадают в одном: ActiveDocument во многих случаях означает то же самое, что и ThisDocument, хотя, вообще говоря, это разные объекты. Объект ActiveDocument указывает на активный, то есть текущий документ, тот документ, чье окно активно и находится на переднем плане. Объект ThisDocument содержит ссылку на тот документ, в котором, собственно, находится выполняемый макрос.
Метод PrintOut: печать документа
Вывести на печать документ:
ActiveDocument.PrintOut
Метод SendMail: отправка документа по электронной почте, как вложение
Отправить документ по электронной почте, как вложение:
Options.SendMailAttach = True
ThisDocument.SendMail
В последнем случае по электронной почте будет отправлен документ или шаблон, в котором содержится макрос. Если макрос создан при помощи диалогового окна Макросы без уточнения местонахождения макроса, то в путь отправится шаблон Normal.dot. При этом автоматически откроется окно MS Exchange с созданным сообщением E-mail, где остается лишь указать адрес.
Метод Close
Метод Close имеется как у семейства Documents в целом, так и у каждого отдельно взятого Document-объекта. В первом случае он используется для группового закрытия документов, во втором — для закрытия конкретного документа.
Закрыть все документы с сохранением по подтверждению пользователя:

170 Глава 7. В мире объектов MS Office
Documents.Close wdPromptToSaveChanges
Закрыть текущий документ без сохранения:
ActiveDocument.Close wdDoNotSaveChanges
Методы Save и SaveAs
Явным образом сохранить документ можно при помощи метода Save (сохранение под текущим именем) или SaveAs (сохранить как):
ActiveDocument.Save
ActiveDocument.SaveAs «C:Мои документыMyDoc2.doc»
Объект Range: работа с текстовым содержимым документа
Основным рабочим инструментом для операций с содержимым документа Word является объект типа Range. Этот специальный, “абстрактный” объект представляет собой диапазон текста. По названию, а также по своему смыслу он схож с объектом Range рабочего листа Excel. Эти два
разных Range-объекта вполне могут соседствовать и даже присутствовать вместе в одной строке кода, как можно было убедиться в одной из предыдущих глав.
← см. в гл. раздел “”.
При работе с текстовым содержимым документа в целом, а также при операциях с абзацами, предложениями, словами и символами, всегда используется один и тот же объект — Range. В каждом случае, в любом контексте он представляет соответствующий текстовый диапазон, будь то весь документ или единственное слово. По этой причине очень важно освоить приемы работы именно с Range-объектом, как таковым, а детали обращения с предложениями, словами и другими разновидностями текстовых диапазонов не будут представлять никакой трудности.
Явно задать текстовый диапазон Range можно задать множеством различных способов. Многие свойства документа, не содержащие в своем названии слова “Range”, на самом деле возвращают при обращении к ним объект типа Range. У многих объектов существует свойство Range
и также существует метод Range, — в любом случае в результате будет получен Range-объект. Итак, проиллюстрируем одновременно различные способы определения текстового диапазона Range и действия, которые можно проделать с уже определенным Range-диапазоном.
Свойство Bold: выделение диапазона полужирным начертанием его символов
Выделить полужирным начертанием первые десять символов документа:
ActiveDocument.Range(Start:=0, End:=9).Bold = True
Свойство InsertBefore: вставка строки
Вставить вначале документа строку “АБВГД”:
ActiveDocument.Range(Start:=0, End:=0).InsertBefore «АБВГД»
Проверка правописания
Выполнить проверку правописания в первом разделе документа, и, в случае обнаружения ошибки, выдать сообщение:
If Not CheckSpelling(ActiveDocument.Sections(1).Range) Then
MsgBox «Обнаружена ошибка!»
End If

Работа с объектами MS Word 171
Задание верхнего колонтитула
Задать верхний колонтитул первой страницы для второго раздела:
ActiveDocument.Sections(2).Headers(wdHeaderFooterFirstPage).Range = _ «Глава 2»
Семейства Paragraphs, Sentences, Words и Characters
Семейство Paragraphs представляет все абзацы документа, семейство Sentences — все предложения, в семействе Words содержатся слова, а в семействе Characters — символы документа. Все эти семейства устроены одинаковым образом.
Свойства First и Last
К их членам можно обращаться по номерам, свойства First и Last указывают на, соответственно, первый и последний элементы.
Свойства Count
Свойстве Count содержится число элементов в семействе. И для всех этих семейств в любом случае в результате возвращается объект типа Range.
Свойство Alignment
Задать выравнивание по правому краю для первого абзаца:
ActiveDocument.Paragraphs(1).Alignment = wdAlignParagraphRight
Создание вокруг абзаца рамку заданного стиля
Заключить первый абзац в рамку стиля 3D:
ActiveDocument.Paragraphs.First.Borders.OutsideLineStyle = _
wdLineSyleEmboss3D
Вставка текста после заданного абзаца
Вставить текст после последнего абзаца:
ActiveDocument.Paragraphs.Last.Range.InsertAfter «Конец.»
Изменение фона абзаца
Задать для пятого абзаца штриховку (узор) 15%:
ActiveDocument.Paragraphs(5).Shading.Texture = _
wdTexture15Percent
Изменение стиля абзаца
Задать стиль 1-го абзаца Заголовок1:
ActiveDocument.Paragraphs.First.Style = «Заголовок 1»
Изменение стиля абзаца
Аналогичным образом можно обращаться к предложениям документа. Выбрать для первого предложения шрифт Arial:
ActiveDocument.Sentences(1).Font.Name = «Arial»
172 Глава 7. В мире объектов MS Office
Перемещение по тексту
Задать смещение вверх на три пункта для символов первого предложения и вниз на три пункта для второго:
ActiveDocument.Sentences(1).Font.Position = 3
ActiveDocument.Sentences(2).Font.Position = — 3
Метод Delete
Удалить последнее предложение:
ActiveDocument.Sentences.Last.Delete
Преобразование символов в верхний регистр
Преобразовать символы первого предложения в верхний регистр:
ActiveDocument.Sentences(1).Case = wdUpperCase
Изменение начертания символов Выделить первое слово полужирным начертанием:
ActiveDocument.Words.First.Bold = True
Семейство StoryRanges
Семейство StoryRanges также возвращает Range-объект, — оно обеспечивает доступ к различным структурным компонентам текста, таким, как основной текст, примечания, сноски, колонтитулы и др. Выбор нужного компонента осуществляется посредством соответствующей константы. Например, задать шрифт Arial для основного текста документа (не затронув при этом все остальное, как случилось бы при обращении к свойству ActiveDocument.Range), можно при помощи следующего кода:
ActiveDocument.StoryRanges(wdMainTextStory).Font.Name = «Arial»
Выделить полужирным нижний колонтитул 1-й страницы:
ActiveDocument.StoryRanges(wdFirstPageFooterStory).Bold = True
Работа со списками и таблицами документа Word
Word-таблицы
Таблицы в документе Word представлены объектами типа Table, доступными через семейство Tables. Каждая таблица — объект Table — состоит из строк (объекты типа Row, объединенные в семейство Rows) и столбцов (объекты типа Column, объединенные в семейство Rows). Кроме того, таблицу можно рассматривать, как набор ячеек (объектов типа Cell, объединенных в семейство Cells).
Управление границами таблиц
Разрешить отображение границ для первой таблицы документа:
ActiveDocument.Tables(1).Borders.Enable = True
Удаление столбца таблицы
Удалить первый столбец в первой таблице:
Соседние файлы в папке Книги
- #
31.05.201530.78 Кб77excel_vba.html
- #
- #
31.05.2015192.38 Кб65VBA.htm
- #
- #
Bookmarks is a property of a Document object not of Word Application object
so you have to change:
wd.Bookmarks.Add BookMarkName, BMRange
to:
wd.ActiveDocument.Bookmarks.Add BookMarkName, BMRange
furthermore you may consider what follows:
-
you should limit the use of Public variable to where strictly unavoidable (e.g.: to communicate with UserForms)
-
avoid the
Activate/ActiveXXX/Selection/Selectpattern and use fully qualified range references -
you’re iterating through a «vertical» range and then you’re offsetting current cell «vertically» (i.e. one cell down) again: may be you wanted to offset «horizontally» (i.e. to the adjacent cell)?
for all what above I’d propose the following refactoring of your code:
Option Explicit

Sub ReportData()

    Dim wd As Word.Application
    Dim DataCell As Range

    Set wd = New Word.Application

   'Open word template
    wd.Documents.Open Range("D4") & Range("D5")
    wd.Visible = True

    'Creates range with all of the data used in the report
    With Range("D7")
        'Uses copycell function. "Name" is the bookmark name, 0 is the Rowoffset
        For Each DataCell In Range(.Cells, .End(xlDown))
          CopyCell wd, DataCell, "Name", 0
          CopyCell wd, DataCell, "Employer", 1
        Next
    End With

    wd.ActiveDocument.Close True '<--| close and save word document
    wd.Quit '<--| close word application
    Set wd = Nothing '<--| clean memory
End Sub

Sub CopyCell(wd As Word.Application, DataCell As Range, BookMarkName As String, ColOffset As Integer)

    Dim BMRange As Word.Range

    wd.Selection.GoTo What:=wdGoToBookmark, Name:=BookMarkName
    Set BMRange = wd.Selection.Range.Duplicate
    BMRange.Text = DataCell.Offset(0, ColOffset).Value
    wd.ActiveDocument.Bookmarks.Add BookMarkName, BMRange

End Sub
Referencing Word and other applications in Excel VBA
Part four of a four-part series of blogs
Even if you’re writing Visual Basic macros within Excel, there’s nothing to stop you inserting text into Word documents, manipulating PowerPoint slides or sending Outlook emails. This blog explains how to reference other applications, and write macros in Excel to link to other Microsoft Office software
- Creating References to Other Applications in VBA
- Using Tools References to Create a Reference to Word
- Using VBA to Link Applications
- Using Bookmarks to Fill in a Word Document from Excel (this blog)
This blog is part of a complete Excel VBA tutorial. You can also learn to program in VBA on one of our VBA macros courses.
Posted by
Andy Brown
on 05 December 2011
You need a minimum screen resolution of about 700 pixels width to see our blogs. This is because they contain diagrams and tables which would not be viewable easily on a mobile phone or small laptop. Please use a larger tablet, notebook or desktop computer, or change your screen resolution settings.
This page shows an example of how to create a mail merge from Word to Excel.
It’s quite a long example, but should be a great aid to helping understand how
to link applications using VBA.
Files Needed
The files that you’ll need to get this to work are as follows:
- The Excel workbook
containing the people - The Word document
containing the template to be filled in
The macros are written in Excel 2010 and Word 2010, but should work in Office
version 2007 also.
The Aim of the Exercise
Suppose that we have a list of people in an Excel worksheet:

Our aim is to create a «letter» in Word addressed to each of these people.
If we succeed, the end result will be 3 documents saved in Word — the one for
Tinky Winky will look like this, for example:

The form filled in for Tinky Winky, the second of the 3 people we’re writing to.
To do this we’ll loop over the people in the list in Excel, creating a document
in Word for each.
Preparing the Word Document
We now need to create our Word template form and add bookmarks to it, so that
we know where to insert the various fields. The template form begins life
as a simple table:

The first name, last name and company name will appear in the table.
The next thing to do is to make sure that we can see any bookmarks that
we add.
A bookmark in Word is a flag in a document which you can jump to — like an
insertion point.
To view bookmarks, follow these steps:

You can now
insert bookmarks — we’ll create 3, called FirstName,
LastName and Company. For each bookmark, select
the following option and fill in the dialog box which appears:

The ribbon option to insert a bookmark
After creating 3 bookmarks, your document should now look like this:

You can see where the 3 bookmarks have been inserted.
After saving this document, you now need to know how to go to a bookmark in Word
from within your Excel code.
Recording a Macro to go to a Bookmark in Word
If you happen to know Word Visual Basic inside-out, you can ignore this step!
Firstly, start recording a macro (if you’re not sure what recording a macro
means or how to do it, see my earlier tutorial on recording macros in Excel).

Click on this tool to start recording a macro.
While recording (it doesn’t really matter what you called your macro), choose to
find a bookmark:

Choose which bookmark you want to go to:

Choose to go to a bookmark, then choose one from the list (it doesn’t matter which).
Now stop recording:

Click on this tool to stop recording your macro.
If you press ALT + F11
to go into Visual Basic, you’ll find your recorded macro in the Normal
template:

Word by default puts recorded macros into a module called
NewMacros.
You can now see your macro, and copy the only line you want from it:
Selection.GoTo What:=wdGoToBookmark, _
Name:=»LastName»
You can now close down Word, and write your Excel macro!
Writing the Excel Macro
The final stage is to open your workbook in Excel, and write your macro:

A reminder of what the Excel workbook looks like.
To write your macro, go into VBA and create a reference to Word 2010 as
described earlier in this blog. You can then create the macro — here’s
what it could look like:
Option Explicit
Const FilePath As String = «C:ajb files»
Dim wd As New Word.Application
Dim PersonCell As Range
Sub CreateWordDocuments()
Dim doc As Word.Document
wd.Visible = True
Dim PersonRange As Range
Range(«A1»).Select
Set PersonRange = Range( _
ActiveCell, _
ActiveCell.End(xlDown))
For Each PersonCell In PersonRange
Set doc = wd.Documents.Open(FilePath & «Word form.docx»)
CopyCell «FirstName», 1
CopyCell «LastName», 2
CopyCell «Company», 3
doc.SaveAs2 FilePath & «person » & PersonCell.Value & «.docx»
doc.Close
Next PersonCell
wd.Quit
MsgBox «Created files in » & FilePath & «!»
End Sub
Sub CopyCell(BookMarkName As String, ColumnOffset As Integer)
wd.Selection.GoTo What:=wdGoToBookmark, Name:=BookMarkName
wd.Selection.TypeText PersonCell.Offset(0, ColumnOffset).Value
End Sub
When you run this macro, it should:
- Create a new copy of Word in memory, and make it visible;
then - For each person, create a new document, write in the
person’s name and company at the correct locations, then save
and close it.
The results? Three documents on your hard disk:

What you should see after running your macro — each document contains a filled-in form for a different person.
And that’s how you can fill in a Word document from within Excel!
If you’d like to go on one of our VBA courses and have
a real live owl explain this to you, consider booking on our online Advanced VBA course
— wherever you are in the world.
This blog has 5 threads
Add post
23 Nov 21 at
11:11
Amazing article, thank you !
But i have a problem: I want in the same bookmark to use two columns (to put someone’s first name and surname for example). And after a bookmark I want to add a string using something like CopyCell «Amount», 1 & » €». Is this possible?
23 Nov 21 at
11:20
To put in the first name and surname, the easiest thing to do is to use two bookmarks. Likewise with the amount — just add another bookmark, and type what you want in there.
23 Nov 21 at
11:25
I am so stupid. And for my second problem, do you have idea ?
Andy B
23 Nov 21 at
11:40
I guess I’m not really sure what you mean. If you want to paste in the value of something, an easy way to do that is to store the text in a variable in Excel, then just write the contents of the variable in at a Word bookmark as if it were normal text.
27 Oct 20 at
11:45
If i only wanted to create one word document for all instead of individual ones, what would the code look like? Thanks!
27 Oct 20 at
11:56
Just move the first grey line below before the loop, and the last two grey lines after it.
For Each PersonCell In PersonRange
‘open a document in Word
Set doc = wd.Documents.Open(FilePath & «Word form.docx»)
‘go to each bookmark and type in details
CopyCell «FirstName», 1
CopyCell «LastName», 2
CopyCell «Company», 3
‘save and close this document
doc.SaveAs2 FilePath & «person » & PersonCell.Value & «.docx»
doc.Close
Next PersonCell
You could probably do with adding a carriage return after copying each set of values — from memory, something like:
Selection.TypeParagraph
22 May 20 at
11:34
Thanks for wonderful article, this is what I was looking for. For some reason when I run macro it shows a mistake on this line:
Set doc = wd.Documents.Open(FilePath & «Word form.docx»)
Mistake: «Run-time error ‘5174’. This file could not be found. It also showed error 462.
Should it be modified?
28 Jan 21 at
19:25
I had the same problem because
1) FilePath refers to the path that locates the folder of the user form and not the word.docx you downloaded. When i copied the folder’s path i did not realise that the last was missing.
2) At Set doc = wd.Documents.Open(FilePath & «Word form.docx») , «Word form» is the name of the file and when i downloaded it was called «d7». So when i changed to «d7.docx» it worked.
Hope it helped you.
22 May 20 at
16:53
I think the code is good. You may have some strange characters in your folder or file names? Try this StackOverflow article for ideas if you’re still stuck.
19 May 20 at
16:51
Constantly find myself coming back to this page — thanks so much for creating it WiseOwl.
One thing i’ve never mangaged to tackle is how you amend this so that the values inserted into the Word bookmarks keep their source fomatting (or merge formatting with the word document) — sometimes it’d be useful to retain or merge that formatting to improve the look/feel of the document. Any ideas?
20 May 20 at
09:36
I’d try this. Copy something in Excel which includes formatting, then go to Word. Start recording a macro, and use Paste Special to paste in the cells keeping the formatting you want. Stop recording, and have a look to see if the code you’ve got can be tweaked to do what you want. Feel free to report back if you have any success, for others to use in the future!
18 May 18 at
09:55
This is great!
Does anyone have any idea how to amend this so that if the value that you’re copying to the word document is a numerical value?
I.e. if the value you wanted to copy from excel was «15%» if you use this code then the value inserted into the word bookmark reads «0.15».
Is there a way to keep the cell format as it is displayed in the excel document when pasted into the bookmark?
Cheers,
AJHEZ
18 May 18 at
11:20
You could use the Text property of the range you’re copying, rather than the Value property:
wd.Selection.TypeText PersonCell.Offset(0, ColumnOffset).Text
I hope that helps!
In this article, I am going to show you some of the most amazing VBA Excel codes that you can use to optimize your work. VBA is a programming language, which can be used to extend the capabilities of MS Excel and other MS Office applications. It is extremely helpful for MS Excel users, because it can be used to automate your work and significantly improve your efficiency. This article will introduce you to VBA and show you some of the most useful, ready to use VBA codes out there. You can use these macro examples to create your own scripts that fit your own needs.
You do not need programming experience to take advantage of the information in this article, but you are expected to have basic knowledge of Excel. If you are a beginner user, I would recommend you to read the article 20 Excel Formulas You Should Start Using Now to learn more about Excel’s core functionalities.
I have prepared for you a number of ready to use VBA Excel Macro examples with great functionality that you can use to optimize your work. In order to use them, you need to “install” them in your Excel file. The next paragraph deals with Excel macro installation. Skip this part if you are already familiar with this.
Table of Contents
How to install a macro
In Excel, press the key combination alt + F11. This will take you to the VBA editor in MS Excel. Then, right-click on the Microsoft Excel Objects folder on the left and select Insert => Module. This is the place where the macros are stored. To make use of the macro, you need to save the Excel document as macro-enabled. From the tab file => save as, choose save as macro-enabled workbook (the .xlsm extension) Now, it’s time to write your first macro!
1. Copy data from one file to another.
Very useful macro, as it shows how to copy a range of data from inside vba and how to create and name a new workbook. You can easily upgrade it to fit your own requirements:
Sub CopyFiletoAnotherWorkbook()

        Sheets("Example 1").Range("B4:C15").Copy

        Workbooks.Add

        ActiveSheet.Paste

        Application.DisplayAlerts = False

        ActiveWorkbook.SaveAs Filename:="C:TempMyNewBook.xlsx"

        Application.DisplayAlerts = True
End Sub
2. Show hidden rows
Occasionally, large Excel files contain hidden lines for better clarity. Here’s a macro that will unhide all rows from an active worksheet:
Sub ShowHiddenRows()
    Columns.EntireColumn.Hidden = False
    Rows.EntireRow.Hidden = False
End Sub
3. Delete empty rows and columns
Blank rows in Excel are a problem with data processing. Here is how to get rid of them:
Sub DeleteEmptyRowsAndColumns()

        Dim MyRange As Range
        Dim iCounter As Long

        Set MyRange = ActiveSheet.UsedRange

        For iCounter = MyRange.Rows.Count To 1 Step -1

           If Application.CountA(Rows(iCounter).EntireRow) = 0 Then
               Rows(iCounter).Delete


           End If

        Next iCounter

        For iCounter = MyRange.Columns.Count To 1 Step -1

               If Application.CountA(Columns(iCounter).EntireColumn) = 0 Then
                Columns(iCounter).Delete
               End If

        Next iCounter
End Sub
4. Find a blank cell
Sub FindEmptyCell()
    ActiveCell.Offset(1, 0).Select
       Do While Not IsEmpty(ActiveCell)
          ActiveCell.Offset(1, 0).Select
       Loop
End Sub
5. Replace empty cells with a value.
As previously mentioned, blank cells interfere with data processing and the creation of pivot tables. Here is a code which replaces all blank cells with 0. This macro has a very large application because you can use it to find and replace N/A results, as well as other characters such as dots, commas or duplicate values:
Sub FindAndReplace()

        Dim MyRange As Range
        Dim MyCell As Range

        Select Case MsgBox("Can't Undo this action.  " & _
                            "Save Workbook First?", vbYesNoCancel)
            Case Is = vbYes
            ThisWorkbook.Save
            Case Is = vbCancel
            Exit Sub
        End Select

        Set MyRange = Selection

        For Each MyCell In MyRange

            If Len(MyCell.Value) = 0 Then
                MyCell = 0
            End If

        Next MyCell
End Sub
6. Sort numbers
The following macro sorts in ascending order all numbers from the active cell’s column. Just double click any cell from a column you would like to sort.
NB: You need to put the code in Sheet 1 and not in a module to work:
Private Sub Worksheet_BeforeDoubleClick (ByVal Target as Range, Cancel As Boolean)

        Dim LastRow As Long

        LastRow = Cells (Rows.Count, 1) .End (xlUp) .Row

        Rows ("6:" & LastRow) .Sort _
        Key1: = Cells (6, ActiveCell.Column), _
        Order1: = xlAscending
End Sub
7. Remove empty spaces
Occasionally, data in the workbook contains additional spaces (spaces) that can interfere with data analysis and to corrupt of formulas. Here’s a macro that will remove all the spaces from a preselected range of cells:
Sub TrimTheSpaces()

        Dim MyRange As Range
        Dim MyCell As Range

        Select Case MsgBox("Can't Undo this action.  " & _
                            "Save Workbook First?", vbYesNoCancel)
            Case Is = vbYes
            ThisWorkbook.Save
            Case Is = vbCancel
            Exit Sub
        End Select

        Set MyRange = Selection

        For Each MyCell In MyRange

            If Not IsEmpty(MyCell) Then
                MyCell = Trim(MyCell)
            End If

        Next MyCell
End Sub
8. Highlight dublicated values
Sometimes there are duplicate values in the several columns we would like to illuminate. Here’s a macro that does just that:
Sub HighlightDuplicates()

        Dim MyRange As Range
        Dim MyCell As Range

        Set MyRange = Selection

        For Each MyCell In MyRange

            If WorksheetFunction.CountIf(MyRange, MyCell.Value) > 1 Then
                MyCell.Interior.ColorIndex = 36
            End If

        Next MyCell
End Sub
9. Highlight top ten values
This code will highlight the top ten values from a selection of cells:
Sub TopTen()
    Selection.FormatConditions.AddTop10
    Selection.FormatConditions(Selection.FormatConditions.Count).SetFirstPriority
        With Selection.FormatConditions(1)
            .TopBottom = xlTop10Top

            .Rank = 10
            .Percent = False
        End With
        With Selection.FormatConditions(1).Font
            .Color = -16752384
            .TintAndShade = 0
        End With
        With Selection.FormatConditions(1).Interior
            .PatternColorIndex = xlAutomatic
            .Color = 13561798
            .TintAndShade = 0
        End With
    Selection.FormatConditions(1).StopIfTrue = False
End Sub
You can easily tweak the code to highlight different number of values.
10. Highlight greater than values
When you run this code, a window will prompt. It will ask you the value you want to compare the cells you have selected.
Sub HighlightGreaterThanValues()
    Dim i As Integer
    i = InputBox("Enter Greater Than Value", "Enter Value")
    Selection.FormatConditions.Delete

    Selection.FormatConditions.Add Type:=xlCellValue, Operator:=xlGreater, Formula1:=i
    Selection.FormatConditions(Selection.FormatConditions.Count).SetFirstPriority
        With Selection.FormatConditions(1)
            .Font.Color = RGB(0, 0, 0)
            .Interior.Color = RGB(31, 218, 154)
        End With
End Sub
You can tweak this code to highlight lower values as well.
A simple macro that highlights all the cells that contain comments:
Sub HighlightCommentCells()
    Selection.SpecialCells(xlCellTypeComments).Select
    Selection.Style= "Note"
End Sub
12. Highlight Cells with Misspelled words
This is extremely useful when you work with functions that take strings, however, someone entered the string with a mistake and your formulas are not working. Here is how to fix this issue:
 Sub ColorMispelledCells()
    For Each cl In ActiveSheet.UsedRange
        If Not Application.CheckSpelling(Word:=cl.Text) Then _
        cl.Interior.ColorIndex = 28
    Next cl
End Sub
13. Create a pivot table
Here is how to create a pivot table from MS Excel (2007 version). Especially useful, when you are making a custom report every day. You can optimize the pivot table creation in the following way:
Sub PivotTableForExcel2007()
    Dim SourceRange As Range
    Set SourceRange = Sheets("Sheet1").Range("A3:N86")
    ActiveWorkbook.PivotCaches.Create( _
    SourceType:=xlDatabase, _
    SourceData:=SourceRange, _
    Version:=xlPivotTableVersion12).CreatePivotTable _
    TableDestination:="", _
    TableName:="", _
    DefaultVersion:=xlPivotTableVersion12
End Sub
14. Attach active workbook in an Email
My favorite VBA code. It lets you attach and send the file you’re working on with a predefined email address, message title, and message body! You first need to set reference to Microsoft Outlook (in your VBA editior, click on tools => references and choose Microsoft Outlook).
Sub SendFIleAsAttachment()


        Dim OLApp As Outlook.Application
        Dim OLMail As Object

        Set OLApp = New Outlook.Application
        Set OLMail = OLApp.CreateItem(0)
        OLApp.Session.Logon

        With OLMail
        .To = "admin@datapigtechnologies.com; mike@datapigtechnologies.com"
        .CC = ""
        .BCC = ""
        .Subject = "This is the Subject line"
        .Body = "Hi there"
        .Attachments.Add ActiveWorkbook.FullName
        .Display
        End With

        Set OLMail = Nothing
        Set OLApp = Nothing
End Sub
15. Send all Excel charts to a PowerPoint presentation
A very handy macro that lets you add all your Excel charts in your Powerpoint presentation just with a single click:
Sub SendExcelFiguresToPowerPoint()


        Dim PP As PowerPoint.Application
        Dim PPPres As PowerPoint.Presentation
        Dim PPSlide As PowerPoint.Slide
        Dim i As Integer

        Sheets("Slide Data").Select
            If ActiveSheet.ChartObjects.Count < 1 Then
                MsgBox "No charts existing the active sheet"
                Exit Sub
            End If

        Set PP = New PowerPoint.Application
        Set PPPres = PP.Presentations.Add
        PP.Visible = True

            For i = 1 To ActiveSheet.ChartObjects.Count

                ActiveSheet.ChartObjects(i).Chart.CopyPicture _
                Size:=xlScreen, Format:=xlPicture
                Application.Wait (Now + TimeValue("0:00:1"))

                ppSlideCount = PPPres.Slides.Count
                Set PPSlide = PPPres.Slides.Add(SlideCount + 1, ppLayoutBlank)
                PPSlide.Select

                PPSlide.Shapes.Paste.Select
                PP.ActiveWindow.Selection.ShapeRange.Align msoAlignCenters, True
                PP.ActiveWindow.Selection.ShapeRange.Align msoAlignMiddles, True
            Next i

        Set PPSlide = Nothing
        Set PPPres = Nothing
        Set PP = Nothing
End Sub
16. Send Excel table in MS Word
Excel tables are usually put inside text documents. Here is an automated way of exporting your Excel table to MS Word:
 Sub ExcelTableInWord()


        Dim MyRange As Excel.Range
        Dim wd As Word.Application
        Dim wdDoc As Word.Document
        Dim WdRange As Word.Range

       Sheets("Revenue Table").Range("B4:F10").Cop

        Set wd = New Word.Application
        Set wdDoc = wd.Documents.Open _
        (ThisWorkbook.Path & "" & "PasteTable.docx")
        wd.Visible = True

        Set WdRange = wdDoc.Bookmarks("DataTableHere").Rangе

        On Error Resume Next
        WdRange.Tables(1).Delete
        WdRange.Paste

        WdRange.Tables(1).Columns.SetWidth _
        (MyRange.Width / MyRange.Columns.Count), wdAdjustSameWidth

        wdDoc.Bookmarks.Add "DataTableHere", WdRange

        Set wd = Nothing
        Set wdDoc = Nothing
        Set WdRange = Nothing
End Sub
We can use formulas if we want to extract certain number of symbols. But what if we want to extract only the second word from a sentence or a range of words in a cell? To do this, we can create a custom Excel function with VBA. This is one of the most iportant VBA functionalities, because it lets you create your own functions that are non-existent in MS Excel. Let’s go on and create two functions: findword() and findwordrev(). Here’s the vba code for this:
Function FindWord(Source As String, Position As Integer) As String
     On Error Resume Next
     FindWord = Split(WorksheetFunction.Trim(Source), " ")(Position - 1)
     On Error GoTo 0
End Function

Function FindWordRev(Source As String, Position As Integer) As String
     Dim Arr() As String
     Arr = VBA.Split(WorksheetFunction.Trim(Source), " ")
     On Error Resume Next
     FindWordRev = Arr(UBound(Arr) - Position + 1)
     On Error GoTo 0
End Function
Very nice, we have created two cstom Excel functions. Now, try to use them in Excel. The function = FindWordRev (A1,1) takes the last word from cell A1. The function = FindWord (A1,3) takes the third word from cell A1, etc.
18. Protect your Workbook
Sometimes we want to protect the data in our file so that only we can change it. Here’s how to do this with VBA:
Sub ProtectSheets()

        Dim ws As Worksheet

        For Each ws In ActiveWorkbook.Worksheets

        ws.Protect Password:="1234"
        Next ws
End Sub
Congratulations! Since you are still reading this, you are really keen on learning VBA. As you have already seen for yourself, the VBA programming language is extremely useful and can save us a lot of time. I hope you found this information helpful and use it to become a master in MS Excel, VBA and computer software in general.
© 2017 Atanas Yonkov